

1961-64 Ford Pickup Truck - Classic Auto Air
1961-64 Ford Pickup Truck - Classic Auto Air
1961-64 Ford Pickup Truck - Classic Auto Air

Create successful ePaper yourself
Turn your PDF publications into a flip-book with our unique Google optimized e-Paper software.
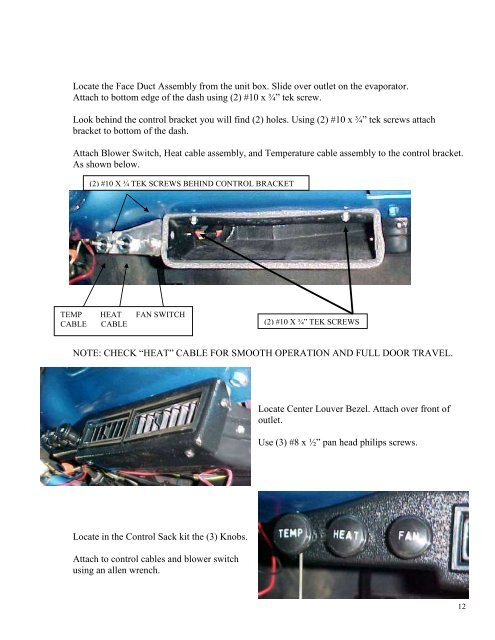
Locate the Face Duct Assembly from the unit box. Slide over outlet on the evaporator.Attach to bottom edge of the dash using (2) #10 x ¾” tek screw.Look behind the control bracket you will find (2) holes. Using (2) #10 x ¾” tek screws attachbracket to bottom of the dash.Attach Blower Switch, Heat cable assembly, and Temperature cable assembly to the control bracket.As shown below.(2) #10 X ¾ TEK SCREWS BEHIND CONTROL BRACKETTEMP HEAT FAN SWITCHCABLE CABLE (2) #10 X ¾” TEK SCREWSNOTE: CHECK “HEAT” CABLE FOR SMOOTH OPERATION AND FULL DOOR TRAVEL.Locate Center Louver Bezel. Attach over front ofoutlet.Use (3) #8 x ½” pan head philips screws.Locate in the Control Sack kit the (3) Knobs.Attach to control cables and blower switchusing an allen wrench.12


