How to prepare Saturation Mail with - Melissa Data
How to prepare Saturation Mail with - Melissa Data
How to prepare Saturation Mail with - Melissa Data

You also want an ePaper? Increase the reach of your titles
YUMPU automatically turns print PDFs into web optimized ePapers that Google loves.
Step 5 — Forms You’ll Need <strong>to</strong> Take <strong>to</strong> the Post Office<br />
12<br />
Checklist<br />
� Review the Qualification<br />
Report and Postage Statement<br />
and make a copy for your<br />
records.<br />
� Prepare <strong>to</strong> pay the amount of<br />
postage due on the Postage<br />
Statement.<br />
� Sign the Postage Statement<br />
certifying you are in<br />
accordance <strong>with</strong> all USPS<br />
rules and regulations.<br />
Postal Forms and Reports<br />
Documentation must be generated by<br />
PAVE certified software like MAILERS+4.<br />
PAVE certified by the USPS means<br />
MAILERS+4 meets the standard of<br />
excellence for presort software. Certification<br />
at the Gold level is your guarantee that<br />
MAILERS+4 surpassed the standard<br />
qualification criteria for presorting and<br />
accuracy that includes Standard <strong>Mail</strong>,<br />
FirstClass, and Periodicals.<br />
Printing Postal Forms Using<br />
MAILERS+4<br />
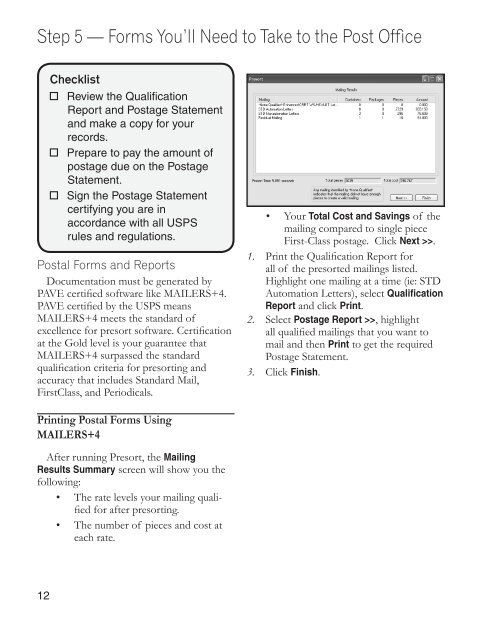
After running Presort, the <strong>Mail</strong>ing<br />
Results Summary screen will show you the<br />
following:<br />
• The rate levels your mailing qualified<br />
for after presorting.<br />
• The number of pieces and cost at<br />
each rate.<br />
• Your Total Cost and Savings of the<br />
mailing compared <strong>to</strong> single piece<br />
First-Class postage. Click Next >>.<br />
1. Print the Qualification Report for<br />
all of the presorted mailings listed.<br />
Highlight one mailing at a time (ie: STD<br />
Au<strong>to</strong>mation Letters), select Qualification<br />
Report and click Print.<br />
2. Select Postage Report >>, highlight<br />
all qualified mailings that you want <strong>to</strong><br />
mail and then Print <strong>to</strong> get the required<br />
Postage Statement.<br />
3. Click Finish.