TL-SL3428_V3_User_Guide - TP-Link
TL-SL3428_V3_User_Guide - TP-Link
TL-SL3428_V3_User_Guide - TP-Link

You also want an ePaper? Increase the reach of your titles
YUMPU automatically turns print PDFs into web optimized ePapers that Google loves.
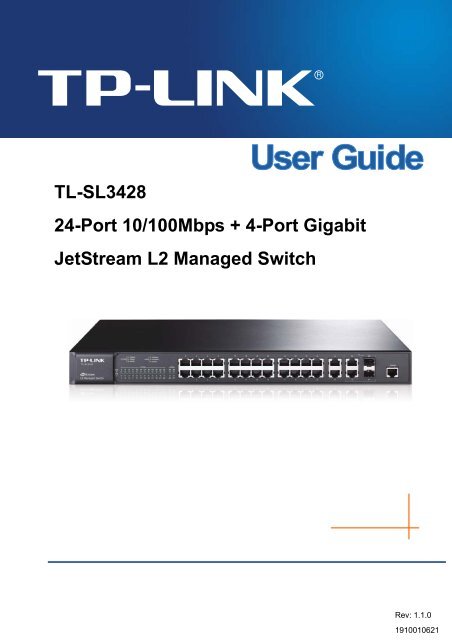
<strong>TL</strong>-<strong>SL3428</strong>24-Port 10/100Mbps + 4-Port GigabitJetStream L2 Managed SwitchRev: 1.1.01910010621
COPYRIGHT & TRADEMARKSSpecifications are subject to change without notice.is a registered trademark of<strong>TP</strong>-LINK TECHNOLOGIES CO., LTD. Other brands and product names are trademarks orregistered trademarks of their respective holders.No part of the specifications may be reproduced in any form or by any means or used to make anyderivative such as translation, transformation, or adaptation without permission from <strong>TP</strong>-LINKTECHNOLOGIES CO., LTD. Copyright © 2012 <strong>TP</strong>-LINK TECHNOLOGIES CO., LTD. All rightsreserved.http://www.tp-link.comFCC STATEMENTThis equipment has been tested and found to comply with the limits for a Class A digital device,pursuant to part 15 of the FCC Rules. These limits are designed to provide reasonable protectionagainst harmful interference when the equipment is operated in a commercial environment. Thisequipment generates, uses, and can radiate radio frequency energy and, if not installed and usedin accordance with the instruction manual, may cause harmful interference to radiocommunications. Operation of this equipment in a residential area is likely to cause harmfulinterference in which case the user will be required to correct the interference at his own expense.This device complies with part 15 of the FCC Rules. Operation is subject to the following twoconditions:1) This device may not cause harmful interference.2) This device must accept any interference received, including interference that may causeundesired operation.Any changes or modifications not expressly approved by the party responsible for compliancecould void the user’s authority to operate the equipment.CE Mark WarningThis is a Class A product. In a domestic environment, this product may cause radio interference, inwhich case the user may be required to take adequate measures.SAFETY NOTICESCaution:Do not use this product near water, for example, in a wet basement or near a swimming pool.Avoid using this product during an electrical storm. There may be a remote risk of electric shockfrom lightning.I
CONTENTSPackage Contents ..........................................................................................................................1Chapter 1 About this <strong>Guide</strong>...........................................................................................................21.1 Intended Readers .........................................................................................................21.2 Conventions..................................................................................................................21.3 Overview of This <strong>Guide</strong> ................................................................................................2Chapter 2 Introduction ..................................................................................................................62.1 Overview of the Switch .................................................................................................62.2 Main Features...............................................................................................................62.3 Appearance Description ...............................................................................................72.3.1 Front Panel ........................................................................................................72.3.2 Rear Panel.........................................................................................................8Chapter 3 Login to the Switch.......................................................................................................93.1 Login.............................................................................................................................93.2 Configuration ................................................................................................................9Chapter 4 System ....................................................................................................................... 114.1 System Info................................................................................................................. 114.1.1 System Summary............................................................................................. 114.1.2 Device Description ...........................................................................................134.1.3 System Time ....................................................................................................144.1.4 System IP.........................................................................................................154.2 <strong>User</strong> Manage ..............................................................................................................164.2.1 <strong>User</strong> Table........................................................................................................164.2.2 <strong>User</strong> Config ......................................................................................................174.3 System Tools ..............................................................................................................184.3.1 Config Restore .................................................................................................184.3.2 Config Backup..................................................................................................194.3.3 Firmware Upgrade ...........................................................................................194.3.4 System Reboot ................................................................................................204.3.5 System Reset...................................................................................................204.4 Access Security ..........................................................................................................214.4.1 Access Control.................................................................................................214.4.2 SSL Config.......................................................................................................234.4.3 SSH Config ......................................................................................................24Chapter 5 Switching....................................................................................................................305.1 Port .............................................................................................................................305.1.1 Port Config.......................................................................................................30II
5.1.2 Port Mirror........................................................................................................315.1.3 Port Security ....................................................................................................345.1.4 Port Isolation....................................................................................................365.2 LAG ............................................................................................................................375.2.1 LAG Table ........................................................................................................375.2.2 Static LAG........................................................................................................395.2.3 LACP Config ....................................................................................................405.3 Traffic Monitor.............................................................................................................425.3.1 Traffic Summary...............................................................................................425.3.2 Traffic Statistics ................................................................................................435.4 MAC Address..............................................................................................................445.4.1 Address Table ..................................................................................................455.4.2 Static Address ..................................................................................................475.4.3 Dynamic Address .............................................................................................485.4.4 Filtering Address ..............................................................................................50Chapter 6 VLAN..........................................................................................................................526.1 802.1Q VLAN..............................................................................................................536.1.1 VLAN Config ....................................................................................................556.1.2 Port Config.......................................................................................................576.2 Protocol VLAN ............................................................................................................596.2.1 Protocol VLAN .................................................................................................606.2.2 Protocol Template ............................................................................................606.2.3 Port Enable ......................................................................................................616.3 Application Example for 802.1Q VLAN .......................................................................626.4 Application Example for Protocol VLAN......................................................................646.5 GVRP .........................................................................................................................65Chapter 7 Spanning Tree............................................................................................................697.1 S<strong>TP</strong> Config .................................................................................................................747.1.1 S<strong>TP</strong> Config.......................................................................................................747.1.2 S<strong>TP</strong> Summary..................................................................................................767.2 Port Config..................................................................................................................777.3 MS<strong>TP</strong> Instance ...........................................................................................................797.3.1 Region Config ..................................................................................................797.3.2 Instance Config ................................................................................................807.3.3 Instance Port Config.........................................................................................817.4 S<strong>TP</strong> Security...............................................................................................................837.4.1 Port Protect......................................................................................................83III
7.4.2 TC Protect........................................................................................................867.5 Application Example for S<strong>TP</strong> Function .......................................................................87Chapter 8 Multicast.....................................................................................................................918.1 IGMP Snooping ..........................................................................................................938.1.1 Snooping Config ..............................................................................................948.1.2 Port Config.......................................................................................................958.1.3 VLAN Config ....................................................................................................968.1.4 Multicast VLAN ................................................................................................988.2 Multicast IP ...............................................................................................................1018.2.1 Multicast IP Table...........................................................................................1028.2.2 Static Multicast IP...........................................................................................1028.3 Multicast Filter...........................................................................................................1048.3.1 IP-Range........................................................................................................1048.3.2 Port Filter .......................................................................................................1058.4 Packet Statistics........................................................................................................106Chapter 9 QoS..........................................................................................................................1089.1 DiffServ..................................................................................................................... 1119.1.1 Port Priority .................................................................................................... 1119.1.2 Schedule Mode .............................................................................................. 1129.1.3 802.1P Priority ............................................................................................... 1139.1.4 DSCP Priority................................................................................................. 1149.2 Bandwidth Control .................................................................................................... 1169.2.1 Rate Limit....................................................................................................... 1169.2.2 Storm Control................................................................................................. 1179.3 Voice VLAN .............................................................................................................. 1189.3.1 Global Config .................................................................................................1209.3.2 Port Config.....................................................................................................1219.3.3 OUI Config .....................................................................................................122Chapter 10 ACL ..........................................................................................................................12410.1 Time-Range ..............................................................................................................12410.1.1 Time-Range Summary ...................................................................................12410.1.2 Time-Range Create........................................................................................12510.1.3 Holiday Config................................................................................................12610.2 ACL Config ...............................................................................................................12610.2.1 ACL Summary................................................................................................12710.2.2 ACL Create ....................................................................................................12710.2.3 MAC ACL .......................................................................................................128IV
10.2.4 Standard-IP ACL ............................................................................................12910.2.5 Extend-IP ACL ...............................................................................................13010.3 Policy Config.............................................................................................................13110.3.1 Policy Summary .............................................................................................13110.3.2 Policy Create..................................................................................................13210.3.3 Action Create .................................................................................................13210.4 Policy Binding ...........................................................................................................13310.4.1 Binding Table .................................................................................................13310.4.2 Port Binding ...................................................................................................13410.4.3 VLAN Binding.................................................................................................13410.5 Application Example for ACL ....................................................................................135Chapter 11 Network Security......................................................................................................13811.1 IP-MAC Binding ........................................................................................................13811.1.1 Binding Table .................................................................................................13811.1.2 Manual Binding ..............................................................................................13911.1.3 ARP Scanning................................................................................................14111.1.4 DHCP Snooping.............................................................................................14211.2 ARP Inspection .........................................................................................................14811.2.1 ARP Detect ....................................................................................................15211.2.2 ARP Defend ...................................................................................................15311.2.3 ARP Statistics ................................................................................................15411.3 DoS Defend ..............................................................................................................15511.4 802.1X ......................................................................................................................15711.4.1 Global Config .................................................................................................16111.4.2 Port Config.....................................................................................................16211.4.3 Radius Server ................................................................................................164Chapter 12 SNMP.......................................................................................................................16612.1 SNMP Config............................................................................................................16812.1.1 Global Config .................................................................................................16812.1.2 SNMP View....................................................................................................16912.1.3 SNMP Group..................................................................................................17012.1.4 SNMP <strong>User</strong> ....................................................................................................17112.1.5 SNMP Community..........................................................................................17312.2 Notification................................................................................................................17512.3 RMON.......................................................................................................................17712.3.1 History Control ...............................................................................................17812.3.2 Event Config ..................................................................................................178V
12.3.3 Alarm Config ..................................................................................................179Chapter 13 Cluster......................................................................................................................18213.1 NDP ..........................................................................................................................18313.1.1 Neighbor Info .................................................................................................18313.1.2 NDP Summary ...............................................................................................18413.1.3 NDP Config ....................................................................................................18613.2 NTDP........................................................................................................................18713.2.1 Device Table ..................................................................................................18713.2.2 NTDP Summary.............................................................................................18813.2.3 NTDP Config..................................................................................................19013.3 Cluster ......................................................................................................................19113.3.1 Cluster Summary ...........................................................................................19113.3.2 Cluster Config ................................................................................................19313.4 Application Example for Cluster Function .................................................................194Chapter 14 Maintenance ............................................................................................................19714.1 System Monitor.........................................................................................................19714.1.1 CPU Monitor ..................................................................................................19714.1.2 Memory Monitor .............................................................................................19814.2 Log............................................................................................................................19914.2.1 Log Table .......................................................................................................20014.2.2 Local Log .......................................................................................................20114.2.3 Remote Log ...................................................................................................20114.2.4 Backup Log....................................................................................................20214.3 Device Diagnose.......................................................................................................20314.3.1 Cable Test ......................................................................................................20314.3.2 Loopback .......................................................................................................20414.4 Network Diagnose ....................................................................................................20514.4.1 Ping................................................................................................................20514.4.2 Tracert............................................................................................................206Chapter 15 System Maintenance via F<strong>TP</strong> ..................................................................................207Appendix A: Specifications .........................................................................................................212Appendix B: Configuring the PCs ...............................................................................................213Appendix C: 802.1X Client Software ..........................................................................................216Appendix D: Glossary.................................................................................................................224VI
Package ContentsThe following items should be found in your box:‣ One <strong>TL</strong>-<strong>SL3428</strong> Switch‣ One power cord‣ One console cable‣ Two mounting brackets and other fittings‣ Quick Installation <strong>Guide</strong>‣ Resource CD for <strong>TL</strong>-<strong>SL3428</strong> switch, including:This <strong>User</strong> <strong>Guide</strong>Other Helpful InformationNote:Make sure that the package contains the above items. If any of the listed items are damaged ormissing, please contact your distributor.1
Chapter 1 About this <strong>Guide</strong>This <strong>User</strong> <strong>Guide</strong> contains information for setup and management of <strong>TL</strong>-<strong>SL3428</strong> switch. Pleaseread this guide carefully before operation.1.1 Intended ReadersThis <strong>Guide</strong> is intended for network managers familiar with IT concepts and network terminologies.1.2 ConventionsIn this <strong>Guide</strong> the following conventions are used:‣ The switch or <strong>TL</strong>-<strong>SL3428</strong> mentioned in this <strong>Guide</strong> stands for <strong>TL</strong>-<strong>SL3428</strong> 24-Port 10/100Mbps+ 4-Port Gigabit JetStream L2 Managed Switch without any explanation.‣ Menu Name→Submenu Name→Tab page indicates the menu structure. System→SystemInfo→System Summary means the System Summary page under the System Info menuoption that is located under the System menu.‣ Bold font indicates a button, a toolbar icon, menu or menu item.Symbols in this <strong>Guide</strong>:SymbolNote:Tips:DescriptionIgnoring this type of note might result in a malfunction or damage to thedevice.This format indicates important information that helps you make better useof your device.1.3 Overview of This <strong>Guide</strong>ChapterChapter 1 About This <strong>Guide</strong>Chapter 2 IntroductionChapter 3 Login to the SwitchIntroductionIntroduces the guide structure and conventions.Introduces the features, application and appearance of <strong>TL</strong>-<strong>SL3428</strong>switch.Introduces how to log on to <strong>TL</strong>-<strong>SL3428</strong> Web management page.2
ChapterChapter 4 SystemChapter 5 SwitchingChapter 6 VLANChapter 7 Spanning TreeChapter 8 MulticastIntroductionThis module is used to configure system properties of the switch.Here mainly introduces:• System Info: Configure the description, system time and networkparameters of the switch.• <strong>User</strong> Manage: Configure the user name and password for usersto log on to the Web management page with a certain accesslevel.• System Tools: Manage the configuration file of the switch.• Access Security: Provide different security measures for thelogin to enhance the configuration management security.This module is used to configure basic functions of the switch. Heremainly introduces:• Port: Configure the basic features for the port.• LAG: Configure <strong>Link</strong> Aggregation Group. LAG is to combine anumber of ports together to make a single high-bandwidth datapath.• Traffic Monitor: Monitor the traffic of each port• MAC Address: Configure the address table of the switch.This module is used to configure VLANs to control broadcast inLANs. Here mainly introduces:• 802.1Q VLAN: Configure port-based VLAN.• Protocol VLAN: Create VLANs in application layer to make somespecial data transmitted in the specified VLAN.• GVRP: GVRP allows the switch to automatically add or removethe VLANs via the dynamic VLAN registration information andpropagate the local VLAN registration information to otherswitches, without having to individually configure each VLAN.This module is used to configure spanning tree function of theswitch. Here mainly introduces:• S<strong>TP</strong> Config: Configure and view the global settings of spanningtree function.• Port Config: Configure CIST parameters of ports.• MS<strong>TP</strong> Instance: Configure MS<strong>TP</strong> instances.• S<strong>TP</strong> Security: Configure protection function to prevent devicesfrom any malicious attack against S<strong>TP</strong> features.This module is used to configure multicast function of the switch.Here mainly introduces:• IGMP Snooping: Configure global parameters of IGMP Snoopingfunction, port properties, VLAN and multicast VLAN.• Multicast IP: Configure multicast IP table.• Multicast Filter: Configure multicast filter feature to restrict usersordering multicast programs.• Packet Statistics: View the multicast data traffic on each port ofthe switch, which facilitates you to monitor the IGMP messagesin the network.3
ChapterChapter 9 QoSChapter 10 ACLChapter 11 Network SecurityChapter 12 SNMPChapter 13 ClusterIntroductionThis module is used to configure QoS function to provide differentquality of service for various network applications andrequirements. Here mainly introduces:• DiffServ: Configure priorities, port priority, 802.1P priority andDSCP priority.• Bandwidth Control: Configure rate limit feature to control thetraffic rate on each port; configure storm control feature to filterbroadcast, multicast and UL frame in the network.• Voice VLAN: Configure voice VLAN to transmit voice datastream within the specified VLAN so as to ensure thetransmission priority of voice data stream and voice quality.This module is used to configure match rules and process policiesof packets to filter packets in order to control the access of theillegal users to the network. Here mainly introduces:• Time-Range: Configure the effective time for ACL rules.• ACL Config: ACL rules.• Policy Config: Configure operation policies.• Policy Binding: Bind the policy to a port/VLAN to take its effect ona specific port/VLAN.This module is used to configure the multiple protection measuresfor the network security. Here mainly introduces:• IP-MAC Binding: Bind the IP address, MAC address, VLAN IDand the connected Port number of the Host together.• ARP Inspection: Configure ARP inspection feature to prevent thenetwork from ARP attacks.• DoS Defend: Configure DoS defend feature to prevent DoSattack.• 802.1X: Configure common access control mechanism for LANports to solve mainly authentication and security problems.This module is used to configure SNMP function to provide amanagement frame to monitor and maintain the network devices.Here mainly introduces:• SNMP Config: Configure global settings of SNMP function.• Notification: Configure notification function for the managementstation to monitor and process the events.• RMON: Configure RMON function to monitor network moreefficiently.This module is used to configure cluster function to central managethe scattered devices in the network. Here mainly introduces:• NDP: Configure NDP function to get the information of the directlyconnected neighbor devices.• NTDP: Configure NTDP function for the commander switch tocollect NDP information.• Cluster: Configure cluster function to establish and maintaincluster.4
ChapterChapter 14 MaintenanceChapter 15 SystemMaintenance via F<strong>TP</strong>Appendix A SpecificationsAppendix B Configure the PCsAppendix C 802.1X ClientSoftwareAppendix D GlossaryIntroductionThis module is used to assemble the commonly used system toolsto manage the switch. Here mainly introduces:• System Monitor: Monitor the memory and CPU of the switch.• Log: View configuration parameters on the switch.• Cable Test: Test the connection status of the cable connected tothe switch.• Loopback: Test if the port of the switch and the connected deviceare available.• Network Diagnose: Test if the destination is reachable and theaccount of router hops from the switch to the destination.Introduces how to download firmware of the switch via F<strong>TP</strong>function.Lists the hardware specifications of the SwitchIntroduces how to configure the PCs.Introduces how to use 802.1X Client Software provided forauthentication.Lists the glossary used in this manual.Return to CONTENTS5
Chapter 2 IntroductionThanks for choosing the <strong>TL</strong>-<strong>SL3428</strong> 24-Port 10/100Mbps + 4-Port Gigabit L2 Managed Switch!2.1 Overview of the SwitchDesigned for workgroups and departments, <strong>TL</strong>-<strong>SL3428</strong> from <strong>TP</strong>-<strong>Link</strong> provides wire-speedperformance and full set of layer 2 management features. It provides a variety of service featuresand multiple powerful functions with high security.The EIA-standardized framework and smart configuration capacity can provide flexible solutionsfor a variable scale of networks. ACL, 802.1x and Dynamic ARP Inspection provide robust securitystrategy. QoS and IGMP snooping/filtering optimize voice and video application. <strong>Link</strong> aggregation(LACP) increases aggregated bandwidth, optimizing the transport of business critical data. SNMP,RMON, WEB/CLI/Telnet Log-in bring abundant management policies. <strong>TL</strong>-<strong>SL3428</strong> Switchintegrates multiple functions with excellent performance, and is friendly to manage, which can fullymeet the need of the users demanding higher networking performance.2.2 Main FeaturesResiliency and Availability+ <strong>Link</strong> aggregation (LACP) increases aggregated bandwidth, optimizing the transport ofbusiness critical data.+ IEEE 802.1s Multiple Spanning Tree provides high link availability in multiple VLANenvironments.+ Multicast snooping automatically prevents flooding of IP multicast traffic.+ Root Guard protects root bridge from malicious attack or configuration mistakesLayer 2 Switching+ GVRP (GARP VLAN Registration Protocol) allows automatic learning and dynamicassignment of VLANs.+ Supports 255 active VLAN groups and 4K VLAN IDs.Quality of Service+ Supports L2/L3 granular CoS with 4 priority queues per port.+ Rate limiting confines the traffic flow accurately according to the preset value.Security+ Supports multiple industry standard user authentication methods such as 802.1x, RADIUS.+ Dynamic ARP Inspection blocks ARP packets from unauthorized hosts, preventingman-in-the-middle attacks.+ L2/L3/L4 Access Control Lists restrict untrusted access to the protected resource.+ Provides SSHv1/v2, SSL 2.0/3.0 and <strong>TL</strong>S v1 for access encryption.Manageability+ IP Clustering provides high scalability and easy Single-IP-Management.+ Supports Telnet, CLI, SNMP v1/v2c/v3, RMON and web access.+ Port Mirroring enables monitoring selected ingress/egress traffic.6
2.3 Appearance Description2.3.1 Front PanelFigure 2-1 Front PanelThe following parts are located on the front panel of the Switch:‣ 10/100Mbps Ports: Designed to connect to the device with a bandwidth of 10Mbps or100Mbps. Each has a corresponding 10/100Mbps LED.‣ 10/100/1000Mbps Ports: Designed to connect to the device with a bandwidth of 10Mbps,100Mbps or 1000Mbps. Each has a corresponding 1000Mbps LED.‣ SFP Ports: Designed to install the SFP module. The Switch features some SFP transceiverslots that are shared with the associated RJ45 ports. The associated two ports are referred as a“Combo” port, which means they cannot be used simultaneously, otherwise only SFP portworks.‣ Console Port: Designed to connect with the serial port of a computer or terminal for monitoringand configuring the Switch.‣ LEDsName Status IndicationPWRSYS10/100Mbps1000MbpsOnFlashingOffOnFlashingOffOnFlashingGreenYellowOffOnFlashingGreenYellowOffPower is on.Power supply is abnormal.Power is off or power supply is abnormal.The Switch is working abnormally.The Switch is working normally.The Switch is working abnormally.A device is linked to the corresponding port, but no activity.Data is being transmitted or received.The linked device is running at 100Mbps.The linked device is running at 10Mbps.No device is connected to the corresponding port.A device is linked to the corresponding port, but no activity.Data is being transmitted or received.The linked device is running at 1000Mbps.The linked device is running at 10/100Mbps.No device is connected to the corresponding port.7
Note:When using the SFP port with a 100M module or a gigabit module, you need log on to the GUI(Graphical <strong>User</strong> Interface) of the Switch and configure its corresponding Speed and Duplex modeon Switching→Port→Port Config page. For 100M module, please select 100MFD while select1000MFD for gigabit module. By default, the Speed and Duplex mode of SFP port is 1000MFD.2.3.2 Rear PanelThe rear panel of <strong>TL</strong>-<strong>SL3428</strong> features a power socket and a Grounding Terminal (marked with ).Figure 2-2 Rear Panel‣ Grounding Terminal: <strong>TL</strong>-<strong>SL3428</strong> already comes with Lightning Protection Mechanism. Youcan also ground the Switch through the PE (Protecting Earth) cable of AC cord or with GroundCable. For detail information, please refer to Quick Installation <strong>Guide</strong>.‣ AC Power Socket: Connect the female connector of the power cord here, and the maleconnector to the AC power outlet. Please make sure the voltage of the power supply meets therequirement of the input voltage (100-240V~ 50/60Hz 0.6A).Return to CONTENTS8
3.1 LoginChapter 3 Login to the Switch1) To access the configuration utility, open a web-browser and type in the default addresshttp://192.168.0.1 in the address field of the browser, then press the Enter key.Figure 3-1 Web-browserTips:To log in to the Switch, the IP address of your PC should be set in the same subnet addresses ofthe Switch. The IP address is 192.168.0.x ("x" is any number from 2 to 254), Subnet Mask is255.255.255.0. For the detailed instructions as to how to do this, please refer to Appendix B.2) After a moment, a login window will appear, as shown in Figure 3-2. Enter admin for the <strong>User</strong>Name and Password, both in lower case letters. Then click the Login button or press the Enterkey.3.2 ConfigurationFigure 3-2 LoginAfter a successful login, the main page will appear as Figure 3-3, and you can configure thefunction by clicking the setup menu on the left side of the screen.9
Figure 3-3 Main Setup-MenuNote:Clicking Apply can only make the new configurations effective before the switch is rebooted. Ifyou want to keep the configurations effective even the switch is rebooted, please click SavingConfig. You are suggested to click Saving Config before cutting off the power or rebooting theswitch to avoid losing the new configurations.Return to CONTENTS10
Chapter 4 SystemThe System module is mainly for system configuration of the switch, including four submenus:System Info, <strong>User</strong> Manage, System Tools and Access Security.4.1 System InfoThe System Info, mainly for basic properties configuration, can be implemented on SystemSummary, Device Description, System Time and System IP pages.4.1.1 System SummaryOn this page you can view the port connection status and the system information.The port status diagram shows the working status of 24 10/100Mbps RJ45 ports, 410/100/1000Mbps RJ45 ports and 2 SFP ports of the switch. The ports labeled as numbers are10/100Mbps ports; the ports labeled as G are 10/100/1000Mbps ports; the ports labeled as SFPare SFP ports.Choose the menu System→System Info→System Summary to load the following page.‣ Port StatusFigure 4-1 System SummaryIndicates the 100Mbps port is not connected to a device.Indicates the 100Mbps port is at the speed of 100Mbps.11
Indicates the 100Mbps port is at the speed of 10Mbps.Indicates the 1000Mbps port is not connected to a device.Indicates the 1000Mbps port is at the speed of 1000Mbps.Indicates the 1000Mbps port is at the speed of 10Mbps or 100Mbps.Indicates the SFP port is not connected to a device.Indicates the SFP port is at the speed of 1000Mbps.Indicates the SFP port is at the speed of 100Mbps.When the cursor moves on the port, the detailed information of the port will be displayed.‣ Port InfoFigure 4-2 Port InformationPort:Type:Rate:Status:Displays the port number of the switch.Displays the type of the port.Displays the maximum transmission rate of the port.Displays the connection status of the port.Click a port to display the bandwidth utilization on this port. The actual rate divided by theoreticalmaximum rate is the bandwidth utilization. Figure 4-3 displays the bandwidth utilization monitoredevery four seconds. Monitoring the bandwidth utilization on each port facilitates you to monitor thenetwork traffic and analyze the network abnormities.12
Figure 4-3 Bandwidth Utilization‣ Bandwidth UtilizationRx:Tx:Select Rx to display the bandwidth utilization of receiving packetson this port.Select Tx to display the bandwidth utilization of sending packetson this port.4.1.2 Device DescriptionOn this page you can configure the description of the switch, including device name, device locationand system contact.Choose the menu System→System Info→Device Description to load the following page.Figure 4-4 Device DescriptionThe following entries are displayed on this screen:‣ Device DescriptionDevice Name:Enter the name of the switch.13
Device Location:System Contact:Enter the location of the switch.Enter your contact information.4.1.3 System TimeSystem Time is the time displayed while the switch is running. On this page you can configure thesystem time and the settings here will be used for other time-based functions like ACL.You can manually set the system time, get GMT automatically if it has connected to a N<strong>TP</strong> server orsynchronize with PC’s clock as the system time.Choose the menu System→System Info→System Time to load the following page.Figure 4-5 System TimeThe following entries are displayed on this screen:‣ Time InfoCurrentDate:CurrentSource:‣ Time ConfigManual:SystemTimeDisplays the current date and time of the switch.Displays the current time source of the switch.When this option is selected, you can set the date and timemanually.14
Get GMT:SynchronizePC’S Clock:‣ DST ConfigDST Status:Start Time:End Time:withWhen this option is selected, you can configure the time zone andthe IP Address for the N<strong>TP</strong> Server. The switch will get GMTautomatically if it has connected to a N<strong>TP</strong> Server.• Time Zone: Select your local time.• Primary/Secondary N<strong>TP</strong> Server: Enter the IP Address for theN<strong>TP</strong> Server.When this option is selected, the administrator PC’s clock isutilized.Enable or Disable DST.Select start time.Select end time.Note:1. The system time will be restored to the default when the switch is restarted and you needreconfigure the system time of the switch.2. When Get GMT is selected and no time server is configured, the switch will get time from thetime server of the Internet if it has connected to the Internet.4.1.4 System IPEach device in the network possesses a unique IP Address. You can log on to the Webmanagement page to operate the switch using this IP Address. The switch supports three modesto obtain an IP address: Static IP, DHCP and BOO<strong>TP</strong>. The IP address obtained using a new modewill replace the original IP address. On this page you can configure the system IP of the switch.Choose the menu System→System Info→System IP to load the following page.Figure 4-6 System IPThe following entries are displayed on this screen:‣ IP ConfigMAC Address:Displays MAC Address of the switch.15
IP Address Mode:Management VLAN:IP Address:Subnet Mask:Default Gateway:Select the mode to obtain IP Address for the switch.• Static IP: When this option is selected, you should enter IPAddress, Subnet Mask and Default Gateway manually.• DHCP: When this option is selected, the switch will obtainnetwork parameters from the DHCP Server.• BOO<strong>TP</strong>: When this option is selected, the switch will obtainnetwork parameters from the BOO<strong>TP</strong> Server.Enter the ID of management VLAN, the only VLAN through whichyou can get access to the switch. By default VLAN1 owning all theports is the Management VLAN and you can access the switch viaany port on the switch. However, if another VLAN is created andset to be the Management VLAN, you may have to reconnect themanagement station to a port that is a member of theManagement VLAN.Enter the system IP of the switch. The default system IP is192.168.0.1 and you can change it appropriate to your needs.Enter the subnet mask of the switch.Enter the default gateway of the switch.Note:1. Changing the IP address to a different IP segment will interrupt the network communication,so please keep the new IP address in the same IP segment with the local network.2. The switch only possesses an IP address. The IP address configured will replace the originalIP address.3. If the switch gets the IP address from DHCP server, you can see the configuration of theswitch in the DHCP server; if DHCP option is selected but no DHCP server exists in thenetwork, the switch will keep obtaining IP address from DHCP server until success.4. If DHCP or BOO<strong>TP</strong> option is selected, the switch will gets network parameters dynamicallyfrom the Internet, so IP address, subnet mask and default gateway can not be configured.5. By default, the default IP address is 192.168.0.1.4.2 <strong>User</strong> Manage<strong>User</strong> Manage functions to configure the user name and password for users to log on to the Webmanagement page with a certain access level so as to protect the settings of the switch from beingrandomly changed.The <strong>User</strong> Manage function can be implemented on <strong>User</strong> Table and <strong>User</strong> Config pages.4.2.1 <strong>User</strong> TableOn this page you can view the information about the current users of the switch.Choose the menu System→<strong>User</strong> Manage→<strong>User</strong> Table to load the following page.16
Figure 4-7 <strong>User</strong> Table4.2.2 <strong>User</strong> ConfigOn this page you can configure the access level of the user to log on to the Web managementpage. The switch provides two access levels: Guest and Admin. The guest only can view thesettings without the right to configure the switch; the admin can configure all the functions of theswitch. The Web management pages contained in this guide are subject to the admin’s login without anyexplanation.Choose the menu System→<strong>User</strong> Manage→<strong>User</strong> Config to load the following page.Figure 4-8 <strong>User</strong> ConfigThe following entries are displayed on this screen:‣ <strong>User</strong> Info<strong>User</strong> Name:Access Level:<strong>User</strong> Status:Create a name for users’ login.Select the access level to login.• Admin: Admin can edit, modify and view all the settings ofdifferent functions.• Guest: Guest only can view the settings without the right to editand modify.Select Enable/Disable the user configuration.17
Password:Confirm Password:Type a password for users’ login.Retype the password.‣ <strong>User</strong> TableSelect:<strong>User</strong> ID, Name,Access Level andstatus:Operation:Select the desired entry to delete the corresponding userinformation. It is multi-optional The current user information can’tbe deleted.Displays the current user ID, user name, access level and userstatus.Click the Edit button of the desired entry, and you can edit thecorresponding user information. After modifying the settings,please click the Modify button to make the modification effective.Access level and user status of the current user information can’tbe modified.4.3 System ToolsThe System Tools function, allowing you to manage the configuration file of the switch, can beimplemented on Config Restore, Config Backup, Firmware Upgrade, System Reboot andSystem Reset pages.4.3.1 Config RestoreOn this page you can upload a backup configuration file to restore your switch to this previousconfiguration.Choose the menu System→System Tools→Config Restore to load the following page.Figure 4-9 Config RestoreThe following entries are displayed on this screen:‣ Config RestoreRestore Config:Click the Restore Config button to restore the backupconfiguration file. It will take effect after the switch automaticallyreboots.18
Note:1. It will take a few minutes to restore the configuration. Please wait without any operation.2. To avoid any damage, please don’t power down the switch while being restored.3. After being restored, the current settings of the switch will be lost. Wrong uploadedconfiguration file may cause the switch unmanaged.4.3.2 Config BackupOn this page you can download the current configuration and save it as a file to your computer foryour future configuration restore.Choose the menu System→System Tools→Config Backup to load the following page.Figure 4-10 Config BackupThe following entries are displayed on this screen:‣ Config BackupBackup Config:Click the Backup Config button to save the current configurationas a file to your computer. You are suggested to take this measurebefore upgrading.Note:It will take a few minutes to backup the configuration. Please wait without any operation.4.3.3 Firmware UpgradeThe switch system can be upgraded via the Web management page. To upgrade the system is toget more functions and better performance. Go to http://www.tp-link.com to download the updatedfirmware.Choose the menu System→System Tools→Firmware Upgrade to load the following page.19
Figure 4-11 Firmware UpgradeNote:1. Don’t interrupt the upgrade.2. Please select the proper software version matching with your hardware to upgrade.3. To avoid damage, please don't turn off the device while upgrading.4. After upgrading, the device will reboot automatically.5. You are suggested to backup the configuration before upgrading.4.3.4 System RebootOn this page you can reboot the switch and return to the login page. Please save the currentconfiguration before rebooting to avoid losing the configuration unsaved.Choose the menu System→System Tools→System Reboot to load the following page.Figure 4-12 System RebootNote:To avoid damage, please don't turn off the device while rebooting.4.3.5 System ResetOn this page you can reset the switch to the default. All the settings will be cleared after the switchis reset.Choose the menu System→System Tools→System Reset to load the following page.20
Figure 4-13 System ResetNote:After the system is reset, the switch will be reset to the default and all the settings will be cleared.4.4 Access SecurityAccess Security provides different security measures for the remote login so as to enhance theconfiguration management security. It can be implemented on Access Control, SSL Config andSSH Config pages.4.4.1 Access ControlOn this page you can control the users logging on to the Web management page to enhance theconfiguration management security. The definitions of Admin and Guest refer to 1.2 <strong>User</strong> ManageChoose the menu System→Access Security→Access Control to load the following page.21
Figure 4-14 Access ControlThe following entries are displayed on this screen:‣ Access Control ConfigControl Mode:IP Address&MaskMAC Address:Port:Select the control mode for users to log on to the Webmanagement page.• IP-based: Select this option to limit the IP-range of the users forlogin.• MAC-based: Select this option to limit the MAC Address of theusers for login.• Port-based: Select this option to limit the ports for login.These fields can be available for configuration only when IP-basedmode is selected. Only the users within the IP-range you set hereare allowed for login.The field can be available for configuration only when MAC-basedmode is selected. Only the user with this MAC Address you sethere is allowed for login.The field can be available for configuration only when Port-basedmode is selected. Only the users connected to these ports you sethere are allowed for login.‣ Session Config22
Session Timeout:If you do nothing with the Web management page within thetimeout time, the system will log out automatically. If you want toreconfigure, please login again.‣ Access <strong>User</strong> NumberNumber Control;Admin Number:Guest Number:Select Enable/Disable the Number Control function.Enter the maximum number of the users logging on to the Webmanagement page as Admin.Enter the maximum number of the users logging on to the Webmanagement page as Guest.4.4.2 SSL ConfigSSL (Secure Sockets Layer), a security protocol, is to provide a secure connection for theapplication layer protocol (e.g. HT<strong>TP</strong>) communication based on TCP. SSL is widely used to securethe data transmission between the Web browser and servers. It is mainly applied throughecommerce and online banking.SSL mainly provides the following services:1. Authenticate the users and the servers based on the certificates to ensure the data aretransmitted to the correct users and servers;2. Encrypt the data transmission to prevent the data being intercepted;3. Maintain the integrality of the data to prevent the data being altered in the transmission.Adopting asymmetrical encryption technology, SSL uses key pair to encrypt/decrypt information. Akey pair refers to a public key (contained in the certificate) and its corresponding private key. Bydefault the switch has a certificate (self-signed certificate) and a corresponding private key. TheCertificate/Key Download function enables the user to replace the default key pair.After SSL is effective, you can log on to the Web management page via https://192.168.0.1. Forthe first time you use HT<strong>TP</strong>S connection to log into the switch with the default certificate, you willbe prompted that “The security certificate presented by this website was not issued by a trustedcertificate authority” or “Certificate Errors”. Please add this certificate to trusted certificates orcontinue to this website.On this page you can configure the SSL function.Choose the menu System→Access Security→SSL Config to load the following page.23
Figure 4-15 SSL ConfigThe following entries are displayed on this screen:‣ Global ConfigSSL:Select Enable/Disable the SSL function on the switch.‣ Certificate DownloadCertificate File:Select the desired certificate to download to the switch. Thecertificate must be BASE64 encoded.‣ Key DownloadKey File:Select the desired SSL Key to download to the switch. The keymust be BASE64 encoded.Note:1. The SSL certificate and key downloaded must match each other; otherwise the HT<strong>TP</strong>Sconnection will not work.2. The SSL certificate and key downloaded will not take effect until the switch is rebooted.3. To establish a secured connection using https, please enter https:// into the URL field of thebrowser.4. It may take more time for https connection than that for http connection, because httpsconnection involves authentication, encryption and decryption etc.4.4.3 SSH ConfigAs stipulated by IETF (Internet Engineering Task Force), SSH (Secure Shell) is a security protocolestablished on application and transport layers. SSH-encrypted-connection is similar to a telnetconnection, but essentially the old telnet remote management method is not safe, because thepassword and data transmitted with plain-text can be easily intercepted. SSH can provideinformation security and powerful authentication when you log on to the switch remotely through24
an insecure network environment. It can encrypt all the transmission data and prevent theinformation in a remote management being leaked.Comprising server and client, SSH has two versions, V1 and V2 which are not compatible witheach other. In the communication, SSH server and client can auto-negotiate the SSH version andthe encryption algorithm. After getting a successful negotiation, the client sends authenticationrequest to the server for login, and then the two can communicate with each other after successfulauthentication. This switch supports SSH server and you can log on to the switch via SSHconnection using SSH client software.SSH key can be downloaded into the switch. If the key is successfully downloaded, the certificateauthentication will be preferred for SSH access to the switch.Choose the menu System→Access Seurity→SSH Config to load the following page.Figure 4-16 SSH ConfigThe following entries are displayed on this screen:‣ Global ConfigSSH:Protocol V1:Protocol V2:Idle Timeout:Max Connect:Select Enable/Disable SSH function.Select Enable/Disable SSH V1 to be the supported protocol.Select Enable/Disable SSH V2 to be the supported protocol.Specify the idle timeout time. The system will automaticallyrelease the connection when the time is up. The default time is500 seconds.Specify the maximum number of the connections to the SSHserver. No new connection will be established when the number ofthe connections reaches the maximum number you set. Thedefault value is 5.25
‣ Key DownloadKey Type:Key File:Download:Select the type of SSH Key to download. The switch supportsthree types: SSH-1 RSA, SSH-2 RSA and SSH-2 DSA.Select the desired key file to download.Click the Download button to download the desired key file to theswitch.Note:1. Please ensure the key length of the downloaded file is in the range of 256 to 3072 bits.2. After the Key File is downloaded, the user’s original key of the same type will be replaced.The wrong uploaded file will result in the SSH access to the switch via Passwordauthentication.Application Example 1 for SSH:‣ Network Requirements1. Log on to the switch via password authentication using SSH and the SSH function is enabledon the switch.2. PuTTY client software is recommended.‣ Configuration Procedure1. Open the software to log on to the interface of PuTTY. Enter the IP address of the switch intoHost Name field; keep the default value 22 in the Port field; select SSH as the Connectiontype.2. Click the Open button in the above figure to log on to the switch. Enter the login user name andpassword, and then you can continue to configure the switch.26
Application Example 2 for SSH:‣ Network Requirements1. Log on to the switch via password authentication using SSH and the SSH function is enabledon the switch.2. PuTTY client software is recommended.‣ Configuration Procedure1. Select the key type and key length, and generate SSH key.Note:1. The key length is in the range of 256 to 3072 bits.2. During the key generation, randomly moving the mouse quickly can accelerate the keygeneration.2. After the key is successfully generated, please save the public key and private key to thecomputer.27
3. On the Web management page of the switch, download the public key file saved in thecomputer to the switch.Note:1. The key type should accord with the type of the key file.2. The SSH key downloading can not be interrupted.4. Download the private key file to SSH client software.28
5. After the public key and private key are downloaded, please log on to the interface of PuTTYand enter the IP address for login.After successful authentication, please enter the login user name. If you log on to the switchwithout entering password, it indicates that the key has been successfully downloaded.Return to CONTENTS29
Chapter 5 SwitchingSwitching module is used to configure the basic functions of the switch, including four submenus:Port, LAG, Traffic Monitor and MAC Address.5.1 PortThe Port function, allowing you to configure the basic features for the port, is implemented on thePort Config, Port Mirror, Port Security and Port Isolation pages.5.1.1 Port ConfigOn this page, you can configure the basic parameters for the ports. When the port is disabled, thepackets on the port will be discarded. Disabling the port which is vacant for a long time can reducethe power consumption effectively. And you can enable the port when it is in need.The parameters will affect the working mode of the port, please set the parameters appropriate toyour needs.Choose the menu Switching→Port→Port Config to load the following page.Figure 5-1 Port ConfigHere you can view and configure the port parameters.Port Select:Select:Port:Click the Select button to quick-select the corresponding portbased on the port number you entered.Select the desired port for configuration. It is multi-optional.Displays the port number.30
Description:Status:Speed and Duplex:Flow Control:LAG:Give a description to the port for identification.Allows you to Enable/Disable the port. When Enable isselected, the port can forward the packets normally.Select the Speed and Duplex mode for the port. The deviceconnected to the switch should be in the same Speed andDuplex mode with the switch. When “Auto” is selected, theSpeed and Duplex mode will be determined byauto-negotiation. For the SFP port, this Switch does not supportauto-negotiation.Allows you to Enable/Disable the Flow Control feature. WhenFlow Control is enabled, the switch can synchronize the speedwith its peer to avoid the packet loss caused by congestion.Displays the LAG number which the port belongs to.Note:1. The switch can not be managed through the disabled port. Please enable the port which isused to manage the switch.2. The parameters of the port members in a LAG should be set as the same.3. When using the SFP port with a 100M module or a gigabit module, you need to configure itscorresponding Speed and Duplex mode. For 100M module, please select 100MFD whileselect 1000MFD for gigabit module. By default, the Speed and Duplex mode of SFP port is1000MFD.5.1.2 Port MirrorPort Mirror, a packets obtaining technology, functions to forward copies of packets fromone/multiple ports (mirrored port) to a specific port (mirroring port). Usually, the mirroring port isconnected to a data diagnose device, which is used to analyze the mirrored packets for monitoringand troubleshooting the network.Choose the menu Switching→Port→Port Mirror to load the following page.31
Figure 5-2 Mirroring PortThe following entries are displayed on this screen.‣ Mirror Group ListGroup:Mirroring:Mode:Mirrored Port:Operation:Displays the mirror group number.Displays the mirroring port number.Displays the mirror mode.Displays the mirrored ports.Click Edit to configure the mirror group.Click Edit to display the following figure.32
Figure 5-3 Mirroring PortThe following entries are displayed on this screen.‣ Mirror GroupNumber:Select the mirror group number you want to configure.‣ Mirroring PortMirroring Port:Select the mirroring port number.‣ Mirrored PortPort Select:Select:Port:Ingress:Egress:Click the Select button to quick-select the corresponding port basedon the port number you entered.Select the desired port as a mirrored port. It is multi-optional.Displays the port number.Select Enable/Disable the Ingress feature. When the Ingress isenabled, the incoming packets received by the mirrored port will becopied to the mirroring port.Select Enable/Disable the Egress feature. When the Egress is33
enabled, the outgoing packets sent by the mirrored port will becopied to the mirroring port.LAG:Displays the LAG number which the port belongs to. The LAGmember can not be selected as the mirrored port or mirroring port.Note:1. The LAG member can not be selected as the mirrored port or mirroring port.2. A port can not be set as the mirrored port and the mirroring port simultaneously.3. The Port Mirror function can take effect span the multiple VLANs.5.1.3 Port SecurityMAC Address Table maintains the mapping relationship between the port and the MAC address ofthe connected device, which is the base of the packet forwarding. The capacity of MAC AddressTable is fixed. MAC Address Attack is the attack method that the attacker takes to obtain thenetwork information illegally. The attacker uses tools to generate the cheating MAC address andquickly occupy the MAC Address Table. When the MAC Address Table is full, the switch willbroadcast the packets to all the ports. At this moment, the attacker can obtain the networkinformation via various sniffers and attacks. When the MAC Address Table is full, the packetstraffic will flood to all the ports, which results in overload, lower speed, packets drop and evenbreakdown of the system.Port Security is to protect the switch from the malicious MAC Address Attack by limiting themaximum number of MAC addresses that can be learned on the port. The port with Port Securityfeature enabled will learn the MAC address dynamically. When the learned MAC address numberreaches the maximum, the port will stop learning. Thereafter, the other devices with the MACaddress unlearned can not access to the network via this port.Choose the menu Switching→Port→Port Security to load the following page.34
Figure 5-4 Port SecurityThe following entries are displayed on this screen:‣ Port SecuritySelect:Port:Max Learned MAC:Learned Num:Learn Mode:Status:Select the desired port for Port Security configuration. It ismulti-optional.Displays the port number.Specify the maximum number of MAC addresses that can belearned on the port.Displays the number of MAC addresses that have been learnedon the port.Select the Learn Mode for the port. Dynamic: When Dynamic mode is selected, the learnedMAC address will be deleted automatically after the agingtime. Static: When Static mode is selected, the learned MACaddress will be out of the influence of the aging time andcan only be deleted manually. The learned entries will becleared after the switch is rebooted. Permanent: When Permanent mode is selected, thelearned MAC address will be out of the influence of theaging time and can only be deleted manually. The learnedentries will be saved even the switch is rebooted.Select Enable/Disable the Port Security feature for the port.35
Note:1. The Port Security function is disabled for the LAG port member. Only the port is removed fromthe LAG, will the Port Security function be available for the port.2. The Port Security function is disabled when the 802.1X function is enabled.5.1.4 Port IsolationPort Isolation provides a method of restricting traffic flow to improve the network security byforbidding the port to forward packets to the ports that are not on its forward portlist.Choose the menu “Switching→Port→Port Isolation” to load the following page.Figure 5-5 Port Isolation ConfigThe following entries are displayed on this screen:‣ Port Isolation ConfigPort:Select the port number to set its forwardlist.36
Forward Portlist:Select the port that to be forwarded to.‣ Port Isolation ListPort:Forward Portlist:Display the port number.Display the forwardlist.5.2 LAGLAG (<strong>Link</strong> Aggregation Group) is to combine a number of ports together to make a singlehigh-bandwidth data path, so as to implement the traffic load sharing among the member ports inthe group and to enhance the connection reliability.For the member ports in an aggregation group, their basic configuration must be the same. Thebasic configuration includes S<strong>TP</strong>, QoS, GVRP, VLAN, port attributes, MAC Address Learningmode and other associated settings. The further explains are following:• If the ports, which are enabled for the GVRP, 802.1Q VLAN, Voice VLAN, S<strong>TP</strong>, QoS, PortIsolation, DHCP Snooping and Port Configuration (Speed and Duplex, Flow Control),are in a LAG, their configurations should be the same.• The ports, which are enabled for the Port Security, Port Mirror, MAC Address Filtering,Static MAC Address Binding, 802.1X Authentication and IP Source Guard, can not beadded to the LAG.• It’s not suggested to add the ports with ARP Inspection and DoS Defend enabled to theLAG.If the LAG is needed, you are suggested to configure the LAG function here before configuring theother functions for the member ports.Tips:1. Calculate the bandwidth for a LAG: If a LAG consists of the four ports in the speed of1000Mbps Full Duplex, the whole bandwidth of the LAG is up to 8000Mbps (2000Mbps * 4)because the bandwidth of each member port is 2000Mbps counting the up-linked speed of1000Mbps and the down-linked speed of 1000Mbps.2. The traffic load of the LAG will be balanced among the ports according to the AggregateArithmetic. If the connections of one or several ports are broken, the traffic of these ports willbe transmitted on the normal ports, so as to guarantee the connection reliability.Depending on different aggregation modes, aggregation groups fall into two types: Static LAGand LACP Config. The LAG function is implemented on the LAG Table, Static LAG and LACPConfig configuration pages.5.2.1 LAG TableOn this page, you can view the information of the current LAG of the switch.Choose the menu Switching→LAG→LAG Table to load the following page.37
Figure 5-6 LAG TableThe following entries are displayed on this screen:‣ Global ConfigHash Algorithm:Select the applied scope of Aggregate Arithmetic, whichresults in choosing a port to transfer the packets. SRC MAC + DST MAC: When this option is selected,the Aggregate Arithmetic will apply to the source anddestination MAC addresses of the packets. SRC IP + DST IP: When this option is selected, theAggregate Arithmetic will apply to the source anddestination IP addresses of the packets.‣ LAG TableSelect:Group Number:Description:Member:Operation:Select the desired LAG. It is multi-optional.Displays the LAG number here.Displays the description of LAG.Displays the LAG member.Allows you to view or modify the information for each LAG. Edit: Click to modify the settings of the LAG. Detail: Click to get the information of the LAG.Click the Detail button for the detailed information of your selected LAG.38
Figure 5-7 Detail Information5.2.2 Static LAGOn this page, you can manually configure the LAG. The LACP feature is disabled for the memberports of the manually added Static LAG.Choose the menu Switching→LAG→Static LAG to load the following page.Figure 5-8 Manually ConfigThe following entries are displayed on this screen:‣ LAG ConfigGroup Number:Select a Group Number for the LAG.39
Description:Give a description to the LAG for identification.‣ LAG TableMember Port:Select the port as the LAG member. Clearing all the ports ofthe LAG will delete this LAG.Tips:1. The LAG can be deleted by clearing its all member ports.2. A port can only be added to a LAG. If a port is the member of a LAG or is dynamicallyaggregated as the LACP member, the port number will be displayed in gray and can not beselected.5.2.3 LACP ConfigLACP (<strong>Link</strong> Aggregation Control Protocol) is defined in IEEE802.3ad and enables the dynamic linkaggregation and disaggregation by exchanging LACP packets with its partner. The switch candynamically group similarly configured ports into a single logical link, which will highly extend thebandwidth and flexibly balance the load.With the LACP feature enabled, the port will notify its partner of the aggregation ID (consist ofSystem Priority, system MAC address and the Admin Key). A dynamic aggregation group will onlybe formed between ports having the same aggregation ID. Up to fourteen aggregation groups canbe formed by the switch. If the amount of the configured aggregation groups exceeds themaximum number, the group with smaller System Priority takes the priority to be aggregated.Similarly, up to eight ports can be selected in an aggregation group. Therefore, the port also hasthe priority to be selected as the dynamic aggregation group member. The port with smaller PortPriority will be considered as the preferred one. If the two port priorities are equal; the port withsmaller port number is preferred.On this page, you can configure the LACP feature of the switch.Choose the menu Switching→LAG→LACP Config to load the following page.40
Figure 5-9 LACP ConfigThe following entries are displayed on this screen:‣ Global ConfigSystem Priority:Specify a System Priority for the port. The System Priority and theAdmin Key constitute the aggregation ID. A dynamic aggregationgroup will only be formed between ports having the same aggregationID.‣ LACP ConfigPort Select:Select:Port:Admin Key:Port Priority:Click the Select button to quick-select the corresponding port basedon the port number you entered.Select the desired port for LACP configuration. It is multi-optional.Displays the port number.Specify an Admin Key for the port. The member ports in a dynamicaggregation group must have the same Admin Key.Specify a Port Priority for the port. This value determines the priorityof the port to be selected as the dynamic aggregation groupmember. The port with smaller Port Priority will be considered as the41
preferred one. If the two port priorities are equal; the port withsmaller port number is preferred.Status:LAG:Enable/Disable the LACP feature for your selected port.Displays the LAG number which the port belongs to.5.3 Traffic MonitorThe Traffic Monitor function, monitoring the traffic of each port, is implemented on the TrafficSummary and Traffic Statistics pages.5.3.1 Traffic SummaryTraffic Summary screen displays the traffic information of each port, which facilitates you tomonitor the traffic and analyze the network abnormity.Choose the menu Switching→Traffic Monitor→Traffic Summary to load the following page.Figure 5-10 Traffic SummaryThe following entries are displayed on this screen:‣ Auto RefreshAuto Refresh:Refresh Rate:Allows you to Enable/Disable refreshing the Traffic Summaryautomatically.Enter a value in seconds to specify the refresh interval.42
‣ Traffic SummaryPort Select:Port:Packets Rx:Packets Tx:Octets Rx:Octets Tx:Statistics:Click the Select button to quick-select the corresponding port basedon the port number you entered.Displays the port number.Displays the number of packets received on the port. The errorpackets are not counted in.Displays the number of packets transmitted on the port.Displays the number of octets received on the port. The error octetsare counted in.Displays the number of octets transmitted on the port.Click the Statistics button to view the detailed traffic statistics of theport.5.3.2 Traffic StatisticsTraffic Statistics screen displays the detailed traffic information of each port, which facilitates you tomonitor the traffic and locate faults promptly.Choose the menu Switching→Traffic Monitor→Traffic Statistics to load the following page.Figure 5-11 Traffic StatisticsThe following entries are displayed on this screen:‣ Auto RefreshAuto Refresh:Allows you to Enable/Disable refreshing the Traffic Summary43
automatically.Refresh Rate:Enter a value in seconds to specify the refresh interval.‣ StatisticsPort:Received:Sent:Broadcast:Multicast:Unicast:Alignment Errors:UndersizePkts:Pkts64Octets:Pkts65to127Octets:Pkts128to255Octets:Pkts256to511Octets:Pkts512to1023Octets:PktsOver1023Octets:Collisions:Enter a port number and click the Select button to view the trafficstatistics of the corresponding port.Displays the details of the packets received on the port.Displays the details of the packets transmitted on the port.Displays the number of good broadcast packets received ortransmitted on the port. The error frames are not counted in.Displays the number of good multicast packets received ortransmitted on the port. The error frames are not counted in.Displays the number of good unicast packets received ortransmitted on the port. The error frames are not counted in.Displays the number of the received packets that have a badFrame Check Sequence (FCS) with a non-integral octet(Alignment Error). The length of the packet is between 64 bytesand 1518 bytes.Displays the number of the received packets (excluding errorpackets) that are less than 64 bytes long.Displays the number of the received packets (including errorpackets) that are 64 bytes long.Displays the number of the received packets (including errorpackets) that are between 65 and 127 bytes long.Displays the number of the received packets (including errorpackets) that are between 128 and 255 bytes long.Displays the number of the received packets (including errorpackets) that are between 256 and 511 bytes long.Displays the number of the received packets (including errorpackets) that are between 512 and 1023 bytes long.Displays the number of the received packets (including errorpackets) that are more than 1023 bytes long.Displays the number of collisions experienced by a port duringpacket transmissions.5.4 MAC AddressThe main function of the switch is forwarding the packets to the correct ports based on thedestination MAC address of the packets. Address Table contains the port-based MAC addressinformation, which is the base for the switch to forward packets quickly. The entries in the AddressTable can be updated by auto-learning or configured manually. Most the entries are generated andupdated by auto-learning. In the stable networks, the static MAC address entries can facilitate the44
switch to reduce broadcast packets and enhance the efficiency of packets forwarding remarkably.The address filtering feature allows the switch to filter the undesired packets and forbid itsforwarding so as to improve the network security.The types and the features of the MAC Address Table are listed as the following:Type Configuration Way Aging outBeing kept after reboot(if the configuration issaved)Relationship betweenthe bound MACaddress and the portStaticAddress TableManually configuring No Yes The bound MACaddress can not belearned by the otherports in the sameVLAN.DynamicAddress TableAutomaticallylearningYes No The bound MACaddress can be learnedby the other ports in thesame VLAN.FilteringAddress TableManually configuring No Yes -Table 5-1 Types and features of Address TableThis function includes four submenus: Address Table, Static Address, Dynamic Address andFiltering Address.5.4.1 Address TableOn this page, you can view all the information of the Address Table.Choose the menu Switching→MAC Address→Address Table to load the following page.45
Figure 5-12 Address TableThe following entries are displayed on this screen:‣ Search OptionMAC Address:VLAN ID:Port:Type:Enter the MAC address of your desired entry.Enter the VLAN ID of your desired entry.Select the corresponding port number of your desired entry.Select the type of your desired entry.• All: This option allows the address table to display all theaddress entries.• Static: This option allows the address table to display the staticaddress entries only.• Dynamic: This option allows the address table to display thedynamic address entries only.• Filtering: This option allows the address table to display thefiltering address entries only.‣ Address Table46
MAC Address:VLAN ID:Port:Type:Aging Status:Displays the MAC address learned by the switch.Displays the corresponding VLAN ID of the MAC address.Displays the corresponding Port number of the MAC address.Displays the Type of the MAC address.Displays the Aging status of the MAC address.5.4.2 Static AddressThe static address table maintains the static address entries which can be added or removedmanually, independent of the aging time. In the stable networks, the static MAC address entriescan facilitate the switch to reduce broadcast packets and remarkably enhance the efficiency ofpackets forwarding without learning the address. The static MAC address learned by the port withPort Security enabled in the static learning mode will be displayed in the Static Address Table.Choose the menu Switching→MAC Address→Static Address to load the following page.Figure 5-13 Static AddressThe following entries are displayed on this screen:‣ Create Static AddressMAC Address:VLAN ID:Port:Enter the static MAC Address to be bound.Enter the corresponding VLAN ID of the MAC address.Select a port from the pull-down list to be bound.‣ Search Option47
Search Option:Select a Search Option from the pull-down list and click the Searchbutton to find your desired entry in the Static Address Table.MAC: Enter the MAC address of your desired entry.VLAN ID: Enter the VLAN ID number of your desired entry.Port: Enter the Port number of your desired entry.‣ Static Address TableSelect:MAC Address:VLAN ID:Port:Type:Aging Status:Select the entry to delete or modify the corresponding port number. Itis multi-optional.Displays the static MAC Address.Displays the corresponding VLAN ID of the MAC address.Displays the corresponding Port number of the MAC address. Hereyou can modify the port number to which the MAC address is bound.The new port should be in the same VLAN.Displays the Type of the MAC address.Displays the Aging Status of the MAC address.Note:1. If the corresponding port number of the MAC address is not correct, or the connected port (orthe device) has been changed, the switch can not be forward the packets correctly. Pleasereset the static address entry appropriately.2. If the MAC address of a device has been added to the Static Address Table, connecting thedevice to another port will cause its address not to be recognized dynamically by the switch.Therefore, please ensure the entries in the Static Address Table are correct and valid.3. The MAC address in the Static Address Table can not be added to the Filtering Address Tableor bound to a port dynamically.4. This static MAC address bound function is not available if the 802.1X feature is enabled.5.4.3 Dynamic AddressThe dynamic address can be generated by the auto-learning mechanism of the switch. TheDynamic Address Table can update automatically by auto-learning or aging out the MAC address.To fully utilize the MAC address table, which has a limited capacity, the switch adopts an agingmechanism for updating the table. That is, the switch removes the MAC address entries related toa network device if no packet is received from the device within the aging time.On this page, you can configure the dynamic MAC address entry.Choose the menu Switching→MAC Address→Dynamic Address to load the following page.48
Figure 5-14 Dynamic AddressThe following entries are displayed on this screen:‣ Aging ConfigAuto Aging:Aging Time:Allows you to Enable/Disable the Auto Aging feature.Enter the Aging Time for the dynamic address.‣ Search OptionSearch Option:Select a Search Option from the pull-down list and click the Searchbutton to find your desired entry in the Dynamic Address Table. MAC: Enter the MAC address of your desired entry. VLAN ID: Enter the VLAN ID number of your desired entry. Port: Enter the Port number of your desired entry.‣ Dynamic Address Table49
Select:MAC Address:VLAN ID:Port:Type:Aging Status:Bind:Select the entry to delete the dynamic address or to bind the MACaddress to the corresponding port statically. It is multi-optional.Displays the dynamic MAC Address.Displays the corresponding VLAN ID of the MAC address.Displays the corresponding port number of the MAC address.Displays the Type of the MAC address.Displays the Aging Status of the MAC address.Click the Bind button to bind the MAC address of your selected entryto the corresponding port statically.Tips:Setting aging time properly helps implement effective MAC address aging. The aging time that istoo long or too short results decreases the performance of the switch. If the aging time is too long,excessive invalid MAC address entries maintained by the switch may fill up the MAC address table.This prevents the MAC address table from updating with network changes in time. If the aging timeis too short, the switch may remove valid MAC address entries. This decreases the forwardingperformance of the switch. It is recommended to keep the default value.5.4.4 Filtering AddressThe filtering address is to forbid the undesired packets to be forwarded. The filtering address canbe added or removed manually, independent of the aging time. The filtering MAC address allowsthe switch to filter the packets which includes this MAC address as the source address ordestination address, so as to guarantee the network security. The filtering MAC address entriesact on all the ports in the corresponding VLAN.Choose the menu Switching→MAC Address→Filtering Address to load the following page.Figure 5-15 Filtering Address50
The following entries are displayed on this screen:‣ Create Filtering AddressMAC Address:VLAN ID:Enter the MAC Address to be filtered.Enter the corresponding VLAN ID of the MAC address.‣ Search OptionSearch Option:Select a Search Option from the pull-down list and click the Searchbutton to find your desired entry in the Filtering Address Table. MAC: Enter the MAC address of your desired entry. VLAN ID: Enter the VLAN ID number of your desired entry.‣ Filtering Address TableSelect:MAC Address:VLAN ID:Port:Type:Aging Status:Select the entry to delete the corresponding filtering address. It ismulti-optional.Displays the filtering MAC Address.Displays the corresponding VLAN ID.Here the symbol “__” indicates no specified port.Displays the Type of the MAC address.Displays the Aging Status of the MAC address.Note:1. The MAC address in the Filtering Address Table can not be added to the Static Address Tableor bound to a port dynamically.2. This MAC address filtering function is not available if the 802.1X feature is enabled.Return to CONTENTS51
Chapter 6 VLANThe traditional Ethernet is a data network communication technology basing on CSMA/CD (CarrierSense Multiple Access/Collision Detect) via shared communication medium. Through thetraditional Ethernet, the overfull hosts in LAN will result in serious collision, flooding broadcasts,poor performance or even breakdown of the Internet. Though connecting the LANs throughswitches can avoid the serious collision, the flooding broadcasts can not be prevented, which willoccupy plenty of bandwidth resources, causing potential serious security problems.A Virtual Local Area Network (VLAN) is a network topology configured according to a logicalscheme rather than the physical layout. The VLAN technology is developed for switches to controlbroadcast in LANs. By creating VLANs in a physical LAN, you can divide the LAN into multiplelogical LANs, each of which has a broadcast domain of its own. Hosts in the same VLANcommunicate with one another as if they are in a LAN. However, hosts in different VLANs cannotcommunicate with one another directly. Therefore, broadcast packets are limited in a VLAN. Hostsin the same VLAN communicate with one another via Ethernet whereas hosts in different VLANscommunicate with one another through the Internet devices such as Router, the Lay3 Switch andetc. The following figure illustrates a VLAN implementation.Figure 6-1 VLAN implementationCompared with the traditional Ethernet, VLAN enjoys the following advantages.(1) Broadcasts are confined to VLANs. This decreases bandwidth utilization and improvesnetwork performance.(2) Network security is improved. VLANs cannot communicate with one another directly. Thatis, a host in a VLAN cannot access resources in another VLAN directly, unless routers orLayer 3 switches are used.(3) Network configuration workload for the host is reduced. VLAN can be used to groupspecific hosts. When the physical position of a host changes within the range of the VLAN,you need not change its network configuration.A VLAN can span across multiple switches, or even routers. This enables hosts in a VLAN to bedispersed in a looser way. That is, hosts in a VLAN can belong to different physical networksegment. This switch supports two ways, namely, 802.1Q VLAN and Protocol VLAN, to classifyVLANs. VLAN tags in the packets are necessary for the switch to identify packets of different52
VLANs. The switch can analyze the received untagged packets on the port and match the packetswith the Protocol VLAN and 802.1Q VLAN in turn. If a packet is matched, the switch will add acorresponding VLAN tag to it and forward it in the corresponding VLAN.6.1 802.1Q VLANVLAN tags in the packets are necessary for the switch to identify packets of different VLANs. Theswitch works at the data link layer in OSI model and it can identify the data link layer encapsulationof the packet only, so you can add the VLAN tag field into the data link layer encapsulation foridentification.In 1999, IEEE issues the IEEE 802.1Q protocol to standardize VLAN implementation, defining thestructure of VLAN-tagged packets. IEEE 802.1Q protocol defines that a 4-byte VLAN tag isencapsulated after the destination MAC address and source MAC address to show the informationabout VLAN.As shown in the following figure, a VLAN tag contains four fields, including <strong>TP</strong>ID (Tag ProtocolIdentifier), Priority, CFI (Canonical Format Indicator), and VLAN ID.Figure 6-2 Format of VLAN Tag(1) <strong>TP</strong>ID: <strong>TP</strong>ID is a 16-bit field, indicating that this data frame is VLAN-tagged. By default, it is0x8100.(2) Priority: Priority is a 3-bit field, referring to 802.1p priority. Refer to section “QoS & QoSprofile” for details.(3) CFI: CFI is a 1-bit field, indicating whether the MAC address is encapsulated in thestandard format in different transmission media. This field is not described in detail in thischapter.(4) VLAN ID: VLAN ID is a 12-bit field, indicating the ID of the VLAN to which this packetbelongs. It is in the range of 0 to 4,095. Generally, 0 and 4,095 is not used, so the field is inthe range of 1 to 4,094.VLAN ID identifies the VLAN to which a packet belongs. When the switch receives anun-VLAN-tagged packet, it will encapsulate a VLAN tag with the default VLAN ID of the inboundport for the packet, and the packet will be assigned to the default VLAN of the inbound port fortransmission.In this <strong>User</strong> <strong>Guide</strong>, the tagged packet refers to the packet with VLAN tag whereas the untaggedpacket refers to the packet without VLAN tag, and the priority-tagged packet refers to the packetwith VLAN tag whose VLAN ID is 0.‣ <strong>Link</strong> Types of portsWhen creating the 802.1Q VLAN, you should set the link type for the port according to itsconnected device. The link types of port including the following three types:(1) ACCESS: The ACCESS port can be added in a single VLAN, and the egress rule of theport is UNTAG. The PVID is same as the current VLAN ID. If the ACCESS port is added toanother VLAN, it will be removed from the current VLAN automatically.53
(2) TRUNK: The TRUNK port can be added in multiple VLANs, and the egress rule of the portis TAG. The TRUNK port is generally used to connect the cascaded network devices for itcan receive and forward the packets of multiple VLANs. When the packets are forwardedby the TRUNK port, its VLAN tag will not be changed.(3) GENERAL: The GENERAL port can be added in multiple VLANs and set various egressrules according to the different VLANs. The default egress rule is UNTAG. The PVID canbe set as the VID number of any VLAN the port belongs to.‣ PVIDPVID (Port Vlan ID) is the default VID of the port. When the switch receives an un-VLAN-taggedpacket, it will add a VLAN tag to the packet according to the PVID of its received port and forwardthe packets.When creating VLANs, the PVID of each port, indicating the default VLAN to which the portbelongs, is an important parameter with the following two purposes:(1) When the switch receives an un-VLAN-tagged packet, it will add a VLAN tag to the packetaccording to the PVID of its received port(2) PVID determines the default broadcast domain of the port, i.e. when the port receives ULpackets or broadcast packets, the port will broadcast the packets in its default VLAN.Different packets, tagged or untagged, will be processed in different ways, after being received byports of different link types, which is illustrated in the following table.Port TypeUntagged PacketsReceiving PacketsTagged PacketsForwarding PacketsAccessTrunkGeneralWhen untaggedpackets arereceived, the portwill add the defaultVLAN tag, i.e. thePVID of the ingressport, to the packets.If the VID of packet isthe same as the PVIDof the port, the packetwill be received.If the VID of packet isnot the same as thePVID of the port, thepacket will be dropped.If the VID of packet isallowed by the port, thepacket will be received.If the VID of packet isforbidden by the port,the packet will bedropped.The packet will beforwarded after removing itsVLAN tag.The packet will beforwarded with its currentVLAN tag.If the egress rule of port isTAG, the packet will beforwarded with its currentVLAN tag.If the egress rule of port isUNTAG, the packet will beforwarded after removing itsVLAN tag.Table 6-1 Relationship between Port Types and VLAN Packets Processing54
IEEE 802.1Q VLAN function is implemented on the VLAN Config and Port Config pages.6.1.1 VLAN ConfigOn this page, you can view the current created 802.1Q VLAN.Choose the menu VLAN→802.1Q VLAN→VLAN Config to load the following page.Figure 6-3 VLAN TableTo ensure the normal communication of the factory switch, the default VLAN of all ports is set toVLAN1. The Web Management Page of switch can only be accessed through the ports in VLAN1.VLAN1 can not be modified or deleted.The following entries are displayed on this screen:‣ VLAN TableVLAN ID Select:Select:VLAN ID:Description:Members:Operation:Click the Select button to quick-select the corresponding entrybased on the VLAN ID number you entered.Select the desired entry to delete the corresponding VLAN. It ismulti-optional.Displays the ID number of VLAN.Displays the user-defined description of VLAN.Displays the port members in the VLAN.Allows you to view or modify the information for each entry. Edit: Click to modify the settings of VLAN. Detail: Click to get the information of VLAN.Click Edit button to modify the settings of the corresponding VLAN. Click Create button to create anew VLAN.55
Figure 6-4 Create or Modify 802.1Q VLANThe following entries are displayed on this screen:‣ VLAN ConfigVLAN ID:Description:Check:Enter the ID number of VLAN.Give a description to the VLAN for identification.Click the Check button to check whether the VLAN ID you enteredis valid or not.‣ VLAN MembersPort Select:Select:Port:<strong>Link</strong> Type:Click the Select button to quick-select the corresponding entrybased on the port number you entered.Select the desired port to be a member of VLAN or leave it blank.It's multi-optional.Displays the port number.Displays the <strong>Link</strong> Type of the port. It can be reset on Port Configscreen.56
Egress Rule:LAG:Select the Egress Rule for the VLAN port member. The defaultegress rule is UNTAG. TAG: All packets forwarded by the port are tagged. Thepackets contain VLAN information. UNTAG: Packets forwarded by the portDisplays the LAG to which the port belongs.6.1.2 Port ConfigBefore creating the 802.1Q VLAN, please acquaint yourself with all the devices connected to theswitch in order to configure the ports properly.Choose the menu VLAN→802.1Q VLAN→Port Config to load the following page.Figure 6-5 802.1Q VLAN – Port ConfigThe following entries are displayed on this screen:‣ VLAN Port ConfigPort Select:Select:Port:Click the Select button to quick-select the corresponding entrybased on the port number you entered.Select the desired port for configuration. It is multi-optional.Displays the port number.57
<strong>Link</strong> Type:PVID:LAG:VLAN:Select the <strong>Link</strong> Type from the pull-down list for the port.ACCESS: The ACCESS port can be added in a single VLAN,and the egress rule of the port is UNTAG. The PVID is sameas the current VLAN ID. If the current VLAN is deleted, thePVID will be set to 1 by default.TRUNK: The TRUNK port can be added in multiple VLANs,and the egress rule of the port is TAG. The PVID can be set asthe VID number of any VLAN the port belongs to.GENERAL: The GENERAL port can be added in multipleVLANs and set various egress rules according to the differentVLANs. The default egress rule is UNTAG. The PVID can beset as the VID number of any VLAN the port belongs to.Enter the PVID number of the port.Displays the LAG to which the port belongs.Click the Detail button to view the information of the VLAN towhich the port belongs.Click the Detail button to view the information of the corresponding VLANFigure 6-6 View the Current VLAN of PortThe following entries are displayed on this screen:‣ VLAN of PortVLAN ID Select:VLAN ID:VLAN Description:Operation:Click the Select button to quick-select the corresponding entrybased on the VLAN ID number you entered.Displays the ID number of VLAN.Displays the user-defined description of VLAN.Allows you to remove the port from the current VLAN.Configuration Procedure:Step Operation Description1 Set the link type forport.Required. On the VLAN→802.1Q VLAN→Port Config page, setthe link type for the port basing on its connected device.58
2 Create VLAN. Required. On the VLAN→802.1Q VLAN→VLAN Config page,click the Create button to create a VLAN. Enter the VLAN ID andthe description for the VLAN. Meanwhile, specify its memberports.3 Modify/View VLAN. Optional. On the VLAN→802.1Q VLAN→VLAN Config page,click the Edit/Detail button to modify/view the information of thecorresponding VLAN.4 Delete VLAN Optional. On the VLAN→802.1Q VLAN→VLAN Config page,select the desired entry to delete the corresponding VLAN byclicking the Delete button.6.2 Protocol VLANProtocol VLAN is another way to classify VLANs basing on network protocol. Protocol VLANs canbe sorted by IP, IPX, DECnet, AppleTalk, Banyan and so on. Through the Protocol VLANs, thebroadcast domain can span over multiple switches and the Host can change its physical positionin the network with its VLAN member role always effective. By creating Protocol VLANs, thenetwork administrator can manage the network clients basing on their actual applications andservices effectively.This switch can classify VLANs basing on the common protocol types listed in the following table.Please create the Protocol VLAN to your actual need.Protocol Type Type valueARP0x0806IP0x0800MPLS0x8847/0x8848IPX0x8137IS-IS0x8000LACP0x8809802.1X 0x888ETable 6-2 Protocol types in common useThe packet in Protocol VLAN is processed in the following way:1. When receiving an untagged packet, the switch matches the packet with the current ProtocolVLAN. If the packet is matched, the switch will add a corresponding Protocol VLAN tag to it. Ifno Protocol VLAN is matched, the switch will add a tag to the packet according to the PVID ofthe received port. Thus, the packet is assigned automatically to the corresponding VLAN fortransmission.2. When receiving tagged packet, the switch will process it basing on the 802.1Q VLAN. If thereceived port is the member of the VLAN to which the tagged packet belongs, the packet willbe forwarded normally. Otherwise, the packet will be discarded.3. If the Protocol VLAN is created, please set its enabled port to be the member ofcorresponding 802.1Q VLAN so as to ensure the packets forwarded normally.59
6.2.1 Protocol VLANOn this page, you can create Protocol VLAN and view the information of the current definedProtocol VLANs.Choose the menu VLAN→Protocol VLAN→Protocol VLAN to load the following page.Figure 6-7 Create Protocol VLANThe following entries are displayed on this screen:‣ Create Protocol VLANProtocol:VLAN ID:Select the defined protocol template.Enter the ID number of the Protocol VLAN. This VLAN should be oneof the 802.1Q VLANs the ingress port belongs to.‣ Protocol VLAN TableSelect:Protocol:Ether Type:VLAN ID:Operation:Select the desired entry. It is multi-optional.Displays the protocol template of the VLAN.Displays the Ethernet protocol type field in the protocol template.Displays the corresponding VLAN ID of the protocol.Click the Edit button to modify the settings of the entry. And click theModify button to apply your settings.6.2.2 Protocol TemplateThe Protocol Template should be created before configuring the Protocol VLAN. By default, theswitch has defined the IP Template, ARP Template, RARP Template, etc. You can add moreProtocol Template on this page.Choose the menu VLAN→Protocol VLAN→Protocol Template to load the following page.60
Figure 6-8 Create and View Protocol TemplateThe following entries are displayed on this screen:‣ Create Protocol TemplateProtocol Name:Ether Type:Give a name for the Protocol Template.Enter the Ethernet protocol type field in the protocol template.‣ Protocol Template TableSelect:Protocol Name:Ether Type:Select the desired entry. It is multi-optional.Displays the name of the protocol template.Displays the Ethernet protocol type field in the protocol template.Note:The Protocol Template bound to VLAN can not be deleted.6.2.3 Port EnableOn this page, you can enable the port for the Protocol VLAN feature. Only the port is enabled, canthe configured Protocol VLAN take effect.Choose the menu “VLAN→Protocol VLAN→Port Enable” to load the following page.61
Figure 6-9 Enable Protocol VLAN for PortPort Enable:Select your desired port for Protocol VLAN feature. All the ports aredisabled by default.Configuration Procedure:Step Operation Description1 Set the link type for port. Required. On the VLAN→802.1Q VLAN→Port Configpage, set the link type for the port basing on its connecteddevice.2 Create VLAN. Required. On the VLAN→802.1Q VLAN→VLAN Configpage, click the Create button to create a VLAN. Enter theVLAN ID and the description for the VLAN. Meanwhile,specify its member ports.3 Create Protocol Template. Required. On the VLAN→Protocol VLAN→ProtocolTemplate page, create the Protocol Template beforeconfiguring Protocol VLAN.4 Select your desired ports forProtocol VLAN feature.Required. On the VLAN→Protocol VLAN→Port Enablepage, select and enable the desired ports for ProtocolVLAN feature.5 Create Protocol VLAN. Required. On the VLAN→Protocol VLAN→ProtocolVLAN page, select the protocol type and enter the VLAN IDto create a Protocol VLAN.6 Modify/View VLAN. Optional. On the VLAN→Protocol VLAN→Protocol VLANpage, click the Edit button to modify/view the information ofthe corresponding VLAN.7 Delete VLAN. Optional. On the VLAN→Protocol VLAN→Protocol VLANpage, select the desired entry to delete the correspondingVLAN by clicking the Delete button.6.3 Application Example for 802.1Q VLAN‣ Network Requirements• Switch A is connecting to PC A and Server B;• Switch B is connecting to PC B and Server A;• PC A and Server A is in the same VLAN;62
• PC B and Server B is in the same VLAN;• PCs in the two VLANs cannot communicate with each other.‣ Network Diagram‣ Configuration Procedure• Configure Switch AStep Operation Description1 Configure the<strong>Link</strong> Type of theportsRequired. On VLAN→802.1Q VLAN→Port Config page, configurethe link type of Port 2, Port 3 and Port 4 as ACCESS, TRUNK andACCESS respectively2 Create VLAN10 Required. On VLAN→802.1Q VLAN→VLAN Config page, create aVLAN with its VLANID as 10, owning Port 2 and Port 3.3 Create VLAN20 Required. On VLAN→802.1Q VLAN→VLAN Config page, create aVLAN with its VLANID as 20, owning Port 3 and Port 4.• Configure Switch BStep Operation Description1 Configure the<strong>Link</strong> Type of theportsRequired. On VLAN→802.1Q VLAN→Port Config page, configurethe link type of Port 7, Port 6 and Port 8 as ACCESS, TRUNK andACCESS respectively.2 Create VLAN10 Required. On VLAN→802.1Q VLAN→VLAN Config page, create aVLAN with its VLANID as 10, owning Port 6 and Port 8.3 Create VLAN20 Required. On VLAN→802.1Q VLAN→VLAN Config page, create aVLAN with its VLANID as 20, owning Port 6 and Port 7.63
6.4 Application Example for Protocol VLAN‣ Network Requirements• Department A is connected to the company LAN via Port12 of Switch A;• Department A has IP host and AppleTalk host;• IP host, in VLAN10, is served by IP server while AppleTalk host is served by AppleTalk server;• Switch B is connected to IP server and AppleTalk server.‣ Network Diagram‣ Configuration Procedure• Configure Switch AStep Operation Description1 Configure the<strong>Link</strong> Type of theportsRequired. On VLAN→802.1Q VLAN→Port Config page, configure thelink type of Port 11 and Port 13 as ACCESS, and configure the link typeof Port 12 as GENERAL.2 Create VLAN10 Required. On VLAN→802.1Q VLAN→VLAN Config page, create aVLAN with its VLANID as 10, owning Port 12 and Port 13, andconfigure the egress rule of Port 12 as Untag.3 Create VLAN20 Required. On VLAN→802.1Q VLAN→VLAN Config page, create aVLAN with its VLANID as 20, owning Port 11 and Port 12, and configurethe egress rule of Port 12 as Untag.• Configure Switch BStep Operation Description1 Configure the<strong>Link</strong> Type of theportsRequired. On VLAN→802.1Q VLAN→Port Config page, configure thelink type of Port 4 and Port 5 as ACCESS, and configure the link type ofPort 3 as GENERAL.2 Create VLAN10 Required. On VLAN→802.1Q VLAN→VLAN Config page, create a64
VLAN with its VLANID as 10, owning Port 3 and Port 4, and configurethe egress rule of Port 3 as Untag.3 Create VLAN20 Required. On VLAN→802.1Q VLAN→VLAN Config page, create aVLAN with its VLANID as 20, owning Port 3 and Port 5, and configurethe egress rule of Port 3 as Untag.4 Create ProtocolTemplateRequired. On VLAN→Protocol VLAN→Protocol Template page,configure the protocol template practically. E.g. the Ether Type of IPnetwork packets is 0800 and that of AppleTalk network packets is 809B.5 Port Enable Required. On the VLAN→Protocol VLAN→Port Enable page, selectand enable Port 3, Port 4 and Port 5 for Protocol VLAN feature.6 Create ProtocolVLAN 107 Create ProtocolVLAN 20On VLAN→Protocol VLAN→Protocol VLAN page, create protocolVLAN 10 with Protocol as IP.On VLAN→Protocol VLAN→Protocol VLAN page, create protocolVLAN 20 with Protocol as AppleTalk.6.5 GVRPGVRP (GARP VLAN Registration Protocol) is an implementation of GARP (generic attributeregistration protocol). GVRP allows the switch to automatically add or remove the VLANs via thedynamic VLAN registration information and propagate the local VLAN registration information toother switches, without having to individually configure each VLAN.‣ GARPGARP provides the mechanism to assist the switch members in LAN to deliver, propagate andregister the information among the members. GARP itself does not work as the entity among thedevices. The application complied with GARP is called GARP implementation, and GVRP is theimplementation of GARP. When GARP is implemented on a port of device, the port is calledGARP entity.The information exchange between GARP entities is completed by messages. GARP defines themessages into three types: Join, Leave and LeaveAll. Join Message: When a GARP entity expects other switches to register certain attributeinformation of its own, it sends out a Join message. And when receiving the Join messagefrom the other entity or configuring some attributes statically, the device also sends out a Joinmessage in order to be registered by the other GARP entities. Leave Message: When a GARP entity expects other switches to deregister certain attributeinformation of its own, it sends out a Leave message. And when receiving the Leave messagefrom the other entity or deregistering some attributes statically, the device also sends out aLeave message. LeaveAll Message: Once a GARP entity starts up, it starts the LeaveAll timer. After the timertimes out, the GARP entity sends out a LeaveAll message. LeaveAll message is to deregisterall the attribute information so as to enable the other GARP entities to re-register attributeinformation of their own.Through message exchange, all the attribute information to be registered can be propagated to allthe switches in the same switched network.The interval of GARP messages is controlled by timers. GARP defines the following timers:65
Hold Timer: When a GARP entity receives a piece of registration information, it does notsend out a Join message immediately. Instead, to save the bandwidth resources, it starts theHold timer, puts all registration information it receives before the timer times out into one Joinmessage and sends out the message after the timer times out.Join Timer: To transmit the Join messages reliably to other entities, a GARP entity sendseach Join message two times. The Join timer is used to define the interval between the twosending operations of each Join message.Leave Timer: When a GARP entity expects to deregister a piece of attribute information, itsends out a Leave message. Any GARP entity receiving this message starts its Leave timer,and deregisters the attribute information if it does not receives a Join message again beforethe timer times out.LeaveAll Timer: Once a GARP entity starts up, it starts the LeaveAll timer, and sends out aLeaveAll message after the timer times out, so that other GARP entities can re-register all theattribute information on this entity. After that, the entity restarts the LeaveAll timer to begin anew cycle.‣ GVRPGVRP, as an implementation of GARP, maintains dynamic VLAN registration information andpropagates the information to other switches by adopting the same mechanism of GARP.After the GVRP feature is enabled on a switch, the switch receives the VLAN registrationinformation from other switches to dynamically update the local VLAN registration information,including VLAN members, ports through which the VLAN members can be reached, and so on.The switch also propagates the local VLAN registration information to other switches so that all theswitching devices in the same switched network can have the same VLAN information. The VLANregistration information includes not only the static registration information configured locally, butalso the dynamic registration information, which is received from other switches.In this switch, only the port with TRUNK link type can be set as the GVRP application entity tomaintain the VLAN registration information. GVRP has the following three port registration modes:Normal, Fixed, and Forbidden. Normal: In this mode, a port can dynamically register/deregister a VLAN and propagate thedynamic/static VLAN information. Fixed: In this mode, a port cannot register/deregister a VLAN dynamically. It only propagatesstatic VLAN information. That is, the port in Fixed mode only permits the packets of its staticVLAN to pass. Forbidden: In this mode, a port cannot register/deregister VLANs. It only propagates VLAN 1information. That is, the port in Forbidden mode only permits the packets of the default VLAN(namely VLAN 1) to pass.Choose the menu VLAN→GVRP to load the following page.66
Figure 6-10 GVRP ConfigNote:If the GVRP feature is enabled for a member port of LAG, please ensure all the member ports ofthis LAG are set to be in the same status and registration mode.The following entries are displayed on this screen:‣ Global ConfigGVRP:Allows you to Enable/Disable the GVRP function.‣ Port ConfigPort Select:Select:Port:Status:RegistrationMode:Click the Select button to quick-select the corresponding entry basedon the port number you entered.Select the desired port for configuration. It is multi-optional.Displays the port number.Enable/Disable the GVRP feature for the port. The port type should beset to TRUNK before enabling the GVRP feature.Select the Registration Mode for the port. Normal: In this mode, a port can dynamically register/deregistera VLAN and propagate the dynamic/static VLAN information.67
Fixed: In this mode, a port cannot register/deregister a VLANdynamically. It only propagates static VLAN information.Forbidden: In this mode, a port cannot register/deregisterVLANs. It only propagates VLAN 1 information.LeaveAll Timer:Join Timer:Leave Timer:LAG:Once the LeaveAll Timer is set, the port with GVRP enabled can senda LeaveAll message after the timer times out, so that other GARPports can re-register all the attribute information. After that, theLeaveAll timer will start to begin a new cycle. The LeaveAll Timerranges from 1000 to 30000 centiseconds.To guarantee the transmission of the Join messages, a GARP portsends each Join message two times. The Join Timer is used to definethe interval between the two sending operations of each Joinmessage. The Join Timer ranges from 20 to 1000 centiseconds.Once the Leave Timer is set, the GARP port receiving a Leavemessage will start its Leave timer, and deregister the attributeinformation if it does not receive a Join message again before thetimer times out. The Leave Timer ranges from 60 to 3000centiseconds.Displays the LAG to which the port belongs.Note:LeaveAll Timer >= 10* Leave Timer, Leave Timer >= 2*Join TimerConfiguration Procedure:Step Operation Description1 Set the link type for port. Required. On the VLAN→802.1Q VLAN→Port Configpage, set the link type of the port to be TRUNK.2 Enable GVRP function. Required. On the VLAN→GVRP page, enable GVRPfunction.3 Configure the registrationmode and the timers for theport.Required. On the VLAN→GVRP page, configure theparameters of ports basing on actual applications.Return to CONTENTS68
Chapter 7 Spanning TreeS<strong>TP</strong> (Spanning Tree Protocol), subject to IEEE 802.1D standard, is to disbranch a ring network inthe Data <strong>Link</strong> layer in a local network. Devices running S<strong>TP</strong> discover loops in the network and blockports by exchanging information, in that way, a ring network can be disbranched to form atree-topological ring-free network to prevent packets from being duplicated and forwarded endlesslyin the network.BPDU (Bridge Protocol Data Unit) is the protocol data that S<strong>TP</strong> and RS<strong>TP</strong> use. Enoughinformation is carried in BPDU to ensure the spanning tree generation. S<strong>TP</strong> is to determine thetopology of the network via transferring BPDUs between devices.To implement spanning tree function, the switches in the network transfer BPDUs between eachother to exchange information and all the switches supporting S<strong>TP</strong> receive and process thereceived BPDUs. BPDUs carry the information that is needed for switches to figure out thespanning tree.‣ S<strong>TP</strong> ElementsBridge ID(Bridge Identifier): Indicates the value of the priority and MAC address of the bridge.Bridge ID can be configured and the switch with the lower bridge ID has the higher priority.Root Bridge: Indicates the switch has the lowest bridge ID. Configure the best PC in the ringnetwork as the root bridge to ensure best network performance and reliability.Designated Bridge: Indicates the switch has the lowest path cost from the switch to the rootbridge in each network segment. BPDUs are forwarded to the network segment through thedesignated bridge. The switch with the lowest bridge ID will be chosen as the designated bridge.Root Path Cost: Indicates the sum of the path cost of the root port and the path cost of all theswitches that packets pass through. The root path cost of the root bridge is 0.Bridge Priority: The bridge priority can be set to a value in the range of 0~61440. The lower valuepriority has the higher priority. The switch with the higher priority has more chance to be chosen asthe root bridge.Root Port: Indicates the port that has the lowest path cost from this bridge to the Root Bridge andforwards packets to the root.Designated Port: Indicates the port that forwards packets to a downstream network segment orswitch.Port Priority: The port priority can be set to a value in the range of 0~255. The lower value priorityhas the higher priority. The port with the higher priority has more chance to be chosen as the rootport.Path Cost: Indicates the parameter for choosing the link path by S<strong>TP</strong>. By calculating the path cost,S<strong>TP</strong> chooses the better links and blocks the redundant links so as to disbranch the ring-network toform a tree-topological ring-free network.The following network diagram shows the sketch map of spanning tree. Switch A, B and C areconnected together in order. After S<strong>TP</strong> generation, switch A is chosen as root bridge, the path fromport 2 to port 6 is blocked.• Bridge: Switch A is the root bridge in the whole network; switch B is the designated bridge ofswitch C.69
• Port: Port 3 is the root port of switch B and port 5 is the root port of switch C; port 1 is thedesignated port of switch A and port 4 is the designated port of switch B; port 6 is the blockedport of switch C.‣ S<strong>TP</strong> TimersHello Time:Figure 7-1 Basic S<strong>TP</strong> diagramHello Time ranges from 1 to 10 seconds. It specifies the interval to send BPDU packets. It is usedto test the links.Max. Age:Max. Age ranges from 6 to 40 seconds. It specifies the maximum time the switch can wait withoutreceiving a BPDU before attempting to reconfigure.Forward Delay:Forward Delay ranges from 4 to 30 seconds. It specifies the time for the port to transit its stateafter the network topology is changed.When the S<strong>TP</strong> regeneration caused by network malfunction occurs, the S<strong>TP</strong> structure will getsome corresponding change. However, as the new configuration BPDUs cannot be spread in thewhole network at once, the temporal loop will occur if the port transits its state immediately.Therefore, S<strong>TP</strong> adopts a state transit mechanism, that is, the new root port and the designatedport begins to forward data after twice forward delay, which ensures the new configuration BPDUsare spread in the whole network.‣ BPDU Comparing Principle in S<strong>TP</strong> modeAssuming two BPDUs: BPDU X and BPDU YIf the root bridge ID of X is smaller than that of Y, X is superior to Y.If the root bridge ID of X equals that of Y, but the root path cost of X is smaller than that of Y, X issuperior to Y.If the root bridge ID and the root path cost of X equal those of Y, but the bridge ID of X is smallerthan that of Y, X is superior to Y.If the root bridge ID, the root path cost and bridge ID of X equal those of Y, but the port ID of X issmaller than that of Y, X is superior to Y.70
‣ S<strong>TP</strong> Generation• In the beginningIn the beginning, each switch regards itself as the root, and generates a configuration BPDU foreach port on it as a root, with the root path cost being 0, the ID of the designated bridge being thatof the switch, and the designated port being itself.• Comparing BPDUsEach switch sends out configuration BPDUs and receives a configuration BPDU on one of its portsfrom another switch. The following table shows the comparing operations.StepOperation1 If the priority of the BPDU received on the port is lower than that of the BPDU if ofthe port itself, the switch discards the BPDU and does not change the BPDU ofthe port.2 If the priority of the BPDU is higher than that of the BPDU of the port itself, theswitch replaces the BPDU of the port with the received one and compares it withthose of other ports on the switch to obtain the one with the highest priority.• Selecting the root bridgeTable 7-1 Comparing BPDUsThe root bridge is selected by BPDU comparing. The switch with the smallest root ID is chosen asthe root bridge.• Selecting the root port and designate portThe operation is taken in the following way:StepOperation1 For each switch (except the one chosen as the root bridge) in a network, the portthat receives the BPDU with the highest priority is chosen as the root port of theswitch.2 Using the root port BPDU and the root path cost, the switch generates adesignated port BPDU for each of its ports.• Root ID is replaced with that of the root port;• Root path is replaced with the sum of the root path cost of the root port andthe path cost between this port and the root port;• The ID of the designated bridge is replaced with that of the switch;• The ID of the designated port is replaced with that of the port.3 The switch compares the resulting BPDU with the BPDU of the desired portwhose role you want to determine.• If the resulting BPDU takes the precedence over the BPDU of the port, theport is chosen as the designated port and the BPDU of this port is replacedwith the resulting BPDU. The port regularly sends out the resulting BPDU;• If the BPDU of this port takes the precedence over the resulting BPDU, theBPDU of this port is not replaced and the port is blocked. The port only canreceive BPDUs.Table 7-2 Selecting root port and designated port71
Tips:In a S<strong>TP</strong> with stable topology, only the root port and designated port can forward data, and theother ports are blocked. The blocked ports only can receive BPDUs.RS<strong>TP</strong> (Rapid Spanning Tree Protocol), evolved from the 802.1D S<strong>TP</strong> standard, enable Ethernetports to transit their states rapidly. The premises for the port in the RS<strong>TP</strong> to transit its state rapidlyare as follows.• The condition for the root port to transit its port state rapidly: The old root port of the switchstops forwarding data and the designated port of the upstream switch begins to forwarddata.• The condition for the designated port to transit its port state rapidly: The designated port isan edge port or connecting to a point-to-point link. If the designated port is an edge port, itcan directly transit to forwarding state; if the designated port is connecting to apoint-to-point link, it can transit to forwarding state after getting response from thedownstream switch through handshake.‣ RS<strong>TP</strong> ElementsEdge Port: Indicates the port connected directly to terminals.P2P <strong>Link</strong>: Indicates the link between two switches directly connected.MS<strong>TP</strong> (Multiple Spanning Tree Protocol), compatible with both S<strong>TP</strong> and RS<strong>TP</strong> and subject to IEEE802.1s standard, not only enables spanning trees to converge rapidly, but also enables packets ofdifferent VLANs to be forwarded along their respective paths so as to provide redundant linkswith a better load-balancing mechanism.Features of MS<strong>TP</strong>:• MS<strong>TP</strong> combines VLANs and spanning tree together via VLAN-to-instance mapping table. Itbinds several VLANs to an instance to save communication cost and network resources.• MS<strong>TP</strong> divides a spanning tree network into several regions. Each region has severalinternal spanning trees, which are independent of each other.• MS<strong>TP</strong> provides a load-balancing mechanism for the packets transmission in the VLAN.• MS<strong>TP</strong> is compatible with both S<strong>TP</strong> and RS<strong>TP</strong>.‣ MS<strong>TP</strong> ElementsMST Region (Multiple Spanning Tree Region): An MST Region comprises switches with the sameregion configuration and VLAN-to-Instances mapping relationship.IST (Internal Spanning Tree): An IST is a spanning tree in an MST.CST (Common Spanning Tree): A CST is the spanning tree in a switched network that connects allMST regions in the network.CIST (Common and Internal Spanning Tree): A CIST, comprising IST and CST, is the spanningtree in a switched network that connects all switches in the network.The following figure shows the network diagram in MS<strong>TP</strong>.72
Figure 7-2 Basic MS<strong>TP</strong> diagram‣ MS<strong>TP</strong>MS<strong>TP</strong> divides a network into several MST regions. The CST is generated between these MSTregions, and multiple spanning trees can be generated in each MST region. Each spanning tressis called an instance. As well as S<strong>TP</strong>, MS<strong>TP</strong> uses BPDUs to generate spanning tree. The onlydifference is that the BPDU for MS<strong>TP</strong> carry the MS<strong>TP</strong> configuration information on the switches.‣ Port StatesIn an MS<strong>TP</strong>, ports can be in the following four states:• Forwarding: In this status the port can receive/forward data, receive/send BPDU packets aswell as learn MAC address.• Learning: In this status the port can receive/send BPDU packets and learn MAC address.• Blocking: In this status the port can only receive BPDU packets.• Disconnected: In this status the port is not participating in the S<strong>TP</strong>.‣ Port RolesIn an MS<strong>TP</strong>, the following roles exist:• Root Port: Indicates the port that has the lowest path cost from this bridge to the Root Bridgeand forwards packets to the root.• Designated Port: Indicates the port that forwards packets to a downstream network segmentor switch.• Master Port: Indicates the port that connects a MST region to the common root. The pathfrom the master port to the common root is the shortest path between this MST region andthe common root.• Alternate Port: Indicates the port that can be a backup port of a root or master port.• Backup Port: Indicates the port that is the backup port of a designated port.• Disabled: Indicates the port that is not participating in the S<strong>TP</strong>.The following diagram shows the different port roles.73
Figure 7-3 Port rolesThe Spanning Tree module is mainly for spanning tree configuration of the switch, including foursubmenus: S<strong>TP</strong> Config, Port Config, MS<strong>TP</strong> Instance and S<strong>TP</strong> Security.7.1 S<strong>TP</strong> ConfigThe S<strong>TP</strong> Config function, for global configuration of spanning trees on the switch, can beimplemented on S<strong>TP</strong> Config and S<strong>TP</strong> Summary pages.7.1.1 S<strong>TP</strong> ConfigBefore configuring spanning trees, you should make clear the roles each switch plays in eachspanning tree instance. Only one switch can be the root bridge in each spanning tree instance. Onthis page you can globally configure the spanning tree function and related parameters.Choose the menu Spanning Tree→S<strong>TP</strong> Config→S<strong>TP</strong> Config to load the following page.74
Figure 7-4 S<strong>TP</strong> ConfigThe following entries are displayed on this screen:‣ Global ConfigS<strong>TP</strong>:Version:Select Enable/Disable S<strong>TP</strong> function globally on the switch.Select the desired S<strong>TP</strong> version on the switch.• S<strong>TP</strong>: Spanning Tree Protocol.• RS<strong>TP</strong>: Rapid Spanning Tree Protocol.• MS<strong>TP</strong>: Multiple Spanning Tree Protocol.‣ Parameters ConfigCIST Priority:Hello TimeMax Age:Forward Delay:TxHold Count:Max Hops:Enter a value from 0 to 61440 to specify the priority of the switchfor comparison in the CIST. CIST priority is an important criterionon determining the root bridge. In the same condition, the switchwith the highest priority will be chosen as the root bridge. Thelower value has the higher priority. The default value is 32768 andshould be exact divisor of 4096.Enter a value from 1 to 10 in seconds to specify the interval tosend BPDU packets. It is used to test the links. 2*(Hello Time + 1)≤ Max Age. The default value is 2 seconds.Enter a value from 6 to 40 in seconds to specify the maximumtime the switch can wait without receiving a BPDU beforeattempting to reconfigure. The default value is 20 seconds.Enter a value from 4 to 30 in seconds to specify the time for theport to transit its state after the network topology is changed.2*(Forward Delay-1) ≥ Max Age. The default value is 15 seconds.Enter a value from 1 to 20 to set the maximum number of BPDUpackets transmitted per Hello Time interval. The default value is5pps.Enter a value from 1 to 40 to set the maximum number of hops75
that occur in a specific region before the BPDU is discarded. Thedefault value is 20 hops.Note:1. The forward delay parameter and the network diameter are correlated. A too small forwarddelay parameter may result in temporary loops. A too large forward delay may cause anetwork unable to resume the normal state in time. The default value is recommended.2. An adequate hello time parameter can enable the switch to discover the link failures occurredin the network without occupying too much network resources. A too large hello timeparameter may result in normal links being regarded as invalid when packets drop occurred inthe links, which in turn result in spanning tree being regenerated. A too small hello timeparameter may result in duplicated configuration being sent frequently, which increases thenetwork load of the switches and wastes network resources. The default value isrecommended.3. A too small max age parameter may result in the switches regenerating spanning treesfrequently and cause network congestions to be falsely regarded as link problems. A too largemax age parameter result in the switches unable to find the link problems in time, which inturn handicaps spanning trees being regenerated in time and makes the network lessadaptive. The default value is recommended.4. If the TxHold Count parameter is too large, the number of MS<strong>TP</strong> packets being sent in eachhello time may be increased with occupying too much network resources. The default value isrecommended.7.1.2 S<strong>TP</strong> SummaryOn this page you can view the related parameters for Spanning Tree function.Choose the menu Spanning Tree→S<strong>TP</strong> Config→S<strong>TP</strong> Summary to load the following page.76
Figure 7-5 S<strong>TP</strong> Summary7.2 Port ConfigOn this page you can configure the parameters of the ports for CISTChoose the menu Spanning Tree→Port Config to load the following page.77
Figure 7-6 Port ConfigThe following entries are displayed on this screen:‣ Port ConfigPort Select:Select:Port:Status:Priority:ExtPath:IntPath:Edge Port:P2P <strong>Link</strong>:MCheck:S<strong>TP</strong> Version:Port Role:Click the Select button to quick-select the corresponding port based onthe port number you entered.Select the desired port for S<strong>TP</strong> configuration. It is multi-optional.Displays the port number of the switch.Select Enable /Disable S<strong>TP</strong> function for the desired port.Enter a value from 0 to 240 divisible by 16. Port priority is an importantcriterion on determining if the port connected to this port will be chosenas the root port. The lower value has the higher priority.ExtPath Cost is used to choose the path and calculate the path costsof ports in different MST regions. It is an important criterion ondetermining the root port. The lower value has the higher priority.IntPath Cost is used to choose the path and calculate the path costs ofports in an MST region. It is an important criterion on determining theroot port. The lower value has the higher priority.Select Enable/Disable Edge Port. The edge port can transit its statefrom blocking to forwarding rapidly without waiting for forward delay.Select the P2P link status. If the two ports in the P2P link are root portor designated port, they can transit their states to forwarding rapidly toreduce the unnecessary forward delay.Select Enable to perform MCheck operation on the port. Unchangemeans no MCheck operation.Displays the S<strong>TP</strong> version of the port.Displays the role of the port played in the S<strong>TP</strong> Instance.• Root Port: Indicates the port that has the lowest path cost from78
Port Status:LAG:this bridge to the Root Bridge and forwards packets to the root.• Designated Port: Indicates the port that forwards packets to adownstream network segment or switch.• Master Port: Indicates the port that connects a MST region to thecommon root. The path from the master port to the common rootis the shortest path between this MST region and the commonroot.• Alternate Port: Indicates the port that can be a backup port of aroot or master port.• Backup Port: Indicates the port that is the backup port of adesignated port.• Disabled: Indicates the port that is not participating in the S<strong>TP</strong>.Displays the working status of the port.• Forwarding: In this status the port can receive/forward data,receive/send BPDU packets as well as learn MAC address.• Learning: In this status the port can receive/send BPDU packetsand learn MAC address.• Blocking: In this status the port can only receive BPDU packets.• Disconnected: In this status the port is not participating in the S<strong>TP</strong>.Displays the LAG number which the port belongs to.Note:1. Configure the ports connected directly to terminals as edge ports and enable the BPDUprotection function as well. This not only enables these ports to transit to forwarding staterapidly but also secures your network.2. All the links of ports in a LAG can be configured as point-to-point links.3. When the link of a port is configured as a point-to-point link, the spanning tree instancesowning this port are configured as point-to-point links. If the physical link of a port is not apoint-to-point link and you forcibly configure the link as a point-to-point link, temporary loopsmay be incurred.7.3 MS<strong>TP</strong> InstanceMS<strong>TP</strong> combines VLANs and spanning tree together via VLAN-to-instance mapping table(VLAN-to-spanning-tree mapping). By adding MS<strong>TP</strong> instances, it binds several VLANs to aninstance to realize the load balance based on instances.Only when the switches have the same MST region name, MST region revision andVLAN-to-Instance mapping table, the switches can be regarded as in the same MST region.The MS<strong>TP</strong> Instance function can be implemented on Region Config, Instance Config andInstance Port Config pages.7.3.1 Region ConfigOn this page you can configure the name and revision of the MST regionChoose the menu Spanning Tree→MS<strong>TP</strong> Instance→Region Config to load the following page.79
Figure 7-7 Region ConfigThe following entries are displayed on this screen:‣ Region ConfigRegion Name: Create a name for MST region identification using up to 32 characters.Revision:Enter the revision from 0 to 65535 for MST region identification.7.3.2 Instance ConfigInstance Configuration, a property of MST region, is used to describe the VLAN to Instancemapping configuration. You can assign VLAN to different instances appropriate to your needs.Every instance is a VLAN group independent of other instances and CIST.Choose the menu Spanning Tree→MS<strong>TP</strong> Instance→Instance Config to load the following page.Figure 7-8 Instance Config80
The following entries are displayed on this screen:‣ Instance TableInstance ID Select:Select:Instance:Status:Priority:VLAN ID:Clear:Click the Select button to quick-select the corresponding Instance IDbased on the ID number you entered.Select the desired Instance ID for configuration. It is multi-optional.Displays Instance ID of the switch.Select Enable/Disable the instance.Enter the priority of the switch in the instance. It is an importantcriterion on determining if the switch will be chosen as the root bridgein the specific instance.Enter the VLAN ID which belongs to the corresponding instance ID.After modification here, the previous VLAN ID will be cleared andmapped to the CIST.Click the Clear button to clear up all VLAN IDs from the instance ID.The cleared VLAN ID will be automatically mapped to the CIST.‣ VLAN-Instance MappingVLAN ID:Instance ID:Enter the desired VLAN ID. After modification here, the new VLAN IDwill be added to the corresponding instance ID and the previous VLANID won’t be replaced.Enter the corresponding instance ID.Note:In a network with both GVRP and MS<strong>TP</strong> enabled, GVRP packets are forwarded along the CIST. Ifyou want to broadcast packets of a specific VLAN through GVRP, please be sure to map the VLANto the CIST when configuring the MS<strong>TP</strong> VLAN-instance mapping table. For detailed introduction ofGVRP, please refer to GVRP function page.7.3.3 Instance Port ConfigA port can play different roles in different spanning tree instance. On this page you can configurethe parameters of the ports in different instance IDs as well as view status of the ports in thespecified instance.Choose the menu Spanning Tree→MS<strong>TP</strong> Instance→Instance Port Config to load the followingpage.81
Figure 7-9 Instance Port ConfigThe following entries are displayed on this screen:‣ Port ConfigInstance ID:Port Select:Select:Port:Priority:Path Cost:Port Role:Port Status:LAG:Select the desired instance ID for its port configuration.Click the Select button to quick-select the corresponding port based onthe port number you entered.Select the desired port to specify its priority and path cost. It ismulti-optional.Displays the port number of the switch.Enter the priority of the port in the instance. It is an important criterionon determining if the port connected to this port will be chosen as theroot port.Path Cost is used to choose the path and calculate the path costs ofports in an MST region. It is an important criterion on determining theroot port. The lower value has the higher priority.Displays the role of the port played in the MS<strong>TP</strong> Instance.Displays the working status of the port.Displays the LAG number which the port belongs to.82
Note:The port status of one port in different spanning tree instances can be different.Global configuration Procedure for Spanning Tree function:Step Operation Description1 Make clear roles the switchesplay in spanning treeinstances: root bridge ordesignated bridge2 Globally configure MS<strong>TP</strong>parameters3 Configure MS<strong>TP</strong> parametersfor portsPreparation.Required. Enable Spanning Tree function on the switchand configure MS<strong>TP</strong> parameters on SpanningTree→S<strong>TP</strong> Config→S<strong>TP</strong> Config page.Required. Configure MS<strong>TP</strong> parameters for ports onSpanning Tree→Port Config→Port Config page.4 Configure the MST region Required. Create MST region and configure the role theswitch plays in the MST region on SpanningTree→MS<strong>TP</strong> Instance→Region Config and InstanceConfig page.5 Configure MS<strong>TP</strong> parametersfor instance portsOptional. Configure different instances in the MST regionand configure MS<strong>TP</strong> parameters for instance ports onSpanning Tree→MS<strong>TP</strong> Instance→Instance PortConfig page.7.4 S<strong>TP</strong> SecurityConfiguring protection function for devices can prevent devices from any malicious attack againstS<strong>TP</strong> features. The S<strong>TP</strong> Security function can be implemented on Port Protect and TC Protectpages.Port Protect function is to prevent the devices from any malicious attack against S<strong>TP</strong> features.7.4.1 Port ProtectOn this page you can configure loop protect feature, root protect feature, TC protect feature,BPDU protect feature and BPDU filter feature for ports. You are suggested to enablecorresponding protection feature for the qualified ports.‣ Loop ProtectIn a stable network, a switch maintains the states of ports by receiving and processing BPDUpackets from the upstream switch. However, when link congestions or link failures occurred to thenetwork, a down stream switch does not receive BPDU packets for certain period, which results inspanning trees being regenerated and roles of ports being reselected, and causes the blockedports to transit to forwarding state. Therefore, loops may be incurred in the network.The loop protect function can suppresses loops. With this function enabled, a port, regardless ofthe role it plays in instances, is always set to blocking state, when the port does not receive BPDUpackets from the upstream switch and spanning trees are regenerated, and thereby loops can beprevented.‣ Root Protect83
A CIST and its secondary root bridges are usually located in the high-bandwidth core region.Wrong configuration or malicious attacks may result in configuration BPDU packets with higherpriorities being received by the legal root bridge, which causes the current legal root bridge to loseits position and network topology jitter to occur. In this case, flows that should travel alonghigh-speed links may lead to low-speed links, and network congestion may occur.To avoid this, MS<strong>TP</strong> provides root protect function. Ports with this function enabled can only be setas designated ports in all spanning tree instances. When a port of this type receives BDPUpackets with higher priority, it transits its state to blocking state and stops forwarding packets (as ifit is disconnected from the link). The port resumes the normal state if it does not receive anyconfiguration BPDU packets with higher priorities for a period of two times of forward delay.‣ TC ProtectA switch removes MAC address entries upon receiving TC-BPDU packets. If a user maliciouslysends a large amount of TC-BPDU packets to a switch in a short period, the switch will be busywith removing MAC address entries, which may decrease the performance and stability of thenetwork.To prevent the switch from frequently removing MAC address entries, you can enable the TCprotect function on the switch. With TC protect function enabled, if the account number of thereceived TC-BPDUs exceeds the maximum number you set in the TC threshold field, the switchwill not performs the removing operation in the TC protect cycle. Such a mechanism prevents theswitch from frequently removing MAC address entries.‣ BPDU ProtectPorts of the switch directly connected to PCs or servers are configured as edge ports to rapidlytransit their states. When these ports receive BPDUs, the system automatically configures theseports as non-edge ports and regenerates spanning trees, which may cause network topology jitter.Normally these ports do not receive BPDUs, but if a user maliciously attack the switch by sendingBPDUs, network topology jitter occurs.To prevent this attack, MS<strong>TP</strong> provides BPDU protect function. With this function enabled on theswitch, the switch shuts down the edge ports that receive BPDUs and reports these cases to theadministrator. If a port is shut down, only the administrator can restore it.‣ BPDU FilterBPDU filter function is to prevent BPDUs flood in the S<strong>TP</strong> network. If a switch receives maliciousBPDUs, it forwards these BPDUs to the other switched in the network, which may result inspanning trees being continuously regenerated. In this case, the switch occupying too much CPUor the protocol status of BPDUs is wrong.With BPDU filter function enabled, a port does not receive or forward BPDUs, but it sends out itsown BPDUs. Such a mechanism prevents the switch from being attacked by BPDUs so as toguarantee generation the spanning trees correct.Choose the menu Spanning Tree→S<strong>TP</strong> Security→Port Protect to load the following page.84
Figure 7-10 Port ProtectThe following entries are displayed on this screen:‣ Port ProtectPort Select:Select:Port:Loop Protect:Root Protect:TC Protect:BPDU Protect:BPDU Filter:LAG:Click the Select button to quick-select the corresponding port based onthe port number you entered.Select the desired port for port protect configuration. It ismulti-optional.Displays the port number of the switch.Loop Protect is to prevent the loops in the network brought byrecalculating S<strong>TP</strong> because of link failures and network congestions.Root Protect is to prevent wrong network topology change caused bythe role change of the current legal root bridge.TC Protect is to prevent the decrease of the performance and stabilityof the switch brought by continuously removing MAC address entriesupon receiving TC-BPDUs in the S<strong>TP</strong> network.BPDU Protect is to prevent the edge port from being attacked bymaliciously created BPDUsBPDU Filter is to prevent BPDUs flood in the S<strong>TP</strong> network.Displays the LAG number which the port belongs to.85
7.4.2 TC ProtectWhen TC Protect is enabled for the port on Port Protect page, the TC threshold and TC protectcycle need to be configured on this page.Choose the menu Spanning Tree→S<strong>TP</strong> Security→TC Protect to load the following page.Figure 7-11 TC ProtectThe following entries are displayed on this screen:‣ TC ProtectTC Threshold:TC Protect Cycle:Enter a number from 1 to 100. It is the maximum number of theTC-BPDUs received by the switch in a TC Protect Cycle. Thedefault value is 20.Enter a value from 1 to 10 to specify the TC Protect Cycle. Thedefault value is 5.86
7.5 Application Example for S<strong>TP</strong> Function‣ Network Requirements• Switch A, B, C, D and E all support MS<strong>TP</strong> function.• A is the central switch.• B and C are switches in the convergence layer. D, E and F are switches in the access layer.• There are 6 VLANs labeled as VLAN101-VLAN106 in the network.• All switches run MS<strong>TP</strong> and belong to the same MST region.• The data in VLAN01, 103 and 105 are transmitted in the S<strong>TP</strong> with B as the root bridge. Thedata in VLAN02, 104 and 106 are transmitted in the S<strong>TP</strong> with C as the root bridge.‣ Network Diagram‣ Configuration Procedure• Configure Switch A:Step Operation Description1 Configure ports On VLAN→802.1Q VLAN page, configure the link typeof the related ports as Trunk, and add the ports to VLAN101 and VLAN 106. The detailed instructions can befound in the section 802.1Q VLAN.2 Enable S<strong>TP</strong> function On Spanning Tree→S<strong>TP</strong> Config→S<strong>TP</strong> Config page,enable S<strong>TP</strong> function and select MS<strong>TP</strong> version.On Spanning Tree→S<strong>TP</strong> Config→Port Config page,enable MS<strong>TP</strong> function for the port.3 Configure the region name andthe revision of MST region4 Configure VLAN-to-Instancemapping table of the MST regionOn Spanning Tree→MS<strong>TP</strong> Instance→Region Configpage, configure the region as <strong>TP</strong>-LINK and keep thedefault revision setting.On Spanning Tree→MS<strong>TP</strong> Instance→InstanceConfig page, configure VLAN-to-Instance mappingtable. Map VLAN 101, 103 and 105 to Instance 1; mapVLAN 102, 104 and 106 to Instance 2.87
• Configure Switch B:Step Operation Description1 Configure ports On VLAN→802.1Q VLAN page, configure the link typeof the related ports as Trunk, and add the ports to VLAN101 and VLAN 106. The detailed instructions can befound in the section 802.1Q VLAN.2 Enable S<strong>TP</strong> function On Spanning Tree→S<strong>TP</strong> Config→S<strong>TP</strong> Config page,enable S<strong>TP</strong> function and select MS<strong>TP</strong> version.On Spanning Tree→S<strong>TP</strong> Config→Port Config page,enable MS<strong>TP</strong> function for the port.3 Configure the region name andthe revision of MST region4 Configure VLAN-to-Instancemapping table of the MST region5 Configure switch B as the rootbridge of Instance 16 Configure switch B as thedesignated bridge of Instance 2On Spanning Tree→MS<strong>TP</strong> Instance→Region Configpage, configure the region as <strong>TP</strong>-LINK and keep thedefault revision setting.On Spanning Tree→MS<strong>TP</strong> Instance→InstanceConfig page, configure VLAN-to-Instance mappingtable. Map VLAN 101, 103 and 105 to Instance 1; mapVLAN 102, 104 and 106 to Instance 2.On Spanning Tree→MS<strong>TP</strong> Instance→InstanceConfig page, configure the priority of Instance 1 to be 0.On Spanning Tree→MS<strong>TP</strong> Instance→InstanceConfig page, configure the priority of Instance 2 to be4096.• Configure Switch C:Step Operation Description1 Configure ports On VLAN→802.1Q VLAN page, configure the link typeof the related ports as Trunk, and add the ports to VLAN101 and VLAN 106. The detailed instructions can befound in the section 802.1Q VLAN.2 Enable S<strong>TP</strong> function On Spanning Tree→S<strong>TP</strong> Config→S<strong>TP</strong> Config page,enable S<strong>TP</strong> function and select MS<strong>TP</strong> version.On Spanning Tree→S<strong>TP</strong> Config→Port Config page,enable MS<strong>TP</strong> function for the port.3 Configure the region name andthe revision of MST region4 Configure VLAN-to-Instancemapping table of the MST region5 Configure switch C as the rootbridge of Instance 16 Configure switch C as the rootbridge of Instance 2On Spanning Tree→MS<strong>TP</strong> Instance→Region Configpage, configure the region as <strong>TP</strong>-LINK and keep thedefault revision setting.On Spanning Tree→MS<strong>TP</strong> Instance→InstanceConfig page, configure VLAN-to-Instance mappingtable. Map VLAN 101, 103 and 105 to Instance 1; mapVLAN 102, 104 and 106 to Instance 2.On Spanning Tree→MS<strong>TP</strong> Instance→InstanceConfig page, configure the priority of Instance 1 to be4096.On Spanning Tree→MS<strong>TP</strong> Instance→InstanceConfig page, configure the priority of Instance 2 to be 0.88
• Configure Switch D:Step Operation Description1 Configure ports On VLAN→802.1Q VLAN page, configure the link typeof the related ports as Trunk, and add the ports to VLAN101 and VLAN 106. The detailed instructions can befound in the section 802.1Q VLAN.2 Enable S<strong>TP</strong> function On Spanning Tree→S<strong>TP</strong> Config→S<strong>TP</strong> Config page,enable S<strong>TP</strong> function and select MS<strong>TP</strong> version.On Spanning Tree→S<strong>TP</strong> Config→Port Config page,enable MS<strong>TP</strong> function for the port.3 Configure the region name andthe revision of MST region4 Configure VLAN-to-Instancemapping table of the MST regionOn Spanning Tree→MS<strong>TP</strong> Instance→Region Configpage, configure the region as <strong>TP</strong>-LINK and keep thedefault revision setting.On Spanning Tree→MS<strong>TP</strong> Instance→InstanceConfig page, configure VLAN-to-Instance mappingtable. Map VLAN 101, 103 and 105 to Instance 1; mapVLAN 102, 104 and 106 to Instance 2.• The configuration procedure for switch E and F is the same with that for switch D.‣ The topology diagram of the two instances after the topology is stable• For Instance 1 (VLAN 101, 103 and 105), the red paths in the following figure are connectedlinks; the gray paths are the blocked links.• For Instance 2 (VLAN 102, 104 and 106), the blue paths in the following figure are connectedlinks; the gray paths are the blocked links.89
‣ Suggestion for Configuration• Enable TC Protect function for all the ports of switches.• Enable Root Protect function for all the ports of root bridges.• Enable Loop Protect function for the non-edge ports.Enable BPDU Protect function or BPDU Filter function for the edge ports which are connected tothe PC and server.Return to CONTENTS90
Chapter 8 Multicast‣ Multicast OverviewIn the network, packets are sent in three modes: unicast, broadcast and multicast. In unicast, thesource server sends separate copy information to each receiver. When a large number of usersrequire this information, the server must send many pieces of information with the same content tothe users. Therefore, large bandwidth will be occupied. In broadcast, the system transmitsinformation to all users in a network. Any user in the network can receive the information, nomatter the information is needed or not.Point-to-multipoint multimedia business, such as video conferences and VoD (video-on-demand),plays an important part in the information transmission field. Suppose a point to multi-point serviceis required, unicast is suitable for networks with sparsely users, whereas broadcast is suitable fornetworks with densely distributed users. When the number of users requiring this information isnot certain, unicast and broadcast deliver a low efficiency. Multicast solves this problem. It candeliver a high efficiency to send data in the point to multi-point service, which can save largebandwidth and reduce the network load. In multicast, the packets are transmitted in the followingway as shown in Figure 8-1.Features of multicast:Figure 8-1 Information transmission in the multicast mode1. The number of receivers is not certain. Usually point-to-multipoint transmission is needed;2. Multiple users receiving the same information form a multicast group. The multicastinformation sender just need sends the information to the network device once;3. Each user can join and leave the multicast group at any time;4. Real time is highly demanded and certain packets drop is allowed.‣ Multicast Address91
1. Multicast IP Address:As specified by IANA (Internet Assigned Numbers Authority), Class D IP addresses are used asdestination addresses of multicast packets. The multicast IP addresses range from224.0.0.0~239.255.255.255. The following table displays the range and description of severalspecial multicast IP addresses.Multicast IP address range224.0.0.0~224.0.0.255224.0.1.0~224.0.1.255239.0.0.0~239.255.255.255DescriptionReserved multicast addresses for routing protocolsand other network protocolsAddresses for video conferencingLocal management multicast addresses, which areused in the local network only2. Multicast MAC Address:Table 8-1 Range of the special multicast IPWhen a unicast packet is transmitted in an Ethernet network, the destination MAC address is theMAC address of the receiver. When a multicast packet is transmitted in an Ethernet network, thedestination is not a receiver but a group with uncertain number of members, so a multicast MACaddress, a logical MAC address, is needed to be used as the destination address.As stipulated by IANA, the high-order 24 bits of a multicast MAC address begins with 01-00-5Ewhile the low-order 23 bits of a multicast MAC address are the low-order 23 bits of the multicast IPaddress. The mapping relationship is described as Figure 8-2.Figure 8-2 Mapping relationship between multicast IP address and multicast MAC addressThe high-order 4 bits of the IP multicast address are 1110, identifying the multicast group. Only 23bits of the remaining low-order 28 bits are mapped to a multicast MAC address. In that way, 5 bitsof the IP multicast address is not utilized. As a result, 32 IP multicast addresses are mapped to thesame MAC address.‣ Multicast Address TableThe switch is forwarding multicast packets based on the multicast address table. As thetransmission of multicast packets can not span the VLAN, the first part of the multicast addresstable is VLAN ID, based on which the received multicast packets are forwarded in the VLANowning the receiving port. The multicast address table is not mapped to an egress port but a groupport list. When forwarding a multicast packet, the switch looks up the multicast address tablebased on the destination multicast address of the multicast packet. If the corresponding entry cannot be found in the table, the switch will broadcast the packet in the VLAN owning the receivingport. If the corresponding entry can be found in the table, it indicates that the destination addressshould be a group port list, so the switch will duplicate this multicast data and deliver each port onecopy. The general format of the multicast address table is described as Figure 8-3 below.VLAN ID Multicast IP PortFigure 8-3 Multicast Address Table92
‣ IGMP SnoopingIn the network, the hosts apply to the near Router for joining (leaving) a multicast group by sendingIGMP (Internet Group Management Protocol) messages. When the up-stream device forwardsdown the multicast data, the switch is responsible for sending them to the hosts. IGMP Snooping isa multicast control mechanism, which can be used on the switch for dynamic registration of themulticast group. The switch, running IGMP Snooping, manages and controls the multicast group vialistening to and processing the IGMP messages transmitted between the hosts and the multicastrouter, thereby effectively prevent multicast groups being broadcasted in the network.The Multicast module is mainly for multicast management configuration of the switch, includingfour submenus: IGMP Snooping, Multicast IP, Multicast Filter and Packet Statistics.8.1 IGMP Snooping‣ IGMP Snooping ProcessThe switch, running IGMP Snooping, listens to the IGMP messages transmitted between the hostand the router, and tracks the IGMP messages and the registered port. When receiving IGMPreport message, the switch adds the port to the multicast address table; when the switch listens toIGMP leave message from the host, the router sends the Group-Specific Query message of theport to check if other hosts need this multicast, if yes, the router will receive IGMP report message;if no, the router will receive no response from the hosts and the switch will remove the port fromthe multicast address table. The router regularly sends IGMP query messages. After receiving theIGMP query messages, the switch will remove the port from the multicast address table if theswitch receives no IGMP report message from the host within a period of time.‣ IGMP MessagesThe switch, running IGMP Snooping, processes the IGMP messages of different types as follows.1. IGMP Query MessageIGMP query message, sent by the router, falls into two types, IGMP general query message andIGMP group-specific-query message. The router regularly sends IGMP general message to queryif the multicast groups contain any member. When receiving IGMP leave message, the receivingport of the router will send IGMP group-specific-query message to the multicast group and theswitch will forward IGMP group-specific-query message to check if other members in the multicastgroup of the port need this multicast.When receiving IGMP general query message, the switch will forward them to all other ports in theVLAN owning the receiving port. The receiving port will be processed: if the receiving port is not arouter port yet, it will be added to the router port list with its router port time specified; if thereceiving port is already a router port, its router port time will be directly reset.When receiving IGMP group-specific-query message, the switch will send the group-specific querymessage to the members of the multicast group being queried.2. IGMP Report MessageIGMP report message is sent by the host when it applies for joining a multicast group or responsesto the IGMP query message from the router.When receiving IGMP report message, the switch will send the report message via the router portin the VLAN as well as analyze the message to get the address of the multicast group the hostapplies for joining. The receiving port will be processed: if the receiving port is a new member port,it will be added to the multicast address table with its member port time specified; if the receivingport is already a member port, its member port time will be directly reset.3. IGMP Leave Message93
The host, running IGMPv1, does not send IGMP leave message when leaving a multicast group,as a result, the switch can not get the leave information of the host momentarily. However, afterleaving the multicast group, the host does not send IGMP report message any more, so the switchwill remove the port from the corresponding multicast address table when its member port timetimes out. The host, running IGMPv2 or IGMPv3, sends IGMP leave message when leaving amulticast group to inform the multicast router of its leaving.When receiving IGMP leave message, the switch will forward IGMP group-specific-query messageto check if other members in the multicast group of the port need this multicast and reset themember port time to the leave time. When the leave time times out, the switch will remove the portfrom the corresponding multicast group. If no other member is in the group after the port isremoved, the switch will remove the whole multicast group and send IGMP leave message to therouter.‣ IGMP Snooping Fundamentals1. PortsRouter Port: Indicates the switch port directly connected to the multicast router.Member Port: Indicates a switch port connected to a multicast group member.2. TimersRouter Port Time: Within the time, if the switch does not receive IGMP query message from therouter port, it will consider this port is not a router port any more. The default value is 300 seconds.Member Port Time: Within the time, if the switch does not receive IGMP report message from themember port, it will consider this port is not a member port any more. The default value is 260seconds.Leave Time: Indicates the interval between the switch receiving a leave message from a host andthe switch removing the host from the multicast groups. The default value is 1 second.The IGMP Snooping function can be implemented on Snooping Config, Port Config, VLANConfig and Multicast VLAN pages.8.1.1 Snooping ConfigTo configure the IGMP Snooping on the switch, please firstly configure IGMP global configurationand related parameters on this page.If the multicast address of the received multicast data is not in the multicast address table, theswitch will broadcast the data in the VLAN. When Unknown Multicast Discard feature is enabled,the switch drops the received unknown multicast so as to save the bandwidth and enhance theprocess efficiency of the system. Please configure this feature appropriate to your needs.Choose the menu Multicast→IGMP Snooping→Snooping Config to load the following page.94
Figure 8-4 Basic ConfigThe following entries are displayed on this screen:‣ Global ConfigIGMP Snooping:Unknown Multicast:Select Enable/Disable IGMP Snooping function globally on theSwitch.Select the operation for the switch to process unknown multicast,Forward or Discard.‣ IGMP Snooping StatusDescription:Member:Displays IGMP Snooping status.Displays the member of the corresponding status.8.1.2 Port ConfigOn this page you can configure the IGMP feature for ports of the switch.Choose the menu Multicast→IGMP Snooping→Port Config to load the following page.95
Figure 8-5 Port ConfigThe following entries are displayed on this screen:‣ Port ConfigPort Select:Select:Port:IGMP Snooping:Fast Leave:LAG:Click the Select button to quick-select the corresponding portbased on the port number you entered.Select the desired port for IGMP Snooping feature configuration. Itis multi-optional.Displays the port of the Switch.Select Enable/Disable IGMP Snooping for the desired port.Select Enable/Disable Fast Leave feature for the desired port. IfFast Leave is enabled for a port, the Switch will immediatelyremove this port from the multicast group upon receiving IGMPleave messages.Displays the LAG number which the port belongs to.Note:1. Fast Leave on the port is effective only when the host supports IGMPv2 or IGMPv3.2. When both Fast Leave feature and Unknown Multicast Discard feature are enabled, theleaving of a user connected to a port owning multi-user will result in the other usersintermitting the multicast business.8.1.3 VLAN ConfigMulticast groups established by IGMP Snooping are based on VLANs. On this page you canconfigure different IGMP parameters for different VLANs.96
Choose the menu Multicast→IGMP Snooping→VLAN Config to load the following page.Figure 8-6 VLAN ConfigThe following entries are displayed on this screen:‣ VLAN ConfigVLAN ID:Router Port Time:Member Port Time:Leave Time:Static Router Port:Enter the VLAN ID to enable IGMP Snooping for the desiredVLAN.Specify the aging time of the router port. Within this time, if theswitch doesn’t receive IGMP query message from the router port,it will consider this port is not a router port any more.Specify the aging time of the member port. Within this time, if theswitch doesn’t receive IGMP report message from the memberport, it will consider this port is not a member port any more.Specify the interval between the switch receiving a leave messagefrom a host and the switch removing the host from the multicastgroups.Select the static router port which is mainly used in the networkwith stable topology.‣ VLAN TableVLAN ID Select:Click the Select button to quick-select the corresponding VLAN IDbased on the ID number you entered.97
Select:VLAN ID:Router Port Time:Member Port Time:Leave Time:Router Port:Select the desired VLAN ID for configuration. It is multi-optional.Displays the VLAN ID.Displays the router port time of the VLAN.Displays the member port time of the VLAN.Displays the leave time of the VLAN.Displays the router port of the VLAN.Note:The settings here will be invalid when multicast VLAN is enabledConfiguration procedure:Step Operation Description1 Enable IGMP Snoopingfunction2 Configure the multicastparameters for VLANsRequired. Enable IGMP Snooping globally on the switchand for the port on Multicast→IGMPSnooping→Snooping Config and Port Config page.Optional. Configure the multicast parameters for VLANs onMulticast→IGMP Snooping→VLAN Config page.If a VLAN has no multicast parameters configuration, itindicates the IGMP Snooping is not enabled in the VLAN,thus the multicast data in the VLAN will be broadcasted.8.1.4 Multicast VLANIn old multicast transmission mode, when users in different VLANs apply for join the samemulticast group, the multicast router will duplicate this multicast information and deliver eachVLAN owning a receiver one copy. This mode wastes a lot of bandwidth.The problem above can be solved by configuring a multicast VLAN. By adding switch ports to themulticast VLAN and enabling IGMP Snooping, you can make users in different VLANs share thesame multicast VLAN. This saves the bandwidth since multicast streams are transmitted onlywithin the multicast VLAN and also guarantees security because the multicast VLAN is isolatedfrom user VLANS.Before configuring a multicast VLAN, you should firstly configure a VLAN as multicast VLAN andadd the corresponding ports to the VLAN on the 802.1Q VLAN page. If the multicast VLAN isenabled, the multicast configuration for other VLANs on the VLAN Config page will be invalid, thatis, the multicast streams will be transmitted only within the multicast VLAN.Choose the menu Multicast→IGMP Snooping→Multicast VLAN to load the following page.98
Figure 8-7 Multicast VLANThe following entries are displayed on this screen:‣ Multicast VLANMulticast VLAN:VLAN ID:Router Port Time:Member Port Time:Leave Time:Static Router Port:Select Enable/Disable Multicast VLAN feature.Enter the VLAN ID of the multicast VLAN.Specify the aging time of the router port. Within this time, if theswitch doesn’t receive IGMP query message from the router port,it will consider this port is not a router port any more.Specify the aging time of the member port. Within this time, if theswitch doesn’t receive IGMP report message from the memberport, it will consider this port is not a member port any more.Specify the interval between the switch receiving a leave messagefrom a host, and the switch removing the host from the multicastgroups.Select the static router port which is mainly used in the networkwith stable topology.Note:1. The router port should be in the multicast VLAN, otherwise the member ports can not receivemulticast streams.2. The Multicast VLAN won't take effect unless you first complete the configuration for thecorresponding VLAN owning the port on the 802.1Q VLAN page.3. The link type of the member ports in the multicast VLAN can only be GENERAL.4. Configure the link type of the router port in the multicast VLAN as TRUNK or configure theegress rule as TAG and the link type as GENERAL otherwise all the member ports in themulticast VLAN can not receive multicast streams.99
5. After a multicast VLAN is created, all the IGMP packets will be processed only within themulticast VLAN.Configuration procedure:Step Operation Description1 Enable IGMP SnoopingfunctionRequired. Enable IGMP Snooping globally on the switchand for the port on Multicast→IGMPSnooping→Snooping Config and Port Config page.2 Create a multicast VLAN Required. Create a multicast VLAN and add all the memberports and router ports to the VLAN on the VLAN→802.1QVLAN page.• Configure the link type of the member ports asGENERAL.• Configure the link type of the router ports as TRUNKor configure the egress rule as tagged GENERAL.3 Configure parameters formulticast VLANOptional. Enable and configure a multicast VLAN on theMulticast→IGMP Snooping→Multicast VLAN page.It is recommended to keep the default time parameters.4 Look over the configuration If it is successfully configured, the VLAN ID of the multicastVLAN will be displayed in the IGMP Snooping Status tableon the Multicast→IGMP Snooping→Snooping Configpage.Application Example for Multicast VLAN:‣ Network RequirementsMulticast source sends multicast streams via the router, and the streams are transmitted to user Aand user B through the switch.Router: Its WAN port is connected to the multicast source; its LAN port is connected to the switch.The multicast packets are transmitted in VLAN3.Switch: Port 3 is connected to the router and the packets are transmitted in VLAN3; port 4 isconnected to user A and the packets are transmitted in VLAN4; port 5 is connected to user B andthe packets are transmitted in VLAN5.<strong>User</strong> A: Connected to Port 4 of the switch.<strong>User</strong> B: Connected to port 5 of the switch.Configure a multicast VLAN, and user A and B receive multicast streams through the multicastVLAN.‣ Network Diagram100
‣ Configuration ProcedureStep Operation Description1 Create VLANs Create three VLANs with the VLAN ID 3, 4 and 5 respectively,and specify the description of VLAN3 as Multicast VLAN onVLAN→802.1Q VLAN page.2 Configure ports On VLAN→802.1Q VLAN function pages.For port 3, configure its link type as GENERAL and its egress ruleas TAG, and add it to VLAN3, VLAN4 and VLAN5.For port 4, configure its link type as GENERAL and its egress ruleas UNTAG, and add it to VLAN3 and VLAN 4.For port 5, configure its link type as GENERAL and its egress ruleas UNTAG, and add it to VLAN3 and VLAN 5.3 Enable IGMPSnooping function4 Enable MulticastVLANEnable IGMP Snooping function globally on Multicast→IGMPSnooping→Snooping Config page. Enable IGMP Snoopingfunction for port 3, port4 and port 5 on Multicast→IGMPSnooping→Port Config page.Enable Multicast VLAN, configure the VLAN ID of a multicastVLAN as 3 and keep the other parameters as default onMulticast→IGMP Snooping→Multicast VLAN page.5 Check Multicast VLAN 3-5 and Multicast VLAN 3 will be displayed in the IGMPSnooping Status table on the Multicast→IGMPSnooping→Snooping Config page.8.2 Multicast IPIn a network, receivers can join different multicast groups appropriate to their needs. The switchforwards multicast streams based on multicast address table. The Multicast IP can beimplemented on Multicast IP Table, Static Multicast IP page.101
8.2.1 Multicast IP TableOn this page you can view the multicast IP table on the switch.Choose the menu Multicast→Multicast IP→Multicast IP Table to load the following page.Figure 8-8 Multicast IP TableThe following entries are displayed on this screen:‣ Search OptionMulticast IP:VLAN ID:Port:Type:Enter the multicast IP address the desired entry must carry.Enter the VLAN ID the desired entry must carry.Select the port number the desired entry must carry.Select the type the desired entry must carry.• All: Displays all multicast IP entries.• Static: Displays all static multicast IP entries.• Dynamic: Displays all dynamic multicast IP entries.‣ Multicast IP TableMulticast IPVLAN ID:Forward PortType:Displays multicast IP address.Displays the VLAN ID of the multicast group.Displays the forward port of the multicast group.Displays the type of the multicast IP.Note:If the configuration on VLAN Config page and multicast VLAN page is changed, the switch willclear up the dynamic multicast addresses in multicast address table and learn new addresses.8.2.2 Static Multicast IPStatic Multicast IP table, isolated from dynamic multicast group and multicast filter, is not learnedby IGMP Snooping. It can enhance the quality and security for information transmission in somefixed multicast groups.102
Choose the menu Multicast→Multicast IP→Static Multicast IP to load the following page.Figure 8-9 Static Multicast IP TableThe following entries are displayed on this screen:‣ Create Static MulticastMulticast IP:VLAN ID:Forward Port:Enter static multicast IP address.Enter the VLAN ID of the multicast IP.Enter the forward port of the multicast group.‣ Search OptionSearch Option:Select the rules for displaying multicast IP table to find the desiredentries quickly.• All: Displays all static multicast IP entries.• Multicast IP: Enter the multicast IP address the desired entrymust carry.• VLAN ID: Enter the VLAN ID the desired entry must carry.• Port: Enter the port number the desired entry must carry.‣ Static Multicast IP TableSelect:Multicast IP:VLAN ID:Forward Port:Select the desired entry to delete the corresponding staticmulticast IP. It is multi-optional.Displays the multicast IP.Displays the VLAN ID of the multicast group.Displays the forward port of the multicast group.103
8.3 Multicast FilterWhen IGMP Snooping is enabled, you can specified the multicast IP-range the ports can join so asto restrict users ordering multicast programs via configuring multicast filter rules.When applying for a multicast group, the host will send IGMP report message. After receiving thereport message, the switch will firstly check the multicast filter rules configured for the receivingport. If the port can be added to the multicast group, it will be added to the multicast address table;if the port can not be added to the multicast group, the switch will drop the IGMP report message.In that way, the multicast streams will not be transmitted to this port, which allows you to controlhosts joining the multicast group.8.3.1 IP-RangeOn this page you can figure the desired IP-ranges to be filtered.Choose the menu Multicast→Multicast Filter→IP-Range to load the following page.Figure 8-10 Multicast FilterThe following entries are displayed on this screen:‣ Create IP-RangeIP Range ID:Start Multicast IP:End Multicast IP:Enter the IP-range ID.Enter start multicast IP of the IP-range you set.Enter end multicast IP of the IP-range you set.‣ IP-Range TableIP-Range ID Select:Select:IP-Range ID:Click the Select button to quick-select the corresponding IP-rangeID based on the ID number you entered.Select the desired entry to delete or modify the correspondingIP-range. It is multi-optional.Displays IP-range ID.104
Start Multicast IP:End Multicast IP:Displays start multicast IP of the IP-range.Displays end multicast IP of the IP-range.8.3.2 Port FilterOn this page you can configure the multicast filter rules for port. Take the configuration on thispage and the configuration on IP-Range page together to function to implement multicast filterfunction on the switch.Choose the menu Multicast→Multicast Filter→Port Filter to load the following page.Figure 8-11 Port FilterThe following entries are displayed on this screen:‣ Port Filter ConfigPort Select:Select:Port:Filter:Action Mode:Bound IP-Range (ID):Click the Select button to quick-select the corresponding portbased on the port number you entered.Select the desired port for multicast filtering. It is multi-optional.Displays the port number.Select Enable/Disable multicast filtering feature on the port.Select the action mode to process multicast packets when themulticast IP is in the filtering IP-range.• Permit: Only the multicast packets whose multicast IP is in theIP-range will be processed.• Deny: Only the multicast packets whose multicast IP is not inthe IP-range will be processed.Enter the IP-rang ID the port will be bound to.105
Max Groups:LAG:Specify the maximum number of multicast groups to prevent someports taking up too much bandwidth.Displays the LAG number which the port belongs to.Note:1. Multicast Filter feature can only have effect on the VLAN with IGMP Snooping enabled.2. Multicast Filter feature has no effect on static multicast IP.3. Up to 15 IP-Ranges can be bound to one port.Configuration Procedure:Step Operation Description1 Configure IP-Range Required. Configure IP-Range to be filtered onMulticast→Multicast Filter→IP-Range page.2 Configure multicast filterrules for portsOptional. Configure multicast filter rules for ports onMulticast→Multicast Filter→Port Filter page.8.4 Packet StatisticsOn this page you can view the multicast data traffic on each port of the switch, which facilitates youto monitor the IGMP messages in the network.Choose the menu Multicast→Packet Statistics to load the following page.Figure 8-12 Packet StatisticsThe following entries are displayed on this screen:106
‣ Auto RefreshAuto Refresh:Refresh Period:Select Enable/Disable auto refresh feature.Enter the time from 3 to 300 in seconds to specify the auto refreshperiod.‣ IGMP StatisticsPort Select:Port:Query Packet:Click the Select button to quick-select the corresponding portbased on the port number you entered.Displays the port number of the switch.Displays the number of query packets the port received.Report Packet (V1): Displays the number of IGMPv1 report packets the port received.Report Packet (V2): Displays the number of IGMPv2 report packets the port received.Report Packet (<strong>V3</strong>): Displays the number of IGMPv3 report packets the port received.Leave Packet:Error Packet:Displays the number of leave packets the port received.Displays the number of error packets the port received.Return to CONTENTS107
Chapter 9 QoSQoS (Quality of Service) functions to provide different quality of service for various networkapplications and requirements and optimize the bandwidth resource distribution so as to provide anetwork service experience of a better quality.‣ QoSThis switch classifies the ingress packets, maps the packets to different priority queues and thenforwards the packets according to specified scheduling algorithms to implement QoS function.Figure 9-1 QoS function• Traffic classification: Identifies packets conforming to certain characters according to certainrules.• Map: The user can map the ingress packets to different priority queues based on the prioritymodes. This switch implements three priority modes based on port, on 802.1P and on DSCP.• Queue scheduling algorithm: When the network is congested, the problem that many packetscompete for resources must be solved, usually in the way of queue scheduling. The switchsupports four schedule modes: SP, WRR, SP+WRR and Equ.‣ Priority ModeThis switch implements three priority modes based on port, on 802.1P and on DSCP. By default, thepriority mode based on port is enabled and the other two modes are optional.1. Port PriorityPort priority is just a property of the port. After port priority is configured, the data stream will bemapped to the egress queues according to the CoS of the port and the mapping relationshipbetween CoS and queues.2. 802.1P Priority108
Figure 9-2 802.1Q frameAs shown in the figure above, each 802.1Q Tag has a Pri field, comprising 3 bits. The 3-bit priorityfield is 802.1p priority in the range of 0 to 7. 802.1P priority determines the priority of the packetsbased on the Pri value. On the Web management page of the switch, you can configure differentpriority tags mapping to the corresponding priority levels, and then the switch determine whichpacket is sent preferentially when forwarding packets. The switch processes untagged packetsbased on the default priority mode.3. DSCP PriorityFigure 9-3 IP datagramAs shown in the figure above, the ToS (Type of Service) in an IP header contains 8 bits. The firstthree bits indicate IP precedence in the range of 0 to 7. RFC2474 re-defines the ToS field in the IPpacket header, which is called the DS field. The first six bits (bit 0-bit 5) of the DS field indicateDSCP precedence in the range of 0 to 63. The last 2 bits (bit 6 and bit 7) are reserved. On the Webmanagement page, you can configure different DS field mapping to the corresponding prioritylevels. Non-IP datagram with 802.1Q tag are mapped to different priority levels based on 802.1Ppriority mode if 8021.1P Priority mode is enabled; the untagged non-IP datagram are mappedbased on port priority mode.‣ Schedule ModeWhen the network is congested, the problem that many packets compete for resources must besolved, usually in the way of queue scheduling. The switch implements four scheduling queues,TC0, TC1, TC2 and TC3. TC0 has the lowest priority while TC3 has the highest priority. The switchprovides four schedule modes: SP, WRR, SP+WRR and Equ.1. SP-Mode: Strict-Priority Mode. In this mode, the queue with higher priority will occupy thewhole bandwidth. Packets in the queue with lower priority are sent only when the queue withhigher priority is empty. The switch has four egress queues labeled as TC0, TC1, TC2 andTC3. In SP mode, their priorities increase in order. TC3 has the highest priority. Thedisadvantage of SP queue is that: if there are packets in the queues with higher priority for along time in congestion, the packets in the queues with lower priority will be “starved to death”because they are not served.109
Figure 9-4 SP-Mode2. WRR-Mode: Weight Round Robin Mode. In this mode, packets in all the queues are sent inorder based on the weight value for each queue and every queue can be assured of a certainservice time. The weight value indicates the occupied proportion of the resource. WRR queueovercomes the disadvantage of SP queue that the packets in the queues with lower prioritycan not get service for a long time. In WRR mode, though the queues are scheduled in order,the service time for each queue is not fixed, that is to say, if a queue is empty, the next queuewill be scheduled. In this way, the bandwidth resources are made full use of. The defaultweight value ratio of TC0, TC1, TC2 and TC3 is 1:2:4:8.Figure 9-5 WRR-Mode3. SP+WRR-Mode: Strict-Priority + Weight Round Robin Mode. In this mode, this switchprovides two scheduling groups, SP group and WRR group. Queues in SP group and WRRgroup are scheduled strictly based on strict-priority mode while the queues inside WRR groupfollow the WRR mode. In SP+WRR mode, TC3 is in the SP group; TC0, TC1 and TC2 belongto the WRR group and the weight value ratio of TC0, TC1 and TC2 is 1:2:4. In this way, whenscheduling queues, the switch allows TC3 to occupy the whole bandwidth following the SPmode and the TC0, TC1 and TC2 in the WRR group will take up the bandwidth according totheir ratio 1:2:4.4. Equ-Mode: Equal-Mode. In this mode, all the queues occupy the bandwidth equally. Theweight value ratio of all the queues is 1:1:1:1.110
The QoS module is mainly for traffic control and priority configuration, including three submenus:DiffServ, Bandwidth Control and Voice VLAN.9.1 DiffServThis switch classifies the ingress packets, maps the packets to different priority queues and thenforwards the packets according to specified scheduling algorithms to implement QoS function.This switch implements three priority modes based on port, on 802.1P and on DSCP, and supportsfour queue scheduling algorithms. The port priorities are labeled as CoS0, CoS1… CoS7.The DiffServ function can be implemented on Port Priority, Schedule Mode, 802.1P Priority andDSCP Priority pages.9.1.1 Port PriorityOn this page you can configure the port priority.Choose the menu QoS→DiffServ→Port Priority to load the following page.Figure 9-6 Port Priority ConfigThe following entries are displayed on this screen:‣ Port Priority ConfigSelect:Port:Priority:LAG:Select the desired port to configure its priority. It is multi-optional.Displays the physical port number of the switch.Specify the priority for the port.Displays the LAG number which the port belongs to.111
Note:To complete QoS function configuration, you have to go to the Schedule Mode page to select aschedule mode after the configuration is finished on this page.Configuration Procedure:Step Operation Description1 Log on to the Port Prioritypage2 Select the desired ports forconfigurationSelect the desired ports. It is multi-optional.3 Select the port priority Required. Select a priority from CoS0 to CoS7.4 Select a schedule mode Required. Log on to the Schedule Mode page toselect a schedule mode.9.1.2 Schedule ModeOn this page you can select a schedule mode for the switch. When the network is congested, theproblem that many packets compete for resources must be solved, usually in the way of queuescheduling. The switch will control the forwarding sequence of the packets according to the priorityqueues and scheduling algorithms you set. On this switch, the priority levels are labeled as TC0,TC1… TC3.Choose the menu QoS→DiffServ→Schedule Mode to load the following page.Figure 9-7 Schedule ModeThe following entries are displayed on this screen:‣ Schedule Mode ConfigSP-Mode:WRR-Mode:Strict-Priority Mode. In this mode, the queue with higher prioritywill occupy the whole bandwidth. Packets in the queue with lowerpriority are sent only when the queue with higher priority is empty.Weight Round Robin Mode. In this mode, packets in all the queuesare sent in order based on the weight value for each queue. Theweight value ratio of TC0, TC1, TC2 and TC3 is 1:2:4:8.112
SP+WRR-Mode:Equ-Mode:Strict-Priority + Weight Round Robin Mode. In this mode, thisswitch provides two scheduling groups, SP group and WRRgroup. Queues in SP group and WRR group are scheduled strictlybased on strict-priority mode while the queues inside WRR groupfollow the WRR mode. In SP+WRR mode, TC3 is in the SP group;TC0, TC1 and TC2 belong to the WRR group and the weight valueratio of TC0, TC1 and TC2 is 1:2:4. In this way, when schedulingqueues, the switch allows TC3 to occupy the whole bandwidthfollowing the SP mode and the TC0, TC1 and TC2 in the WRRgroup will take up the bandwidth according to their ratio 1:2:4.Equal-Mode. In this mode, all the queues occupy the bandwidthequally. The weight value ratio of all the queues is 1:1:1:1.9.1.3 802.1P PriorityOn this page you can configure 802.1P priority. 802.1P gives the Pri field in 802.1Q tag arecommended definition. This field is used to divide packets into 8 priorities. When 802.1P Priority isenabled, the packets with 802.1Q tag are mapped to different priority levels based on 802.1P prioritymode. The untagged packets are mapped based on port priority mode.Choose the menu QoS→DiffServ→802.1P Priority to load the following page.Figure 9-8 802.1P PriorityThe following entries are displayed on this screen:‣ 802.1P Priority Config802.1P Priority: Select Enable/Disable 802.1P Priority.‣ Priority LevelPriority Tag:Indicates the precedence level defined by IEEE802.1P.113
Priority Level:Indicates the priority level the packets with tag are mapped to. Thepriority levels are labeled as TC0, TC1, TC2 and TC3.Note:To complete QoS function configuration, you have to go to the Schedule Mode page to select aschedule mode after the configuration is finished on this page.Configuration Procedure:Step Operation Description1 Log on to the 802.1P Prioritypage2 Enable 802.1P priorityfunction3 Map the 802.1P priority tag tothe priority levelRequired. By default, the 802.1P priority function isdisabled.Required. Select 802.1P priority tag and thecorresponding priority level.4 Select a schedule mode Required. Log on to the Schedule Mode page toselect a schedule mode.9.1.4 DSCP PriorityOn this page you can configure DSCP priority. DSCP (DiffServ Code Point) is a new definition to IPToS field given by IEEE. This field is used to divide IP datagram into 64 priorities. When DSCPPriority is enabled, IP datagram are mapped to different priority levels based on DSCP prioritymode; non-IP datagram with 802.1Q tag are mapped to different priority levels based on 802.1Ppriority mode if 8021.1P Priority mode is enabled; the untagged non-IP datagram are mapped basedon port priority mode.Choose the menu QoS→DiffServ→DSCP Priority to load the following page.114
Figure 9-9 DSCP PriorityThe following entries are displayed on this screen:‣ DSCP Priority ConfigDSCP Priority:Select Enable or Disable DSCP Priority.‣ Priority LevelDSCP:Priority Level:Indicates the priority determined by the DS region of IP datagram.It ranges from 0 to 63.Indicates the priority level the packets with tag are mapped to. Thepriority levels are labeled as TC0, TC1, TC2 and TC3.Note:To complete QoS function configuration, you have to go to the Schedule Mode page to select aschedule mode after the configuration is finished on this page.Configuration Procedure:Step Operation Description1 Log on to the DSCP Prioritypage2 Enable DP priority function Required. By default, the DSCP priority function isdisabled.115
3 Map the DSCP priority to thepriority levelRequired. Select DSCP priority and the correspondingpriority level.4 Select a schedule mode Required. Log on to the Schedule Mode page toselect a schedule mode.9.2 Bandwidth ControlBandwidth function, allowing you to control the traffic rate and broadcast flow on each port toensure network in working order, can be implemented on Rate Limit and Storm Control pages.9.2.1 Rate LimitRate limit functions to control the ingress/egress traffic rate on each port via configuring theavailable bandwidth of each port. In this way, the network bandwidth can be reasonably distributedand utilized.Choose the menu QoS→Bandwidth Control→Rate Limit to load the following page.Figure 9-10 Rate LimitThe following entries are displayed on this screen:‣ Rate Limit ConfigPort Select:Click the Select button to quick-select the corresponding portbased on the port number you entered.116
Select:Port:Ingress Rate(Kbps):Egress Rate(Kbps):LAG:Select the desired port for Rate configuration. It is multi-optional.Displays the port number of the Switch.Configure the bandwidth for receiving packets on the port. You canselect a rate from the dropdown list or select "Manual" to setIngress rate, the system will automatically select integral multipleof 64Kbps that closest to the rate you entered as the real Ingressrate.Configure the bandwidth for sending packets on the port. You canselect a rate from the dropdown list or select "Manual" to setEgress rate, the system will automatically select integral multipleof 64Kbps that closest to the rate you entered as the real Egressrate.Displays the LAG number which the port belongs to.Note:1. If you enable ingress rate limit feature for the storm control-enabled port, storm control featurewill be disabled for this port.2. When selecting "Manual" to set Ingress/Egress rate, the system will automatically selectintegral multiple of 64Kbps that closest to the rate you entered as the real Ingress/Egress rate.For example, if you enter 1023Kbps for egress rate, the system will automatically select1024Kbps as the real Egress rate.3. When egress rate limit feature is enabled for one or more ports, you are suggested to disablethe flow control on each port to ensure the switch works normally.9.2.2 Storm ControlStorm Control function allows the switch to filter broadcast, multicast and UL frame in the network.If the transmission rate of the three kind packets exceeds the set bandwidth, the packets will beautomatically discarded to avoid network broadcast storm.Choose the menu QoS→Bandwidth Control→Storm Control to load the following page.117
Figure 9-11 Storm ControlThe following entries are displayed on this screen:‣ Storm Control ConfigPort Select:Select:Port:Broadcast:Multicast:UL-Frame:Rate (bps):LAG:Click the Select button to quick-select the corresponding portbased on the port number you entered.Select the desired port for Storm Control configuration. It ismulti-optional.Displays the port number of the Switch.Enable/Disable broadcast control feature for the port.Enable/Disable multicast control feature for the port.Enable/Disable UL-Frame control feature for the port.Select the bandwidth for receiving the specified packet on the port.The packet traffic exceeding the bandwidth will be discarded.Displays the LAG number which the port belongs to.Note:If you enable storm control feature for the ingress rate limit-enabled port, ingress rate limit featurewill be disabled for this port.9.3 Voice VLANVoice VLANs are configured specially for voice data stream. By configuring Voice VLANs andadding the ports with voice devices attached to voice VLANs, you can perform QoS-related118
configuration for voice data, ensuring the transmission priority of voice data stream and voicequality.‣ OUI Address (Organizationally unique identifier address)The switch can determine whether a received packet is a voice packet by checking its source MACaddress. If the source MAC address of a packet complies with the OUI addresses configured bythe system, the packet is determined as voice packet and transmitted in voice VLAN.An OUI address is a unique identifier assigned by IEEE (Institute of Electrical and ElectronicsEngineers) to a device vendor. It comprises the first 24 bits of a MAC address. You can recognizewhich vendor a device belongs to according to the OUI address. The following table shows theOUI addresses of several manufacturers. The following OUI addresses are preset of the switch bydefault.Number OUI AddressVendor1 00-01-E3-00-00-00 Siemens phone2 00-03-6B-00-00-00 Cisco phone3 00-04-0D-00-00-00 Avaya phone4 00-60-B9-00-00-00 Philips/NEC phone5 00-D0-1E-00-00-00 Pingtel phone6 00-E0-75-00-00-00 Polycom phone7 00-E0-BB-00-00-00 3com phoneTable 9-1 OUI addresses on the switch‣ Voice VLAN Port ModeA voice VLAN can operate in two modes: automatic mode and manual mode.Automatic Mode: In this mode, the switch will automatically add a port which receives voicepackets to voice VLAN and determine the priority of the packets through learning the source MACof the UNTAG packets sent from IP phone when it is powered on. The aging time of voice VLANcan be configured on the switch. If the switch does not receive any voice packet on the ingressport within the aging time, the switch will remove this port from voice VLAN. Voice ports areautomatically added into or removed from voice VLAN.Manual Mode: You need to manually add the port of IP phone to voice VLAN.In practice, the port voice VLAN mode is configured according to the type of packets sent out fromvoice device and the link type of the port. The following table shows the detailed information.119
Port Voice VLANModeAutomatic ModeManual ModeVoiceStream TypeTAGstreamvoiceUNTAG voicestreamTAGstreamvoiceUNTAG voicestream<strong>Link</strong> type of the port and processing modeACCESS: Not supported.TRUNK: Supported. The default VLAN of the port can not bevoice VLAN.GENERAL: Supported. The default VLAN of the port can notbe voice VLAN and the egress rule of the access port in thevoice VLAN should be TAG.ACCESS: Supported.TRUNK: Not supported.GENERAL: Supported. The default VLAN of the port can notbe voice VLAN and the egress rule of the access port in thevoice VLAN should be UNTAG.ACCESS: Not supported.TRUNK:Supported. The default VLAN of the port should notbe voice VLAN.GENERAL:Supported. The default VLAN of the port can notbe voice VLAN and the egress rule of the access port in thevoice VLAN should be TAG.ACCESS: Supported.TRUNK: Not supported.GENERAL: Supported. The default VLAN of the port shouldbe voice VLAN and the egress rule of the access port in thevoice VLAN should be UNTAG.Table 9-2 Port voice VLAN mode and voice stream processing modeNote:Don’t transmit voice stream together with other business packets in the voice VLAN except forsome special requirements.The Voice VLAN function can be implemented on Global Config, Port Config and OUI Configpages.9.3.1 Global ConfigOn this page, you can configure the global parameters of the voice VLAN, including VLAN ID andaging time.Choose the menu QoS→Voice VLAN→Global Config to load the following page.Figure 9-12 Global Configuration120
The following entries are displayed on this screen:‣ Global ConfigVoice VLAN:VLAN ID:Aging Time:Select Enable/Disable Voice VLAN function.Enter the VLAN ID of the voice VLAN.Specifies the living time of the member port in auto mode after theOUI address is aging out.9.3.2 Port ConfigBefore the voice VLAN function is enabled, the parameters of the ports in the voice VLAN shouldbe configured on this page.Choose the menu QoS→Voice VLAN→Port Config to load the following page.Figure 9-13 Port ConfigNote:To enable voice VLAN function for the LAG member port, please ensure its member state accordswith its port mode.If a port is a member port of voice VLAN, changing its port mode to be “Auto” will make the portleave the voice VLAN and will not join the voice VLAN automatically until it receives voice streams.121
The following entries are displayed on this screen:‣ Port ConfigPort Select:Select:Port:Port Mode:Member State:LAG:Click the Select button to quick-select the corresponding portbased on the port number you entered.Select the desired port for voice VLAN configuration. It ismulti-optional.Displays the port number of the Switch.Select the mode for the port to join the voice VLAN.• Auto: In this mode, the switch automatically adds a port to thevoice VLAN or removes a port from the voice VLAN bychecking whether the port receives voice data or not.• Manual: In this mode, you can manually add a port to thevoice VLAN or remove a port from the voice VLAN.Displays the state of the port in the current voice VLAN.Displays the LAG number which the port belongs to.9.3.3 OUI ConfigThe switch supports OUI create and add the MAC address of the special voice device to the OUItable of the switch. The switch determines whether a received packet is a voice packet or not bychecking its OUI address. The switch analyzes the received packets. If the packets recognized asvoice packets, the access port will be automatically added to the Voice VLAN.Choose the menu QoS→Voice VLAN→OUI Config to load the following page.Figure 9-14 OUI Configuration122
The following entries are displayed on this screen:‣ Create OUIOUI:Mask:Description:Enter the OUI address of the voice device.Enter the OUI address mask of the voice device.Give a description to the OUI for identification.‣ OUI TableSelect:OUI:Mask:Description:Select the desired entry to view the detailed information.Displays the OUI address of the voice device.Displays the OUI address mask of the voice device.Displays the description of the OUI.Configuration Procedure of Voice VLAN:Step Operation Description1 Configure the link typeof the portRequired. On VLAN→802.1Q VLAN→Port Config page,configure the link type of ports of the voice device.2 Create VLAN Required. On VLAN→802.1Q VLAN→Port Config page, clickthe Create button to create a VLAN.3 Add OUI address Optional. On QoS→Voice VLAN→OUI Config page, you cancheck whether the switch is supporting the OUI template or not.If not, please add the OUI address.4 Configure theparameters of the portsin voice VLANRequired. On QoS→Voice VLAN→Port Config page,configure the parameters of the ports in voice VLAN.5 Enable Voice VLAN Required. On QoS→Voice VLAN→Global Config page,configure the global parameters of voice VLAN.Return to CONTENTS123
Chapter 10 ACLACL (Access Control List) is used to filter packets by configuring match rules and process policiesof packets in order to control the access of the illegal users to the network. Besides, ACL functionsto control traffic flows and save network resources. It provides a flexible and secured accesscontrol policy and facilitates you to control the network security.On this switch, ACLs classify packets based on a series of match conditions, which can be L2-L4protocol key fields carried in the packets. A time-range based ACL enables you to implement ACLcontrol over packets by differentiating the time-ranges.The ACL module is mainly for ACL configuration of the switch, including four submenus:Time-Range, ACL Config, Policy Config and Policy Binding.10.1 Time-RangeIf a configured ACL is needed to be effective in a specified time-range, a time-range should befirstly specified in the ACL. As the time-range based ACL takes effect only within the specifiedtime-range, data packets can be filtered by differentiating the time-ranges.On this switch absolute time, week time and holiday can be configured. Configure an absolute timesection in the form of “the start date to the end date” to make ACLs effective; configure a week timesection to make ACLs effective on the fixed days of the week; configure a holiday section to makeACLs effective on some special days. In each time-range, four time-slices can be configured.The Time-Range configuration can be implemented on Time-Range Summary, Time-RangeCreate and Holiday Config pages.10.1.1 Time-Range SummaryOn this page you can view the current time-ranges.Choose the menu ACL→Time-Range→Time-Range Summary to load the following page.Figure 10-1 Time-Range TableThe following entries are displayed on this screen:‣ Time-Range TableSelect:Index:Time-Range Name:Slice:Mode:Operation:Select the desired entry to delete the corresponding time-range.Displays the index of the time-range.Displays the name of the time-range.Displays the time-slice of the time-range.Displays the mode the time-range adopts.Click the Edit button to modify the time-range. Click the Detail button todisplay the complete information of this time–range.124
10.1.2 Time-Range CreateOn this page you can create time-ranges.Choose the menu ACL→Time-Range→Time-Range Create to load the following page.Figure 10-2 Time-Range CreateNote:To successfully configure time-ranges, please firstly specify time-slices and then time-ranges.The following entries are displayed on this screen:‣ Create Time-RangeName:Holiday:Absolute:Week:Enter the name of the time-range for time identification.Select Holiday you set as a time-range. The ACL rule based on thistime-range takes effect only when the system time is within the holiday.Select Absolute to configure absolute time-range. The ACL rule basedon this time-range takes effect only when the system time is within theabsolute time-range.Select Week to configure week time-range. The ACL rule based on thistime-range takes effect only when the system time is within the weektime-range.‣ Create Time-SliceStart Time:End Time:Set the start time of the time-slice.Set the end time of the time-slice.‣ Time-Slice TableIndex:Start Time:Displays the index of the time-slice.Displays the start time of the time-slice.125
End Time:Delete:Displays the end time of the time-slice.Click the Delete button to delete the corresponding time-slice.10.1.3 Holiday ConfigHoliday mode is applied as a different secured access control policy from the week mode. On thispage you can define holidays according to your work arrangement.Choose the menu ACL→Time-Range→Holiday Config to load the following page.Figure 10-3 Holiday ConfigurationThe following entries are displayed on this screen:‣ Create HolidayStart Date:End Date:Holiday Name:Specify the start date of the holiday.Specify the end date of the holiday.Enter the name of the holiday.‣ Holiday TableSelect:Index:Holiday Name:Start Date:End Date:Select the desired entry to delete the corresponding holiday.Displays the index of the holiday.Displays the name of the holiday.Displays the start date of the holiday.Displays the end date of the holiday.10.2 ACL ConfigAn ACL may contain a number of rules, and each rule specifies a different package range. Packetsare matched in match order. Once a rule is matched, the switch processes the matched packetstaking the operation specified in the rule without considering the other rules, which can enhancethe performance of the switch.Packets are classified based on match rules in order of the rules. Once a rule is matched,126
The ACL Config function can be implemented on ACL Summary, ACL Create, MAC ACL,Standard-IP ACL and Extend-IP ACL pages.10.2.1 ACL SummaryOn this page, you can view the current ACLs configured in the switch.Choose the menu ACL→ACL Config→ACL Summary to load the following page.Figure 10-4 ACL SummaryThe following entries are displayed on this screen:‣ Search OptionSelect ACL:ACL Type:Rule Order:Select the ACL you have createdDisplays the type of the ACL you select.Displays the rule order of the ACL you select.‣ Rule TableDisplay the rule table of the ACL you have selected. Here you can edit the rules, view the details ofthem, and move them up and down.10.2.2 ACL CreateOn this page you can create ACLs.Choose the menu ACL→ACL Config→ACL Create to load the following page.Figure 10-5 ACL Create127
The following entries are displayed on this screen:‣ Create ACLACL ID:Rule Order:Enter ACL ID of the ACL you want to create.<strong>User</strong> Config order is set to be match order in this ACL.10.2.3 MAC ACLMAC ACLs analyze and process packets based on a series of match conditions, which can be thesource MAC addresses, destination MAC addresses, VLAN ID, and EtherType carried in thepackets.Choose the menu ACL→ACL Config→MAC ACL to load the following page.Figure 10-6 Create MAC RuleThe following entries are displayed on this screen:‣ Create MAC ACLACL ID:Rule ID:Operation:S-MAC:D-MAC:MASK:VLAN ID:Select the desired MAC ACL for configuration.Enter the rule ID.Select the operation for the switch to process packets which match therules.• Permit: Forward packets.• Deny: Discard Packets.Enter the source MAC address contained in the rule.Enter the destination MAC address contained in the rule.Enter MAC address mask. If it is set to 1, it must strictly match theaddress.Enter the VLAN ID contained in the rule.128
EtherType:<strong>User</strong> Priority:Time-Range:Enter EtherType contained in the rule.Select the user priority contained in the rule for the tagged packets tomatch.Select the time-range for the rule to take effect.10.2.4 Standard-IP ACLStandard-IP ACLs analyze and process data packets based on a series of match conditions, whichcan be the source IP addresses and destination IP addresses carried in the packets.Choose the menu ACL→ACL Config→Standard-IP ACL to load the following page.Figure 10-7 Create Standard-IP RuleThe following entries are displayed on this screen:‣ Create Standard-IP ACLACL ID:Rule ID:Operation:S-IP:D-IP:Mask:Time-Range:Select the desired Standard-IP ACL for configuration.Enter the rule ID.Select the operation for the switch to process packets which match therules.• Permit: Forward packets.• Deny: Discard Packets.Enter the source IP address contained in the rule.Enter the destination IP address contained in the rule.Enter IP address mask. If it is set to 1, it must strictly match theaddress.Select the time-range for the rule to take effect.129
10.2.5 Extend-IP ACLExtend-IP ACLs analyze and process data packets based on a series of match conditions, whichcan be the source IP addresses, destination IP addresses, IP protocol and other information of thissort carried in the packets.Choose the menu ACL→ACL Config→Extend-IP ACL to load the following page.Figure 10-8 Create Extend-IP RuleThe following entries are displayed on this screen:‣ Create Extend-IP ACLACL ID:Rule ID:Operation:S-IP:D-IP:Mask:IP Protocol:TCP Flag:S-Port:Select the desired Extend-IP ACL for configuration.Enter the rule ID.Select the operation for the switch to process packets which match therules.• Permit: Forward packets.• Deny: Discard Packets.Enter the source IP address contained in the rule.Enter the destination IP address contained in the rule.Enter IP address mask. If it is set to 1, it must strictly match theaddress.Select IP protocol contained in the rule.Configure TCP flag when TCP is selected from the pull-down list of IPProtocol.Configure TCP/IP source port contained in the rule when TCP/UDP isselected from the pull-down list of IP Protocol.130
D-Port:DSCP:Time-Range:Configure TCP/IP destination port contained in the rule whenTCP/UDP is selected from the pull-down list of IP Protocol.Enter the DSCP information contained in the rule.Select the time-range for the rule to take effect.10.3 Policy ConfigA Policy is used to control the data packets those match the corresponding ACL rules byconfiguring ACLs and actions together for effect. The operations here include stream mirror,stream condition, QoS remarking and redirect.The Policy Config can be implemented on Policy Summary, Police Create and Action Createpages.10.3.1 Policy SummaryOn this page, you can view the ACL and the corresponding operations in the policy.Choose the menu ACL→Policy Config→Policy Summary to load the following page.Figure 10-9 Policy SummaryThe following entries are displayed on this screen:‣ Search OptionSelect Policy:Select name of the desired policy for view. If you want to delete thedesired policy, please click the Delete button.‣ Action TableSelect:Index:ACL ID:S-Mirror:S-Condition:Redirect:Select the desired entry to delete the corresponding policy.Enter the index of the policy.Displays the ID of the ACL contained in the policy.Displays the source mirror port of the policy.Displays the source condition added to the policy.Displays the redirect added to the policy.131
Operation:Click the Edit button to modify the action.10.3.2 Policy CreateOn this page you can create the policy.Choose the menu ACL→Policy Config→Policy Create to load the following page.Figure 10-10 Create PolicyThe following entries are displayed on this screen:‣ Create PolicyPolicy Name:Enter the name of the policy.10.3.3 Action CreateOn this page you can add ACLs and create corresponding actions for the policy.Choose the menu ACL→Policy Config→Action Create to load the following page.Figure 10-11 Action CreateThe following entries are displayed on this screen:‣ Create ActionSelect Policy:Select the name of the policy.132
Select ACL:S-Mirror:S-Condition:Redirect:Select the ACL for configuration in the policy.Select S-Mirror to mirror the data packets in the policy to the specificport.Select S-Condition to limit the transmission rate of the data packets inthe policy.• Rate: Specify the forwarding rate of the data packets those matchthe corresponding ACL.• Out of Band: Specify the disposal way of the data packets thoseare transmitted beyond the rate.Select Redirect to change the forwarding direction of the data packetsin the policy.• Destination Port: Forward the data packets those match thecorresponding ACL to the specific port.10.4 Policy BindingPolicy Binding function can have the policy take its effect on a specific port/VLAN. The policy willtake effect only when it is bound to a port/VLAN. In the same way, the port/VLAN will receive thedata packets and process them based on the policy only when the policy is bound to theport/VLAN.The Policypages.Binding can be implemented on Binding Table, Port Binding and VLAN Binding10.4.1 Binding TableOn this page view the policy bound to port/VLAN.Choose the menu ACL→Policy Binding→Binding Table to load the following page.Figure 10-12 Binding TableThe following entries are displayed on this screen:‣ Search OptionShow Mode:Select a show mode appropriate to your needs.‣ Policy Bind TableSelect:Select the desired entry to delete the corresponding binding policy.133
Index:Policy Name:Interface:Direction:Displays the index of the binding policy.Displays the name of the binding policy.Displays the port number or VLAN ID bound to the policy.Displays the binding direction.10.4.2 Port BindingOn this page you can bind a policy to a port.Choose the menu ACL→Policy Binding→Port Binding to load the following page.Figure 10-13 Bind the policy to the portThe following entries are displayed on this screen:‣ Port-Bind ConfigPolicy Name:Port:Select the name of the policy you want to bind.Enter the number of the port you want to bind.‣ Port-Bind TableIndex:Policy Name:Port:Direction:Displays the index of the binding policy.Displays the name of the binding policy.Displays the number of the port bound to the corresponding policy.Displays the binding direction.10.4.3 VLAN BindingOn this page you can bind a policy to a VLAN.Choose the menu ACL→Policy Binding→VLAN Binding to load the following page.134
Figure 10-14 Bind the policy to the VLANThe following entries are displayed on this screen:‣ VLAN-Bind ConfigPolicy Name:VLAN ID:Select the name of the policy you want to bind.Enter the ID of the VLAN you want to bind.‣ VLAN-Bind TableIndex:Policy Name:VLAN ID:Direction:Displays the index of the binding policy.Displays the name of the binding policy.Displays the ID of the VLAN bound to the corresponding policy.Displays the binding direction.Configuration Procedure:Step Operation Description1 Configure effectivetime-rangeRequired. On ACL→Time-Range configuration pages,configure the effective time-ranges for ACLs.2 Configure ACL rules Required. On ACL→ACL Config configuration pages,configure ACL rules to match packets.3 Configure Policy Required. On ACL→Policy Config configuration pages,configure the policy to control the data packets those matchthe corresponding ACL rules.4 Bind the policy to theport/VLANRequired. On ACL→Policy Binding configuration pages,bind the policy to the port/VLAN to make the policy effectiveon the corresponding port/VLAN.10.5 Application Example for ACL‣ Network Requirements1. The manager of the R&D department can access to the forum of the company and the Internetwithout any forbiddance. The MAC address of the manager is 00-46-A5-5D-12-C3.2. The staff of the R&D department can not access to the Internet during the working time but canvisit the forum all day.135
3. The staff of the marketing department can access to the Internet all day but can not visit theforum during the working time.4. The R&D department and marketing department can not communicate with each other.‣ Network Diagram‣ Configuration ProcedureStep Operation Description1 ConfigureTime-range2 Configure forrequirement 1On ACL→Time-Range page, create a time-range named work_time.Select Week mode and configure the week time from Monday to Friday.Add a time-slice 08:00~18:00.On ACL→ACL Config→ACL Create page, create ACL 11.On ACL→ACL Config→MAC ACL page, select ACL 11, create Rule 1,configure the operation as Permit, configure the S-MAC as00-45-A5-5D-12-C3 and mask as FF-FF-FF-FF-FF-FF, and configurethe time-range as No Limit.On ACL→Policy Config→Policy Create page, create a policy namedmanager.On ACL→Policy Config→Action Create page, add ACL 11 to Policymanager.On ACL→Policy Binding→Port Binding page, select Policy managerto bind to port 3.136
3 Configure forrequirement 2and 44 Configure forrequirement 3and 4On ACL→ACL Config→ACL Create page, create ACL 100.On ACL→ACL Config→Standard-IP ACL page, select ACL 100,create Rule 1, configure operation as Deny, configure S-IP as172.31.70.1 and mask as 255.255.255.0, configure D-IP as172.31.50.1 and mask as 255.255.255.0, configure the time-range asNo Limit.On ACL→ACL Config→Standard-IP ACL page, select ACL 100,create Rule 2, configure operation as Deny, configure S-IP as172.31.70.1 and mask as 255.255.255.0, configure D-IP as172.31.88.5 and mask as 255.255.255.255, configure the time-rangeas No Limit.On ACL→ACL Config→Standard-IP ACL page, select ACL 100,create Rule 3, configure operation as Permit, configure S-IP as172.31.70.1 and mask as 255.255.255.0, configure D-IP as172.31.88.5 and mask as 255.255.255.0, configure the time-range aswork_time.On ACL→Policy Config→Action Create page, add ACL 100 to Policylimit1.On ACL→Policy Binding→Port Binding page, select Policy limit1 tobind to port 3.On ACL→ACL Config→ACL Create page, create ACL 101.On ACL→ACL Config→Standard-IP ACL page, select ACL 101,create Rule 1, configure operation as Deny, configure S-IP as172.31.70.1 and mask as 255.255.255.0, configure D-IP as172.31.50.1 and mask as 255.255.255.0, configure the time-range asNo Limit.On ACL→ACL Config→Standard-IP ACL page, select ACL 101,create Rule 2, configure operation as Deny, configure S-IP as172.31.70.1 and mask as 255.255.255.0, configure D-IP as172.31.88.5 and mask as 255.255.255.255, configure the time-rangeas No Limit.On ACL→Policy Config→Policy Create page, create a policy namedlimit2.On ACL→Policy Config→Action Create page, add ACL 101 to Policylimit1.On ACL→Policy Binding→Port Binding page, select Policy limit2 tobind to port 4.Return to CONTENTS137
Chapter 11 Network SecurityNetwork Security module is to provide the multiple protection measures for the network security,including five submenus: IP-MAC Binding, ARP Inspection, DoS Defend and 802.1X. Pleaseconfigure the functions appropriate to your need.11.1 IP-MAC BindingThe IP-MAC Binding function allows you to bind the IP address, MAC address, VLAN ID and theconnected Port number of the Host together. Basing on the IP-MAC binding table, ARP Inspectionand IP Source Guard functions can control the network access and only allow the Hosts matchingthe bound entries to access the network.The following three IP-MAC Binding methods are supported by the switch.(1) Manually: You can manually bind the IP address, MAC address, VLAN ID and the Portnumber together in the condition that you have got the related information of the Hosts in theLAN.(2) Scanning: You can quickly get the information of the IP address, MAC address, VLAN IDand the connected port number of the Hosts in the LAN via the ARP Scanning function,and bind them conveniently. You are only requested to enter the IP address on the ARPScanning page for the scanning.(3) DHCP Snooping: You can use DHCP Snooping functions to monitor the process of theHost obtaining the IP address from DHCP server, and record the IP address, MAC address,VLAN and the connected Port number of the Host for automatic binding.These three methods are also considered as the sources of the IP-MAC Binding entries. Theentries from various sources should be different from one another to avoid collision. Among theentries in collision, only the entry from the source with the highest priority will take effect. Thesethree sources (Manual, Scanning and Snooping) are in descending order of priority.The IP-MAC Binding function is implemented on the Binding Table, Manual Binding, ARPScanning and DHCP Snooping pages.11.1.1 Binding TableOn this page, you can view the information of the bound entries.Choose the menu Network Security→IP-MAC Binding→Binding Table to load the followingpage.Figure 11-1 Binding Table138
The following entries are displayed on this screen:‣ Search OptionSource:Select a Source from the pull-down list and click the Searchbutton to view your desired entry in the Binding Table. All: All the bound entries will be displayed. Manual: Only the manually added entries will bedisplayed. Scanning: Only the entries formed via ARP Scanning willbe displayed. Snooping: Only the entries formed via DHCP Snoopingwill be displayed.‣ Binding TableIP Select:Select:Host Name:IP Address:MAC Address:VLAN ID:Port:Protect Type:Source:Collision:Click the Select button to quick-select the corresponding entrybased on the IP address you entered.Select the desired entry to modify the Host Name and ProtectType. It is multi-optional.Displays the Host Name here.Displays the IP Address of the Host.Displays the MAC Address of the Host.Displays the VLAN ID here.Displays the number of port connected to the Host.Allows you to view and modify the Protect Type of the entry.Displays the Source of the entry.Displays the Collision status of the entry. Warning: Indicates that the collision may be caused by theMS<strong>TP</strong> function. Critical: Indicates that the entry has a collision with theother entries.Note:1 Among the entries with Critical collision level, the one with the highest Source priority will takeeffect.2 Among the conflicting entries with the same Source priority, only the last added or edited onewill take effect.11.1.2 Manual BindingYou can manually bind the IP address, MAC address, VLAN ID and the Port number together inthe condition that you have got the related information of the Hosts in the LAN.Choose the menu Network Security→IP-MAC Binding→Manual Binding to load the followingpage.139
Figure 11-2 Manual BindingThe following entries are displayed on this screen:‣ Manual Binding OptionHost Name:IP Address:MAC Address:VLAN ID:Port:Protect Type:Enter the Host Name.Enter the IP Address of the Host.Enter the MAC Address of the Host.Enter the VLAN ID.Select the number of port connected to the Host.Select the Protect Type for the entry.‣ Manual Binding TableSelect:Host Name:IP Address:MAC Address:VLAN ID:Port:Protect Type:Collision:Select the desired entry to be deleted. It is multi-optional.Displays the Host Name here.Displays the IP Address of the Host.Displays the MAC Address of the Host.Displays the VLAN ID here.Displays the number of port connected to the Host.Displays the Protect Type of the entry.Displays the Collision status of the entry.Warning: Indicates that the collision may be caused bythe MS<strong>TP</strong> function.Critical: Indicates that the entry has a collision with theother entries.140
11.1.3 ARP ScanningARP (Address Resolution Protocol) is used to analyze and map IP addresses to the correspondingMAC addresses so that packets can be delivered to their destinations correctly. IP address is theaddress of the Host on Network layer. MAC address, the address of the Host on Data link layer, isnecessary for the packet to reach the very device. So the destination IP address carried in apacket need to be translated into the corresponding MAC address.ARP functions to translate the IP address into the corresponding MAC address and maintain anARP Table, where the latest used IP address-to-MAC address mapping entries are stored. Whenthe Host communicates with a strange Host, ARP works as the following figure shown.Figure 11-3 ARP Implementation Procedure(1) Suppose there are two hosts in the LAN: Host A and Host B. To send a packet to Host B,Host A checks its own ARP Table first to see if the ARP entry related to the IP address of HostB exists. If yes, Host A will directly send the packets to Host B. If the corresponding MACaddress is not found in the ARP Table, Host A will broadcast ARP request packet, whichcontains the IP address of Host B, the IP address of Host A, and the MAC address of Host A,in the LAN.(2) Since the ARP request packet is broadcasted, all hosts in the LAN can receive it. However,only the Host B recognizes and responds to the request. Host B sends back an ARP replypacket to Host A, with its MAC address carried in the packet.(3) Upon receiving the ARP reply packet, Host A adds the IP address and the correspondingMAC address of Host B to its ARP Table for the further packets forwarding.ARP Scanning function enables the switch to send the ARP request packets of the specified IPfield to the Hosts in the LAN or VLAN. Upon receiving the ARP reply packet, the switch can get theIP address, MAC address, VLAN and the connected port number of the Host by analyzing thepacket and bind them conveniently.Choose the menu Network Security→IP-MAC Binding→ARP Scanning to load the followingpage.141
Figure 11-4 ARP ScanningThe following entries are displayed on this screen:‣ Scanning OptionStart IP Address:End IP Address:VLAN ID:Scan:Specify the Start IP Address.Specify the End IP Address.Enter the VLAN ID. If blank, the switch will send the untaggedpackets for scanning.Click the Scan button to scan the Hosts in the LAN.‣ Scanning ResultSelect:Host Name:IP Address:MAC Address:VLAN ID:Port:Protect Type:Collision:Select the desired entry to be bound or deleted.Displays the Host Name here.Displays the IP Address of the Host.Displays the MAC Address of the Host.Displays the VLAN ID here.Displays the number of port connected to the Host.Displays the Protect Type of the entry.Displays the Collision status of the entry. Warning: Indicates that the collision may be caused by theMS<strong>TP</strong> function. Critical: Indicates that the entry has a collision with theother entries.11.1.4 DHCP SnoopingNowadays, the network is getting larger and more complicated. The amount of the PCs alwaysexceeds that of the assigned IP addresses. The wireless network and the laptops are widely usedand the locations of the PCs are always changed. Therefore, the corresponding IP address of thePC should be updated with a few configurations. DHCP(Dynamic Host Configuration Protocol, the142
network configuration protocol optimized and developed basing on the BOO<strong>TP</strong>, functions to solvethe above mentioned problems.‣ DHCP Working PrincipleDHCP works via the “Client/Server” communication mode. The Client applies to the Server forconfiguration. The Server assigns the configuration information, such as the IP address, to theClient, so as to reach a dynamic employ of the network source. A Server can assign the IPaddress for several Clients, which is illustrated in the following figure.Figure 11-5 Network diagram for DHCP-snooping implementationFor different DHCP Clients, DHCP Server provides three IP address assigning methods:(1) Manually assign the IP address: Allows the administrator to bind the static IP address tothe specific Client (e.g.: WWW Server) via the DHCP Server.(2) Automatically assign the IP address: DHCP Server assigns the IP address without anexpiration time limitation to the Clients.(3) Dynamically assign the IP address: DHCP Server assigns the IP address with anexpiration time. When the time for the IP address expired, the Client should apply for anew one.The most Clients obtain the IP addresses dynamically, which is illustrated in the following figure.143
Figure 11-6 Interaction between a DHCP client and a DHCP server(1) DHCP-DISCOVER Stage: The Client broadcasts the DHCP-DISCOVER packet to find theDHCP Server.(2) DHCP-OFFER Stage: Upon receiving the DHCP-DISCOVER packet, the DHCP Serverselects an IP address from the IP pool according to the assigning priority of the IPaddresses and replies to the Client with DHCP-OFFER packet carrying the IP address andother information.(3) DHCP-REQUEST Stage: In the situation that there are several DHCP Servers sending theDHCP-OFFER packets, the Client will only respond to the first received DHCP-OFFERpacket and broadcast the DHCP-REQUEST packet which includes the assigned IPaddress of the DHCP-OFFER packet.(4) DHCP-ACK Stage: Since the DHCP-REQUEST packet is broadcasted, all DHCP Serverson the network segment can receive it. However, only the requested Server processes therequest. If the DHCP Server acknowledges assigning this IP address to the Client, it willsend the DHCP-ACK packet back to the Client. Otherwise, the Server will send theDHCP-NAK packet to refuse assigning this IP address to the Client.‣ Option 82The DHCP packets are classified into 8 types with the same format basing on the format ofBOO<strong>TP</strong> packet. The difference between DHCP packet and BOO<strong>TP</strong> packet is the Option field. TheOption field of the DHCP packet is used to expand the function, for example, the DHCP cantransmit the control information and network parameters via the Option field, so as to assign the IPaddress to the Client dynamically. For the details of the DHCP Option, please refer to RFC 2132.Option 82 records the location of the DHCP Client. Upon receiving the DHCP-REQUEST packet,the switch adds the Option 82 to the packet and then transmits the packet to DHCP Server.Administrator can be acquainted with the location of the DHCP Client via Option 82 so as to locatethe DHCP Client for fulfilling the security control and account management of Client. The Serversupported Option 82 also can set the distribution policy of IP addresses and the other parametersaccording to the Option 82, providing more flexible address distribution way.144
Option 82 can contain 255 sub-options at most. If Option 82 is defined, at least a sub-optionshould be defined. This Switch supports two sub-options: Circuit ID and Remote ID. Since there isno universal standard about the content of Option 82, different manufacturers define thesub-options of Option 82 to their need. For this Switch, the sub-options are defined as thefollowing: The Circuit ID is defined to be the number of the port which receives the DHCP Requestpackets and its VLAN number. The Remote ID is defined to be the MAC address of DHCPSnooping device which receives the DHCP Request packets from DHCP Clients.‣ DHCP Cheating AttackDuring the working process of DHCP, generally there is no authentication mechanism betweenServer and Client. If there are several DHCP servers in the network, network confusion andsecurity problem will happen. The common cases incurring the illegal DHCP servers are thefollowing two:(1) It’s common that the illegal DHCP server is manually configured by the user by mistake.(2) Hacker exhausted the IP addresses of the normal DHCP server and then pretended to bea legal DHCP server to assign the IP addresses and the other parameters to Clients. Forexample, hacker used the pretended DHCP server to assign a modified DNS serveraddress to users so as to induce the users to the evil financial website or electronic tradingwebsite and cheat the users of their accounts and passwords. The following figureillustrates the DHCP Cheating Attack implementation procedure.Figure 11-7 DHCP Cheating Attack Implementation ProcedureDHCP Snooping feature only allows the port connected to the DHCP Server as the trusted port toforward DHCP packets and thereby ensures that users get proper IP addresses. DHCP Snoopingis to monitor the process of the Host obtaining the IP address from DHCP server, and record the IPaddress, MAC address, VLAN and the connected Port number of the Host for automatic binding.The bound entry can cooperate with the ARP Inspection, IP Source Guard and the other securityprotection features. DHCP Snooping feature prevents the network from the DHCP ServerCheating Attack by discarding the DHCP packets on the distrusted port, so as to enhance thenetwork security.145
Choose the menu Network Security→IP-MAC Binding→Binding Table to load the followingpage.Figure 11-8 DHCP SnoopingNote:If you want to enable the DHCP Snooping feature for the member port of LAG, please ensure theparameters of all the member ports are the same.The following entries are displayed on this screen:‣ DHCP Snooping Config146
DHCP Snooping:Global Flow Control:Decline Threshold:Decline Flow Control:Enable/Disable the DHCP Snooping function globally.Select the value to specify the maximum amount of DHCPmessages that can be forwarded by the switch per second. Theexcessive massages will be discarded.Select the value to specify the minimum transmission rate of theDecline packets to trigger the Decline protection for the specificport.Select the value to specify the Decline Flow Control. The trafficflow of the corresponding port will be limited to be this value ifthe transmission rate of the Decline packets exceeds theDecline Threshold.‣ Option 82 ConfigOption 82 Support:Existed Option 82 field:Enable/Disable the Option 82 feature.Select the operation for the Option 82 field of the DHCP requestpackets from the Host. Keep: Indicates to keep the Option 82 field of the packets. Replace: Indicates to replace the Option 82 field of thepackets with the switch defined one. Drop: Indicates to discard the packets including the Option82 field.Customization: Enable/Disable the switch to define the Option 82.Circuit ID: Enter the sub-option Circuit ID for the customized Option 82.Remote ID: Enter the sub-option Remote ID for the customized Option 82.‣ Port ConfigPort Select:Select:Port:Trusted Port:MAC Verify:Flow Control:Decline Protect:LAG:Click the Select button to quick-select the corresponding portbased on the port number you entered.Select your desired port for configuration. It is multi-optional.Displays the port number.Select Enable/Disable the port to be a Trusted Port. Only theTrusted Port can receive the DHCP packets from DHCPservers.Select Enable/Disable the MAC Verify feature. There are twofields of the DHCP packet containing the MAC address of theHost. The MAC Verify feature is to compare the two fields anddiscard the packet if the two fields are different.Select Enable/Disable the Flow Control feature for the DHCPpackets. The excessive DHCP packets will be discarded.Select Enable/Disable the Decline Protect feature.Displays the LAG to which the port belongs to.147
11.2 ARP InspectionAccording to the ARP Implementation Procedure stated in 11.1.3 ARP Scanning, it can be foundthat ARP protocol can facilitate the Hosts in the same network segment to communicate with oneanother or access to external network via Gateway. However, since ARP protocol is implementedwith the premise that all the Hosts and Gateways are trusted, there are high security risks duringARP Implementation Procedure in the actual complex network. Thus, the cheating attacks againstARP, such as imitating Gateway, cheating Gateway, cheating terminal Hosts and ARP FloodingAttack, frequently occur to the network, especially to the large network such as campus networkand so on. The following part will simply introduce these ARP attacks.‣ Imitating GatewayThe attacker sends the MAC address of a forged Gateway to Host, and then the Host willautomatically update the ARP table after receiving the ARP response packets, which causes thatthe Host can not access the network normally. The ARP Attack implemented by imitating Gatewayis illustrated in the following figure.Figure 11-9 ARP Attack - Imitating GatewayAs the above figure shown, the attacker sends the fake ARP packets with a forged Gatewayaddress to the normal Host, and then the Host will automatically update the ARP table afterreceiving the ARP packets. When the Host tries to communicate with Gateway, the Host willencapsulate this false destination MAC address for packets, which results in a breakdown of thenormal communication.‣ Cheating GatewayThe attacker sends the wrong IP address-to-MAC address mapping entries of Hosts to theGateway, which causes that the Gateway can not communicate with the legal terminal Hostsnormally. The ARP Attack implemented by cheating Gateway is illustrated in the following figure.148
Figure 11-10 ARP Attack – Cheating GatewayAs the above figure shown, the attacker sends the fake ARP packets of Host A to the Gateway,and then the Gateway will automatically update its ARP table after receiving the ARP packets.When the Gateway tries to communicate with Host A in LAN, it will encapsulate this falsedestination MAC address for packets, which results in a breakdown of the normal communication.‣ Cheating Terminal HostsThe attacker sends the false IP address-to-MAC address mapping entries of terminal Host/Serverto another terminal Host, which causes that the two terminal Hosts in the same network segmentcan not communicate with each other normally. The ARP Attack implemented by cheating terminalHosts is illustrated in the following figure.149
Figure 11-11 ARP Attack – Cheating Terminal HostsAs the above figure shown, the attacker sends the fake ARP packets of Host A to Host B, and thenHost B will automatically update its ARP table after receiving the ARP packets. When Host B triesto communicate with Host A, it will encapsulate this false destination MAC address for packets,which results in a breakdown of the normal communication.‣ Man-In-The-Middle AttackThe attacker continuously sends the false ARP packets to the Hosts in LAN so as to make theHosts maintain the wrong ARP table. When the Hosts in LAN communicate with one another, theywill send the packets to the attacker according to the wrong ARP table. Thus, the attacker can getand process the packets before forwarding them. During the procedure, the communicationpackets information between the two Hosts are stolen in the case that the Hosts were unaware ofthe attack. That is called Man-In-The-Middle Attack. The Man-In-The-Middle Attack is illustrated inthe following figure.150
Figure 11-12 Man-In-The-Middle AttackSuppose there are three Hosts in LAN connected with one another through a switch.Host A: IP address is 192.168.0.101; MAC address is 00-00-00-11-11-11.Host B: IP address is 192.168.0.102; MAC address is 00-00-00-22-22-22.Attacker: IP address is 192.168.0.103; MAC address is 00-00-00-33-33-33.1. First, the attacker sends the false ARP response packets.2. Upon receiving the ARP response packets, Host A and Host B updates the ARP table oftheir own.3. When Host A communicates with Host B, it will send the packets to the false destinationMAC address, i.e. to the attacker, according to the updated ARP table.4. After receiving the communication packets between Host A and Host B, the attackerprocesses and forwards the packets to the correct destination MAC address, whichmakes Host A and Host B keep a normal-appearing communication.5. The attacker continuously sends the false ARP packets to the Host A and Host B so as tomake the Hosts always maintain the wrong ARP table.In the view of Host A and Host B, their packets are directly sent to each other. But in fact, there is aMan-In-The-Middle stolen the packets information during the communication procedure. This kindof ARP attack is called Man-In-The-Middle attack.‣ ARP Flooding AttackThe attacker broadcasts a mass of various fake ARP packets in a network segment to occupy thenetwork bandwidth viciously, which results in a dramatic slowdown of network speed. Meantime,the Gateway learns the false IP address-to-MAC address mapping entries from these ARPpackets and updates its ARP table. As a result, the ARP table is fully occupied by the false entriesand unable to learn the ARP entries of legal Hosts, which causes that the legal Hosts can notaccess the external network.151
The IP-MAC Binding function allows the switch to bind the IP address, MAC address, VLAN IDand the connected Port number of the Host together when the Host connects to the switch. Basingon the predefined IP-MAC Binding entries, the ARP Inspection functions to detect the ARP packetsand filter the illegal ARP packet so as to prevent the network from ARP attacks.The ARP Inspection function is implemented on the ARP Detect, ARP Defend and ARPStatistics pages.11.2.1 ARP DetectARP Detect feature enables the switch to detect the ARP packets basing on the bound entries inthe IP-MAC Binding Table and filter the illegal ARP packets, so as to prevent the network fromARP attacks, such as the Network Gateway Spoofing and Man-In-The-Middle Attack, etc.Choose the menu Network Security→ARP Inspection→ARP Detect to load the following page.Figure 11-13 ARP DetectThe following entries are displayed on this screen:‣ ARP DetectARP Detect:Enable/Disable the ARP Detect function, and click the Applybutton to apply.‣ Trusted PortTrusted Port:Select the port for which the ARP Detect function is unnecessaryas the Trusted Port. The specific ports, such as up-linked port,routing port and LAG port, should be set as Trusted Port. Toensure the normal communication of the switch, pleaseconfigure the ARP Trusted Port before enabling the ARP Detectfunction.152
Configuration Procedure:Step Operation Description1 Bind the IP address, MACaddress, VLAN ID and theconnected Port number ofthe Host together.2 Enable the protection for thebound entry.Required. On the IP-MAC Binding page, bind the IPaddress, MAC address, VLAN ID and the connected Portnumber of the Host together via Manual Binding, ARPScanning or DHCP Snooping.Required. On the Network Security→IP-MACBinding→Binding Table page, specify a protect type forthe corresponding bound entry.3 Specify the trusted port. Required. On the Network Security→ARPInspection→ARP Detect page, specify the trusted port.The specific ports, such as up-linked port, routing portand LAG port, should be set as Trusted Port.4 Enable ARP Detect feature. Required. On the Network Security→ARPInspection→ARP Detect page, enable the ARP Detectfeature.11.2.2 ARP DefendWith the ARP Defend enabled, the switch can terminate receiving the ARP packets for 300seconds when the transmission speed of the legal ARP packet on the port exceeds the definedvalue so as to avoid ARP Attack flood.Choose the menu Network Security→ARP Inspection→ARP Defend to load the following page.Figure 11-14 ARP Defend153
The following entries are displayed on this screen:‣ ARP DefendPort Select:Select:Port:Defend:Speed:Current Speed:Status:LAG:Operation:Click the Select button to quick-select the corresponding portbased on the port number you entered.Select your desired port for configuration. It is multi-optional.Displays the port number.Select Enable/Disable the ARP Defend feature for the port.Enter a value to specify the maximum amount of the received ARPpackets per second.Displays the current speed of the received ARP packets.Displays the status of the ARP attack.Displays the LAG to which the port belongs to.Click the Recover button to restore the port to the normal status.The ARP Defend for this port will be re-enabled.Note:It’s not recommended to enable the ARP Defend feature for the LAG member port.11.2.3 ARP StatisticsARP Statistics feature displays the number of the illegal ARP packets received on each port, whichfacilitates you to locate the network malfunction and take the related protection measures.Choose the menu Network Security→ARP Inspection→ARP Statistics to load the followingpage.154
Figure 11-15 ARP StatisticsThe following entries are displayed on this screen:‣ Auto RefreshAuto Refresh:Refresh Interval:Enable/Disable the Auto Refresh feature.Specify the refresh interval to display the ARP Statistics.‣ Illegal ARP PacketPort:Trusted Port:Illegal ARP Packet:Displays the port number.Indicates the port is an ARP Trusted Port or not.Displays the number of the received illegal ARP packets.11.3 DoS DefendDoS (Denial of Service) Attack is to occupy the network bandwidth maliciously by the networkattackers or the evil programs sending a lot of service requests to the Host, which incurs anabnormal service or even breakdown of the network.With DoS Defend function enabled, the switch can analyze the specific fields of the IP packets anddistinguish the malicious DoS attack packets. Upon detecting the packets, the switch will discardthe illegal packets directly and limit the transmission rate of the legal packets if the over legalpackets may incur a breakdown of the network. The switch can defend a few types of DoS attacklisted in the following table.155
DoS Attack TypeDescriptionScan SYNFIN The attacker sends the packet with its SYN field and the FIN field set to 1.The SYN field is used to request initial connection whereas the FIN field isused to request disconnection. Therefore, the packet of this type is illegal.The switch can defend this type of illegal packet.XmascanNULL Scan AttackSYN packet with its source portless than 1024Ping FloodingSYN/SYN-ACK FloodingThe attacker sends the illegal packet with its TCP index, FIN, URG andPSH field set to 1.The attacker sends the illegal packet with its TCP index and all the controlfields set to 0. During the TCP connection and data transmission, thepackets with all the control fields set to 0 are considered as the illegalpackets.The attacker sends the illegal packet with its TCP SYN field set to 1 andsource port less than 1024.The attacker floods the destination system with Ping broadcast stormpackets to forbid the system to respond to the legal communication.The attacker uses a fake IP address to send TCP request packets to theServer. Upon receiving the request packets, the Server responds withSYN-ACK packets. Since the IP address is fake, no response will bereturned. The Server will keep on sending SYN-ACK packets. If the attackersends overflowing fake request packets, the network resource will beoccupied maliciously and the requests of the legal clients will be denied.Table 11-1 Defendable DoS Attack TypesOn this page, you can enable the DoS Defend type appropriate to your need.Choose the menu Network Security→DoS Defend→DoS Defend to load the following page.Figure 11-16 DoS DefendThe following entries are displayed on this screen:‣ Config156
DoS Protection:Allows you to Enable/Disable DoS Defend function.‣ Defend TableSelect:Defend Type:Select the entry to enable the corresponding Defend Type.Displays the Defend Type name.Tips:You are suggested to take the following further steps to ensure the network security.1. It’s recommended to inspect and repair the system vulnerability regularly. It is also necessaryto install the system bulletins and backup the important information in time.2. The network administrator is suggested to inspect the physic environment of the network andblock the unnecessary network services.3. Enhance the network security via the protection devices, such as the hardware firewall.11.4 802.1XThe 802.1X protocol was developed by IEEE802 LAN/WAN committee to deal with the securityissues of wireless LANs. It was then used in Ethernet as a common access control mechanism forLAN ports to solve mainly authentication and security problems.802.1X is a port-based network access control protocol. It authenticates and controls devicesrequesting for access in terms of the ports of LAN access control devices. With the 802.1Xprotocol enabled, a supplicant can access the LAN only when it passes the authentication,whereas those failing to pass the authentication are denied when accessing the LAN.‣ Architecture of 802.1X Authentication802.1X adopts a client/server architecture with three entities: a supplicant system, anauthenticator system, and an authentication server system, as shown in the following figure.Figure 11-17 Architecture of 802.1X authentication(1) Supplicant System: The supplicant system is an entity in LAN and is authenticated by theauthenticator system. The supplicant system is usually a common user terminal computer.An 802.1X authentication is initiated when a user launches client program on the157
supplicant system. Note that the client program must support the 802.1X authenticationprotocol.(2) Authenticator System: The authenticator system is usually an 802.1X-supported networkdevice, such as this <strong>TP</strong>-LINK switch. It provides the physical or logical port for thesupplicant system to access the LAN and authenticates the supplicant system.(3) Authentication Server System: The authentication server system is an entity thatprovides authentication service to the authenticator system. Normally in the form of aRADIUS server. Authentication Server can store user information and serve to performauthentication and authorization. To ensure a stable authentication system, an alternateauthentication server can be specified. If the main authentication server is in trouble, thealternate authentication server can substitute it to provide normal authentication service.‣ The Mechanism of an 802.1X Authentication SystemIEEE 802.1X authentication system uses EAP (Extensible Authentication Protocol) to exchangeinformation between the supplicant system and the authentication server.(1) EAP protocol packets transmitted between the supplicant system and the authenticatorsystem are encapsulated as EAPOL packets.(2) EAP protocol packets transmitted between the authenticator system and the RADIUSserver can either be encapsulated as EAPOR (EAP over RADIUS) packets or beterminated at authenticator system and the authenticator system then communicate withRADIUS servers through PAP (Password Authentication Protocol) or CHAP (ChallengeHandshake Authentication Protocol) protocol packets.(3) When a supplicant system passes the authentication, the authentication server passes theinformation about the supplicant system to the authenticator system. The authenticatorsystem in turn determines the state (authorized or unauthorized) of the controlled portaccording to the instructions (accept or reject) received from the RADIUS server.‣ 802.1X Authentication ProcedureAn 802.1X authentication can be initiated by supplicant system or authenticator system. When theauthenticator system detects an unauthenticated supplicant in LAN, it will initiate the 802.1Xauthentication by sending EAP-Request/Identity packets to the supplicant. The supplicant systemcan also launch an 802.1X client program to initiate an 802.1X authentication through the sendingof an EAPOL-Start packet to the switch,This <strong>TP</strong>-LINK switch can authenticate supplicant systems in EAP relay mode or EAP terminatingmode. The following illustration of these two modes will take the 802.1X authentication procedureinitiated by the supplicant system for example.(1) EAP Relay ModeThis mode is defined in 802.1X. In this mode, EAP-packets are encapsulated in higher levelprotocol (such as EAPOR) packets to allow them successfully reach the authentication server.This mode normally requires the RADIUS server to support the two fields of EAP: theEAP-message field and the Message-authenticator field. This switch supports EAP-MD5authentication way for the EAP relay mode. The following figure describes the basic EAP-MD5authentication procedure.158
Supplicant System EAP SwitchEAP Authentication ServerEAPOL-StartEAP-Request/IdentityEAP-Response/IdentityRADIUS-Access-RequestEAP-RequestRADIUS-Access-ChallengeEAP-ResponseRADIUS-Access-RequestEAP-SuccessRADIUS-Access-AcceptFigure 11-18 EAP-MD5 Authentication Procedure1. A supplicant system launches an 802.1X client program via its registered user name andpassword to initiate an access request through the sending of an EAPOL-Start packet to theswitch. The 802.1X client program then forwards the packet to the switch to start theauthentication process.2. Upon receiving the authentication request packet, the switch sends an EAP-Request/Identitypacket to ask the 802.1X client program for the user name.3. The 802.1X client program responds by sending an EAP-Response/Identity packet to theswitch with the user name included. The switch then encapsulates the packet in a RADIUSAccess-Request packet and forwards it to the RADIUS server.4. Upon receiving the user name from the switch, the RADIUS server retrieves the user name,finds the corresponding password by matching the user name in its database, encrypts thepassword using a randomly-generated key, and sends the key to the switch through anRADIUS Access-Challenge packet. The switch then sends the key to the 802.1X clientprogram.5. Upon receiving the key (encapsulated in an EAP-Request/MD5 Challenge packet) from theswitch, the client program encrypts the password of the supplicant system with the key andsends the encrypted password (contained in an EAP-Response/MD5 Challenge packet) tothe RADIUS server through the switch. (The encryption is irreversible.)6. The RADIUS server compares the received encrypted password (contained in a RADIUSAccess-Request packet) with the locally-encrypted password. If the two match, it will thensend feedbacks (through a RADIUS Access-Accept packet and an EAP-Success packet) tothe switch to indicate that the supplicant system is authorized.7. The switch changes the state of the corresponding port to accepted state to allow thesupplicant system access the network. And then the switch will monitor the status ofsupplicant by sending hand-shake packets periodically. By default, the switch will force thesupplicant to log off if it can not get the response from the supplicant for two times.8. The supplicant system can also terminate the authenticated state by sending EAPOL-Logoffpackets to the switch. The switch then changes the port state from accepted to rejected.(2) EAP Terminating Mode159
In this mode, packet transmission is terminated at authenticator systems and the EAP packets aremapped into RADIUS packets. Authentication and accounting are accomplished through RADIUSprotocol.In this mode, PAP or CHAP is employed between the switch and the RADIUS server. This switchsupports the PAP terminating mode. The authentication procedure of PAP is illustrated in thefollowing figure.Supplicant SystemEAPSwitchRADIUSAuthentication ServerEAPOL-StartEAP-Request/IdentityEAP-Response/IdentityEAP-RequestEAP-ResponseRADIUS-Access-RequestEAP-SuccessRADIUS-Access-AcceptFigure 11-19 PAP Authentication ProcedureIn PAP mode, the switch encrypts the password and sends the user name, therandomly-generated key, and the supplicant system-encrypted password to the RADIUS server forfurther authentication. Whereas the randomly-generated key in EAP-MD5 relay mode is generatedby the authentication server, and the switch is responsible to encapsulate the authenticationpacket and forward it to the RADIUS server.‣ 802.1X TimerIn 802.1 x authentication, the following timers are used to ensure that the supplicant system, theswitch, and the RADIUS server interact in an orderly way:(1) Supplicant system timer (Supplicant Timeout): This timer is triggered by the switchafter the switch sends a request packet to a supplicant system. The switch will resend therequest packet to the supplicant system if the supplicant system fails to respond in thespecified timeout period.(2) RADIUS server timer (Server Timeout): This timer is triggered by the switch after theswitch sends an authentication request packet to RADIUS server. The switch will resendthe authentication request packet if the RADIUS server fails to respond in the specifiedtimeout period.(3) Quiet-period timer (Quiet Period): This timer sets the quiet-period. When a supplicantsystem fails to pass the authentication, the switch quiets for the specified period before itprocesses another authentication request re-initiated by the supplicant system.‣ Guest VLANGuest VLAN function enables the supplicants that do not pass the authentication to access thespecific network resource.By default, all the ports connected to the supplicants belong to a VLAN, i.e. Guest VLAN. <strong>User</strong>sbelonging to the Guest VLAN can access the resources of the Guest VLAN without being160
authenticated. But they need to be authenticated before accessing external resources. Afterpassing the authentication, the ports will be removed from the Guest VLAN and be allowed toaccess the other resources.With the Guest VLAN function enabled, users can access the Guest VLAN to install 802.1X clientprogram or upgrade their 802.1x clients without being authenticated. If there is no supplicant pastthe authentication on the port in a certain time, the switch will add the port to the Guest VLAN.With 802.1X function enabled and Guest VLAN configured, after the maximum number retrieshave been made to send the EAP-Request/Identity packets and there are still ports that have notsent any response back, the switch will then add these ports into the Guest VLAN according totheir link types. Only when the corresponding user passes the 802.1X authentication, the port willbe removed from the Guest VLAN and added to the specified VLAN. In addition, the port will backto the Guest VLAN when its connected user logs off.The 802.1X function is implemented on the Global Config, Port Config and Radius Serverpages.11.4.1 Global ConfigOn this page, you can enable the 802.1X authentication function globally and control theauthentication process by specifying the Authentication Method, Guest VLAN and various Timers.Choose the menu Network Security→802.1X→Global Config to load the following page.Figure 11-20 Global ConfigThe following entries are displayed on this screen:‣ Global Config802.1X:Authentication Method:Enable/Disable the 802.1X function.Select the Authentication Method from the pull-down list. EAP-MD5: IEEE 802.1X authentication systemuses extensible authentication protocol (EAP) to161
exchange information between the switch and theclient. The EAP protocol packets withauthentication data can be encapsulated in theadvanced protocol (such as RADIUS) packets to betransmitted to the authentication server.PAP: IEEE 802.1X authentication system usesextensible authentication protocol (EAP) toexchange information between the switch and theclient. The transmission of EAP packets isterminated at the switch and the EAP packets areconverted to the other protocol (such as RADIUS)packets for transmission.Guest VLAN:Guest VLAN ID:Enable/Disable the Guest VLAN feature.Enter your desired VLAN ID to enable the Guest VLANfeature. The supplicants in the Guest VLAN can accessthe specified network source.‣ Authentication ConfigQuiet:Quiet Period:Retry Times:Supplicant Timeout:Server Timeout:Enable/Disable the Quiet timer.Specify a value for Quiet Period. Once the supplicantfailed to the 802.1X Authentication, then the switch will notrespond to the authentication request from the samesupplicant during the Quiet Period.Specify the maximum transfer times of the repeatedauthentication request.Specify the maximum time for the switch to wait for theresponse from supplicant before resending a request tothe supplicant.Specify the maximum time for the switch to wait for theresponse from authentication server before resending arequest to the authentication server.11.4.2 Port ConfigOn this page, you can configure the 802.1X features for the ports basing on the actual network.Choose the menu Network Security→802.1X→Port Config to load the following page.162
Figure 11-21 Port ConfigThe following entries are displayed on this screen:‣ Port ConfigPort Select:Select:Port:Status:Guest VLAN:Control Mode:Control Type:Click the Select button to quick-select the corresponding portbased on the port number you entered.Select your desired port for configuration. It is multi-optional.Displays the port number.Select Enable/Disable the 802.1X authentication feature for theport.Select Enable/Disable the Guest VLAN feature for the port.Specify the Control Mode for the port. Auto: In this mode, the port will normally work only afterpassing the 802.1X Authentication. Force-Authorized: In this mode, the port can work normallywithout passing the 802.1X Authentication. Force-Unauthorized: In this mode, the port is forbiddenworking for its fixed unauthorized status.Specify the Control Type for the port. MAC Based: Any client connected to the port should pass the802.1X Authentication for access. Port Based: All the clients connected to the port can accessthe network on the condition that any one of the clients haspassed the 802.1X Authentication.163
Authorized:LAG:Displays the authentication status of the port.Displays the LAG to which the port belongs to.11.4.3 Radius ServerRADIUS (Remote Authentication Dial-In <strong>User</strong> Service) server provides the authentication servicefor the switch via the stored client information, such as the user name, password, etc, with thepurpose to control the authentication and accounting status of the clients. On this page, you canconfigure the parameters of the authentication server.Choose the menu Network Security→802.1X→Radius Server to load the following page.Figure 11-22 Radius ServerThe following entries are displayed on this screen:‣ Authentication ConfigPrimary IP:Secondary IP:Enter the IP address of the authentication server.Enter the IP address of the alternate authentication server.Authentication Port: Set the UDP port of authentication server(s). The default port is 1812Authentication KEY:Set the shared password for the switch and the authenticationservers to exchange messages.‣ Accounting ConfigAccounting:Primary IP:Secondary IP:Enable/Disable the accounting feature.Enter the IP address of the accounting server.Enter the IP address of the alternate accounting server.Accounting Port: Set the UDP port of accounting server(s). The default port is 1813.Accounting Key:Set the shared password for the switch and the accountingservers to exchange messages.164
Note:1. The 802.1X function takes effect only when it is enabled globally on the switch and for the port.2. The 802.1X function can not be enabled for LAG member ports. That is, the port with 802.1Xfunction enabled can not be added to the LAG.3. The 802.1X function should not be enabled for the port connected to the authentication server.In addition, the authentication parameters of the switch and the authentication server shouldbe the same.Configuration Procedure:Step Operation Description1 Connect an authenticationserver to the switch and dosome configuration.2 Install the 802.1X clientsoftware.3 Configure the 802.1Xglobally.4 Configure the parameters ofthe authentication server5 Configure the 802.1X for theport.Required. Record the information of the client in the LAN tothe authentication server and configure the correspondingauthentication username and password for the client.Required. For the client computers, you are required toinstall the 802.1X software TpSupplicant provided on theCD. For the installation guide, please refer to Appendix C:802.1X Client Software.Required. By default, the global 802.1X function is disabled.On the Network Security→802.1X→Global Config page,configure the 802.1X function globally.Required. On the Network Security→802.1X→RadiusServer page, configure the parameters of the server.Required. On the Network Security→802.1X→PortConfig page, configure the 802.1X feature for the port ofthe switch basing on the actual network.Return to CONTENTS165
Chapter 12 SNMP‣ SNMP OverviewSNMP (Simple Network Management Protocol) has gained the most extensive application on theUDP/IP networks. SNMP provides a management frame to monitor and maintain the networkdevices. It is used for automatically managing the various network devices no matter the physicaldifferences of the devices. Currently, the most network management systems are based on SNMP.SNMP is simply designed and convenient for use with no need of complex fulfillment proceduresand too much network resources. With SNMP function enabled, network administrators can easilymonitor the network performance, detect the malfunctions and configure the network devices. Inthe meantime, they can locate faults promptly and implement the fault diagnosis, capacity planningand report generating.‣ SNMP Management FrameSNMP management frame includes three network elements: SNMP Management Station, SNMPAgent and MIB (Management Information Base).SNMP Management Station: SNMP Management Station is the workstation for running theSNMP client program, providing a friendly management interface for the administrator to managethe most network devices conveniently.SNMP Agent: Agent is the server software operated on network devices with the responsibility ofreceiving and processing the request packets from SNMP Management Station. In the meanwhile,Agent will inform the SNMP Management Station of the events whenever the device statuschanges or the device encounters any abnormalities such as restarting the device.MIB: MIB is the set of the managed objects. MIB defines a few attributes of the managed objects,including the names, the access rights, and the data types. Every SNMP Agent has its own MIB.The SNMP Management station can read/write the MIB objects basing on its management right.SNMP Management Station is the manager of SNMP network while SNMP Agent is the managedobject. The information between SNMP Management Station and SNMP Agent are exchangedthrough SNMP (Simple Network Management Protocol). The relationship among SNMPManagement Station, SNMP Agent and MIB is illustrated in the following figure.‣ SNMP VersionsFigure 12-1 Relationship among SNMP Network ElementsThis switch supports SNMP v3, and is compatible with SNMP 1 and SNMP v2c. The SNMPversions adopted by SNMP Management Station and SNMP Agent should be the same.Otherwise, SNMP Management Station and SNMP Agent can not communicate with each othernormally. You can select the management mode with proper security level according to your actualapplication requirement.166
SNMP v1: SNMP v1 adopts Community Name authentication. The community name is used todefine the relation between SNMP Management Station and SNMP Agent. The SNMP packetsfailing to pass community name authentication are discarded. The community name can limitaccess to SNMP Agent from SNMP NMS, functioning as a password.SNMP v2c: SNMP v2c also adopts community name authentication. It is compatible with SNMPv1 while enlarges the function of SNMP v1.SNMP v3: Basing on SNMP v1 and SNMP v2c, SNMP v3 extremely enhances the security andmanageability. It adopts VACM (View-based Access Control Model) and USM (<strong>User</strong>-BasedSecurity Model) authentication. The user can configure the authentication and the encryptionfunctions. The authentication function is to limit the access of the illegal user by authenticating thesenders of packets. Meanwhile, the encryption function is used to encrypt the packets transmittedbetween SNMP Management Station and SNMP Agent so as to prevent any information beingstolen. The multiple combinations of authentication function and encryption function canguarantee a more reliable communication between SNMP Management station and SNMP Agent.‣ MIB IntroductionTo uniquely identify the management objects of the device in SNMP messages, SNMP adopts thehierarchical architecture to identify the managed objects. It is like a tree, and each tree noderepresents a managed object, as shown in the following figure. Thus the object can be identifiedwith the unique path starting from the root and indicated by a string of numbers. The number stringis the Object Identifier of the managed object. In the following figure, the OID of the managedobject B is {1.2.1.1}. While the OID of the managed object A is {1.2.1.1.5}.‣ SNMP Configuration Outline1. Create ViewFigure 12-2 Architecture of the MIB treeThe SNMP View is created for the SNMP Management Station to manage MIB objects. Themanaged object, uniquely identified by OID, can be set to under or out of the management ofSNMP Management Station by configuring its view type (included/excluded). The OID of managedobject can be found on the SNMP client program running on the SNMP Management Station.2. Create SNMP GroupAfter creating the SNMP View, it’s required to create a SNMP Group. The Group Name, SecurityModel and Security Level compose the identifier of the SNMP Group. The Groups with these threeitems the same are considered to be the same. You can configure SNMP Group to control thenetwork access by providing the users in various groups with different management rights via theRead View, Write View and Notify View.3. Create SNMP <strong>User</strong>167
The <strong>User</strong> is configured in a SNMP Group can manage the switch via the client program onmanagement station. The specified <strong>User</strong> Name and the Auth/Privacy Password are used forSNMP Management Station to access the SNMP Agent, functioning as the password.SNMP module is used to configure the SNMP function of the switch, including three submenus:SNMP Config, Notification and RMON.12.1 SNMP ConfigThe SNMP Config can be implemented on the Global Config, SNMP View, SNMP Group,SNMP <strong>User</strong> and SNMP Community pages.12.1.1 Global ConfigTo enable SNMP function, please configure the SNMP function globally on this page.Choose the menu SNMP→SNMP Config→Global Config to load the following page.Figure 12-3 Global ConfigThe following entries are displayed on this screen:‣ Global ConfigSNMP:Enable/Disable the SNMP function.‣ Local EngineLocal Engine ID:Specify the Switch’s Engine ID for the remote clients. TheEngine ID is a unique alphanumeric string used to identify theSNMP engine on the Switch.‣ Remote EngineRemote Engine ID:Specify the Remote Engine ID for Switch. The Engine ID is aunique alphanumeric string used to identify the SNMP engineon the remote device which receives informs from Switch.168
Note:The amount of Engine ID characters must be even.12.1.2 SNMP ViewThe OID (Object Identifier) of the SNMP packets is used to describe the managed objects of theswitch, and the MIB (Management Information Base) is the set of the OIDs. The SNMP View iscreated for the SNMP management station to manage MIB objects.Choose the menu SNMP→SNMP Config→SNMP View to load the following page.Figure 12-4 SNMP ViewThe following entries are displayed on this screen:‣ View ConfigView Name:MIB Object ID:View Type:Give a name to the View for identification. Each View caninclude several entries with the same name.Enter the Object Identifier (OID) for the entry of View.Select the type for the view entry. Include: The view entry can be managed by the SNMPmanagement station. Exclude: The view entry can not be managed by the SNMPmanagement station.‣ View TableSelect:View Name:View Type:MIB Object ID:Select the desired entry to delete the corresponding view. Allthe entries of a View will be deleted together.Displays the name of the View entry.Displays the type of the View entry.Displays the OID of the View entry.169
12.1.3 SNMP GroupOn this page, you can configure SNMP Group to control the network access by providing the usersin various groups with different management rights via the Read View, Write View and Notify View.Choose the menu SNMP→SNMP Config→SNMP Group to load the following page.Figure 12-5 SNMP GroupThe following entries are displayed on this screen:‣ Group ConfigGroup Name:Security Model:Security Level:Read View:Write View:Enter the SNMP Group name. The Group Name, Security Modeland Security Level compose the identifier of the SNMP Group.These three items of the <strong>User</strong>s in one group should be the same.Select the Security Model for the SNMP Group. v1: SNMPv1 is defined for the group. In this model, theCommunity Name is used for authentication. SNMP v1 can beconfigured on the SNMP Community page directly. v2c: SNMPv2c is defined for the group. In this model, theCommunity Name is used for authentication. SNMP v2c can beconfigured on the SNMP Community page directly. v3: SNMPv3 is defined for the group. In this model, the USMmechanism is used for authentication. If SNMPv3 is enabled,the Security Level field is enabled for configuration.Select the Security Level for the SNMP v3 Group. noAuthNoPriv: No authentication and no privacy securitylevels are used. authNoPriv: Only the authentication security level is used. authPriv: Both the authentication and the privacy securitylevels are used.Select the View to be the Read View. The management access isrestricted to read-only, and changes cannot be made to theassigned SNMP View.Select the View to be the Write View. The management access is170
writing only and changes can be made to the assigned SNMPView. The View defined both as the Read View and the Write Viewcan be read and modified.Notify View:Select the View to be the Notify View. The management stationcan receive notification messages of the assigned SNMP viewgenerated by the Switch's SNMP agent.‣ Group TableSelect:Group Name:Security Model:Security Level:Read View:Write View:Notify View:Operation:Select the desired entry to delete the corresponding group. It'smulti-optional.Displays the Group Name here.Displays the Security Model of the group.Displays the Security Level of the group.Displays the Read View name in the entry.Displays the Write View name in the entry.Displays the Notify View name in the entry.Click the Edit button to modify the Views in the entry and click theModify button to apply.Note:Every Group should contain a Read View. The default Read View is viewDefault.12.1.4 SNMP <strong>User</strong>The <strong>User</strong> in a SNMP Group can manage the switch via the management station software. The<strong>User</strong> and its Group have the same security level and access right. You can configure the SNMP<strong>User</strong> on this page.Choose the menu SNMP→SNMP Config→SNMP <strong>User</strong> to load the following page.171
Figure 12-6 SNMP <strong>User</strong>The following entries are displayed on this screen:‣ <strong>User</strong> Config<strong>User</strong> Name:<strong>User</strong> Type:Group Name:Security Model:Security Level:Auth Mode:Auth Password:Privacy Mode:Privacy Password:Enter the <strong>User</strong> Name here.Select the type for the <strong>User</strong>. Local <strong>User</strong>: Indicates that the user is connected to alocal SNMP engine. Remote <strong>User</strong>: Indicates that the user is connected to aremote SNMP engine.Select the Group Name of the <strong>User</strong>. The <strong>User</strong> is classified tothe corresponding Group according to its Group Name,Security Model and Security Level.Select the Security Model for the <strong>User</strong>.Select the Security Level for the SNMP v3 <strong>User</strong>.Select the Authentication Mode for the SNMP v3 <strong>User</strong>. None: No authentication method is used. MD5: The port authentication is performed viaHMAC-MD5 algorithm. SHA: The port authentication is performed via SHA(Secure Hash Algorithm). This authentication mode has ahigher security than MD5 mode.Enter the password for authentication.Select the Privacy Mode for the SNMP v3 <strong>User</strong>. None: No privacy method is used. DES: DES encryption method is used.Enter the Privacy Password.172
‣ <strong>User</strong> TableSelect:<strong>User</strong> Name:<strong>User</strong> Type:Group Name:Security Model:Security Level:Auth Mode:Privacy Mode:Operation:Select the desired entry to delete the corresponding <strong>User</strong>. It ismulti-optional.Displays the name of the <strong>User</strong>.Displays the <strong>User</strong> Type.Displays the Group Name of the <strong>User</strong>.Displays the Security Model of the <strong>User</strong>.Displays the Security Level of the <strong>User</strong>.Displays the Authentication Mode of the <strong>User</strong>.Displays the Privacy Mode of the <strong>User</strong>.Click the Edit button to modify the Group of the <strong>User</strong> and clickthe Modify button to apply.Note:The SNMP <strong>User</strong> and its Group should have the same Security Model and Security Level.12.1.5 SNMP CommunitySNMP v1 and SNMP v2c adopt community name authentication. The community name can limitaccess to the SNMP agent from SNMP network management station, functioning as a password. IfSNMP v1 or SNMP v2c is employed, you can directly configure the SNMP Community on thispage without configuring SNMP Group and <strong>User</strong>.Choose the menu SNMP→SNMP Config→SNMP Community to load the following page.Figure 12-7 SNMP CommunityThe following entries are displayed on this screen:‣ Community ConfigCommunity Name:Access:Enter the Community Name here.Defines the access rights of the community.173
ead-only: Management right of the Community isrestricted to read-only, and changes cannot be made tothe corresponding View.read-write: Management right of the Community isread-write and changes can be made to the correspondingView.MIB View:Select the MIB View for the community to access.‣ Community TableSelect:Community Name:Access:MIB View:Operation:Select the desired entry to delete the corresponding Community.It is multi-optional.Displays the Community Name here.Displays the right of the Community to access the View.Displays the Views which the Community can access.Click the Edit button to modify the MIB View and the Accessright of the Community, and then click the Modify button toapply.Note:The default MIB View of SNMP Community is viewDefault.Configuration Procedure:• If SNMPv3 is employed, please take the following steps:Step Operation Description1 Enable SNMP function globally. Required. On the SNMP→SNMP Config→GlobalConfig page, enable SNMP function globally.2 Create SNMP View. Required. On the SNMP→SNMP Config→SNMPView page, create SNMP View of the managementagent. The default View Name is viewDefault and thedefault OID is 1.3 Create SNMP Group. Required. On the SNMP→SNMP Config→SNMPGroup page, create SNMP Group for SNMPv3 andspecify SNMP Views with various access levels forSNMP Group.4 Create SNMP <strong>User</strong>. Required. On the SNMP→SNMP Config→SNMP<strong>User</strong> page, create SNMP <strong>User</strong> in the Group andconfigure the auth/privacy mode and auth/privacypassword for the <strong>User</strong>.• If SNMPv1 or SNMPv2c is employed, please take the following steps:Step Operation Description1 Enable SNMP function globally. Required. On the SNMP→SNMP Config→GlobalConfig page, enable SNMP function globally.174
2 Create SNMP View. Required. On the SNMP→SNMP Config→SNMPView page, create SNMP View of the managementagent. The default View Name is viewDefault and thedefault OID is 1.3Create SNMPCommunitydirectly.Configureaccess levelfor the <strong>User</strong>. Create SNMPGroup and SNMP<strong>User</strong>.Required alternatively.• Create SNMP Community directly.On the SNMP→SNMP Config→SNMPCommunity page, create SNMP Communitybased on SNMP v1 and SNMP v2c.• Create SNMP Group and SNMP <strong>User</strong>.Similar to the configuration way based onSNMPv3, you can create SNMP Group andSNMP <strong>User</strong> of SNMP v1/v2c. The <strong>User</strong> namecan limit access to the SNMP agent from SNMPnetwork management station, functioning as acommunity name. The users can manage thedevice via the Read View, Write View and NotifyView defined in the SNMP Group.12.2 NotificationWith the Notification function enabled, the switch can initiatively report to the management stationabout the important events that occur on the Views (e.g., the managed device is rebooted), whichallows the management station to monitor and process the events in time.The notification information includes the following two types:Trap : Trap is the information that the managed device initiatively sends to the Networkmanagement station without request.Inform:Inform packet is sent to inform the management station and ask for the reply. The switchwill resend the inform request if it doesn’t get the response from the management station duringthe Timeout interval, and it will terminate resending the inform request if the resending times reachthe specified Retry times. The Inform type has a higher security than the Trap type, which isemployed on SNMPv3.On this page, you can configure the notification function of SNMP.Choose the menu SNMP→Notification→Notification to load the following page.175
Figure 12-8 Notification ConfigThe following entries are displayed on this screen:‣ Create NotificationIP Address:UDP Port:<strong>User</strong>:Security Model:Security Level:Type:Retry:Timeout:Enter the IP Address of the management Host.Enter the number of the UDP port used to send notifications.The UDP port functions with the IP address for the notificationsending. The default is 162.Enter the <strong>User</strong> name of the management station.Select the Security Model of the management station.Select the Security Level for the SNMP v3 <strong>User</strong>.noAuthNoPriv: No authentication and no privacy securitylevel are used.authNoPriv: Only the authentication security level is used.authPriv: Both the authentication and the privacy securitylevels are used.Select the type for the notifications. Trap: Indicates traps are sent. Inform: Indicates informs are sent. The Inform type has ahigher security than the Trap type.Specify the amount of times the switch resends an informrequest. The switch will resend the inform request if it doesn’tget the response from the management station during theTimeout interval, and it will terminate resending the informrequest if the resending times reach the specified Retry times.Specify the maximum time for the switch to wait for theresponse from the management station before resending arequest.‣ Notification Table176
Select: Select the desired entry to delete the correspondingmanagement station.IP Address:UDP Port:<strong>User</strong>:Security Model:Security Level:Type:Timeout:Retry:Operation:Displays the IP Address of the management host.Displays the UDP port used to send notifications.Displays the <strong>User</strong> name of the management station.Displays the Security Model of the management station.Displays the Security Level for the SNMP v3 <strong>User</strong>.Displays the type of the notifications.Displays the maximum time for the switch to wait for theresponse from the management station before resending arequest.Displays the amount of times the switch resends an informrequest.Click the Edit button to modify the corresponding entry and clickthe Modify button to apply.12.3 RMONRMON (Remote Monitoring) basing on SNMP (Simple Network Management Protocol)architecture, functions to monitor the network. RMON is currently a commonly used networkmanagement standard defined by Internet Engineering Task Force (IETF), which is mainly used tomonitor the data traffic across a network segment or even the entire network so as to enable thenetwork administrator to take the protection measures in time to avoid any network malfunction. Inaddition, RMON MIB records network statistics information of network performance andmalfunction periodically, based on which the management station can monitor network at any timeeffectively. RMON is helpful for network administrator to manage the large-scale network since itreduces the communication traffic between management station and managed agent.‣ RMON GroupThis switch supports the following four RMON Groups defined on the RMON standard (RFC1757):History Group, Event Group, Statistic Group and Alarm Group.RMON GroupHistory GroupEvent GroupStatistic GroupAlarm GroupFunctionAfter a history group is configured, the switch collects and records networkstatistics information periodically, based on which the management stationcan monitor network effectively.Event Group is used to define RMON events. Alarms occur when an event isdetected.Statistic Group is set to monitor the statistic of alarm variables on the specificports.Alarm Group is configured to monitor the specific alarm variables. When thevalue of a monitored variable exceeds the threshold, an alarm event isgenerated, which triggers the switch to act in the set way.177
The RMON Groups can be configured on the History Control, Event Config and Alarm Configpages.12.3.1 History ControlOn this page, you can configure the History Group for RMON.Choose the menu SNMP→RMON→History Control to load the following page.Figure 12-9 History ControlThe following entries are displayed on this screen:‣ History Control TableSelect:Index:Port:Interval:Owner:Status:Select the desired entry for configuration.Displays the index number of the entry.Specify the port from which the history samples were taken.Specify the interval to take samplings from the port.Enter the name of the device or user that defined the entry.Select Enable/Disable the corresponding sampling entry.12.3.2 Event ConfigOn this page, you can configure the RMON events.Choose the menu SNMP→RMON→Event Config to load the following page.178
Figure 12-10 Event ConfigThe following entries are displayed on this screen:‣ Event TableSelect:Index:<strong>User</strong>:Description:Type:Owner:Status:Select the desired entry for configuration.Displays the index number of the entry.Enter the name of the <strong>User</strong> or the community to which theevent belongs.Give a description to the event for identification.Select the event type, which determines the act way of thenetwork device in response to an event. None: No processing. Log: Logging the event. Notify: Sending trap messages to the management station. Log&Notify: Logging the event and sending trap messagesto the management station.Enter the name of the device or user that defined the entry.Select Enable/Disable the corresponding event entry.12.3.3 Alarm ConfigOn this page, you can configure Statistic Group and Alarm Group for RMON.Choose the menu SNMP→RMON→Alarm Config to load the following page.179
Figure 12-11 Alarm ConfigThe following entries are displayed on this screen:‣ Alarm TableSelect:Index:Variable:Port:Sample Type:Rising Threshold:Rising Event:Falling Threshold:Falling Event:Alarm Type:Select the desired entry for configuration.Displays the index number of the entry.Select the alarm variables form the pull-sown list.Select the port on which the Alarm entry acts.Specify the sampling method for the selected variable andcomparing the value against the thresholds. Absolute: Compares the values directly with the thresholdsat the end of the sampling interval. Delta: Subtracts the last sampled value from the currentvalue. The difference in the values is compared to thethreshold.Enter the rising counter value that triggers the Rising Thresholdalarm.Select the index of the corresponding event which will betriggered if the sampled value is larger than the RisingThreshold.Enter the falling counter value that triggers the Falling Thresholdalarm.Select the index of the corresponding event which will betriggered if the sampled value is lower than the FallingThreshold.Specify the type of the alarm. All: The alarm event will be triggered either the sampledvalue exceeds the Rise Hold or is under the Fall Hold. Rising: When the sampled value exceeds the RisingThreshold, an alarm event is triggered. Falling: When the sampled value is under the FallingThreshold, an alarm event is triggered.180
Interval:Owner:Status:Enter the alarm interval time in seconds.Enter the name of the device or user that defined the entry.Select Enable/Disable the corresponding alarm entry.Note:When alarm variables exceed the Threshold on the same direction continuously for several times,an alarm event will only be generated on the first time, that is, the Rising Alarm and Falling Alarmare triggered alternately for that the alarm following to Rising Alarm is certainly a Falling Alarm andvice versa.Return to CONTENTS181
Chapter 13 ClusterWith the development of network technology, the network scale is getting larger and more networkdevices are required, which may result in a more complicated network management system. As alarge number of devices need to be assigned different network addresses and every managementdevice needs to be respectively configured to meet the application requirements, manpower areneeded.The Cluster Management function can solve the above problem. It is mainly used to centralmanage the scattered devices in the network. A network administrator can manage and maintainthe switches in the cluster via a management switch. The management switch is the commanderof the cluster and the others are member switches.The typical topology is as follows.‣ Cluster RoleFigure 13-1 Cluster topologyAccording to their functions and status in a cluster, switches in the cluster play different roles. Youcan specify the role a switch plays. There are three roles.Commander Switch: Indicates the device that can configure and manage all the devices in acluster. It discovers and determins the candidate switches by collecting NDP (Neighbor DiscoveryProtocol) and NTDP (Neighbor Topology Discovery Protocol).Member Switch: Indicates the device that is managed in a cluster.Candidate Switch: Indicates the device that does not belong to any cluster though it can beadded to a cluster.Individual Switch: Indicates the device with cluster feature disabledThe roles can be changed from one to anther following the specified rules.• The current switch you create cluster is specified as the commander switch.182
• The commander switch discovers and determines candidate switches by collecting relatedinformation.• After being added to the cluster, the candidate switch becomes to be the member switch,• After being removed from the cluster, the member switch becomes to be the candidate switch.• The commander switch becomes to be the candidate switch only when the cluster is deleted.‣ Introduction to ClusterCluster functions to configure and manage the switches in the cluster based on three protocols,NDP, NTDP and CMP (Cluster Management Protocol).• NDP: All switches get neighbor information by collecting NDP.• NTDP: The commander switch collects the NDP information and neighboring connectioninformation of each device in a specific network range to determine the candidate switches inthe cluster.Cluster maintenance: The commander switch adds the candidate switch to the cluster andremoves the member switch from the cluster according to the collected NTDP information.The Cluster module, mainly used for cluster management configuration, including three submenus:NDP, NTDP and Cluster.13.1 NDPNDP (Neighbor Discovery Protocol) is used to get the information of the directly connected neighbordevices to support cluster establishing. An NDP-enabled device sends NDP packets regularly toneighbor devices as well as receives NDP packets from neighbor devices. An NDP packet carriesthe NDP information (including the device name, MAC address, firmware version and so on).A switch keeps and maintains a neighbor information table, which contains the NDP information ofeach neighbor switch. If a switch receives the NDP information of a new neighbor, it will add theinformation to the neighbor information table. If the received NDP information is different from theold information, the switch will update it in the neighbor information table; if the received NDPinformation is the same with the old information, the switch will just update the aging time; if theswitch does not receive NDP information within the aging time, the switch will remove thecorresponding information from the table automatically.The NDP function can be implemented on Neighbor Info, NDP Summary and NDP Configpages.13.1.1 Neighbor InfoOn this page you can view the NDP neighbor information of the switch.Choose the menu Cluster→NDP→Neighbor Info to load the following page.Figure 13-2 Neighbor Information183
The following entries are displayed on this screen:‣ NeighborSearch Option:Select the information the desired entry should contain and thenclick the Search button to display the desired entry in the followingNeighbor Information table.‣ Neighbor InfoNative Port:Remote Port:Device Name:Device MAC:Firmware Version:Aging Time:Displays the port number of the switch.Displays the port number of the neighbor switch which isconnected to the corresponding port.Displays the name of the neighbor switch.Displays MAC address of the neighbor switch.Displays the firmware version of the neighbor switch.Displays the period for the switch s to keep the NDP packets fromthe neighbor switch.13.1.2 NDP SummaryOn this page you can view the NDP configuration of the switch.Choose the menu Cluster→NDP→NDP Summary to load the following page.184
Figure 13-3 NDP SummaryThe following entries are displayed on this screen:‣ Global ConfigNDP:Aging Time:Hello Time:Displays the global NDP status (enabled or disabled) for theswitch.Displays the period for the neighbor switch to keep the NDPpackets from this switch.Displays the interval to send NDP packets.‣ Port StatusPort:Displays the port number of the switch.NDP: Displays the NDP status (enabled or disabled) for the current port.Send NDP Packets:Receive NDP Packets:Error NDP Packets:Neighbors:Displays the count of currently sent NDP packets.Displays the count of currently received NDP packets.Displays the count of currently received error NDP packets.Displays the count of the connected neighbors.185
Detail:Click the Detail button to view the complete information collectedfor the port.13.1.3 NDP ConfigOn this page you can configure the NDP function for the switch.Choose the menu Cluster→NDP→NDP Config to load the following page.Figure 13-4 NDP ConfigThe following entries are displayed on this screen:‣ Global ConfigNDP:Aging Time:Hello Time:Select Enable/Disable NDP function globally.Enter the period for the neighbor switch to keep the NDP packetsfrom this switch.Enter the interval to send NDP packets.‣ Port ConfigSelect:Select the desired port to configure its NDP status.186
Port:NDP:Enable:Disable:Displays the port number of the switch.Displays NDP status of the current port.Click the Enable button to enable NDP for the port you select.Click the Disable button to disable NDP for the port you select.Note:1. NDP function is effective only when NDP function is enabled globally and for the port.2. The aging time should be set over the hello time value, otherwise the neighbor informationtable of NDP ports will be unstable13.2 NTDPNTDP (Neighbor Topology Discovery Protocol)is used for the commander switch to collect NDPinformation. NTDP transmits and forwards NTDP topology collection request based on NDPneighbor information table, and collects the NDP information and neighboring connectioninformation of each device in a specific network range. The commander switch can collects thespecified topology in the network regularly and you can also enable topology collection manuallyon the commander switch.After the commander switch sends out NTDP request packets, lots of switches receive the requestpackets and send out response packets at the same time, which may result in network congestionand the commander switch overload. To avoid the above problem, two time parameters aredesigned to control the spread speed of NTDP request packets.• NTDP hop delay: Indicates the time between the switch receiving NTDP request packets andthe switch forwarding NTDP request packets for the first time.• NTDP port delay: Indicates the time between the port forwarding NTDP request packets and itsadjacent port forwarding NTDP request packets over.The NTDP function can be implemented on Device Table, NTDP Summary and NTDP Comfitpages.13.2.1 Device TableOn this page you can view the information of the devices collected by NTDP. Meanwhile, no matterwhether a cluster is established, on this page you can manually collect NTDP information at anytime to manage and control devices.Choose the menu Cluster→NTDP→Device Table to load the following page.Figure 13-5 Device TableThe following entries are displayed on this screen:187
‣ Device TableDevice Type:Device MAC:Cluster Name:Role:Hops:Neighbor Info:Collect Topology:Displays the device description collected through NTDP.Displays the MAC address of this device.Displays the cluster name of this device.Displays the role this device plays in the cluster.• Commander: Indicates the device that can configure andmanage all the devices in a cluster.• Member: Indicates the device that is managed in a cluster.• Candidate: Indicates the device that does not belong to anycluster though it can be added to a cluster.• Individual: Indicates the device with cluster feature disabled.Displays the hop count from this device to the switch.Click the Detail button to view the complete information of thisdevice and its neighbors.Click the Collect Topology button to collect NTDP information ofthe switch so as to collect the latest network topology.Click the Detail button to view the complete information of this device and its neighbors.1.0.1 Build 20100226 Rel.3828813.2.2 NTDP SummaryFigure 13-6 Information of the Current DeviceOn this page you can view the NTDP configuration.Choose the menu Cluster→NTDP→NTDP Summary to load the following page.188
Figure 13-7 NTDP SummaryThe following entries are displayed on this screen:‣ Global ConfigNTDP:NTDP Interval Time:NTDP Hops:NTDP Hop Delay:NTDP Port Delay:Displays the NTDP status (enabled or disabled) of the switchglobally.Displays the interval to collect topology information.Displays the hop count the switch topology collects.Displays the time between the switch receiving NTDP requestpackets and the switch forwarding NTDP request packets for thefirst time.Displays the time between the port forwarding NTDP requestpackets and its adjacent port forwarding NTDP request packetsover.‣ Port Status189
Port:NTDP:Displays the port number of the switch.Displays NTDP status (enabled or disabled) of the current port.13.2.3 NTDP ConfigOn this page you can configure NTDP globally.Choose the menu Cluster→NTDP→NTDP Config to load the following page.Figure 13-8 NTDP ConfigThe following entries are displayed on this screen:‣ Global ConfigNTDP:Select Enable/Disable NTDP for the switch globally.NTDP Interval Time: Enter the interval to collect topology information. The default is 1minute.NTDP Hops: Enter the hop count the switch topology collects. The default is 3hops.190
NTDP Hop Delay:NTDP Port Delay:Enter the time between the switch receiving NTDP requestpackets and the switch forwarding NTDP request packets for thefirst time. The default is 200 milliseconds.Enter the time between the port forwarding NTDP request packetsand its adjacent port forwarding NTDP request packets over. Thedefault is 20 milliseconds.‣ Port ConfigSelect:Port:NTDP:Enable:Disable:Select the desired port for NTDP status configuration.Displays the port number of the switch.Displays NTDP status (enabled or disabled) of the current port.Click the Enable button to enable NTDP feature for the port youselect.Click the Disable button to disable NTDP feature for the port youselect.Note:NTDP function is effective only when NTDP function is enabled globally and for the port.13.3 ClusterA commander switch can recognize and add the candidate switch to a cluster automatically basedon NDP and NTDP. You can manually add the candidate switch to a cluster. If the candidate switchis successfully added to the cluster, it will get a private IP address assigned by the commanderswitch. You can manage and configure the member switch via the commander switch.The Cluster function can be implemented on Cluster Summary and Cluster Config pages.13.3.1 Cluster SummaryOn this page you can view the status of the current cluster.Choose the menu Cluster→Cluster→Cluster Summary to load the following page.• For a candidate switch, the following page is displayed:Figure 13-9 Cluster Summary for Candidate SwitchThe following entries are displayed on this screen:‣ Global191
Cluster:Cluster Role:Displays the cluster status (enabled or disabled) of the switch.Displays the role the switch plays in the cluster.• For a member switch, the following page is displayed:Figure 13-10 Cluster Summary for Member SwitchThe following entries are displayed on this screen:‣ Global ConfigCluster:Cluster Role:Cluster Name:Commander MAC:Displays the cluster status (enabled or disabled) of the switch.Displays the role the switch plays in the cluster.Displays the name of the current cluster the switch belongs to.Displays the MAC address of the commander switch.• For an individual switch, the following page is displayed:Figure 13-11 Cluster Summary for Individual SwitchThe following entries are displayed on this screen:‣ Global ConfigCluster:Cluster Role:Displays the cluster status (enabled or disabled) of the switch.Displays the role the switch plays in the cluster.192
13.3.2 Cluster ConfigOn this page you can configure the status of the cluster the switch belongs to.Choose the menu Cluster→Cluster→Cluster Config to load the following page.• For a candidate switch, the following page is displayed.Figure 13-12 Cluster Configuration for Candidate SwitchThe following entries are displayed on this screen:‣ Current RoleRole:Displays the role the current switch plays in the cluster.‣ Role ChangeIndividual:Select this option to change the role of the switch to be individualswitch.• For a member switch, the following page is displayed.Figure 13-13 Cluster Configuration for Member SwitchThe following entries are displayed on this screen:‣ Current RoleRole:Displays the role the current switch plays in the cluster.‣ Role Change193
Individual:Select this option to change the role of the switch to be individualswitch.• For an individual switch, the following page is displayed.Figure 13-14 Cluster Configuration for Individual SwitchThe following entries are displayed on this screen:‣ Current RoleRole:Displays the role the current switch plays in the cluster.‣ Role ChangeCandidate:Select this option to change the role of the switch to be candidateswitch.13.4 Application Example for Cluster Function‣ Network RequirementsThree switches form cluster, one commander switch(Here take <strong>TP</strong>-LINK <strong>TL</strong>-SL5428E as anexample) and two member switches(Here take <strong>TP</strong>-LINK <strong>TL</strong>-<strong>SL3428</strong> as an example). Theadministrator manages all the switches in the cluster via the commander switch.• Port 1 of the commander switch is connecting to the external network, port 2 is connecting tomember switch 1 and port 3 is connecting to member switch 2.• IP pool: 175.128.0.1, Mask: 255.255.255.0.‣ Network Diagram194
Figure 13-15 Network diagram‣ Configuration Procedure• Configure the member switchStep Operation Description1 Enable NDP function on theswitch and for port 12 Enable NTDP function on theswitch and for port 1On Cluster→NDP→NDP Config page, enable NDPfunction.On Cluster→NTDP→NTDP Config page, enableNTDP function.• Configure the commander switchStep Operation Description1 Enable NDP function on theswitch and for port 1, port 2 andport 32 Enable NTDP function on theswitch and for port 1, port 2 andport 33 Create a cluster and configurethe related parametersOn Cluster→NDP→NDP Config page, enable NDPfunction.On Cluster→NTDP→NTDP Config page, enableNTDP function.On Cluster→Cluster→Cluster Config page, configurethe role as Commander and enter the relatedinformation.IP pool: 175.128.0.1Mask: 255.255.255.0195
4 Configure the member switch On Cluster→Cluster→Member Config page, selectthe member switch and click the Manage button to logon to its Web management page.OrOn Cluster→Cluster→Cluster Topology page,double-click the switch icon to view its detailedinformation; click the switch icon and click the Managebutton to log on to the Web management page.Return to CONTENTS196
Chapter 14 MaintenanceMaintenance module, assembling the commonly used system tools to manage the switch,provides the convenient method to locate and solve the network problem.(1) System Monitor: Monitor the utilization status of the memory and the CPU of switch.(2) Log: View the configuration parameters of the switch and find out the errors via the Logs.(3) Cable Test: Test the connection status of the cable to locate and diagnose the trouble spotof the network.(4) Loopback: Test whether the ports of the switch and its peer device are available.(5) Network Diagnose: Test whether the destination device is reachable and detect the routehops from the switch to the destination device.14.1 System MonitorSystem Monitor functions to display the utilization status of the memory and the CPU of switch viathe data graph. The CPU utilization rate and the memory utilization rate should fluctuate stablyaround a specific value. If the CPU utilization rate or the memory utilization rate increasesmarkedly, please detect whether the network is being attacked.The System Monitor function is implemented on the CPU Monitor and Memory Monitor pages.14.1.1 CPU MonitorChoose the menu Maintenance→System Monitor→CPU Monitor to load the following page.197
Figure 14-1 CPU MonitorClick the Monitor button to enable the switch to monitor and display its CPU utilization rate everyfour seconds.14.1.2 Memory MonitorChoose the menu Maintenance→System Monitor→Memory Monitor to load the following page.198
Figure 14-2 Memory MonitorClick the Monitor button to enable the switch to monitor and display its Memory utilization rateevery four seconds.14.2 LogThe Log system of switch can record, classify and manage the system information effectively,providing powerful support for network administrator to monitor network operation and diagnosemalfunction.The Logs of switch are classified into the following eight levels.Severity Level Descriptionemergencies 0 The system is unusable.alerts 1 Action must be taken immediately.critical 2 Critical conditionserrors 3 Error conditionswarnings 4 Warnings conditionsnotifications 5 Normal but significant conditionsinformational 6 Informational messagesdebugging 7 Debug-level messagesTable 14-1 Log Level199
The Log function is implemented on the Log Table, Local Log, Remote Log and Backup Logpages.14.2.1 Log TableThe switch supports logs output to two directions, namely, log buffer and log file. The informationin log buffer will be lost after the switch is rebooted or powered off whereas the information in logfile will be kept effective even the switch is rebooted or powered off. Log Table displays the systemlog information in log buffer.Choose the menu Maintenance→Log→Log Table to load the following page.Figure 14-3 Log TableThe following entries are displayed on this screen:‣ Log InfoIndex:Time:Module:Severity:Content:Displays the index of the log information.Displays the time when the log event occurs. The log can get thecorrect time after you configure on the System ->SystemInfo->System Time Web management page.Displays the module which the log information belongs to. You canselect a module from the drop-down list to display the correspondinglog information.Displays the severity level of the log information. You can select aseverity level to display the log information whose severity level valueis the same or smaller.Displays the content of the log information.Note:1. The logs are classified into eight levels based on severity. The higher the information severityis, the lower the corresponding level is.2. This page displays logs in the log buffer, and at most 512 logs are displayed.200
14.2.2 Local LogLocal Log is the log information saved in switch. By default, all system logs are saved in log bufferand the logs with severities from level_0 to level_4 are saved in log file meanwhile. On this page,you can set the output channel for logs.Choose the menu Maintenance→Log→Local Log to load the following page.Figure 14-4 Local LogThe following entries are displayed on this screen:‣ Local Log ConfigSelect:Log Buffer:Log File:Severity:Status:Select the desired entry to configure the corresponding local log.Indicates the RAM for saving system log. The inforamtion in thelog buffer is displayed on the Log Table page. It will be lost whenthe switch is restarted.Indicates the flash sector for saving system log. The inforamtionin the log file will not be lost after the switch is restarted and canbe exported on the Backup Log page.Specify the severity level of the log information output to eachchannel. Only the log with the same or smaller severity levelvalue will be output.Enable/Disable the channel.14.2.3 Remote LogRemote log feature enables the switch to send system logs to the Log Server. Log Server is tocentralize the system logs from various devices for the administrator to monitor and manage thewhole network.Choose the menu Maintenance→Log→Remote Log to load the following page.201
Figure 14-5 Log HostThe following entries are displayed on this screen:‣ Log HostIndex:Host IP:UDP Port:Severity:Status:Displays the index of the log host. The switch supports 4 loghosts.Configure the IP for the log host.Displays the UDP port used for receiving/sending loginformation. Here we use the standard port 514.Specify the severity level of the log information sent to each loghost. Only the log with the same or smaller severity level valuewill be sent to the corresponding log host.Enable/Disable the log host.Note:The Log Server software is not provided. If necessary, please download it on the Internet.14.2.4 Backup LogBackup Log feature enables the system logs saved in the switch to be output as a file for devicediagnosis and statistics analysis. When a critical error results in the breakdown of the system, youcan export the logs to get some related important information about the error for device diagnosisafter the switch is restarted.Choose the menu Maintenance→Log→Backup Log to load the following page.202
The following entry is displayed on this screen:‣ Backup LogFigure 14-6 Backup LogBackup Log:Click the Backup Log button to save the log as a file to your computer.Note:It will take a few minutes to backup the log file. Please wait without any operation.14.3 Device DiagnoseThis switch provides Cable Test and Loopback functions for device diagnose.14.3.1 Cable TestCable Test functions to test the connection status of the cable connected to the switch, whichfacilitates you to locate and diagnose the trouble spot of the network.Choose the menu Maintenance→Device Diagnose→Cable Test to load the following page.Figure 14-7 Cable TestThe following entries are displayed on this screen:‣ Cable TestPort:Select the port for cable testing.203
Pair:Status:Length:Error:Displays the Pair number.Displays the connection status of the cable connected to the port. Thetest results of the cable include normal, close, open, short, impedanceor unknown.If the connection status is normal, here displays the length range ofthe cable.If the connection status is close, open or impedance, here displays theerror length of the cable.Note:1. The Length displayed here is the length of pair cable not that of the physical cable.2. The test result is just for your reference.14.3.2 LoopbackLoopback test function, looping the sender and the receiver of the signal, is used to test whetherthe port of the switch is available as well as to check and analyze the physical connection status ofthe port to help you locate and solve network malfunctions.Choose the menu Maintenance→Device Diagnose→Loopback to load the following page.Figure 14-8 LoopbackThe following entries are displayed on this screen:‣ Loopback TypeInternal:External:Select Internal to test whether the port is available.Select External to test whether the device connected to the portof the switch is available‣ Loopback Port204
Loopback Port:Test:Select the desired port for loopback test.Click the Test button to start the loopback test for the port.14.4 Network DiagnoseThis switch provides Ping test and Tracert test functions for network diagnose.14.4.1 PingPing test function, testing the connectivity between the switch and one node of the network,facilitates you to test the network connectivity and reachability of the host so as to locate thenetwork malfunctions.Choose the menu Maintenance→Network Diagnose→Ping to load the following page.Figure 14-9 PingThe following entries are displayed on this screen:‣ Ping ConfigDestination IP:Ping Times:Data Size:Interval:Enter the IP address of the destination node for Ping test.Enter the amount of times to send test data during Ping testing. Thedefault value is recommended.Enter the size of the sending data during Ping testing. The defaultvalue is recommended.Specify the interval to send ICMP request packets. The default valueis recommended.205
14.4.2 TracertTracert test function is used to test the connectivity of the gateways during its journey from thesource to destination of the test data. When malfunctions occur to the network, you can locatetrouble spot of the network with this tracert test.Choose the menu Maintenance→Network Diagnose→Tracert to load the following page.Figure 14-10TracertThe following entries are displayed on this screen:‣ Tracert ConfigDestination IP:Max Hop:Enter the IP address of the destination device.Specify the maximum number of the route hops the test data can passthrough.Return to CONTENTS206
Chapter 15 System Maintenance via F<strong>TP</strong>The firmware can be downloaded to the switch via F<strong>TP</strong> function. F<strong>TP</strong> (File Transfer Protocol), aprotocol in the application layer, is mainly used to transfer files between the remote server and thelocal PCs. It is a common protocol used in the IP network for files transfer. If there is somethingwrong with the firmware of the switch and the switch can not be launched, the firmware can bedownloaded to the switch again via F<strong>TP</strong> function.1. Hardware InstallationFigure 15-11) Connect F<strong>TP</strong> server to port 1 of the switch.2) Connect the Console port of the PC to the switch.3) Save the firmware of the switch in the shared file of F<strong>TP</strong> server. Please write down theuser name, password and the firmware name.2. Configure the Hyper TerminalAfter the hardware installation, please take the following steps to configure the hyper terminal ofthe management PC to manage the switch.1) Select Start→All Programs→Accessories→Communications→Hyper Terminal toopen hyper terminal.207
Figure 15-2 Open Hyper Terminal2) The Connection Description Window will prompt shown as Figure 15-3. Enter a name intothe Name field and click OK.Figure 15-3 Connection Description3) Select the port to connect in Figure 15-4 and click OK.208
Figure 15-4 Select the port to connect4) Configure the port selected in the step above shown as the following Figure 15-5.Configure Bits per second as 38400, Data bits as 8, Parity as None, Stop bits as 1,Flow control as None, and then click OK.Figure 15-5 Port Settings3. Download Firmware via booUtil menuTo download firmware to the switch via F<strong>TP</strong> function, you need to enter into the bootUtil menu ofthe switch and take the following steps.1) Connect the console port of the PC to the console port of the switch and open hyperterminal. Connect F<strong>TP</strong> server to port 1 of the switch.2) Power off and restart the switch. When you are prompted that “Press CTRL-B to enter thebootUtil” in the hyper terminal, please press CTRL-B key to enter into bootUtil menushown as Figure 15-6.209
Figure 15-6 bootUtil MenuAs the prompt is displayed for a short time, you are suggested not to release the CTRL-B keyuntil you enter into bootUtil menu after powering on the switch.3) After entering into bootUtil menu, please firstly configure the IP parameters of the switch.The format is:ifconfig ip xxx.xxx.xxx.xxx mask 255.255.255.0 gateway xxx.xxx.xxx.xxx.For example: Configure the IP address as 172.31.70.22, mask as 255.255.255.0 andgateway as172.31.70.1. The detailed command is shown as below. Enter the commandand press Enter.[<strong>TP</strong>-LINK]: ifconfig ip 172.31.70.22 mask 255.255.255.0 gateway 172.31.70.14) Configure the parameters of the F<strong>TP</strong> server which keeps the upgrade firmware. Later youcan download the firmware to the switch from the F<strong>TP</strong> server. The format of the commandis: ftp host xxx.xxx.xxx.xxx user xxxxx pwd xxxxx file xxxxxx.bin.Here take the following parameters of the F<strong>TP</strong> server as an example. IP address is172.31.70.146; the user name and password for login to the F<strong>TP</strong> server are both 123; thename of the upgrade firmware is tl_sl3428_up.bin. The detailed command is shown asbelow. Enter the command and press Enter.[<strong>TP</strong>-LINK]: ftp host 172.31.70.146 user 123 pwd 123 file tl_sl3428_up.bin5) Enter the upgrade command and press Enter to upgrade the firmware. After a while, theprompt “You can only use the port 1 to upgrade” will display in the hyper terminal shownas the following figure.6) When the prompt “Are you want to upgrade the firmware[Y/N]:” displays, please enter Y tostart upgrade or enter N to quit upgrade shown as the following figure. The # iconindicates it is upgrading. After upgrading, the [<strong>TP</strong>-LINK] command will display.7) Please enter start command to start the switch shown as the following figure. Enter theuser name and password (the default user name and password are both admin) to login tothe CLI command window and you can manage the switch via CLI command.210
When you forget the login user name and password, you can enter reset command after enteringinto bootUtil menu to reset the system. The system will be restored to the factory default settings,and the default login user name and password are both admin.Return to CONTENTS211
Appendix A: SpecificationsIEEE802.3 10Base-T EthernetIEEE802.3u 100Base-TX/100Base-FX Fast EthernetIEEE802.3ab 1000Base-T Gigabit EthernetStandardsIEEE802.3z 1000Base-X Gigabit EthernetIEEE802.3x Flow ControlIEEE802.1p PriorityIEEE802.1q VLAN BridgeIEEE802.1X Port-based Access AuthenticationEthernet: 10Mbps HD,20Mbps FDTransmission RateFast Ethernet: 100Mbps HD,200Mbps FDGigabit Ethernet: 2000Mbps FD10Base-T: U<strong>TP</strong>/S<strong>TP</strong> of Cat. 3 or above100Base-TX: U<strong>TP</strong>/S<strong>TP</strong> of Cat. 5 or aboveTransmission Medium100Base-FX: MMF or SMF SFP Module (Optional)1000Base-T: 4-pair U<strong>TP</strong> (≤100m) of Cat. 5, Cat. 5e, Cat. 61000Base-X: MMF or SMF SFP Module (Optional)LEDPWR、SYS、10/100Mbps LEDs、1000Mbps LEDsTransmission MethodStore and ForwardPackets Forwarding Rate10BASE-T:14881pps/port100BASE-TX:148810pps/port1000Base-T:1488095pps/portOperating Temperature: 0 ℃ ~ 40℃OperatingEnvironmentStorage Temperature: -40 ℃ ~ 70℃Operating Humidity: 10% ~ 90% RH Non-condensingStorage Humidity: 5% ~ 90% RH Non-condensingReturn to CONTENTS212
Appendix B: Configuring the PCsIn this section, we’ll introduce how to install and configure the TCP/IP correctly in Windows 2000.First make sure your Ethernet Adapter is working, refer to the adapter’s manual if necessary.1. Configure TCP/IP component1) On the Windows taskbar, click the Start button, and then click Control Panel.2) Click the Network and Internet Connections icon, and then click on the NetworkConnections tab in the appearing window.3) Right click the icon that showed below, select Properties on the prompt page.Figure B-14) In the prompt page that showed below, double click on the Internet Protocol (TCP/IP).213
Figure B-25) The following TCP/IP Properties window will display and the IP Address tab is open onthis window by default.214
6) Select Use the following IP address. And the following items will be available. If the switch'sIP address is 192.168.0.1, specify IP address as 192.168.0.x (x is from 2 to 254), and theSubnet mask as 255.255.255.0.Now:Click OK to save your settings.Return to CONTENTS215
Appendix C: 802.1X Client SoftwareIn 802.1X mechanism, the supplicant Client should be equipped with the corresponding clientsoftware complied with 802.1X protocol standard for 802.1X authentication. When the switch<strong>TL</strong>-<strong>SL3428</strong> works as the authenticator system, please take the following instructions to install theTpSupplicant provided on the attached CD for the supplicant Client.1.1 Installation <strong>Guide</strong>1. Insert the provided CD into your CD-ROM drive. Open the file folder and double click the iconcontinue.to load the following figure. Choose the proper language and click Next toFigure C-1 Choose Setup Language2. Please wait for the InstallShield Wizard preparing the setup shown as the following screen.Figure C-2 Preparing Setup3. Then the following screen will appear. Click Next to continue. If you want to stop theinstallation, click Cancel.216
Figure C-3 Welcome to the InstallShield Wizard4. To continue, choose the destination location for the installation files and click Next on thefollowing screen.Figure C-4 Choose Destination LocationBy default, the installation files are saved on the Program Files folder of system disk. Click theChange button to modify the destination location proper to your need.5. Till now, The Wizard is ready to begin the installation. Click Install to start the installation onthe following screen.217
Figure C-5 Install the Program6. The InstallShield Wizard is installing TpSupplicant-V2.0 shown as the following screen.Please wait.Figure C-6 Setup Status7. On the following screen, click Finish to complete the installation.218
Figure C-7 InstallShield Wizard CompleteNote: Please pay attention to the tips on the above screen. If you have not installed WinPcap 4.0.2or the higher version on your computer, the 802.1X Client Software TpSupplicant can not work. It’srecommended to go to http://www.winpcap.org to download the latest version of WinPcap forinstallation.1.2 Uninstall SoftwareIf you want to remove the TpSupplicant, please take the following steps:1. On the Windows taskbar, click the Start button, point to All Programs<strong>TP</strong>-LINKTpSupplicant-V2.0, and then click Uninstall <strong>TP</strong>-LINK 802.1X, shown as the followingfigure.2. Then the following screen will appear. If you want to stop the remove process, click Cancel.219
Figure C-8 Preparing Setup3. On the continued screen, click Yes to remove the application from your PC.4. Click Finish to complete.Figure C-9 Uninstall the Application1.3 ConfigurationFigure C-10 Uninstall Complete1. After completing installation, double click the icon to run the <strong>TP</strong>-LINK 802.1X ClientSoftware. The following screen will appear.220
Figure C-11 <strong>TP</strong>-LINK 802.1X ClientEnter the Name and the Password specified in the Authentication Server. The length of Nameand Password should be less than 15 characters.2. Click the Properties button on Figure C-11 to load the following screen for configuring theconnection properties.Figure C-12 Connection PropertiesSend 802.1X protocol packets by Unicast: When this option is selected, the Client will send theEAPOL Start packets to the switch via multicast and send the 802.1X authentication packets viaunicast.Obtain an IP address automatically: Select this option if the Client automatically obtains the IPaddress from DHCP server. After passing the authentication, the Client can be assigned the IPaddress by DHCP server. The Client can access the network after getting the new IP address.221
Auto reconnect after timeout: Select this option to allow the Client to automatically start theconnection again when it does not receive the handshake reply packets from the switch within aperiod.3. To continue, click Connect button after entering the Name and Password on Figure C-11.Then the following screen will appear to prompt that the Radius server is being searched.Figure C-13 Authentication Dialog4. When passing the authentication, the following screen will appear.Figure C-14 Successfully Authenticated5. Double click the icon on the right corner of desktop, and then the following connectionstatus screen will pop up.Figure C-15 Connection Status222
FAQQ1: Why does this error dialog box pop up when starting up the <strong>TP</strong>-LINK 802.1X Client Software?A1: It’s because the supported DLL file is missing. You are suggested to go tohttp://www.winpcap.org to download WinPcap 4.0.2 or the higher version for installation, andrun the client software again.Q2: Is this <strong>TP</strong>-LINK 802.1X Client Software compliable with the switches of the othermanufacturers?A2: No. This <strong>TP</strong>-LINK 802.1X Client Software is customized for <strong>TP</strong>-LINK switches.Q3: Is it safe to set the password being automatically saved?A3: Yes. The password saved in the configuration files is encrypted.Return to CONTENTS223
Appendix D: GlossaryAccess Control List (ACL)ACLs can limit network traffic and restrict access to certain users or devices by checking eachpacket for certain IP or MAC (i.e., Layer 2) information.Boot Protocol (BOO<strong>TP</strong>)BOO<strong>TP</strong> is used to provide bootup information for network devices, including IP addressinformation, the address of the TF<strong>TP</strong> server that contains the devices system files, and the nameof the boot file.Class of Service (CoS)CoS is supported by prioritizing packets based on the required level of service, and then placingthem in the appropriate output queue. Data is transmitted from the queues using weightedround-robin service to enforce priority service and prevent blockage of lower-level queues. Prioritymay be set according to the port default, the packet’s priority bit (in the VLAN tag), TCP/UDP portnumber, or DSCP priority bit.Differentiated Services Code Point (DSCP)DSCP uses a six-bit tag to provide for up to 64 different forwarding behaviors. Based on networkpolicies, different kinds of traffic can be marked for different kinds of forwarding. The DSCP bitsare mapped to the Class of Service categories, and then into the output queues.Domain Name Service (DNS)A system used for translating host names for network nodes into IP addresses.Dynamic Host Control Protocol (DHCP)Provides a framework for passing configuration information to hosts on a TCP/IP network. DHCPis based on the Bootstrap Protocol (BOO<strong>TP</strong>), adding the capability of automatic allocation ofreusable network addresses and additional configuration options.Extensible Authentication Protocol over LAN (EAPOL)EAPOL is a client authentication protocol used by this switch to verify the network access rights forany device that is plugged into the switch. A user name and password is requested by the switch,and then passed to an authentication server (e.g., RADIUS) for verification. EAPOL isimplemented as part of the IEEE 802.1X Port Authentication standard.GARP VLAN Registration Protocol (GVRP)Defines a way for switches to exchange VLAN information in order to register necessary VLANmembers on ports along the Spanning Tree so that VLANs defined in each switch can workautomatically over a Spanning Tree network.Generic Attribute Registration Protocol (GARP)The GARP provides a generic attribute dissemination capability that is used by participants inGARP Applications (GARP Participants) to register and de-register attribute values with otherGARP Participants within a Bridged LAN. The definition of the attribute types, the values that theycan carry, and the semantics that are associated with those values when registered, are specific tothe operation of the GARP Application concerned.224
Generic Multicast Registration Protocol (GMRP)GMRP allows network devices to register end stations with multicast groups. GMRP requires thatany participating network devices or end stations comply with the IEEE 802.1p standard.Group Attribute Registration Protocol (GARP)See Generic Attribute Registration Protocol.IEEE 802.1DSpecifies a general method for the operation of MAC bridges, including the Spanning TreeProtocol.IEEE 802.1QVLAN Tagging—Defines Ethernet frame tags which carry VLAN information. It allows switches toassign endstations to different virtual LANs, and defines a standard way for VLANs tocommunicate across switched networks.IEEE 802.1pAn IEEE standard for providing quality of service (QoS) in Ethernet networks. The standard usespacket tags that define up to eight traffic classes and allows switches to transmit packets based onthe tagged priority value.IEEE 802.1XPort Authentication controls access to the switch ports by requiring users to first enter a user IDand password for authentication.IEEE 802.3acDefines frame extensions for VLAN tagging.IEEE 802.3xDefines Ethernet frame start/stop requests and timers used for flow control on full-duplex links.(Now incorporated in IEEE 802.3-2002)Internet Group Management Protocol (IGMP)A protocol through which hosts can register with their local router for multicast services. If there ismore than one multicast switch/router on a given subnetwork, one of the devices is made the“querier” and assumes responsibility for keeping track of group membership.IGMP SnoopingListening to IGMP Query and IGMP Report packets transferred between IP Multicast Routers andIP Multicast host groups to identify IP Multicast group members.IGMP QueryOn each subnetwork, one IGMP-capable device will act as the querier — that is, the device thatasks all hosts to report on the IP multicast groups they wish to join or to which they already belong.The elected querier will be the device with the lowest IP address in the subnetwork.IP Multicast FilteringIt is a feature to allow or deny the Client to add the specified multicast group.Multicast SwitchingA process whereby the switch filters incoming multicast frames for services for which no attachedhost has registered, or forwards them to all ports contained within the designated multicast group.225
Layer 2Data <strong>Link</strong> layer in the ISO 7-Layer Data Communications Protocol. This is related directly to thehardware interface for network devices and passes on traffic based on MAC addresses.<strong>Link</strong> AggregationSee Port Trunk.<strong>Link</strong> Aggregation Control Protocol (LACP)Allows ports to automatically negotiate a trunked link with LACP-configured ports on anotherdevice.Management Information Base (MIB)An acronym for Management Information Base. It is a set of database objects that containsinformation about a specific device.MD5 Message-Digest AlgorithmAn algorithm that is used to create digital signatures. It is intended for use with 32 bit machinesand is safer than the MD4 algorithm, which has been broken. MD5 is a one-way hash function,meaning that it takes a message and converts it into a fixed string of digits, also called a messagedigest.Network Time Protocol (N<strong>TP</strong>)N<strong>TP</strong> provides the mechanisms to synchronize time across the network. The time servers operatein a hierarchical-master-slave configuration in order to synchronize local clocks within the subnetand to national time standards via wire or radio.Port AuthenticationSee IEEE 802.1X.Port MirroringA method whereby data on a target port is mirrored to a monitor port for troubleshooting with alogic analyzer or RMON probe. This allows data on the target port to be studied unobstructively.Port TrunkDefines a network link aggregation and trunking method which specifies how to create a singlehigh-speed logical link that combines several lower-speed physical links.Remote Authentication Dial-in <strong>User</strong> Service (RADIUS)RADIUS is a logon authentication protocol that uses software running on a central server tocontrol access to RADIUS-compliant devices on the network.Remote Monitoring (RMON)RMON provides comprehensive network monitoring capabilities. It eliminates the polling requiredin standard SNMP, and can set alarms on a variety of traffic conditions, including specific errortypes.Rapid Spanning Tree Protocol (RS<strong>TP</strong>)RS<strong>TP</strong> reduces the convergence time for network topology changes to about 10% of that requiredby the older IEEE 802.1D S<strong>TP</strong> standard.226
Secure Shell (SSH)A secure replacement for remote access functions, including Telnet. SSH can authenticate userswith a cryptographic key, and encrypt data connections between management clients and theswitch.Simple Network Management Protocol (SNMP)The application protocol in the Internet suite of protocols which offers network managementservices.Simple Network Time Protocol (SN<strong>TP</strong>)SN<strong>TP</strong> allows a device to set its internal clock based on periodic updates from a Network TimeProtocol (N<strong>TP</strong>) server. Updates can be requested from a specific N<strong>TP</strong> server, or can be receivedvia broadcasts sent by N<strong>TP</strong> servers.Spanning Tree Algorithm (STA)A technology that checks your network for any loops. A loop can often occur in complicated orbackup linked network systems. Spanning Tree detects and directs data along the shortestavailable path, maximizing the performance and efficiency of the network.TelnetDefines a remote communication facility for interfacing to a terminal device over TCP/IP.Transmission Control Protocol/Internet Protocol (TCP/IP)Protocol suite that includes TCP as the primary transport protocol, and IP as the network layerprotocol.Trivial File Transfer Protocol (TF<strong>TP</strong>)A TCP/IP protocol commonly used for software downloads.<strong>User</strong> Datagram Protocol (UDP)UDP provides a datagram mode for packet-switched communications. It uses IP as the underlyingtransport mechanism to provide access to IP-like services. UDP packets are delivered just like IPpackets – connection-less datagrams that may be discarded before reaching their targets. UDP isuseful when TCP would be too complex, too slow, or just unnecessary.Virtual LAN (VLAN)A Virtual LAN is a collection of network nodes that share the same collision domain regardless oftheir physical location or connection point in the network. A VLAN serves as a logical workgroupwith no physical barriers, and allows users to share information and resources as though locatedon the same LAN.Return to CONTENTS227