TL-SC3000 3GPP Surveillance Camera - Mondo Plast
TL-SC3000 3GPP Surveillance Camera - Mondo Plast
TL-SC3000 3GPP Surveillance Camera - Mondo Plast

You also want an ePaper? Increase the reach of your titles
YUMPU automatically turns print PDFs into web optimized ePapers that Google loves.
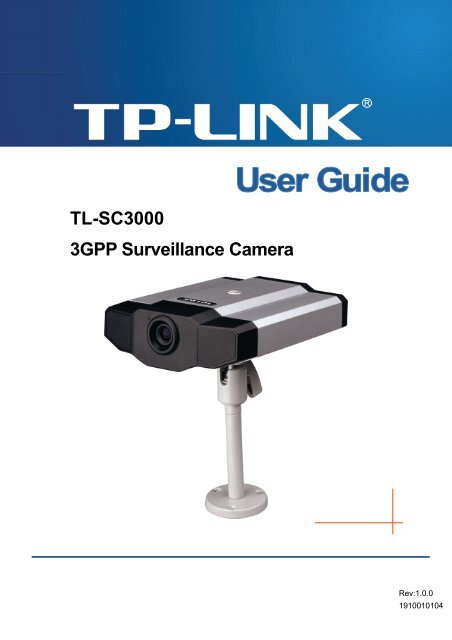
<strong>TL</strong>-<strong>SC3000</strong><strong>3GPP</strong> <strong>Surveillance</strong> <strong>Camera</strong>Rev:1.0.01910010104
COPYRIGHT & TRADEMARKSSpecifications are subject to change without notice.is a registered trademark of TP-LINKTECHNOLOGIES CO., LTD. Other brands and product names are trademarks or registered trademarksof their respective holders.No part of the specifications may be reproduced in any form or by any means or used to make anyderivative such as translation, transformation, or adaptation without permission from TP-LINKTECHNOLOGIES CO., LTD. Copyright © 2008 TP-LINK TECHNOLOGIES CO., LTD. All rightsreserved.http://www.tp-link.com
FCC STATEMENTThis equipment has been tested and found to comply with the limits for a Class B digital device, pursuantto part 15 of the FCC Rules. These limits are designed to pro-vide reasonable protection against harmfulinterference in a residential installation. This equipment generates, uses and can radiate radio frequencyenergy and, if not in-stalled and used in accordance with the instructions, may cause harmfulinterference to radio communications. However, there is no guarantee that interference will not occur in aparticular installation. If this equipment does cause harmful interference to radio or television reception,which can be determined by turning the equipment off and on, the user is encouraged to try to correctthe interference by one or more of the following measures:‣ Reorient or relocate the receiving antenna.‣ Increase the separation between the equipment and receiver.‣ Connect the equipment into an outlet on a circuit different from that to which the receiver isconnected.‣ Consult the dealer or an experienced radio/ TV technician for help.This device complies with part 15 of the FCC Rules. Operation is subject to the following two conditions:1) This device may not cause harmful interference.2) This device must accept any interference received, including interference that may causeundesired operation.Any changes or modifications not expressly approved by the party responsible for compliance could voidthe user’s authority to operate the equipment.CE Mark WarningThis is a class B product. In a domestic environment, this product may cause radio interference, in whichcase the user may be required to take adequate measures.
CONTENTSPackage Contents ..................................................................................................................................1Chapter 1. Product Overview ..........................................................................................................21.1 Description.......................................................................................................................21.2 Features...........................................................................................................................21.3 Specifications .................................................................................................................3Chapter 2. Hardware Overview........................................................................................................42.1 Rear Panel.......................................................................................................................42.2 Upper Side & Underside ..................................................................................................5Chapter 3. Installation ......................................................................................................................53.1 Install the Hardware .........................................................................................................53.2 Assign an IP address and Access the <strong>Camera</strong> ................................................................9Chapter 4. Video Viewer Basic Operation ....................................................................................114.1 The Live View Page .......................................................................................................114.2 Address Book.................................................................................................................124.3 Manual Record...............................................................................................................134.4 Playback ........................................................................................................................154.5 Snapshot........................................................................................................................164.6 Information.....................................................................................................................17Chapter 5. Video Viewer Miscellaneous Control Panel ...............................................................185.1 Color Setting ..................................................................................................................195.2 Backup (For DVR only) ..................................................................................................205.3 Record Setting ...............................................................................................................215.4 Server Setting ................................................................................................................245.4.1 General..................................................................................................................245.4.2 Network .................................................................................................................295.4.3 Video......................................................................................................................355.5 Tools ..............................................................................................................................365.5.1 Firmware Upgrade .................................................................................................365.5.2 Language Selection ...............................................................................................375.6 Status List ......................................................................................................................385.6.1 Record ...................................................................................................................385.6.2 Event .....................................................................................................................405.6.3 Backup (For DVR only)..........................................................................................405.6.4 Playback Screen....................................................................................................41Chapter 6. IE Web Browser............................................................................................................426.1 Access the <strong>Camera</strong> from an IE Web Browser................................................................426.2 Toolbar Display on the IE Web Browser.........................................................................43Chapter 7.Chapter 8.QuickTime Player.........................................................................................................45Monitoring via Mobile Device......................................................................................47
8.1 Checklist before using....................................................................................................478.2 Installation and Setup ....................................................................................................478.2.1 Software download ................................................................................................478.2.2 GPRS / 3G Mobile Phone......................................................................................488.2.3 PDA .......................................................................................................................498.3 Available Functions........................................................................................................518.3.1 GPRS / 3G Mobile Phone......................................................................................518.3.2 PDA .......................................................................................................................51Appendix 1Recording Time Table..................................................................................................53Appendix 2 User Level For Remote Operation ..............................................................................55Appendix 3 Default Value ................................................................................................................55
<strong>TL</strong>-<strong>SC3000</strong><strong>3GPP</strong> <strong>Surveillance</strong> <strong>Camera</strong>Package ContentsThe following items should be found in your package:‣ One <strong>TL</strong>-<strong>SC3000</strong> <strong>3GPP</strong> <strong>Surveillance</strong> <strong>Camera</strong>‣ One Adapter and power cord‣ One Bracket‣ One RJ45 network cable‣ Quick Installation Guide‣ One Resource CD , including:• This User Guide• Video Viewer AP Software Note:Make sure that the package contains the above items. If any of the listed items are damaged or missing,please contact with your distributor.1
<strong>TL</strong>-<strong>SC3000</strong><strong>3GPP</strong> <strong>Surveillance</strong> <strong>Camera</strong>Chapter 1.Product Overview1.1 DescriptionThis camera series is a network-based digital surveillance device with a built-in web server for thepurpose of remote monitoring and recording. It supports TCP/IP networking for live video transmission inthe format of H.264, MPEG4 or MJPEG, and you can easily operate the camera via the web browser orthe supplied video viewer AP software. Video surveillance over IP network infrastructure is available andeasy from anywhere, at anytime.1.2 Features‣ Low-latency video streaming for sharp and clear images‣ Hybrid digital / analog video output‣ Multi-area, multi-level sensitivity motion detection‣ <strong>3GPP</strong> Support‣ High quality 1/3.6’’ Panasonic MOS Sensor2
<strong>TL</strong>-<strong>SC3000</strong><strong>3GPP</strong> <strong>Surveillance</strong> <strong>Camera</strong>1.3 Specifications*SPECIFICATIONSNetworkLAN PortLAN SpeedSupported ProtocolsFrame Rate<strong>TL</strong>-<strong>SC3000</strong>YES10/100 Based-T EthernetDDNS, PPPoE, DHCP, NTP, SNTP, TCP/IP,ICMP, SMTP, FTP, HTTP, RTP, RTSPNTSC:30fps, PAL:25fpsNumber of Online Users 10SecurityWeb management softwareVideo / AudioVideo CompressionVideo Remote ControlVideo Adjustment<strong>Camera</strong>Image SensorPixelsLensMultiple user access levels with passwordYES (Control up to 16 network cameras simultaneously)MPEG4 / MJPEGYESBrightness, Contrast, Saturation and Hue1/3.6" image sensor640(H) x 480(V)f3.6mmF-number F2.0Viewing Angle 80° 55.6°Shutter Speed1 / 60 (1/50) to 1 / 100,000 sec.Min Illumination 1 Lux / F2.0Video OutputBLCWhite BalanceOthersRemote ControlMotion DetectionPower1.0 Vp-p. 75ΩAUTOATWYESYESDC12V, 1AOperating Temperature 0~40℃Humidity 85%Minimum WebBrowsing Requirements·Pentium 4 CPU 1.3 GHz or higher, or equivalent AMD·256 MB RAM·AGP graphics card, Direct Draw, 32MB RAM·Windows XP, Windows 2000 Server, ME, 98, DirectX 9.0 or later·Internet Explorer 6.x or laterDimensions (L x W x H)** 152.5 x 115.2 x 40.2 mm (6.00” x 4.54” x 1.58”)Shipping Weight812g (1.79 lbs) including mounting bracket and power supplyIndoor / Outdoor ApplicationIndoor* The specifications are subject to change without notice.** Dimensional tolerance: ± 5mm3
<strong>TL</strong>-<strong>SC3000</strong><strong>3GPP</strong> <strong>Surveillance</strong> <strong>Camera</strong>Dimensions: 152.5 (L) x 115.2 (W) x 40.2 (H) mmChapter 2.Hardware Overview2.1 Rear PanelCONNECTOR / BUTTONReset DefaultPower IndicatorVideo OutputLANPower ConnectorDESCRIPTIONThis button is hidden in the pinhole. Press and hold the resetbutton until the network camera reboots. This will reset allparameters, including the IP address to factory default settings.When the camera is power-supplied, this indicator will be on asred.Connect to the video input connector of your monitor with a videocable (i.e. a RCA line with the BNC connector, or a coaxial line) forvideo output.* The video cable is optional.Connect the camera to the network with the supplied RJ45 cable.Connect the DC 12V adapter for power supply.4
<strong>TL</strong>-<strong>SC3000</strong><strong>3GPP</strong> <strong>Surveillance</strong> <strong>Camera</strong>2.2 Upper Side & UndersideChapter 3.Installation3.1 Install the HardwareThis camera can be installed in two ways: ceiling-mounted and desktop. During the installation, pleasemake sure the upper side of the camera is always facing up, as shown in Figure 1 below, regardless ofwhich installation way you’re using. This is to ensure the video output won’t be up side down. Note:‣ The illustrations below are based on the ceiling-mounted installation.‣ For the detailed cable connection, please refer to the section “Rear Panel” on Page 4.Tool needed: Power drill x 1 (not supplied within the sales package)1. Prepare all the parts needed for camera installation.Find the network camera, bracket package, a bag of screws & wall plugs, and a cap supplied withthe sales package, as shown in Figure 3-1.Unpack the bracket package to find the bracket disassembled into three parts: the base, stemand joint lock.5
<strong>TL</strong>-<strong>SC3000</strong><strong>3GPP</strong> <strong>Surveillance</strong> <strong>Camera</strong>2. Fix the base of the bracket.Figure 3-1 Parts needed for camera installationFix the base of the bracket with the supplied 3 screws to the place you want to install by using apower drill.Figure 3-2 Screw the base to the ceiling3. Assemble the bracket:a) Align the stem with the central hole of the base, and rotate it to secure, as shown in Figure 3-3.b) Align the joint lock with the stem, and rotate it to secure, as shown in Figure 3-4.6
<strong>TL</strong>-<strong>SC3000</strong><strong>3GPP</strong> <strong>Surveillance</strong> <strong>Camera</strong>Figure 3-3 Connect the stem to the base4. Connect the camera to the bracket.Figure 3-4 Connect the joint lock to the stemCeiling-mounted:With the upper side of the camera facing up, align the mounting screw hole on the upper side with thescrew thread of the joint lock, and rotate the camera to secure, as shown in Figure 3-5.Desktop:With the upper side of the camera facing up, align the mounting screw hole on the underside with thescrew thread of the joint lock, and rotate the camera to secure.7
<strong>TL</strong>-<strong>SC3000</strong><strong>3GPP</strong> <strong>Surveillance</strong> <strong>Camera</strong>Figure 3-5 Connect the camera to the bracket5. Insert the cap to the other mounting screw hole of the camera.Ceiling-mounted:Insert the cap to the mounting screw hole on the underside of the camera, as shown in Figure 3-6.Desktop:Insert the cap to the mounting screw hole on the upper side of the camera.Figure 3-6 Insert the cap to the camera6. Adjust the viewing angle of the camera, and fasten the joint lock to fix the angle. The installation iscompleted, as shown in Figure 3-7.8
<strong>TL</strong>-<strong>SC3000</strong><strong>3GPP</strong> <strong>Surveillance</strong> <strong>Camera</strong>Figure 3-7 Finish the installation3.2 Assign an IP address and Access the <strong>Camera</strong>Step 1. Install the SoftwarePlace the supplied Video Viewer AP software CD into your DVD- / CD-ROM drive. The installationprocess will automatically start. Follow the on-screen instructions to install the application programs.After installation, a “Video Viewer” shortcut icon will be shown on your PC desktop.Step 2.Connect the network camera to the Internet access via a RJ-45 network cable.Step 3. Search the available IP address to loginDouble-click “ ” icon on your PC desktop to enter the Video Viewer control panel. By defaults, the“Address Book” ( ) panel will be displayed on the right side of the Video Viewer control panel.Click ” ” (Search) ” ” (Refresh) to search the available IP address(es). The foundaddress(es) will be listed, and can be added into the address book by clicking ” ” (Add intoaddress book).For details, please see “ ” (Search) in the user manual.Select the IP address you just added into the address book, and click “settings.” (Edit) to edit theDouble-click the IP address in the address book to login. Note:For detailed network settings under different network types (Static IP / PPPOE / DHCP), please refer to“Network” and “DDNS” in the user manual.If you cannot search any available IP address, please follow the instructions below.Step 4.Add the IP address and other network settings to logina) Double-click “ ” icon on your PC desktop to enter the Video Viewer control panel. By defaults,9
<strong>TL</strong>-<strong>SC3000</strong><strong>3GPP</strong> <strong>Surveillance</strong> <strong>Camera</strong>the “Address Book” panel will be displayed on the right side of the Video Viewer control panel.b) The default network camera settings are as follows:ItemDefault SettingIP Address 192.168.1.10User NamePasswordPort Number 80adminadminc) Click ” ” (Address Book) ” ” (Add) button to key in the IP address, user name,password, and port number of the network camera you intend to connect.ItemDefault SettingIP Address 192.168.1.10User NamePasswordPort Number 80adminadmind) Double-click the IP address you just added into the address book to login.10
<strong>TL</strong>-<strong>SC3000</strong><strong>3GPP</strong> <strong>Surveillance</strong> <strong>Camera</strong>Chapter 4.Video Viewer Basic Operation4.1 The Live View PageAfter setting up the network information, login user name and password, double-click “ ” on the PCdesktop to open and log into the Video Viewer control panel. You will see a screen similar to the followingwith 6 major sections:Connect to only one network camera1-cut displayConnect to multiple network cameras (e.g. 4cameras)4-cut displayNO. Button Function Description1Image DisplayScaleFull ScreenCloseClose AllTo switch to another camera view if two or morenetwork cameras are connected, click thecorresponding blue tab. The camera title shown in theblue tab can be customized (For example, “01”, “02”,“03” and “04”). The default camera title is “<strong>Camera</strong>1”.For detailed camera title setting, please refer to“General” on Page 24. The software can control up to16 network cameras simultaneously.Click to view the images in the 1-cut, 4-cut, 9-cut and16-cut mode.Click to view the images in the full screen mode. To exitthe full screen mode, press “Esc” key on the keyboardof the PC.Click to close the current image display view.If the image display view is closed, you will be loggedout automatically.Click to close all the current image display view.If the image display view is closed, you will be loggedout automatically.11
<strong>TL</strong>-<strong>SC3000</strong><strong>3GPP</strong> <strong>Surveillance</strong> <strong>Camera</strong>234 /5Address BookMiscellaneousControlRecord /Stop RecordSnapshotClick to show the predefined IP address(es). You canadd, remove or search the IP address to log in thenetwork camera remotely.Click to show the main operation functions: audiovolume control, color setting, backup, record setting,server setting, upgrade, and find status log list.Click to start / stop the manual recording.Click to take a snapshot of the current view. Thesnapshot will be saved in the path you specified in“Record Setting” on Page 21.6 Information Click to show the current network connection details.4.2 Address BookThis view is displayed when the Video Viewer is activated for you to log in / out the network camera fromthe current address list, or search the available IP address as follows:‣ (Address Book)Click to view the pre-defined network camera access details.To log in, choose one IP address from the address list, and click the address twice; to log out, click theconnected IP address twice.You can also create new IP address information, or modify or remove the current IP address information.12
<strong>TL</strong>-<strong>SC3000</strong><strong>3GPP</strong> <strong>Surveillance</strong> <strong>Camera</strong>NO. Button Function DescriptionClick to directly add one IP address for login. Key in all the networkcamera access information needed, and click “Apply” and “Close”to add the selected address to the address book.1 Add2 Edit3 RemoveRecordSelect one current IP address from the address list, and click thisbutton to edit the settings.Select one IP address from the address list, and click this button todelete it.Check this checkbox to enable the record settings. For details,please refer to the “Record Setting” on Page 21. The defaultsetting is unchecked.‣ (Search)Click to search and view the available IP address(es) for the network camera connection. You canchoose one address to add into the address book, edit the details, or update the address list.NO. Button Function Description4Add intoaddressbook5 SettingSelect from the available IP address list, and click this button.Key in the network camera access information needed, andclick “Apply” and “Close” to add the selected address to theaddress book.Select from the available IP address list, and click this button toedit the setting.6 Refresh Click to update the available IP address list.4.3 Manual Record1) Choose the record type and assign the record locationClick “ ” (Miscellaneous Control) → “ ” (Record Setting) to go to the “Record Setting”13
<strong>TL</strong>-<strong>SC3000</strong><strong>3GPP</strong> <strong>Surveillance</strong> <strong>Camera</strong>page. Check the record type “Manual”, and assign the location to save the recordings bydouble-clicking the “Video Path” cell.2) Start manual recordingOnce the “Manual” checkbox is checked in the “Record On/Off” section, check the “REC” box inthe address book panel “ ” to start manual recording. When the record function is started, aflashing indication icon will be shown at the bottom right corner of the image display view. And therecordings will be saved in the specified location.3) If you want to stop recording, click “ ” on the top bar or cancel ticking off “REC” in the addressbook Note:For detailed schedule record setting, motion-triggered and alarm-triggered recording, please refer to“Record Setting” on Page 21 and “Trigger” on Page 27.14
<strong>TL</strong>-<strong>SC3000</strong><strong>3GPP</strong> <strong>Surveillance</strong> <strong>Camera</strong>4.4 PlaybackTo play a recording, click “ ” (Miscellaneous Control) → “ ” (Status List), and select the “Record”tab. A list of all the recordings will be shown by defaults, and you can also sort out the logs you want tospeed up the search time. For details, please see “Status List” on Page 38.To immediately play a recording file, select a log from the list, and click “Play” button, or double-click theselected log. Then, the playback control panel will be shown at the bottom of the main control panelsimilar to the following. For the playback control panel details, please see “Playback Screen” on Page41.15
<strong>TL</strong>-<strong>SC3000</strong><strong>3GPP</strong> <strong>Surveillance</strong> <strong>Camera</strong>4.5 SnapshotTo take a snapshot of the current view, click “current view is captured, you’ll see an icon “view.” (Snapshot) on the main control panel. Once the” shown at the bottom right corner of the image displayThe snapshot will be saved in the path you specified in “setting, please refer to “Record Setting” on Page 21.” (Record Setting). For snapshot path16
<strong>TL</strong>-<strong>SC3000</strong><strong>3GPP</strong> <strong>Surveillance</strong> <strong>Camera</strong>Chapter 5.Video Viewer Miscellaneous Control PanelClick “follows:” (Miscellaneous Control) on the Video Viewer control panel, and 7 functions are available as18
<strong>TL</strong>-<strong>SC3000</strong><strong>3GPP</strong> <strong>Surveillance</strong> <strong>Camera</strong>Click the buttonto show the current version of the Video Viewer.NO. Button Function Description1This volume adjustment button would be enabled in our other models which support 2-wayaudio2 Color SettingClick this button to adjust the brightness /contrast / hue / saturation for the selectednetwork camera. For details, please see“Color Setting” on Page 19.3Backup(For DVR only)The network cameras don’t supportnetwork backup function. This function isavailable when the Video Viewer isconnected to a DVR. You can log into theDVR via this software and remotely backupthe video data saved in the DVR. Fordetails, please see “Backup” on Page 20.4 Record Setting5 Server Setting6 Tools7 Status ListClick this button to go to the detailed recordsetting. For details, please refer to “RecordSetting” on Page 21.Click this button to go into the detailedserver setting. For details, please refer to“Server Setting” on Page 21.Click this button to update the firmwareversion of your network camera. For details,please refer to “Tools” on Page 36.Click this button to view all the record listand login/logout event list, search thedesired log list(s) by date, or playback therecording of the selected log list. For details,please refer to “Status List” on Page 38 .5.1 Color SettingIn the live view page, choose the desired network camera from the image display tab. Click “ ”(Miscellaneous Control) → “ ” (Color Setting) to go into the “Color Setting” page, and you can adjustthe brightness / contrast / hue / saturation for the selected network camera.19
<strong>TL</strong>-<strong>SC3000</strong><strong>3GPP</strong> <strong>Surveillance</strong> <strong>Camera</strong>Click “ ” (Set) to apply the change to the selected network camera. Click “ ” (Default) andclick “” (Set) to return to the default color settings. Note:You need to be a supervisor to operate this function. For details, please see “Account” on Page 25.5.2 Backup (For DVR only)The network cameras don’t have network backup function. This function is available when the VideoViewer is connected to a DVR. You can log into the DVR via this software and remotely backup the videodata saved in the DVR. Click “ ” (Miscellaneous Control) → “ ” (Backup) to go into the “Backup”page, and you can select a specific time range or event to make a video backup of the recorded filessaved in the DVR. Note:You need to be a supervisor to operate this function. For details, please see “Account” on Page 25.20
<strong>TL</strong>-<strong>SC3000</strong><strong>3GPP</strong> <strong>Surveillance</strong> <strong>Camera</strong>NO. FunctionDescriptionIP Address / Port / User Name /Select the IP address of the desired network camera from1the drop-down list and check if the network information isPasswordcorrect.Specify the hard disk (HDD Number) and channel number2 HDD Number / Channel(Channel) within which have the video data you need.Specify the time range within which has the video data you3 Filter the recorded video by timewant in the “Start Time” and “End Time” columns.Select an event type from the event list. This list shows alllogs in the specified network storage device from the latestto the earliest.To quickly find the events you need, check or uncheck the4 Filter the recorded video by event event type “System” / “Manual” / “Alarm” / “Motion”, andselect the log you want.To view the earlier or later logs that are not shown in thecurrent page, click “Prev. Page” or “Next Page”.To refresh the event list, click “Reload”.5 File Path Assign the location where the backup files are saved.To view the backup images simultaneously when thedownload process is in progress, select the checkbox“Simultaneous Playback”. You will see the backup imageswhile the images are being downloaded to the PC or6 Simultaneous Playbacknotebook.To simply backup images without previewing, deselect thecheckbox “Simultaneous Playback”. You will only see amessage box indicating the total time needed, the currentstatus and the saving location.Click “Download” to start or “Cancel” to discard the video7 Download / Cancelbackup.5.3 Record SettingClick “ ” (Miscellaneous Control) → “ ” (Record Setting) to go into the “Record Setting” page,and you can set which type of the recording is enabled (Manual / Schedule / Motion / Alarm), and wherethe recorded data / snapshots are saved.21
<strong>TL</strong>-<strong>SC3000</strong><strong>3GPP</strong> <strong>Surveillance</strong> <strong>Camera</strong> Note:Once all the record settings are finished, please check the “REC” checkbox in the address book panel“ ” to start manual recording. Please refer to “Address Book” on Page 12.Record On/OffIn this section, you can select which type of the recording will be enabled. There are 4 options: Manual /Schedule / Motion / Alarm.Prev / Post Event Record TimeIn this section, you can set the pre- / post-event record time from 0 ~ 10 seconds by pressing anddragging the slider.Hard Disk OverwriteCheck this checkbox to overwrite from the oldest recorded data when the HDD is full.Record Time RangeThere are two options available for you to set the recording time: Weekly & Custom.‣ WeeklyChoose the time box(es) within which you want to enable the recording. The time scale is from 0 ~24 hours per day, and there are 3 time lines for each weekday, representing 3 different recordingtypes.When you select the time box(es), you may see the color orange, pink or blue:orange => the 1 st line, schedule recordpink => the 2 nd line, alarm recordblue => the 3 rd line, motion record22
<strong>TL</strong>-<strong>SC3000</strong><strong>3GPP</strong> <strong>Surveillance</strong> <strong>Camera</strong>Tip: To set schedule record, alarm record and motion record all at once for the whole week, press “+”button. To clear all record time settings, press “-“ button.‣ CustomTo specify the more specific time for recording, click “Custom”.a) Select the desired record type(s) (Schedule / Motion / Alarm), and set the start & end date andtime.b) Press “Add”, and a pop-up window will appear and ask you to confirm your setting. Click “OK”to add the record setting, or “Cancel” to discard the setting.c) After adding the record setting, you will see the item(s) you added in the custom record list.To delete a certain item, choose the item you want to delete, and click “Delete”.To modify a certain item, choose the item you want to modify, change the start time and endtime, and click “Update”.23
<strong>TL</strong>-<strong>SC3000</strong><strong>3GPP</strong> <strong>Surveillance</strong> <strong>Camera</strong>Record PathSelect and view the location for saving the recorded video and snapshot pictures.To change the saving path for the recorded video clips or snapshots, check the drive you want, click thecell of “Video Path” or “Picture Path” twice, and select a new path for saving the video clips or snapshots.5.4 Server SettingClick “ ” (Miscellaneous Control) → “ ” (Server Setting) to go into the “Server Setting” page, andyou can view, set or modify all the network camera setting. All the changes you make here will be appliedto the connected network camera. Note:You need to be a supervisor to operate this function. For details, please see “Account” on Page 25.5.4.1 GeneralClick “ ” (Miscellaneous Control) → “ ” (Server Setting) → “General” to go into the “General”page. In “General” page, you will see the following items:24
<strong>TL</strong>-<strong>SC3000</strong><strong>3GPP</strong> <strong>Surveillance</strong> <strong>Camera</strong>ItemDescriptionFirmware Version Display the current firmware version of the network camera.MAC AddressTitleLogDisplay the MAC address of the network camera.Provide a title for the network camera. Only 15 characters are allowed. The defaultcamera title is “<strong>Camera</strong>1”.Click “ ” (Miscellaneous Control) → “ ” (Server Setting) → “General” → “Log” to go into the“Log” page. In the “Log” page, you can see all the logs for the network camera, such as “Power On”,“Reset Default”, “Net Login” and “SNTP Update” … etc.‧To refresh the logs, click “Reload”.‧To view the earlier or later logs that are not shown in the current page, click “Prev. Page” or “NextPage”.‧To clear all the logs, click “Clean”.AccountClick “ ” (Miscellaneous Control) → “ ” (Server Setting) → “General” → “Account” to go into the“Account” page. In the “Account” page, you can create a new account for login, or delete or modify theexisting account setting.To add an account, click “New”, and set the “User Name”, “Password”, “User Level” and “Life Time”.Then, click “Apply” to save your setting and create a new account.25
<strong>TL</strong>-<strong>SC3000</strong><strong>3GPP</strong> <strong>Surveillance</strong> <strong>Camera</strong>‧ To modify an existing account, select the account you want, change the setting, and click “Apply”.‧ To remove an existing account, select the account you want, and click “Delete”.‧ To save your changes, click “Apply”.ColumnDescriptionUser Name Set a user name that will be used for remote login. The user name allows up to 31characters.Password Set the password that will be used for remote login. The password allows up to 31characters.User LevelSet the security level of an account to give the permission to control different VideoViewer functions. There are 4 user levels: “Supervisor”, “Power User”, “Normal User” and“Guest”.For the functions each user level is allowed to access. For details, please refer toAppendix 2 User Level For Remote Operation” on Page 55.Life Time Select how long this account is allowed to stay online (1 MIN / 5 MIN / 10 MIN / 1 HOUR /1 DAY / INFINITE)Max User(s)Allow maximum 10 online users simultaneously26
<strong>TL</strong>-<strong>SC3000</strong><strong>3GPP</strong> <strong>Surveillance</strong> <strong>Camera</strong>Online UserClick “ ” (Miscellaneous Control) → “ ” (Server Setting) → “General” → “OnLineUser”, and youcan check all the online user information. To update the user information, click “Refresh”.TriggerClick “ ” (Miscellaneous Control) → “ ” (Server Setting) → “General” → “Trigger” to enter thispage.‣ Motion Trigger:ItemMotionDurationDescriptionIn this section, you can select to enable the function of motion trigger.Set the duration time of the motion trigger recording (5 / 10 / 20 / 40 seconds).Select to enable the function of motion trigger. And then click “Setting” to set the motion detection area.27
<strong>TL</strong>-<strong>SC3000</strong><strong>3GPP</strong> <strong>Surveillance</strong> <strong>Camera</strong>FunctionSensitivityMotion DetectionSetting AreaSelect AllClear AllApplyDescriptionSet the detection sensitivity:0 ~ 9,the higher the number, the lower the sensitivity.Set the motion detection area by selecting the area grids with your mouse. Pinkgrids represent the area that is not being detected while the transparent grids arethe area under detection. You can set multiple areas under detection.Click “+” (Select All) to set the whole area under detection.Click “-” (Clear All) to set the whole area undetected.After setup, click “Apply” to confirm.‣ NotifyIn this section, you can select to enable the function of E-mail and/or FTP notification.ItemMethodVideo TypeTotal TimeDescription·EmailIf the E-mail notification function is activated, the network camera will send thecaptured video clip to the assigned E-mail address(s) once motion-trigger oralarm-trigger recording happened.·FTPIf the FTP notification function is activated, the network camera will upload thecaptured video clip to the specified FTP site once motion-trigger or alarm-triggerrecording happened.Display the video type of the notification files. The video type will vary according tothe setting of “Stream Format” in the “” (Address Book) page.If you’ve set the video type as MPEG4, you can set the record time of the notificationvideo clip as 1 ~ 5 seconds.If you’ve set the video type as JPEG, then this option stands for 1 ~ 5 images.28
<strong>TL</strong>-<strong>SC3000</strong><strong>3GPP</strong> <strong>Surveillance</strong> <strong>Camera</strong> Note:‣ If your network camera & mail server are not connected by LAN, and the network connection is notstable or failed, the notification method by Email or FTP might be failed.‣ Sometimes the length of the video clip emailed or uploaded might not be the same as the one youspecified in “Total Time”. This is because the system can only emailed or uploaded up to 500KBvideo clip.5.4.2 NetworkClick “ ” (Miscellaneous Control) → “ ” (Server Setting) → “Network” to go into the “Network”page. In “Network” page, you can set the network configuration of the network camera.Select the network type you will be using for the network camera connection. There are 3 networkconnection types: Static IP, PPPOE and DHCP. Note:PPPOE and DHCP network connection types are required to apply the DDNS service to get a“Hostname” to correspond to a dynamic IP address. Please refer to “DDNS” section for details.FunctionWeb PortStatic IPPPPOEDescriptionTypically, the default TCP port used by HTTP is 80. However, in some cases, it is better tochange this port number for added flexibility or security. The valid web port number rangesfrom 1 to 9999.Computers are communicated and recognized by their own unique IP addresses over theInternet. “Static IP” provided by your ISP (Internet Service Provider) means the IP addressof the computer is fixed.Key in the server IP address, gateway and network information provided by your ISPprovider to configure a static IP network connection.PPPOE stands for Point-to-Point Protocol over Ethernet. Users can easily have the Internetservice as long as they’re ready for the following things: 1) Insert an Ethernet card into thePC. 2) Obtain the ADSL service via any ISP. 3) Obtain and install the PPPOE software CD.When everything is ready, choose the “PPPOE” IP type, and key in the user name andpassword provided by your ISP. Then, select “Network” → “DDNS” to set DDNS settings.For detailed DDNS settings, please refer to “DDNS” section.29
<strong>TL</strong>-<strong>SC3000</strong><strong>3GPP</strong> <strong>Surveillance</strong> <strong>Camera</strong>FunctionDHCPDescriptionThis DHCP function needs to be supported by a router or cable modem network with theDHCP service. Choose the “DHCP” IP type, and select “Network” → “DDNS” to set DDNSsettings.For detailed DDNS settings, please refer to “DDNS” section.DDNSYou need to apply a DDNS account before setting PPPOE or DHCP connection. DDNS is a service fortransforming the dynamic IP corresponding to a specific “host name”. Go to a website which provide freeDDNS services and apply a host name.Click “ ” (Miscellaneous Control) → “ ” (Server Setting) → “Network” → “DDNS” to enter.‣ DDNS Apply:Under the connection of PPPoE or DHCP, you could key in the domain name which points to the IPaddress of you DVR to login. However, you need apply for a DDNS account at first.Go to http://www.dyndns.com and sign up a DDNS account.30
<strong>TL</strong>-<strong>SC3000</strong><strong>3GPP</strong> <strong>Surveillance</strong> <strong>Camera</strong>Sign upEnter all the information necessary for signing up an account according to the website instructions.tplinkipcam1. Key in a user name forlogin. This name is not equalto the domain name.2. Key in your E-mail addressand input it again to confirm.3. Set the password andinput it again to confirm.31
<strong>TL</strong>-<strong>SC3000</strong><strong>3GPP</strong> <strong>Surveillance</strong> <strong>Camera</strong>4. Click “Create Account”.Then, you will see the screen “Account Created”, and Dyndns will email the instructions to your specifiedE-mail address. Please read this email within 48 hours and complete the procedure to activate youraccount according to the instructions in the email.Go to the hyperlink in the email and you will see “Account Confirmed”. Your account is createdsuccessfully now. Input the user name and the password you preset before to log in.Input the user nameand the password tologin.Click “Add Host Services”32
<strong>TL</strong>-<strong>SC3000</strong><strong>3GPP</strong> <strong>Surveillance</strong> <strong>Camera</strong>tplinkipcamtplinkipcam1. Input a meaningfulhost name2. Choose adomain33
<strong>TL</strong>-<strong>SC3000</strong><strong>3GPP</strong> <strong>Surveillance</strong> <strong>Camera</strong>SNTPSNTP (Simple Network Time Protocol) is for time setting. Click “ ” (Miscellaneous Control) → “ ”(Server Setting) → “Network” → “SNTP” to go into the “SNTP” page.FunctionGMT (Greenwich MeanTime)DescriptionOnce users choose the time zone, the network camera will adjust the localarea time of the system automatically.Server Name Users can simply use the default SNTP server (For example,time.stdtime.gov.tw).Sync Server TimeFTPThe network camera will synchronize the time with the network time.Click “ ” (Miscellaneous Control) → “ ” (Server Setting) → “Network” → “FTP” to go into the“FTP” page. Enter the detailed FTP information and press “Apply” to confirm. The information you sethere will be applied when the function of FTP notification is enabled in the "Trigger" menu.MAIL34
<strong>TL</strong>-<strong>SC3000</strong><strong>3GPP</strong> <strong>Surveillance</strong> <strong>Camera</strong>Click “ ” (Miscellaneous Control) → “ ” (Server Setting) → “Network” → “MAIL” to go into the“MAIL” page. Enter the detailed E-mail information and press “Apply” to confirm. The information you sethere will be applied when the function of E-mail notification is enabled in the "Trigger" menu.FunctionServerMail FromVerify PasswordEmail AddressDescriptionEnter the SMTP server address provided from your e-mail system supplier.Enter the entire mail address to ensure E-mails will not be blocked by SMTP.The account would be the mail sender.Some mail servers are required to verify the password. Please enter the“user name” and “password” of the sender account.Add the E-mail address(s) of the assigned recipient(s). Note:Users can assign up to 4 mail accounts for E-mail notification.5.4.3 VideoClick “ ” (Miscellaneous Control) → “ ” (Server Setting) → “Video” to go into the “Video” page.35
<strong>TL</strong>-<strong>SC3000</strong><strong>3GPP</strong> <strong>Surveillance</strong> <strong>Camera</strong>ItemDescriptionJPEG Choose the image size (VGA / QVGA) and picture quality (BEST / HIGH / NORMAL /BASIC) when the web transmission format is JPEG.MPEG Choose the image size (VGA / QVGA) and picture quality (BEST / HIGH / NORMAL /BASIC) when the web transmission format is MPEG.Frame RateThe frame rate allowed to each viewer can be adjusted to adapt to the bandwidth on thenetwork. Set the desired image frequency to the maximum (FULL) or to a specifiedframe rate (HALF / ONE THIRD / QUARTER / ONE FIFTH / ONE TENTH). The actualframe rate depends on the actual network connection, and may be lower than thespecified one.5.5 ToolsClick “ ” (Miscellaneous Control) → “ ” (Tools) to go into the “Tools” page. Note:You need to be a supervisor to operate this function. For details, please see “Account” on Page 25.5.5.1 Firmware UpgradeIn this page, you can upgrade the firmware of your network camera.36
<strong>TL</strong>-<strong>SC3000</strong><strong>3GPP</strong> <strong>Surveillance</strong> <strong>Camera</strong>FunctionUpdate ServerCurrent VersionAddUpdate FirmwareSystem Backup(For DVR only)DescriptionSelect the IP address of the network camera. Make sure the network settings of theselected network camera are correct.In the “Firmware” section, you will see the current firmware version.For example, 1010-1004-1003-1000To upgrade the firmware version of your network camera, click “Add” to locate andselect the firmware files.There are several upgrade files. Please upgrade one by one.To start upgrading the firmware of the network camera, click “Update Firmware” tostart the upgrade process. After upgraded, you will see a message shown on thescreen:“Update Firmware Succeeded! Don’t plug off power, the machine will rebootautomatically!”If you want to backup your system before upgrading the firmware version, select“System Backup” in the “Configure File” section, click “…” to specify the location forsaving system backup, and click “Backup” to start the backup process. Note:The network setting of the camera might restore to default values after upgrade. If this is true, please setthe network information again.5.5.2 Language SelectionThis software is available in English / Chinese / French / German / Portuguese / Spanish / Japanese.Select a language from the drop-down list, and press “Apply”. You will be prompted to restart theapplication to make this change take effect.37
<strong>TL</strong>-<strong>SC3000</strong><strong>3GPP</strong> <strong>Surveillance</strong> <strong>Camera</strong> Note:The default language depends on the operation system of your PC. If the language of your operationsystem is not supported by this software, English will be the default language.5.6 Status ListClick “ ” to view all the event and record logs (All), or search for the specific log(s) by date or byrecord type (Condition).There are three types of logs: Record, Backup and Event. To playback the recorded data for a specificrecord or backup log, select the log, and double-click to start the video playback.For detailed playback operation, please refer to “Playback Screen” on Page 41.5.6.1 RecordSelect “Record” to search for the specific log(s) by date or by record type.38
<strong>TL</strong>-<strong>SC3000</strong><strong>3GPP</strong> <strong>Surveillance</strong> <strong>Camera</strong>Button / FunctionRange UnitDate Selection (From / To)Record TypeQueryDelete / Delete AllPlayRepairApplyCloseDescriptionSet different time range unit (One Day / One Week) of the event logs.Choose the specific date range including the event / record logs you mightwant.This section is enabled only when the “Record” tab is selected.Select the record type you want to search (User / Alarm / Motion).When all the search criteria are set, click to search the specified logs. Theresult will be displayed in the log list, arranged by time from the earliest tothe latest.Click “Delete” to remove the selected log(s), or click “Delete All” to clear thecurrent log list.Tip: To select more logs all at once, press and hold the “Ctrl” key on yourkeyboard, and click to select the logs you want to remove.Click to play the selected record log. The playback panel will be shown foryour further operation. For playback details, please see “Playback Screen”on Page 41.Click to fix the log with errors.This button is available in the “Record” tab when the “Reserve” checkbox ischecked or unchecked.If you want to keep an important record log for future reference and it can’tbe removed, check the “Reserve” checkbox, and click “Apply”. The selectedlog will be kept and won’t be deleted when somebody accidentally orintentionally chooses it and click “Delete” or “Delete All”.Click “Close” to quit this window.39
<strong>TL</strong>-<strong>SC3000</strong><strong>3GPP</strong> <strong>Surveillance</strong> <strong>Camera</strong>5.6.2 EventSelect “Event” to search for the specific event log(s) by date.Button / FunctionRange UnitDate Selection (From / To)QueryDelete / Delete AllCloseDescriptionSet different time range unit (One Day / One Week) of the event logs.Choose the specific date range including the event / record logs you mightwant.When all the search criteria are set, click to search the specified logs. Theresult will be displayed in the log list, arranged by time from the earliest tothe latest.Click “Delete” to remove the selected log(s), or click “Delete All” to clear thecurrent log list.Tip: To select more logs all at once, press and hold the “Ctrl” key onyour keyboard, and click to select the logs you want to remove.Click “Close” to quit this window.5.6.3 Backup (For DVR only)Select “Backup” to search for the specific log(s) by date.40
<strong>TL</strong>-<strong>SC3000</strong><strong>3GPP</strong> <strong>Surveillance</strong> <strong>Camera</strong>Button / FunctionRange UnitDate Selection (From / To)QueryDelete / Delete AllPlayCloseDescriptionSet different time range unit (One Day / One Week) of the event logs.Choose the specific date range including the event / record logs you mightwant.When all the search criteria are set, click to search the specified logs. Theresult will be displayed in the log list, arranged by time from the earliest tothe latest.Click “Delete” to remove the selected log(s), or click “Delete All” to clear thecurrent log list.Tip: To select more logs all at once, press and hold the “Ctrl” key onyour keyboard, and click to select the logs you want to remove.Click to play the selected download log. The playback panel will be shownfor your further operation. For playback details, please see “PlaybackScreen” on Page 41.Click “Close” to quit this window.5.6.4 Playback ScreenWhen you select and play the recorded data for a specific log, you will immediately go into the playbackmode, and the following playback panel appears.41
<strong>TL</strong>-<strong>SC3000</strong><strong>3GPP</strong> <strong>Surveillance</strong> <strong>Camera</strong>NO. Function Description1Playback / DownloadInfo DisplayThis area shows the detailed playback / download information, such as the filename, record date and time, and the speed, etc.2 Playback Progress Bar This area shows the playback progress and the progress percentage.3Playback OperationThis area is enabled only when the playback is started.(Rewind) / (Forward) / (Stop) / (Pause) / (Play)Rewind / ForwardClick once to get 2X fast rewind / forward, twice to get 4X, three times to get 8X,and four times to get 16X the highest.4 De-Interlace Click to reduce the vibration of the paused picture.Chapter 6.IE Web Browser6.1 Access the <strong>Camera</strong> from an IE Web BrowserYou can view the images or operate your network camera from an IE web browser.42
<strong>TL</strong>-<strong>SC3000</strong><strong>3GPP</strong> <strong>Surveillance</strong> <strong>Camera</strong> Note:The supported PC operation systems are Windows 2000 and Windows XP.Step 1: Key in the IP address used by your network camera in the URL address box, such as“http://ipcam.dyndns.org”, and press Enter. You will be prompted to enter the user name andpassword to access the network camera.If the port number your network camera used is NOT 80, you need to key in the port numberadditionally. The format is “http://ipaddress:portnum”.Take dynamic IP type as an example: Host name “ipcam.dyndns.org” / Port number “202”. Keyin “http://ipcam.dyndns.org:202” into the URL address box, and press “Enter”.Step 2: Enter the user name and password, the same as the ones used at the Video Viewer, and press“OK”. You will see a similar screen as the following when the login information is correct.6.2 Toolbar Display on the IE Web BrowserNO. Function Description1 Main ActiveX / Quick TimeAccording to the type of web browser on youroperating system, choose the ActiveX or QuickTimecontrols.TCP / UDPChoose the internet transmission protocol: TCP /UDP.BEST / HIGH /NORMAL / LOWChoose the image quality: BEST / HIGH / NORMAL/ LOWVGA / QVGAChoose the image size: VGA (640 × 480) / QVGA(320 × 240).43
<strong>TL</strong>-<strong>SC3000</strong><strong>3GPP</strong> <strong>Surveillance</strong> <strong>Camera</strong>NO. Function Description2 Network3 <strong>Camera</strong>5 GeneralAudio On / Audio OffStatic IP / DHCP /PPPOE / DDNSSNTPFTPMAILSnapshot PathFrame RateSystem TypeStream FormatMaximum ExposureLimitsDetectionMotionLevelColor SettingLanguageMac AddressSensitivityChoose the audio function: On or Off.(This audio function is only for AVI202 and AVI212model)In the “Network” page, you can set the networkconfiguration of the network camera. For details,please refer to “Network” section of the VideoViewer on Page 29.Set the SNTP (Simple Network Time Protocol) forthe time setting. For details, please refer to “SNTP”section of the Video Viewer on Page 27.Assigned a specific FTP site for the motion/alarmnotification function. For details, please refer to“FTP” section of the Video Viewer on Page 34.Assigned a specific email account for themotion/alarm notification function. For details,please refer to “MAIL” section of the Video Vieweron Page 34.Set the location where the snapshot pictures aresaved.According to the bandwidth, set the required framerate (FULL / HALF / ONE THIRD / QUARTER / ONEFIFTH / ONE TENTH / ONE FIFTEENTH). Fordetails, please refer to “Video” section of the VideoViewer on Page 35.Set the system type of the connected networkcamera (NTSC / PAL).Select the stream format of the networktransmission (MPEG-4 / Motion JPEG).To compensate for the lighting conditions, themaximum exposure time can be adjusted. Fordetails, please refer to “Video” section of the VideoViewer on Page 35.Motion detection is used to generate a motiontrigger whenever a movement occurs in the videoimage. Set the motion detection area. For details,please refer to “Motion Trigger” section of the VideoViewer on Page 22.Set different motion sensitivity level according todifferent application. For details, please refer to“Motion Trigger” section of the Video Viewer onPage 27.Adjust the brightness / contrast / hue / saturation forthe network camera. For details, please refer to“Color Setting” section of the Video Viewer on Page19.Support English / Chinese language for the webinterface.Display the MAC address of the network camera.For details, please refer to “General” section of theVideo Viewer on Page 24.44
<strong>TL</strong>-<strong>SC3000</strong><strong>3GPP</strong> <strong>Surveillance</strong> <strong>Camera</strong>NO. Function Description6 SnapshotLogAccountTriggerConfigureIn the “Log” page, you can see all the logs for thenetwork camera, such as “POWER ON”,“REMOTE LOGIN”, “RESET DEFAULT”, “EMAIL”,“FTP”, “DDNS”, “PPPOE”, “DHCP” and “SNTPUPDATE”…etc. For details, please refer to “Log”section of the Video Viewer on Page 25.Add / Edit / Delete the user name, password, userlevel and life time for accessing the network camera.For details, please refer to Appendix 2 User LevelFor Remote Operation” on Page 55.Set the motion trigger and/or alarm trigger function,such as “Trigger Motion”, “Trigger Alarm” and“Trigger Duration”. Set the motion trigger and/oralarm trigger notification function, such as “Method”and “Record Time”. For details, please refer to“Trigger” section of the Video Viewer on Page 27.Display and upgrade the firmware version of thenetwork camera. For details, please refer to “Tools”section of the Video Viewer on Page 36.Click this button to take a snapshot of the currentview. The snapshot will be saved in the path youspecified in the “Snapshot Path” of the “<strong>Camera</strong>”menu from the IE browser.Chapter 7.QuickTime PlayerYou can also use the QuickTime player to log into the network camera and check the live view only. Note:QuickTime is Apple’s multimedia software. You need to have QuickTime installed in you computer first,and you can access the network camera to see the live view.Step 1: Go to Apple’s official website to download QuickTime. The website address is as follows:http://www.apple.com/quicktime/win.htmla) Click “Download” to go into the download page, and select to download the free player.b) Leave your Email address, and press “Free Download Now” to download the latest QuickTimeplayer.c) When the download is completed, execute the “QuickTimeInstaller.exe” file, and follow theon-screen instructions to finish the installation procedure.Step 2: Open your QuickTime player. Select “File” → “Open URL”, and key in the URL address.The URL format for MPEG4 IP cameras is “rtsp://ipaddress:port/live/mpeg4”.For example, if the IP adderss is “tplinkipcam.dyndns.org” and port number is “201”, key in“rtsp://tplinkipcam.dyndns.org:201/live/mpeg4” in the URL box. Click “OK” to continue.45
<strong>TL</strong>-<strong>SC3000</strong><strong>3GPP</strong> <strong>Surveillance</strong> <strong>Camera</strong>Step 3: A pop-up window will appear and prompt you to enter the authentication information. Key in theuser name and password for accessing your network camera. The user name and passwordare the same as the ones you use to log into the Video Viewer.If the information is correct, press “OK” to go on. If not, press “Cancel” to quit the accessing.Step 4: When the login is successful, you will see a similar screen as the following.46
<strong>TL</strong>-<strong>SC3000</strong><strong>3GPP</strong> <strong>Surveillance</strong> <strong>Camera</strong>Chapter 8.Monitoring via Mobile Device8.1 Checklist before usingMake sure your PDA or mobile phones conform to the following requirements:DeviceMake sure …The OS is based on WinCE.J2ME MIDP2.0 is supported.PDAInternet services via WiFi or GPRS / 3G networks aresubscribed and available to use.For details, please check with your local network operator orservice provider.J2ME is supported.Internet services via GPRS / 3G networks are subscribed andavailable to use.GPRS / 3G Mobile For details, please check with your local network operator orPhonesservice provider.The port number of the connected device (such as DVR ornetwork camera) is NOT 80. The suggested port number is88.8.2 Installation and Setup8.2.1 Software downloadSTEP1:To download the software for mobile surveillance, please visit the following website address from yourPDA or mobile phones: Note:http://211.22.74.18/1. The Internet access setting via WiFi or GPRS / 3G networks varies depending on different PDA ormobile phone brand. For details, please refer to its individual user manual, or check with your localnetwork operator or service provider.2. You might be charged for Internet access via WiFi or GPRS / 3G networks. For the Internet accessrate details, please check with your local network operator or service provider.You will see the following five applications to download:• GPRS / 3G Software• EagleEyes (J2ME)• EagleEyes (J2ME New version)• EagleEyes (For WinCE)• EagleEyes (For WinCE New Version)47
<strong>TL</strong>-<strong>SC3000</strong><strong>3GPP</strong> <strong>Surveillance</strong> <strong>Camera</strong> Note:Please ignore EagleEyes (J2ME). This one is outdated and not suitable for remote surveillance now.STEP2: Select the application you need and start downloading.For <strong>TL</strong>-<strong>SC3000</strong> user, please download EagleEyes(J2ME newVersion) for your GPRS/3G MobilePhone while EagleEyes(For WinCE New Version) for PDA.STEP3: Follow the on-screen instructions after downloading.For mobile phones, the application will save to the location you specified.For PDA, the application will save to “Programs”.8.2.2 GPRS / 3G Mobile PhoneThe setting interface of each mobile phone may vary depending on its individual brand. Therefore, theinterface shown below only illustrates the main functions of the application, and is for reference only. For theactual display, please refer to your own mobile phone.With EagleEyes (J2ME New version) installedSTEP1: Go to the location where you save the application, and you will see the item “EagleEyes”.STEP2: Select “Connect & View” to go to the setting page, similar as follows. Key in the information necessaryfor DVR or network camera remote access.Select “Connect & View”Create New Connection Set48
<strong>TL</strong>-<strong>SC3000</strong><strong>3GPP</strong> <strong>Surveillance</strong> <strong>Camera</strong>1. Host NameGive a name for this connection set.2. User NameEnter the user name used to access the device you want to connect.3. PasswordEnter the password used to access the device you want to connect.4. IPEnter the IP address of the device you want to connect.5. PortEnter the port number used by the device you want to connect.You can use the port number from 0 ~ 65536 except 80. It’s recommended to use 88.STEP3: Make sure the information above is correct, and confirm the connection set to save the setting, and atthe same time, you will return to the previous layer.STEP4: Select “Connect & View” again, and select the connection set you just created to start connecting tothe device you want.8.2.3 PDAThe setting interface of each PDA may vary depending on its individual brand. Therefore, the interface shownbelow only illustrates the main functions of the application. For the actual display, please refer to your ownPDA.49
<strong>TL</strong>-<strong>SC3000</strong><strong>3GPP</strong> <strong>Surveillance</strong> <strong>Camera</strong>With EagleEyes (For WinCE New version) installedSTEP1: Go to “Programs” “EagleEyes” to go to the setting page.STEP2: Click “NEW DEVICE” to add a connection set, and key in the information necessary for DVR ornetwork camera remote access.Create New Connection Set Edit Connection Set Connection Set Created1. NameGive a name for this connection set.2. Transfer MethodSelect TCP or UDP.3. IP AddressEnter the IP address of the device you want to connect.4. PortEnter the port number used by the device you want to connect.5. User NameEnter the user name used to access the device you want to connect.6. PasswordEnter the password used to access the device you want to connect.7. Stream FormatSelect MPEG4, JPEG or H.264 (if available).8. AV OptionSelect VIDEO, or VIDEO / AUDIO.STEP3: Make sure the information above is correct, and confirm the connection set to save the setting, and atthe same time, you will return to the previous layer.STEP4: Select the connection set you just created to start connecting to the device you want.50
<strong>TL</strong>-<strong>SC3000</strong><strong>3GPP</strong> <strong>Surveillance</strong> <strong>Camera</strong>8.3 Available FunctionsWhen the installation is completed, you can start the remote surveillance via your device now. The functionsavailable are depending on the remote device you have, and the software you installed.For details, please refer to the following sections.8.3.1 GPRS / 3G Mobile PhoneWith EagleEyes (J2ME New version) installedDVR Mode- Single channel switch- 4-cut / 9-cut / 16-cut display mode switch- Quality changeDVR Mode - Main Panel DVR Mode - Quality Select DVR Mode - Quality Options8.3.2 PDAWith EagleEyes (For WinCE New version) installeda) DVR Mode- Record / playback at the remote site- Playback- Channel switch- Remote independent operation- 4-cut / 9-cut / 16-cut display mode switch- Quality changeb) PTZ Mode- Record at the remote site- Pan / tilt / zoom control- Auto pan- Auto Tracking- Focus near / far- Preset point 1~16 selection51
<strong>TL</strong>-<strong>SC3000</strong><strong>3GPP</strong> <strong>Surveillance</strong> <strong>Camera</strong>DVR ModePTZ Mode52
<strong>TL</strong>-<strong>SC3000</strong><strong>3GPP</strong> <strong>Surveillance</strong> <strong>Camera</strong>Appendix 1 Recording Time TableThe following table lists the recording time table for <strong>TL</strong>-<strong>SC3000</strong> and takes PAL video system imagecapture as an example. The compression format for <strong>TL</strong>-<strong>SC3000</strong> is MPEG4Table 1: static stateResolutionVGAQVGAQualityBestHighNormalBasicBestHighFrame Rate<strong>TL</strong>-<strong>SC3000</strong>MB/HrsFull 9921/2 7281/3 5521/4 4581/5 4421/10 2321/15 153.2full 8261/2 4901/3 3641/4 3301/5 2961/10 163.21/15 128.8full 4901/2 2781/3 2261/4 196.61/5 180.61/10 100.81/15 79.4full 2761/2 185.41/3 147.61/4 131.81/5 125.21/10 68.21/15 56.8full 7781/2 4641/3 3521/4 2921/5 2621/10 134.41/15 78.4full 5221/2 2901/3 2181/4 1871/5 170.21/10 91.453
<strong>TL</strong>-<strong>SC3000</strong><strong>3GPP</strong> <strong>Surveillance</strong> <strong>Camera</strong>NormalBasic1/15 66.6full 2881/2 1721/3 140.61/4 1241/5 111.61/10 631/15 55.4full 1661/2 1121/3 91.81/4 80.61/5 83.61/10 49.41/15 36.254
<strong>TL</strong>-<strong>SC3000</strong><strong>3GPP</strong> <strong>Surveillance</strong> <strong>Camera</strong>Appendix 2 User Level For Remote Operation● For Video ViewerSupervisor Power User Normal User GuestAddress Book ● ● ● ●Emap ● ● ● ●Miscellaneous ControlColor Setting ● X X XBackup X X X XRecord Setting ● ● ● ●Server Setting ● X X XTools* Update ● X X X* Language ● ● ● ●Status List ● ● ● ●Record ● ● ● ●Snapshot ● ● ● ●Information ● ● ● ●● For Web BrowserSupervisor Power User Normal User GuestMainConnection Mode ● ● ● ●Protocol ● ● ● ●Quality ● ● ● XChange resolution ● ● ● XNetworkDDNS ● ● X XSNTP ● X X XFTP ● ● X XMAIL ● ● X X<strong>Camera</strong>Color ● ● X XGeneralLog ● X X XAccount ● X X XTrigger ● ● X XConfigure ● X X XSnapshot ● ● ● ●Appendix 3 Default ValueDefault ValueItemsDefault ValueDefault Network Settings:User NameadminPasswordadminPort 80IP Address 192.168.1.1055