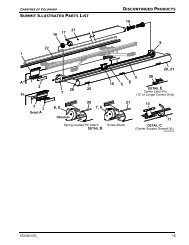
SIDEOUT KOVER II SOKII with Deflector.pdf - Carefree of Colorado
SIDEOUT KOVER II SOKII with Deflector.pdf - Carefree of Colorado
SIDEOUT KOVER II SOKII with Deflector.pdf - Carefree of Colorado

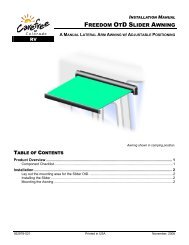
You also want an ePaper? Increase the reach of your titles
YUMPU automatically turns print PDFs into web optimized ePapers that Google loves.
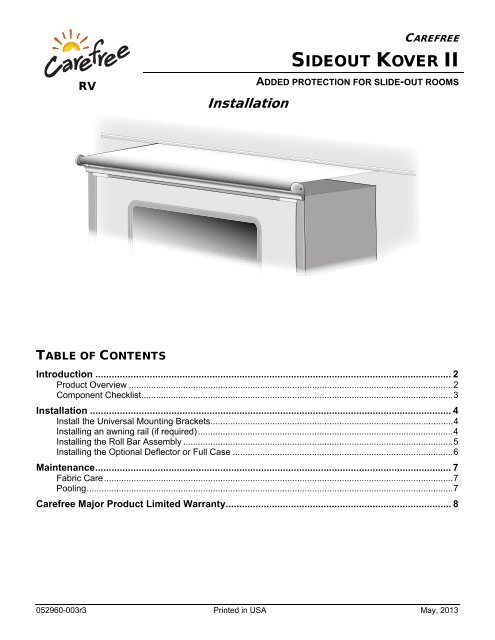
CAREFREE<strong>SIDEOUT</strong> <strong>KOVER</strong> <strong>II</strong>RVInstallationADDED PROTECTION FOR SLIDE-OUT ROOMSTABLE OF CONTENTSIntroduction ................................................................................................................................... 2Product Overview ................................................................................................................................... 2Component Checklist.............................................................................................................................. 3Installation ..................................................................................................................................... 4Install the Universal Mounting Brackets .................................................................................................. 4Installing an awning rail (if required) ....................................................................................................... 4Installing the Roll Bar Assembly ............................................................................................................. 5Installing the Optional <strong>Deflector</strong> or Full Case ......................................................................................... 6Maintenance ................................................................................................................................... 7Fabric Care ............................................................................................................................................. 7Pooling .................................................................................................................................................... 7<strong>Carefree</strong> Major Product Limited Warranty ................................................................................... 8052960-003r3 Printed in USA May, 2013
<strong>Carefree</strong> <strong>of</strong> <strong>Colorado</strong>INTRODUCTIONSOK<strong>II</strong> w/ <strong>Deflector</strong>PRODUCT OVERVIEWThe <strong>Carefree</strong> SideOut Kover <strong>II</strong> (SOK<strong>II</strong>) is a classic slide-out room ro<strong>of</strong> cover.Canopies are available in Vinyl, PolyWeave, Fullview, Standard or custom Sunbrella Acrylic fabrics.42" fabric extension standard. Available for room widths <strong>of</strong> 54" to 197". Available <strong>with</strong> optional deflector.Overall Width = Fabric Width + 5”Fabric Width = Room Length + 3” to 7” (see chart)6.125”5.75”1” (typ)Universal Bracket (2)Center Support BracketUsed w/ <strong>Deflector</strong>s over 5’SOK2017aROOM WIDTH VS FABRIC WIDTHROOMWIDTHFLANGEWIDTHFABRICWIDTHROOMWIDTHFLANGEWIDTHFABRICWIDTHROOMWIDTHFLANGEWIDTHFABRICWIDTH54 - 57 59 - 62 61 102 - 105 107 - 110 109 150 - 153 155-158 15758 - 61 63 - 66 65 106 - 109 111 - 114 113 154 - 157 159-162 16162 - 65 68 - 70 69 110 - 113 115-118 117 158 - 161 163 - 166 16566 - 69 71 - 74 73 114 - 117 119-122 121 162 - 165 167 - 170 16970 - 73 75 - 78 77 118 - 121 123-126 125 166 - 169 171 - 174 17374 - 77 79 - 82 81 122 - 125 127-130 129 170 - 173 175 - 178 17778 - 81 83 - 86 85 126 - 129 131-134 133 174 - 177 179 - 182 18182 - 85 87 - 90 89 130 - 133 135-138 137 178 - 181 183 - 186 18586 - 89 91 - 94 93 134 - 137 139-142 141 182 - 185 187 - 190 18990 - 93 95 - 98 97 138 - 141 143-146 145 186 - 189 191 - 194 19394 - 97 99 - 102 101 142 - 145 147-150 149 190 - 193 195 - 198 19798 - 101 103 - 106 105 146 - 149 151-154 153 194 - 197 199 - 203 201NOTES: 1. All Dimensions are in inches.2. If measurement is a fraction, round up to the next inch.Extension(to face <strong>of</strong> flange)RoomWidthFlangeWidthSOK2018Figure 1. SOK<strong>II</strong> Specifications.2 052960-003r3
<strong>Carefree</strong> <strong>of</strong> <strong>Colorado</strong>COMPONENT CHECKLISTSOK<strong>II</strong> w/ <strong>Deflector</strong>1 82 36549 10 11741314151612SOK2001 ITEM DESCRIPTIONQTY NOTEBASIC ASSEMBLY 1 Awning Rail 1 2 Screw, Hex Head #10 x 3/4 20 3 Screw, Hex Head #6 x 3/8 2 4 Universal Mount Bracket 2 5 Roll Bar Assembly 1 1 6 Pivot Assembly, RH 1 2 7 End Cap, LH 1 8 End Cap, RH 1 9 TEK Screw #12 x 1 14 10 Screw, Phillips Head #6 x 5/16 4 11 Screw, Phillips Head 1/4 -20 x 1 2OPTIONAL EQUIPMENT 12 <strong>Deflector</strong> 1 13 Support Bracket 1 3 14 Screw, Phillips Head 1/4-20 x 3/4 2 15 Spacer, 3/8" 1 3 16 Screw #12 x 1 3/4 1 31. Roll Bar assembly includes canopy, spring assembly and left pivot bracket. DO NOT attempt toremove the left pivot bracket from the roll bar.NOTES: 2. The right pivot bracket is shipped in the roller tube but is not attached.3. The support bracket and hardware (items 13, 15 and 16) are only used <strong>with</strong> deflectors 5 feet orlonger.3 052960-003r3
<strong>Carefree</strong> <strong>of</strong> <strong>Colorado</strong>INSTALLATIONSOK<strong>II</strong> w/ <strong>Deflector</strong>INSTALL THE UNIVERSAL MOUNTING BRACKETSRoom FlangeAwning Rail5”-6”Top <strong>of</strong> FlangeRo<strong>of</strong> StructureBottom <strong>of</strong> FlangeInstaller DefinedBacking SpacerWhen Required#12 x 1TEK ScrewsOuter Face <strong>of</strong>Room WallUniversal BracketWall StructureRight PivotBracketSOK2019Figure 2. Mounting the Universal Brackets.1. Using a non-permanent method <strong>of</strong> marking, mark the locations <strong>of</strong> the outside face <strong>of</strong> the slide-out wallsand ro<strong>of</strong> on the room face/flange. These will be guides for mounting the brackets.2. Horizontally position the bracket by aligning the outer edge <strong>of</strong> the bracket <strong>with</strong> the outer face <strong>of</strong> theroom wall.3. Vertically position the bracket to meet the following requirements: The centerline <strong>of</strong> the upper mounting holes must align <strong>with</strong> the ro<strong>of</strong> structure so that the mountingscrews will securely go in to the structure. The centerline <strong>of</strong> the upper mounting holes must be <strong>with</strong>in 5" – 6" <strong>of</strong> the centerline <strong>of</strong> the existingawning rail; or, the area to mount a new awning rail must be <strong>with</strong>in 5" – 6" from the centerline <strong>of</strong> theupper mounting holes.4. Using a quality silicone sealant, coat the mounting surface <strong>of</strong> the bracket <strong>with</strong> particular attentionaround the mounting holes.5. After positioning the bracket, mount using the #12 x 1 TEK screws.NOTE: If the bottom set <strong>of</strong> mounting holes is <strong>of</strong>f the edge <strong>of</strong> the flange, it will be necessary touse an installer defined spacer behind the bottom holes <strong>of</strong> the bracket as shown above.6. Repeat for other side.7. Slide the RIGHT pivot bracket into the RIGHT universal bracket. Do not secure <strong>with</strong> screws at this time.INSTALLING AN AWNING RAIL (IF REQUIRED)1. Position the awning rail <strong>with</strong>in 5" – 6" <strong>of</strong> the centerline <strong>of</strong> the uppermounting holes <strong>of</strong> the universal bracket. Awning rail must be level.2. After determining mounting position, mark the position <strong>with</strong> a chalk line.3. Seal the back <strong>of</strong> the rail <strong>with</strong> silicone sealant or putty tape.4. Align the awning rail onto the wall and secure <strong>with</strong> #10 x 3/4” screws.Use all the attachment holes in the rail.5. Use a screwdriver to spread open the left end <strong>of</strong> the awning rail on theinstallation side.6. File any sharp edges or burrs from the end <strong>of</strong> the rail. This will helpprotect the awning fabric from damage during installation.7. Spray inside the awning rail track <strong>with</strong> silicone lubricant.Spread openthe end <strong>of</strong> theawning railFigure 3. Installing theAwning Rail.T0012a4 052960-003r3
<strong>Carefree</strong> <strong>of</strong> <strong>Colorado</strong>INSTALLING THE ROLL BAR ASSEMBLYSOK<strong>II</strong> w/ <strong>Deflector</strong>RightPivot Bracket2 1/4” MinLeftPivot Bracket#6 x 3/8 Hex HeadScrews (2)Cotter Pinto Lock Spring#6 x 5/16PPH Screws(2 per bracket)Figure 4. Installing the Roll Bar Assembly.1. For ease <strong>of</strong> installation, unroll a maximum <strong>of</strong> one wrap <strong>of</strong> the fabric from the roll bar.2. Carefully slide the cover fabric into the awning rail.3. While sliding the fabric, simultaneously slide the roll bar onto the right pivot bracket and slide the leftpivot bracket into the left mounting bracket.4. Center the rollbar and fabric over the room.NOTE: The pivot brackets must have a minimum engagement <strong>of</strong> 2 1/4 inches. If the minimum isnot met, the mounting brackets must be moved outward or the roll bar must be shorter.5. Secure the pivot brackets to the mounting brackets using two (2) #6 x 5/16 phillips head screws.NOTE: If the screws do not engage the pivot bracket, it will be necessary to drill a small pilothole through the mounting bracket in a location the screw will engage the pivot bracket.6. Firmly grasp the roll bar and remove the cotter pin from the left end <strong>of</strong> the roll bar. Allow the fabric toSLOWLY roll up.CAUTIONUSE CARE WHEN REMOVING THE COTTER PIN. THE PIN IS HOLDING THE PRE-WOUND TENSION OF THE SPRING.FAILURE TO SECURELY HOLD THE ROLLBAR MAY ALLOW THE ROLLBAR TO RAPIDLY ROLL UP AND CAUSEPERSONAL INJURY OR DAMAGE.7. Open and close the room several times to verify the fabric is centered and rolling up straight. Adjust asnecessary.8. Secure the fabric to the awning rail by drilling a 3/32" hole through the awning rail, polycord and fabricapproximately 1"-2" from the edge <strong>of</strong> the fabric. Attach <strong>with</strong> two (2) #6 x 3/8 screws.SOK20165 052960-003r3
<strong>Carefree</strong> <strong>of</strong> <strong>Colorado</strong>INSTALLING THE OPTIONAL DEFLECTOR OR FULL CASESOK<strong>II</strong> w/ <strong>Deflector</strong><strong>Deflector</strong>DETAIL A1/4-20 x 3/4 Screw (2)Right End Cap1/4-20 x 1 Screw(typ)1/4-20 x 3/4 Screw(typ)Left End Cap<strong>Deflector</strong>Support Bracket<strong>Deflector</strong>#12 x 1 3/4 Screw3/8 SpacerDETAIL B SOK2020Figure 5. Attaching the Optional <strong>Deflector</strong>.1. (Refer to Detail B) For deflectors over 60 inches in length, slide the center support bracket onto theback and align <strong>with</strong> the hole in the middle <strong>of</strong> the deflector.2. Extend the room out approximately 6 inches. This is to allow some play in the fabric.3. (Refer to Detail A) Lift the deflector up and hook into the groove <strong>of</strong> the mounting brackets.4. Align the outer holes <strong>with</strong> the nuts on the pivot brackets and secure using 1/4-20 x 3/4 screws.5. For deflector <strong>with</strong> the center support bracket, drill a 3/16" pilot hole into the coach wall.6. (Refer to Detail B) For deflector <strong>with</strong> the center support bracket, attach the case and bracket using the3/8 inch spacer and #12 x 1 3/4 screw.7. Attach the left and right end caps to the pivot brackets using one each 1/4-20 x 1 screw.6 052960-003r3
<strong>Carefree</strong> <strong>of</strong> <strong>Colorado</strong>MAINTENANCESOK<strong>II</strong> w/ <strong>Deflector</strong>FABRIC CARECAUTIONDO NOT USE OIL BASED CLEANERS OR ANY CAUSTIC, GRANULATED, OR ABRASIVE TYPE CLEANERS ON YOURCAREFREE PRODUCT.1. One <strong>of</strong> the best ways to keep the fabric looking good and to delay the need for deep or vigorouscleanings is to hose fabrics <strong>of</strong>f on a monthly basis <strong>with</strong> clear water. This practice will help prevent dirtfrom becoming deeply imbedded in the fabric and eliminate the need for more frequent vigorouscleanings. In most environments, a thorough cleaning will be needed every two to three years.2. When it's time for a thorough cleaning, the fabric can be cleaned while still mounted. For Vinyl Fabric – Use a s<strong>of</strong>t brush and warm water <strong>with</strong> soap. For Acrylic Fabric – Use a stiff brush and warm water <strong>with</strong> soap.3. When cleaning the fabric, it is important to observe the following: Always use a natural soap. Never detergent. Water should be cold to lukewarm. Never more than 100 degrees. Air-dry only. Never apply heat to the fabric. Always allow the fabric to dry completely before rolling up the fabric.MildewMildew is a fungus growth that looks like dirt. Vinyl coated polyester fabrics are mildew resistant because<strong>of</strong> a chemical biocide in the vinyl coating. Under ordinary conditions, mildew will not appear. However, inareas where high temperature and humidity are common, mildew can be a problem and require thematerial to be washed more frequently. THOROUGHLY rinse the fabric <strong>with</strong> clean water and allow to air drycompletely before rolling up the fabric.POOLINGWhen water collects on the top <strong>of</strong> the fabric, this is known as "pooling". This can occur during inclementweather or if a running air conditioner discharges over the SOK<strong>II</strong>. The water is dumped when the room isretracted. It is recommended that if water accumulates on the top <strong>of</strong> the SOK<strong>II</strong>, briefly retract the room todump the water. This will help prevent the fabric from stretching or distorting.7 052960-003r3
<strong>Carefree</strong> <strong>of</strong> <strong>Colorado</strong>CAREFREE MAJOR PRODUCT LIMITED WARRANTYSOK<strong>II</strong> w/ <strong>Deflector</strong><strong>Carefree</strong> <strong>of</strong> <strong>Colorado</strong> (hereafter referred to as <strong>Carefree</strong>) warrants to the first retail Purchaser that the<strong>Carefree</strong> Product is free <strong>of</strong> defects in material and workmanship <strong>with</strong>in the terms and conditions as set forthin the warranty statement available online at www.carefree<strong>of</strong>colorado.com. <strong>Carefree</strong>’s obligation under thiswarranty is limited to the repair or replacement, at <strong>Carefree</strong>’s option, <strong>of</strong> any defective component <strong>with</strong> newor factory refurbished components.OWNER MUST RETAIN THE ORIGINAL PROOF OF PURCHASE AND/OR HAVE THE PRODUCT WARRANTYREGISTRATION ON FILE AT CAREFREE FOR WARRANTY CLAIMS.THIS WARRANTY IS NOT TRANSFERABLE.For- Warranty Duration;- Warranty Coverage and Exclusions;- Warranty Terms <strong>of</strong> Coverage; and,- Warranty Claim ProceduresRefer to publication052580-111 "<strong>Carefree</strong> Major Product Limited Warranty"available online atwww.carefree<strong>of</strong>colorado.comRegister your <strong>Carefree</strong> products on-line at www.carefree<strong>of</strong>colorado.comIMPORTANT NOTICE: It is strongly recommended that adjustments and repairs be performed bytrained technicians at your Authorized <strong>Carefree</strong> Dealer. Work performed by non-authorizedpersons or businesses may void warranty.<strong>Carefree</strong> <strong>of</strong> <strong>Colorado</strong> 2145 W. 6 th Avenue Broomfield, CO 80020 a Scott Fetzer company8 052960-003r3