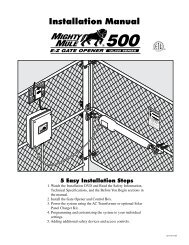
Installation Manual - GTO/Pro
Installation Manual - GTO/Pro
Installation Manual - GTO/Pro

You also want an ePaper? Increase the reach of your titles
YUMPU automatically turns print PDFs into web optimized ePapers that Google loves.
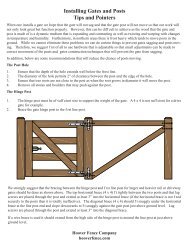
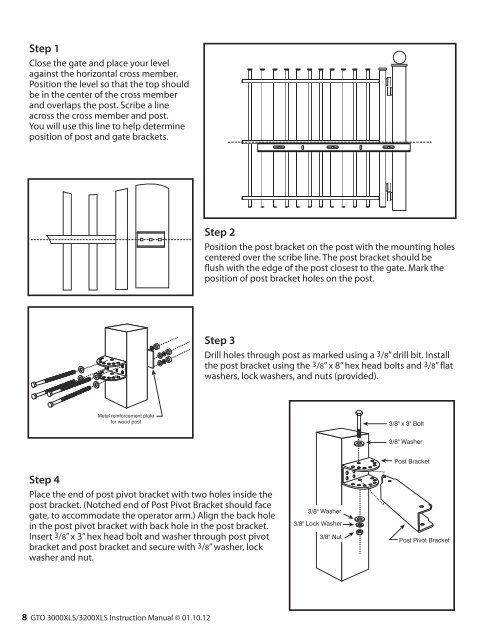
Step 1Close the gate and place your levelagainst the horizontal cross member.Position the level so that the top shouldbe in the center of the cross memberand overlaps the post. Scribe a lineacross the cross member and post.You will use this line to help determineposition of post and gate brackets.Step 2Position the post bracket on the post with the mounting holescentered over the scribe line. The post bracket should beflush with the edge of the post closest to the gate. Mark theposition of post bracket holes on the post.Step 3Drill holes through post as marked using a 3/8” drill bit. Installthe post bracket using the 3/8” x 8” hex head bolts and 3/8” flatwashers, lock washers, and nuts (provided) .Metal reinforcement platefor wood post3/8" x 3" Bolt3/8" WasherStep 4Place the end of post pivot bracket with two holes inside thepost bracket. (Notched end of Post Pivot Bracket should facegate, to accommodate the operator arm.) Align the back holein the post pivot bracket with back hole in the post bracket.Insert 3/8” x 3” hex head bolt and washer through post pivotbracket and post bracket and secure with 3/8” washer, lockwasher and nut.3/8" Washer3/8" Lock Washer3/8" NutPost BracketPost Pivot Bracket8 <strong>GTO</strong> 3000XLS/3200XLS Instruction <strong>Manual</strong> © 01.10.12