Almost Ready To Fly 2M Electric Powered R/C Sailplane - Carrocar
Almost Ready To Fly 2M Electric Powered R/C Sailplane - Carrocar
Almost Ready To Fly 2M Electric Powered R/C Sailplane - Carrocar
- No tags were found...

Create successful ePaper yourself
Turn your PDF publications into a flip-book with our unique Google optimized e-Paper software.
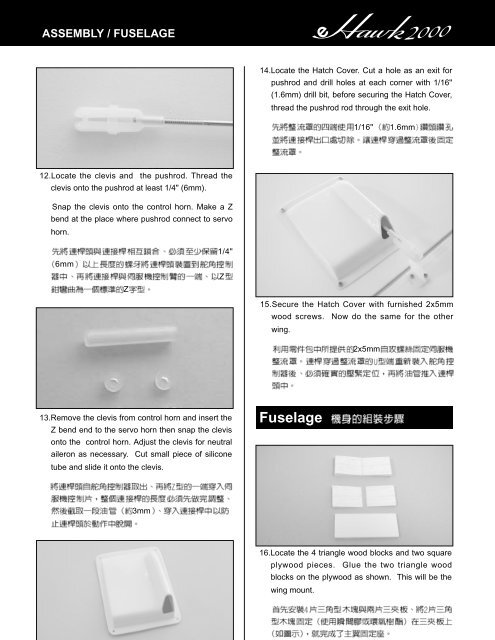
ASSEMBLY / FUSELAGE14.Locate the Hatch Cover. Cut a hole as an exit forpushrod and drill holes at each corner with 1/16"(1.6mm) drill bit, before securing the Hatch Cover,thread the pushrod rod through the exit hole.1/16" 1.6mm12.Locate the clevis and the pushrod. Thread theclevis onto the pushrod at least 1/4" (6mm).Snap the clevis onto the control horn. Make a Zbend at the place where pushrod connect to servohorn.6mmZ1/4"Z15.Secure the Hatch Cover with furnished 2x5mmwood screws. Now do the same for the otherwing.2x5mm13.Remove the clevis from control horn and insert theZ bend end to the servo horn then snap the clevisonto the control horn. Adjust the clevis for neutralaileron as necessary. Cut small piece of siliconetube and slide it onto the clevis.Fuselage3mm16.Locate the 4 triangle wood blocks and two squareplywood pieces. Glue the two triangle woodblocks on the plywood as shown. This will be thewing mount.