RayClic Unpowered Installation Instructions - California Detection ...
RayClic Unpowered Installation Instructions - California Detection ...
RayClic Unpowered Installation Instructions - California Detection ...

You also want an ePaper? Increase the reach of your titles
YUMPU automatically turns print PDFs into web optimized ePapers that Google loves.
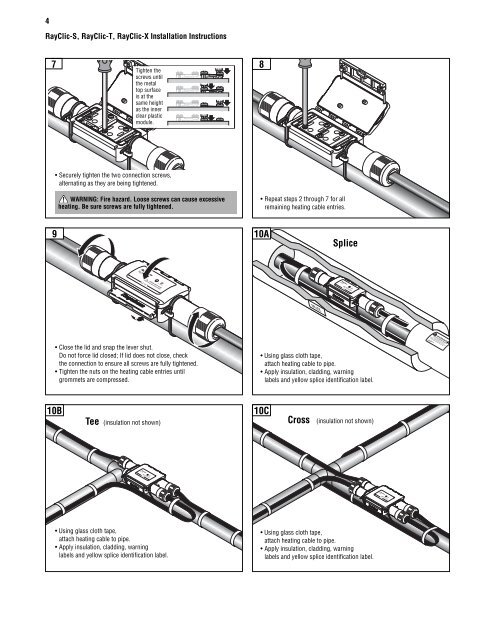
R®4<strong>RayClic</strong>-S, <strong>RayClic</strong>-T, <strong>RayClic</strong>-X <strong>Installation</strong> <strong>Instructions</strong>7 8Tighten thescrews untilthe metaltop surfaceis at thesame heightas the innerclear plasticmodule.• Securely tighten the two connection screws,alternating as they are being tightened.WARNING: Fire hazard. Loose screws can cause excessiveheating. Be sure screws are fully tightened.• Repeat steps 2 through 7 for allremaining heating cable entries.910ASplice• Close the lid and snap the lever shut.Do not force lid closed; If lid does not close, checkthe connection to ensure all screws are fully tightened.• Tighten the nuts on the heating cable entries untilgrommets are compressed.• Using glass cloth tape,attach heating cable to pipe.• Apply insulation, cladding, warninglabels and yellow splice identification label.10BTee (insulation not shown)10CCross (insulation not shown)• Using glass cloth tape,attach heating cable to pipe.• Apply insulation, cladding, warninglabels and yellow splice identification label.• Using glass cloth tape,attach heating cable to pipe.• Apply insulation, cladding, warninglabels and yellow splice identification label.