RayClic Unpowered Installation Instructions - California Detection ...
RayClic Unpowered Installation Instructions - California Detection ...
RayClic Unpowered Installation Instructions - California Detection ...

Create successful ePaper yourself
Turn your PDF publications into a flip-book with our unique Google optimized e-Paper software.
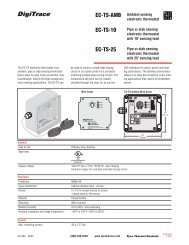
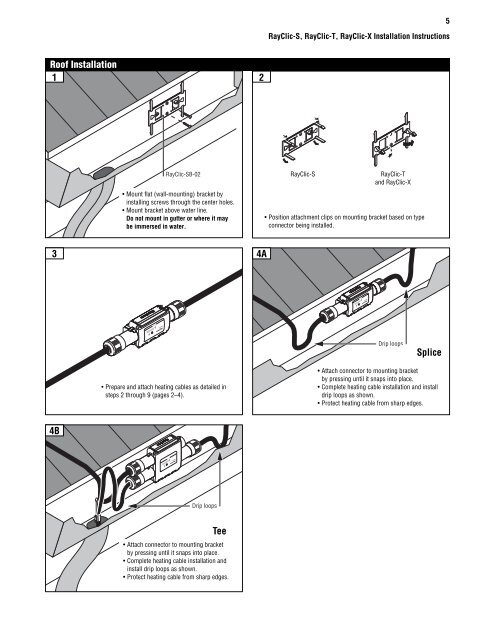
<strong>RayClic</strong>-S, <strong>RayClic</strong>-T, <strong>RayClic</strong>-X <strong>Installation</strong> <strong>Instructions</strong>5Roof <strong>Installation</strong>12<strong>RayClic</strong>-SB-02• Mount flat (wall-mounting) bracket byinstalling screws through the center holes.• Mount bracket above water line.Do not mount in gutter or where it maybe immersed in water.<strong>RayClic</strong>-S<strong>RayClic</strong>-Tand <strong>RayClic</strong>-X• Position attachment clips on mounting bracket based on typeconnector being installed.34ADrip loopsSplice• Prepare and attach heating cables as detailed insteps 2 through 9 (pages 2–4).• Attach connector to mounting bracketby pressing until it snaps into place.• Complete heating cable installation and installdrip loops as shown.• Protect heating cable from sharp edges.4BDrip loopsTee• Attach connector to mounting bracketby pressing until it snaps into place.• Complete heating cable installation andinstall drip loops as shown.• Protect heating cable from sharp edges.