


You also want an ePaper? Increase the reach of your titles
YUMPU automatically turns print PDFs into web optimized ePapers that Google loves.
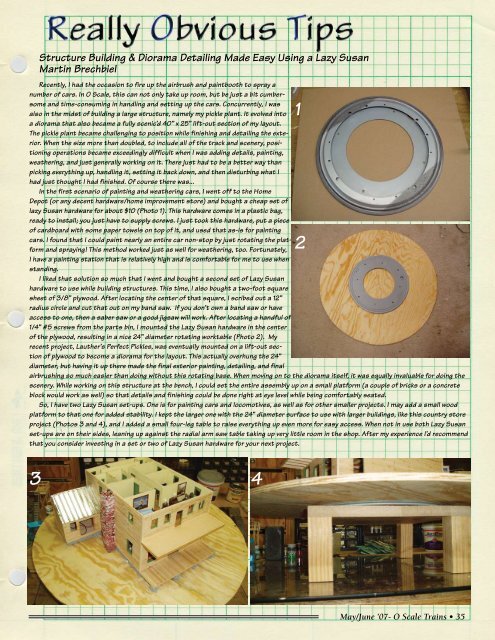
Structure Building & Diorama Detailing Made Easy Using a Lazy SusanMartin BrechbielRecently, I had the occasion to fire up the airbrush and paintbooth to spray anumber of cars. In O <strong>Scale</strong>, this can not only take up room, but be just a bit cumbersomeand time-consuming in handling and setting up the cars. Concurrently, I wasalso in the midst of building a large structure, namely my pickle plant. It evolved into 1a diorama that also became a fully scenic’d 40” x 25” lift-out section of my layout.The pickle plant became challenging to position while finishing and detailing the exterior.When the size more than doubled, to include all of the track and scenery, positioningoperations became exceedingly difficult when I was adding details, painting,weathering, and just generally working on it. There just had to be a better way thanpicking everything up, handling it, setting it back down, and then disturbing what Ihad just thought I had finished. Of course there was...In the first scenario of painting and weathering cars, I went off to the HomeDepot (or any decent hardware/home improvement store) and bought a cheap set oflazy Susan hardware for about $10 (Photo 1). This hardware comes in a plastic bag,ready to install; you just have to supply screws. I just took this hardware, put a pieceof cardboard with some paper towels on top of it, and used that as-is for paintingcars. I found that I could paint nearly an entire car non-stop by just rotating the platformand spraying! This method worked just as well for weathering, too. Fortunately,2I have a painting station that is relatively high and is comfortable for me to use whenstanding.I liked that solution so much that I went and bought a second set of Lazy Susanhardware to use while building structures. This time, I also bought a two-foot squaresheet of 3/8” plywood. After locating the center of that square, I scribed out a 12”radius circle and cut that out on my band saw. If you don’t own a band saw or haveaccess to one, then a saber saw or a good jigsaw will work. After locating a handful of1/4” #5 screws from the parts bin, I mounted the Lazy Susan hardware in the centerof the plywood, resulting in a nice 24” diameter rotating worktable (Photo 2). Myrecent project, Lauther’s Perfect Pickles, was eventually mounted on a lift-out sectionof plywood to become a diorama for the layout. This actually overhung the 24”diameter, but having it up there made the final exterior painting, detailing, and finalairbrushing so much easier than doing without this rotating base. When moving on to the diorama itself, it was equally invaluable for doing thescenery. While working on this structure at the bench, I could set the entire assembly up on a small platform (a couple of bricks or a concreteblock would work as well) so that details and finishing could be done right at eye level while being comfortably seated.So, I have two Lazy Susan set-ups. One is for painting cars and locomotives, as well as for other smaller projects. I may add a small woodplatform to that one for added stability. I kept the larger one with the 24” diameter surface to use with larger buildings, like this country storeproject (Photos 3 and 4), and I added a small four-leg table to raise everything up even more for easy access. When not in use both Lazy Susanset-ups are on their sides, leaning up against the radial arm saw table taking up very little room in the shop. After my experience I’d recommendthat you consider investing in a set or two of Lazy Susan hardware for your next project.3 4May/June ’07- O <strong>Scale</strong> <strong>Trains</strong> • 35


