


You also want an ePaper? Increase the reach of your titles
YUMPU automatically turns print PDFs into web optimized ePapers that Google loves.
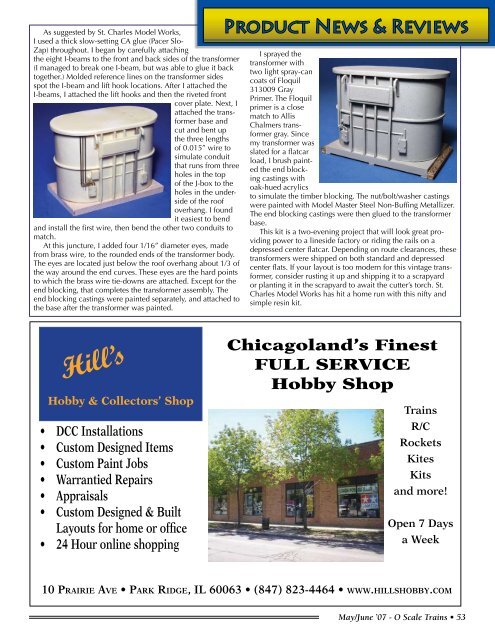
As suggested by St. Charles Model Works,I used a thick slow-setting CA glue (Pacer Slo-Zap) throughout. I began by carefully attachingthe eight I-beams to the front and back sides of the transformer(I managed to break one I-beam, but was able to glue it backtogether.) Molded reference lines on the transformer sidesspot the I-beam and lift hook locations. After I attached theI-beams, I attached the lift hooks and then the riveted frontcover plate. Next, Iattached the transformerbase andcut and bent upthe three lengthsof 0.015” wire tosimulate conduitthat runs from threeholes in the topof the J-box to theholes in the undersideof the roofoverhang. I foundit easiest to bendand install the first wire, then bend the other two conduits tomatch.At this juncture, I added four 1/16” diameter eyes, madefrom brass wire, to the rounded ends of the transformer body.The eyes are located just below the roof overhang about 1/3 ofthe way around the end curves. These eyes are the hard pointsto which the brass wire tie-downs are attached. Except for theend blocking, that completes the transformer assembly. Theend blocking castings were painted separately, and attached tothe base after the transformer was painted.Product News & ReviewsI sprayed thetransformer withtwo light spray-cancoats of Floquil313009 GrayPrimer. The Floquilprimer is a closematch to AllisChalmers transformergray. Sincemy transformer wasslated for a flatcarload, I brush paintedthe end blockingcastings withoak-hued acrylicsto simulate the timber blocking. The nut/bolt/washer castingswere painted with Model Master Steel Non-Buffing Metallizer.The end blocking castings were then glued to the transformerbase.This kit is a two-evening project that will look great providingpower to a lineside factory or riding the rails on adepressed center flatcar. Depending on route clearances, thesetransformers were shipped on both standard and depressedcenter flats. If your layout is too modern for this vintage transformer,consider rusting it up and shipping it to a scrapyardor planting it in the scrapyard to await the cutter’s torch. St.Charles Model Works has hit a home run with this nifty andsimple resin kit.Hill’sHobby & Collectors’ Shop• DCC Installations• Custom Designed Items• Custom Paint Jobs• Warrantied Repairs• Appraisals• Custom Designed & BuiltLayouts for home or office• 24 Hour online shoppingChicagoland’s FinestFULL SERVICEHobby Shop<strong>Trains</strong>R/CRocketsKitesKitsand more!Open 7 Daysa Week10 PRAIRIE AVE • PARK RIDGE, IL 60063 • (847) 823-4464 • WWW.HILLSHOBBY.COMMay/June ’07 - O <strong>Scale</strong> <strong>Trains</strong> • 53


