


You also want an ePaper? Increase the reach of your titles
YUMPU automatically turns print PDFs into web optimized ePapers that Google loves.
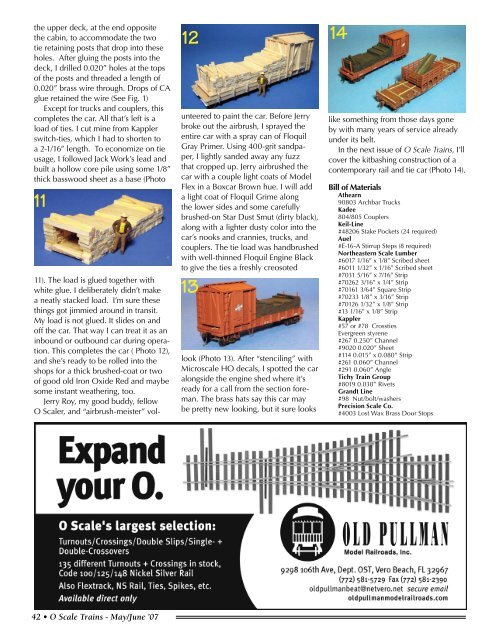
the upper deck, at the end oppositethe cabin, to accommodate the twotie retaining posts that drop into theseholes. After gluing the posts into thedeck, I drilled 0.020” holes at the topsof the posts and threaded a length of0.020” brass wire through. Drops of CAglue retained the wire (See Fig. 1)Except for trucks and couplers, thiscompletes the car. All that’s left is aload of ties. I cut mine from Kapplerswitch-ties, which I had to shorten toa 2-1/16” length. To economize on tieusage, I followed Jack Work’s lead andbuilt a hollow core pile using some 1/8”thick basswood sheet as a base (Photo111211). The load is glued together withwhite glue. I deliberately didn’t makea neatly stacked load. I’m sure thesethings got jimmied around in transit.My load is not glued. It slides on andoff the car. That way I can treat it as aninbound or outbound car during operation.This completes the car ( Photo 12),and she’s ready to be rolled into theshops for a thick brushed-coat or twoof good old Iron Oxide Red and maybesome instant weathering, too.Jerry Roy, my good buddy, fellowO <strong>Scale</strong>r, and “airbrush-meister” volunteeredto paint the car. Before Jerrybroke out the airbrush, I sprayed theentire car with a spray can of FloquilGray Primer. Using 400-grit sandpaper,I lightly sanded away any fuzzthat cropped up. Jerry airbrushed thecar with a couple light coats of ModelFlex in a Boxcar Brown hue. I will adda light coat of Floquil Grime alongthe lower sides and some carefullybrushed-on Star Dust Smut (dirty black),along with a lighter dusty color into thecar’s nooks and crannies, trucks, andcouplers. The tie load was handbrushedwith well-thinned Floquil Engine Blackto give the ties a freshly creosoted13look (Photo 13). After “stenciling” withMicroscale HO decals, I spotted the caralongside the engine shed where it’sready for a call from the section foreman.The brass hats say this car maybe pretty new looking, but it sure looks14like something from those days goneby with many years of service alreadyunder its belt.In the next issue of O <strong>Scale</strong> <strong>Trains</strong>, I’llcover the kitbashing construction of acontemporary rail and tie car (Photo 14).Bill of MaterialsAthearn90803 Archbar TrucksKadee804/805 CouplersKeil-Line#48206 Stake Pockets (24 required)Auel#E-16-A Stirrup Steps (8 required)Northeastern <strong>Scale</strong> Lumber#6017 1/16” x 1/8” Scribed sheet#6011 1/32” x 1/16” Scribed sheet#7031 5/16” x 7/16” Strip#70262 3/16” x 1/4” Strip#70161 3/64” Square Strip#70233 1/8” x 3/16” Strip#70126 1/32” x 1/8” Strip#13 1/16” x 1/8” StripKappler#57 or #78 CrosstiesEvergreen styrene#267 0.250” Channel#9020 0.020” Sheet#114 0.015” x 0.080” Strip#261 0.060” Channel#291 0.060” AngleTichy Train Group#8019 0.030” RivetsGrandt Line#98 Nut/bolt/washersPrecision <strong>Scale</strong> Co.#4003 Lost Wax Brass Door Stops42 • O <strong>Scale</strong> <strong>Trains</strong> - May/June ’07


