
Create successful ePaper yourself
Turn your PDF publications into a flip-book with our unique Google optimized e-Paper software.
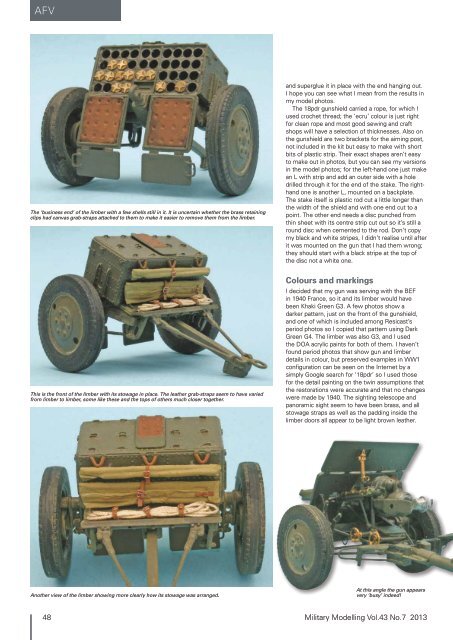
AFVThe ‘business end’ of the limber with a few shells still in it. It is uncertain whether the brass retainingclips had canvas grab-straps attached to them to make it easier to remove them from the limber.and superglue it in place with the end hanging out.I hope you can see what I mean from the results inmy model photos.The 18pdr gunshield carried a rope, for which Iused crochet thread; the ‘ecru’ colour is just rightfor clean rope and most good sewing and craftshops will have a selection of thicknesses. Also onthe gunshield are two brackets for the aiming post,not included in the kit but easy to make with shortbits of plastic strip. Their exact shapes aren’t easyto make out in photos, but you can see my versionsin the model photos; for the left-hand one just makean L with strip and add an outer side with a holedrilled through it for the end of the stake. The righthandone is another L, mounted on a backplate.The stake itself is plastic rod cut a little longer thanthe width of the shield and with one end cut to apoint. The other end needs a disc punched fromthin sheet with its centre strip cut out so it’s still around disc when cemented to the rod. Don’t copymy black and white stripes, I didn’t realise until afterit was mounted on the gun that I had them wrong;they should start with a black stripe at the top ofthe disc not a white one.This is the front of the limber with its stowage in place. The leather grab-straps seem to have variedfrom limber to limber, some like these and the tops of others much closer together.Colours and markingsI decided that my gun was serving with the BEFin 1940 France, so it and its limber would havebeen Khaki Green G3. A few photos show adarker pattern, just on the front of the gunshield,and one of which is included among Resicast’speriod photos so I copied that pattern using DarkGreen G4. The limber was also G3, and I usedthe DOA acrylic paints for both of them. I haven’tfound period photos that show gun and limberdetails in colour, but preserved examples in WW1configuration can be seen on the Internet by asimply Google search for ‘18pdr’ so I used thosefor the detail painting on the twin assumptions thatthe restorations were accurate and that no changeswere made by 1940. The sighting telescope andpanoramic sight seem to have been brass, and allstowage straps as well as the padding inside thelimber doors all appear to be light brown leather.Another view of the limber showing more clearly how its stowage was arranged.At this angle the gun appearsvery ‘busy’ indeed!48<strong>Military</strong> <strong>Modelling</strong> Vol.43 No.7 <strong>2013</strong>