LEGACY Control System operations - Lionel
LEGACY Control System operations - Lionel
LEGACY Control System operations - Lionel
You also want an ePaper? Increase the reach of your titles
YUMPU automatically turns print PDFs into web optimized ePapers that Google loves.
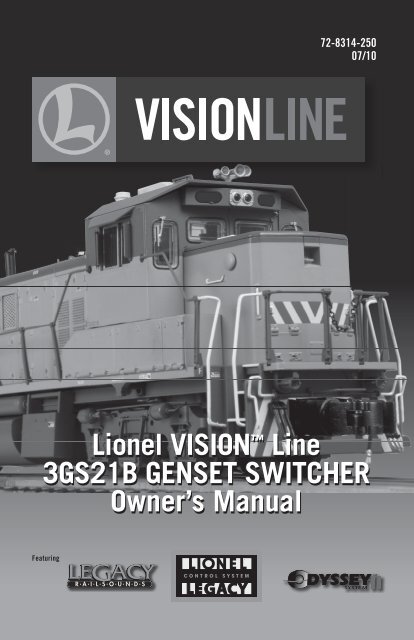
Congratulations!As a VISION Line locomotive, the 3GS21B GENSET SWITCHER is the most technicallyadvanced and realistic O Gauge diesel locomotive ever made. On the outside, thisgold standard engine features more realistic interior detail, exterior detail and decorationthan ever before. Inside the body you'll find the highest caliber electronics and sounds togive you unprecedented operational realism. In addition to all the great features foundon <strong>Lionel</strong> Standard O locomotives, your 3GS21B GENSET SWITCHER is equipped with anarray of other realistic and dramatic effects including a removable cab roof for viewing ahighly detailed interior with illuminated gauges, 2 opening doors on the locomotives cab,opening doors below the brakeman's window showing scale details underneath. Prototypicalfeatures include 3 exhaust stacks that open at random and emit smoke. Smoke output issynchronized to the diesel RPM of the Legacy RailSounds sound system. More than ever,you are in control of the realistic effects and operation of your locomotive. The VISION Line3GS21B GENSET SWITCHER locomotive is ready for duty on your layout.Unpacking Your VISION Line locomotiveBecause of all the fine details and special features on your VISION Line locomotive, wethought it best to really pack it tight, even better than our normal sturdy packing. ThisVISION Line locomotive is the first ever packaged with ECO-friendly material, and alsoincludes a baseplate used to secure the locomotive while in transit. Both the containerand the baseplate are held together with velcro straps. Carefully remove the container andbaseplate from the box and set it on a flat surface. Remove the velcro straps and carefullyremove the shell and wrapping. Look at the bottom of the baseplate to locate the screwsthat fasten the baseplate to the locomotive. With a Phillips screwdriver, remove the screwswhile keeping the locomotive level. CAUTION: The handrails of your locomotive are theantennas for the <strong>LEGACY</strong> system. The stanchions are plastic to insulate the handrails fromthe die-cast body. The stanchions are very fragile, so do not squeeze them or the handrailswhen unpacking the locomotive. Your VISION locomotive is now ready to place on the track.PLEASE see the smoke fluid section Fig. 8, page 35 before you run your locomotive.The following <strong>Lionel</strong> marks are used throughout this catalog and are protectedunder law. All rights reserved.<strong>Lionel</strong>®, <strong>LEGACY</strong>, TrainMaster®, Odyssey®, RailSounds®, CrewTalk, TowerCom, DynaChuff,StationSounds, Pullmor®, ElectroCoupler, Magne-Traction®, CAB-1® Remote <strong>Control</strong>ler,American Flyer®, <strong>Lionel</strong> ZW®, ZW®, MagniVision®, TMCC®, <strong>Lionel</strong>ville®, Wireless Tether,Powerhouse, LionMaster®, Conventional Classics, Postwar Celebration Series, TruRail, PH-1Powerhouse®, Powermaster®, Powerstation-Powerhouse®, Accessory Motor <strong>Control</strong>ler, AMC,Accessory Switch <strong>Control</strong>ler, ASC, Action Recorder <strong>Control</strong>ler, ARC, Track Power <strong>Control</strong>ler300, TPC 300, Track Power <strong>Control</strong>ler 400, TPC 400, Block Power <strong>Control</strong>ler, BPC,Operating Track <strong>Control</strong>ler, OTC, FatBoy, <strong>Lionel</strong> Lines®, Joshua <strong>Lionel</strong> Cowen Series, Lockon®,TrainSounds, MultiHorn, Choo-Choo2
VISION Line features of this locomotiveNew Lighting Features• Rule 17 lighting for both headlight and rear light• Enhanced realistic lighting in cab interior with illuminated panel detailsUnparalleled Detailing• Movable cab details• Opening door on the brakeman’s side of cab and two hinged covers below the cab open toreveal realistic detailsOpening side doorsreveals interior detailBrakeman's sideof LocomotiveFront of LocomotiveRear of Locomotive3
VISION Line features of this locomotiveUnparalleled Detailing• Removable cab roof reveals the decorated cab interiorTo remove roof, lift up a little,then pull awayNOTE: Carefully slip thecab roof on to avoid paintdamageFront of LocomotiveIlluminated cab interiorwith back-lit gaugesPrototypical Genset locomotive three diesel engines feature: Engines on the real locomotivecycle on and off automatically to provide variable pulling power. To simplify maintenance, differentengines are used at different times, so that the total number of hours on each is kept relativelyequal. Your <strong>Lionel</strong> model reproduces this unique feature. Notice that the smoke output from each ofthe three stacks changes, depending on which engine is operating.When idling at RPM level 1 for an extended period, the Genset will enter standby mode. The dieselengines will automatically turn off and every 30 seconds an electronic alert beep will sound towarn working crew that the locomotive is in standby. To maintain fluid and temperature levels, thelocomotive will automatically re-start one of its engines when necessary.4
VISION Line features of this locomotive continuedNew Smoke Features• TruRail Exhaust, a new cab-controlled, variable-intensity smoke effect• 3 fan-driven smoke units with adjustable smoke output and multiple stacks delivers varyingintensities of smoke• All smoke effects are synchronized to the RailSounds sound systemNote: TruRail Exhaust models the prototypical behavior of the GENSET switcher locomotive.The GENSET is unique in that it cycles through the 3 diesel engines as load is applied. Inaddition, engines are brought online in a manner to evenly balance the wear and optimizeserviceability. Like the actual switcher, this locomotive is capable of producing smoke fromany of the three smoke stacks simultaneously in accordance with the number of enginesthat are currently operating. The engines cycle on and off automatically to provide variablepulling power. The overall volume of smoke can be controlled through the cab and set to off,low, medium or high depending on your preference.In an effort to reproduce this prototypical behavior, at each start up (Power on/off), yourVision locomotive will start up with a different engine - cycling through the three available.To bring more engines (i.e., smoke units) online, simply increase the RPM level by pushingthe RPM (UP) button, or increase the rail speed that will cause an increase in the RPM level.Once you reach a predetermined RPM level, another engine will be activated.To decrease the number of operating smoke units, simply push the RPM (DOWN) button, ordecrease the rail speed that will cause a decrease in the RPM level. Once a certain RPMlevel is achieved, a another engine will be deactivated.CAUTION: DO NOT PLACE FLUID IN THE SMOKE STACKS!The movable covers on the stacks are very fragile! Please refer to Figure 8 on page 35 asto where to fill the unit with smoke fluid.Upgraded Sound Features• The <strong>LEGACY</strong> RailSounds sound system synchronized realistic sounds to nearly all aspectsof locomotive operation• The independently adjustable volume control allows you to use the Remote <strong>Control</strong>ler tolower the level of background effects (such as RPM levels) while keeping operatorcontrolled effects (such as the horn) at full volume• TruRail Dialog – Activate our upgraded dialog features which boast the mostauthentic railroad terminology possible. Also, dialog scenarios can change with engineoperation and user control• TruRail Signals – Activate the “quilling” horn and user-playable bell. The GENSET'selectronic bell plays a recording of a real locomotive bell. It is used on this and othermodern locomotives to simplify inspection and maintenance regulations. There is a dedicatedCAB-2 slide lever control for both horn and bell functionsHave fun experimenting with the prototypical behavior of your 3GS21B GENSET locomotive.Standard Features for this locomotive:• <strong>LEGACY</strong> <strong>Control</strong> <strong>System</strong> – You can run the engine in <strong>LEGACY</strong> <strong>Control</strong> mode, in TrainMasterCommand <strong>Control</strong> mode, or in Conventional mode with a standard transformer• Odyssey II Speed <strong>Control</strong> with ON/OFF switch• High-torque motor with momentum flywheel5
Standard Features for this locomotive continued:• Front and rear ElectroCouplers• Die-cast metal locomotive body, frame, and truck sides• Traction tires• Accurate separately-applied builder’s plates• Engineer and brakeman figures• Opening roof on cab• Sliding cab window glass• Enhanced realistic lighting in cab interior with backlit gauges• Directional lighting including operating headlight and back-up light• Illuminated number boards• Ground lights• Oscillating ditch lights on both ends• Fan-driven smoke units with ON/OFF switch• User-adjustable smoke outputTable of contentsQuick Start<strong>LEGACY</strong> <strong>Control</strong> <strong>operations</strong> 8TrainMaster Command <strong>Control</strong> <strong>operations</strong> 8Transformer <strong>operations</strong> 8Locomotive switch function overviewLocomotive switch location 9-10<strong>LEGACY</strong> RailSounds sound system <strong>operations</strong>Installing the battery 11<strong>LEGACY</strong> <strong>Control</strong> <strong>System</strong> <strong>operations</strong>Get ready to run 12Start ‘Er Up 12The <strong>LEGACY</strong> CAB-2 Remote <strong>Control</strong>ler 13The Velocity Throttle 14The Multi-<strong>Control</strong>ler 14-15The Train Brake Slider 15The Warning Sound <strong>Control</strong>ler 16The Speed Bar 17Ground Light <strong>Control</strong> 18Rule 17 Lighting <strong>Control</strong> 18<strong>LEGACY</strong> RailSounds 19Activating the CrewTalk dialog and TowerCom announcements 20Assigning your locomotive a new ID# 21Reprogramming your locomotive to restore features 216
Quick StartNote!Power your locomotive with an alternating-current (50-60Hz AC) transformer only.Powering your locomotive with a direct-current (DC) transformer, or in excess of 19volts AC, may result in damage to sensitive electronic components.<strong>LEGACY</strong> <strong>Control</strong> <strong>operations</strong>For the finest operating experience, your locomotive is fully compatible with the new<strong>LEGACY</strong> <strong>Control</strong> <strong>System</strong>.To operate in <strong>LEGACY</strong> mode, you need a <strong>LEGACY</strong> Command Base and <strong>LEGACY</strong> CAB-2Remote <strong>Control</strong>ler. Both products are offered together in the <strong>LEGACY</strong> Command Set,6-14295.1. Turn off track power and plug in the <strong>LEGACY</strong> Base.2. Place your locomotive on <strong>Lionel</strong> or <strong>Lionel</strong>-compatible O-42 (O-54 recommended) track.3. Increase track power voltage to full power (no more than 19 volts AC).4. Press ENG and 1 to address your locomotive with your <strong>LEGACY</strong> CAB-2 Remote <strong>Control</strong>ler.5. Throttle up and move ‘em out.TrainMaster Command <strong>Control</strong> <strong>operations</strong>To operate your locomotive in the Command <strong>Control</strong> environment, you need a CommandBase (available separately, 6-12911) and a CAB-1 Remote <strong>Control</strong>ler (available separately,6-12868).1. Turn off track power and plug in the Command Base.2. Place your locomotive on <strong>Lionel</strong> or <strong>Lionel</strong>-compatible O-42 (O-54 recommended) track.3. Increase track voltage to full power (no more than 19 volts AC).4. Press ENG and 1 to address your locomotive with your CAB-1 Remote <strong>Control</strong>ler.5. Throttle up and move ‘em out.Transformer <strong>operations</strong>1. Turn off track power.2. Place your locomotive on <strong>Lionel</strong> or <strong>Lionel</strong>-compatible O-42 (O-54 recommended) track.3. Power your locomotive at 12-18 volts with your alternating current (AC)transformer.4. Wait three to eight seconds until the locomotive’s headlight illuminates and the<strong>LEGACY</strong> RailSounds sound system starts up.5. Move ‘em out! Press the DIRECTION button on your controller, then throttle up.Note!For conventional operation, there must not be a Command Base powered upanywhere in the area. The locomotive receives its signals through the airwaves. Ifa base is detected your locomotive will default to command mode.8
Locomotive switch function overviewLocomotive switch locationThe switches SWITCHthat control the features and programing of your locomotive are located under thedrop down door section under the cab on the engineer's side of the locomotive (see Figure 2, page10). When SWITCH you drop down the door these switches are visible with their icons. Icons on the righthand side show the ON or RUN positions. Icons on the left hand side show the OFF or PROGRAMpositions. SWITCH On the inside of the drop down door, there is also a legend with words that help describethe function of each switch.Looking at the switches from left to right they are as follows:OFFPROGRAMSWITCHSWITCHSWITCHSWITCHSWITCHSWITCHSWITCHSWITCHSWITCHSWITCHSWITCHSWITCHONRUNSmoke Unit SwitchUsed to turn the main smoke stack unit function “ON” and “OFF”.This switch is "read" by your engine at start-up. Switching it after start-up willhave no effect.Odyssey II Speed <strong>Control</strong> <strong>System</strong> SwitchUsed to turn the Odyssey II Speed <strong>Control</strong> <strong>System</strong> “ON” and “OFF”.Program Run SwitchUsed to assign an ID# and reprogram the locomotive in <strong>LEGACY</strong> and Commandoperation when the switch is in the “PROG” position. Also used to “lock” yourlocomotive in a single direction, or neutral, in conventional operation when theswitch is placed in the “PROG” position. See pages 21, 27, and 31.SWITCHSound controlsRailSounds ON/OFF SwitchUsed to turn off all sounds except horn and bell.OFFONVolume UP/DOWN <strong>Control</strong>Used to turn the maximum volume up or down.-+Figure 1. Locomotive switch functions9
Locomotive switch function overviewLocomotive switch location continuedRear of LocomotiveFront of Locomotive- +Figure 2. Locomotive switch locations10
<strong>LEGACY</strong> RailSounds sound system <strong>operations</strong>Installing the batteryAlthough the <strong>LEGACY</strong> RailSounds sound system is powered through the track, werecommend that you install a nine-volt alkaline battery in the locomotive to preventthe sound system from shutting down during track power interruptions (for example,at a switch or a dirty section of track). Follow these steps and see below as you installthe battery.Note!If the RailSounds sound system turns off during interruptions in track power,you may need to replace the battery.1. Remove the hatch from the front nose of the locomotive by lifting upthen away. SeeFigure 3 below.2. Remove the protective cover from the battery harness.3. Snap the battery harness onto the nine-volt alkaline battery’s terminals.4. Slide the battery into the battery well in the nose cavity.5. Replace the hatch on the nose of the locomotive. See Figure 3 below.Figure 3. Installing the battery in the locomotive11
<strong>LEGACY</strong> <strong>Control</strong> <strong>System</strong> <strong>operations</strong>Note!This section is a brief overview of the <strong>LEGACY</strong> <strong>Control</strong> <strong>System</strong>. For a more in-depthexplanation of the <strong>LEGACY</strong> <strong>Control</strong> <strong>System</strong> features, please see your <strong>LEGACY</strong> <strong>Control</strong><strong>System</strong> Operations Manual.GET READY TO RUNGet your engine running now by following the instructions in this guide. We'll power upthe track, "address the engine" so it can be controlled by your CAB-2 remote, and learnto use the Velocity Throttle, Horn, Bell, Brake and Direction commands.Power Up The TrackIf using a PowerMaster, TPC or ZW, refer to the proper manual for the correct methodto power up. With your locomotive on the track and ready to roll, power up your track to aconstant 18 volts. If a circuit breaker trips when you turn on the <strong>Lionel</strong> power supply, checkthe wheels of your locomotive to make sure they are all securely on the track. Check tomake sure the track is free of all metals that may cause a short circuit.Address Your EngineFirst, you must address the engine. This "tells" your CAB-2 which locomotive you wantto control. This is important when you have more than one engine on your layout.To address an engine:1. Press ENG2. Press 1See reference numbers 1, 2, and 3Start 'Er UpNow it is time to start up your engine's sound system.3. Press StartupYour engine sound system will start up and the Touch-screen <strong>Control</strong> Panel will appear.Startup dialog. Pressing and holding the startup key while the engine is off triggers aconversation between the dispatcher and locomotive crew, prior to the prime mover soundscoming on. Tapping the same button while the engine is shutdown starts the prime moversounds without dialog.12
<strong>LEGACY</strong> <strong>Control</strong> <strong>System</strong> <strong>operations</strong>The <strong>LEGACY</strong> CAB-2 Remote <strong>Control</strong>lerMain DisplayDisplays real-time information about your railroad system.Displays real-time feedback of operation.Scroll ButtonNavigates through the entire list ofEngines, Trains, Switches, etc.Select ButtonPerforms addressing by 3-4digit road number.Touch Screen Key PadA group of touch sensitive keys withicons for each function. These keysserve many purposes and their iconschange accordingly.Train Brake SliderThis slider is used to increase ordecrease the amount of Train Brakeaffecting the engine or train.Train Link ButtonFor future use.AUX-1/Thru ButtonPress to view the <strong>Control</strong> Panelwhile operating. <strong>Control</strong>s switchdirection.Emergency Halt ButtonStops everything on layout;also stops recordingplayback.AUX-2/Out Button<strong>Control</strong>s switch direction.Turns Headlight ON/OFFRecord ButtonUsed to record and play backevents.Velocity ThrottleThrottle control overengines, also used tonavigate thru info/options.Info ButtonUsed to enter/view the info/options of selectedcomponents.CTC ButtonPress and hold to turn your remote onand off. Tap this button toenter the remote and base options. Tapit again to return to the main screen.Soft KeysThese keys directly correlate to the 5selection boxes located at the bottomof the main display. These are alsoused in the info/option menus to selectoptions.Warning Sound <strong>Control</strong>lerWarning Bell and Variable Whistle/Horncontrol. Pull down to sound Whistle/Horn. Push up and release to triggerWarning Bell.Multi <strong>Control</strong>lerBoost, Brake, and Direction control.Rock forward for Boost, rock backwardfor engine brake, and press down fordirection change. Click-hold-and rockfor absolute direction selection.Front & Rear Coupler ButtonsFire couplers.Feedback ButtonToggle ON/OFF the vibration feedbackfeature in the CAB-2 Remote.Official R.R. Speed <strong>Control</strong> BarToggles the touchscreen display of R.R.preset speeds and control panel.Low, Medium, High Momentum ButtonsUsed to select the desired momentum of youraddressed engine/train/accessory.Set ButtonUsed to set Engine address and forprogramming.13
<strong>LEGACY</strong> <strong>Control</strong> <strong>System</strong> <strong>operations</strong>THE VELOCITY THROTTLEThe Velocity Throttle (that big red rotary knob on the bottom of your <strong>Lionel</strong> remote)is used to start your engine moving, slow it down or speed it up. Use it simply byturning it clockwise (speed up) or counter-clockwise (slow down).4. Turn the Velocity Throttle clockwise a small amount. Your engine will begin to move.5. Experiment with the engine’s response to the Velocity Throttle. Turn the VelocityThrottle clockwise and counter-clockwise.6. Slow and stop your engine by turning the Velocity Throttle counter-clockwise.See reference numbers 4, 5, and 6THE MULTI-CONTROLLERDirectionThe direction of your engine toggles between forward and reverse at the touch ofthe Multi-<strong>Control</strong>ler.7. Press the Multi-<strong>Control</strong>ler once. Your engine will come to a stop and the lights willchange directions.8. Turn the Velocity Throttle clockwise a small amount. Your Engine will reversedirections and travel in the opposite direction.See reference numbers 7, and 814
<strong>LEGACY</strong> <strong>Control</strong> <strong>System</strong> <strong>operations</strong>THE MULTI-CONTROLLER (continued)Boost & BrakeBoost and Brake give you another way tocontrol the speed of your train. Boost givesyour loco a temporary increase in tractivepower, and returns to the previous speed whenyou release the control. The brake commandslows you down more quickly than the VelocityThrottle alone.9. Experiment with Boost and Brake. Noticehow your engine responds to the Multi-<strong>Control</strong>ler.THE TRAIN BRAKE SLIDERSee reference number 9A Train Brake is used to slow down and limit the top speed of your train by addinga load. The more the Train Brake is applied by pulling the Train Brake Slider down, themore laboring is heard from the engine. Eventually Train Brake application will slowdown the train and it is even possible to stop a train by pulling the Train Brake Sliderall the way down. A tremendous amount of laboring can be heard whenever you applythe Train Brake in a large amount.10. Experiment with the Train Brake. Try a small amount of the Train Brake when yourengine is moving down the rails at a medium speed. Notice the effect the TrainBrake has on sound and speed. Try adding even more Train Brake and notice thatthe engine sounds like it is working harder and harder.See reference number 1015
<strong>LEGACY</strong> <strong>Control</strong> <strong>System</strong> <strong>operations</strong>THE WARNING SOUND CONTROLLERWarning sounds are an important part of <strong>Lionel</strong> Railroading. Your <strong>Lionel</strong> Legacy<strong>Control</strong> <strong>System</strong> equipped engines have a real-time variable "quilling" Horn while<strong>Lionel</strong> TMCC engines do not have this feature.11. Blow the Horn by pulling down on the Warning Sound <strong>Control</strong>ler.12. Try pulling down the Warning Sound <strong>Control</strong>ler various amounts and listen. Noticethe difference in intensity of the Horn sound.13. Push the Warning Sound <strong>Control</strong>ler up once and quickly release. Notice that thebell rings.14. Push the Warning Sound <strong>Control</strong>ler up and hold it for 1.5 seconds. Notice that thebell is sounding continuously.15. Push the warning sound controller up and hold for 1.5 seconds. Notice that thecontinuous bell stops.16. Experiment with ringing the bell in your own rhythm or continuously, depending onhow you push the Warning Sound <strong>Control</strong>lerSee reference numbers 11, and 12 See reference numbers 13, 14, 15, and 1616
<strong>LEGACY</strong> <strong>Control</strong> <strong>System</strong> <strong>operations</strong>THE SPEED BARSelection of Preset SpeedsThe Speed Bar is used to select a new touch-screen Icon <strong>Control</strong> set. This set of touchscreenkeys is used to select preset speeds. Pressing AUX-1 returns you to the standardcontrol panel.17. Press, hold and release the Preset Speed icons one by one. Experiment.18. The speed of the enginechanges with each pressand release of a differentPreset Speed key.19. You can also use the VelocityThrottle and other actioncontrols in this mode andcontinue to use Presetspeeds at the same time.20. Repeat step 17.21. Press AUX-1 to leave thePreset speed mode andreturn to the Standard<strong>Control</strong> Panel.22. Press the speed bar totoggle between the Speed<strong>Control</strong> Panel and theStandard <strong>Control</strong> Panel.At this point you know thebasics of how to operate your<strong>LEGACY</strong> <strong>Control</strong> system. ThereSee reference numbers 17, 18, 19, 20, 21, and 22is a lot of fun waiting as youexperience the interaction of thecontrols and the touch-screen.Be sure to read the entire <strong>Lionel</strong> Legacy <strong>Control</strong> <strong>System</strong> Manual to get the most from your<strong>Lionel</strong> products.Note!There are no TowerCom announcements when a Preset speed key ispressed. Switcher engines do not have this feature.17
<strong>LEGACY</strong> <strong>Control</strong> <strong>System</strong> <strong>operations</strong>GROUND LIGHT CONTROLWhen operating the locomotive under low-light or darkconditions, Ground Lights provide the engineer andbrakeman with a visual reference to the ground and allowGround lightthem to more accurately judge the motion of the locomotive.AUTO MODE is the default operation of the Ground Lights.In AUTO MODE, the Ground Lights are ON when the locomotiveis stopped and they remain ON when the locomotive is in motion through speed step 24. At speed step25 and above, the Ground Lights are OFF. When the locomotive slows to speed step 24, the Ground Lightswill turn ON. In the Legacy environment, you may activate the Ground Lights when the locomotive is inmotion at speed step 25 and above using the icon shown below to turn the Ground Lights ON. When thelocomotive comes to a stop by either throttling down or by pressing the DIRECTION button, the GroundLights will default to AUTO MODE. You may also set the Ground Lights so that they will remain OFF whenthe locomotive is stopped or in motion by using the icon shown below to turn the Ground Lights OFF. Whenthe Ground lights are set to OFF, The AUTO MODE is de-activated.Note! For optimal effect of the functional Ground Lights, operate your locomotive in low light conditions.Ground Light ONGround Light OFFRULE 17 LIGHTING CONTROLRule 17 lighting features – In Auto mode, when the locomotive stops the headlights dim.Press Rule 17 OFF Button:Headlights operate at full intensity when locomotive is in motion or stopped.TAP Rule 17 ON button:Toggles headlamp between dim and full settings. Does not engage Rule 17 Auto mode.PRESS and HOLD Rule 17 ON Button:Engages Rule 17 Auto mode, which causes the headlights to dim when the locomotive stops.Rule 17 Lighting ONRule 17 Lighting OF18
<strong>LEGACY</strong> <strong>Control</strong> <strong>System</strong> <strong>operations</strong><strong>LEGACY</strong> RailSoundsVolume UPRaises the volume of the <strong>LEGACY</strong> RailSoundssound system background sounds, such asdiesel RPM and air release sounds. The horn,bell and dialog are unaffected. The defaultis full volume. The volume setting is retainedwhen track power is turned off.Crew TalkEngineer begins radio dialog and dispatcherreplies.Engine RPM upIncreases RPM levels.Engine RPM downDecreases RPM levels.RailSounds ShutdownActivates the <strong>LEGACY</strong>RailSounds sound systemshutdown sequence whenstopped.Shutdown sounds.Volume DOWNLowers the volume of the <strong>LEGACY</strong> RailSoundssound system background sounds, such asdiesel RPM and air release sounds. The horn,bell, and dialog are unaffected. The volumesetting is retained when track power is turnedoff. Sound volume decreases.Emergency KeyActivates the emergencystop feature while in motion.(Icon will change as thestate of the locomotivechanges).Stops and resets the locomotiveResets the locomotives directionto forward and restores standardlighting defaults.Tower ComDispatcher begins radio dialog andengineer replies.Figure 5. Legacy RailSounds and RESET icons19
<strong>LEGACY</strong> <strong>Control</strong> <strong>System</strong> <strong>operations</strong>Activating the CrewTalk dialog and TowerCom announcementsWith the <strong>LEGACY</strong> RailSounds sound system, CrewTalk dialog and TowerComannouncements feature a variety of brief radio conversations between the engineer anddispatcher. All dialog is intelligible, and each comment is followed by at least one automaticresponse.CrewTalk dialog is an engineer-initiated radio conversation with the dispatcher. TowerComannouncements are a dispatcher-initiated radio conversation with the engineer. Be sure tolisten for the different combinations of words and phrases that comprise these exchanges.Refer to Table 1 below for the dialog commands. The dialog in the table provides examplesof the conversations you can trigger. The actual dialog will vary.*Locomotive Commands Example dialogStoppedMovingAUX1,AUX1,*Crew: Ask To DepartTower: Deny DepartureTower: Ask To StandbyCrew: AcknowledgeCrew: Ask To DepartTower: Approve DepartureTower: Approve DepartureCrew: AcknowledgeCrew: Shutdown AnnouncementShutdown sequenceTower: Approved For ArrivalCrew: AcknowledgeCrew: Ask If clearTower: Confirm All ClearTower: Order Emergencey StopCrew: AcknowledgeActivating while the locomotive is in motion enables an arrival conversationfor 30 seconds. If the train stops within this time, pressing will play this specialconversation.20
<strong>LEGACY</strong> <strong>Control</strong> <strong>System</strong> <strong>operations</strong>Assigning your locomotive a new ID#As your roster of Command <strong>Control</strong>-equipped locomotives grows, you will want togive each unit a unique ID#. The locomotive will respond to commands associatedwith its ID# while all other units will disregard these commands.1. Slide the program run switch on your locomotive to the PROG position. See Figure 2on page 10.2. Place the locomotive on the track.3. Connect the <strong>LEGACY</strong> Base and plug it in.4. Power up the track.5. Press ENG.6. Enter the unique ID#. Choose any number from 1 to 99 that has not been assigned toanother locomotive (ENG). We recommend using a part of your locomotive’s road number.7. Press SET. The locomotive’s horn will sound.8. Slide the program run switch back to the RUN position.The locomotive’s ID# has been set. Be sure to record the new ID# for your reference.REPROGRAMMING YOUR LOCOMOTIVE TO RESTORE FEATURESIf your locomotive is unresponsive to your commands in the Command <strong>Control</strong> environment,we recommend that you follow this procedure to reset your locomotive. All factory defaultsettings will be restored when you reprogram the locomotive.1. Slide the program run switch to the PROG position.2. Plug in and connect your <strong>LEGACY</strong> Base.3. Place your locomotive and tender on the track, then power up the track.4. Press ENG and enter the locomotive’s ID#.5. Press SET.6. Press INFO.7. Press AUX PROG.8. Enter 2 for this particular locomotive.9. Press CTC to exit programming mode.10. Turn off track power and wait ten seconds.11. Slide the program run switch back to the RUN position.At this point, your locomotive has been reset. Restore power to the track andoperate the locomotive as usual. Be sure to use the ID# entered in Step 4.21
TrainMaster Command <strong>Control</strong> <strong>operations</strong>Operating your locomotive in the Command <strong>Control</strong> environmentIn addition to your transformer, to operate your locomotive in the Command <strong>Control</strong>environment you need a Command Base (available separately, 6-12911) and aCAB-1 Remote <strong>Control</strong>ler (available separately, 6-12868).Your commands are sent by the CAB-1 Remote <strong>Control</strong>ler to the Command Base,which translates the command into digital code. That code is sent through the outsiderails to your locomotive, which will not respond until it recognizes its unique ID#.TrainMaster Command <strong>Control</strong> gives you the power to operate multiple Commandequippedlocomotives on the same track at the same time.Keep in mind that track power is like gasoline in the tank of a car—it gives you thepower to go places, but it does not tell you where to go or how fast to get there.1. Turn off track power and plug in the Command Base. Be sure that the CommandBase is connected to the outside rail or to the Common/Ground/U terminal on yourtrack power supply.2. Place your locomotive on <strong>Lionel</strong> or <strong>Lionel</strong> compatible O-42 (O-54 recommended)track.3. Increase track voltage to full power (no more than 19 volts AC). OnPowerMasters, slide the CMD/CONV switch to CMD. Program Track Power <strong>Control</strong>lersto Command <strong>Control</strong> operation.Caution!Power your locomotive with an alternating-current (50-60Hz AC)transformer only. Powering your locomotive with a direct-current (DC)transformer or in excess of 19 volts AC may result in damage to sensitiveelectronic components.4. Press ENG and enter the ID# to address your locomotive with your CAB-1Remote <strong>Control</strong>ler. All <strong>Lionel</strong> locomotives come factory-programmed as ID# 1. Tochange the ID#, see page 27.5. Throttle up and move ‘em out! Your locomotive will respond to every commandfrom your CAB-1 Remote <strong>Control</strong>ler.22
TrainMaster Command <strong>Control</strong> <strong>operations</strong>Using the <strong>LEGACY</strong> RailSounds sound system in the TrainMaster Command <strong>Control</strong>environmentTo access the <strong>LEGACY</strong> RailSounds sound system features listed below, you mustoperate your locomotive in the TrainMaster Command <strong>Control</strong> environment. TheCAB-1 Remote <strong>Control</strong>ler/Command Base is required to activate these features.Note!For proper operation of the <strong>LEGACY</strong> RailSounds sound system during trackpower interruptions and for the locomotive shutdown sequence, you mustinstall a nine-volt alkaline battery. Refer to Figure 3 on page 11.In the TrainMaster Command <strong>Control</strong> environment, you will experience the features ofthe <strong>LEGACY</strong> RailSounds sound system listed below.• Eight levels of diesel motor RPM. Your CAB-1 Remote <strong>Control</strong>ler throttleautomatically determines the level of the diesel motor RPM. You may also set theRPM sounds to a particular level manually, using your CAB-1 Remote <strong>Control</strong>ler.• MultiHorn. A different horn sound at different speeds—a <strong>LEGACY</strong> RailSoundssound system exclusive.• Mechanical bell. Press BELL on your CAB-1 Remote <strong>Control</strong>ler to begin the effect,then press BELL a second time to discontinue the effect.• Squealing brakes. Press the BRAKE button and listen for the squealing of thelocomotive’s brakes as the locomotive slows down.• Coupler release sounds. Use your CAB-1 Remote <strong>Control</strong>ler to release anElectroCoupler, and you get the sounds of the coupler opening.• CrewTalk dialog and TowerCom announcements. Use your CAB-1 Remote <strong>Control</strong>lerto trigger conversations between the dispatcher and locomotive engineer. You’llhear “hold for clearance,” “cleared for departure,” and many other exchanges. Seepage 26.• Shutdown sequence. When you turn off track power, you have two seconds to powerup again after you hear the reverse unit reset sound. If you do not restore power,you will hear the realistic diesel shutdown sequence. Because track power is off, anine-volt alkaline battery is required for this sequence to function. Refer to Figure3 on page 11. You may also trigger the shutdown sequence without powering downthe track using the AUX1, 5 command when the locomotive is stopped and thediesel RPM sounds are at their lowest level.Note!Because track power is off, a battery is required for this sequence tofunction. See Figure 3 page 11 for battery installation.23
TrainMaster Command <strong>Control</strong> <strong>operations</strong>CAB-1 Remote <strong>Control</strong>ler commandsThe CAB-1 Remote <strong>Control</strong>ler commands are detailed below. The correspondingRailSounds sound system effects are in bold italic type.Releases the ElectroCoupler on the front of thelocomotive. Coupler release sound.Releases the ElectroCoupler on the rear of thetender. Coupler release sound.Activates the numeric keypad.Short air release sound.Toggles the headlight and rear light on and off.Electric circuit breaker snap.Accelerates the locomotive with a clockwiserotation. Decelerates the locomotive with acounter-clockwise rotation.Speed-dependent RPM sounds.Activates the locomotive’s horn. Release thebutton to discontinue the sound.Horn sound.Toggles the bell sound on and off.Mechanical bell sound.Changes the locomotive’s direction. The locomotivedecelerates to a stop and continues in the oppositedirection when you increase the throttle.Air release sound.Increases the locomotive’s speed while the buttonis pressed. Release the button to return to theinitial speed. RPM increase.Decreases the locomotive’s speed while the buttonis pressed. Squealing brake sounds.Shuts down all PowerMasters on your railroad.Stops all TrainMaster Command <strong>Control</strong>-equippedlocomotives in operation. Use HALT only inemergency situations.SET L M HL = 32 speed stepsM = 100 speed stepsH = 100 speed stepswith momentum.24
TrainMaster Command <strong>Control</strong> <strong>operations</strong>Activating the CrewTalk dialog and TowerCom announcementsWith the <strong>LEGACY</strong> RailSounds sound system, CrewTalk dialog and TowerComannouncements feature a variety of brief radio conversations between the engineer anddispatcher. All dialog is intelligible, and each comment is followed by at least one automaticresponse.CrewTalk dialog is an engineer-initiated radio conversation with the dispatcher. TowerComannouncements are a dispatcher-initiated radio conversation with the engineer. Be sure tolisten for the different combinations of words and phrases that comprise these exchanges.Refer to Table 2 below for the dialog commands. The dialog in the table provides examplesof the conversations you can trigger. The actual dialog will vary.*Locomotive Commands Example dialogAUX1, 2AUX1, 7Crew: Ask To DepartTower: Deny DepartureTower: Ask To StandbyCrew: AcknowledgeStopped 2 Crew: Ask To DepartTower: Approve Departure7 Tower: Approve DepartureCrew: AcknowledgeAUX1, 5AUX1, 2Crew: Shutdown AnnouncementShutdown SequenceCrew: Ask For Clearance To ArriveTower: Approve ArrivalMoving AUX1, 7 Crew: Clear For ArrivalTower: Acknowledge2 Tower: Ask If ClearCrew: Confirm All Clear7 Tower: Announce All ClearCrew: AcknowledgeAUX1, 5**Tower: Order Emergencey StopCrew: AcknowledgeActivating either AUX1, 2 or AUX1, 7 while the locomotive is in motion enables an arrivalconversation for 30 seconds. If the train stops within this time, pressing 2 or 7 will playthis special conversation.Table 2. CAB-1 Remote <strong>Control</strong>ler dialog commands26
TrainMaster Command <strong>Control</strong> <strong>operations</strong>Assigning your locomotive a new ID#As your roster of TrainMaster Command <strong>Control</strong>-equipped locomotives grows, youwill want to give each unit a unique ID#. The locomotive will respond to commandsassociated with its ID# while all other units will disregard these commands.1. Slide the program run switch on your locomotive to the PROG position. See Figure 2on page 10.2. Place the locomotive on the track.3. Connect the Command Base and plug it in.4. Power up the track.5. Press ENG.6. Enter the unique ID#. Choose any number from 1 to 99 that has not been assigned toanother locomotive (ENG). We recommend using a part of your locomotive’s cab number.7. Press SET. The locomotive’s horn will sound.8. Slide the program run switch back to the RUN position.The locomotive’s ID# has been set. Be sure to record the new ID# for your reference.Reprogramming your locomotive to restore featuresIf your locomotive is unresponsive to your commands in the TrainMaster Command <strong>Control</strong>environment, we recommend that you follow this procedure to reset your locomotive. Allfactory default settings will be restored when you reprogram the locomotive.1. Slide the program run switch to the PROG position.2. Plug in and connect your Command Base.3. Place your locomotive on the track, then power up the track.4. Press ENG and enter the locomotive’s ID#.5. Press SET.6. Press ENG and enter the locomotive’s ID# again.7. Press AUX1.8. Enter 2 for this particular locomotive.9. Turn off track power and wait ten seconds.10. Slide the program run switch back to the RUN position.At this point, your locomotive has been reset. Restore power to the track andoperate the locomotive as usual. Be sure to use the ID# entered in Step 4.27
Conventional transformer <strong>operations</strong>Operating your locomotive in the conventional environmentYour locomotive is capable of operating in the conventional environment with nothing more thana standard <strong>Lionel</strong> alternating current (AC) transformer.In the conventional environment, your locomotive cycles through a repeating pattern of<strong>operations</strong>: forward, neutral, reverse, neutral, and so on. To advance to the next operation, press theDIRECTION button on your transformer. Alternately, you could use the throttle to briefly turn off trackpower so that the locomotive advances to the next operation when power is restored.Once you cycle the locomotive into forward or reverse, you control your locomotive’s speed byvarying track voltage with the transformer’s throttle. To increase the speed of the locomotive,increase track voltage. To decrease the speed, decrease track voltage. To stop the locomotive and tochange directions (or to enter neutral), track voltage is turned off or interrupted.Use the HORN and BELL buttons on your transformer to activate these features. If yourtransformer is not equipped with these controls, separate buttons are available (610-5906-001).Please refer to page 34 of this manual.To experience all of your locomotive’s features, we recommend operating in the <strong>LEGACY</strong>Command <strong>Control</strong> environment. With a simple one-wire connection, you can use the CAB-2 Remote<strong>Control</strong>ler to access all of the functions of your locomotive. Refer to pages 9-21 to see how tooperate your locomotive in the <strong>LEGACY</strong> Command <strong>Control</strong> environment.28
Conventional transformer <strong>operations</strong>Operating your locomotive in the conventional environment (continued)1. Place your locomotive on <strong>Lionel</strong> or <strong>Lionel</strong>-compatible O-42 (O-54 recommended)track.2. Power your locomotive at 12-18 volts with your alternating current (AC)transformer.Caution!Power your locomotive with an alternating current (AC) transformeronly. Powering your locomotive with a direct current (DC) transformeror in excess of 19 volts AC may result in damage to sensitive electroniccomponents. 50-60 HZ AC is required.3. Wait three to eight seconds as your locomotive determines whether it is in aconventional environment or a TrainMaster Command <strong>Control</strong> environment.When the locomotive has determined that a TrainMaster Command Base is notconnected to the track, the locomotive’s headlight will illuminate and the <strong>LEGACY</strong>RailSounds sound system will start. You are ready for operation in the conventionalenvironment.4. Move‘em out!Press the DIRECTION button on your transformer to sequence your locomotivethrough the repeating pattern of <strong>operations</strong>: forward, neutral, reverse, neutral, andso on. You may also briefly turn off track power to advance the locomotive to thenext operating state. Adjust the throttle until your locomotive moves at your desiredspeed.Note!When placing your locomotive on your layout for the first time, it willstart out in neutral. Thereafter, it will start in forward after every powerinterruption lasting five seconds or longer.We recommend that you operate your <strong>LEGACY</strong> locomotive with The Odyssey II Speed<strong>Control</strong> <strong>System</strong> turned on. You may choose to operate your locomotive without speedcontrol by placing the Odyssey II Speed <strong>Control</strong> <strong>System</strong> switch to the OFF position. SeeFigure 1 on page 9.Use the HORN and BELL buttons on your transformer to activate those features.Refer to page 34 if your transformer is not equipped with those buttons. Adjust thevolume using the volume control knob located under the drop down door below thecab. Refer to Figure 2 on page 10.29
Conventional transformer <strong>operations</strong>Using the <strong>LEGACY</strong> RailSounds sound system in the conventional environmentWhen you first power up your locomotive, you will hear the sounds of the locomotiveat rest. As the locomotive set moves, the RPM sounds automatically increase withthe locomotive’s speed. In the conventional environment, the horn and bell sounds areactivated by your transformer controls.To silence the motor sounds, slide the <strong>LEGACY</strong> RailSounds sound system switch locatedunder the drop down door below the cab to the BELL HORN position (see Figure 2 on page10 for the location of this switch) before you power up the locomotive or after the locomotivehas been powered down for a minimum of ten seconds. The horn and bell sounds will still beactive. To adjust the volume, use the volume control knob located under the drop down doorbelow the cab. Refer to Figure 2 on page 10.Note!Note!When the <strong>LEGACY</strong> RailSounds sounds system switch is in the “BELL HORN”position, the CrewTalk dialog and TowerCom announcements are inactive.For proper operation of the <strong>LEGACY</strong> RailSounds sound system during trackpower interruptions and for the locomotive shutdown sequence, you mustinstall a nine-volt alkaline battery. Refer to Figure 3 on page 11.In the conventional environment, you will experience several features of the <strong>LEGACY</strong>RailSounds sound system.• Eight levels of diesel motor RPM. The level of diesel motor RPM automaticallyvaries with your throttle adjustments.• MultiHorn. A different horn sound at different speeds—a <strong>LEGACY</strong> RailSoundssound system exclusive.• Mechanical bell. Press BELL on your transformer to begin the effect, then pressBELL a second time to discontinue the effect.• CrewTalk dialog and TowerCom announcements. CrewTalk dialog is triggered byyour transformer’s HORN button. See page 31.• Reverse unit reset sound. Power down your track, wait three seconds, andlisten for the air-release sound—that’s the locomotive telling you that its <strong>Lionel</strong>Command reverse unit has reset to forward. Because the track is powered down, anine-volt alkaline battery is required for this feature. Refer to Figure 3 on page 11.• Shutdown sequence. When you turn off track power, you have two seconds to powerup again after you hear the reverse unit reset sound. If you do not restore power,you will hear the realistic diesel shutdown sequence. Because track power is off,a nine-volt battery is required for this sequence to function. Refer to Figure 3 onpage 11.30
Conventional transformer <strong>operations</strong>Activating the CrewTalk dialog and TowerCom announcementsIn the conventional environment, CrewTalk dialog and TowerCom announcements aretriggered by short horn blasts and vary with the state of the locomotive.• If the locomotive has been stopped for less than 15 seconds, a short horn blasttriggers a “please standby” dialog (a 9V battery is required for this sequence).• If the locomotive has been stopped for longer than 15 seconds, a short horn blasttriggers a “cleared outbound” dialog.• If the locomotive is moving, a short horn blast triggers an “all clear ahead” dialog.• If the locomotive is moving, turning on the bell and a short horn blast triggers a“slow to caution speed” dialog.Conventional transformer <strong>operations</strong>Locking your locomotive into a single directionWhen the PROG/RUN switch is in the RUN position, your locomotive sequencesthrough a repeating pattern of <strong>operations</strong>: forward, neutral, reverse, neutral, andso on.To “lock” your locomotive into a single direction (for example, to operate in forwardonly), you can deactivate the Command reverse unit’s sequencing function.1. Use your transformer’s DIRECTION button or interruptions in track power to get yourlocomotive moving in the desired direction or into neutral.2. Slow the locomotive down without stopping (reduce the throttle without turning offtrack power).3. Slide the PROG/RUN switch to the PROG position. At this point, the locomotive is“locked” into your chosen direction. See Figure 2 on page 10 for the location of thisswitch.To restore the forward-neutral-reverse sequence, just slide the PROG/RUN switchback to the RUN position.31
Conventional transformer <strong>operations</strong>Uncoupling your locomotive in the conventional environmentYour locomotive features an ElectroCoupler that is released by remote control at anypoint around your layout in the TrainMaster Command <strong>Control</strong> environment.In the conventional environment, the ElectroCoupler will not open manually or by usinga Remote-<strong>Control</strong> Track section. To couple your locomotive in the conventional environment,you must rely on a piece of rolling stock equipped with a magnetic coupler. Simplyrelease the magnetic coupler and couple the rolling stock to the locomotive, even if theElectroCoupler is closed.Keep in mind that you may still make use of <strong>Lionel</strong> Remote-<strong>Control</strong> Track sections(6-65530 for O gauge; 6-12746 and 6-65149 for O-27 gauge; and 6-12020 and 6-12054for FasTrack layouts) with the magnetic couplers on the rolling stock. Place the trigger discon the magnetic coupler over the central coil on the Remote-<strong>Control</strong> Track section, thenpress UNCOUPLE on the track section’s controller. As illustrated in Figure 6, the magneticfield pulls the disc downward, releasing the coupler.Remote-<strong>Control</strong>Track SectionFigure 6. Magnetic coupler operation32
Odyssey II Speed <strong>Control</strong> system <strong>operations</strong>Odyssey II Speed <strong>Control</strong> system performanceThe Odyssey II Speed <strong>Control</strong> system is “cruise control” for your locomotive. Once the speedcontrol is set, your locomotive will maintain a constant speed, no matter what load is placedon the locomotive or what grades you have on your layout. The Odyssey II Speed <strong>Control</strong> systemalso allows for extremely slow movement that will amaze any scale enthusiast.Odyssey II Speed <strong>Control</strong> system <strong>LEGACY</strong> <strong>Control</strong> operationIn <strong>LEGACY</strong> <strong>Control</strong> <strong>System</strong> CAB-2 mode, Odyssey II Speed <strong>Control</strong> system provides0-199 speed steps. For a more indepth explanation of the <strong>LEGACY</strong> <strong>Control</strong> <strong>System</strong>features, please see your <strong>LEGACY</strong> <strong>Control</strong> <strong>System</strong> <strong>operations</strong> manual.Odyssey II Speed <strong>Control</strong> system TrainMaster Command <strong>Control</strong> operationWhen the Odyssey II Speed <strong>Control</strong> system is activated, changes in the speed of thelocomotive will correspond to each signal from the Command Base. For example, whenyou address the locomotive and slowly turn the throttle knob, the first flash of the red lighton the Command Base corresponds to the first speed step, which is the slowest speed ofthe locomotive. The locomotive will maintain that speed until you increase or decrease thethrottle.In TrainMaster Command <strong>Control</strong> CAB-1 mode, Odyssey II Speed <strong>Control</strong> <strong>System</strong> nowprovides selectable resolution and momentum. L=32 speed steps, M=100 speed steps, andH=100 speed steps with momentum.Odyssey II Speed <strong>Control</strong> system conventional transformer operationThe Odyssey II Speed <strong>Control</strong> system is automatically operational when you operate yourlocomotive in conventional (non-Command <strong>Control</strong>) mode, as long as the Odyssey II Speed<strong>Control</strong> system switch is in the ON position (see Figure 2 on page 10). This means that yourlocomotive will maintain a constant speed, compensating for grades, loads, and turns. Simplyuse your transformer’s throttle to adjust the speed of your locomotive.Note!Because of the way the speed control operates in conventional mode, you will noticea slight delay between adjusting your transformer throttle and the change in thespeed of your locomotive. If you desire instantaneous response to throttle changes,turn off the Odyssey II Speed <strong>Control</strong> system using the Odyssey II Speed <strong>Control</strong>switch (see Figure 2 on page 10).33
Conventional RailSounds <strong>operations</strong>Installing a <strong>Lionel</strong> Sound Activation Button for conventional operationIf your transformer lacks HORN and BELL buttons, you will need to install <strong>Lionel</strong>no. 610-5906-001 Sound Activation Buttons (available separately) to activate thelocomotive’s horn and bell sounds.Connect the buttons as shown below. Be sure that all track power passes throughthe Sound Activation Button(s). Do not bypass the buttons.For AC transformers lacking a BELL buttonBlack wire1 2Existing wireRed wireCommon/Ground/UPower/APOWERSUPPLY<strong>Lionel</strong> no. 610-5906-001Sound Activation Button foractivating the bellFor AC transformers lacking BELL and HORN buttons<strong>Lionel</strong> no. 610-5906-001Sound Activation Button foractivating thehornRed wireBlack wireExisting wireWirenutRed wireBlack wireCommon/Ground/UPower/APOWERSUPPLY<strong>Lionel</strong> no. 610-5906-001Sound Activation Button foractivating the bellFigure 7. Sound activation button34
Maintaining and servicing your locomotiveAdding fluid to your locomotive’s smoke generatorsYour locomotive is equipped with 3 smoke generators that produce a safe, clean, whitesmoke during operation. Each of the VISION Line 3GS21B GENSET SWITCHER's smokegenerators are located under one of the 3 exhaust stacks behind the rear of the cab. Graspthe stack by the sides and pull straight up to remove it. Place 20 drops of smoke fluid ineach hole for the first time, and 10 to 20 thereafter. See Figure 8 below. DO NOT EXCEED20 DROPS as this can cause your smoke unit to become oversaturated, allowing leakageonto the electronics. Line up the key on the stack with the slot in locomotive body and pushstraight down to reinstall. Note that operating your locomotive’s 3 smoke units withoutsmoke fluid will cause damage to the heating elements.If you prefer to operate your locomotive without smoke, locate the smoke unit switchunder the door on the side of the cab and slide it to the OFF position. Refer to Figure 2 onpage 10 for the location of this switch.CAUTION: DO NOT PLACE FLUID IN THE SMOKE STACKS!The movable covers on the stacks are very fragile! Please see below as to how to fill eachof the 3 smoke units with smoke fl uid.Rear of locomotiveFront of locomotiveThe holeand stackare keyedFigure 8. Smoke fluid fill locationNote!Please Make sure that each of the 3smoke units are filled with smoke fluid35Hole for smoke fluid
Maintaining and servicing your locomotiveLubricating your locomotiveHelp your <strong>Lionel</strong> locomotive lead a longand productive life on your railroadby maintaining it properly. To keep yourlocomotive lubricated, we recommend thatyou purchase a <strong>Lionel</strong> Lubrication andMaintenance Kit (6-62927), available fromyour authorized <strong>Lionel</strong> dealer.When you find that the lubricationpoints illustrated in Figure 9 appear dry,lubricate your locomotive after you haveremoved any accumulated dirt and dust.There are two basic rules to keep in mindwhen you are lubricating your locomotive:use only a small amount of lubricationand avoid getting grease or oil on yourlocomotive’s wheels, roller pick-ups, or thetrack.Front of locomotiveLubricate theaxles with <strong>Lionel</strong>oil sparinglyLubricate thegears with <strong>Lionel</strong>grease sparinglyLubricate the axleswith <strong>Lionel</strong> oilsparinglyFigure 9. Lubrication points36Rear of locomotive
Maintaining and servicing your locomotiveMaintaining your locomotive’s handrail antennaThe handrails on your locomotive are the antennas that receive the digitalcommunication from the Command Base. For optimum reception, the handrailshave been insulated from the die-cast body. Please handle the locomotive carefullyto avoid handrail damage. The handrails should not touch the locomotive’s body.If your locomotive appears to have problems receiving communications from theCommand Base, be sure that the ends of the handrails are insulated from the bodywith either an insulating washer or handrail stanchion.Servicing your locomotive’s lampsBefore having the headlamp in your locomotive changed, be sure to checkNote!that the AUX2 command was not used to turn the headlamp off.Your locomotive is illuminated by several LEDs (light emitting diodes) that are notuser-serviceable. They can be replaced by your authorized <strong>Lionel</strong> Service Center, ifit is ever required. You should never attempt this yourself due to the complexity ofthis VISION Line locomotive.37
Maintaining and servicing your locomotiveTire-TractionYour locomotive is equipped with traction tires. This means that two of the drive wheelsare fitted with rubber traction tires to enhance tractive effort so your locomotive can pullmany cars at once.<strong>Lionel</strong> has provided two extra traction tires to replace the installed traction tires ifthey ever wear out. The traction tires are replaced by slipping off the old traction tire andreplacing it with a new traction tire (<strong>Lionel</strong> part # 620-8815-206) on the wheel.38
NOTES39
<strong>Lionel</strong> VISION Line Locomotive WarrantyThis <strong>Lionel</strong> VISION Line locomotive, including all mechanical and electrical components, moving parts, motorsand structural components, with the exception of LIGHT BULBS, LED’s & TRACTION TIRES are warranted to theoriginal owner-purchaser for a period of two years from the original date of purchase against original defects inmaterials or workmanship when purchased through an Authorized <strong>Lionel</strong> Value Added Dealer*.This warranty does NOT cover the following:• Normal wear and tear• Light bulbs or LED’s• Defects appearing in the course of commercial use• Damage resulting from abuse/misuse of the productThe original owner-purchaser MUST register this product following the instructions on the enclosed WarrantyRegistration Card to activate the 2-year warranty, which is effective from the original date of purchase.Transfer of this product by the original owner-purchaser to another person voids this warranty in its entirety.Modification of this product in any way; visually mechanically or electronically, voids the warranty in its entirety.In the event service is required to this Vision Line locomotive, <strong>Lionel</strong> will, upon request of the original ownerpurchaser,provide a prepaid UPS shipping label for the return of this product to the <strong>Lionel</strong> Service Department.Under no circumstances will shipping be reimbursed if a method other than a prepaid shipping label from <strong>Lionel</strong>is used. In the event the defective product cannot be repaired and a suitable replacement is not available, <strong>Lionel</strong>will, at its discretion, refund the original purchase price of the locomotive.This warranty will expire if the product is not registered within 3 years from the date of manufacture. An extendedwarranty may be available for purchase. Please contact <strong>Lionel</strong> Customer Service for more information regardingextended warranties.In no event shall <strong>Lionel</strong> LLC be held liable for incidental or consequential damages.Some states do not allow the exclusion or limitation of incidental or consequential damages, so the above exclusionmay not apply to you.This warranty gives you specific legal rights and you may have other rights which vary from state to state.Instructions for Obtaining ServiceIf service for this <strong>Lionel</strong> VISION Line locomotive is required please call <strong>Lionel</strong> Customer Service FIRST at 586-949-4100 and follow the prompts to reach a Customer Service Representative. You must register your Vision Line locomotivefollowing the instructions on the Warranty Registration card enclosed in this box. You can also write <strong>Lionel</strong> at 26750Twenty Three Mile Road, Chesterfield, MI 48051 to request a return authorization number and prepaid shipping label.You MUST have a return authorization (RA) number to ensure your locomotive can be properly tracked upon receipt at<strong>Lionel</strong> LLC.Once you have your Return Authorization (RA) number, make sure the item is packed in its original Styrofoaminner container which is placed inside the original outer display box (this will help prevent damage during shippingand handling).Please make sure you have followed all of the above instructions carefully before returning any item for service.You may choose to have your product repaired by one of <strong>Lionel</strong>’s Factory Trained Authorized Service Stations afterthe warranty has expired. A reasonable service fee should be expected once the product warranty has expired.Warranty InformationPlease follow the instructions on the Warranty Registration Card included in this box to activate your 2-yearwarranty. Please keep a copy of your original receipt along with the form below and your Vision Line locomotive IDnumber as a reference, should warranty service be required in the future.*A complete listing of <strong>Lionel</strong> Authorized Value Added Dealers can be found by calling 1-800-4-LIONEL or by visitingour website at www.lionel.com.Products that are more than 3 years old, from date of manufacture, are not applicable for warranty coverage, howeveran extended warranty may be available for purchase, please contact <strong>Lionel</strong> Customer Service for details.Name Address Place of Purchase Date of Purchase Product Number Product Description ©2010 LIONEL L.L.C., U.S.A.PRINTED IN CHINA


