

Web.Designer.Advanced.Angular-P2P

You also want an ePaper? Increase the reach of your titles
YUMPU automatically turns print PDFs into web optimized ePapers that Google loves.
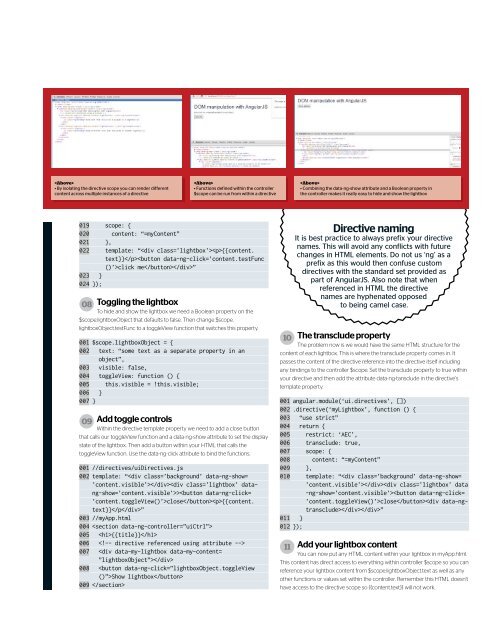
• By isolating the directive scope you can render different<br />
content across multiple instances of a directive<br />
<br />
• Functions defined within the controller<br />
$scope can be run from within a directive<br />
<br />
• Combining the data-ng-show attribute and a Boolean property in<br />
the controller makes it really easy to hide and show the lightbox<br />
019 scope: {<br />
020 content: “=myContent”<br />
021 },<br />
022 template: “{{content.<br />
text}}click me”<br />
023 }<br />
024 });<br />
08 Toggling the lightbox<br />
To hide and show the lightbox we need a Boolean property on the<br />
$scope.lightboxObject that defaults to false. Then change $scope.<br />
lightboxObject.testFunc to a toggleView function that switches this property.<br />
001 $scope.lightboxObject = {<br />
002 text: “some text as a separate property in an<br />
object”,<br />
003 visible: false,<br />
004 toggleView: function () {<br />
005 this.visible = !this.visible;<br />
006 }<br />
007 }<br />
09 Add toggle controls<br />
Within the directive template property we need to add a close button<br />
that calls our toggleView function and a data-ng-show attribute to set the display<br />
state of the lightbox. Then add a button within your HTML that calls the<br />
toggleView function. Use the data-ng-click attribute to bind the functions.<br />
001 //directives/uiDirectives.js<br />
002 template: “>close{{content.<br />
text}}