

Web.Designer.Advanced.Angular-P2P

You also want an ePaper? Increase the reach of your titles
YUMPU automatically turns print PDFs into web optimized ePapers that Google loves.
001 <br />
002 The title of my lightbox<br />
003 {{lightboxObject.text}}<br />
004 <br />
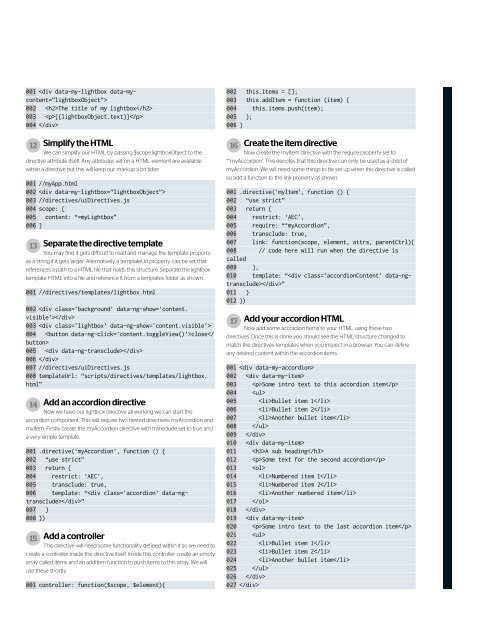
12 Simplify the HTML<br />
We can simplify our HTML by passing $scope.lightboxObject to the<br />
directive attribute itself. Any attributes set on a HTML element are available<br />
within a directive but this will keep our markup a bit tidier.<br />
001 //myApp.html<br />
002 <br />
003 //directives/uiDirectives.js<br />
004 scope: {<br />
005 content: “=myLightbox”<br />
006 }<br />
13 Separate the directive template<br />
You may find it gets difficult to read and manage the template property<br />
as a string if it gets larger. Alternatively a templateUrl property can be set that<br />
references a path to a HTML file that holds this structure. Separate the lightbox<br />
template HTML into a file and reference it from a templates folder as shown.<br />
001 //directives/templates/lightbox.html<br />
002 <br />
003 <br />
004 close<br />
005 <br />
006 <br />
007 //directives/uiDirectives.js<br />
008 templateUrl: “scripts/directives/templates/lightbox.<br />
html”<br />
14 Add an accordion directive<br />
Now we have our lightbox directive all working we can start the<br />
accordion component. This will require two nested directives: myAccordion and<br />
myItem. Firstly create the myAccordion directive with transclude set to true and<br />
a very simple template.<br />
001 .directive(‘myAccordion’, function () {<br />
002 “use strict”<br />
003 return {<br />
004 restrict: ‘AEC’,<br />
005 transclude: true,<br />
006 template: “”<br />
007 }<br />
008 })<br />
15 Add a controller<br />
This directive will need some functionality defined within it so we need to<br />
create a controller inside the directive itself. Inside this controller create an empty<br />
array called items and an addItem function to push items to this array. We will<br />
use these shortly.<br />
001 controller: function($scope, $element){<br />
002 this.items = [];<br />
003 this.addItem = function (item) {<br />
004 this.items.push(item);<br />
005 };<br />
006 }<br />
16 Create the item directive<br />
Now create the myItem directive with the require property set to<br />
“^myAccordion”. This denotes that this directive can only be used as a child of<br />
myAccordion. We will need some things to be set up when this directive is called<br />
so add a function to the link property as shown.<br />
001 .directive(‘myItem’, function () {<br />
002 “use strict”<br />
003 return {<br />
004 restrict: ‘AEC’,<br />
005 require: “^myAccordion”,<br />
006 transclude: true,<br />
007 link: function(scope, element, attrs, parentCtrl){<br />
008 // code here will run when the directive is<br />
called<br />
009 },<br />
010 template: “”<br />
011 }<br />
012 })<br />
17 Add your accordion HTML<br />
Now add some accordion items to your HTML using these two<br />
directives. Once this is done you should see the HTML structure changed to<br />
match the directives templates when you inspect in a browser. You can define<br />
any desired content within the accordion items.<br />
001 <br />
002 <br />
003 Some intro text to this accordion item<br />
004 <br />
005 Bullet item 1<br />
006 Bullet item 2<br />
007 Another bullet item<br />
008 <br />
009 <br />
010 <br />
011 A sub heading<br />
012 Some text for the second accordion<br />
013 <br />
014 Numbered item 1<br />
015 Numbered item 2<br />
016 Another numbered item<br />
017 <br />
018 <br />
019 <br />
020 Some intro text to the last accordion item<br />
021 <br />
022 Bullet item 1<br />
023 Bullet item 2<br />
024 Another bullet item<br />
025 <br />
026 <br />
027