

Web.Designer.Advanced.Angular-P2P

You also want an ePaper? Increase the reach of your titles
YUMPU automatically turns print PDFs into web optimized ePapers that Google loves.
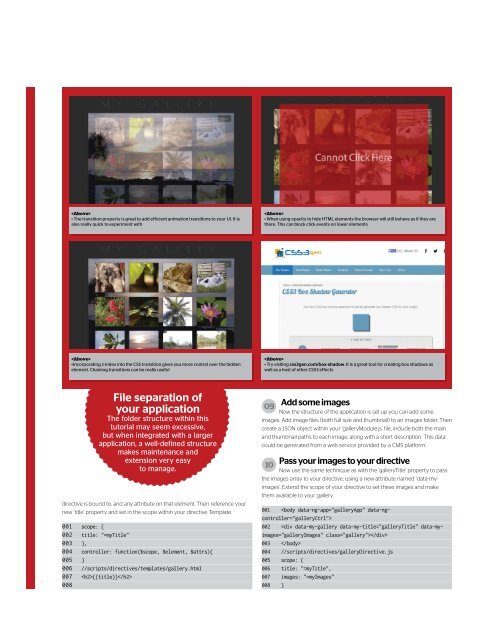
• The transition property is great to add efficient animation transitions to your UI. It is<br />
also really quick to experiment with<br />
<br />
• When using opacity to hide HTML elements the browser will still behave as if they are<br />
there. This can block click events on lower elements<br />
<br />
•Incorporating z-index into the CSS transition gives you more control over the hidden<br />
element. Chaining transitions can be really useful<br />
<br />
• Try visiting css3gen.com/box-shadow. It is a great tool for creating box shadows as<br />
well as a host of other CSS3 effects<br />
File separation of<br />
your application<br />
The folder structure within this<br />
tutorial may seem excessive,<br />
but when integrated with a larger<br />
application, a well-defined structure<br />
makes maintenance and<br />
extension very easy<br />
to manage.<br />
directive is bound to, and any attribute on that element. Then reference your<br />
new ‘title’ property and set in the scope within your directive Template.<br />
001 scope: {<br />
002 title: "=myTitle"<br />
003 },<br />
004 controller: function($scope, $element, $attrs){<br />
005 }<br />
006 //scripts/directives/templates/gallery.html<br />
007 {{title}}<br />
008<br />
09<br />
Add some images<br />
Now the structure of the application is set up you can add some<br />
images. Add image files (both full size and thumbnail) to an images folder. Then<br />
create a JSON object within your ‘galleryModule.js’ file, include both the main<br />
and thumbnail paths to each image, along with a short description. This data<br />
could be generated from a web service provided by a CMS platform.<br />
10<br />
Pass your images to your directive<br />
Now use the same technique as with the ‘galleryTitle’ property to pass<br />
the images array to your directive, using a new attribute named ‘data-myimages’.<br />
Extend the scope of your directive to set these images and make<br />
them available to your gallery.<br />
001 <br />
002 <br />
003 <br />
004 //scripts/directives/galleryDirective.js<br />
005 scope: {<br />
006 title: "=myTitle",<br />
007 images: "=myImages"<br />
008 }