

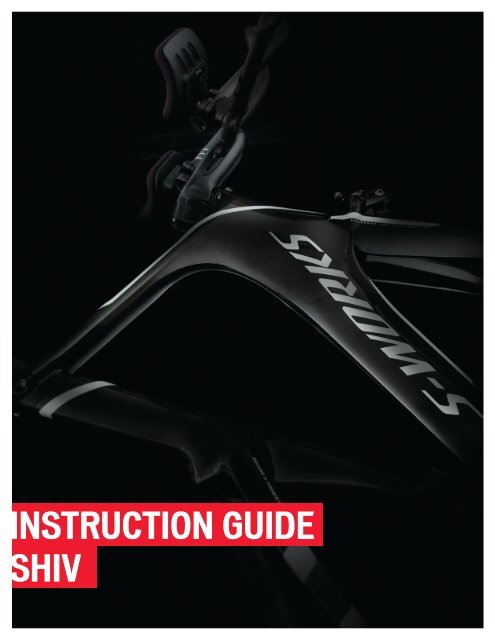
INSTRUCTION GUIDE SHIV
0000051673_R1
0000051673_R1

Create successful ePaper yourself
Turn your PDF publications into a flip-book with our unique Google optimized e-Paper software.
<strong>INSTRUCTION</strong> <strong>GUIDE</strong><br />
<strong>SHIV</strong>
THIS <strong>INSTRUCTION</strong> <strong>GUIDE</strong> CONTAINS IMPORTANT INFORMATION.<br />
PLEASE READ CAREFULLY AND STORE IN A SAFE PLACE.<br />
TABLE OF CONTENTS<br />
INTRODUCTION............................................................................................................................. 1<br />
TOOLS REQUIRED.......................................................................................................................... 1<br />
FRAME PREPARATION.................................................................................................................. 2<br />
FORK PREPARATION.................................................................................................................... 2<br />
SEATPOST PREPARATION............................................................................................................ 2<br />
SUPPLEMENTAL DOCUMENTATION.............................................................................................. 2<br />
WARRANTY.................................................................................................................................. 2<br />
GEOMETRY................................................................................................................................... 3<br />
HARDWARE.................................................................................................................................. 4<br />
CHAPTER 1: FORK / STEM / HANDLEBAR INSTALLATION.............................................................. 5<br />
1. INSTALLING THE FORK INTO THE STEERER TUBE...................................................................5<br />
2. INSTALLING THE CARBON AERO HANDLEBAR ON THE AERO STEM..............................6<br />
3. INSTALLING THE ALLOY HANDLEBAR WITH A STANDARD 31.8MM STEM...................... 7<br />
4. INSTALLING THE EXPANDER PLUG AND TOP CAP.................................................................. 7<br />
CHAPTER 2: HANDLEBAR EXTENSION / RISER INSTALLATION......................................................8<br />
1. INSTALLING THE EXTENSION RISERS..........................................................................................8<br />
SYSTEM WITH NO RISER SPACERS:..................................................................................................9<br />
SYSTEM WITH RISER SPACERS:.........................................................................................................9<br />
2. INSTALLING THE CLAMPS, EXTENSIONS AND ARM PADS................................................. 10<br />
3. ADJUSTING THE EXTENSIONS AND ARM PADS...................................................................... 11<br />
CHAPTER 3: CABLE HOUSING / WIRE INSTALLATION.................................................................. 12<br />
1. INSTALLING THE BRAKE CABLE HOUSINGS AND SHIFTER WIRES................................. 12<br />
2. ROUTING THE DERAILLEUR CABLES / WIRES AT THE BOTTOM BRACKET................. 14<br />
3. Di2 WIRING LOCATIONS................................................................................................................. 14<br />
4. INSTALLING THE CABLE ROUTING COVER PLATE................................................................ 15<br />
5. INSTALLING THE CABLE ROUTING CONTROL TOWER........................................................ 15<br />
CHAPTER 4: BRAKE INSTALLATION............................................................................................. 16<br />
1. FRONT AND REAR BRAKE ASSEMBLY (Exploded view)......................................................... 16<br />
2. INSTALLING THE FRONT BRAKE ASSEMBLY...........................................................................17<br />
3. INSTALLING THE REAR BRAKE ASSEMBLY............................................................................ 18<br />
4. ADJUSTING THE FRONT AND REAR BRAKE ASSEMBLIES................................................ 19<br />
CHAPTER 5: SEATPOST INSTALLATION...................................................................................... 20<br />
1. INSTALLING AND ADJUSTING THE <strong>SHIV</strong> SEATPOST............................................................. 20<br />
2. SEATPOST SETBACK OPTIONS................................................................................................... 21<br />
CHAPTER 6: FUELSELAGE INSTALLATION.................................................................................. 22<br />
1. INSTALLING THE FUELSELAGE ................................................................................................... 22<br />
SPECIALIZED BICYCLE COMPONENTS<br />
15130 Concord Circle, Morgan Hill, CA 95037 (408) 779-6229<br />
0000051673_IG_R1, 04/2015<br />
Please note all instructions and notices are subject to change and updates without notice.<br />
Please visit www.specialized.com for periodic tech updates.<br />
Feedback: techdocs@specialized.com
INTRODUCTION<br />
This instruction guide contains important safety, performance and service information. Read it before you take the first ride on your new Shiv equipped with<br />
the Specialized Carbon Aerobar with Aerostem or Hydroformed Alloy Aerobar, and keep it for reference. This instruction guide should be used in conjunction<br />
with the Specialized Bicycle Owner’s Manual (“Owner’s Manual”). Please read the Owner’s Manual in its entirety before reading this Instruction Guide. If you do<br />
not have a copy of the Owner’s Manual, you can download it for free at www.specialized.com, or obtain it from your nearest Authorized Specialized Dealer or<br />
Specialized Rider Care.<br />
Additional safety, performance and service information for specific components such as suspension or pedals on your bicycle, or for accessories such as<br />
helmets or lights, may also be available. Make sure that your Authorized Specialized Dealer has given you all the manufacturers’ literature that was included with<br />
your bicycle or accessories. In case of a conflict between the instructions in this instruction guide and information provided by a component manufacturer, always<br />
follow the component manufacturer’s instructions.<br />
This guide is not intended as a comprehensive use, service, repair or maintenance guide. Please see your Authorized Specialized Dealer for all service, repairs or<br />
maintenance. Your Authorized Specialized Dealer may also be able to refer you to classes, clinics or books on bicycle use, service, repair, and maintenance.<br />
Specialized recommends that installation be performed by an Authorized Specialized Dealer. If you attempt to perform the installation yourself, which<br />
Specialized does not recommend, make sure you possess the appropriate mechanical skill, knowledge, and quality tools to do so. If you have any doubt<br />
regarding your mechanical ability or have any questions, please consult with your Authorized Specialized Dealer.<br />
WARNING! The combination of<br />
this symbol and word indicates a<br />
potentially hazardous situation which,<br />
if not avoided, could result in serious<br />
injury or death. Many of the Warnings<br />
say “you may lose control and fall.”<br />
Because any fall can result in serious<br />
injury or even death, we do not always<br />
repeat the warning of possible injury<br />
or death.<br />
CAUTION: The combination of the safety alert<br />
symbol and the word CAUTION indicates a<br />
potentially hazardous situation, which, if not<br />
avoided, may result in minor or moderate<br />
injury, or is an alert against unsafe practices.<br />
The word CAUTION used without the safety<br />
alert symbol indicates a situation which, if not<br />
avoided, could result in serious damage to the<br />
bicycle or the voiding of your warranty.<br />
INFO: This<br />
symbol<br />
alerts the<br />
reader to<br />
information<br />
which is<br />
particularly<br />
important.<br />
GREASE:<br />
This symbol<br />
means that<br />
high quality<br />
grease<br />
should be<br />
applied as<br />
illustrated.<br />
TORQUE: This<br />
symbol highlights<br />
the correct torque<br />
value for a specific<br />
bolt. In order<br />
to achieve the<br />
specified torque<br />
value, a quality<br />
torque wrench must<br />
be used.<br />
TECH TIP:<br />
Tech Tips are<br />
useful tips<br />
and tricks<br />
regarding<br />
installation<br />
and use.<br />
WARNING! Correct tightening force on fasteners (nuts, bolts, screws) on your bicycle is important. If too little force is applied, the<br />
fastener may not hold securely. If too much force is applied, and the fastener can strip threads, stretch, deform or break. Either way,<br />
incorrect tightening force can result in component failure, which can cause you to lose control and fall.<br />
CAUTION: Ensure that all contact surfaces are clean and bolt threads are greased or have a threadlocking compound (refer to the<br />
instructions for each bolt) prior to installation.<br />
CAUTION: While riding, listen for any creaks, as a creak can be a sign of a problem with one or more components. Periodically examine<br />
all surfaces in bright sunlight to check for any small hairline cracks or fatigue at stress points, such as welds, seams, holes, and points<br />
of contact with other parts. If you hear any creaks or discovery any cracks, no matter how small, immediately stop riding the part and<br />
have it inspected by your Authorized Specialized Dealer.<br />
WARNING! Only use Specialized supplied hardware at all times. Using other hardware may compromise the integrity and strength of the<br />
assembly which may result in damage to the bicycle or its components or in an accident which can cause serious injury or death.<br />
Where indicated, ensure that each bolt is torqued to specification. After your first ride, and periodically thereafter, recheck the<br />
tightness of each bolt to ensure secure attachment of the aerobar. The following is a summary of torque specifications in this guide:<br />
TORQUE SPECS:<br />
LOCATION Torque (in-lbf) Torque (Nm) LOCATION Torque (in-lbf) Torque (Nm)<br />
Stem @ Steerer Tube 40 4.5 Control Tower 25 2.8<br />
Stem @ Handlebar 80 9.0 Brake mounting bolts 70 7.9<br />
Risers @ Handlebar 80 9.0 Brake cable pinch bolt 55 6.2<br />
Extension mount @ Extension 40 4.5 Brake pad 43 4.9<br />
Extension mount @ Pad Holder 40 4.5 Saddle rail clamp bolt 120 13.5<br />
Bottom bracket door 25 2.8 Seat collar bolt 45 5.1<br />
TOOLS REQUIRED<br />
• 2, 2.5, 3, 4, 5, 6mm Allen keys<br />
• 3, 4, 5, 6mm socket-style Allen keys<br />
• 10mm wrench<br />
• Torque wrench<br />
• High-quality grease<br />
• Blue threadlocker (Loctite 242)<br />
• Cable and housing cutters<br />
• Flathead screwdriver (notched)<br />
Page 1 of 23
FRAME PREPARATION<br />
CAUTION: Do not face or ream the bottom bracket shell! This can possibly prevent proper installation of the crank. Your Specialized<br />
frame does not require any bottom bracket shell pre-installation preparation, as all surfaces have been precisely machined to specific<br />
tolerances at the factory for proper interface with the S-Works Carbon crankset.<br />
WARNING! Great care should be taken to not damage carbon fiber or composite material. Any damage may result in a loss of structural<br />
integrity, which may result in a catastrophic failure. This damage may or may not be visible in inspection. Before each ride, and after any<br />
crash, you should carefully inspect your bicycle for any fraying, gouging, scratches through the paint, chipping, bending, or any other<br />
signs of damage. Do not ride if your bicycle shows any of these signs. After any crash, and before you ride any further, take your bicycle<br />
to a Specialized Authorized Dealer for a complete inspection.<br />
FORK PREPARATION<br />
• Inspect the fork and stem to ensure that there are no burrs or sharp edges<br />
that can damage the surfaces in contact with each other. Remove any burrs or<br />
sharp edges using fine grit sandpaper.<br />
1<br />
External slotted clamp<br />
Internal Wedge<br />
• All edges of the stem in contact with the steerer tube should be rounded out to<br />
eliminate any stress points.<br />
WARNING! Burrs and sharp edges can damage the carbon and<br />
alloy surfaces of the components. Any deep scratches or gouges<br />
in the stem or fork can weaken the components.<br />
NOTE: Specialized recommends using an external slotted clamp style stem. Internal wedge clamp style stems can cause damage to the steerer tube if<br />
improperly installed (Fig. 1).<br />
SPECIALIZED BRANDED STEMS:<br />
• Specialized multi-position stems are equipped with a shim and offer a nearcontinuous<br />
surface contact, which helps to evenly distribute loads (Fig. 2).<br />
• Specialized carbon road stems and Barmac Systems have built-in continuous<br />
surface contact, which helps to evenly distribute loads.<br />
• Specialized SL stems with large bore holes are specifically designed in<br />
conjunction with Specialized forks with carbon steerer tubes, to ensure proper<br />
load distribution.<br />
NON-SPECIALIZED BRANDED STEMS:<br />
Specialized recommends against the use of non-Specialized-branded stems with<br />
large bore holes in contact with the steerer tube. Large bore holes reduce the<br />
clamping surface area and may concentrate the load onto the carbon steerer tube<br />
in an unsafe manner.<br />
2<br />
Full contact with<br />
steerer tube<br />
Specialized<br />
multi-position stem<br />
(with shim)<br />
SL stem, with tested<br />
surface area<br />
Specialized<br />
SL stem with large<br />
steerer tube bore<br />
Large hole, limited<br />
surface area<br />
Non-Specializedbranded<br />
stem with large<br />
steerer tube bore<br />
As we cannot test every combination, Specialized does not warrant the use of non-Specialized branded stems with Specialized forks (carbon steerer tubes) and<br />
Specialized Carbon steerer tube plugs, unless specified as original equipment by Specialized. Specialized hereby disclaims all warranties, including the warranties of<br />
fitness for particular purpose and merchantibility.<br />
SEATPOST PREPARATION<br />
• Remove all burrs and square edges from the seat tube and seatpost surfaces in contact each other. These edges and burrs can dig into the material,<br />
compromising the strength of the carbon. (Fig.2).<br />
• Remove any grease from the internal surface of the seat tube. Composite seatposts are non-metallic, they cannot seize in the seat tube. Applying grease<br />
reduces the friction that is critical to proper seatpost grip.<br />
SUPPLEMENTAL DOCUMENTATION<br />
For additional instructions, please refer to the Carbon Crank Instruction Guide IG0338 and techdocs.shimano.com for all Shimano guides. Shiv installation<br />
videos are also available at http://servicevideos.specialized.com.<br />
For the complete warranty provisions, please refer to www.specialized.com.<br />
WARRANTY<br />
Page 2 of 23
GEOMETRY<br />
16<br />
16<br />
17<br />
8<br />
5<br />
3<br />
1<br />
15<br />
4<br />
2<br />
14<br />
9 10<br />
7<br />
6<br />
12<br />
13<br />
11<br />
SIZE X-SMALL SMALL MEDIUM LARGE X-LARGE<br />
1 Frame Reach (mm) 365 385 405 425 445<br />
2 Frame Stack (mm) 495 515 540 565 590<br />
3 Stem Length, -18° Horizontal (mm) * 60 / 90 60 / 90 60 / 90 60 / 90 60 / 90<br />
4 Seat Tube Length, BB Center to Top (mm) 505 525 551 577 603<br />
5 Top Tube Length (mm) 481 504 530 557 582<br />
6 BB Drop (mm) 72 72 72 72 72<br />
7 Chain-Stay Length (mm) 395 395 395 395 395<br />
8 Seat-Tube Angle (°) 77 77 77 77 77<br />
9 Head-Tube Angle (°) 70.25 71.5 72 72.5 72.5<br />
10 Fork Rake (mm) 50 50 45 45 45<br />
11 Trail (mm) 69 61 63 60 60<br />
12 Front-Center (mm) 573 589 608 631 659<br />
13 Wheelbase (mm) 957 973 992 1016 1043<br />
14 Stand-Over Height (mm) 752 772 797 822 847<br />
15 Head-Tube Length (mm) 99 115 139 163 189<br />
16 Seat Post Setback (mm) ** +/- 12.5 / 37.5 +/- 12.5 / 37.5 +/- 12.5 / 37.5 +/- 12.5 / 37.5 +/- 12.5 / 37.5<br />
17 Seat-Post Length (mm) 350 350 350 350 350<br />
* 60mm or 90mm length options are for the Specialized aero stem.<br />
** Two seatpost options available. +/- 12.5mm or +/- 37.5mm<br />
Page 3 of 23
HARDWARE<br />
RISER CARBON BAR ALLOY BAR<br />
STACK HEIGHT 20mm 10mm 5mm BOLT LENGTH BOLT LENGTH<br />
0mm 25mm 30mm<br />
5mm 1 30mm 35mm<br />
10mm 1 35mm 40mm<br />
15mm 1 1 40mm 45mm<br />
20mm 1 45mm 50mm<br />
25mm 1 1 50mm 55mm<br />
30mm 1 2 55mm 60mm<br />
35mm 1 1 1 60mm 65mm<br />
40mm 2 65mm 70mm<br />
45mm 2 1 70mm 75mm<br />
50mm 2 2 75mm 80mm<br />
55mm 2 1 1 80mm 85mm<br />
60mm 3 85mm 90mm<br />
65mm 3 1 90mm 95mm<br />
70mm 3 2 95mm 100mm<br />
75mm 3 1 1 100mm<br />
QTY ITEM SIDE VIEW ITEM ANGLED VIEW ITEM DESCRIPTION<br />
2<br />
Arm pad holder<br />
(requires 4 x M6x10mm bolts)<br />
2 Extension bracket<br />
4 5mm extension riser<br />
2 10mm extension riser<br />
6 20mm extension riser<br />
Page 4 of 23
CHAPTER 1: FORK / STEM / HANDLEBAR INSTALLATION<br />
1. INSTALLING THE FORK INTO THE STEERER TUBE<br />
H<br />
G<br />
F<br />
E<br />
D<br />
C<br />
A<br />
B<br />
Specialized Shiv frames are designed in conjunction with the Specialized aero stem/handlebar combo or a 1 1/8” x 31.8mm standard stem with the Specialized<br />
alloy aero handlebar. The Specialized aero handlebars work specifically with the handlebar risers and extensions to offer the greatest range of position<br />
adjustment.<br />
When using a Specialized aero stem or a Specialized Multi-Position 1 1/8 x 31.8mm stem, Specialized strongly recommends following the specific instructions<br />
below to guarantee the best build possible.<br />
TECH TIP: Before starting the assembly of the bike, install the seatpost in the frame as shown in Chapter 5.<br />
WARNING! When placing the bicycle in a repair stand, clamp the seatpost using a frame clamp specifically designed for thin-wall carbon tubes<br />
(for example, the Park Tools 100-X4 Extreme Range Clamp). Clamping the seatpost with a standard clamp can cause damage to the seatpost<br />
that may or may not be visible. Do not clamp the frame tubes.<br />
TECH TIP: For the initial setup, since the proper height is not yet determined, it is recommended to cut the steerer tube at the highest<br />
position for assembly (2 x 25mm steerer tube spacers), then cut the fork to the desired height once the build is complete and the bike<br />
has been fit to the rider.<br />
TECH TIP: If the intent is to install the Aero stem in the lowest position (without spacers), it is recommended to place a 5mm spacer<br />
above the stem to retain enough steerer tube length in the event that a standard 1 1/8” stem is installed.<br />
1. Install the lower 1 1/8” cartridge bearing A on the steerer tube of the fork.<br />
2. Install the fork B into the head tube C of the Shiv frame and settle the bearing into the base of the head tube.<br />
3. Install the upper 1 1/8” cartridge bearing D on the steerer tube of the fork and settle the bearing into the top of the head tube.<br />
4. Install the bearing compression ring E over the bearing.<br />
5. Install the top cap F over the compression ring.<br />
6. Install 2 x 25mm head tube spacers G onto the steerer tube.<br />
7. Install the stem H that will be used to build the bike onto the steerer tube. This is important to make sure the steerer tube is cut to the correct length.<br />
WARNING! Do not twist the stem onto the carbon steerer tube. This can result in damage to the composite surface, which can render<br />
the fork unsafe.<br />
8. Mark the steerer tube directly above the stem, then remove the fork from the steerer tube. Make a 2nd mark 2mm below the original mark.<br />
9. Place a steerer tube cutting guide tool on the steerer tube, with the guide slot aligned with the 2nd mark. Double-check the measurement, so that<br />
the mark is 2mm below the top of the stem with 2x25mm spacers installed below the stem.<br />
10. Cut the steerer tube (using a carbon cutting blade, or a blade with a minimum 36 teeth) at the cut mark, remove the tool, then remove any burrs from<br />
the top of the steerer using a fine grit sandpaper.<br />
11. Repeat steps 1 through 7.<br />
Page 5 of 23
2. INSTALLING THE CARBON AERO HANDLEBAR ON THE AERO STEM<br />
90mm<br />
J<br />
I<br />
I<br />
60mm<br />
J<br />
SPECIALIZED AERO STEM:<br />
12. Determine the desired stem length of 60 or 90mm (longer 80 / 110mm stem available separately) and install the carbon aero handlebar I along<br />
with the handlebar position wedge J .<br />
TECH TIP: If the stem length is not yet determined, it’s recommended to start at the 90mm (or 110mm) position. Changing the stem from the<br />
60mm to 90mm (or 80mm to 110mm) position will require that the cable housings be replaced with longer ones to accommodate the additional<br />
stem length. It’s easier to trim cable housings to a shorter length if adjusting from the 90mm to the 60mm (or 110mm to 80mm) position.<br />
L<br />
K<br />
13. Apply grease to the bolts, then install the stem’s upper section K and four bolts L (M6x32mm, 4mm countersunk Allen hex head).<br />
14. Alternate the torque to the stem bolts in 5 in-lbf (0.6 Nm) increments, up to a final torque setting of 80 in-lbf (9.0 Nm), to ensure an even load<br />
distribution to the handlebar.<br />
Page 6 of 23
3. INSTALLING THE ALLOY HANDLEBAR WITH A STANDARD 31.8MM STEM<br />
M<br />
N<br />
STANDARD 31.8MM STEM:<br />
15. Determine the desired stem M length and angle, then place the Specialized aero handlebar N into the stem.<br />
16. Orient the handlebar position horizontally, then torque the stem faceplate bolts to the manufacturer’s specifications.<br />
WARNING! Do not grease the interface between the stem and the alloy handlebar. Grease may cause the handlebar to slip, which can<br />
result in a loss of control.<br />
4. INSTALLING THE EXPANDER PLUG AND TOP CAP<br />
Q<br />
P<br />
O<br />
17. Install the Specialized 48mm Long Expander Plug O into the steerer tube, then torque to 80 in-lbf (9.0 Nm).<br />
18. Install the preload top cap P , followed by the bolt with washer Q , then preload the headset bearings to remove any play.<br />
19. Torque the stem bolts to the manufacturer’s specifications.<br />
WARNING! Carbon fiber steerer tubes require the use of the Long Expander Plug assembly supplied with the fork. Do not use a star nut,<br />
as it can damage the inside surface of the steerer tube. Damage to the steerer tube can result in failure, causing serious personal injury<br />
or death.<br />
Page 7 of 23
CHAPTER 2: HANDLEBAR EXTENSION / RISER INSTALLATION<br />
WARNING! Aerobars are attached to the front of your bicycle, and as a result, proper and secure installation is critical. Improper<br />
installation or adjustment may result in damage to the bicycle or its components or in an accident which can cause serious injury or<br />
death.<br />
WARNING! Aerobars can require riding positions that are new or different to many riders, which may cause you to lose control and fall.<br />
Continue to look forward while riding and not down towards the ground. We advise that you practice using these aerobars in a low traffic<br />
area to become accustomed to any changes in the steering or handling of your bicycle.<br />
EXPLODED PARTS VIEW:<br />
1. INSTALLING THE EXTENSION RISERS<br />
These Aerobars can be adjusted in many ways to provide the ideal fit for the rider. Your Authorized Specialized Dealer can help you find that ideal fit. The<br />
Specialized supplied risers allow for a height adjustment of the Aerobars. Use the following Riser Chart to determine the correct bolt length and use of supplied<br />
risers for the corresponding stack height:<br />
RISER CARBON BAR ALLOY BAR<br />
STACK HEIGHT 20mm 10mm 5mm BOLT LENGTH BOLT LENGTH<br />
0mm 25mm 30mm<br />
5mm 1 30mm 35mm<br />
10mm 1 35mm 40mm<br />
15mm 1 1 40mm 45mm<br />
20mm 1 45mm 50mm<br />
25mm 1 1 50mm 55mm<br />
30mm 1 2 55mm 60mm<br />
35mm 1 1 1 60mm 65mm<br />
40mm 2 65mm 70mm<br />
45mm 2 1 70mm 75mm<br />
50mm 2 2 75mm 80mm<br />
55mm 2 1 1 80mm 85mm<br />
60mm 3 85mm 90mm<br />
65mm 3 1 90mm 95mm<br />
70mm 3 2 95mm 100mm<br />
75mm 3 1 1 100mm<br />
Page 8 of 23
SYSTEM WITH NO RISER SPACERS:<br />
1. Apply grease to the bolts, then install the bolts through the handlebar, through the risers and into the extension brackets. Refer to the chart (see<br />
page 8) for the corresponding bolt length.<br />
2. Torque the bolts to 80 in-lbf (9.0 Nm).<br />
SYSTEM WITH RISER SPACERS:<br />
5mm 10mm 15mm 20mm 25mm 30mm 35mm 40mm 45mm 50mm 55mm 60mm 65mm 70mm 75mm<br />
C<br />
3. Additional extension riser stack height can be achieved (5 to 75mm) by stacking different combinations of riser parts C , in increments of 5mm.<br />
Refer to the chart (see page 8) for the corresponding bolt length.<br />
* The alloy aero bars are equipped with a total of 10mm (2x5mm) of extension risers per side. Additional parts are available to provide up to 70mm of extension<br />
riser height, in a separate Service Parts Kit.<br />
Page 9 of 23
2. INSTALLING THE CLAMPS, EXTENSIONS AND ARM PADS<br />
H<br />
DEPTH RANGE:
3. ADJUSTING THE EXTENSIONS AND ARM PADS<br />
6. The extensions have the ability to be swapped left to right, to adjust the stance width of the hand grip area. They can also be moved fore-aft for<br />
length adjustment (+/- 10mm) and rotated for additional hand grip area width and angle fine-tuning.<br />
7. The arm pads have three lateral and three fore-aft positions to fine-tune the rider’s elbow width and the position of the pad under the arm.<br />
8. Once the fit is determined, torque the riser bolts, extension clamp and pad holder bolts according to the torque specifications listed in the chart on<br />
page 1.<br />
9. Place the foam pads on the pad holders.<br />
Page 11 of 23
CHAPTER 3: CABLE HOUSING / WIRE INSTALLATION<br />
1. INSTALLING THE BRAKE CABLE HOUSINGS AND SHIFTER WIRES<br />
A<br />
C<br />
D<br />
B<br />
1. Route a section of front brake cable housing A through the non-drive-side portion of the handlebar. If running electronic shifters, route the<br />
electronic shifter wire C through the handlebar at before the cable housings, and according to the manufacturer’s instructions. Be careful not to<br />
damage the wiring with the cable housing.<br />
TECH TIP: For Di2 instructions, refer to techdocs.shimano.com for Shimano guides.<br />
2. Repeat on the drive-side of the handlebar for the rear brake B and rear shifter D .<br />
3. Trim the brake cable housings to the appropriate length once the brakes have been installed on the bike (see chapter 4).<br />
Brake cable housings<br />
4. Route the rear brake cable housing through the small port hole in the top of the top tube.<br />
5. Install the brake levers into the ends of the handlebar according to the manufacturer’s instructions.<br />
6. Route the front brake cable housing to the front brake for later trimming.<br />
Page 12 of 23
Shifter cable housings<br />
7. Route the shifter cable housings through the handlebar extensions and into the large cable housing port in the top of the top tube.<br />
8. Install the shift levers into the ends of the extensions according to the manufacturer’s instructions.<br />
Electronic shifter wires<br />
9. Route the wiring through the extensions and install the shift levers according to the manufacturer’s instructions.<br />
Page 13 of 23
2. ROUTING THE DERAILLEUR CABLES / WIRES AT THE BOTTOM BRACKET<br />
A<br />
B<br />
CABLE<br />
SYSTEM<br />
ELECTRONIC<br />
SYSTEM<br />
To shifters<br />
To rear<br />
derailleur<br />
To front<br />
derailleur<br />
To rear<br />
derailleur<br />
To front<br />
derailleur<br />
To<br />
battery<br />
OPTION A: STANDARD CABLE<br />
• Rear derailleur: Route the rear derailleur cable housing through the large hole going into the drive-side chainstay.<br />
TECH TIP: To help guide the rear derailleur cable housing through the chainstay, run a gear cable through the chainstay starting at the<br />
dropout and exiting at the bottom bracket cable guide port. This will help guide the housing through the chainstay and out the dropout.<br />
• Front derailleur: Trim the front derailleur cable housing to the appropriate length to insert into the cable noodle, then route the noodle into the non-drive-side<br />
hole going up toward the seat tube. This noodle acts as a cable stop, the cable will be bare leading to the front derailleur.<br />
OPTION B: ELECTRONIC WIRING<br />
• Rear derailleur: Route the rear derailleur cable housing or wire through the dropout hole and out the large drive-side hole at the bottom bracket.<br />
• Front derailleur: Route the wire through the hole in the seat tube and out the small non-drive-side hole at the bottom bracket.<br />
• Join the connectors according to the manufacturer’s instructions, then place any excess wiring up into the frame in front of the bottom bracket shell.<br />
TECH TIP: For Di2 instructions, refer to techdocs.shimano.com for Shimano guides.<br />
3. Di2 WIRING LOCATIONS<br />
Rear derailleur<br />
wire into dropout<br />
Point frame downward.<br />
Rear derailleur wire exits<br />
at bottom bracket<br />
Front<br />
derailleur<br />
Insert split grommet<br />
into dropout<br />
Shifters<br />
Rear<br />
derailleur<br />
Battery<br />
Page 14 of 23
4. INSTALLING THE CABLE ROUTING COVER PLATE<br />
To<br />
battery<br />
E<br />
F<br />
10. Once the wiring or cable housing is routed, install the cable routing cover plate E , followed by the cover plate bolt F (M6x15mm, 3mm<br />
countersunk Allen hex head). Apply grease to the bolt.<br />
11. Torque the bolt to 25 in-lbf (2.8 Nm).<br />
5. INSTALLING THE CABLE ROUTING CONTROL TOWER<br />
G<br />
Small tower, no spacer Medium tower, 1 spacer Large tower, 2 spacers<br />
12. Once the bike fit has been finalized, choose the Control Tower that corresponds to the final amount of spacers. Attach the Control Tower to the<br />
frame using the tower bolt G (M5x20mm, 4mm Allen hex head). Apply grease to the bolt.<br />
13. Torque the bolt to 25 in-lbf (2.8 Nm).<br />
Page 15 of 23
CHAPTER 4: BRAKE INSTALLATION<br />
1. FRONT AND REAR BRAKE ASSEMBLY (Exploded view)<br />
1. Aero bolt cap<br />
2. Brake bolt O-ring<br />
3. Brake pivot bolt<br />
4. Brake arm<br />
5. Spring plate<br />
6. Spring<br />
7. Spring cover<br />
1<br />
2<br />
3<br />
4<br />
5<br />
6<br />
7<br />
Non-drive-side<br />
Drive-side<br />
NON-DRIVE SIDE (Rear View)<br />
DRIVE SIDE (Rear View)<br />
7<br />
6<br />
Clockwise<br />
wound<br />
Place long spring<br />
tip facing out<br />
Counter-clockwise<br />
wound<br />
5<br />
1. Place the spring plates 5 in the brake cavity. Make sure they’re facing the correct direction with the flat edge against the adjuster screw. The spring<br />
plate is reversible for either side brake.<br />
2. Install the springs 6 , clockwise for the drive-side brake, counter-clockwise for the non-drive-side brake. The shorter of the two spring pins goes in<br />
the brake.<br />
3. Install the brake spring covers 7 .<br />
Page 16 of 23
2. INSTALLING THE FRONT BRAKE ASSEMBLY<br />
A<br />
B<br />
C<br />
4. Install the drive-side brake arm A . A flathead screwdriver with a notch in the flat edge can help rotate the spring into the fork’s spring hole.<br />
5. If the bolts do not have blue loctite from the factory, apply blue loctite, then install the brake bolt B and tighten to 70 in-lbf (7.9 Nm).<br />
6. Install the drive-side brake bolt cover C .<br />
D<br />
E<br />
F<br />
7. Rotate the drive-side brake out of the way and install the non-drive-side brake D .<br />
8. If the bolts do not have blue loctite from the factory, apply blue loctite, then install the brake bolt E and tighten to 70 in-lbf (7.9 Nm).<br />
9. Install the non-drive-side brake bolt cover F .<br />
Page 17 of 23
G<br />
10. Place the cable noodle G in the cable noodle guide and trim the cable housing so that it has a smooth path to the cable noodle that’s as short as<br />
possible while still fully seating in the noodle. Make sure it stays fully seated through the entire range of the brake, from closed to open.<br />
3. INSTALLING THE REAR BRAKE ASSEMBLY<br />
11. Install the rear brake arms, following the same steps as the front brake installation.<br />
TECH TIP: Remove the crank to ease installation and adjustment of the rear brakes.<br />
12. Place the cable noodle in the cable noodle guide and trim the cable housing so that it has a smooth path to the cable noodle that’s as short as<br />
possible while still fully seating in the noodle. Make sure it stays fully seated through the entire range of the brake, from closed to open.<br />
Page 18 of 23
13. Route the cable through the brake lever, into the housing and through the rear brake cable noodle. Repeat the routing method for the front brake.<br />
14. Route the cable around the brake pinch bolt, then apply the specified torque shown below.<br />
4. ADJUSTING THE FRONT AND REAR BRAKE ASSEMBLIES<br />
1mm<br />
1-2mm<br />
15. Apply the same adjustments to the front and rear brakes.<br />
Page 19 of 23
CHAPTER 5: SEATPOST INSTALLATION<br />
1. INSTALLING AND ADJUSTING THE <strong>SHIV</strong> SEATPOST<br />
7x7mm<br />
ANGLED SURFACES<br />
7x9mm<br />
D<br />
F<br />
C<br />
A<br />
B<br />
A<br />
C<br />
E<br />
Tab into groove<br />
Align arrows<br />
1. Apply grease to the conical surfaces of the clamp mechanism A and install them into the seatpost B .<br />
2. Engage the saddle rails into the slots of the conical portions of the clamp mechanism, then place the outer caps C over the saddle rails.<br />
TECH TIP: The Shiv seatpost can be assembled with outer rail clamps for 7x7 alloy rails or 7x9 carbon rails. Choose the rail clamps that correspond<br />
to the saddle.<br />
NOTE: Ensure that the wedges are parallel to each other. If the wedges are offset relative to each other, they can force the saddle rails<br />
twist, which can result in permanently bent rails and an uneven saddle position.<br />
3. Install the nut D . To avoid damage to the clamp mechanism, the arrows must align to ensure the tab is placed in the groove of the outer cap E .<br />
4. Install the bolt F . Use blue threadlocker (Loctite 242) on the threads, place into the opposite side outer cap and thread into the nut. Tighten lightly.<br />
5. Install the seatpost into the seat tube.<br />
G<br />
6. Adjust the saddle G to the desired tilt angle and fore-aft position.<br />
7. Torque the seatpost bolt to 120 in-lbf (13.5 Nm).<br />
Page 20 of 23
J<br />
H<br />
I<br />
8. Apply grease to the bolts, then install the seat collar plate H , bolts I (M5x20mm, 4mm Allen hex head) and domed washers J .<br />
9. Adjust the seatpost to the desired height for proper leg extension.<br />
10. Alternate the torque to the seat collar bolts, in 5 in-lbf (0.6 Nm) increments, up to a final torque setting of 45 in-lbf (5.1 Nm) to ensure an even load<br />
distribution to the seatpost. Once complete, the gap between the frame and the seat collar should be equal on both sides.<br />
WARNING! The Shiv is equipped with a minimum insertion sight hole (see figure above). This is the minimum insertion required for the<br />
seatpost and frame to remain structurally safe. All frame sizes require a minimum post insertion of 75mm; the seatpost MUST be visible<br />
through the sight hole.<br />
TECH TIP: The application of carbon assembly compound (fiber paste) can increase friction between carbon surfaces. Please visit your<br />
Specialized Authorized Dealer for additional information.<br />
2. SEATPOST SETBACK OPTIONS<br />
25mm<br />
25mm<br />
25mm<br />
-37.5mm -12.5mm +12.5mm +37.5mm<br />
11. The Shiv seatposts are available in +/- 12.5mm and +/- 37.5mm setbacks. The seatposts are also reversible, to offer four positions with 25mm offset.<br />
Page 21 of 23
CHAPTER 6: FUELSELAGE INSTALLATION<br />
1. INSTALLING THE FUELSELAGE<br />
The Specialized Fuelselage Integrated Hydration System reservoir is designed to fit exclusively with Specialized Shiv carbon frames, through the top tube port<br />
and into the down tube. The Fuelselage hose can be trimmed to the desired length, and combined with the mouth port magnet and matching magnet loop, the<br />
valve location can be customized to the rider’s ideal location.<br />
1 2 3<br />
1. Fig.1: Thread the hose through the reservoir top cover, the mouth port, then through the hose sleeve.<br />
2. Fig.1: Place the threaded nut onto the hose, below the hose sleeve.<br />
3. Fig.1: Press the hose onto the fitting at the base of the reservoir, then thread the nut onto the fitting.<br />
4. Fig.2: Insert the reservoir into the port in the top tube of the frame. Use the hose to help guide the reservoir into the frame, to prevent bunching.<br />
5. Fig.3: Thread the screw supplied with the Fuelselage into the threaded rivet. The ferromagnetic screw allows the mouth port magnet to function.<br />
6. Fig.3: Place the clip at the front of the mouth port under the lip of the top tube port, then lower the magnetic tip of the mouth port down until the<br />
magnet comes in contact with the screw.<br />
4 5<br />
7. Fig.4: Place the magnet loop around the aero extension, on the desired side.<br />
8. Fig.4: Once the rider position and magnet loop position are determined, if the hose is too long, remove the silicone straw and carefully cut the hose<br />
down to the desired length, so that the magnet in the silicone straw lines up with the magnet loop.<br />
9. Fig.5: Fill the reservoir with drinking fluid.<br />
NOTE: Do not fill with alcohol, milk products or hot beverages. Clean out the reservoir regularly with a mild detergent.<br />
A video instruction guide is available at http://servicevideos.specialized.com.<br />
Page 22 of 23
SPECIALIZED BICYCLE COMPONENTS<br />
15130 Concord Circle, Morgan Hill, CA 95037 (408) 779-6229