Panasonic Air Conditioner
Panasonic Air Conditioner
Panasonic Air Conditioner

Create successful ePaper yourself
Turn your PDF publications into a flip-book with our unique Google optimized e-Paper software.
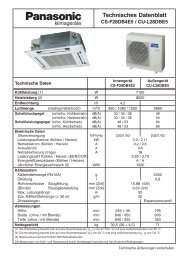
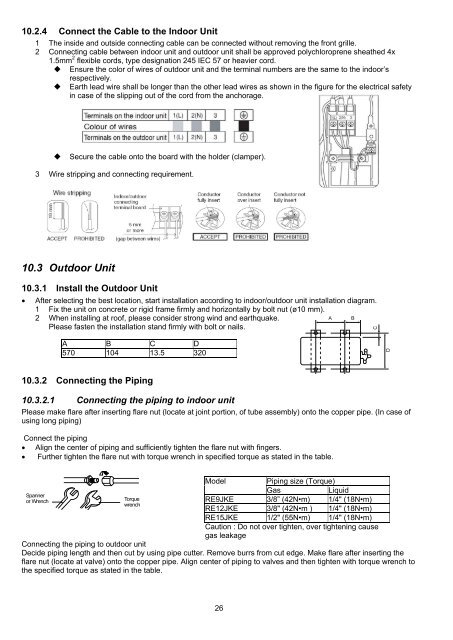
10.2.4 Connect the Cable to the Indoor Unit<br />
1 The inside and outside connecting cable can be connected without removing the front grille.<br />
2 Connecting cable between indoor unit and outdoor unit shall be approved polychloroprene sheathed 4x<br />
1.5mm 2 flexible cords, type designation 245 IEC 57 or heavier cord.<br />
� Ensure the color of wires of outdoor unit and the terminal numbers are the same to the indoor’s<br />
respectively.<br />
� Earth lead wire shall be longer than the other lead wires as shown in the figure for the electrical safety<br />
in case of the slipping out of the cord from the anchorage.<br />
� Secure the cable onto the board with the holder (clamper).<br />
3 Wire stripping and connecting requirement.<br />
10.3 Outdoor Unit<br />
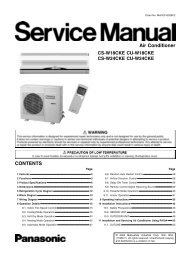
10.3.1 Install the Outdoor Unit<br />
� After selecting the best location, start installation according to indoor/outdoor unit installation diagram.<br />
1 Fix the unit on concrete or rigid frame firmly and horizontally by bolt nut (ø10 mm).<br />
2 When installing at roof, please consider strong wind and earthquake.<br />
Please fasten the installation stand firmly with bolt or nails.<br />
A B<br />
A B C D<br />
570 104 13.5 320<br />
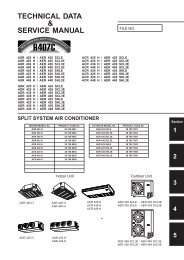
10.3.2 Connecting the Piping<br />
10.3.2.1 Connecting the piping to indoor unit<br />
Please make flare after inserting flare nut (locate at joint portion, of tube assembly) onto the copper pipe. (In case of<br />
using long piping)<br />
Connect the piping<br />
� Align the center of piping and sufficiently tighten the flare nut with fingers.<br />
� Further tighten the flare nut with torque wrench in specified torque as stated in the table.<br />
Model<br />
Piping size (Torque)<br />
Gas Liquid<br />
Spann<br />
er<br />
or<br />
Wrenc<br />
h<br />
Torq<br />
ue<br />
RE9JKE 3/8” (42N m) 1/4" (18N m)<br />
wrenc<br />
h<br />
RE12JKE 3/8" (42N m ) 1/4" (18N m)<br />
RE15JKE 1/2" (55N m) 1/4" (18N m)<br />
Caution : Do not over tighten, over tightening cause<br />
gas leakage<br />
Connecting the piping to outdoor unit<br />
Decide piping length and then cut by using pipe cutter. Remove burrs from cut edge. Make flare after inserting the<br />
flare nut (locate at valve) onto the copper pipe. Align center of piping to valves and then tighten with torque wrench to<br />
the specified torque as stated in the table.<br />
26<br />
C<br />
D