

QUILTsocial | Issue 08
Here it is, the new issue of QUILTsocial Magazine! We're extremely excited to release this FREE issue featuring a full 88 pages packed with free tutorials, patterns, and product reviews. This is a very exciting issue! (I know, I say that about all of them...) But I'm very excited that we're taking a close look at 3 different sewing machine brands, highlighting their special features and exploring them with cool projects. This issue also has the very fun and diverse quilting projects you've come to expect from QUILTsocial. You don't want to miss our many tutorials, like reducing bulk in your seams, threads that enhance Sashiko work, and bringing together stenciling fabric and machine embroidery to create a one of kind quilt block, to name a few. Enjoy the issue, and happy quilting!
Here it is, the new issue of QUILTsocial Magazine! We're extremely excited to release this FREE issue featuring a full 88 pages packed with free tutorials, patterns, and product reviews.
This is a very exciting issue! (I know, I say that about all of them...) But I'm very excited that we're taking a close look at 3 different sewing machine brands, highlighting their special features and exploring them with cool projects.
This issue also has the very fun and diverse quilting projects you've come to expect from QUILTsocial. You don't want to miss our many tutorials, like reducing bulk in your seams, threads that enhance Sashiko work, and bringing together stenciling fabric and machine embroidery to create a one of kind quilt block, to name a few. Enjoy the issue, and happy quilting!

You also want an ePaper? Increase the reach of your titles
YUMPU automatically turns print PDFs into web optimized ePapers that Google loves.
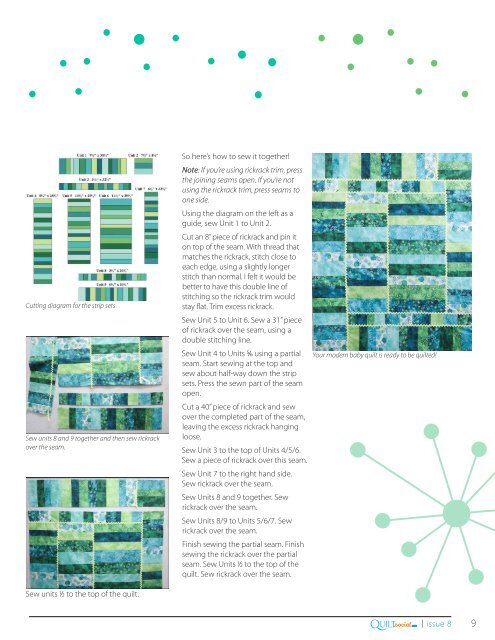
Cutting diagram for the strip sets<br />
Sew units 8 and 9 together and then sew rickrack<br />
over the seam.<br />
Sew units 1⁄2 to the top of the quilt.<br />
So here’s how to sew it together!<br />
Note: If you’re using rickrack trim, press<br />
the joining seams open. If you’re not<br />
using the rickrack trim, press seams to<br />
one side.<br />
Using the diagram on the left as a<br />
guide, sew Unit 1 to Unit 2.<br />
Cut an 8” piece of rickrack and pin it<br />
on top of the seam. With thread that<br />
matches the rickrack, stitch close to<br />
each edge, using a slightly longer<br />
stitch than normal. I felt it would be<br />
better to have this double line of<br />
stitching so the rickrack trim would<br />
stay flat. Trim excess rickrack.<br />
Sew Unit 5 to Unit 6. Sew a 31” piece<br />
of rickrack over the seam, using a<br />
double stitching line.<br />
Sew Unit 4 to Units 5⁄6 using a partial<br />
seam. Start sewing at the top and<br />
sew about half-way down the strip<br />
sets. Press the sewn part of the seam<br />
open.<br />
Cut a 40” piece of rickrack and sew<br />
over the completed part of the seam,<br />
leaving the excess rickrack hanging<br />
loose.<br />
Sew Unit 3 to the top of Units 4/5/6.<br />
Sew a piece of rickrack over this seam.<br />
Sew Unit 7 to the right hand side.<br />
Sew rickrack over the seam.<br />
Sew Units 8 and 9 together. Sew<br />
rickrack over the seam.<br />
Sew Units 8/9 to Units 5/6/7. Sew<br />
rickrack over the seam.<br />
Finish sewing the partial seam. Finish<br />
sewing the rickrack over the partial<br />
seam. Sew Units 1⁄2 to the top of the<br />
quilt. Sew rickrack over the seam.<br />
Your modern baby quilt is ready to be quilted!<br />
Q<br />
.com<br />
UILTsocial<br />
| issue 8 9


