
Create successful ePaper yourself
Turn your PDF publications into a flip-book with our unique Google optimized e-Paper software.
SELWYN TIMES Tuesday <strong>July</strong> <strong>26</strong> <strong>2016</strong> 27<br />
Gardening<br />
Plant silverbeet in stages for constant supply<br />
• By Tod Palenski<br />
SPINACH AND silverbeet are the perfect<br />
space fillers in a winter vege garden.<br />
Plant them in between your larger<br />
and longer growing vegetables like<br />
broccoli and cauliflower and they’ll<br />
be finished with the space before its<br />
needed.<br />
They’re both full of vitamins, are<br />
perfect additions to a wide variety of<br />
dishes and, my favourite, you can pick<br />
the leaves off the plants as they reach<br />
the size you desire.<br />
Once you’ve got your seedlings you<br />
need to find a spot to plant them. Spinach<br />
likes full sun and well-fertilised soil.<br />
And silverbeet likes well-drained soil –<br />
which, actually makes it really good for<br />
planting in pots.<br />
Before you start gardening it pays to<br />
mix into the soil some compost or a<br />
good general fertiliser like nitrophoska<br />
blue.<br />
Then simply plant your seedlings<br />
around 20cm apart from each other.<br />
Remember, if you’ve planted (or are<br />
planning to grow) longer growing<br />
vegetables, like any members of the<br />
brassica family, plant your silverbeet<br />
and spinach seedlings in the rows in<br />
between.<br />
Both of these tasty veges are also enjoyed<br />
by slugs and snails so keep an eye<br />
out for these slimy pests.<br />
Depending on the condition of your<br />
soil your space filling plants will be<br />
ready to harvest in around eight to 12<br />
weeks. If your soil is well composted<br />
and free-draining you’ll be looking at<br />
more like eight weeks.<br />
And remember if you want a constant<br />
supply of beet and spinach – stagger<br />
your planting (plant more every couple<br />
of weeks).<br />
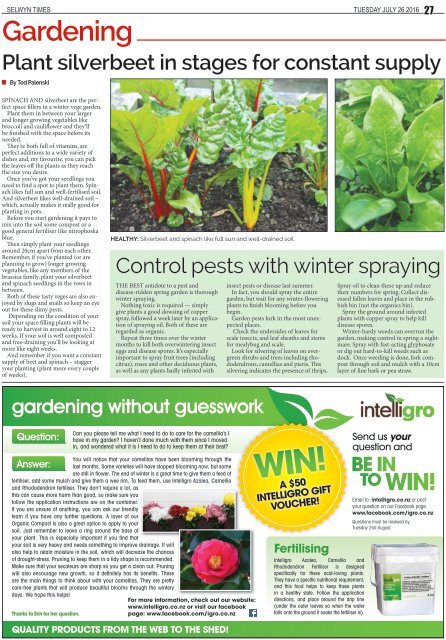
HEALTHY: Silverbeet and spinach like full sun and well-drained soil.<br />
Control pests with winter spraying<br />
THE BEST antidote to a pest and<br />
disease-ridden spring garden is thorough<br />
winter spraying.<br />
Nothing toxic is required — simply<br />
give plants a good dowsing of copper<br />
spray, followed a week later by an application<br />
of spraying oil. Both of these are<br />
regarded as organic.<br />
Repeat three times over the winter<br />
months to kill both overwintering insect<br />
eggs and disease spores. It’s especially<br />
important to spray fruit trees (including<br />
citrus), roses and other deciduous plants,<br />
as well as any plants badly infested with<br />
insect pests or disease last summer.<br />
In fact, you should spray the entire<br />
garden, but wait for any winter-flowering<br />
plants to finish blooming before you<br />
begin.<br />
Garden pests lurk in the most unexpected<br />
places.<br />
Check the undersides of leaves for<br />
scale insects, and leaf sheaths and stems<br />
for mealybug and scale.<br />
Look for silvering of leaves on evergreen<br />
shrubs and trees including rhododendrons,<br />
camellias and pieris. This<br />
silvering indicates the presence of thrips.<br />
Spray oil to clean these up and reduce<br />
their numbers for spring. Collect diseased<br />
fallen leaves and place in the rubbish<br />
bin (not the organics bin).<br />
Spray the ground around infected<br />
plants with copper spray to help kill<br />
disease spores.<br />
Winter-hardy weeds can overrun the<br />
garden, making control in spring a nightmare.<br />
Spray with fast-acting glyphosate<br />
or dig out hard-to-kill weeds such as<br />
dock. Once weeding is done, fork compost<br />
through soil and mulch with a 10cm<br />
layer of fine bark or pea straw.<br />
gardening without guesswork<br />
Question:<br />
Can you please tell me what I need to do to care for the camellia’s I<br />
have in my garden? I haven’t done much with them since I moved<br />
in, and wondered what it is I need to do to keep them at their best?<br />
You will notice that your camellias have been blooming through the<br />
Answer: last months. Some varieties will have stopped blooming now, but some<br />
are still in flower. The end of winter is a great time to give them a feed of<br />
fertiliser, add some mulch and give them a wee rim. To feed them, use Intelligro Azalea, Camellia<br />
and Rhododendron fertiliser. They don’t require a lot, as<br />
this can cause more harm than good, so make sure you<br />
follow the application instructions are on the container.<br />
If you are unsure of anything, you can ask our friendly<br />
team if you have any further questions. A layer of our<br />
Organic Compost is also a great option to apply to your<br />
soil. Just remember to leave a ring around the base of<br />
your plant. This is especially important if you find that<br />
your soil is very heavy and needs something to improve drainage. It will<br />
also help to retain moisture in the soil, which will decrease the chances<br />
of drought-stress. Pruning to keep them in a tidy shape is recommended.<br />
Make sure that your secateurs are sharp so you get a clean cut. Pruning<br />
will also encourage new growth, so it definitely has its benefits. These<br />
are the main things to think about with your camellias. They are pretty<br />
care-free plants that will produce beautiful blooms through the wintery<br />
days. We hope this helps!<br />
Thanks to Erin for her question.<br />
for more information, check out our website:<br />
www.intelligro.co.nz or visit our facebook<br />
page: www.facebook.com/igro.co.nz<br />
QualITy prOducTs frOm ThE WEB TO ThE shEd!<br />
WIN!<br />
a $50<br />
INTEllIgrO gIfT<br />
VOuchEr!<br />
fertilising<br />
Intelligro Azalea, Camellia and<br />
Rhododendron Fertiliser is designed<br />
specifically for these acid-loving plants.<br />
They have a specific nutritional requirement,<br />
and this food helps to keep these plants<br />
in a healthy state. Follow the application<br />
directions, and place around the drip line<br />
(under the outer leaves so when the water<br />
falls onto the ground it soaks the fertiliser is).<br />
Send us your<br />
question and<br />
BE IN<br />
TO WIN!<br />
Email to: info@igro.co.nz or post<br />
your question on our Facebook page:<br />
www.facebook.com/igro.co.nz<br />
Questions must be received by<br />
Tuesday 2nd August