You also want an ePaper? Increase the reach of your titles
YUMPU automatically turns print PDFs into web optimized ePapers that Google loves.
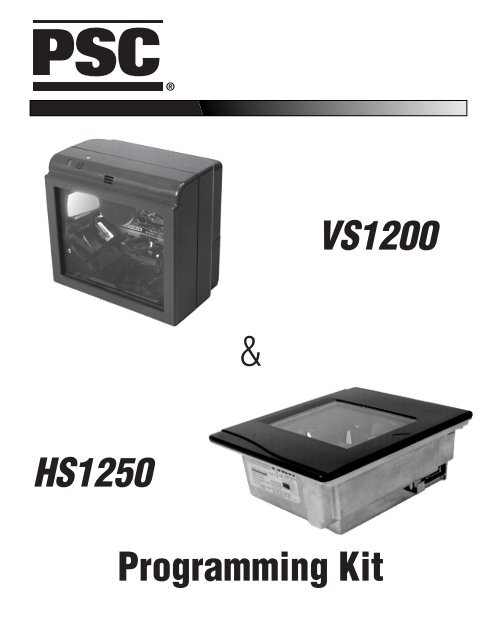
<strong>HS1250</strong><br />
&<br />
<strong>VS1200</strong><br />
<strong>Programming</strong> <strong>Kit</strong>
PSC Scanning, INC.<br />
959 Terry Street<br />
Eugene, Oregon 97402-9120<br />
Telephone: (541) 683-5700<br />
Toll Free: (800) 547-2507<br />
Telefax: (541) 686-1702<br />
PSC AND THE PSC LOGO ARE REGISTERED TRADEMARKS OF PSC INC.<br />
This manual and its contents are copyrighted, with all rights reserved.<br />
Under copyright law, this manual may not be copied in whole or in part<br />
without the prior written consent of PSC. The same proprietary and<br />
copyright notices must appear on any permitted copies as appear on the<br />
original. This exception does not permit copies to be made for others,<br />
whether or not sold. Under the law, copying includes translating into<br />
another language or format.<br />
DISCLAIMER<br />
The information and specifications contained in this manual<br />
are subject to change without notice. PSC shall not be held<br />
liable for damages resulting from the use or misuse of the<br />
information contained herein.
Table of Contents<br />
ABOUT PROGRAMMING ......................................................... 1<br />
SCANNER PROGRAMMING<br />
(HOW IT WORKS) ........................................................ 5<br />
PROGRAMMING YOUR SCANNER ...................................... 7<br />
PROGRAMMING CONVENTIONS ......................................... 9<br />
SPECIAL LABELS ............................................................... 11<br />
INCREMENT VOLUME ................................................... 12<br />
INCREMENT TONE ....................................................... 13<br />
SWITCH LABEL .......................................................... 14<br />
RETURN TO FACTORY DEFAULT ...................................... 15<br />
PROGRAMMABLE SPEAKER FEATURES ..................................... 16<br />
SPEAKER VOLUME PROGRAMMING .................................. 21<br />
UPC/EAN PRICE/WEIGHT<br />
CHECK DIGIT SELECTIONS ................................................... 28<br />
TIMEOUTS ....................................................................... 34<br />
SETTING LASER TIMEOUT ............................................. 35<br />
SETTING MOTOR TIMEOUT ........................................... 39<br />
SETTING DOUBLE READ TIMEOUT ................................... 44<br />
PERIPHERAL PORT ............................................................. 48<br />
R44-1340 i
CHANGING BARCODE TYPES ................................................. 56<br />
UPC/EAN EXPANSION ............................................... 58<br />
UPC CHECK DIGIT TRANSMISSION ................................. 64<br />
CODE 39 ................................................................. 73<br />
CODE 128 ............................................................... 83<br />
INTERLEAVED 2 OF 5 ................................................... 97<br />
INTERFACE SELECTIONS ..................................................... 139<br />
RS-232 INTERFACE SPECIFICATIONS ............................ 139<br />
OCIA INTERFACE SELECTION ...................................... 162<br />
OCIA/RS-232 DUAL INTERFACE ................................ 169<br />
MULTIDROP SCANNER ADDRESSING .............................. 178<br />
INDEX ........................................................................... 183<br />
ii <strong>VS1200</strong> & <strong>HS1250</strong> <strong>Programming</strong> <strong>Kit</strong>
<strong>VS1200</strong> & <strong>HS1250</strong><br />
PROGRAMMING<br />
W/BARCODES<br />
This programming guide contains the procedures<br />
and barcode programming labels necessary to set<br />
<strong>VS1200</strong> and <strong>HS1250</strong>'s programmable features.<br />
ABOUT PROGRAMMING<br />
The following list shows an overview of this<br />
manual’s organization. We have divided the<br />
contents into groups of features that are usually<br />
changed together. For example, all of the RS-232<br />
parameters (baud rate, parity, stop bits, etc.) are<br />
grouped together.<br />
• About <strong>Programming</strong><br />
• Special Labels (Switch label, Increment<br />
Tone & Increment Volume)<br />
• Return to Factory Default<br />
• Operational Settings (Speaker, Laser<br />
& Motor Timeouts)<br />
R44-1340 1
• RS-232 Parameters (Baud Rate, etc.)<br />
• Symbology Selection<br />
• Interleaved 2 of 5 Label Length<br />
Check the Index for the location of specific programming<br />
labels.<br />
This introduction describes the programming and<br />
configuration procedures for the <strong>VS1200</strong> &<br />
<strong>HS1250</strong>.<br />
Scanner <strong>Programming</strong>: describes how to put the<br />
scanner in <strong>Programming</strong> Mode and how to use the<br />
programming barcodes to set the scanner’s<br />
parameters.<br />
Special Labels: includes a set of labels which<br />
perform unique functions and cannot be duplicated<br />
by standard label definition and printing<br />
equipment. Each special label affects the scanner<br />
when in normal operating mode. These include:<br />
• <strong>Programming</strong> Switch Label - puts the<br />
scanner in <strong>Programming</strong> Mode and<br />
exits from <strong>Programming</strong> Mode.<br />
• Increment Volume Label - changes the<br />
speaker volume setting in volatile<br />
(temporary) memory. If power to the<br />
2 <strong>VS1200</strong> & <strong>HS1250</strong> <strong>Programming</strong> <strong>Kit</strong>
scanner is interrupted, the volume<br />
will revert to the default setting.<br />
Return to Factory Settings: resets the<br />
scanner to the original factory settings<br />
for all options. Any special features or<br />
options programmed prior to scanning<br />
this label in <strong>Programming</strong> Mode<br />
must be reselected.<br />
User Features: allow selection of On/Off<br />
Switch, Laser Timeout, Motor<br />
Timeout, Peripheral Port, Speaker<br />
Volume, Double Read Timeout<br />
interval, and Price/Weight Check<br />
Digit read and transmission.<br />
When the speaker's volume is programmed<br />
with these labels, the setting<br />
is stored in default memory. If power<br />
to the scanner is interrupted, the<br />
volume setting is retained.<br />
R44-1340 3
RS-232 Communication Format : settings<br />
are used only with scanners which<br />
have an RS-232 interface. Options<br />
include Data Bits, Baud Rate, Parity,<br />
Handshake, Stop Bit, and Prefixes.<br />
OCIA Communication Format : is used<br />
only with scanners that have an OCIA<br />
communication interface. The labels<br />
in this manual allow you to change<br />
OCIA interface types and enable or<br />
disable an Intercharacter Delay.<br />
Symbology Selection: allow selection of<br />
the types of barcode (symbologies) the<br />
scanner can read. These features also<br />
include UPC/EAN Expansion, control<br />
the calculation and transmission of<br />
check digits for Code 39. If Interleaved<br />
2 of 5 symbology is selected,<br />
label length settings are required.<br />
4 <strong>VS1200</strong> & <strong>HS1250</strong> <strong>Programming</strong> <strong>Kit</strong>
SCANNER PROGRAMMING<br />
(HOW IT WORKS)<br />
The <strong>VS1200</strong> & <strong>HS1250</strong> features advanced programming<br />
capabilities which lets you change the<br />
scanner’s configuration and functional behavior by<br />
using the EAN-13 programming labels in this<br />
manual.<br />
The scanner’s operating parameters are held in<br />
three different portions of memory.<br />
• RAM (Random Access Memory)<br />
holds the current operational settings<br />
while the scanner is powered-up.<br />
These settings are lost when power to<br />
the scanner is removed. For example,<br />
the Increment Volume label changes<br />
the volume setting held in RAM, but<br />
is lost when power to the scanner is<br />
interrupted. RAM is temporary or<br />
‘volatile’ memory.<br />
• Default Memory is stored in the<br />
EEPROM and holds the operational<br />
settings that are loaded to RAM each time<br />
R44-1340 5
the scanner is powered-up. This portion<br />
of memory is preserved even if the<br />
scanner is powered down. All settings<br />
made through the <strong>Programming</strong> Mode<br />
are stored in default memory.<br />
• Permanent Memory is also stored in<br />
the EEPROM and holds the factory<br />
programmed settings for all of the<br />
scanner’s operational parameters. The<br />
contents of permanent memory are<br />
loaded into default memory when the<br />
Return to Factory Settings label is<br />
scanned. The contents of permanent<br />
memory can only be modified at the<br />
factory.<br />
By entering the ‘<strong>Programming</strong> Mode’<br />
the desired characteristics can be set in<br />
default memory by scanning barcode<br />
programming labels. These settings<br />
are saved even if the scanner is<br />
powered down.<br />
6 <strong>VS1200</strong> & <strong>HS1250</strong> <strong>Programming</strong> <strong>Kit</strong>
PROGRAMMING YOUR SCANNER<br />
To program your scanner:<br />
1. Power-up the scanner to be programmed<br />
by plugging the power cord<br />
into the scanner and an electrical<br />
outlet of the appropriate voltage.<br />
Wait for the scanner to complete the<br />
selftest routine and emit a tone. The<br />
green lamp will light steadily, indicating<br />
that the scanner is in normal<br />
Operating Mode.<br />
2. Put the scanner into <strong>Programming</strong><br />
Mode by scanning the Switch Label<br />
(located on page 14 and on the inside<br />
of the back cover).<br />
The green LED flashes continuously<br />
indicating that the scanner is in<br />
<strong>Programming</strong> Mode.<br />
R44-1340 7
3. Scan a programming label(s) for the<br />
feature you want to change. The<br />
scanner will emit a 'good read' tone to<br />
indicate that the label has been read<br />
and the setting has been stored in the<br />
scanner’s memory. Scan the remaining<br />
programming labels as required.<br />
If a label scanned is not a valid<br />
programming label, the scanner will<br />
emit a low rejection tone.<br />
4. After all the desired programming<br />
labels have been successfully scanned,<br />
exit <strong>Programming</strong> Mode by pressing<br />
the Operator switch or scanning the<br />
Switch Label. The green lamp will<br />
light dimly, indicating that the<br />
scanner is ready for normal operation.<br />
8 <strong>VS1200</strong> & <strong>HS1250</strong> <strong>Programming</strong> <strong>Kit</strong>
PROGRAMMING CONVENTIONS<br />
• All options set while in <strong>Programming</strong><br />
Mode are stored in default memory,<br />
and will be retained even if the<br />
scanner is powered-down.<br />
• Settings are stored on a first-in, firstout<br />
basis. The last programming label<br />
scanned for a given option is the<br />
setting stored in memory. For example,<br />
if a programming label which<br />
sets the baud rate at 9600 is scanned,<br />
followed by a label which sets the<br />
baud rate at 19,200, the scanner will be<br />
programmed with a baud rate of<br />
19,200.<br />
• Only labels included in this manual<br />
will be accepted as valid programming<br />
labels. Labels which attempt to<br />
set features not implemented in a<br />
scanner’s software revision will be<br />
rejected as invalid. <strong>Programming</strong><br />
labels which are not printed in<br />
accordance with industry standards<br />
may also be rejected.<br />
R44-1340 9
• If an invalid label is scanned when in<br />
<strong>Programming</strong> Mode, the scanner will<br />
emit a low tone to indicate that the label<br />
is either not a programming label or<br />
that it contains values outside of the<br />
acceptable programming range.<br />
• After five minutes of inactivity in<br />
<strong>Programming</strong> Mode, the scanner will<br />
revert to normal Operating Mode. Any<br />
options set during the programming<br />
session will be stored and activated.<br />
• If confusion arises as to which options<br />
have been set during a programming<br />
session, scanning the Return to Factory<br />
Settings label will reset the scanner to<br />
the original factory defaults for all<br />
options, regardless of interface type.<br />
We recommend that you use the table<br />
provided in the back of this manual to<br />
record all changes that you make. This<br />
will help to ensure that you can record<br />
all modifications that you have made<br />
to the factory default configuration.<br />
This will be very helpful if you must<br />
return the <strong>VS1200</strong> or <strong>HS1250</strong> to the<br />
factory default settings.<br />
10 <strong>VS1200</strong> & <strong>HS1250</strong> <strong>Programming</strong> <strong>Kit</strong>
PROGRAMMABLE FEATURES<br />
The remainder of this manual includes programming<br />
labels for all <strong>VS1200</strong> or <strong>HS1250</strong> programmable<br />
features. Refer to the detailed features<br />
listing shown in the index at the back of this<br />
manual to find the individual features that you<br />
wish to change.<br />
SPECIAL LABELS<br />
There are three programming labels in this<br />
manual that work differently from all the other<br />
labels included in this <strong>Programming</strong> Guide; the<br />
Increment Volume, Increment Tone, and the<br />
Switch labels.<br />
Increment Volume works without entering<br />
<strong>Programming</strong> Mode, but its volume selection is<br />
lost when power is removed from the scanner.<br />
Increment Tone works without entering <strong>Programming</strong><br />
Mode, but its tone selection is lost when<br />
power is removed from the scanner.<br />
The Switch label is the key that allows you to<br />
enter and exit <strong>Programming</strong> Mode.<br />
R44-1340 11
INCREMENT VOLUME<br />
The Increment Volume label affects the scanner<br />
when in normal Operating Mode. Each pass of the<br />
label increments the speaker volume to the next<br />
loudest available level. When the highest of the<br />
three available levels is reached, the sequence<br />
starts again at the quietest level. If speaker<br />
volume is set using this label, the scanner reverts<br />
to the default volume setting when power to the<br />
scanner is interrupted. To permanently store<br />
changes to the speaker’s default volume use the<br />
labels titled, Speaker Volume, later in this manual.<br />
Increment Volume<br />
12 <strong>VS1200</strong> & <strong>HS1250</strong> <strong>Programming</strong> <strong>Kit</strong>
INCREMENT TONE<br />
The Increment Tone label affects the scanner when<br />
in normal Operating Mode. Each pass of the label<br />
increments the speaker tone to the next highest<br />
available level. When the highest of the three<br />
levels is reached, the sequence starts again at the<br />
lowest level. If speaker tone is set using this label,<br />
the scanner reverts to the default tone setting<br />
when power to the scanner is interrupted.<br />
NOTE<br />
The <strong>VS1200</strong> Class 39 scanners do not<br />
support this option.<br />
Increment Tone<br />
R44-1340 13
SWITCH LABEL<br />
Like the Increment Volume and Tone labels, the<br />
Switch label affects the scanner when in normal<br />
Operating Mode. Scanning the Switch label in<br />
normal Operating Mode causes the scanner to<br />
enter <strong>Programming</strong> Mode. Scanning the Switch<br />
label while in <strong>Programming</strong> Mode instructs the<br />
scanner to save all changes made while in <strong>Programming</strong><br />
Mode, exit <strong>Programming</strong> Mode, reset<br />
the scanner to implement the changes you made,<br />
and return to normal Operating Mode. All<br />
programming sessions must begin with the Switch<br />
label for the scanner to recognize them as programming<br />
labels and end with the Switch label or<br />
press the button (or allow programming mode to<br />
time out) in order for the scanner to store the<br />
changes you have made.<br />
Switch Label<br />
14 <strong>VS1200</strong> & <strong>HS1250</strong> <strong>Programming</strong> <strong>Kit</strong>
RETURN TO FACTORY DEFAULT<br />
Use this label to return the<br />
scanner or scanner/scale to the<br />
factory default settings.<br />
6 500000 000009<br />
R44-1340 15
PROGRAMMABLE SPEAKER FEATURES<br />
The speaker has three programmable features:<br />
• Good Read indicator can be turned on<br />
or off.<br />
• Good Read volume can be set to one<br />
of three levels. The volume can either<br />
be changed temporarily using the<br />
switch on the top of the scanner,<br />
Increment Volume label, or its default<br />
can be reprogrammed using the<br />
programming labels on the following<br />
pages.<br />
16 <strong>VS1200</strong> & <strong>HS1250</strong> <strong>Programming</strong> <strong>Kit</strong>
VOLUME SWITCH: DISABLE<br />
Use this label to disable the<br />
scanner's volume selection switch.<br />
6 401024 000016<br />
R44-1340 17
VOLUME SWITCH: ENABLE<br />
Use this label to enable the<br />
scanner's volume selection switch.<br />
6 401024 000009<br />
18 <strong>VS1200</strong> & <strong>HS1250</strong> <strong>Programming</strong> <strong>Kit</strong>
SPEAKER: ON<br />
Use this label to enable the<br />
speaker.<br />
6 400103 000008<br />
R44-1340 19
SPEAKER: OFF<br />
Use this label to disable the<br />
speaker.<br />
6 400103 000015<br />
20 <strong>VS1200</strong> & <strong>HS1250</strong> <strong>Programming</strong> <strong>Kit</strong>
SPEAKER VOLUME PROGRAMMING<br />
The <strong>VS1200</strong> & <strong>HS1250</strong> allow you to change the<br />
speaker's volume without entering <strong>Programming</strong><br />
Mode or using programming labels. To change<br />
the speaker's volume press and release the speaker<br />
switch.<br />
The scanner sounds the next volume setting three<br />
times. There are three volume options available.<br />
Continue pressing and releasing the switch until<br />
the volume level you want is sounded.<br />
If you wish to change the speaker's active default<br />
setting, use the labels on the following pages to<br />
change the speaker volume setting.<br />
NOTE<br />
If this feature appears not to work, the<br />
switch may be disabled. Follow the<br />
normal programming sequence and use<br />
the label on page 18 to enable the<br />
switch and try again.<br />
R44-1340 21
SPEAKER VOLUME = LOW<br />
Use this label to set the speaker<br />
volume to low.<br />
6 400025 000001<br />
22 <strong>VS1200</strong> & <strong>HS1250</strong> <strong>Programming</strong> <strong>Kit</strong>
SPEAKER VOLUME = MEDIUM<br />
Use this label to set the speaker<br />
volume to medium.<br />
6 400025 000018<br />
R44-1340 23
SPEAKER VOLUME = HIGH<br />
Use this label to set the speaker<br />
volume to high.<br />
6 400025 000025<br />
24 <strong>VS1200</strong> & <strong>HS1250</strong> <strong>Programming</strong> <strong>Kit</strong>
SPEAKER TONE = LOW<br />
Use this label to set the speaker<br />
tone to low.<br />
NOTE<br />
The <strong>VS1200</strong> Class 39 scanners do not<br />
support this option.<br />
6 400020 000006<br />
R44-1340 25
SPEAKER GOOD READ TONE = MEDIUM<br />
Use this label to set the speaker<br />
tone to medium.<br />
NOTE<br />
The <strong>VS1200</strong> Class 39 scanners do<br />
not support this option.<br />
6 400020 000013<br />
26 <strong>VS1200</strong> & <strong>HS1250</strong> <strong>Programming</strong> <strong>Kit</strong>
SPEAKER GOOD READ TONE = HIGH<br />
Use this label to set the speaker<br />
tone to high.<br />
NOTE<br />
The <strong>VS1200</strong> Class 39 scanners do not<br />
support this option.<br />
6 400029 000021<br />
R44-1340 27
UPC/EAN PRICE/WEIGHT<br />
CHECK DIGIT SELECTIONS<br />
The Price/Weight Check Digit selections allow<br />
you to specify whether the scanner should calculate<br />
an extra check digit based on a four or fivedigit<br />
price/weight block, and compare it with the<br />
price/weight check digit contained in the barcode.<br />
If the calculated check digit does not match the<br />
value of the check digit contained in the barcode,<br />
the label will be rejected as invalid.<br />
28 <strong>VS1200</strong> & <strong>HS1250</strong> <strong>Programming</strong> <strong>Kit</strong>
PRICE/WEIGHT CHECK DIGIT = 4 DIGIT<br />
Use this label to enable the<br />
calculation and comparison of<br />
four digit Price/Weight Check<br />
Digit for UPC/EAN.<br />
6 400092 000010<br />
R44-1340 29
PRICE/WEIGHT CHECK DIGIT = 5 DIGITS<br />
Use this label to enable the<br />
calculation and comparison of five<br />
digit Price/Weight Check Digit<br />
for UPC/EAN.<br />
6 400092 000027<br />
30 <strong>VS1200</strong> & <strong>HS1250</strong> <strong>Programming</strong> <strong>Kit</strong>
PRICE/WEIGHT CHECK DIGIT = 4 DIGITS (EUROPE)<br />
Use this label to enable the<br />
calculation and comparison of<br />
four digit Price/Weight Check<br />
Digit for UPC/EAN.<br />
6 400092 000034<br />
R44-1340 31
PRICE/WEIGHT CHECK DIGIT = 5 DIGITS (EUROPE)<br />
Use this label to enable the<br />
calculation and comparison of five<br />
digit Price/Weight Check Digit<br />
for UPC/EAN.<br />
6 400092 000041<br />
32 <strong>VS1200</strong> & <strong>HS1250</strong> <strong>Programming</strong> <strong>Kit</strong>
PRICE/WEIGHT CHECK DIGIT: DISABLE<br />
Use this label to disable Price/<br />
Weight Check Digit calculation<br />
and comparison.<br />
6 400092 000003<br />
R44-1340 33
TIMEOUTS<br />
Timeouts allow you to shut off the scanner's laser<br />
and/or motor if the scanner isn't used for a<br />
predetermined period of time. This feature is<br />
included to prolong the life of the motor and<br />
Visible Laser Diode (VLD).<br />
NOTE<br />
Laser safety requires that the laser<br />
switch off before the motor. If you set<br />
the motor timeout shorter than the laser<br />
timeout, the laser will switch off<br />
when the motor times out.<br />
If you want to maximize both productivity and<br />
scanner life, set laser to timeout in five minutes,<br />
but leave the motor on for fifteen minutes. The<br />
scanner will be ready to scan, and you will prolong<br />
the life of the VLD.<br />
34 <strong>VS1200</strong> & <strong>HS1250</strong> <strong>Programming</strong> <strong>Kit</strong>
SETTING LASER TIMEOUT<br />
The laser timeout programming labels set the time<br />
for switching the visible laser diode (VLD) off if<br />
the scanner isn't used. Using this feature can<br />
prolong the life of the VLD.<br />
The selections are:<br />
• Set timeout = 5 minutes<br />
• Set timeout = 10 minutes<br />
• Set timeout = 15 minutes<br />
R44-1340 35
LASER TIMEOUT = 5 MINUTES<br />
Use this label to set the laser<br />
timeout to 5 minutes.<br />
6 400079 000200<br />
36 <strong>VS1200</strong> & <strong>HS1250</strong> <strong>Programming</strong> <strong>Kit</strong>
LASER TIMEOUT = 10 MINUTES<br />
Use this label to set the laser<br />
timeout to 10 minutes.<br />
6 400079 000408<br />
R44-1340 37
LASER TIMEOUT = 15 MINUTES<br />
Use this label to set the laser<br />
timeout to 15 minutes.<br />
6 400079 000606<br />
38 <strong>VS1200</strong> & <strong>HS1250</strong> <strong>Programming</strong> <strong>Kit</strong>
SETTING MOTOR TIMEOUT<br />
The Motor Timeout programming labels set the<br />
time for switching the motor off if the scanner isn't<br />
used. At no time will the motor timeout before the<br />
laser.<br />
The selections are:<br />
• Motor timeout = 5 minutes<br />
• Motor timeout = 15 minutes<br />
• Motor timeout = 30 minutes<br />
• Motor timeout = 60 minutes<br />
R44-1340 39
MOTOR TIMEOUT = 5 MINUTES<br />
Use this label to set the motor<br />
timeout to 5 minutes.<br />
6 400078 000201<br />
40 <strong>VS1200</strong> & <strong>HS1250</strong> <strong>Programming</strong> <strong>Kit</strong>
MOTOR TIMEOUT = 15 MINUTES<br />
Use this label to set the motor<br />
timeout to 15 minutes.<br />
6 400078 000607<br />
R44-1340 41
MOTOR TIMEOUT = 30 MINUTES<br />
Use this label to set the motor<br />
timeout to 30 minutes.<br />
6 400078 001208<br />
42 <strong>VS1200</strong> & <strong>HS1250</strong> <strong>Programming</strong> <strong>Kit</strong>
MOTOR TIMEOUT = 60 MINUTES<br />
Use this label to set the motor<br />
timeout to 60 minutes.<br />
6 400078 002403<br />
R44-1340 43
SETTING DOUBLE READ TIMEOUT<br />
The double read timeout sets a time limit that<br />
determines how much time must pass before<br />
reading the same label (e.g. two identical items)<br />
twice. A typical setting is 600ms.<br />
The selections are:<br />
• Set timeout = 600 milliseconds<br />
• Set timeout = 800 milliseconds<br />
• Set timeout = 1 second<br />
44 <strong>VS1200</strong> & <strong>HS1250</strong> <strong>Programming</strong> <strong>Kit</strong>
DOUBLE READ TIMEOUT = 600MS<br />
Sets the time you must wait<br />
between reading the same label<br />
twice to 600ms. This is the<br />
recommended setting.<br />
6 400077 000608<br />
R44-1340 45
DOUBLE READ TIMEOUT = 800MS<br />
Sets the time you must wait<br />
between reading the same label<br />
twice to 800ms.<br />
6 400077 000806<br />
46 <strong>VS1200</strong> & <strong>HS1250</strong> <strong>Programming</strong> <strong>Kit</strong>
DOUBLE READ TIMEOUT = 1 SECOND<br />
Sets the time you must wait<br />
between reading the same label<br />
twice to one second.<br />
6 400077 001001<br />
R44-1340 47
PERIPHERAL PORT<br />
The <strong>VS1200</strong> & <strong>HS1250</strong> peripheral port can be<br />
configured to accept input from an undecoded<br />
handheld scanner. The labels on the following<br />
pages allow you to enable/disable the port, or<br />
change the communication speed.<br />
HANDHELD PERIPHERAL PORT: ENABLE<br />
Use this label to enable the<br />
peripheral port to accept input<br />
from a handheld (HHLC) scanner.<br />
6 401035 000005<br />
48 <strong>VS1200</strong> & <strong>HS1250</strong> <strong>Programming</strong> <strong>Kit</strong>
HANDHELD PERIPHERAL PORT: DISABLE<br />
Use this label to disable the<br />
peripheral port to accept input<br />
from a handheld (HHLC) scanner.<br />
6 401035 000012<br />
R44-1340 49
HANDHELD PERIPHERIAL PORT SPEED<br />
Since the communication speed of handheld<br />
scanners vary greatly, it is necessary to select a<br />
speed that tells the <strong>VS1200</strong> or <strong>HS1250</strong> how long to<br />
wait to receive a complete barcode data. This<br />
selection process is rather unscientific (trial and<br />
error) since industry standards do not exist. We<br />
have included references for known and tested<br />
models of other manufacturers handheld scanners,<br />
but these should be considered as guidelines since<br />
newer and older models from the same manufacturer<br />
may be different.<br />
The selectable options are named speeds five<br />
through nine with five being used for scanners<br />
that communicate at a slow rate and nine for<br />
scanners that communicate at a faster rate.<br />
50 <strong>VS1200</strong> & <strong>HS1250</strong> <strong>Programming</strong> <strong>Kit</strong>
HANDHELD PERIPHERAL PORT: SPEED = 5<br />
This label sets the communication<br />
speed to five. Use Peripherial Port<br />
Speed settings to tell the scanner<br />
how long to wait to receive a<br />
complete barcode data. This<br />
setting works best when connecting<br />
a Symbol Technology<br />
undecoded scanner to the<br />
peripherial port.<br />
6 401067 000059<br />
R44-1340 51
HANDHELD PERIPHERAL PORT: SPEED = 6<br />
This label sets the communication<br />
speed to six. Use Peripherial Port<br />
Speed settings to tell the scanner<br />
how long to wait to receive a<br />
complete barcode data.<br />
6 401067 000066<br />
52 <strong>VS1200</strong> & <strong>HS1250</strong> <strong>Programming</strong> <strong>Kit</strong>
HANDHELD PERIPHERAL PORT: SPEED = 7<br />
This label sets the communication<br />
speed to seven. Use Peripherial<br />
Port Speed settings to tell the<br />
scanner how long to wait to<br />
receive a complete barcode data.<br />
This is the default setting. Use<br />
this setting when connecting a<br />
SP400, Caere or PSC undecoded<br />
scanner.<br />
6 401067 000073<br />
R44-1340 53
HANDHELD PERIPHERAL PORT: SPEED = 8<br />
This label sets the communication<br />
speed to eight. Use Peripherial<br />
Port Speed settings to tell the<br />
scanner how long to wait to<br />
receive a complete barcode data.<br />
6 401067 000080<br />
54 <strong>VS1200</strong> & <strong>HS1250</strong> <strong>Programming</strong> <strong>Kit</strong>
HANDHELD PERIPHERAL PORT: SPEED = 9<br />
This label sets the communication<br />
speed to nine. Use Peripherial<br />
Port Speed settings to tell the<br />
scanner how long to wait to<br />
receive a complete barcode data.<br />
6 401067 000097<br />
R44-1340 55
CHANGING BARCODE TYPES<br />
One of the scanner's features is the ability to autodiscriminate<br />
between the UPC/EAN symbology<br />
family and one industrial codes; Code 39, Interleaved<br />
2 of 5, Code 128, Codabar or Code 93. The<br />
following barcodes allow you to change the types<br />
of barcode symbologies that your scanner recognizes.<br />
Be sure that your POS terminal interface<br />
can recognize the barcodes you wish to enable<br />
before you change these settings.<br />
To change symbologies:<br />
1. Select the symbology you wish to<br />
enable. (e.g. Code 39)<br />
2. Scan the appropriate programming<br />
barcode label that enables the selected<br />
symbology.<br />
3. Enable all additional parameters that<br />
are required by your POS terminal<br />
(e.g. check digits, start/stop characters,<br />
etc).<br />
All of the symbology selection features on the<br />
following pages can be used to customize the<br />
<strong>VS1200</strong> or <strong>HS1250</strong> scanner.<br />
56 <strong>VS1200</strong> & <strong>HS1250</strong> <strong>Programming</strong> <strong>Kit</strong>
EDGE: DISABLE<br />
The Edge software only supports the UPC/EAN label<br />
set. If an industrial code (Code 39, Code 128, Code 93,<br />
Codabar, or Interleaved 2 of 5) is selected in addition to<br />
UPC/EAN, the Edge software will be automatically<br />
disabled and the Adaptive software will be enabled.<br />
The barcode label on this page can be used to disable<br />
Edge without enabling an industrial code.<br />
To re-enable the Edge software (and consequently disable<br />
industrial codes), you must use the Return to Default<br />
label on page four. Scanning this label will reset the<br />
scanner's configuration to the original factory settings.<br />
Scan this label to disable the ability to read torn or<br />
partially disfigured labels. Scanning this label automatically<br />
enables the Adaptive software which helps read<br />
marginless, overprinted and underprinted labels.<br />
6 401036 000004<br />
R44-1340 57
UPC/EAN EXPANSION<br />
The labels on the following pages<br />
allow you to change the UPC/<br />
EAN label transmission format.<br />
UPC-E TO UPC-A EXPANSION – ENABLE<br />
Use this label to enable the ex-pansion<br />
of UPC-E labels to UPC-A format<br />
before transmission to the host<br />
terminal. Enabling this feature will<br />
automatically disable the 'Expand<br />
UPC-E to EAN-13' feature. The<br />
scanner will now translate UPC-E<br />
label data into UPC-A format before<br />
sending it to the host.<br />
6 400065 000016<br />
58 <strong>VS1200</strong> & <strong>HS1250</strong> <strong>Programming</strong> <strong>Kit</strong>
UPC-E TO UPC-A EXPANSION – DISABLE<br />
Use this label to disable the expansion<br />
of UPC-E labels to UPC-A<br />
format before transmission to the<br />
host terminal. The scanner now<br />
sends UPC-E label data to the host.<br />
6 400065 000009<br />
R44-1340 59
UPC-E TO EAN-13 EXPANSION – ENABLE<br />
Use this label to enable the expansion<br />
of UPC-E labels to<br />
EAN-13 format before transmission<br />
to the host terminal.<br />
Enabling this feature will automatically<br />
disable the 'Expand<br />
UPC-E to UPC-A' feature.<br />
The scanner will now translate<br />
UPC-E label data into EAN-13<br />
format before sending it to the<br />
host.<br />
6 401026 000014<br />
60 <strong>VS1200</strong> & <strong>HS1250</strong> <strong>Programming</strong> <strong>Kit</strong>
UPC-E TO EAN-13 EXPANSION – DISABLE<br />
Use this label to disable the expansion<br />
of UPC-E labels to<br />
EAN-13 format before transmission<br />
to the host terminal. The<br />
scanner will now send UPC-E<br />
label data to the host.<br />
6 401026 000007<br />
R44-1340 61
UPC-A TO EAN-13 EXPANSION – ENABLE<br />
Use this label to enable the expansion<br />
of UPC-A labels to<br />
EAN-13 format before transmission<br />
to the host terminal.<br />
The scanner will now translate<br />
UPC-A label data into EAN-13<br />
format before sending it to the<br />
host.<br />
6 400067 000014<br />
62 <strong>VS1200</strong> & <strong>HS1250</strong> <strong>Programming</strong> <strong>Kit</strong>
UPC-A TO EAN-13 EXPANSION – DISABLE<br />
Use this label to disable the expansion<br />
of UPC-A labels to<br />
EAN-13 format before transmission<br />
to the host terminal. The<br />
scanner will now send UPC-A<br />
label data to the host.<br />
6 400067 000007<br />
R44-1340 63
UPC CHECK DIGIT TRANSMISSION<br />
The following pages contain the programming<br />
labels for enabling and disabling the transmission<br />
of UPC and EAN check digits.<br />
NOTE<br />
These features DO NOT APPLY to the<br />
IBM 46xx interface.<br />
They are:<br />
• UPC-A Check Digit Transmission<br />
• UPC-E Check Digit Transmission<br />
• EAN-8 Check Digit Transmission<br />
• EAN-13 Check Digit Transmission<br />
64 <strong>VS1200</strong> & <strong>HS1250</strong> <strong>Programming</strong> <strong>Kit</strong>
UPC-A CHECK DIGIT TRANSMISSION: ENABLE<br />
Use this label to enable sending<br />
the UPC-A check digit to the host.<br />
NOTE<br />
This features DOES NOT APPLY to the<br />
IBM 46xx interface.<br />
6 400183 000011<br />
R44-1340 65
UPC-A CHECK DIGIT TRANSMISSION: DISABLE<br />
Use this label to disable sending<br />
the UPC-A check digit to the host.<br />
NOTE<br />
This features DOES NOT APPLY to the<br />
IBM 46xx interface.<br />
6 400183 000004<br />
66 <strong>VS1200</strong> & <strong>HS1250</strong> <strong>Programming</strong> <strong>Kit</strong>
UPC-E CHECK DIGIT TRANSMISSION: ENABLE<br />
Use this label to enable sending<br />
the UPC-E check digit to the host.<br />
NOTE<br />
This features DOES NOT APPLY to the<br />
IBM 46xx interface.<br />
6 400064 000017<br />
R44-1340 67
UPC-E CHECK DIGIT TRANSMISSION: DISABLE<br />
Use this label to disable sending<br />
the UPC-E check digit to the host.<br />
NOTE<br />
This features DOES NOT APPLY to the<br />
IBM 46xx interface.<br />
6 400064 000000<br />
68 <strong>VS1200</strong> & <strong>HS1250</strong> <strong>Programming</strong> <strong>Kit</strong>
EAN-8 CHECK DIGIT TRANSMISSION: ENABLE<br />
Use this label to enable sending<br />
the EAN-8 check digit to the host.<br />
NOTE<br />
This features DOES NOT APPLY to the<br />
IBM 46xx interface.<br />
6 400184 000010<br />
R44-1340 69
EAN-8 CHECK DIGIT TRANSMISSION: DISABLE<br />
Use this label to disable sending<br />
the EAN-8 check digit to the host.<br />
NOTE<br />
This features DOES NOT APPLY to the<br />
IBM 46xx interface.<br />
6 400184 000003<br />
70 <strong>VS1200</strong> & <strong>HS1250</strong> <strong>Programming</strong> <strong>Kit</strong>
EAN-13 CHECK DIGIT TRANSMISSION: ENABLE<br />
Use this label to enable sending<br />
the EAN-13 check digit to the<br />
host.<br />
NOTE<br />
This features DOES NOT APPLY to the<br />
IBM 46xx interface.<br />
6 400185 000019<br />
R44-1340 71
EAN-13 CHECK DIGIT TRANSMISSION: DISABLE<br />
Use this label to disable sending<br />
the EAN-13 check digit to the<br />
host.<br />
NOTE<br />
This features DOES NOT APPLY to the<br />
IBM 46xx interface.<br />
6 400185 000002<br />
72 <strong>VS1200</strong> & <strong>HS1250</strong> <strong>Programming</strong> <strong>Kit</strong>
CODE 39<br />
The labels on the following pages allow you to<br />
enable or disable Code 39, select barcode content<br />
verification, choose whether or not to send the<br />
check digit to the host and set the minimum<br />
number of good reads required before the label<br />
data is sent to the host.<br />
CODE 39: ENABLE<br />
Use this barcode to select Code 39<br />
as an active symbology.<br />
6 400142 000014<br />
R44-1340 73
CODE 39: DISABLE<br />
Use this barcode to disable<br />
Code 39 as an active symbology.<br />
6 400142 000007<br />
74 <strong>VS1200</strong> & <strong>HS1250</strong> <strong>Programming</strong> <strong>Kit</strong>
CODE 39: CHECK DIGIT – VERIFY<br />
Use this barcode to enable Verify<br />
Code 39 check digit. Scanning<br />
this label tells the scanner to<br />
calculate the check digit and<br />
verify that it matches the barcodes<br />
internal check digit. The check<br />
digit will not be sent to the host<br />
unless you also enable Code 39:<br />
Check Digit - Send.<br />
Check your system interface<br />
communications requirements<br />
before changing this setting.<br />
6 400085 000010<br />
R44-1340 75
CODE 39: CHECK DIGIT – DON'T VERIFY<br />
Using this barcode disables<br />
verification of the Code 39 check<br />
digit. If you disable this feature,<br />
you should also scan the label that<br />
disables sending the Code 39<br />
Check Digit.<br />
Check your system interface<br />
communications requirements<br />
before changing this setting.<br />
6 400085 000003<br />
76 <strong>VS1200</strong> & <strong>HS1250</strong> <strong>Programming</strong> <strong>Kit</strong>
CODE 39: CHECK DIGIT – SEND<br />
Use this barcode to instruct the<br />
scanner to send the Code 39 check<br />
digit (if present). This feature<br />
should not be set unless Code 39:<br />
Check Digit - Verify is also enabled.<br />
Check your system interface<br />
communications requirements<br />
before changing this setting.<br />
6 400138 000011<br />
R44-1340 77
CODE 39: CHECK DIGIT – DON'T SEND<br />
Use this barcode to disable Send<br />
Code 39 check digit.<br />
Check your system interface<br />
communications requirements<br />
before changing this setting.<br />
6 400138 000004<br />
78 <strong>VS1200</strong> & <strong>HS1250</strong> <strong>Programming</strong> <strong>Kit</strong>
CODE 39: MINIMUM READ = 1<br />
Minimum read settings are useful<br />
when poorly printed barcodes<br />
causes the scanner to misread<br />
labels and send incorrect data to<br />
the host.<br />
Scanning this label sets the<br />
number of times the barcode must<br />
be read to one. Use this setting<br />
when you do not experience<br />
misreads.<br />
6 400107 000011<br />
R44-1340 79
CODE 39: MINIMUM READ = 2<br />
Minimum read settings are useful<br />
when poorly printed barcodes<br />
causes the scanner to misread<br />
labels and send incorrect data to<br />
the host.<br />
Scanning this label sets the<br />
number of times the barcode must<br />
be read to two. Use this setting<br />
when you occasionally experience<br />
misreads.<br />
6 400107 000028<br />
80 <strong>VS1200</strong> & <strong>HS1250</strong> <strong>Programming</strong> <strong>Kit</strong>
CODE 39: MINIMUM READ = 3<br />
Minimum read settings are useful<br />
when poorly printed barcodes<br />
causes the scanner to misread<br />
labels and send incorrect data to<br />
the host.<br />
Scanning this label sets the<br />
number of times the barcode must<br />
be read to three. Use this setting<br />
when you regularly experience<br />
misreads.<br />
If you must use this setting, you<br />
should examine your barcode<br />
production methods.<br />
6 400107 000035<br />
R44-1340 81
CODE 39: MINIMUM READ = 4<br />
Minimum read settings are useful<br />
when poorly printed barcodes<br />
causes the scanner to misread<br />
labels and send incorrect data to<br />
the host.<br />
Scanning this label sets the<br />
number of times the barcode must<br />
be read to four. Use this setting<br />
when misreads are a common<br />
problem.<br />
If you must use this setting, you<br />
should examine your barcode<br />
production methods.<br />
6 400107 000042<br />
82 <strong>VS1200</strong> & <strong>HS1250</strong> <strong>Programming</strong> <strong>Kit</strong>
CODE 128<br />
The labels on the following pages allow you to<br />
enable or disable Code 128 and set the minimum<br />
number of good reads required before the label<br />
data is sent to the host.<br />
CODE 128: ENABLE<br />
Use this barcode to select Code<br />
128 as an active symbology.<br />
6 400146 000010<br />
R44-1340 83
CODE 128: DISABLE<br />
Use this barcode to disable Code<br />
128 as an active symbology.<br />
6 400146 000003<br />
84 <strong>VS1200</strong> & <strong>HS1250</strong> <strong>Programming</strong> <strong>Kit</strong>
CODE 128: MINIMUM READ = 1<br />
Minimum read settings are useful<br />
when poorly printed barcodes<br />
causes the scanner to misread<br />
labels and send incorrect data to<br />
the host.<br />
Scanning this label sets the<br />
number of times the barcode must<br />
be read to one. Use this setting<br />
when you do not experience<br />
misreads.<br />
6 400111 000014<br />
R44-1340 85
CODE 128: MINIMUM READ = 2<br />
Minimum read settings are useful<br />
when poorly printed barcodes<br />
causes the scanner to misread<br />
labels and send incorrect data to<br />
the host.<br />
Scanning this label sets the<br />
number of times the barcode must<br />
be read to two. Use this setting<br />
when you occasionally experience<br />
misreads.<br />
6 400111 000021<br />
86 <strong>VS1200</strong> & <strong>HS1250</strong> <strong>Programming</strong> <strong>Kit</strong>
CODE 128: MINIMUM READ = 3<br />
Minimum read settings are useful<br />
when poorly printed barcodes<br />
causes the scanner to misread<br />
labels and send incorrect data to<br />
the host.<br />
Scanning this label sets the<br />
number of times the barcode must<br />
be read to three. Use this setting<br />
when you regularly experience<br />
misreads.<br />
If you must use this setting, you<br />
should examine your barcode<br />
production methods.<br />
6 400111 000038<br />
R44-1340 87
CODE 128: MINIMUM READ = 4<br />
Minimum read settings are useful<br />
when poorly printed barcodes<br />
causes the scanner to misread<br />
labels and send incorrect data to<br />
the host.<br />
Scanning this label sets the<br />
number of times the barcode must<br />
be read to four. Use this setting<br />
when you regularly experience<br />
misreads.<br />
If you must use this setting, you<br />
should examine your barcode<br />
production methods.<br />
6 400111 000045<br />
88 <strong>VS1200</strong> & <strong>HS1250</strong> <strong>Programming</strong> <strong>Kit</strong>
CODABAR: ENABLE<br />
Use this barcode to select Codabar<br />
as an active symbology.<br />
NOTE<br />
The <strong>VS1200</strong> Class 39 scanners do not<br />
support this option.<br />
6 400143 000013<br />
R44-1340 89
CODABAR: DISABLE<br />
Use this barcode to disable<br />
Codabar as an active symbology.<br />
NOTE<br />
The <strong>VS1200</strong> Class 39 scanners do not<br />
support this option.<br />
6 400143 000006<br />
90 <strong>VS1200</strong> & <strong>HS1250</strong> <strong>Programming</strong> <strong>Kit</strong>
CODABAR CHECK DIGIT: SEND<br />
Use this barcode to enable Send<br />
Codabar check digit. This feature<br />
is only required for some host<br />
interfaces. Check your system<br />
interface communications requirements<br />
before changing this<br />
setting.<br />
NOTE<br />
The <strong>VS1200</strong> Class 39 scanners do not<br />
support this option.<br />
6 400140 000016<br />
R44-1340 91
CODABAR CHECK DIGIT: DON'T SEND<br />
Use this barcode to disable Send<br />
Codabar check digit. This feature<br />
is only required for some host<br />
interfaces. Check your system<br />
interface communications requirements<br />
before changing this<br />
setting.<br />
NOTE<br />
The <strong>VS1200</strong> Class 39 scanners do not<br />
support this option.<br />
6 400140 000009<br />
92 <strong>VS1200</strong> & <strong>HS1250</strong> <strong>Programming</strong> <strong>Kit</strong>
CODABAR CHECK DIGIT: VERIFY<br />
Use this barcode to enable the<br />
Verify Codabar Check Digit<br />
feature. This feature is only<br />
required for some host interfaces.<br />
Check your system interface<br />
communications requirements<br />
before changing this setting.<br />
NOTE<br />
The <strong>VS1200</strong> Class 39 scanners do not<br />
support this option.<br />
6 400113 000012<br />
R44-1340 93
CODABAR CHECK DIGIT: DON'T VERIFY<br />
Use this barcode to disable Verify<br />
Codabar check digit. This feature<br />
is only required for some host<br />
interfaces. Check your system<br />
interface communications requirements<br />
before changing this<br />
setting.<br />
NOTE<br />
The <strong>VS1200</strong> Class 39 scanners do not<br />
support this option.<br />
6 400113 000005<br />
94 <strong>VS1200</strong> & <strong>HS1250</strong> <strong>Programming</strong> <strong>Kit</strong>
CODABAR START/STOP CHARACTER: SEND<br />
Use this barcode to enable Send<br />
Codabar Start/Stop character.<br />
This feature is only required for<br />
some host interfaces. Check your<br />
system interface communications<br />
requirements before changing this<br />
setting.<br />
NOTE<br />
The <strong>VS1200</strong> Class 39 scanners do not<br />
support this option.<br />
6 400147 000019<br />
R44-1340 95
CODABAR START/STOP CHARACTER: DON'T SEND<br />
Use this barcode to disable 'Send'<br />
Codabar Start/Stop character.<br />
This feature is only required for<br />
some host interfaces. Check your<br />
system interface communications<br />
requirements before changing this<br />
setting.<br />
NOTE<br />
The <strong>VS1200</strong> Class 39 scanners do not<br />
support this option.<br />
6 400147 000002<br />
96 <strong>VS1200</strong> & <strong>HS1250</strong> <strong>Programming</strong> <strong>Kit</strong>
INTERLEAVED 2 OF 5<br />
If you select Interleaved 2 of 5 (I 2 of 5) as an active<br />
symbology, you must select fixed label length(s)<br />
using the programming labels on the following<br />
pages.<br />
You have the option of selecting either one or two<br />
lengths. If you only wish to enable one fixed label<br />
length, select that length using the first set of label<br />
length programming labels and then use the label<br />
on page 125 to set the second label length to none.<br />
This instructs the scanner to only recognize the<br />
first label length.<br />
R44-1340 97
I 2 OF 5: ENABLE<br />
Use this barcode to select<br />
Interleaved 2 of 5 as an active<br />
symbology.<br />
6 400144 000012<br />
98 <strong>VS1200</strong> & <strong>HS1250</strong> <strong>Programming</strong> <strong>Kit</strong>
I 2 OF 5: DISABLE<br />
Use this barcode to disable<br />
Interleaved 2 of 5 as an active<br />
symbology.<br />
6 400144 000005<br />
R44-1340 99
I 2 OF 5: CHECK DIGIT – VERIFY<br />
Use this barcode to enable Verify<br />
Interleaved 2 of 5 check digit.<br />
Scanning this label tells the<br />
scanner to calculate the check<br />
digit and verify that it matches the<br />
barcodes internal check digit. The<br />
check digit will not be sent to the<br />
host unless you also enable<br />
Interleaved 2 of 5: Check Digit -<br />
Send.<br />
Check your system interface<br />
communications requirements<br />
before changing this setting.<br />
6 400112 000013<br />
100 <strong>VS1200</strong> & <strong>HS1250</strong> <strong>Programming</strong> <strong>Kit</strong>
I 2 OF 5: CHECK DIGIT – DON'T VERIFY<br />
Using this barcode disables<br />
verification of the Interleaved 2 of<br />
5 check digit. If you disable this<br />
feature, you should also scan the<br />
label that disables sending the<br />
Interleaved 2 of 5 Check Digit.<br />
Check your system interface<br />
communications requirements<br />
before changing this setting.<br />
6 400112 000006<br />
R44-1340 101
I 2 OF 5: CHECK DIGIT – SEND<br />
Use this barcode to instruct the<br />
scanner to send the Interleaved 2<br />
of 5 check digit (if present). This<br />
feature should not be set unless<br />
Interleaved 2 of 5: Check Digit -<br />
Verify is also enabled.<br />
Check your system interface<br />
communications requirements<br />
before changing this setting.<br />
6 400139 000010<br />
102 <strong>VS1200</strong> & <strong>HS1250</strong> <strong>Programming</strong> <strong>Kit</strong>
I 2 OF 5: CHECK DIGIT – DON'T SEND<br />
Use this barcode to disable<br />
sending the Interleaved 2 of 5<br />
check digit to the host. This<br />
feature is only required for some<br />
host interfaces. Check your<br />
system interface communications<br />
requirements before changing this<br />
setting.<br />
6 400139 000003<br />
R44-1340 103
I 2 OF 5: MINIMUM READ = 1<br />
Minimum read settings are useful<br />
when poorly printed barcodes<br />
causes the scanner to misread<br />
labels and send incorrect data to<br />
the host.<br />
Scanning this label sets the<br />
number of times the barcode must<br />
be read to one. Use this setting<br />
when you do not experience<br />
misreads.<br />
6 400109 000019<br />
104 <strong>VS1200</strong> & <strong>HS1250</strong> <strong>Programming</strong> <strong>Kit</strong>
I 2 OF 5: MINIMUM READ = 2<br />
Minimum read settings are useful<br />
when poorly printed barcodes<br />
causes the scanner to misread<br />
labels and send incorrect data to<br />
the host.<br />
Scanning this label sets the<br />
number of times the barcode must<br />
be read to two. Use this setting<br />
when you occasionally experience<br />
misreads.<br />
6 400109 000026<br />
R44-1340 105
I 2 OF 5: MINIMUM READ = 3<br />
Minimum read settings are useful<br />
when poorly printed barcodes<br />
causes the scanner to misread<br />
labels and send incorrect data to<br />
the host.<br />
Scanning this label sets the<br />
number of times the barcode must<br />
be read to three. Use this setting<br />
when you regularly experience<br />
misreads.<br />
If you must use this setting, you<br />
should examine your barcode<br />
production methods.<br />
6 400109 000033<br />
106 <strong>VS1200</strong> & <strong>HS1250</strong> <strong>Programming</strong> <strong>Kit</strong>
I 2 OF 5: MINIMUM READ = 4<br />
Minimum read settings are useful<br />
when poorly printed barcodes<br />
causes the scanner to misread<br />
labels and send incorrect data to<br />
the host.<br />
Scanning this label sets the<br />
number of times the barcode must<br />
be read to four. Use this setting<br />
when misreads are a common<br />
problem.<br />
If you must use this setting, you<br />
should examine your barcode<br />
production methods.<br />
6 400109 000040<br />
R44-1340 107
I 2 OF 5: FIRST LABEL LENGTH = 4<br />
Set Interleaved 2 of 5 length<br />
equals 4 digits. The scanner will<br />
only read this length and a second<br />
label length you select using the<br />
Second Label Length barcodes<br />
that follow.<br />
6 400086 000040<br />
108 <strong>VS1200</strong> & <strong>HS1250</strong> <strong>Programming</strong> <strong>Kit</strong>
I 2 OF 5: FIRST LABEL LENGTH = 6<br />
Set Interleaved 2 of 5 length<br />
equals 6 digits. The scanner will<br />
only read this length and a second<br />
label length you select using the<br />
Second Label Length barcodes<br />
that follow.<br />
6 400086 000064<br />
R44-1340 109
I 2 OF 5: FIRST LABEL LENGTH = 8<br />
Set Interleaved 2 of 5 length<br />
equals 8 digits. The scanner will<br />
only read this length and a second<br />
label length you select using the<br />
Second Label Length barcodes<br />
that follow.<br />
6 400086 000088<br />
110 <strong>VS1200</strong> & <strong>HS1250</strong> <strong>Programming</strong> <strong>Kit</strong>
I 2 OF 5: FIRST LABEL LENGTH = 10<br />
Set Interleaved 2 of 5 length<br />
equals 10 digits. The scanner will<br />
only read this length and a second<br />
label length you select using the<br />
Second Label Length barcodes<br />
that follow.<br />
6 400086 000101<br />
R44-1340 111
I 2 OF 5: FIRST LABEL LENGTH = 12<br />
Set Interleaved 2 of 5 length<br />
equals 12 digits. The scanner will<br />
only read this length and a second<br />
label length you select using the<br />
Second Label Length barcodes<br />
that follow.<br />
6 400086 000125<br />
112 <strong>VS1200</strong> & <strong>HS1250</strong> <strong>Programming</strong> <strong>Kit</strong>
I 2 OF 5: FIRST LABEL LENGTH = 14<br />
Set Interleaved 2 of 5 length<br />
equals 14 digits. The scanner will<br />
only read this length and a second<br />
label length you select using the<br />
Second Label Length barcodes<br />
that follow.<br />
6 400086 000149<br />
R44-1340 113
I 2 OF 5: FIRST LABEL LENGTH = 16<br />
Set Interleaved 2 of 5 length<br />
equals 16 digits. The scanner will<br />
only read this length and a second<br />
label length you select using the<br />
Second Label Length barcodes<br />
that follow.<br />
6 400086 000163<br />
114 <strong>VS1200</strong> & <strong>HS1250</strong> <strong>Programming</strong> <strong>Kit</strong>
I 2 OF 5: FIRST LABEL LENGTH = 18<br />
Set Interleaved 2 of 5 length<br />
equals 18 digits. The scanner will<br />
only read this length and a second<br />
label length you select using the<br />
Second Label Length barcodes<br />
that follow.<br />
6 400086 000187<br />
R44-1340 115
I 2 OF 5: FIRST LABEL LENGTH = 20<br />
Set Interleaved 2 of 5 length<br />
equals 20 digits. The scanner will<br />
only read this length and a second<br />
label length you select using the<br />
Second Label Length barcodes<br />
that follow.<br />
6 400086 000200<br />
116 <strong>VS1200</strong> & <strong>HS1250</strong> <strong>Programming</strong> <strong>Kit</strong>
I 2 OF 5: FIRST LABEL LENGTH = 22<br />
Set Interleaved 2 of 5 length<br />
equals 22 digits. The scanner will<br />
only read this length and a second<br />
label length you select using the<br />
Second Label Length barcodes<br />
that follow.<br />
6 400086 000224<br />
R44-1340 117
I 2 OF 5: FIRST LABEL LENGTH = 24<br />
Set Interleaved 2 of 5 length<br />
equals 24 digits. The scanner will<br />
only read this length and a second<br />
label length you select using the<br />
Second Label Length barcodes<br />
that follow.<br />
6 400086 000248<br />
118 <strong>VS1200</strong> & <strong>HS1250</strong> <strong>Programming</strong> <strong>Kit</strong>
I 2 OF 5: FIRST LABEL LENGTH = 26<br />
Set Interleaved 2 of 5 length<br />
equals 26 digits. The scanner will<br />
only read this length and a second<br />
label length you select using the<br />
Second Label Length barcodes<br />
that follow.<br />
6 400086 000262<br />
R44-1340 119
I 2 OF 5: FIRST LABEL LENGTH = 28<br />
Set Interleaved 2 of 5 length<br />
equals 28 digits. The scanner will<br />
only read this length and a second<br />
label length you select using the<br />
Second Label Length barcodes<br />
that follow.<br />
6 400086 000286<br />
120 <strong>VS1200</strong> & <strong>HS1250</strong> <strong>Programming</strong> <strong>Kit</strong>
I 2 OF 5: FIRST LABEL LENGTH = 30<br />
Set Interleaved 2 of 5 length<br />
equals 30 digits. The scanner will<br />
only read this length and a second<br />
label length you select using the<br />
Second Label Length barcodes<br />
that follow.<br />
6 400086 000309<br />
R44-1340 121
I 2 OF 5: FIRST LABEL LENGTH = 32<br />
Set Interleaved 2 of 5 length<br />
equals 32 digits. The scanner will<br />
only read this length and a second<br />
label length you select using the<br />
Second Label Length barcodes<br />
that follow.<br />
6 400086 000323<br />
122 <strong>VS1200</strong> & <strong>HS1250</strong> <strong>Programming</strong> <strong>Kit</strong>
I 2 OF 5: SECOND LABEL LENGTH = NONE<br />
Use this label to instruct the<br />
scanner to only recognize the one<br />
label length set using the preceding<br />
labels.<br />
6 400087 000001<br />
R44-1340 123
I 2 OF 5: SECOND LABEL LENGTH = 4<br />
Set second Interleaved 2 of 5<br />
length equals 4 digits. The<br />
scanner will only read this length<br />
and a first label length you select<br />
using the First Label Length<br />
barcodes.<br />
6 400087 000049<br />
124 <strong>VS1200</strong> & <strong>HS1250</strong> <strong>Programming</strong> <strong>Kit</strong>
I 2 OF 5: SECOND LABEL LENGTH = 6<br />
Set second Interleaved 2 of 5<br />
length equals 6 digits. The<br />
scanner will only read this length<br />
and a first label length you select<br />
using the First Label Length<br />
barcodes.<br />
6 400087 000063<br />
R44-1340 125
I 2 OF 5: SECOND LABEL LENGTH = 8<br />
Set second Interleaved 2 of 5<br />
length equals 8 digits. The<br />
scanner will only read this length<br />
and a first label length you select<br />
using the First Label Length<br />
barcodes.<br />
6 400087 000087<br />
126 <strong>VS1200</strong> & <strong>HS1250</strong> <strong>Programming</strong> <strong>Kit</strong>
I 2 OF 5: SECOND LABEL LENGTH = 10<br />
Set second Interleaved 2 of 5<br />
length equals 10 digits. The<br />
scanner will only read this length<br />
and a first label length you select<br />
using the First Label Length<br />
barcodes.<br />
6 400087 000100<br />
R44-1340 127
I 2 OF 5: SECOND LABEL LENGTH = 12<br />
Set second Interleaved 2 of 5<br />
length equals 12 digits. The<br />
scanner will only read this length<br />
and a first label length you select<br />
using the First Label Length<br />
barcodes.<br />
6 400087 000124<br />
128 <strong>VS1200</strong> & <strong>HS1250</strong> <strong>Programming</strong> <strong>Kit</strong>
I 2 OF 5: SECOND LABEL LENGTH = 14<br />
Set second Interleaved 2 of 5<br />
length equals 14 digits. The<br />
scanner will only read this length<br />
and a first label length you select<br />
using the First Label Length<br />
barcodes.<br />
6 400087 000148<br />
R44-1340 129
I 2 OF 5: SECOND LABEL LENGTH = 16<br />
Set second Interleaved 2 of 5<br />
length equals 16 digits. The<br />
scanner will only read this length<br />
and a first label length you select<br />
using the First Label Length<br />
barcodes.<br />
6 400087 000162<br />
130 <strong>VS1200</strong> & <strong>HS1250</strong> <strong>Programming</strong> <strong>Kit</strong>
I 2 OF 5: SECOND LABEL LENGTH = 18<br />
Set second Interleaved 2 of 5<br />
length equals 18 digits. The<br />
scanner will only read this length<br />
and a first label length you select<br />
using the First Label Length<br />
barcodes.<br />
6 400087 000186<br />
R44-1340 131
I 2 OF 5: SECOND LABEL LENGTH = 20<br />
Set second Interleaved 2 of 5<br />
length equals 20 digits. The<br />
scanner will only read this length<br />
and a first label length you select<br />
using the First Label Length<br />
barcodes.<br />
6 400087 000209<br />
132 <strong>VS1200</strong> & <strong>HS1250</strong> <strong>Programming</strong> <strong>Kit</strong>
I 2 OF 5: SECOND LABEL LENGTH = 22<br />
Set second Interleaved 2 of 5<br />
length equals 22 digits. The<br />
scanner will only read this length<br />
and a first label length you select<br />
using the First Label Length<br />
barcodes.<br />
6 400087 000223<br />
R44-1340 133
I 2 OF 5: SECOND LABEL LENGTH = 24<br />
Set second Interleaved 2 of 5<br />
length equals 24 digits. The<br />
scanner will only read this length<br />
and a first label length you select<br />
using the First Label Length<br />
barcodes.<br />
6 400087 000247<br />
134 <strong>VS1200</strong> & <strong>HS1250</strong> <strong>Programming</strong> <strong>Kit</strong>
I 2 OF 5: SECOND LABEL LENGTH = 26<br />
Set second Interleaved 2 of 5<br />
length equals 26 digits. The<br />
scanner will only read this length<br />
and a first label length you select<br />
using the First Label Length<br />
barcodes.<br />
6 400087 000261<br />
R44-1340 135
I 2 OF 5: SECOND LABEL LENGTH = 28<br />
Set second Interleaved 2 of 5<br />
length equals 28 digits. The<br />
scanner will only read this length<br />
and a first label length you select<br />
using the First Label Length<br />
barcodes.<br />
6 400087 000285<br />
136 <strong>VS1200</strong> & <strong>HS1250</strong> <strong>Programming</strong> <strong>Kit</strong>
I 2 OF 5: SECOND LABEL LENGTH = 30<br />
Set second Interleaved 2 of 5<br />
length equals 30 digits. The<br />
scanner will only read this length<br />
and a first label length you select<br />
using the First Label Length<br />
barcodes.<br />
6 400087 000308<br />
R44-1340 137
I 2 OF 5: SECOND LABEL LENGTH = 32<br />
Set second Interleaved 2 of 5<br />
length equals 32 digits. The<br />
scanner will only read this length<br />
and a first label length you select<br />
using the First Label Length<br />
barcodes.<br />
6 400087 000322<br />
138 <strong>VS1200</strong> & <strong>HS1250</strong> <strong>Programming</strong> <strong>Kit</strong>
INTERFACE SELECTIONS<br />
The <strong>VS1200</strong> and <strong>HS1250</strong>'s RS-232, OCIA and<br />
Multidrop interfaces have user programmable<br />
features that may need to be set or changed to<br />
match your specific interface requirements. To<br />
ensure compatibility consult with your technical<br />
support personnel before changing these settings.<br />
RS-232 INTERFACE SPECIFICATIONS<br />
The following labels pertain only to POS terminals<br />
with an RS-232 communication interface. In order<br />
for the POS terminal and scanner to communicate<br />
the scanner's configuration must match the communication<br />
settings of the POS terminal. Typically, the<br />
scanner's factory default configuration has been set<br />
to match your POS terminal requirements.<br />
The RS-232 interface communication options are:<br />
• Baud Rate<br />
• Stop Bits<br />
• Clear to Send (CTS)<br />
• Parity<br />
• Xon/Xoff<br />
• Data Bits<br />
• Symbology or Label IDs (Prefixes)<br />
R44-1340 139
RESTRICTIONS<br />
The RS-232 interface hardware and software data<br />
flow control features are mutually exclusive and<br />
both should not be enabled at the same time.<br />
CTS/RTS – hardware flow control. If<br />
this feature is enabled, Xon/Off<br />
(software flow control) should be<br />
disabled. The result of enabling both<br />
flow controls is unpredictable.<br />
Xon/Xoff – software flow control. If this<br />
feature is enabled, CTS/RTS (hardware<br />
flow control) should be disabled.<br />
The result of enabling both flow<br />
controls is unpredictable.<br />
140 <strong>VS1200</strong> & <strong>HS1250</strong> <strong>Programming</strong> <strong>Kit</strong>
RS-232: BAUD RATE = 300<br />
Use this label to set the RS-232<br />
Baud Rate to 300.<br />
6 400029 000052<br />
R44-1340 141
RS-232: BAUD RATE = 1200<br />
Use this label to set the RS-232<br />
Baud Rate to 1200.<br />
6 400029 000045<br />
142 <strong>VS1200</strong> & <strong>HS1250</strong> <strong>Programming</strong> <strong>Kit</strong>
RS-232: BAUD RATE = 2400<br />
Use this label to set the RS-232<br />
Baud Rate to 2400.<br />
6 400029 000038<br />
R44-1340 143
RS-232: BAUD RATE = 4800<br />
Use this label to set the RS-232<br />
Baud Rate to 4800.<br />
6 400029 000021<br />
144 <strong>VS1200</strong> & <strong>HS1250</strong> <strong>Programming</strong> <strong>Kit</strong>
RS-232: BAUD RATE = 9600<br />
Use this label to set the RS-232<br />
Baud Rate to 9600.<br />
6 400029 000014<br />
R44-1340 145
RS-232: BAUD RATE = 19200<br />
Use this label to set the RS-232<br />
Baud Rate to 19200.<br />
6 400029 000007<br />
146 <strong>VS1200</strong> & <strong>HS1250</strong> <strong>Programming</strong> <strong>Kit</strong>
RS-232: STOP BITS = 1<br />
Use this label to set the number of<br />
Stop Bits to one.<br />
6 400034 000009<br />
R44-1340 147
RS-232: STOP BITS = 2<br />
Use this label to set the number of<br />
Stop Bits to two.<br />
6 400034 000016<br />
148 <strong>VS1200</strong> & <strong>HS1250</strong> <strong>Programming</strong> <strong>Kit</strong>
RS-232: CLEAR TO SEND – ENABLE<br />
Use this label to enable CTS/RTS<br />
hardware flow control.<br />
6 400032 000018<br />
R44-1340 149
RS-232: CLEAR TO SEND - DISABLE<br />
Use this label to disable CTS/RTS<br />
hardware flow control.<br />
6 400032 000001<br />
150 <strong>VS1200</strong> & <strong>HS1250</strong> <strong>Programming</strong> <strong>Kit</strong>
RS-232: PARITY = SPACE<br />
Use this label to set Parity to<br />
Space.<br />
6 400031 000040<br />
R44-1340 151
RS-232: PARITY = EVEN<br />
Use this label to set Parity to Even.<br />
6 400031 000019<br />
152 <strong>VS1200</strong> & <strong>HS1250</strong> <strong>Programming</strong> <strong>Kit</strong>
RS-232: PARITY = MARK<br />
Use this label to set Parity to<br />
Mark.<br />
6 400031 000033<br />
R44-1340 153
RS-232: PARITY = ODD<br />
Use this label to set Parity to Odd.<br />
6 400031 000026<br />
154 <strong>VS1200</strong> & <strong>HS1250</strong> <strong>Programming</strong> <strong>Kit</strong>
RS-232: PARITY = NONE<br />
Use this label to set Parity to<br />
None.<br />
6 400031 000002<br />
R44-1340 155
RS-232: XON/XOFF – ENABLE<br />
Use this label to enable Xon/Xoff<br />
for data flow control.<br />
6 400033 000017<br />
156 <strong>VS1200</strong> & <strong>HS1250</strong> <strong>Programming</strong> <strong>Kit</strong>
RS-232: XON/XOFF – DISABLE<br />
Use this label to disable Xon/Xoff<br />
for no data flow control.<br />
6 400033 000000<br />
R44-1340 157
RS-232: DATA BITS = 7<br />
Use this label to set RS-232 data<br />
format equals seven bits.<br />
6 400155 000001<br />
158 <strong>VS1200</strong> & <strong>HS1250</strong> <strong>Programming</strong> <strong>Kit</strong>
RS-232: DATA BITS = 8<br />
Use this label to set RS-232 data<br />
format equals eight data bits.<br />
6 400155 000018<br />
R44-1340 159
RS-232: LABEL IDS SEND<br />
This sends a label identifier which<br />
tells the host the barcode label's<br />
symbology. For example, here are<br />
the industry standard default<br />
label identifiers for some common<br />
symbologies:<br />
Code 39 ......................................... '*'<br />
UPC-A .......................................... 'A'<br />
UPC-E..........................................'E0'<br />
EAN-8 ......................................... 'FF'<br />
EAN-13 ......................................... 'F'<br />
6 400157 000016<br />
160 <strong>VS1200</strong> & <strong>HS1250</strong> <strong>Programming</strong> <strong>Kit</strong>
RS-232: LABEL IDS DON'T SEND<br />
Disables sending of label identifier.<br />
6 400157 000009<br />
R44-1340 161
OCIA INTERFACE SELECTION<br />
The labels on the following pages allow you to<br />
select one of five OCIA interfaces. The options<br />
available are:<br />
• S-P OCIA<br />
• NCR 8 Bit<br />
• NCR 9 Bit<br />
• Nixdorf OCIA<br />
NOTE<br />
The <strong>VS1200</strong> Class 39 scanners do not<br />
support this option.<br />
Following the OCIA interface selection labels are<br />
programming labels for enabling and disabling<br />
OCIA intercharacter delay.<br />
162 <strong>VS1200</strong> & <strong>HS1250</strong> <strong>Programming</strong> <strong>Kit</strong>
OCIA INTERFACE = S-P OCIA<br />
Scan this label to set the OCIA<br />
interface to a match the standard<br />
Spectra-Physics OCIA interface<br />
configuration.<br />
NOTE<br />
The <strong>VS1200</strong> Class 39 scanners do not<br />
support this option.<br />
6 400030 000027<br />
R44-1340 163
OCIA INTERFACE = NCR 8 BIT<br />
Scan this label to set the OCIA<br />
interface to a communicate with<br />
an NCR 8 bit POS system.<br />
NOTE<br />
The <strong>VS1200</strong> Class 39 scanners do not<br />
support this option.<br />
6 400030 000034<br />
164 <strong>VS1200</strong> & <strong>HS1250</strong> <strong>Programming</strong> <strong>Kit</strong>
OCIA INTERFACE = NCR 9 BIT<br />
Scan this label to set the OCIA<br />
interface to a communicate with<br />
an NCR 9 bit POS system.<br />
NOTE<br />
The <strong>VS1200</strong> Class 39 scanners do not<br />
support this option.<br />
6 400030 000171<br />
R44-1340 165
OCIA INTERFACE = NIXDORF<br />
Scan this label to set the OCIA<br />
interface to communicate with a<br />
Nixdorf POS system.<br />
NOTE<br />
The <strong>VS1200</strong> Class 39 scanners do not<br />
support this option.<br />
6 400030 000072<br />
166 <strong>VS1200</strong> & <strong>HS1250</strong> <strong>Programming</strong> <strong>Kit</strong>
OCIA INTERCHARACTER DELAY – ENABLE<br />
Scan this label to enable OCIA<br />
intercharacter delay.<br />
6 400182 000012<br />
R44-1340 167
OCIA INTERCHARACTER DELAY - DISABLE<br />
Scan this label to disable OCIA<br />
intercharacter delay.<br />
6 400182 000005<br />
168 <strong>VS1200</strong> & <strong>HS1250</strong> <strong>Programming</strong> <strong>Kit</strong>
OCIA/RS-232 DUAL INTERFACE<br />
The Class 39 scanners use a dual<br />
OCIA/RS-232 interface board.<br />
Both interfaces must be set to a<br />
known configuration to ensure<br />
proper communications. The<br />
following programming labels<br />
configure these dual interfaces as<br />
described.<br />
R44-1340 169
NCR 8 BIT OCIA/STANDARD RS-232<br />
NOTE<br />
This feature is only supported by<br />
Class 39 scanners.<br />
6 400030 000225<br />
170 <strong>VS1200</strong> & <strong>HS1250</strong> <strong>Programming</strong> <strong>Kit</strong>
NCR 8 BIT OCIA/NIXDORF RS-232<br />
NOTE<br />
This feature is only supported by<br />
Class 39 scanners.<br />
6 400030 000232<br />
R44-1340 171
NCR 9 BIT OCIA/STANDARD RS-232<br />
NOTE<br />
This feature is only supported by<br />
Class 39 scanners.<br />
6 400030 000249<br />
172 <strong>VS1200</strong> & <strong>HS1250</strong> <strong>Programming</strong> <strong>Kit</strong>
NCR 9 BIT OCIA/NIXDORF RS-232<br />
NOTE<br />
This feature is only supported by<br />
Class 39 scanners.<br />
6 400030 000256<br />
R44-1340 173
SP OCIA/STANDARD RS-232<br />
NOTE<br />
This feature is only supported by<br />
Class 39 scanners.<br />
6 400030 000263<br />
174 <strong>VS1200</strong> & <strong>HS1250</strong> <strong>Programming</strong> <strong>Kit</strong>
SP OCIA/NIXDORF RS-232<br />
NOTE<br />
This feature is only supported by<br />
Class 39 scanners.<br />
6 400030 000270<br />
R44-1340 175
NIXDORF OCIA/STANDARD RS-232<br />
NOTE<br />
This feature is only supported by<br />
Class 39 scanners.<br />
6 400030 000287<br />
176 <strong>VS1200</strong> & <strong>HS1250</strong> <strong>Programming</strong> <strong>Kit</strong>
NIXDORF OCIA/NIXDORF RS-232<br />
NOTE<br />
This feature is only supported by<br />
Class 39 scanners.<br />
6 400030 000294<br />
R44-1340 177
MULTIDROP SCANNER ADDRESSING<br />
The labels on the next four pages allow you to set<br />
the scanner address for scanners connected to a<br />
multidrop system.<br />
These settings are determined by your system's<br />
requirements. Check with your system support<br />
personnel before changing these settings.<br />
NOTE<br />
The <strong>VS1200</strong> Class 39 scanners do not<br />
support this option.<br />
178 <strong>VS1200</strong> & <strong>HS1250</strong> <strong>Programming</strong> <strong>Kit</strong>
MULTIDROP SCANNER ADDRESS = p<br />
Scan this label to set the scanner<br />
identifier to 'p' (70hex).<br />
NOTE<br />
The <strong>VS1200</strong> Class 39 scanners do not<br />
support this option.<br />
6 400160 001123<br />
R44-1340 179
MULTIDROP SCANNER ADDRESS = q<br />
Scan this label to set the scanner<br />
identifier to 'q' (71hex).<br />
NOTE<br />
The <strong>VS1200</strong> Class 39 scanners do not<br />
support this option.<br />
6 400160 001130<br />
180 <strong>VS1200</strong> & <strong>HS1250</strong> <strong>Programming</strong> <strong>Kit</strong>
MULTIDROP SCANNER ADDRESS = r<br />
Scan this label to set the scanner<br />
identifier to 'r' (72hex).<br />
NOTE<br />
The <strong>VS1200</strong> Class 39 scanners do not<br />
support this option.<br />
6 400160 001147<br />
R44-1340 181
MULTIDROP SCANNER ADDRESS = s<br />
Scan this label to set the scanner<br />
identifier to 's' (73hex).<br />
NOTE<br />
The <strong>VS1200</strong> Class 39 scanners do not<br />
support this option.<br />
6 400160 001154<br />
182 <strong>VS1200</strong> & <strong>HS1250</strong> <strong>Programming</strong> <strong>Kit</strong>
C<br />
INDEX<br />
Changing Barcode Types -------------------------------------- 56<br />
Codabar Check Digit: ----------------------------------------- 91<br />
Codabar: Disable ----------------------------------------------- 90<br />
Codabar: Enable ----------------------------------------------- 89<br />
Code 128: Disable ---------------------------------------------- 84<br />
Code 128: Enable ----------------------------------------------- 83<br />
Code 128: Minimum Read ------------------------------- 85–88<br />
Code 39 – Disable ---------------------------------------------- 74<br />
Code 39 – Enable ----------------------------------------------- 73<br />
Code 39: Check Digit ------------------------------------- 75–77<br />
Code 39: Minimum Read --------------------------------- 79–82<br />
D<br />
Double Read Timeout -------------------------------------- 45–47<br />
E<br />
EAN-13 Check Digit Transmission ---------------------- 71–72<br />
EAN-8 Check Digit Transmission ------------------------- 69–70<br />
Edge: Disable ------------------------------------------------- 57<br />
H<br />
Handheld Port Speed ------------------------------------------ 50<br />
Handheld Port: Disable ---------------------------------------- 49<br />
Handheld Port: Enable ----------------------------------------- 48<br />
R44-1340 183
I<br />
I 2 of 5 – Disable ----------------------------------------------- 99<br />
I 2 of 5 – Enable ------------------------------------------------ 98<br />
I 2 of 5: Check Digit ------------------------------------- 100–101<br />
I 2 of 5: First Label Length ----------------------------- 108–117<br />
I 2 of 5: Minimum Read -------------------------------- 104–105<br />
I 2 of 5: Second Label Length ------------------------- 124–133<br />
I 2 of 5: Second Label Length = None ---------------------- 123<br />
Increment Volume ---------------------------------------- 12, 13<br />
Increment Tone ------------------------------------------------- 13<br />
L<br />
Laser Timeout ---------------------------------------------- 36–39<br />
M<br />
Motor Timeout ---------------------------------------------- 40–43<br />
Multidrop Scanner Address ---------------------------- 178–182<br />
O<br />
OCIA interface = Nixdorf ------------------------------------- 166<br />
OCIA interface = NCR 8 bit ----------------------------------- 164<br />
OCIA interface = NCR 9 bit ----------------------------------- 165<br />
OCIA interface = S-P OCIA ----------------------------------- 163<br />
OCIA Intercharacter Delay: Disable-------------------------- 168<br />
OCIA Intercharacter Delay: Enable -------------------------- 167<br />
OCIA/RS-232 Dual Interface --------------------------- 169-177<br />
184 <strong>VS1200</strong> & <strong>HS1250</strong> <strong>Programming</strong> <strong>Kit</strong>
P<br />
Price/Weight Check Digit - Disable --------------------------- 33<br />
Price/Weight Check Digit = 4 Digit --------------------------- 29<br />
Price/Weight Check Digit = 4 Digits (Europe) --------------- 31<br />
Price/Weight Check Digit = 5 Digits -------------------------- 30<br />
Price/Weight Check Digit = 5 Digits (Europe) --------------- 32<br />
R<br />
Return to Factory Default ------------------------------------- 15<br />
RS-232 - Label IDs —Don't Send --------------------------- 161<br />
RS-232 - Label IDs —Send ---------------------------------- 160<br />
RS-232: Baud Rate-------------------------------------- 141–145<br />
RS-232: Clear to Send --------------------------------- 149–150<br />
RS-232: Data Bits --------------------------------------- 158–159<br />
RS-232: Parity ----------------------------------------- 151–153<br />
RS-232: Stop Bits --------------------------------------------- 147<br />
RS-232: Xon/Xoff -------------------------------------- 156–157<br />
S<br />
Speaker Off ----------------------------------------------------- 20<br />
Speaker On ------------------------------------------------------ 19<br />
Speaker Volume --------------------------------- 22–24, 25–27<br />
Switch Label ---------------------------------------------------- 14<br />
R44-1340 185
U<br />
UPC-A Check Digit Transmission ------------------------- 65–66<br />
UPC-A to EAN-13 Expansion------------------------------ 62–63<br />
UPC-D – Disable ----------------------------------------------- 57<br />
UPC-E Check Digit Transmission ------------------------- 67–68<br />
UPC-E to EAN-13 Expansion ----------------------------- 60–61<br />
UPC-E to UPC-A Expansion ------------------------------ 58–60<br />
V<br />
Volume Switch Disable ---------------------------------------- 17<br />
Volume Switch Enable ----------------------------------------- 18<br />
186 <strong>VS1200</strong> & <strong>HS1250</strong> <strong>Programming</strong> <strong>Kit</strong>
FEATURE CHANGED CHANGED<br />
NAME FROM TO<br />
R44-1340 187
SWITCH LABEL<br />
All programming sessions must begin by scanning<br />
the Switch label in order for the scanner to recognize<br />
them as programming labels and end with<br />
the Switch label for the scanner to store the<br />
changes you have made. A duplicate of this label<br />
and instructions for its use are found on page 14.<br />
When changing (programming) a feature, it is a<br />
good practice to cover the label on the opposite<br />
page to prevent the scanner from reading both<br />
labels since it reads both the leading and trailing<br />
edges of all items that are scanned.<br />
Switch Label
Corporate Headquarters<br />
675 Basket Road<br />
Webster, NY 14580-9787<br />
Telephone: (716) 265-1600<br />
Toll Free: (800) 828-6489<br />
Telefax: (716) 265-6400<br />
Printed on recycled paper<br />
www.pscnet.com<br />
Eugene Site<br />
959 Terry Street<br />
Eugene, OR 97402-9150<br />
Telephone: (541) 683-5700<br />
Toll Free: (800) 547-2507<br />
Telefax: (541) 686-1702<br />
PRINTED WITH<br />
SOY INK<br />
© 1997 PSC INC. R44-1340 (Rev. E) Printed in USA 7/97<br />
R44-1340


