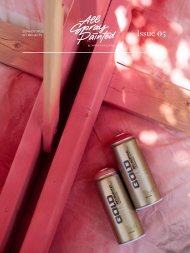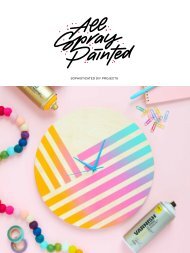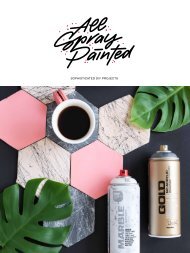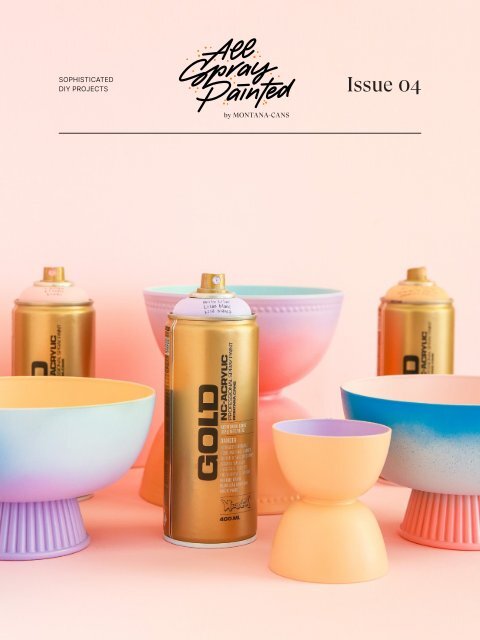
Allspraypainted Magazine #04
The allspraypainted Magazine issue #4 is now available online here for free and in print. For four years now, the allspraypainted magazine has been consistently summarizing the inspiring and nurturing projects being undertaken throughout the year on the allspraypainted website. A printed and free online journal that helps readers to "Create their own worlds" through interesting craft, art, and DIY projects for all skill levels. Using little more than some simple objects and a variety of Montana Cans products, in 2021 we tackled projects for interior, exterior, creative and functional, resolved storage problems, and gave makeovers, and we even heard what some artists and creators had to say in this most peculiar of times. We used materials that were new, we saved money where ever it was possible and upcycled all the objects we could get our hands on. www.allspraypainted.com/
The allspraypainted Magazine issue #4 is now available online here for free and in print.
For four years now, the allspraypainted magazine has been consistently summarizing the inspiring and nurturing projects being undertaken throughout the year on the allspraypainted website. A printed and free online journal that helps readers to "Create their own worlds" through interesting craft, art, and DIY projects for all skill levels.
Using little more than some simple objects and a variety of Montana Cans products, in 2021 we tackled projects for interior, exterior, creative and functional, resolved storage problems, and gave makeovers, and we even heard what some artists and creators had to say in this most peculiar of times. We used materials that were new, we saved money where ever it was possible and upcycled all the objects we could get our hands on.
www.allspraypainted.com/

You also want an ePaper? Increase the reach of your titles
YUMPU automatically turns print PDFs into web optimized ePapers that Google loves.
SOPHISTICATED<br />
DIY PROJECTS<br />
Issue 04<br />
by MONTANA-CANS
<strong>Magazine</strong><br />
allspraypainted<br />
ALLSPRAYPAINTED.COM
Contents<br />
6 Editorial<br />
8<br />
Gradient Desktop<br />
Organizers<br />
Upcycling<br />
14 Introducing<br />
RUST Effect<br />
Introducing<br />
16 An Easter Back<br />
to Basics<br />
Seasonal<br />
22 Introducing<br />
„allspraypainted meets“<br />
Introducing<br />
24 allspraypainted meets<br />
Nadine Kolodziey<br />
Interview
allspraypainted <strong>Magazine</strong><br />
30 Magic Chrome<br />
Makeover<br />
Makeover<br />
38 RUST Effect and<br />
Color Shelving<br />
Makeover<br />
46<br />
Pantone Inspired<br />
Colorway 2021<br />
Makeover<br />
52 RUST Effect Office<br />
Update<br />
Interior<br />
58 How to Marble<br />
with Spray Paint<br />
DIY<br />
64 Glass Paint Bathroom Jar<br />
Makeover<br />
Makeover
Contents<br />
70 Three New Takes On<br />
The Halloween Pumpkin<br />
Seasonal<br />
74<br />
Recap: allspraypainted<br />
meets Carolin Kaiser<br />
Interview<br />
80 Abstract Patterned<br />
Floor Coverings<br />
Interior<br />
86<br />
Colorblock<br />
Storage Boxes<br />
Storage<br />
94<br />
Colorful Christmas<br />
Tealight Candle Holders<br />
Seasonal
Find shops via<br />
montana.link/stores<br />
@allspraypainted
Editorial<br />
6<br />
Create your<br />
own world!<br />
To say „we saw it coming“ is an understatement. From the very beginning of 2021, the world knew<br />
that the year ahead was going to be a wild and unpredictable ride. Like those refreshing autumn<br />
days when the cold winds whisp away the warm summer air. Taking with them the leaves from the<br />
trees and the carefree manner of summer. In 2021, we slowly tasted a little of our former freedoms as<br />
international borders eased their restrictions and the new world started to come to terms with what<br />
it could and couldn‘t do.<br />
With it came a world of opportunity, but above all a new appreciation for everything that we took for<br />
granted prior. In a follow-up interview with former allspraypainted meets artist Carolin Kaiser, she told<br />
us of how post-lockdown, her appreciation and awareness of how amazing natural colors are was<br />
only possible thanks to forced isolation. In another allspraypainted meets feature with artist Nadine<br />
Kolodziey, we were reminded of how fruitful creative flexibility can be in terms of employment and<br />
creative outlets, in a time where many people needed to reinvent their professions to stay afloat.<br />
When we weren‘t being tested by the complexities of our current time, we were being creative. Projects,<br />
projects, projects! And how glad we were to have that to look forward to. We celebrated the<br />
seasons by way of upcycling glass vessels with Montana GLASS Paint for a frosted Christmas, kept it<br />
simple with some concrete Christmas tealights holders, gave natural materials like paper stars a Montana<br />
METALLIC facelift, and ended the year with the popping of corks as our new Montana METALLIC<br />
wine coolers stored our favorite bubbly at the New Year‘s Eve party. Never did the Easter Eggs look<br />
so colorful as they did this year, as did our impressive pumpkins on Halloween.<br />
Getting acquainted with the Montana RUST Effect Spray was more than just fun as we tried it on nearly<br />
everything, from picture frames to clocks, sculptures to shelves. We even gave the working and<br />
office workspaces we spend so much time in a brand new mood with a RUST Effect makeover. And for<br />
those preferring to stick to classic colors, we celebrated the release of the seasonal Pantone colors<br />
by giving our office objects a Pantone-inspired touch.<br />
There was no idea too big or too small. Floor coverings, lighting, plastic storage crates, bathroom<br />
decor objects, all types of furniture (regardless of their material), and even home decor products like<br />
plastic flowers got a run. The Montana PRIMER Sprays, GLITTER colors, GLASS Paints, METALLIC<br />
Sprays, MARBLE, GRANIT, NIGHTGLOW, and all the VARNISH Sprays passed through our creative<br />
hands at one time or another. Leaving us with the confidence and know-how to tackle any project in<br />
the future.<br />
There are a lot more craft and DIY projects installed for 2022. All of them will be fun, creative, and<br />
inspirational. Stay with us as we grow, learn, and create together, one project at a time. In 2022 we<br />
also look forward to featuring more allspraypainted meets artists and putting the spotlight back on<br />
what can be done, rather than what we are told we can‘t do. Turn the pages of this book and enjoy the<br />
ride within it. This, the 4th annual allspraypainted <strong>Magazine</strong>.
8<br />
Gradient Desktop<br />
Organizers<br />
THERE‘S A COLORFUL PLACE FOR EVERYTHING
Spray paint FAQ via<br />
montana.link/help<br />
@allspraypainted
Upcycling Gradient Desktop Organizers<br />
10<br />
Where do we put our pens, paperclips, erasers, sticky notes, and scissors? The<br />
list goes on and on for all the things that live on the desktops that we need to<br />
help us create and stay organized. It is great to have all these things, that is,<br />
unless there are no desktop drawers to store and organize them all. Naturally,<br />
that gave us an idea to resolve the problem and have an excuse to start a<br />
project all at once. The DIY Desktop Organizers were born, and here is how we<br />
made them.
allspraypainted <strong>Magazine</strong><br />
11<br />
HOW WE DID IT<br />
The basis of our DIY Desktop Organizers is the bowls, dishes, or<br />
cups you decide to use. The idea is to glue one to the other to<br />
make a base and a holder on the top. Any variation of shape and<br />
size is possible as long as some thought is given to equilibrium.<br />
Be mindful that whatever combination you use can balance and<br />
hold the weight put into them once filled with desktop goodies.<br />
We chose to use plastic bowls and dishes due to their availability,<br />
strength, and lightweight. They can hold a lot without weighing<br />
a lot.<br />
Scuffing the sides and insides of the bowls lightly with<br />
some sandpaper meant that there was a bit of tooth on the plastic<br />
surfaces to hold paint well. All items were cleaned and dried<br />
and the rims of the bases were glued together using superglue.<br />
Important at this stage to remember is that if any excess glue<br />
drips or runs onto the outside of your join, that you clean it off<br />
straight away with a q-tip. Dry glue drips and blobs will show up<br />
on your painting work and can be wiped away when the glue is<br />
still wet. Depending on the material of your bowls etc, you may<br />
want to ask your local hardware or craft store if the glue you<br />
have is right for the materials you are using. Once glued together<br />
and holding, we left the new look holders overnight to dry.<br />
Then it was time for the fun part. Remembering to shake all<br />
our cans well for 2-3 minutes before using them, we removed the<br />
black safety ring from under the nozzles of the cans (where applicable)<br />
and started with the Montana Plastic PRIMER. Should<br />
you be working with other materials like wood or ceramics, we<br />
recommend using the Montana Universal PRIMER instead. Once<br />
the 2-3 minutes shaking has occurred and you can hear the mixing<br />
balls moving freely, spray the holders from a distance of<br />
about 15cm, in thin light coats, moving in a side-to-side motion<br />
as you trigger on each pass. Start with the inside of the holder<br />
and then move your way to the outside. Once dry, you can repeat<br />
this process with your chosen Montana GOLD colors. Again,<br />
start with the base color you want to use from the inside outwards.<br />
Once dry, you can take the holder in your hands and turn<br />
them upside down, spraying first the midsection of the holder,<br />
allowing any spray mist or splatters to drop downwards to create<br />
an ombre or gradient, and then with your third color spray a<br />
portion of the top rim of your holder, which will be the base once<br />
you place the holder back down the right way up. We chose the<br />
Montana GOLD colors Bazooka Joe, Lyche, Shrimp Pastel, Frozen<br />
Strawberry, Smaragd Green, White Lilac, Flipper, and Shock<br />
Blue Light. You could choose any color or any colorway you like<br />
making your holders look exactly as you want them to.<br />
All holders were then left overnight to dry. This allowed the<br />
curing process of the Montana GOLD colors and gave us some<br />
time to decide if we wanted to clear coat them with a Montana<br />
VARNISH Spray or leave them as they were. If you wish to clear<br />
coat them, choose your preferred Montana VARNISH Spray to finish<br />
in Matte, Semi-Gloss, or Gloss, repeat the painting process<br />
as with the other cans and allow them to dry overnight. Then<br />
you‘re done. Nice work!<br />
The actual work time for this project was no more than 30<br />
minutes, however for best results, allow overnight drying time<br />
for the gluing, painting, and sealing processes. Don‘t skimp on<br />
good glue as the bond between your bowls, cups and dishes are<br />
essential to the longevity of your desktop organizers. And if at<br />
first, you are not happy with your choice of colors, don‘t worryit‘s<br />
just paint! Before applying any clear coat, allow the old colors<br />
to dry and recoat in the new colors as desired. This is a project<br />
for any skill level and could be a good way to upcycle some<br />
bowls, cups, and dishes you may already have lying around.<br />
Don‘t hold back and Happy Crafting!
Upcycling<br />
Gradient Desktop Organizers<br />
12<br />
MATERIALS USED<br />
• Montana MARBLE Effect Pastel Green<br />
• Montana Universal PRIMER<br />
• Montana GOLD Bazooka Joe<br />
• Montana GOLD Lyche<br />
• Montana GOLD Shrimp Pastel<br />
• Montana GOLD Frozen Strawberry<br />
• Montana GOLD Smaragd Green<br />
• Montana GOLD White Lilac<br />
• Montana GOLD Flipper<br />
• Montana GOLD Shock Blue Light<br />
• Montana PRIMER<br />
• Bowls<br />
• Cups<br />
• Dishes<br />
• Superglue<br />
• Q-tips<br />
• Gloves<br />
• Mask<br />
• Drop Sheet
<strong>Allspraypainted</strong> Lookbook 13
14<br />
Introducing<br />
RUST Effect<br />
TESTING THE NEW MONTANA RUST EFFECT SPRAY 400ML
Rust, a charming sign of weathering, aging, and exposure to the<br />
elements. The scars of time can be as alluring and beautiful, as<br />
they can be painful and fatiguing. Or at least that is when rust<br />
claims its victims and things start to break. Although some projects<br />
require the removal of rust before you can give something<br />
a new lease on life, there are often cases while being creative<br />
where you wished that mother nature would step in and help add<br />
a little bit of rust to give something a little extra character. For<br />
exactly these moments, there is now the Montana Cans, RUST<br />
Effect Spray 400ml.<br />
This easy-to-handle 400ml can is as simple to use as any<br />
other Montana can you are used to. Available in the colors Orange<br />
Brown ER8000 and Brown ER8100, this high-pressure can is<br />
ideal for creating the illusion of rust, or that a surface has rusted<br />
naturally over time. Not only does the Nitro-Combi formula offer<br />
two tones of the color of rust, but also a texture on the surface<br />
of your object that looks deceiving like the real thing.<br />
You‘re probably be asking yourself, „but why don‘t you just<br />
leave your object outside for a while to rust naturally?“ Because<br />
pre-primed wood, concrete, plastic, synthetic materials such as<br />
polystyrene, or flat surfaces such as walls and canvas don‘t rust.<br />
That is until now, with a little help from the Montana RUST Effect<br />
Spray 400ml.<br />
The ideas came flooding and it didn‘t take long before we<br />
were out in the studio, or rummaging through cupboards, looking<br />
for things to upcycle, reinvent, or make more charming with<br />
our new favorite effect can. Our treasure hunt resulted in the finding<br />
of some cool looking planters, an old clock, picture frames,<br />
and a little bike model. All items once cleaned and dry, were given<br />
the RUST Effect Spray treatment. Wherever required, each<br />
item was precoated with the applicable Montana Cans PRIMER<br />
Spray in Universal, Plastic, Polystyrene, or Metal PRIMER. If your<br />
objects are precoated, you can test to see if your RUST Effect<br />
Spray applies straight on.<br />
The high-pressure output in conjunction with the nozzle on<br />
the can (a Standard Round female nozzle), was great for getting<br />
into all those hard-to-reach nooks and crannies of each object.<br />
Mixing a little of the Orange Brown with the Brown was not only<br />
fun, it also made each object look more natural and organic. As<br />
if mother nature had done the job herself. And when the first<br />
visitors started to see what we had achieved, the reactions were<br />
nothing short of „WOW!“<br />
With the new Montana RUST Effect Spray 400ml, not only<br />
have new doors of creativity opened, but also the context of the<br />
materials we can use to make them look natural. Stay tuned for<br />
more projects and artworks using Montana RUST Effect Spray<br />
400ml on allspraypainted soon.<br />
„The RUST Effect Spray is great for giving an<br />
object a used look. There‘s no way you can<br />
make things go rusty faster!“<br />
– Carolin Kaiser, visual artist from Mannheim, Germany
16<br />
An Easter Back<br />
to Basics<br />
WHEN ALL YOU NEED IS A LITTLE COLOR
Seasonal An Easter Back to Basics<br />
18<br />
Festive days aren´t just an excuse to have days off work or school. They all<br />
have their backgrounds and historical origins, and in most cases, whatever your<br />
orientation, they are all great days together with people you love. Easter is a<br />
classic example of such a day. Color, searching for Easter eggs, and let‘s not<br />
forget copious amounts of chocolate. The one symbol, however, that seems to<br />
be universal is the humble egg. And with that, we decided to go back to basics<br />
and add some color to the beloved hard-boiled egg. This is how we did it.
allspraypainted <strong>Magazine</strong><br />
19<br />
BEFORE<br />
For this project, there weren´t any materials required that were out of the<br />
ordinary. Our workspaces were already prepared with a drop sheet, gloves,<br />
and our masks. And our chosen Montana GOLD colors were at hand‘s reach.<br />
You can choose any colors you like, but we chose to stick to a pastel<br />
colorway with the colors Light Lilac, Summit, Pudding, Viola, Linden Green,<br />
and of course, Easter Yellow. In keeping with the theme „back to basics“, we<br />
used good old-fashioned chicken eggs. Not so that we could eat them later<br />
(eggs should not be eaten if spray painted), but as they have such a beautiful<br />
form that is natural and durable if hard-boiled. If you wanted, you could<br />
choose to pierce the eggs at both ends and blow out the contents to have<br />
hollow eggs. Or you could use decor eggs made of wood, plastic, or foam. If<br />
you use foam, preprime with Montana Polystyrene PRIMER Spray and ensure<br />
all the foam´s pores are covered and sealed. After having shaken the cans<br />
for 2-3 minutes, removing the nozzle, and allowing the black safety ring<br />
underneath it to fall out, you´re ready to trigger your cans and paint your<br />
eggs. Lay each egg on your drop sheet with enough space around it so you<br />
can spray from all angles. Then paint each egg in thin layers from 15-20cm<br />
distance, in slow sweeping motions. Allow to dry and roll slightly so that the<br />
unpainted patches can be sprayed. Then repeat the process so that all sides<br />
of your egg are painted. Allow to dry and your eggs are done!
Seasonal<br />
An Easter Back to Basics<br />
20
allspraypainted <strong>Magazine</strong><br />
21<br />
AFTER<br />
Your eggs are now dry, the colors look amazing, and the whole painting<br />
process took less than 5 minutes. What was the most challenging part of the<br />
project was hard boiling the eggs so that they didn´t crack. But even that<br />
isn´t too hard if you go slow and start with cold water. Such beautiful, simple<br />
eggs mean you can then put your energy into how you want to present them.<br />
Play with different bowls, holders, and color combinations. Or even make a<br />
day of it and invite some friends to join in and catch up while you‘re doing<br />
it. Compliment your display with some seasonal flowers or twigs from the<br />
garden, and you have yourself a timeless Easter decoration for indoors or<br />
out. Then, all you need to have is a happy Easter. Happy Crafting.
22<br />
Introducing<br />
„allspraypainted<br />
meets“<br />
A FRESH NEW LOOK AT THE CREATORS BEHIND THE CREATIONS
For several years, allspraypainted has been bringing inspiring<br />
creativity from all orientations straight to your screens. To motivate,<br />
assist, and inspire you, so you too can make the world you<br />
live in a colorful one.<br />
With the realization that everyone can use a spray can, we<br />
realized it was time to take a deeper look at what the movers and<br />
shakers using spray paint for their craft. Who are the innovators<br />
such as fine artists, visual artists, architects, interior designers,<br />
and creatives that are at the top of their game when it comes to<br />
using spray paint for their craft?<br />
<strong>Allspraypainted</strong> meets will feature and interview, some<br />
amazing creators who will inform, inspire, and intrigue you. What<br />
drives them, what‘s their motivation, how do they do it? Check<br />
out our feature with German visual artist, Nadine Kolodziey and<br />
learn how she makes her amazing art. Carolin Kaiser gives us<br />
an update on what happened since we last spoke to her back<br />
in 2020. Stay tuned and watch this space for a new way to get<br />
creative.
24<br />
allspraypainted<br />
meets<br />
Nadine Kolodziey<br />
„LEARNING TO UNLEARN“
allspraypainted meets Nadine Kolodziey<br />
26<br />
It‘s funny to think that an email shifted over to the trash can in suspicion of it<br />
being „fake“, could have been the end of a monumental opportunity. Luckily for<br />
Nadine Kolodziey, the forgotten about email from YouTube in the U.S was followed<br />
up weeks later by a surprise telephone call from them personally. They<br />
were trying to contact her regarding a book project for which they wanted her<br />
to design illustrations.
allspraypainted <strong>Magazine</strong> 27<br />
This, only a single element of the broad spectrum of artwork<br />
created by the thirty-something classically trained German illustrator.<br />
Even so early on in her career, Nadine Kolodziey is more<br />
than just your average drawing addict. With her formative years<br />
taking place in the ‚80s and 90s, Nadine has managed to merge<br />
her love of manga and Japanese culture generally, with other<br />
strengths she displays with ease like color use, collage, painting,<br />
and digital artwork.<br />
As a visual artist, Nadine alternates her workspace between the<br />
German cities of Frankfurt and Berlin. Also apt in many forms of<br />
artmaking by hand, it is Berlin that she turns to for the progression<br />
for her newfound love of augmented reality. The diversity of<br />
such progressive and creative cities only adds some extra edge<br />
to her already dynamic work.<br />
At the core of her artistic practice, Kolodziey likes to implement<br />
a motto that always keeps her moving forward. „Learn to unlearn“.<br />
With these three words, she offers herself the freedom to<br />
return to basics to rediscover what lies at the source of each<br />
idea. The love of mixing and matching means no doors are closed<br />
when Nadine Kolodziey creates. With a strong foundation in<br />
drawing, it is often a Montana ACRYLIC marker or design marker<br />
in hand, that starts the process from conception to execution of<br />
an artwork.<br />
„Learn to unlearn“, keywords that guide her through the digital<br />
visual landscape, as she trailblazes with her own augmented<br />
reality app known as „Nadine Kolodziey“ in app stores. As with<br />
most pixel pushers, Nadine Kolodziey is no exception to the notion<br />
that behind most digital artwork creators, there are talen-
allspraypainted <strong>Magazine</strong><br />
ted craftspeople with manual skills. Skills that even<br />
translated into Kolodziey‘s movement into spray<br />
paint works made with her favorite spray paint line,<br />
the Montana GOLD range.<br />
With a mystical effect that seems not completely<br />
graphically inspired, not quite painterly, Kolodziey‘s<br />
also seamlessly applies her favorite Montana GOLD<br />
colors in her canvas work. Works that supply a location<br />
where opacity and transparency meet in a manner<br />
that is dynamic, colorful, and loud. Although the<br />
love of manga, toys, and Japanese cultural references<br />
are ever-present, it is no secret that European<br />
and Memphis design, are also morphed with Kolodziey‘s<br />
personality to keep the work traveling in its<br />
own unique direction.<br />
Kolodziey‘s yearning to invite the audience to interact<br />
with her artwork beyond its design or motif has<br />
not only led her onto the path of augmented reality,<br />
but her stylized 3D works in the form of sculptural<br />
installation also breathe life into her portfolio while<br />
integrating digital enhancement. The works take on<br />
a life of their own creating human experiences and<br />
thus memories. In a recent development within her<br />
augmented reality works, Kolodziey has discovered<br />
the augmented reality spray can filter. Just as in real<br />
life in her studios, this feature enables her use of the<br />
Montana GOLD cans to breach new horizons in a<br />
combination of static artwork, and real-time dynamic<br />
digital artwork. Without requiring a wall or a static<br />
substrate as a painting surface, the spray can filter<br />
enables users to create spray markings in thin air,<br />
within an installation context created by Kolodziey.<br />
This magical merge fulfills both her love of handson<br />
artmaking and her fascination for creating a world<br />
that is otherwise not there. With a background of<br />
white walls and life-sized white polystyrene objects,<br />
the welcomed digital splash of color is nothing less<br />
than captivating.<br />
We look forward to the new horizons<br />
we are sure to see in the development<br />
of Nadine Kolodziey‘s work, but until<br />
then, let‘s enjoy what she has already<br />
achieved today.<br />
Watch the video via<br />
montana.link/nadine<br />
@allspraypainted
30<br />
Magic Chrome and<br />
Metallic Makeover<br />
FROM PLAIN TO TIMELESS IN TWO STEPS
Makeover Magic Chrome and Metallic Makeover<br />
32<br />
It is easy to find objects and ornaments that get your attention and can decorate<br />
your home. Any yard sale, second-hand store, decor, and hardware stores,<br />
all have something to offer. Maybe you already have them stored away from a<br />
time long ago when your taste in color may have been a little different. With<br />
the Montana GOLD Chrome Effect and Metallic Matt color range, you can add a<br />
touch of class and timelessness in as little as two steps. Sound intriguing? Read<br />
on.<br />
What‘s the difference between Chrome Effect and Metallic Matte colors you<br />
might be asking? Chrome Effect colors have shiny metallic pigment particles<br />
that dry on the outside of the paint surface to reflect as much light as possible.<br />
You could consider this an „open“ surface paint that marks when the pigments<br />
are touched or exposed to the elements. The Metallic Matt colors, on the other<br />
hand, are traditional „closed“ surface paint colors that have metallic pigments<br />
inside the paint liquid which dries to form the paint‘s skin. Metallic Matt colors<br />
are less shiny but more durable and able to be handled. Both offer unique finishes<br />
that are beautiful in their own right. Just as we learned in our Magic Chrome<br />
and Metallic Makeover.
Makeover<br />
Magic Chrome and Metallic Makeover<br />
34<br />
BEFORE<br />
Dusting off some old objects like glasses, candle holders, or vases<br />
is done in a flash. If you‘re looking for something new or different,<br />
as suggested prior, go and visit your local stores and yard<br />
sales to see if anything there takes your fancy. With your painting<br />
space ready, objects and ornaments clean, dry, and dustfree,<br />
shake your cans for 2-3 minutes to ensure the mixing balls<br />
were moving freely. Starting with the Montana Universal PRIMER<br />
Spray, paint each object at a distance of about 15cm from the<br />
object‘s surface, in smooth side-to-side motions. You are better<br />
off doing thin multiple coats, than singular thick coats that may<br />
drip or take longer to dry thoroughly. Once dry, it‘s time to take<br />
the Montana GOLD Metallic color of your choice and apply it in<br />
the same manner as the PRIMER. We used the Montana GOLD<br />
Chrome Effect colors Goldchrome, Copperchrome, and Silverchrome,<br />
for the shiny metallic finishes. We turned to the Montana<br />
GOLD Metallic colors Silver Matt and Gold Matt to achieve<br />
the low sheen (or matt finishes) that can be handled. Repeat the<br />
process if desired with each color till you achieve the metallic<br />
finish you were aiming for.
Makeover<br />
Magic Chrome and Metallic Makeover<br />
36<br />
AFTER<br />
Well, it was that easy! What was once a pile of things that were<br />
OK, is now decorative or functional objects and ornaments that<br />
can find a new place in your home. The shiny Chrome Effect<br />
finish took our plain ornaments in a whole new direction. While<br />
the smooth matt luster of the Metallic Matt colors offers a sense<br />
of timelessness, like a family heirloom or a forgotten treasure.<br />
It‘s important to remember, the Chrome Effect colors have pigments<br />
on the surface of the paint, meaning they can‘t be touched<br />
or handled as they will mark or deteriorate. So choose your<br />
objects carefully when you apply each color so you can enjoy<br />
the fruits of your labor for many years to come.<br />
This project is for all skill levels and can be done by anyone<br />
that has a spare 10 minutes (excluding drying times) and<br />
is old enough to use a spray can. Another job well done. Happy<br />
Crafting!
38<br />
RUST Effect and<br />
Color Shelving<br />
A NEW LOOK FOR METAL SHELVES
Makeover<br />
RUST Effect and Color Shelving 40<br />
It isn‘t always possible, or necessary, to buy expensive shelving for simple<br />
storage problems. Just as it isn‘t always simple to find storage shelves that<br />
look good and do the job well. Although available in just about any hardware<br />
store, the classic DIY metal shelves may do a great job when it comes<br />
to storing your books and belongings, but often the way they look is not<br />
exactly what you want inside your home. In this project, we fix two problems<br />
at once using Montana RUST Effect Spray, and our favorite Montana<br />
GOLD colors. Sound tempting? Read on.
allspraypainted <strong>Magazine</strong>
Interior Marble Entryway Bench<br />
42
allspraypainted <strong>Magazine</strong><br />
43<br />
HOW IT WAS DONE<br />
Our shelves came from the local big-box hardware store that had<br />
a few variations of shelving available. Some came with wooden<br />
inserts which we liked, others were completely metal. Should<br />
yours be metal only but you like the idea of wooden shelf inserts,<br />
ask their wood department if you can also purchase some cutto-size<br />
pieces of plywood to fit onto your shelves.<br />
The first step to vitalizing our very standard metal shelving<br />
was to sandpaper the surface of every piece of shelving<br />
lightly while it was still in pieces. This created light abrasion for<br />
our paint to stick to. The same goes for the wood inserts if they<br />
apply to you. You don‘t need to do a great amount of work here,<br />
just ensure that your sandpaper is fine and that all your pieces<br />
are clean, dry, and dust-free before painting. Reverting back to<br />
our regular practice of shaking our cans vigorously for 2-3 minutes<br />
and removing the black safety ring from the nozzle where<br />
applicable, we then started by priming all the metal pieces,<br />
which were either laid down on our drop sheet or propped up in<br />
our protected painting space. Using the Montana Metal PRIMER<br />
Spray, we applied thin, even coats to each piece. While this was<br />
drying, we took our wooden shelf inserts (if applicable to you),<br />
and also coated them in thin even coats. But this we did with<br />
the Montana Universal PRIMER Spray. We suggest priming both<br />
sides of the wood to avoid it warping.<br />
Once all our primed metal parts were dry, the next step<br />
was to give them a touch of rust effect. Starting with our Montana<br />
RUST Effect Spray in the color Brown, we coated all our pieces<br />
as desired. This became the basis of the rust effect. If your<br />
shelving has no wooden inserts, place the flat metal shelving<br />
pieces aside. We will color them later. If you do have wooden<br />
shelf inserts, you can apply RUST Effect Spray only to the sides<br />
of the metal shelves as the inner parts will be covered by the<br />
wood inserts. Once all these metal parts were dry, we grabbed<br />
our Montana RUST Effect Spray in Brown Orange which is lighter<br />
and added some highlighting touches. This made the effect look<br />
more organic and natural as if our shelves had aged and weathered<br />
naturally outside in the elements.<br />
The final touch was to add color. Using our favorite Montana<br />
GOLD colors, we took our first pre-primed wooden shelf<br />
insert and applied one color. Spraying in slow sweeping motions<br />
from side to side, we ensured that our coats went on evenly.<br />
You can recoat once dry if you desire. We chose to change<br />
color for each shelf, however, you could use one throughout if<br />
you prefer. If your shelves are all metal, the same technique applies.<br />
Apply one color to each pre-primed shelf insert, and work<br />
in sweeping motions from side to side. A small tip; why not try<br />
the Montana Flat Jet Cap medium on your Montana GOLD cans<br />
when painting the flat surfaces. It gives a great finish making it<br />
easy to avoid drips and inconsistencies.<br />
All the hard work was now done! Or at least most of it. We<br />
left all our pieces to dry for 24 hours or more. Even though everything<br />
already looked great, before we put it all back together<br />
there was only one last step we wanted to take. Turning to our<br />
trusty Montana VARNISH Spray in the finish of your choice (we<br />
chose GLOSS), we applied thin even coats to all pieces (metal<br />
and wood) as desired. This was the icing on the cake that not<br />
only gave our shelves a look in one singular finish, but also protected<br />
our shelves from scratches, chipping, UV exposure, and<br />
general wear and tear. Again, we left it all to dry overnight before<br />
putting the shelves together.<br />
Although there are only 1-2 hours of actual work, the whole<br />
project would need to be planned over at least 3-4 separate<br />
sessions. One for sanding and priming (allow to dry), one for applying<br />
the color (allow to dry), one for applying the varnish (allow<br />
to dry), and the final to put it all together again. Able to be done<br />
by all skill levels, you are bound to have fun with this project<br />
whether you‘re a beginner or a pro. Now to figure out what to put<br />
in our cool new shelving?<br />
Well done and Happy Crafting!<br />
MATERIALS USED<br />
• Montana RUST Effect Spray Brown<br />
• Montana RUST Effect Spray Orange<br />
• Montana Metal PRIMER Spray<br />
• Montana Universal PRIMER Spray<br />
• Montana GOLD Lychee<br />
• Montana GOLD Light Lilac<br />
• Montana VARNISH Spray Gloss<br />
• Metal shelving<br />
• Wooden shelf inserts (optional)<br />
• Fine sandpaper<br />
• Gloves<br />
• Mask<br />
• Drop Sheet
Makeover<br />
RUST Effect and Color Shelving<br />
44
allspraypainted <strong>Magazine</strong><br />
45
46<br />
Pantone Inspired<br />
Colorway 2021<br />
BRINGING YOUR SPACE UP TO DATE
Makeover Pantone Inspired Colorway 2021<br />
48<br />
The Pantone color trends have been major influencing trends for design, fashion,<br />
homewares, and all things color for many years. And we must be honest,<br />
we think they get it pretty right most of the time. Each year their team introduces<br />
a new set of colors that inspire both independently, as well as when they are<br />
together as a colorway. „So, what are the 2021 colors this year?“, we hear you<br />
asking. The colors announced for 2021 are Ultimate Gray and Illuminating. Colors<br />
that are both solid, uplifting, optimistic, and warm. All the things one needs, after<br />
putting a year like 2020 behind us.<br />
The whole thing got us thinking, and you guessed it, we got inspired. The result<br />
was a Pantone-inspired colorway project in celebration of the 2021 colors. And<br />
of course, you can also find similar colors within the Montana color ranges in a<br />
variety of their paint lines. We chose Montana METALLIC Silver, Montana GOLD<br />
Asphalt, Vanilla, and Easter Yellow. Interested in seeing what we did, Read on.
allspraypainted <strong>Magazine</strong><br />
HOW WE DID IT<br />
The European winter is ending, the sun is shining again, and the<br />
new 2021 Pantone colors have been announced. What a great<br />
opportunity to update our office or our workspace. Or any<br />
other room you think needs it. Our focus was on the ceramic<br />
planter pots that housed our little cacti, a wooden desktop organizer<br />
that was begging for a facelift, a hole punch as we hadn‘t<br />
thought of that before, and a complimentary piece of a wooden<br />
board (or MDF particle board) for general decoration and surface<br />
protection.<br />
CERAMIC PLANTER POTS<br />
The small white planter pots were ambient decoration on our<br />
desks up until now. Therefore, it occurred to us to bring them to<br />
the fore a little. Starting with the biggest one, after it was cleaned<br />
and dried, we applied a complete coat of Montana GOLD<br />
in the color Easter Yellow. Inside and out, we sprayed one side<br />
while in a standing position, the other upside down once the inside<br />
had dried. We then allowed the whole pot to dry and then<br />
masked the top half off with our masking tape so that it would<br />
stay yellow where covered. While we were using the tape, we<br />
also masked triangular shapes into two of the small pots which<br />
we were going to spray a different color each. One pot was<br />
left completely white as a complementary color to our wooden<br />
board, which we will get to later. The remaining half of the big<br />
pot was sprayed with Montana METALLIC Effect Spray in the color<br />
Silver, and the two smaller pots had their triangles painted in<br />
either Asphalt or Easter Yellow from the Montana GOLD range.<br />
We left them all to dry overnight.<br />
WOODEN DESKTOP ORGANIZER<br />
Our wooden desktop organizer was one of those classic musthaves<br />
that gets daily use on our desk and was more than overdue<br />
that we gave it a little color. Ours was smooth and clean,<br />
but you may need to lightly sand with fine sandpaper, clean, and<br />
dust off in preparation for painting. And the rest was easy. Take<br />
the draws out, place it all on our drop sheet, spray, let dry, turn,<br />
and repeat. You can do multiple coats if desired. Let it all dry<br />
overnight, place the draws back in, and it‘s ready to go.<br />
HOLE PUNCH<br />
The hole punch is one of those instruments that always gets looked<br />
over. Not this time! We removed any loose parts that could<br />
be reapplied, gave it a clean and a dry, and then sprayed it with<br />
the Montana GOLD color Vanilla. Once dry we reapplied anything<br />
we removed, and it was ready to go back into service.
Makeover<br />
Pantone Inspired Colorway 2021<br />
50<br />
WOODEN BOARD<br />
Our little wooden board was a logical add-on to our new look<br />
workspace. Ours was a piece of MDF that was clean and smooth.<br />
This or any other clean and smooth wood could be used. If required,<br />
give it a light sanding with some fine sandpaper and then<br />
clean it off in readiness for painting. You can either spray the<br />
whole board the color you want to start with on both sides and<br />
leave it to dry or mask off the area you want to seal off and apply<br />
your first color to the unmasked section. Once dry, repeat this<br />
process by covering the already painted side and cover the side<br />
you want to apply the second color onto. We recommend coating<br />
the whole board once on both sides if it is thin, to avoid it<br />
warping if only one side is covered. Our color combination was<br />
Montana GOLD Vanilla and Asphalt.<br />
Naturally, remember to shake all cans well for 2-3 minutes before<br />
use so you can hear the mixing ball moving freely. If required,<br />
turn the can upside-down and remove the nozzle, allowing the<br />
back safety ring to fall out. Reapply the nozzle and do a test<br />
spray in a direction away from everything.<br />
This is an easy project that is ideal for any level. There is about<br />
an hour of work involved to complete all pieces, but it could be<br />
faster if you chose straight color applications rather than masking<br />
and creating application shapes. You can increase or decrease<br />
the difficulty by doing simple or complicated masking<br />
work. When it‘s all done, you can look at your fantastic handy<br />
work and feel like a Scandanavian designer in your own home or<br />
office. Well done and Happy Crafting.<br />
MATERIALS USED<br />
• Montana GOLD Asphalt<br />
• Montana GOLD Vanilla<br />
• Montana GOLD Easter Yellow<br />
• Montana METALLIC Silver<br />
• Ceramic planter pots<br />
• Wooden desktop organizer<br />
• Hole punch<br />
• Wooden board (or MDF particle board)<br />
• Sandpaper (optional)<br />
• Masking tape<br />
• Gloves<br />
• Mask<br />
• Drop Sheet
<strong>Allspraypainted</strong> Lookbook 51
52<br />
RUST Effect<br />
Office Update<br />
NO NEED TO WAIT FOR THE ELEMENTS
Interior<br />
RUST Effect Office Update 54
allspraypainted <strong>Magazine</strong><br />
55<br />
Office spaces are not just places of business. To work well in an office, it is<br />
ideal if it makes you happy to be there, that it inspires you, and motivates you so<br />
you can work efficiently with discipline. At best, your office puts you in a good<br />
mood when you go there to work. But this is not always the case. So what are<br />
your options? Either imagine it is more inspirational than it really is, or take matters<br />
into your own hands and make somewhere that brings the best out of you.<br />
We chose the latter, and with a little help from the new Montana RUST Effect<br />
Sprays, we created a RUST Effect Office Update.<br />
HOW IT WAS DONE<br />
The items we worked with for our RUST Effect Office Update were a metal desktop<br />
lamp, a recycled food tin, some metal bookends, and a circular desktop organizer. These<br />
items were already at home on our desk, so it was an easy choice. You could choose<br />
to use other functional metal objects that you already have, or take a look in any kind of<br />
homewares, hardware, or furniture stores (like IKEA) that sell many various items that<br />
you may like. The most important thing is they are all clean, dry, and free of dust and<br />
oils.<br />
With your painting area prepared, drop sheet laid down, gloves and mask on,<br />
and your cans all shaken for 2-3 minutes or more, pick up the first item of your choice<br />
and spray it evenly with the Montana Metal PRIMER Spray. In the case of the desktop<br />
lamp, make sure your light bulb is removed, the cord is NOT PLUGGED IN and covered<br />
with masking tape to protect it from being covered by any spray. It is also important<br />
that the fitting where the wires and bulb normally is has been covered well with some<br />
scrunched paper or sealed off completely with masking tape. Repeat this process with<br />
all your items spraying at approximately 15cm distance from each item. Then let them<br />
all dry.<br />
The second step is applying your first coat of Montana RUST Effect Spray in the<br />
color Brown. By the time you have managed to spray all the items, they should be dry<br />
enough to add the second coat which will be with the RUST Effect Spray color Brown<br />
Orange. Only apply the Brown Orange in blotches as you desire. This will give each item<br />
an organic look of rust at various stages as if it had been left out in the rain. When you<br />
are happy with your result, leave all items overnight to dry.<br />
You are now at the final stage of your RUST Effect Office Update. To seal your<br />
items and give them protection against scratching, it is time to apply your preshaken<br />
Montana VARNISH Spray. We suggest Semi-Gloss or Matt as this is closest to the matt<br />
look of natural rust. However, you could also use VARNISH Gloss should you prefer a<br />
shiny finish. As soon as your desktop lamp is dry enough to handle, remove any protective<br />
tape or papers you applied previously.
Interior<br />
RUST Effect Office Update<br />
56<br />
And you‘re done, and everything turned out great! This is a great project for all<br />
skill levels and you only need about 30 minutes of actual work time not considering the<br />
drying time. There is a good chance you may not be able to decide what should now go<br />
where. But that‘s OK, just swap things around from time to time and you will feel you<br />
are creating a completely new office space each time. Well done and Happy Crafting!<br />
MATERIALS USED<br />
• Montana RUST Effect Spray Brown<br />
• Montana RUST Effect Spray Orange<br />
• Montana PRIMER Metal<br />
• Montana VARNISH Spray Matt<br />
• Desktop lamp<br />
• Metal bookends<br />
• Recycled metal food tin<br />
• Circular metal desktop organizer<br />
• Masking tape<br />
• Gloves<br />
• Mask<br />
• Drop Sheet
58<br />
How to Marble with<br />
Spray Paint<br />
ORGANIC EFFECTS WITH NOTHING MORE THAN COLOR
DIY How to Marble with Spray Paint<br />
60<br />
“Everyone is an artist.” There is nothing more disheartening than hearing that<br />
if you don‘t relate to it but still love being creative. If this is the case, maybe a<br />
technique like marbling is just the right way to discover the artist within you.<br />
With little more than some Montana GOLD Spray color, a bucket of water, and<br />
natural vases, you can make artwork that everyone will appreciate. But most of<br />
all, even yourself! It‘s easy, fast and all you need to do is read on to make it happen.
61<br />
HOW WE DID IT<br />
Any vase, plant potter, or terracotta object you have in your home is a potential candidate<br />
for this project. And if there isn‘t anything at home, a trip to the local hardware<br />
store, homewares, or decor shop will have you ready to start in no time. The ideal color<br />
base for the object is white, in a matt finish. However, don‘t be afraid to experiment with<br />
different colors and finishes.<br />
Ensuring your vases, pots, or objects of any natural orientation are clean, dry, and<br />
free of dust and oils, the next step is to prepare all your cans for use. Remove the nozzles<br />
and turn your cans upside-down, allowing the black safety ring to fall out. While in<br />
the upside-down position, tap each can in the palm of your hand till you hear the mixing<br />
balls move around. Then shake the can well for 2-3 minutes so the mixing ball moves<br />
freely, reapplying the nozzle when you are ready to spray. Test spray the can away from<br />
any other surfaces to ensure the cap is on correctly and the can is working perfectly.<br />
In your bucket of water which is on your protected spray area, spray one, two, or<br />
any number of the Montanan GOLD colors you have chosen onto the top of the water.<br />
You will see the color float on the water‘s surface. We chose one color at a time for a<br />
„less is more“ look. However, If you choose to use multiple colors, the effect will vary.<br />
Dip your object slowly into the water which allows the color to adhere to your object<br />
as it submerges. As you remove the object, twist or move it slightly to add the effect<br />
of movement to the color adhering to the object. Place in a clean area to dry. The hard<br />
work is already done. Once completely dry, you could choose to apply some Montana<br />
VARNISH Spray in the finish of your choice on the outsides of your objects to enhance<br />
and protect them. Or just leave them natural if you prefer. With a scrap cloth or paper,<br />
place on the top of the water to absorb any remaining paint. Do not pour the remaining<br />
water into the drain or waterways and allow the remaining water to evaporate.<br />
It doesn‘t get much easier than this! This project can be done by any skill level and<br />
having fun while doing it is guaranteed. Working time is minutes once you have sourced<br />
and cleaned the vases or objects you want to use. And when somebody asks, „Wow,<br />
where did you get those cool vases?“ You can stand up tall and say, „I made them“.<br />
Well done and Happy Crafting!
DIY<br />
How to Marble with Spray Paint<br />
62<br />
MATERIALS USED<br />
• Montana GOLD Poison Light<br />
• Montana GOLD Malachite<br />
• Montana GOLD Light Blue<br />
• Montana GOLD Viola<br />
• Montana VARNISH Spray<br />
• Vase<br />
• Plant potter with natural surface<br />
• Bucket of water<br />
• Gloves<br />
• Mask<br />
• Drop sheets<br />
• Protective material
64<br />
Glass Paint<br />
Bathroom Jar<br />
Makeover<br />
USING LIGHT TO CHANGE THE MOOD
Makeover<br />
Glass Paint Bathroom Jar Makeover<br />
66
allspraypainted <strong>Magazine</strong><br />
67<br />
Over our lifetime, we spend a lot of time in our bathrooms. Often, we forget that<br />
a space like this can influence the mood of some of the most intimate time we<br />
spend alone. So why should this room just be hygienic and practical, when it<br />
can be warm and inspiring as well. With the possibilities offered by the Montana<br />
GLASS Paint color range, we came up with a great idea that can add a bit of light<br />
and life to your bathroom.<br />
BEFORE<br />
It‘s clean, it works, and it doesn‘t smell bad. For some people,<br />
this is enough and the time they spend in their bathroom does<br />
not warrant the worry about how it looks. For others, a bathroom<br />
is a place of refuge in the comfort of a hot bath in winter, a space<br />
for reinvention in front of the mirror before a big night out, or<br />
simply a room you can lock the door and be alone for a quiet<br />
moment. The decor in your bathroom can play a big role in the<br />
mood you experience while in this, the most intimate of rooms in<br />
your house. For this project, we focused on some glass jars with<br />
wood or bamboo air-tight lids. Again, they are clean and functional.<br />
But are they inspiring? Using only some adhesive plastic<br />
film (book covering film), scissors, a Montana ACRYLIC marker<br />
(or marker of your choice), a piece of cardboard, gloves, mask,<br />
drop sheet, Montana GLASS Paint colors (we used Black, Coral<br />
Red, and White), and of course glass jars, we will bring in some<br />
new light into your bathroom.<br />
Ensuring the jars are clean and free of dust and oils, remove<br />
the wooden/bamboo lids and place them somewhere<br />
safe away from your painting space. With your shaken Montana<br />
ACRYLIC marker, on your piece of cardboard, draw shapes as<br />
desired of what you think attractive labels would look like. We<br />
chose diamonds, circles, and rounded edge rectangles of various<br />
sizes. We cut these out and they then became templates for<br />
our plastic adhesive film. On the reverse side of the film, layout<br />
the cardboard shapes and trace around them with your ACRYLIC<br />
marker. Then repeat the process and cut the drawn shapes out<br />
of your adhesive film. Carefully peel off the paper backing and<br />
position the adhesive film shapes on the front of each jar as desired.<br />
Where the film is applied, clear glass will remain, and the<br />
rest of the jar will be covered with GLASS Paint color.<br />
With all adhesive labels applied and gloves on, place your<br />
hand inside each jar one at a time, and with the carefully shaken<br />
(2-3 minutes) Montana GLASS Paint color of your choice in the<br />
other hand, spray your glass paint color on over your drop sheet<br />
at 15-25cm away from the jar. Ideally, the GLASS Paint applies in<br />
a thin even layer to avoid drips. Should you want to increase the<br />
opacity, reapply coats as desired. Once dry, carefully remove<br />
your adhesive film shapes, leaving the clear glass space in their<br />
places. And that‘s it! Nice job.
Makeover<br />
Glass Paint Bathroom Jar Makeover<br />
68<br />
AFTER<br />
After allowing to dry overnight, your glass jars are now filled with<br />
the lids on, and back into service. What was plain transparent<br />
functionality, is now frosted glass variations of White, Coral Red,<br />
and Black, which warmly hold all your bathroom necessities like<br />
soap, toothbrushes, or cotton buds. The transparent effect of<br />
light passing through each vessel adds both a personal touch to<br />
your bathroom experience and a varying mood as the radiating<br />
light changes during each time of the day.<br />
Your new GLASS Paint makeover is not only easy to keep<br />
clean and practical, but it has also brought a whole new level of<br />
warmth to the time you spend in front of the mirror. And all this<br />
in as little as 5 minutes of creation time per jar. Not only will feel<br />
better within your bathroom space, so will those you share the<br />
space with.<br />
This project is super easy and can be done by any level of<br />
DIY ability. There is no reason why anyone cannot give it a go<br />
and get the results they want. And of course, if you didn‘t have<br />
glass jars in your bathroom before, for safety reasons, make sure<br />
to give a little attention to where you put them. Now you can go<br />
back to your hot bath and enjoy the new GLASS Paint ambiance.<br />
Happy Crafting!
allspraypainted <strong>Magazine</strong><br />
69
70<br />
Three New Takes<br />
On The Halloween<br />
Pumpkin<br />
HALLOWEEN, WHERE EVER YOU ARE
Seasonal Three New Takes On The Halloween Pumpkin<br />
72<br />
Pumpkins. A tasty source of nutrients and an ideal ingredient for healthy autumn<br />
meals. But is that what most people think of when they see the first ripe pumpkins?<br />
Nope... they think of Halloween, and so do we. With little effort, we have 3<br />
new Halloween pumpkin ideas that can help you add some Halloween flavor to<br />
your home or workspace. Read on, and get your pumpkin on.<br />
BEFORE<br />
It‘s pumpkin season and the supermarkets, farms, and greengrocers<br />
of the world have all their pumpkin wares on display making<br />
it irresistible to not get on board with the Halloween spirit.<br />
The trick is to choose with your eyes, and not with your stomach.<br />
Most likely three or more pumpkins will stand out as perfect Halloween<br />
project candidates. Choose them, and take them home<br />
to clean and dry them.<br />
The first pumpkin will get the stone age treatment with a<br />
timeless finish of Montana GOLD Spray and Montana GRANIT<br />
Effect. Choosing the Montana GOLD color of your choice as a<br />
base (we recommend a white or soft color), shake all your cans<br />
for 2-3 minutes, prepare your painting space with some sort of<br />
drop sheet, and put on your gloves and mask in readiness to<br />
paint. Apply the color in soft sweeping motions from side to side<br />
from a distance of about 15-20cm. (This process will need to be<br />
repeated for all three pumpkins). Apply in thin even coats and<br />
repeat if desired. Once dry, take your shaken Montana GRANIT<br />
Effect colors (we chose Black and Light Gray), and apply in soft<br />
whispy bursts, only allowing it to land softly on the top of the<br />
pumpkin. You can choose to let it dry as-is, or apply a Montana<br />
VARNISH in the finish of your choice to seal the pumpkin on the<br />
following day. Pumpkin number one - done!<br />
The second pumpkin is for all those people that don‘t mind<br />
a little spookiness in their Halloween decor. Taking the second<br />
pumpkin you have, apply the Montana GOLD color Shock White<br />
or Montana Universal PRIMER Spray to the whole pumpkin. The<br />
lighter the pumpkin becomes, the better the Montana NIGHT<br />
GLOW can perform. Give your pumpkin plenty of time to dry,<br />
or leave it overnight, and then apply the first coat of Montana
allspraypainted <strong>Magazine</strong><br />
73<br />
NIGHTGLOW Paint. We chose NIGHTGLOW Effect Spray Luminescent Green, but you<br />
might prefer Luminescent Orange. Again, apply sweeping motions at a distance of about<br />
15-20cm to avoid drips apply. Allow 5 minutes or more to dry and reapply. The more<br />
coats you apply, the stronger the glow effect will work. Once the final coat as desired<br />
has been applied, leave your pumping to dry. Ideally in the sun, which is also how you<br />
need to charge the NIGHT GLOW paint generally for the paint to glow at night. In the<br />
evenings, place your pumpkin in the darkest corners you can find and turn off the lights.<br />
And watch your new scary pumpkin light up on its own. Pumpkin number two - done!<br />
The final pumpkin has a touch of METALLIC Effect to add a special something<br />
to its natural surface. Using a Montana GOLD color of your choice, spray your whole<br />
pumpkin from top to bottom. As with all the pumpkins before, allow to dry and turn over<br />
to cover the areas not covered previously. Repeat as desired. We chose Montana GOLD<br />
Shock White as a neutral base of which the METALLIC Effect could shine, however you<br />
may choose another color combination. Taking your pre-shaken Montana METALLIC<br />
Effect color, start by applying only to the top stem of your pumpkin. Then slowly proceed<br />
to move around in a contained circle as large as you like. Remember to stop well<br />
before the middle of the pumpkin so there is a clear contrast between the base color<br />
and the METALLIC Effect color. We chose METALLIC Effect Plum for its strong contrast<br />
to the Shock White base. For this pumpkin, it is important to spray at a closer range to<br />
the surface (approx. 5 -10cm), allowing the paint to gather in spots at the top of the<br />
pumpkin and drip down it. Luscious thick drips of metallic pigment goodness can now<br />
roll down your Halloween treasure. Leave to dry overnight before handling. Pumpkin<br />
number three - done!<br />
AFTER<br />
No longer do you look at your beautiful pumpkins wondering if you should cook them or<br />
use them for the Halloween season. It‘s clear, they have now become your new Halloween<br />
icons and are bound to inspire all those that are lucky enough to see them. Should<br />
you have preferred one of the three more than the others, why not continue the project<br />
and create more with new colorways or themes (e.g. Glow/Granit/Metallic). Or if you<br />
want to save some of the ideas for years to come, display the one in the style you like<br />
and save the others for next year. This project is super easy and able to be performed<br />
by any skill level. The important points to remember are to ensure your pumpkins are<br />
clean and dry, and that your cans are always shaken well for 2-3 minutes before use so<br />
you can hear the mixing balls moving freely. Everything else is subject to your creativity.<br />
Well done and Happy Crafting!
74<br />
Recap:<br />
allspraypainted<br />
meets Carolin Kaiser<br />
CATCHING UP AGAIN WITH CAROLIN KAISER<br />
CREATIVITY BEYOND THE PANDEMIC
allspraypainted meets Carolin Kaiser<br />
76<br />
In 2020, the team at allspraypainted was more than excited to introduce the<br />
new allspraypainted meets project. The idea behind it was a breath of creative<br />
fresh air and a window into the creative processes of some of the most innovative<br />
professionals the world has to offer. To kick start the series we met the<br />
very talented and creative German artist/illustrator/designer/commercial artist,<br />
Carolin Kaiser. While talking to the Mannheim resident who is also a confessed<br />
80s girl and lover of all things from that era, we learned that she had a profound<br />
connection between her creative process and music. Not to mention that she<br />
was an advocate of sketching nearly every day. But what we didn‘t know at the<br />
time is that the world was about to change and that a pandemic was coming.<br />
Fast forward a little over a year, and we take a small moment to reflect on how<br />
the Coronavirus has affected the creative process of nearly every professional<br />
and personal creator on earth. Lockdown, restrictions, a new way to be educated<br />
and work, changes of how we have time and how we use it. It got us thinking<br />
about how artists have coped, or are coping with the “new world”. Why not<br />
speak to an artist we thought, and get some feedback from the source. That‘s<br />
when we decided to reach out to our very first feature artist Carolin Kaiser and<br />
see if she would share some thoughts with us. Lucky for us, she was not only<br />
happy to speak to us but she also invited us into her studio to see what she was<br />
working on at the moment. Here is how the visit rolled out.
allspraypainted <strong>Magazine</strong><br />
ALLSPRAYPAINTED<br />
What have you been up to since we last spoke in<br />
2020?<br />
CARO<br />
During the first three lockdowns, not that much actually<br />
happened. My daughter, like many other children,<br />
spent a lot of time at home. It was important<br />
for me to stay relaxed and not lose my nerve. Therefore,<br />
the priority for me at this time was to try and<br />
achieve a relaxed „togetherness“ at home. I started<br />
gardening and invested a lot of time and energy in it.<br />
The garden was the perfect retreat for me from all<br />
the dreariness and chaos. And gave me back a lot. I<br />
didn‘t do any major projects, but I drew in my sketchbook<br />
almost every night. You can say that I used the<br />
pandemic to expand my creative ideas fund, which I<br />
can now fall back on when the restrictions start up<br />
again. I also tested a lot of materials that I could use<br />
for future projects. That was a lot of fun too.<br />
ALLSPRAYPAINTED<br />
Has the way you work changed at all?<br />
CARO<br />
Nothing has really changed in terms of the implementation<br />
of my work, rather, my personal attitude<br />
to making it. I have become more relaxed. I don‘t get<br />
so agitated anymore when something doesn‘t work. I<br />
have become more confident that I will find a way to<br />
make it work. On the one hand, because the Coronavirus<br />
made me aware of what is really important, and<br />
on the other hand because I have grown in myself. In<br />
times like these, you get to know yourself from another<br />
perspective.<br />
At the moment I am so full of power. So much so that I<br />
have rarely been like this before. I‘m soaking up everything<br />
new. Looking for new input and new people. I<br />
missed socializing with people the most. That‘s why<br />
I‘m so happy about all the new projects I am involved<br />
in and the people I‘m getting to know.<br />
A relaxed Carolin created her artwork right before<br />
our eyes as we asked our questions and shared<br />
our thoughts. The works she was working on took a<br />
slightly different form from what we had experienced<br />
from her in the past, however still carried an obvious<br />
connection with all that had come before it. Of<br />
course, we were still looking at her unique take on<br />
80s color schemes, use of ACRYLIC markers and<br />
paints, and imaginative and retrospective motifs like<br />
the palm tree. But now, with some diverse new materials<br />
in addition like metal mesh, glass, wood and<br />
concrete as a basis, we were also seeing the fruits<br />
of her lockdown experimentation in the form of the<br />
use of Montana GLASS Paint and the use of tools like<br />
small angle grinders which assisted her in cutting<br />
and forming metal.
allspraypainted meets<br />
Carolin Kaiser<br />
78<br />
Watch the video via<br />
montana.link/caro<br />
@allspraypainted
allspraypainted <strong>Magazine</strong><br />
79<br />
It is obvious to see that physical lockdown at home<br />
has not meant mental lockdown for Carolin‘s design<br />
process, idea development, or material experimentation.<br />
Taking what she knew to a new level, we watched<br />
on as the artworks progressed and the questioned<br />
rolled on.<br />
ALLSPRAYPAINTED<br />
Is spray paint still your favorite medium? What materials<br />
are you working with right now?<br />
CARO<br />
At the moment I‘m working with different materials.<br />
Currently, I‘m even making paper collages again. But<br />
I‘m reluctant to focus on one medium. I like the variety<br />
and challenge of testing new things, expanding<br />
my material know-how, and exploring new materials<br />
generally. New materials offer new possibilities.<br />
ALLSPRAYPAINTED<br />
What was the process of creating this particular project,<br />
and which part was your favorite?<br />
CARO<br />
The first step, as it always is, is the analog sketch.<br />
Then I convert it into a digital graphic so I can make<br />
the color selection and improvements. I also needed<br />
a production file for this project as the glass elements<br />
had to be cut by a glazier. I also needed templates for<br />
the wood elements as these I cut them out with the<br />
decoupage saw. After that, it‘s sanding, priming, and<br />
painting. I cast the bases from concrete and sawed<br />
them from wood.<br />
CARO<br />
No, no change. I still prefer analog and the handmade<br />
aspect to my work. I don‘t think that will ever change.<br />
The only thing I would like to learn soon is animation.<br />
I would like to breathe more movement into some of<br />
my illustrations.<br />
ALLSPRAYPAINTED<br />
What are your plans for the future?<br />
CARO<br />
Get bigger! Take more risks! I‘m totally up for bigger<br />
formats, bigger collages, room-sized installations, or<br />
even crazier projects. I want to break out and grow<br />
beyond my limitations.<br />
In the end, three new unique artworks<br />
braced the world and we were a little<br />
more informed on what goes on in<br />
the mind of a creative professional in<br />
a time like these. We look forward to<br />
seeing where Carolin‘s journey takes<br />
her and the artworks that are created<br />
during the process.<br />
The process of moving from a design to a finished<br />
object is the most fun for me. You can see and feel<br />
how something is created out of nothing. That is very<br />
fulfilling for me.<br />
ALLSPRAYPAINTED<br />
What is your biggest source of inspiration at the moment?<br />
CARO<br />
I think right now I‘m most inspired by life outside the<br />
door. Into the hustle and bustle. Feeling the vibration<br />
of the city and the people. Experiencing new stories.<br />
But also the colors and shapes of nature that surround<br />
me outside. I have the feeling that this summer<br />
I have perceived the colors much more intensely. It<br />
has surprised me again and again how intense and<br />
luminous the natural world is.<br />
ALLSPRAYPAINTED<br />
How balanced is the proportion of digital to analog<br />
in your artwork now? Has the pandemic changed the<br />
balance of scales at all?
80<br />
Abstract Patterned<br />
Floor Coverings<br />
PUTTING SOME COLOR UNDER YOUR FEET
Interior<br />
Abstract Patterned Floor Coverings 82<br />
Due to our stature as upright human beings, looking down is not often the first<br />
instinct we have when walking into a room. But whether people are aware of it or<br />
not, the floor plays a big part in our environment. It is the basis of every step we<br />
take, it is the surface of which all things support themselves, it is the substance<br />
on which we build everything up from. And in the end, it‘s the place where everything<br />
ends up when it falls. So why not personalize it with some charming floor<br />
coverings and some creative abstract color? With the help of some Montana<br />
GOLD can colors and some natural fiber floor rugs, that‘s exactly what happened.<br />
Sound inviting? Read on.
allspraypainted <strong>Magazine</strong><br />
83<br />
BEFORE<br />
Often the rugs required for this project already exist and have<br />
their place in apartments and homes on the floor. The rugs we<br />
chose for this activity were made of natural fibers and were beige.<br />
However, it is possible to use other rugs, mats, or pieces of<br />
carpet should they be available. The ideal materials are natural,<br />
non (or minimally) treated materials like cotton, jute, or wool.<br />
This is not a must though. Natural materials are better for the environment,<br />
have a tendency to absorb the paint better, and will<br />
be more durable to wear and tear later when in use. Shape and<br />
size are not relevant. If it works for your space, then it is possible<br />
to give them some new abstract color.<br />
The steps for this project were simple and able to be undertaken<br />
by any DIY or creative skill level. Once the rugs are<br />
chosen, found, or purchased, ensure that they are completely<br />
dry, clean, and free of dust and oils. If required, grab a piece of<br />
paper and a pencil, and roughly sketch your rug/mat shape(s)<br />
out a few times. Then, consider how you might like to divide these<br />
spaces into squares, slices, or geometric shapes. Once the<br />
rough ideas are decided upon, either check your Montana GOLD<br />
can supply at home and see which colors you might want to use<br />
and combine, or look at a Montana GOLD color chart and pick<br />
the colors you want to buy for your designs. We chose a mixture<br />
of the earthy colors Shrimp, Cappucino, Shock Brown, Caffe,<br />
Manilla Green, and Mushroom to compliment the natural beige<br />
base color of our rugs.<br />
Assuming you have chosen your colors, shaken your cans<br />
vigorously for 2-3 minutes until you hear the mixing balls moving<br />
freely, have your mask and painting gloves on, and have prepared<br />
your painting space, it is now time to carefully apply the first<br />
color to the shape you have masked off with masking tape and<br />
some sturdy paper or cardboard. This will ensure the rest of your<br />
rug is protected from overspray, and the shape you have created<br />
with your masking tape is crisp, clean, and exactly as you wanted.<br />
Spray in thin even coats from about 15cm from the surface<br />
of the rug(s), in a sweeping motion from side to side. Remove the<br />
masking materials shortly after having applied the color. Once<br />
the shape you have just painted is touch dry or more, repeat<br />
this step to create the layers and shapes of color you intended.<br />
It may be necessary to take off your gloves when removing the<br />
paper from the masked areas and setting up the new color shapes.<br />
We chose to leave selected areas of our rug uncolored so<br />
that there was a balance between positive space (the added color)<br />
and negative space (the rug‘s natural color).
Interior<br />
Abstract Patterned Floor Coverings<br />
84<br />
AFTER<br />
The paint has dried overnight. The paper and masking tape used to cover the nonpainting<br />
areas have been removed, and our gloves and painting masks have long been<br />
removed and are back in their storage spaces. What we are left with is some fantastic<br />
abstract compositions that make our rugs practical surface coverings, decoration, and<br />
now, even pieces of art.<br />
The cleaning instructions for the care of your rugs will be the same as was before<br />
you decorated them. However, it must be considered that friction, excessive water<br />
contact, or agitation could lead to the damaging of your added color. If mud or dirt is<br />
deposited on the rugs, it is best to allow them to dry and then brush off with a soft<br />
brush. Or if you want to avoid and chances of them being damaged, use them in rooms<br />
where clean feet are more likely to come in contact with them.<br />
With a view outside, a cup of something warm in our hands, and the mood of the<br />
light in the room just perfect for taking a moment to breathe and reflect, how nice it is<br />
to look down at the wonderful works of art that reside under our feet. Well done and<br />
Happy Crafting!
allspraypainted <strong>Magazine</strong><br />
85
86<br />
Colorblock<br />
Storage Boxes<br />
THE KEY TO SIMPLICITY IS COLOR
Storage<br />
Colorblock Storage Boxes<br />
88<br />
Often in life, overthinking something can be just as fatal as not thinking about<br />
it at all. Storage and transport are two of those classic topics that fit perfectly<br />
into this category. Moving things can be easy if you have the right tools for the<br />
job, but difficult if you don‘t. Storing things can be just as easy if you have ample<br />
space, but tricky if space is at a premium. With this in mind, we couldn‘t help but<br />
notice how effective the humble plastic fruit and vegetable box is at doing both.<br />
Strong, lightweight, space-efficient, stackable, cheap, and hang on... it can be<br />
aesthetic too. That is if you give it a coat of paint. And that‘s when we got an<br />
idea!<br />
With access to plastic boxes being easy and cheap, we decided to create some<br />
fruit box color blocks with some of our favorite Montana GOLD can colors. If you<br />
want to give it a go too, read on.
Storage<br />
Colorblock Storage Boxes<br />
90<br />
HOW IT WAS DONE<br />
Depending on where you live, the trend toward bringing your<br />
own bags or foldable boxes to the supermarket may already be<br />
the norm. If this is the case, you will regularly be able to find<br />
foldable or rigid plastic boxes on offer at supermarkets, big-box<br />
hardware stores, or homewares stores. If, however, this is not<br />
the case for you, remember the foldable shopping box has its<br />
origins as the classic fruit and vegetable box. And if you visit<br />
your local market or greengrocer, you can probably access some<br />
there, or find out where they get theirs from.<br />
Once you have your plastic boxes, if required, give them a<br />
good clean with some soapy water, and be sure to rinse off all<br />
the soap residues. If yours are new and clean, make sure they<br />
are clean, and free of dust and oil, and above all completely dry<br />
before applying any paint. Believe it or not, the hardest part is<br />
already behind you. Our boxes were pre-colored originally, so<br />
our color choices (as listed in the materials list) were made with<br />
the idea that they would work well with the color of the plastic.<br />
If your boxes are black, or a color you don‘t like, you have the<br />
option of painting them directly with the color of your choice, or<br />
you can prime them first with Montana Plastic PRIMER Spray, or<br />
with the Montana GOLD color Shock White.<br />
Prepare the sections you want to paint of your clean dry<br />
boxes by applying masking tape over the areas you want to keep<br />
the color of the plastic. If you have decided to paint the whole<br />
box, skip this step, and place the boxes on your drop sheep with<br />
enough space so you can move around each box freely in readiness<br />
for painting. If you are only painting half of each box as<br />
we did, place the box on the side that is masked, ensuring easy<br />
access to the areas you want to paint.<br />
It is now time for that ritualistic moment once you have<br />
your mask and gloves on and your space is prepared for painting.<br />
Time to shake your cans for 2-3 minutes so that you can<br />
hear the mixing balls moving freely, turn the can upside-down<br />
removing the nozzle to allow the safety ring under it to fall out.<br />
Reapply the nozzle and turn the can the right way up triggering<br />
it away from everything to ensure the paint is flowing freely. In<br />
smooth sweeping motions from side to side, spray your chosen<br />
color to your chosen plastic box at a 15-20cm distance. Allow to<br />
dry and then turn each box over for the second coat if desired.<br />
Once the boxes are dry, remove the masking tape (if applicable)<br />
to expose your cool two-tone finish. Leave them to dry overnight<br />
so the paint can cure before using the boxes to store or move<br />
anything. You are done!<br />
This is a super easy project that can be done by creators of<br />
any skill level. Each clean box only takes up to 5 minutes to mask<br />
up and paint. Masking different areas or in different patterns<br />
could also add another design element to your boxes but could<br />
also add some time to the completion of each box. They look so<br />
good; the hardest part will be deciding what goes in them. Well<br />
done and Happy Crafting!
allspraypainted <strong>Magazine</strong><br />
91
93
94<br />
Colorful Christmas<br />
Tealight Candle<br />
Holders<br />
ADDING COLOR AND LIGHT THIS CHRISTMAS
Seasonal<br />
Colorful Christmas Tealight Candle Holders<br />
96<br />
Getting into the Christmas spirit is usually<br />
pretty easy. But once all of the old<br />
tricks like the Christmas tree and baubles<br />
are unpacked, hanging up, on display,<br />
or put into their position like every<br />
year, it‘s often the case that we are left<br />
with the feeling that a little something<br />
extra is needed. Light can often be the<br />
difference between feeling Christmas<br />
or just doing it. And natural light in the<br />
form of candlelight is just the thing to<br />
make your Christmas more personal<br />
and intimate. This year, allspraypainted<br />
has just the project for you to add a<br />
little color and light to your Christmas.<br />
Keep reading to learn more about this<br />
exciting project.
allspraypainted <strong>Magazine</strong><br />
97<br />
HOW WE DID IT<br />
At the basis of our idea to add color and light to our Christmas<br />
this year is the very humble tealight candle. This simple but beautiful<br />
candle offers a light that is soft, warm and is possibly the<br />
most easy-to-find candle available. After creating simple concrete<br />
bases to house our tealight candles, we will add a little of<br />
our favorite colors and the rest is placement.<br />
Find a plastic vessel that has the shape you would like for<br />
your tealight candle bases. Soft plastic bottles are easily available<br />
and easy to cut. Alternatively, you may choose something<br />
like plastic plant potters which only need to have the holes in<br />
their bases taped up to hold concrete. Find the size you like that<br />
must be at least slightly larger than the tealight candle itself (or<br />
more). Make sure your base vessel is clean, then cut it slightly<br />
higher than the height you would like your holder to be. Following<br />
the instructions to the ready-mix craft concrete or similar<br />
product that you found in your local hardware or craft store,<br />
mix the concrete mass to the desired consistency and pour it<br />
into your prepared plastic vessel(s) at the height you want your<br />
candle holders to be. Remember to have all the vessels prepared<br />
before starting to pour the concrete. If you want your candle<br />
holders at all at the same height, mark each vessel with a marker<br />
equally beforehand also. To make the space for your tealight,<br />
either press an unlit tealight into the wet concrete making the<br />
impression slightly bigger by gyrating slightly, or find another<br />
product (like another small plastic drink bottle), and place it in<br />
the drying concrete. Depending on the product you used, you<br />
may need to leave the tealight or bottle base in the concrete<br />
mold till it is dry if you are unable to remove it during the drying<br />
process. Once dry, turn the vessels upside down and carefully<br />
push the dried concrete out of the molds. Do this over a soft surface<br />
or onto some soft material to prevent them from breaking<br />
as they exit the mold.<br />
With the well-shaken Montana GOLD cans, and the painting<br />
space prepared and ready to use, take your masking tape<br />
and mask off the areas of your dry concrete holders where you<br />
do not want the paint to cover. Place the masked candle holder<br />
on your drop sheet leaving the exposed concrete areas accessible.<br />
Apply the color to each holder separately in smooth sweeping<br />
motions from side to side at a distance of about 15cm from<br />
the holder. Repeat as desired to get the opacity you wish. After<br />
5 minutes, remove the masking tape without touching the drying<br />
paint and allow all bases to dry overnight.<br />
Should you not want to keep all the candle holders in one<br />
uniform look, variations to your color application can be simply<br />
created by varying where you apply the masking tape to the<br />
concrete base, and where or how much concrete is covered in<br />
color. Other variations may be the type of concrete or modeling<br />
ready-mix you use to create the bases, which can offer alternative<br />
surface qualities.<br />
There is no more hard work to do now and apart from putting<br />
the tealight candles into your new holders and lighting them,<br />
the difficult part is figuring out where to put them and fighting<br />
the urge to keep making more.<br />
This is an easy project that is a beginner to intermediate in<br />
skill level, subject to the amount of effort required for mixing the<br />
concrete (or ready-mix base material) you choose. Should you<br />
want to alter the finish of your new colorful Christmas tealight<br />
candle holder, why not try one of the Montana VARNISH sprays<br />
available in Matte, Semi Gloss, and Gloss.<br />
What a great creative distraction from doing Christmas<br />
shopping or Christmas cooking. Pat yourself on the back and<br />
give yourself a big well done as you stare in the soothing light<br />
of your new Christmas tealight candle holders. Happy Crafting!<br />
MATERIALS USED<br />
• Montana GOLD<br />
• Soft plastic bottle bases<br />
• Planter pots or similar<br />
• Ready-mix craft concrete or similar<br />
• Tealight candles<br />
• A craft cutter or sturdy scissors<br />
• Masking tape<br />
• Marker (optional)<br />
• Gloves<br />
• Mask<br />
• Drop Sheet
Media Owner and Publisher:<br />
MONTANA-CANS /<br />
allspraypainted.com<br />
© 2021 allspraypainted.com<br />
All rights reserved.<br />
Reprinting, even in part,<br />
only with the approval of<br />
the publisher.<br />
MONTANA-CANS<br />
Häusserstraße 36<br />
69115 Heidelberg<br />
Deutschland<br />
Phone +49 (0) 6221 36 333 0<br />
info@montana-cans.com<br />
www.allspraypainted.com<br />
Creators:<br />
Vera from nicestthings.com<br />
Lisa from itsprettynice.com<br />
Rachel from thecraftedlife.com<br />
Martin from contact@deadsailor.de<br />
Carolin from carolinkaiser.de<br />
Nadine from nadinekolodziey.com<br />
Danny and Martin from schreiberpoetter.de
MEETS<br />
MORE ARTIST<br />
INTERVIEWS<br />
COMING SOON<br />
#ALLSPRAYPAINTED #ALLSPRAYPAINTEDMEETS #MONTANACANS
ALLSPRAYPAINTED.COM<br />
FOLLOW US @ALLSPRAYPAINTED<br />
505072