Create successful ePaper yourself
Turn your PDF publications into a flip-book with our unique Google optimized e-Paper software.
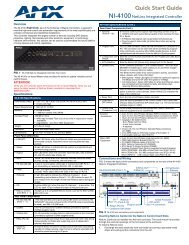
Cable Connections<br />
Power connection<br />
When you are ready to apply power to your <strong>SW8</strong>/<strong>12</strong> <strong>VGA</strong> <strong>Ars</strong> unit, connect the<br />
female end of the power cord to the AC outlet at the left edge of the rear panel,<br />
and connect the male end of the power cord to a <strong>12</strong>0/240 VAC power outlet.<br />
When power is applied all front panel LEDs light for one second, then go out.<br />
The LED for the previously selected input then comes on and remains lit until the<br />
current input is de-selected.<br />
100-240V 50/60Hz<br />
1.2A MAX<br />
Power connector<br />
I<br />
N<br />
P<br />
U<br />
T<br />
S<br />
Figure 2-6 — Power connector<br />
1<br />
2<br />
Computer video input connections<br />
Depending on the model (<strong>SW8</strong> or SW<strong>12</strong>) there are 8 or <strong>12</strong> video input ports on the<br />
rear panel.<br />
Each 15-pin HD female connector supports computer video signals with resolutions<br />
from <strong>VGA</strong> - QXGA and HDTV signals.<br />
10<br />
5 1<br />
15 11<br />
Female<br />
6<br />
Figure 2-7 Video input connectors<br />
<strong>SW8</strong>/<strong>12</strong> <strong>VGA</strong> <strong>Ars</strong> switchers monitor each input port for the presence of a<br />
horizontal sync pulse, which indicates the presence of a video signal. When<br />
detected, the video signal’s presence is reported on the switcher’s RS-232 control<br />
port. See chapter 3, “Operation and Control” for information on the Simple<br />
Instruction Set (SIS ) commands which can be used to communicate through the<br />
RS-232 port.<br />
The SIS command 0S requests the switcher to report the status of all inputs at once.<br />
The SIS command xS requests the status of specific port “x”.<br />
3<br />
4<br />
<strong>SW8</strong>/<strong>12</strong> <strong>VGA</strong> <strong>Ars</strong> • Installation and Operation<br />
2-7