Work Instruction for the Locator® Retentive System - Camlog
Work Instruction for the Locator® Retentive System - Camlog
Work Instruction for the Locator® Retentive System - Camlog

You also want an ePaper? Increase the reach of your titles
YUMPU automatically turns print PDFs into web optimized ePapers that Google loves.
<strong>Work</strong> <strong>Instruction</strong><br />
<strong>for</strong> <strong>the</strong> Locator ®<br />
<strong>Retentive</strong> <strong>System</strong><br />
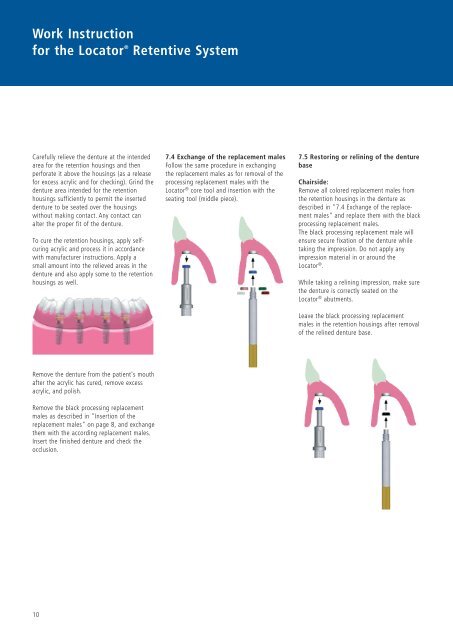
Carefully relieve <strong>the</strong> denture at <strong>the</strong> intended<br />
area <strong>for</strong> <strong>the</strong> retention housings and <strong>the</strong>n<br />
per<strong>for</strong>ate it above <strong>the</strong> housings (as a release<br />
<strong>for</strong> excess acrylic and <strong>for</strong> checking). Grind <strong>the</strong><br />
denture area intended <strong>for</strong> <strong>the</strong> retention<br />
housings sufficiently to permit <strong>the</strong> inserted<br />
denture to be seated over <strong>the</strong> housings<br />
without making contact. Any contact can<br />
alter <strong>the</strong> proper fit of <strong>the</strong> denture.<br />
To cure <strong>the</strong> retention housings, apply selfcuring<br />
acrylic and process it in accordance<br />
with manufacturer instructions. Apply a<br />
small amount into <strong>the</strong> relieved areas in <strong>the</strong><br />
denture and also apply some to <strong>the</strong> retention<br />
housings as well.<br />
Remove <strong>the</strong> denture from <strong>the</strong> patient's mouth<br />
after <strong>the</strong> acrylic has cured, remove excess<br />
acrylic, and polish.<br />
Remove <strong>the</strong> black processing replacement<br />
males as described in "Insertion of <strong>the</strong><br />
replacement males" on page 8, and exchange<br />
<strong>the</strong>m with <strong>the</strong> according replacement males.<br />
Insert <strong>the</strong> finished denture and check <strong>the</strong><br />
occlusion.<br />
10<br />
7.4 Exchange of <strong>the</strong> replacement males<br />
Follow <strong>the</strong> same procedure in exchanging<br />
<strong>the</strong> replacement males as <strong>for</strong> removal of <strong>the</strong><br />
processing replacement males with <strong>the</strong><br />
Locator ® core tool and insertion with <strong>the</strong><br />
seating tool (middle piece).<br />
7.5 Restoring or relining of <strong>the</strong> denture<br />
base<br />
Chairside:<br />
Remove all colored replacement males from<br />
<strong>the</strong> retention housings in <strong>the</strong> denture as<br />
described in "7.4 Exchange of <strong>the</strong> replacement<br />
males" and replace <strong>the</strong>m with <strong>the</strong> black<br />
processing replacement males.<br />
The black processing replacement male will<br />
ensure secure fixation of <strong>the</strong> denture while<br />
taking <strong>the</strong> impression. Do not apply any<br />
impression material in or around <strong>the</strong><br />
Locator ® .<br />
While taking a relining impression, make sure<br />
<strong>the</strong> denture is correctly seated on <strong>the</strong><br />
Locator ® abutments.<br />
Leave <strong>the</strong> black processing replacement<br />
males in <strong>the</strong> retention housings after removal<br />
of <strong>the</strong> relined denture base.