Hybrid Restorations with the CAMLOG Implant System (PDF
Hybrid Restorations with the CAMLOG Implant System (PDF
Hybrid Restorations with the CAMLOG Implant System (PDF

Create successful ePaper yourself
Turn your PDF publications into a flip-book with our unique Google optimized e-Paper software.
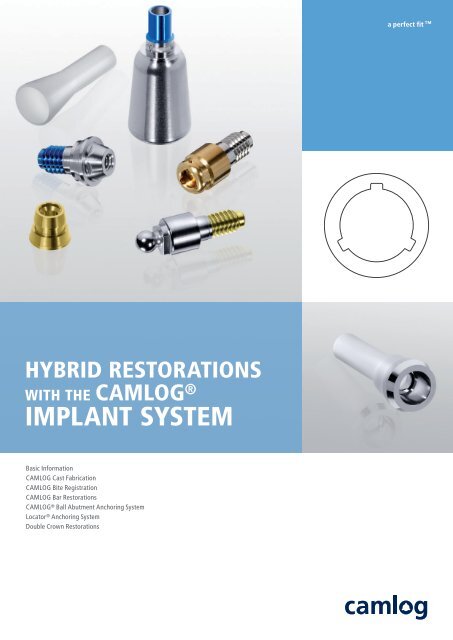
HYBRID RESTORATIONS<br />
WITH THE <strong>CAMLOG</strong> ®<br />
IMPLANT SYSTEM<br />
Basic Information<br />
<strong>CAMLOG</strong> Cast Fabrication<br />
<strong>CAMLOG</strong> Bite Registration<br />
<strong>CAMLOG</strong> Bar <strong>Restorations</strong><br />
<strong>CAMLOG</strong> ® Ball Abutment Anchoring <strong>System</strong><br />
Locator ® Anchoring <strong>System</strong><br />
Double Crown <strong>Restorations</strong><br />
a perfect fit ©<br />
a perfect fit
HYBRID RESTORATIONS WITH THE <strong>CAMLOG</strong> ® IMPLANT SYSTEM<br />
TABLE OF CONTENTS<br />
2<br />
GENERAL SYSTEM INFORMATION ABOUT THE <strong>CAMLOG</strong> ® IMPLANT SYSTEM<br />
SYSTEM INTRODUCTION<br />
GENERAL GUIDELINES FOR THE FABRICATION OF IMPLANT-SUPPORTED PROSTHETICS 5<br />
RECALL<br />
<strong>CAMLOG</strong> ® 5<br />
5<br />
5<br />
IMPLANT ABUTMENT CONNECTION<br />
6<br />
<strong>CAMLOG</strong> COLOR-CODING<br />
9<br />
PLANNING OF THE PROSTHETIC RESTORATION<br />
<strong>CAMLOG</strong> ® IMPRESSION TAKING OPTIONS<br />
<strong>CAMLOG</strong> ® CAST FABRICATION<br />
<strong>CAMLOG</strong> ® BITE REGISTRATION POSTS<br />
BAR RESTORATIONS<br />
INTRODUCTION<br />
PRODUCT DESCRIPTION<br />
<strong>CAMLOG</strong> ® IMPRESSION TAKING OPTIONS<br />
IMPRESSION TAKING OVER <strong>CAMLOG</strong> ® BAR ABUTMENTS<br />
IMPRESSION TAKING OVER THE <strong>CAMLOG</strong> ® IMPLANT SHOULDER<br />
CAST BAR CONSTRUCTIONS<br />
BASE FOR BAR ABUTMENT, BURN-OUT<br />
SLEEVE FOR TITANIUM BONDING BASE, BURN-OUT (PASSIVE-FIT)<br />
BASE FOR BAR ABUTMENT, CAST-ON<br />
BASE FOR BAR ABUTMENT, LASER-WELDABLE<br />
BASE FOR BAR ABUTMENT, SOLDERABLE<br />
RELINING OF A BAR-SUPPORTED FULL DENTURE<br />
BALL ABUTMENT ANCHORING SYSTEM<br />
INTRODUCTION<br />
PRODUCT DESCRIPTION<br />
<strong>CAMLOG</strong> ® IMPRESSION OPTIONS<br />
FABRICATION OF A NEW BALL-RETAINED FULL DENTURE WITH<br />
INTEGRATED METAL REINFORCEMENT<br />
BROADENING OF AN EXISTING FULL DENTURE INTO A BALL ABUTMENT-RETAINED<br />
FULL DENTURE<br />
RELINING OF A BALL ABUTMENT-RETAINED FULL DENTURE<br />
FOLLOW-UP/RECALL<br />
4<br />
10<br />
12<br />
13<br />
17<br />
21<br />
21<br />
21<br />
23<br />
23<br />
27<br />
28<br />
28<br />
30<br />
32<br />
34<br />
35<br />
37<br />
39<br />
39<br />
39<br />
42<br />
43<br />
47<br />
50<br />
51
LOCATOR ® ANCHORING SYSTEM<br />
PRODUCT DESCRIPTION<br />
PROCESSING<br />
INSERTION OF THE <strong>CAMLOG</strong> ® LOCATOR ® ABUTMENT<br />
FABRICATION OF A NEW LOCATOR ® -RETAINED FULL DENTURE<br />
IMPRESSION TAKING<br />
CAST FABRICATION<br />
INTEGRATION OF THE COLORED REPLACEMENT MALES<br />
HYBRID RESTORATIONS WITH THE <strong>CAMLOG</strong> ® IMPLANT SYSTEM<br />
CONVERTING AN EXISTING FULL DENTURE INTO A LOCATOR ® -RETAINED FULL DENTURE 59<br />
CONVERTING AN EXISTING FULL DENTURE INTO A LOCATOR ® -RETAINED FULL<br />
DENTURE IN THE DENTAL PRACTICE<br />
RELINING OF A LOCATOR ® -RETAINED FULL DENTURE<br />
DOUBLE CROWN RESTORATIONS<br />
INTRODUCTION<br />
PRODUCT DESCRIPTION<br />
IMPRESSION TAKING AND CAST FABRICATION<br />
CAST FABRICATION FOR MILLING TECHNIQUE<br />
<strong>CAMLOG</strong> ® UNIVERSAL ABUTMENT AND <strong>CAMLOG</strong> ® UNIVERSAL<br />
ABUTMENT PS FOR PLATFORM SWITCHING<br />
<strong>CAMLOG</strong> ® TELESCOPE ABUTMENT<br />
<strong>CAMLOG</strong> ® GOLD-PLASTIC ABUTMENT<br />
ACCESSORIES AND PROSTHETIC INSTRUMENTS<br />
MATERIALS<br />
FURTHER DOCUMENTATION<br />
52<br />
52<br />
55<br />
55<br />
56<br />
56<br />
57<br />
58<br />
60<br />
62<br />
63<br />
63<br />
63<br />
63<br />
63<br />
65<br />
65<br />
69<br />
73<br />
74<br />
75<br />
3
HYBRID RESTORATIONS WITH THE <strong>CAMLOG</strong> ® IMPLANT SYSTEM<br />
GENERAL<br />
SYSTEM INFORMATION<br />
ABOUT THE <strong>CAMLOG</strong> ® IMPLANT SYSTEM<br />
4<br />
THE <strong>CAMLOG</strong> ® IMPLANT SYSTEM<br />
The <strong>CAMLOG</strong> ® <strong>Implant</strong> <strong>System</strong> is based on years of clinical and laboratory<br />
experience and is a user-friendly, consistent pros<strong>the</strong>tically oriented implant<br />
system.<br />
The <strong>CAMLOG</strong> ® <strong>Implant</strong> <strong>System</strong> is being continuously developed and adapted<br />
to <strong>the</strong> state of technology by <strong>the</strong> internal research and development team<br />
in collaboration <strong>with</strong> clinics, universities and dental technicians.<br />
The <strong>CAMLOG</strong> ® <strong>Implant</strong> <strong>System</strong> is well documented scientifically. Numerous<br />
studies based on various parameters, e. g. implant surface, time of implantation<br />
and/or implant loading, primary stability, connection design or type<br />
of suprastructure, support this. The long-term outcomes for <strong>the</strong> <strong>CAMLOG</strong> ®<br />
<strong>Implant</strong> <strong>System</strong> are persuasive.<br />
IMPORTANT NOTE<br />
The descriptions that follow are not adequate to permit immediate use of<br />
<strong>the</strong> <strong>CAMLOG</strong> ® <strong>Implant</strong> <strong>System</strong>. Instruction by a surgeon experienced in<br />
using <strong>the</strong> <strong>CAMLOG</strong> ® <strong>Implant</strong> <strong>System</strong> is strongly recommended. <strong>CAMLOG</strong> ®<br />
dental implants and abutments should only be used by dentists, physicians,<br />
surgeons and dental technicians who have been trained in using <strong>the</strong> system.<br />
<strong>CAMLOG</strong> regularly offers relevant courses and training sessions. Methodical<br />
errors made during <strong>the</strong> treatment can result in loss of <strong>the</strong> implant and<br />
significant loss of <strong>the</strong> peri-implant bone.
SYSTEM INTRODUCTION<br />
GENERAL GUIDELINES FOR THE FABRICATION OF<br />
IMPLANT-SUPPORTED PROSTHETICS<br />
Modern implant pros<strong>the</strong>tics is now an established component of dentistry.<br />
The expectations and demands of patients are steadily increasing. Therefore,<br />
<strong>the</strong> ultimate goal of modern implant-supported treatment concepts is<br />
for full es<strong>the</strong>tic, functional, phonetic, and psychosocial rehabilitation. This<br />
applies equally to replacements of lost single incisors associated <strong>with</strong><br />
trauma and <strong>the</strong> complex rehabilitation of periodontally compromised remaining<br />
teeth or <strong>the</strong> treatment of an edentulous heavily atrophied maxilla<br />
and mandible.<br />
Increasingly higher demands for quality and specialization require a multidisciplinary<br />
team approach to combine <strong>the</strong> members acquired knowledge<br />
and experience. Modern implant-supported restorations need a high level<br />
of attention to detail and clinical experience. This is true equally for <strong>the</strong> restorative<br />
dentist, <strong>the</strong> surgeon, <strong>the</strong> dental technician, and <strong>the</strong> dental office<br />
support staff such as <strong>the</strong> nurse, hygienist, and chair assistant. The <strong>CAMLOG</strong><br />
team concept takes all of <strong>the</strong>se demands into consideration. The sequence<br />
of treatment procedures is structured, and specific procedures are clearly<br />
assigned to specific team members once <strong>the</strong> joint planning phase is complete.<br />
The implant-supported pros<strong>the</strong>tic restoration should be designed as simple<br />
and as safe as possible in regards to planning and fabrication. The required<br />
number of implants, as well as <strong>the</strong>ir length and diameter are determined<br />
based on <strong>the</strong> restoration planned later and <strong>the</strong> available bony implant site.<br />
The preimplantation planning should be oriented exclusively to pros<strong>the</strong>tic<br />
needs (backward planning).<br />
The patient is <strong>the</strong> focus of <strong>the</strong> implantological restoration. The patients<br />
needs and desires must play a part in <strong>the</strong> fabrication of <strong>the</strong> pros<strong>the</strong>tic restoration.<br />
This also requires taking into account anatomical relationships<br />
and conditions. Natural teeth are attached elastically by <strong>the</strong> periodontium<br />
to <strong>the</strong> alveolar bone. However, implants are rigidly anchored to <strong>the</strong> alveolar<br />
bone by <strong>the</strong> ankylotic connection to <strong>the</strong> bone substance. Mastication<br />
forces placed on implant-borne crown and bridge restorations are transferred<br />
directly to <strong>the</strong> bone. For this reason, <strong>the</strong> mastication forces should<br />
be transferred by a possible physiological process in <strong>the</strong> form of a suitable<br />
occlusion design thus supporting <strong>the</strong> long-term success of <strong>the</strong> integrated<br />
implants.<br />
This can be achieved in <strong>the</strong> posterior occlusal area <strong>with</strong> a surface area of<br />
approx. 1 mm² that allows lateral freedom of movement of approx. 1 mm<br />
in habitual intercuspation. This makes it possible for <strong>the</strong> cusps to glide<br />
smoothly between <strong>the</strong> retrusive contact position (centric occlusion) and <strong>the</strong><br />
maximum intercuspal position called «freedom in centric». In conjunction<br />
HYBRID RESTORATIONS WITH THE <strong>CAMLOG</strong> ® IMPLANT SYSTEM<br />
<strong>with</strong> a premolarized forming, overloads can be avoided. Extreme cusp formations<br />
should be avoided due to dentition that is too strong and vertical<br />
mastication forces affect <strong>the</strong> implant/antagonist axis preferably physiologically.<br />
Guidance functions of crown restorations on individual implants can<br />
lead to lateral force affects that are too strong and should be avoided. Appropriate<br />
planning (e.g. wax-up) is <strong>the</strong>refore essential.<br />
RECALL<br />
Resilient supported full dentures <strong>with</strong> retention devices should be regularly<br />
checked in three-month intervals after insertion. When harmful<br />
movements of <strong>the</strong> pros<strong>the</strong>sis occur, <strong>the</strong>y can be eliminated promptly by<br />
through appropriate measures (occlusion check, activation / replacement<br />
of <strong>the</strong> matrices, relining). Patients <strong>with</strong> inadequate oral hygiene are remotivated<br />
and instructed again as part of oral hygiene and denture care. For<br />
patients <strong>with</strong> good oral hygiene, <strong>the</strong> intervals between <strong>the</strong> functional and<br />
hygiene checks can be extended.<br />
5
HYBRID RESTORATIONS WITH THE <strong>CAMLOG</strong> ® IMPLANT SYSTEM<br />
SYSTEM INTRODUCTION<br />
<strong>CAMLOG</strong> ® IMPLANT ABUTMENT CONNECTION<br />
Various <strong>CAMLOG</strong> ® abutments for anchoring of an implant-retained full<br />
denture <strong>with</strong> varying geometries are available for <strong>the</strong> <strong>CAMLOG</strong> ® <strong>Implant</strong><br />
<strong>System</strong>. The abutments differ in <strong>the</strong> apical area <strong>with</strong> two different types<br />
of connection.<br />
<strong>CAMLOG</strong> ® BAR, BALL AND LOCATOR ® ABUTMENTS<br />
<strong>CAMLOG</strong> ® bar, ball and Locator ® abutments have a thread in <strong>the</strong> apical<br />
area that engages <strong>the</strong> upper respectively lower (for implants <strong>with</strong> Ø 3.3 mm)<br />
inner thread of <strong>the</strong> <strong>CAMLOG</strong> ® lab analog respectively <strong>CAMLOG</strong> ® implant.<br />
The abutments are screwed into <strong>the</strong> <strong>CAMLOG</strong> ® implant <strong>with</strong> a defined<br />
torque using <strong>the</strong> corresponding drivers and close flush <strong>with</strong> <strong>the</strong> implant<br />
shoulder.<br />
<strong>CAMLOG</strong> ®<br />
Bar Abutment<br />
Due to <strong>the</strong> design of <strong>the</strong> screw connection, <strong>the</strong> abutments do not have<br />
cams.<br />
Example: <strong>CAMLOG</strong> ® ball abutment (Ø 4.3 mm) in a <strong>CAMLOG</strong> ® SCREW-LINE implant<br />
6<br />
<strong>CAMLOG</strong> ® Ball<br />
Abutment<br />
<strong>CAMLOG</strong> ® Locator ®<br />
Abutment<br />
Screw-retained<br />
<strong>CAMLOG</strong> ® abutment<br />
Upper inner thread<br />
Lower inner thread<br />
<strong>CAMLOG</strong> ® implant
HYBRID RESTORATIONS WITH THE <strong>CAMLOG</strong> ® IMPLANT SYSTEM<br />
<strong>CAMLOG</strong> ® UNIVERSAL, TELESCOPE AND<br />
GOLD-PLASTIC ABUTMENTS<br />
<strong>CAMLOG</strong> ® universal, telescope and gold-plastic abutments can be used<br />
to fabricate double crown anchoring. They have <strong>the</strong> <strong>CAMLOG</strong> ® Tube-in-<br />
Tube implant abutment connection in <strong>the</strong> apical area and feature three<br />
symmetrically arranged cams.<br />
When inserting <strong>the</strong> <strong>CAMLOG</strong> ® abutments, <strong>the</strong>ir tubular extension toward<br />
<strong>the</strong> apex affects <strong>the</strong> simple, easy and safe orientation in <strong>the</strong> longitudinal<br />
axis of <strong>the</strong> <strong>CAMLOG</strong> ® implant/<strong>CAMLOG</strong> ® lab analog before <strong>the</strong> three<br />
cams rest on <strong>the</strong> shoulder of <strong>the</strong> implant.<br />
The abutment is rotated until tactile engagement of <strong>the</strong> cams in <strong>the</strong> grooves<br />
of <strong>the</strong> implant/lab analog. The abutment is <strong>the</strong>n in <strong>the</strong> final position.<br />
A screwdriver (hex) is used to fix <strong>the</strong> <strong>CAMLOG</strong> ® abutment screw devinitely<br />
<strong>with</strong> a defined torque.<br />
<strong>CAMLOG</strong> ® Universal Abutment<br />
<strong>CAMLOG</strong> ® Universal Abutment PS<br />
Abutment guide in <strong>the</strong><br />
<strong>CAMLOG</strong> ® implant<br />
<strong>CAMLOG</strong> ® Telescope<br />
Abutment<br />
Inserted <strong>CAMLOG</strong> ®<br />
abutment<br />
Groove/cam design<br />
Example: <strong>CAMLOG</strong> ® universal abutment (Ø 4.3 mm) in a SCREW-LINE implant<br />
<strong>CAMLOG</strong> ®<br />
Gold-plastic<br />
Abutment<br />
<strong>CAMLOG</strong> ® abutment screw<br />
<strong>CAMLOG</strong> ® implant<br />
7
HYBRID RESTORATIONS WITH THE <strong>CAMLOG</strong> ® IMPLANT SYSTEM<br />
SYSTEM INTRODUCTION<br />
<strong>CAMLOG</strong> ® UNIVERSAL ABUTMENT PS<br />
FOR PLATFORM SWITCHING (K-SERIES)<br />
The Platform Switching option is used to support <strong>the</strong> hard and soft tissue in<br />
es<strong>the</strong>tic regions. Due to <strong>the</strong> horizontally reduced diameter of <strong>the</strong> <strong>CAMLOG</strong> ®<br />
abutment PS in relationship to <strong>the</strong> implant diameter, <strong>the</strong> implant-abutment<br />
interface on <strong>the</strong> implant shoulder is shifted towards <strong>the</strong> middle of <strong>the</strong> implant.<br />
This makes it possible to adapt soft tissue over <strong>the</strong> implant shoulder<br />
during <strong>the</strong> pros<strong>the</strong>tic restoration.<br />
8<br />
PS<br />
<strong>CAMLOG</strong> ® Universal Abutment PS for Platform Switching (Ø 4.3 mm)<br />
in a <strong>CAMLOG</strong> ® SCREW-LINE implant of <strong>the</strong> K-Series.<br />
IMPORTANT NOTES<br />
• All pros<strong>the</strong>tic components for platform switching have <strong>the</strong> PS label<br />
and K article number (K-Series).<br />
• The platform switching option for double crowns is only possible<br />
<strong>with</strong> <strong>the</strong> <strong>CAMLOG</strong> ® universal abutments PS on <strong>CAMLOG</strong> ®<br />
SCREW-LINE implants (K-Series).<br />
• <strong>CAMLOG</strong> ® universal, telescope and gold-plastic abutments<br />
<strong>with</strong> J article number are not compatible <strong>with</strong> <strong>CAMLOG</strong> ®<br />
SCREW-LINE implants <strong>with</strong> <strong>the</strong> K article number (K-Series).
<strong>CAMLOG</strong> COLOR-CODING<br />
HYBRID RESTORATIONS WITH THE <strong>CAMLOG</strong> ® IMPLANT SYSTEM<br />
To ensure that <strong>the</strong> correct lab analogs are used for <strong>the</strong> impression posts, <strong>the</strong><br />
pros<strong>the</strong>tic components are color-coded to match <strong>the</strong> implant diameters.<br />
You should make sure to use and connect only lab analogs and pros<strong>the</strong>tic<br />
components of <strong>the</strong> same diameter (by color-coding). No components of<br />
different diameters should be joined to one ano<strong>the</strong>r.<br />
COLOR-CODING OF THE SURGICAL AND<br />
PROSTHETICAL <strong>CAMLOG</strong> ® PRODUCTS<br />
COLOR DIAMETER<br />
gray 3.3 mm<br />
yellow 3.8 mm<br />
red 4.3 mm<br />
blue 5.0 mm<br />
green 6.0 mm<br />
9
HYBRID RESTORATIONS WITH THE <strong>CAMLOG</strong> ® IMPLANT SYSTEM<br />
PLANNING OF THE PROSTHETIC<br />
RESTORATION<br />
INTRODUCTION<br />
Modern implant pros<strong>the</strong>tics is planned by working back from <strong>the</strong> desired<br />
<strong>the</strong>rapy goal; this is referred to as "backward planning." It applies particularly<br />
to pre-implantation augmentation procedures to restore sufficient<br />
bony structure to allow placement of implants in <strong>the</strong> optimal pros<strong>the</strong>tic<br />
position.<br />
The restoration of function, phonetics and enabling good hygienic potential<br />
of <strong>the</strong> pros<strong>the</strong>sis in an edentulous arch require pros<strong>the</strong>tically oriented implant<br />
positioning and dimensioning, which <strong>the</strong> dental technician can define<br />
on <strong>the</strong> basis of <strong>the</strong> specific oral situation <strong>with</strong> a wax-up/set-up. The pros<strong>the</strong>tic<br />
design and <strong>the</strong> required implant position(s), axial alignment(s) and<br />
implant-supported anchorage options are planned and selected by <strong>the</strong> dentist<br />
and dental technician working closely toge<strong>the</strong>r. This requires both to be<br />
fully informed of <strong>the</strong> treatment options.<br />
DIAGNOSTIC CASTS, WAX-UP/SET-UP<br />
Diagnostic casts are used to represent <strong>the</strong> oral anatomical features such as<br />
<strong>the</strong> contour and size of <strong>the</strong> alveolar ridge, vestibular folds, oral bands and<br />
retromolar areas. The diagnostic casts are mounted in an adjustable articulator<br />
<strong>with</strong> <strong>the</strong> aid of an arbitrary face bow and centric registration, making<br />
it possible to represent <strong>the</strong> planned pros<strong>the</strong>tic restoration in <strong>the</strong> form of a<br />
wax set-up. The planned pros<strong>the</strong>tic result, <strong>the</strong> planned implant positions<br />
and <strong>the</strong> contour of <strong>the</strong> alveolar ridge are taken into account.<br />
DIMENSION CONTROL WITH SILICONE INDEX<br />
A silicone index created from a wax set-up is used to represent <strong>the</strong> space<br />
requirement for <strong>the</strong> planned full denture restoration on <strong>the</strong> diagnostic cast.<br />
The index should embrace <strong>the</strong> tooth arch from oral to vestibular. After curing,<br />
<strong>the</strong> index is divided along <strong>the</strong> incisal or occlusal midline. After removing<br />
<strong>the</strong> set-up, <strong>the</strong> corresponding silicone index half (buccal or palatinal/<br />
lingual half) shows <strong>the</strong> space requirement for <strong>the</strong> restoration. The silicone<br />
index can <strong>the</strong>n be used to determine optimal implant positioning, axis alignments<br />
and anchoring systems.<br />
ARCH RELATIONS<br />
The arch relations has effects on <strong>the</strong> load direction and <strong>the</strong>refore on <strong>the</strong><br />
axial alignment of <strong>the</strong> implants. This is particularly important <strong>with</strong> cross-bite<br />
situations.<br />
10<br />
X-RAY/DRILLING TEMPLATE WITH CT-TUBES<br />
FOR CT PLANNING<br />
In a planning template fabricated on <strong>the</strong> diagnostic cast, CT-tubes are integrated<br />
at <strong>the</strong> ideal implant position and are used as reference positions in<br />
<strong>the</strong> x-ray image. The CT-tubes have two parts, and <strong>the</strong> titanium material<br />
does not cause any scattering of rays in <strong>the</strong> CT/DVT. The lower section is<br />
polymerized into <strong>the</strong> template. The upper section is pluggable. The entire<br />
CT-tube is used for <strong>the</strong> radiological diagnostics; <strong>the</strong> upper section can be<br />
removed for surgery. Depending on <strong>the</strong> software used for <strong>the</strong> evaluation,<br />
titanium CT-tubes or o<strong>the</strong>r radio-opaque positioning elements (e.g. steel,<br />
barium sulfate) are integrated for <strong>the</strong> CT/DVT-supported planning. Placing<br />
<strong>the</strong> CT-tubes directly on <strong>the</strong> mucosa makes it possible to determine density<br />
in <strong>the</strong> CT/DVT. The documentation included <strong>with</strong> <strong>the</strong>se systems contains<br />
more information on this topic.<br />
As an alternative to <strong>the</strong> drilling template <strong>with</strong> CT-tubes for CT planning, a<br />
drilling template can be fabricated <strong>with</strong> <strong>the</strong> <strong>CAMLOG</strong> ® Guide <strong>System</strong> that<br />
is used for template-guided preparation of <strong>the</strong> implant bed and for insertion<br />
of SCREW-LINE implants <strong>CAMLOG</strong> ® Guide. Fur<strong>the</strong>r information is<br />
available in <strong>the</strong> "<strong>CAMLOG</strong> ® Guide <strong>System</strong>" working instructions, Art. No.<br />
J8000.0107.<br />
10 mm<br />
Ø 2.1 mm<br />
internal diameter<br />
Ø 2.5 mm<br />
external diameter<br />
4 mm<br />
CT-tubes for CT planning<br />
for pilot drill Ø 2.0 mm<br />
Drill for placement of<br />
CT-tubes, Ø 2.0 mm
ANCHORING OPTIONS<br />
In consideration of <strong>the</strong> previous pros<strong>the</strong>tic planning, <strong>the</strong> anchoring option<br />
<strong>with</strong> <strong>CAMLOG</strong> ® bar, ball and Locator ® abutments or <strong>with</strong> <strong>CAMLOG</strong> ® abutments<br />
for double crown restorations should be sought in collaboration <strong>with</strong><br />
<strong>the</strong> dentist and dental technician.<br />
The previously prepared silicone index is used to select <strong>the</strong> suitable<br />
<strong>CAMLOG</strong> ® abutment on <strong>the</strong> cast. <strong>Implant</strong> axis, length, diameter and gingival<br />
height must be taken into account.<br />
RECOMMENDED INDICATIONS FOR THE<br />
<strong>CAMLOG</strong> ® ABUTMENT TYPES<br />
<strong>CAMLOG</strong> ® BAR ABUTMENT<br />
Anchoring of implant-supported full dentures for <strong>the</strong> edentulous maxilla<br />
and mandible on 2, 4 or more <strong>CAMLOG</strong> ® implants. Prefabricated or customized<br />
bar constructions.<br />
<strong>CAMLOG</strong> ® BALL ABUTMENT<br />
Resilient anchoring of implant-retained full dentures for <strong>the</strong> edentulous<br />
maxilla and mandible on 2 <strong>CAMLOG</strong> ® implants to secure a tangential rotation<br />
axis. Anchoring of implant-supported full dentures for <strong>the</strong> edentulous<br />
maxilla and mandible on 4 <strong>CAMLOG</strong> ® implants.<br />
<strong>CAMLOG</strong> ® LOCATOR ® ABUTMENT<br />
Resilient anchoring of implant-supported full dentures for <strong>the</strong> edentulous<br />
maxilla and mandible on <strong>CAMLOG</strong> ® implants.<br />
<strong>CAMLOG</strong> ® UNIVERSAL ABUTMENT<br />
Double crown anchoring of implant-supported full dentures for <strong>the</strong> edentulous<br />
maxilla and mandible on <strong>CAMLOG</strong> ® implants.<br />
<strong>CAMLOG</strong> ® TELESCOPE ABUTMENT<br />
Double crown anchoring of implant-supported full dentures for <strong>the</strong> edentulous<br />
maxilla and mandible on <strong>CAMLOG</strong> ® implants to offset large angulation<br />
corrections in <strong>the</strong> case of disparallel-placed implants.<br />
<strong>CAMLOG</strong> ® GOLD-PLASTIC ABUTMENT<br />
Double crown anchoring of implant-supported full dentures for <strong>the</strong> edentulous<br />
maxilla and mandible on <strong>CAMLOG</strong> ® implants.<br />
HYBRID RESTORATIONS WITH THE <strong>CAMLOG</strong> ® IMPLANT SYSTEM<br />
11
HYBRID RESTORATIONS WITH THE <strong>CAMLOG</strong> ® IMPLANT SYSTEM<br />
<strong>CAMLOG</strong> ®<br />
IMPRESSION TAKING OPTIONS<br />
IMPRESSION TAKING DIRECTLY OVER THE<br />
<strong>CAMLOG</strong> ® IMPLANT SHOULDER<br />
With this method, <strong>the</strong> impression is taken over <strong>the</strong> <strong>CAMLOG</strong> ® implant<br />
shoulder directly <strong>with</strong> a color-coded <strong>CAMLOG</strong> ® impression post, open or<br />
closed tray. The impression posts are equipped <strong>with</strong> a fixing screw that is<br />
tightened by hand on <strong>the</strong> implant using a screwdriver (hex).<br />
<strong>CAMLOG</strong> ® IMPRESSION POSTS, OPEN TRAY<br />
ART. NO. K2121.3300 K2121.3800 K2121.4300 K2121.5000 K2121.6000<br />
<strong>CAMLOG</strong> ® IMPRESSION POSTS PS FOR PLATFORM SWITCHING, OPEN TRAY<br />
ART. NO. . K2119.3800 K2119.4300 K2119.5000 K2119.6000<br />
The <strong>CAMLOG</strong> ® impression posts, open tray, remain in <strong>the</strong> impression.<br />
<strong>CAMLOG</strong> ® IMPRESSION POSTS, CLOSED TRAY, incl. impression cap and bite registration cap<br />
ART. NO. K2110.3300 K2110.3800 K2110.4300 K2110.5000 K2110.6000<br />
<strong>CAMLOG</strong> ® IMPRESSION POSTS PS FOR PLATFORM SWITCHING, CLOSED TRAY<br />
ART. NO. K2109.3800 K2109.4300 K2109.5000 K2109.6000<br />
The impression posts are connected <strong>with</strong> <strong>the</strong> impression caps.<br />
<strong>CAMLOG</strong> ® impression posts, open and closed tray, are compatible <strong>with</strong> <strong>the</strong><br />
<strong>CAMLOG</strong> ® SCREW-LINE and <strong>CAMLOG</strong> ® ROOT-LINE implants.<br />
Detailed information about impression taking <strong>with</strong> <strong>CAMLOG</strong> ® impression<br />
posts is available in <strong>the</strong> working instruction "Impression taking, bite registration<br />
and temporary restoration on <strong>CAMLOG</strong> ® implants", Art. No.<br />
J8000.0065.<br />
12<br />
NOTE<br />
Taking <strong>the</strong> impression directly over <strong>the</strong> <strong>CAMLOG</strong> ® implant shoulder using<br />
a <strong>CAMLOG</strong> ® impression post, open and/or closed tray, requires that<br />
<strong>the</strong> cast be fabricated using a <strong>CAMLOG</strong> ® lab analog of <strong>the</strong> same color.<br />
NOTE<br />
For double crown restorations <strong>with</strong> <strong>CAMLOG</strong> ® universal abutments<br />
PS, <strong>the</strong> impression is taken <strong>with</strong> <strong>CAMLOG</strong> ® impression posts PS,<br />
open or closed tray.
<strong>CAMLOG</strong> ®<br />
CAST FABRICATION<br />
CAST FABRICATION WITH THE <strong>CAMLOG</strong> ® LAB ANALOG<br />
The <strong>CAMLOG</strong> ® lab analog is <strong>the</strong>n used for cast fabrication. The <strong>CAMLOG</strong> ®<br />
lab analog is attached to <strong>the</strong> <strong>CAMLOG</strong> ® impression post, open or closed<br />
tray, and <strong>the</strong> fixing screw is hand-tightened using a screwdriver (hex).<br />
<strong>CAMLOG</strong> ® LAB ANALOG<br />
ART. NO. J3010.3300 J3010.3800 J3010.4300 J3010.5000 J3010.6000<br />
CAST FABRICATION, CLOSED TRAY<br />
PREPARATION<br />
After <strong>the</strong> impression is taken, <strong>the</strong> impression cap remains in <strong>the</strong> impression.<br />
In <strong>the</strong> dental laboratory, <strong>the</strong> <strong>CAMLOG</strong> ® impression post, closed tray, is attached<br />
<strong>with</strong> <strong>the</strong> corresponding <strong>CAMLOG</strong> ® lab analog (note proper seating).<br />
A screwdriver (hex) is used to hand-tighten <strong>the</strong> fixing screw.<br />
The components are repositioned in <strong>the</strong> impression caps. Make sure that<br />
<strong>the</strong> grooves correctly engage in <strong>the</strong> impression cap. Do not use bonding material!<br />
Impression cap <strong>CAMLOG</strong> ®<br />
lab analog<br />
Groove<br />
HYBRID RESTORATIONS WITH THE <strong>CAMLOG</strong> ® IMPLANT SYSTEM<br />
<strong>CAMLOG</strong> ® lab analogs have<br />
a retention element apically<br />
<strong>CAMLOG</strong> ®<br />
impression post,<br />
closed tray<br />
Fixing screw<br />
13
HYBRID RESTORATIONS WITH THE <strong>CAMLOG</strong> ® IMPLANT SYSTEM<br />
<strong>CAMLOG</strong> ®<br />
CAST FABRICATION<br />
CAST FABRICATION<br />
The impression is cast <strong>with</strong> suitable model material and <strong>the</strong> impression<br />
posts may not loosen. After curing, <strong>the</strong> impression is removed and <strong>the</strong> impression<br />
posts loosened from <strong>the</strong> lab analogs.<br />
TIP: We recommend that you fabricate <strong>the</strong> cast <strong>with</strong> a gingival mask. The<br />
surrounding gingiva is represented true to <strong>the</strong> situation especially for subgingival<br />
crown margins and restorations in es<strong>the</strong>tic areas. An optimal design<br />
of <strong>the</strong> crown contour is easier to achieve.<br />
TIP: After removing <strong>the</strong> impression, <strong>the</strong> bite registration caps can be installed<br />
on <strong>the</strong> impression posts in <strong>the</strong> cast for mounting. The bite registration<br />
taken before <strong>the</strong> impression can be placed on <strong>the</strong> caps and <strong>the</strong> cast<br />
mounted.<br />
NOTE<br />
Cast fabrication and bite registration <strong>with</strong> <strong>the</strong> impression posts, closed<br />
tray, and impression posts PS, closed tray, is identical.<br />
14<br />
Bite registration cap
CAST FABRICATION, OPEN TRAY<br />
PREPARATION<br />
After <strong>the</strong> impression is taken, <strong>the</strong> <strong>CAMLOG</strong> ® impression posts, open tray,<br />
remain in <strong>the</strong> impression.<br />
In <strong>the</strong> dental laboratory, <strong>the</strong> lab analogs corresponding to <strong>the</strong> diameters<br />
are attached to <strong>the</strong> impression posts, open tray (note proper seating).<br />
A screwdriver (hex) is used to hand-tighten <strong>the</strong> fixing screw.<br />
CAST FABRICATION<br />
The impression is cast <strong>with</strong> appropriate model material. After curing, <strong>the</strong><br />
impression is removed and <strong>the</strong> impression posts loosened from <strong>the</strong> lab<br />
analogs.<br />
TIP: We recommend that you fabricate <strong>the</strong> cast <strong>with</strong> a gingival mask. The<br />
surrounding gingiva is represented true to <strong>the</strong> situation especially for subgingival<br />
crown margins and restorations in es<strong>the</strong>tic areas. An optimal<br />
design of <strong>the</strong> crown contour is easier to achieve.<br />
NOTE<br />
Cast fabrication <strong>with</strong> <strong>the</strong> impression posts, open tray, and impression<br />
posts PS, open tray, is identical. Finished working cast<br />
HYBRID RESTORATIONS WITH THE <strong>CAMLOG</strong> ® IMPLANT SYSTEM<br />
15
HYBRID RESTORATIONS WITH THE <strong>CAMLOG</strong> ® IMPLANT SYSTEM<br />
<strong>CAMLOG</strong> ®<br />
CAST FABRICATION<br />
ACCESSORIES<br />
REAMER FOR CAST CONDITIONING<br />
If no gingival mask was created during cast fabrication, <strong>the</strong> cervical implant<br />
neck area can be reworked <strong>with</strong> special plaster reamers. The milling profile<br />
exposes <strong>the</strong> lab analog shoulder to ensure <strong>the</strong> gapless seat of <strong>the</strong> abutment.<br />
16<br />
Reamer diameter<br />
Ø 3.3/3.8/4.3/5.0/6.0 mm<br />
Color-coded guide pin<br />
for reamer<br />
After fabricating <strong>the</strong> cast, <strong>the</strong> impression posts are removed. The abutment<br />
cannot be placed and plaster must be removed in <strong>the</strong> cervical area.<br />
The reamer is inserted in <strong>the</strong> universal holder. After screwing in <strong>the</strong> guide<br />
pin, <strong>the</strong> reamer is moved over this and <strong>the</strong> plaster milled off in a clockwise<br />
rotation.<br />
Once lowered completely, <strong>the</strong> reamer lies on <strong>the</strong> lab analog shoulder.<br />
After unscrewing <strong>the</strong> guide pin, <strong>the</strong> abutment is inserted into <strong>the</strong> lab analog.
<strong>CAMLOG</strong> ®<br />
BITE REGISTRATION POSTS<br />
INTRODUCTION<br />
Color-coded <strong>CAMLOG</strong> ® bite registration posts are available for all <strong>CAMLOG</strong><br />
implant diameters for accurate implant-supported measurement of arch relations<br />
and <strong>the</strong>ir transfer to <strong>the</strong> cast situations. The posts include a bite registration<br />
cap and an integrated fixing screw.<br />
There are two options for taking <strong>the</strong> bite registration:<br />
• Option A. Bite registration <strong>with</strong> mounted bite registration caps<br />
• Option B. Bite registration <strong>with</strong> splinted bite register <strong>with</strong>out caps<br />
The <strong>CAMLOG</strong> ® bite registration posts have a pros<strong>the</strong>tic height of 8.1 mm<br />
and are suitable for limited occlusal space conditions. A shortened post/<br />
implant connection in comparison to <strong>the</strong> abutment and impression post<br />
connection make <strong>the</strong> use of splinted bite registration posts <strong>with</strong> implant<br />
abutment divergences of up to 20° possible.<br />
The <strong>CAMLOG</strong> ® bite registration posts are tapered apically in <strong>the</strong> area of <strong>the</strong><br />
shoulder support and are also suitable for <strong>the</strong> platform switching option<br />
(not for implant diameter 3.3 mm).<br />
Apical tapering<br />
HYBRID RESTORATIONS WITH THE <strong>CAMLOG</strong> ® IMPLANT SYSTEM<br />
<strong>CAMLOG</strong> ® Bite Registration Post<br />
Pros<strong>the</strong>tic height 8.1 mm<br />
Shortened post/<br />
implant connection<br />
<strong>CAMLOG</strong> ® <strong>CAMLOG</strong><br />
bite registration post<br />
incl. fixing screw and cap<br />
® BITE REGISTRATION POST INCL. BITE REGISTRATION CAP<br />
Art. No. J2140.3300 J2140.3800* J2140.4300* J2140.5000* J2140.6000*<br />
For implant diameters 3.3 mm 3.8 mm 4.3 mm 5.0 mm 6.0 mm<br />
PH 8.1 mm 8.1 mm 8.1 mm 8.1 mm 8.1 mm<br />
PH: Pros<strong>the</strong>tic height *Note: The bite registration posts <strong>with</strong> diameter 3.8/4.3/5.0/6.0 mm can also be used for <strong>the</strong> platform switching option.<br />
REPLACEMENT BITE REGISTRATION CAP<br />
Art. No. J2112.3300 J2112.3800 J2112.4300 J2112.5000 J2112.6000<br />
Bite registration cap (5 units)<br />
For implant diameters 3.3 mm 3.8 mm 4.3 mm 5.0 mm 6.0 mm<br />
IMPORTANT NOTE<br />
All components for implant-supported bite registration on <strong>CAMLOG</strong> ®<br />
implants are for single use only and must not be modified.<br />
17
HYBRID RESTORATIONS WITH THE <strong>CAMLOG</strong> ® IMPLANT SYSTEM<br />
<strong>CAMLOG</strong> ®<br />
BITE REGISTRATION POSTS<br />
USE<br />
<strong>Implant</strong>-supported measurement of <strong>the</strong> arch relations and <strong>the</strong>re transfer to<br />
<strong>the</strong> cast situation may be carried out using <strong>CAMLOG</strong> ® bite registration<br />
posts <strong>with</strong> mounted bite registration caps or splinted bite registration posts<br />
as a one-piece bite register.<br />
OPTION A.<br />
BITE REGISTRATION WITH MOUNTED BITE REGISTRATION CAPS<br />
The bite registration posts are placed in <strong>the</strong> previously cleaned implants and<br />
a screwdriver (hex) is used to hand-tighten <strong>the</strong> fixing screws.<br />
The bite registration caps are placed on <strong>the</strong> bite registration posts based on<br />
<strong>the</strong> color code and <strong>the</strong> occlusion is checked. Correct seating is indicated by<br />
a perceptible locking feel.<br />
It follows <strong>the</strong> registration of <strong>the</strong> arch relations <strong>with</strong> usual standard materials.<br />
The caps should not be allowed to bond to <strong>the</strong> register.<br />
18
Remove <strong>the</strong> bite register, <strong>the</strong> bite registration caps and <strong>the</strong> bite registration<br />
posts (by loosening <strong>the</strong> fixing screws) and give all to <strong>the</strong> dental laboratory.<br />
Screw in <strong>the</strong> bite registration posts into <strong>the</strong> color-coded lab analogs in <strong>the</strong><br />
cast and mount <strong>the</strong> bite registration caps in <strong>the</strong> final position. Place <strong>the</strong> bite<br />
registration on <strong>the</strong> caps. Connect <strong>the</strong> bite registration to <strong>the</strong> opposing jaw<br />
cast and mount <strong>the</strong> casts in an articulator.<br />
TIP: If bite registration posts cannot be used due to limited space conditions<br />
(to prevent bite elevation), a healing cap, cylindrical, height 6.0 mm,<br />
may be used. Record <strong>the</strong> diameter, <strong>the</strong> position, and <strong>the</strong> height of <strong>the</strong><br />
healing cap on <strong>the</strong> information work sheet and deliver it <strong>with</strong> <strong>the</strong> corresponding<br />
healing cap to <strong>the</strong> dental laboratory.<br />
OPTION B.<br />
BITE REGISTRATION WITH SPLINTED BITE REGISTER<br />
After taking <strong>the</strong> impression and fabricating <strong>the</strong> cast, fix <strong>the</strong> <strong>CAMLOG</strong> ® bite<br />
registration posts in <strong>the</strong> lab analog and fabricate a bite register splinted<br />
<strong>with</strong> <strong>the</strong> posts on <strong>the</strong> working cast. Coat and connect <strong>the</strong> bite registration<br />
posts <strong>with</strong> a suitable plastic. Do not cover <strong>the</strong> fixing screws.<br />
TIP: To avoid distortion stress <strong>with</strong> larger restorations (edentulous jaw,<br />
large gaps), we recommend disconnecting <strong>the</strong> register between <strong>the</strong> implant<br />
pillars and <strong>the</strong>n reconnecting in <strong>the</strong> mouth <strong>with</strong> suitable plastic after attaching<br />
to <strong>the</strong> implants.<br />
HYBRID RESTORATIONS WITH THE <strong>CAMLOG</strong> ® IMPLANT SYSTEM<br />
19
HYBRID RESTORATIONS WITH THE <strong>CAMLOG</strong> ® IMPLANT SYSTEM<br />
<strong>CAMLOG</strong> ®<br />
BITE REGISTRATION POSTS<br />
Once <strong>the</strong> register has been created, it is inserted in <strong>the</strong> mouth, a screwdriver<br />
(hex) is used to hand-tighten <strong>the</strong> fixing screws and <strong>the</strong> occlusion is checked.<br />
It follows <strong>the</strong> registration of <strong>the</strong> arch relations <strong>with</strong> usual standard materials.<br />
Loosen <strong>the</strong> fixing screws after curing. To safely remove <strong>the</strong> bite register,<br />
extract <strong>the</strong> screws from <strong>the</strong> posts to <strong>the</strong> stop position. Remove <strong>the</strong> bite<br />
register <strong>with</strong> <strong>the</strong> integrated bite registration posts and give it to <strong>the</strong> dental<br />
laboratory.<br />
Mount <strong>the</strong> bite register <strong>with</strong> integrated bite registration posts on <strong>the</strong> lab<br />
analogs in <strong>the</strong> cast and screw on. Connect <strong>the</strong> bite registration to <strong>the</strong> opposing<br />
jaw cast and mount <strong>the</strong> casts in an articulator.<br />
20<br />
Fixing screw extracted<br />
to <strong>the</strong> stop position
BAR RESTORATIONS<br />
INTRODUCTION<br />
In implantological hybrid pros<strong>the</strong>tics, bar restorations represent stable implant-connecting<br />
designs; a hybrid pros<strong>the</strong>sis can be securely anchored.<br />
TASKS OF A BAR RESTORATION<br />
• Protecting <strong>the</strong> pros<strong>the</strong>sis against shearing and lifting forces<br />
• Shear distribution<br />
• Stabilization and primary splinting of <strong>the</strong> implants<br />
• Resilience compensation through degrees of freedom<br />
The <strong>CAMLOG</strong> ® bar abutment offers extensive options for fabrication of<br />
prefabricated and custom-milled bars because of <strong>the</strong> wide variety of components<br />
available:<br />
PREFABRICATED TITANIUM OR GOLD BAR<br />
Laser-welded bar version <strong>with</strong> prefabricated titanium bar bases and bar<br />
elements or soldered bar version <strong>with</strong> prefabricated gold bar bases and bar<br />
elements.<br />
CUSTOM-CAST/MILLED BAR<br />
Cast bar version <strong>with</strong> prefabricated bar bases and bar elements made of<br />
burn-out plastic for solid casting technology.<br />
BONDED BAR CONSTRUCTION (PASSIVE FIT)<br />
Bonded bar construction <strong>with</strong> prefabricated bar sleeves made of burn-out<br />
plastic for casting technology and titanium bonding base. The Passive Fit<br />
<strong>System</strong> provides <strong>the</strong> option of fixing cast bars on <strong>the</strong> implants that are<br />
absolutely tension-free.<br />
PRODUCT DESCRIPTION<br />
HYBRID RESTORATIONS WITH THE <strong>CAMLOG</strong> ® IMPLANT SYSTEM<br />
<strong>CAMLOG</strong> ® bar abutments are available for all <strong>CAMLOG</strong> ® implant diameters<br />
in various gingival heights.<br />
<strong>CAMLOG</strong> ® BAR ABUTMENT FOR IMPLANT DIAMETER 3.3 MM<br />
ART. NO. J2255.3305 J2255.3320<br />
GH 0.5 mm 2.0 mm<br />
<strong>CAMLOG</strong> ® BAR ABUTMENT FOR IMPLANT DIAMETER 3.8 MM<br />
ART. NO. J2255.3805 J2255.3820 J2255.3840<br />
GH 0.5 mm 2.0 mm 4.0 mm<br />
<strong>CAMLOG</strong> ® BAR ABUTMENT FOR IMPLANT DIAMETER 4.3 MM<br />
ART. NO. J2255.4305 J2255.4320 J2255.4340<br />
GH 0.5 mm 2.0 mm 4.0 mm<br />
<strong>CAMLOG</strong> ® BAR ABUTMENT FOR IMPLANT DIAMETER 5.0 MM<br />
ART. NO. J2255.5005 J2255.5020 J2255.5040<br />
GH 0.5 mm 2.0 mm 4.0 mm<br />
<strong>CAMLOG</strong> ® BAR ABUTMENT FOR IMPLANT DIAMETER 6.0 MM<br />
ART. NO. J2255.6005 J2255.6020 J2255.6040<br />
GH 0.5 mm 2.0 mm 4.0 mm<br />
GH: Gingival height<br />
21
HYBRID RESTORATIONS WITH THE <strong>CAMLOG</strong> ® IMPLANT SYSTEM<br />
BAR RESTORATIONS<br />
Gingival heights from <strong>the</strong> implant shoulder support to <strong>the</strong> bar<br />
abutment plateau<br />
The gingival height is <strong>the</strong> distance from <strong>the</strong> bar abutment plateau to <strong>the</strong><br />
highest point of <strong>the</strong> surrounding gingiva. The bar abutment plateau should<br />
be approx. 0.5 mm supragingival.<br />
PROSTHETIC SCREWS FOR BAR ABUTMENT, HEX<br />
All bar bases are attached <strong>with</strong> pros<strong>the</strong>tic screws for bar abutment, hex, to<br />
<strong>the</strong> <strong>CAMLOG</strong> ® bar abutments. New unused pros<strong>the</strong>tic screws are used for<br />
final insertion.<br />
ART. NO. J4005.1602 J4005.2002<br />
Thread M 1.6 for bar abutment M 2.0 for bar abutment<br />
Ø 3.3/3.8/4.3 mm Ø 5.0/6.0 mm<br />
Def. torque for insertion of <strong>the</strong> bar framework: 15 Ncm<br />
Abutments must be retightened to <strong>the</strong> same torque after about five minutes<br />
to reach <strong>the</strong> maximum retaining screw tension. This prevents screws<br />
from loosening. The pros<strong>the</strong>tic screws are only hand-tightened on <strong>the</strong> working<br />
cast.<br />
22<br />
0.5 mm<br />
0.5 mm<br />
2 mm<br />
4 mm
<strong>CAMLOG</strong> ® IMPRESSION TAKING OPTIONS<br />
After successful implant insertion, <strong>the</strong> impression can be taken in two versions:<br />
IMPRESSION TAKING OVER <strong>CAMLOG</strong> ® BAR ABUTMENTS:<br />
Impression taking after final insertion of <strong>the</strong> <strong>CAMLOG</strong> ® bar abutments<br />
<strong>with</strong> impression posts for bar abutment. The cast is <strong>the</strong>n fabricated <strong>with</strong><br />
soldering aid/bar lab analogs.<br />
IMPRESSION TAKING OVER <strong>CAMLOG</strong> ® IMPLANT SHOULDER:<br />
Impression taken over <strong>the</strong> <strong>CAMLOG</strong> ® implant shoulder directly <strong>with</strong><br />
<strong>CAMLOG</strong> ® impression posts, open or closed tray, before insertion of<br />
<strong>CAMLOG</strong> ® bar abutments. The cast is <strong>the</strong>n fabricated <strong>with</strong> <strong>CAMLOG</strong> ® lab<br />
analogs. See also page 13–15 and working instruction "Impression taking,<br />
bite registration and temporary restoration on <strong>CAMLOG</strong> ® implants", Art.<br />
No. J8000.0065.<br />
Driver for bar abutment<br />
Ø 3.3/3.8/4.3 mm<br />
Ø 5.0/6.0 mm<br />
HYBRID RESTORATIONS WITH THE <strong>CAMLOG</strong> ® IMPLANT SYSTEM<br />
IMPRESSION TAKING OVER <strong>CAMLOG</strong> ®<br />
BAR ABUTMENTS<br />
INSERTION OF <strong>CAMLOG</strong> ® BAR ABUTMENTS<br />
After successful implant insertion and determination of <strong>the</strong> appropriate gingival<br />
height, <strong>the</strong> <strong>CAMLOG</strong> ® bar abutments are inserted into <strong>the</strong> <strong>CAMLOG</strong> ®<br />
implants.<br />
The abutments are inserted into <strong>the</strong> driver for bar abutments. A driver is<br />
available for each implant diameter 3.3/3.8/4.3 mm and 5.0/6.0 mm. A screw<br />
integrated in <strong>the</strong> instrument secures <strong>the</strong> abutment. The screw is tightened<br />
by hand.<br />
Bar abutment/instrument<br />
connection<br />
The <strong>CAMLOG</strong> ® bar abutments are inserted into <strong>the</strong> previously cleaned<br />
<strong>CAMLOG</strong> ® implants and <strong>the</strong> torque wrench is <strong>the</strong>n used to tighten <strong>the</strong> abutments<br />
definitely in <strong>the</strong> implants based on <strong>the</strong> specified tightening torque.<br />
TIGHTENING TORQUE FOR <strong>CAMLOG</strong> ® BAR ABUTMENTS<br />
Ø 3.3 mm 20 Ncm<br />
Ø 3.8/4.3/5.0/6.0 mm 30 Ncm<br />
<strong>CAMLOG</strong> ® abutments must be retightened to <strong>the</strong> same torque after about<br />
five minutes to reach <strong>the</strong> maximum screw tension. This prevents screws<br />
from loosening to <strong>the</strong> extent possible.<br />
23
HYBRID RESTORATIONS WITH THE <strong>CAMLOG</strong> ® IMPLANT SYSTEM<br />
BAR RESTORATIONS<br />
For impression taking, <strong>the</strong> impression post for <strong>the</strong> <strong>CAMLOG</strong> ® bar abutment<br />
is inserted into <strong>the</strong> driver for impression posts and healing caps for bar abutments.<br />
A driver is available for each implant diameter 3.3/3.8/4.3 mm and<br />
5.0/6.0 mm.<br />
24<br />
Holding screw<br />
Driver<br />
Impression post<br />
Driver for impression posts<br />
and healing caps for <strong>CAMLOG</strong> ®<br />
bar abutments<br />
Mounted impression<br />
post<br />
The impression post is <strong>the</strong>n screwed onto <strong>the</strong> <strong>CAMLOG</strong> ® bar abutment fitted<br />
in <strong>the</strong> <strong>CAMLOG</strong> ® implant.<br />
A closed tray is suitable for impression taking. Then use a silicone or polye<strong>the</strong>r<br />
impression material to take <strong>the</strong> impression.<br />
After removing <strong>the</strong> impression, <strong>the</strong> impression posts remain on <strong>the</strong> <strong>CAMLOG</strong> ®<br />
bar abutments.
The impression posts are <strong>the</strong>n reattached <strong>with</strong> <strong>the</strong> driver for impression<br />
posts and healing caps for bar abutments and unscrewed from <strong>the</strong> bar abutment.<br />
The bar abutments remain in <strong>the</strong> implants. The impression posts are handed<br />
over to <strong>the</strong> dental laboratory.<br />
The screwdriver (hex) is <strong>the</strong>n used to screw healing caps for bar abutments<br />
onto <strong>the</strong> bar abutments based on <strong>the</strong> implant diameters used. The healing<br />
cap for bar abutment protects <strong>the</strong> bar abutment and at <strong>the</strong> same time assumes<br />
<strong>the</strong> function of a gingival former.<br />
CAST FABRICATION<br />
In <strong>the</strong> dental laboratory, <strong>the</strong> impression posts for bar abutments are tightened<br />
by hand to <strong>the</strong> soldering aid/bar lab analogs and repositioned in <strong>the</strong><br />
impression. A soldering aid/bar lab analog is available for each implant diameter<br />
3.3/3.8/4.3 mm and 5.0/6.0 mm.<br />
Impression post for bar abutment<br />
<strong>with</strong> soldering aid/bar lab analog<br />
HYBRID RESTORATIONS WITH THE <strong>CAMLOG</strong> ® IMPLANT SYSTEM<br />
25
HYBRID RESTORATIONS WITH THE <strong>CAMLOG</strong> ® IMPLANT SYSTEM<br />
BAR RESTORATIONS<br />
The cast is fabricated in <strong>the</strong> usual manner <strong>with</strong> suitable material.<br />
After <strong>the</strong> cast material has cured and <strong>the</strong> impression removed, <strong>the</strong> impression<br />
posts for bar abutments remain on <strong>the</strong> soldering aid/bar lab analogs.<br />
The impression posts are unscrewed from <strong>the</strong> soldering aid/bar lab analogs.<br />
Based on <strong>the</strong> planning, <strong>the</strong> bars are fabricated <strong>with</strong> <strong>the</strong> intended bar bases.<br />
26<br />
Finished working cast <strong>with</strong> soldering<br />
aid/bar lab analogs
IMPRESSION TAKING OVER THE <strong>CAMLOG</strong> ®<br />
IMPLANT SHOULDER<br />
INSERTING THE <strong>CAMLOG</strong> ® BAR ABUTMENTS INTO<br />
THE WORKING CAST<br />
The dental technician selects <strong>the</strong> appropriate <strong>CAMLOG</strong> ® bar abutments<br />
according to <strong>the</strong> <strong>CAMLOG</strong> ® implant diameter used (note color-coding) and<br />
<strong>the</strong> specific gingival heights and inserts <strong>the</strong>m into <strong>the</strong> <strong>CAMLOG</strong> ® lab<br />
analogs.<br />
The <strong>CAMLOG</strong> ® bar abutments are inserted into <strong>the</strong> driver for bar abutments.<br />
A driver is available for each implant diameter 3.3/3.8/4.3 mm and 5.0/<br />
6.0 mm. A screw integrated in <strong>the</strong> instrument secures <strong>the</strong> abutment. The<br />
screw is tightened by hand.<br />
The driver is used to tighten <strong>the</strong> <strong>CAMLOG</strong> ® bar abutments by hand. The<br />
bar abutment plateau should be approx. 0.5 mm supragingival.<br />
IMPORTANT NOTE<br />
The bar abutments must not be modified!<br />
The bar is fabricated on <strong>the</strong> cast. A previously prepared silicone index is<br />
used to virtually represent <strong>the</strong> space available in <strong>the</strong> planning and fabrication<br />
of <strong>the</strong> bar construction.<br />
Driver for bar abutment<br />
Ø 3.3/3.8/4.3 mm<br />
Ø 5.0/6.0 mm<br />
Finished working cast <strong>with</strong><br />
<strong>CAMLOG</strong> ® bar abutments<br />
HYBRID RESTORATIONS WITH THE <strong>CAMLOG</strong> ® IMPLANT SYSTEM<br />
Working cast <strong>with</strong> silicone<br />
index<br />
0.5 mm<br />
27
HYBRID RESTORATIONS WITH THE <strong>CAMLOG</strong> ® IMPLANT SYSTEM<br />
BAR RESTORATIONS<br />
FABRICATION OF THE BAR CONSTRUCTION<br />
CAST BAR CONSTRUCTIONS<br />
Various bar bases are available for bar fabrication using casting technology:<br />
FULL CASTING TECHNIQUE<br />
BASE FOR BAR ABUTMENT, BURN-OUT<br />
Fabrication of a cast bar construction <strong>with</strong> prefabricated bar base made of<br />
burn-out plastic (POM) for full casting technique. A pros<strong>the</strong>tic screw for bar<br />
abutment (hex) based on <strong>the</strong> diameter is used to attach <strong>the</strong> bar base to <strong>the</strong><br />
<strong>CAMLOG</strong> ® bar abutment.<br />
28<br />
CAUTION<br />
To avoid deforming <strong>the</strong> bar base, only tighten <strong>the</strong> pros<strong>the</strong>tic screw lightly<br />
by hand.<br />
The bar base can be shortened occlusally to <strong>the</strong> height of <strong>the</strong> screwed pros<strong>the</strong>tic<br />
screw. The overall height of <strong>the</strong> base is 14 mm.<br />
EXAMPLE:<br />
WORKING CAST WITH <strong>CAMLOG</strong> ® LAB ANALOGS<br />
(TITANIUM ALLOY).<br />
WAX-UP<br />
The bar wax-up is created based on <strong>the</strong> planning on <strong>the</strong> burn-out bar base<br />
directly. The wax thickness over <strong>the</strong> plastic coping should be at least 0.3 mm.<br />
Do not cover <strong>the</strong> delicate edge of <strong>the</strong> base <strong>with</strong> wax. Prefabricated bar components<br />
made of wax / plastic can also be used to fabricate a pre-milled bar<br />
construction.<br />
IMPORTANT NOTE<br />
When burning out <strong>the</strong> casting muffle, swelling may occur due to <strong>the</strong><br />
<strong>the</strong>rmal expansion of <strong>the</strong> plastic and damage <strong>the</strong> investment compound<br />
in <strong>the</strong> area of <strong>the</strong> plastic base. This can cause investment compound to<br />
be included in <strong>the</strong> casting metal. Therefore, a minimum wax thickness<br />
of 0.3 mm should be applied to <strong>the</strong> plastic base. When heating, <strong>the</strong> wax<br />
softens first and gives <strong>the</strong> plastic enough space to expand.<br />
Base for bar abutment,<br />
burn-out, <strong>with</strong> pros<strong>the</strong>tic<br />
screw<br />
Example: Milled bar construction<br />
Screw-retained base on <strong>the</strong><br />
<strong>CAMLOG</strong> ® bar abutment
INVESTMENT, CAST AND DEVESTMENT<br />
The abutment is embedded according to <strong>the</strong> instruction manual of <strong>the</strong> muffle<br />
system used. We do not recommend <strong>the</strong> use of a wax wetting agent.<br />
However, if wax wetting agents are used, it must be suitable for use <strong>with</strong><br />
POM plastic components. When embedding, <strong>the</strong> correct placement of <strong>the</strong><br />
wax-up in <strong>the</strong> casting muffle is of importance. Volume ratios and pin angles<br />
must be selected so that <strong>the</strong> required temperature for casting is<br />
achieved. This is particularly important for voluminous casts. We recommend<br />
phosphate bound investment materials. The manufacturer's processing<br />
instructions must be observed and <strong>the</strong> mixing ratios and preheating<br />
times accurately observed. We recommend you do not use any quick heating<br />
processes (speed investment materials). The cast delay time must be<br />
kept as brief as possible.<br />
After casting, <strong>the</strong> cast object must be slowly cooled to room temperature<br />
and <strong>the</strong> object gently devested. We recommend gentle devestment in an<br />
ultrasonic bath <strong>with</strong> waterjet or stripping.<br />
After casting, suitable reworking reamers are available to remove/smooth<br />
out casting residues for reworking <strong>the</strong> screw seat and <strong>the</strong> shoulder contact<br />
area to <strong>the</strong> <strong>CAMLOG</strong> ® bar abutment.<br />
After trimming <strong>the</strong> bar, it is checked for a precision fit. Good hygiene capacity<br />
must be ensured. A distance of min. 2 mm to <strong>the</strong> gingiva must be maintained<br />
to prevent insufficient cleaning and associated changes to <strong>the</strong> mucous<br />
membrane.<br />
The secondary framework, e.g. electroplating technique, is <strong>the</strong>n fabricated.<br />
Reworking reamer,<br />
for base for bar abutment,<br />
for <strong>the</strong> screw seat<br />
Ø 3.3/3.8/4.3 mm and 5.0/6.0 mm<br />
Reworking reamer, for base<br />
for bar abutment, for<br />
<strong>the</strong> plane surface/cone seat<br />
Ø 3.3/3.8/4.3 mm and 5.0/6.0 mm<br />
Example: Milled bar construction<br />
Example: Milled bar construction <strong>with</strong><br />
secondary framework using <strong>the</strong> electroplating<br />
technique and tertiary structure<br />
HYBRID RESTORATIONS WITH THE <strong>CAMLOG</strong> ® IMPLANT SYSTEM<br />
Cast bar<br />
Cast bar<br />
base<br />
Cast bar<br />
Cast bar<br />
base<br />
Reaming out <strong>the</strong> screw channel<br />
of <strong>the</strong> cast bar base<br />
Reaming out <strong>the</strong> inner cone and plane<br />
surface of <strong>the</strong> cast bar base<br />
29
HYBRID RESTORATIONS WITH THE <strong>CAMLOG</strong> ® IMPLANT SYSTEM<br />
BAR RESTORATIONS<br />
INSERTING THE BAR CONSTRUCTION<br />
The <strong>CAMLOG</strong> ® bar abutments are transferred from <strong>the</strong> working cast to <strong>the</strong><br />
<strong>CAMLOG</strong> ® implants and screwed in definitely <strong>with</strong> <strong>the</strong> prescribed torque.<br />
The finished bar construction is transferred to <strong>the</strong> <strong>CAMLOG</strong> ® bar abutments<br />
and fixed definitely <strong>with</strong> 15 Ncm <strong>with</strong> new unused pros<strong>the</strong>tic screws,<br />
using a screwdriver (hex). The newly created full denture is <strong>the</strong>n inserted<br />
and checked for proper fit.<br />
SLEEVE FOR TITANIUM BONDING BASE,<br />
BURN- OUT (PASSIVE FIT)<br />
Cast bar version <strong>with</strong> prefabricated bar sleeve made of burn-out plastic<br />
(POM) for full casting technique and titanium bonding base as a retaining<br />
element for <strong>the</strong> implant. The Passive Fit <strong>System</strong> makes it possible to fabricate<br />
cast bars absolutely tension-free. For bar fabrication, <strong>the</strong> bar sleeve is<br />
placed over <strong>the</strong> titanium bonding base. After completing <strong>the</strong> bar, it is<br />
bonded to <strong>the</strong> implants <strong>with</strong> <strong>the</strong> titanium bonding bases. The plastic sleeve<br />
of <strong>the</strong> bar base can be shortened occlusally to <strong>the</strong> height of <strong>the</strong> pros<strong>the</strong>tic<br />
screw. The overall height of <strong>the</strong> plastic sleeve is 14 mm.<br />
EXAMPLE:<br />
WORKING CAST WITH <strong>CAMLOG</strong> ® LAB ANALOGS<br />
(TITANIUM ALLOY).<br />
WAX-UP<br />
The bar wax-up is created based on <strong>the</strong> planning on <strong>the</strong> burn-out bar base<br />
directly. The wax thickness over <strong>the</strong> plastic coping should be at least 0.3 mm.<br />
Do not cover <strong>the</strong> delicate edge of <strong>the</strong> base <strong>with</strong> wax. Prefabricated bar<br />
components made of wax / plastic can also be used to fabricate a premilled<br />
bar construction.<br />
Embedding, casting and devestment happen as described on page 28–29<br />
"BASE FOR BAR ABUTMENT, BURN-OUT".<br />
30<br />
Sleeve for titanium bonding base,<br />
burn-out, bondable (passive fit)
TRIMMING<br />
After devestment and cleaning of <strong>the</strong> cast, <strong>the</strong> internal fixation edges<br />
(screw seat) are removed from <strong>the</strong> bar sleeves <strong>with</strong> a round bur (Ø 2.4 mm).<br />
The pros<strong>the</strong>tic screw must slide lightly through <strong>the</strong> bar sleeve. The final<br />
screw seat is on <strong>the</strong> titanium bonding base.<br />
Cast bar construction Removing <strong>the</strong> screw seat Checking <strong>the</strong> screw mobility Fit of <strong>the</strong> bonding base<br />
After trimming, pros<strong>the</strong>tic screws are used to attach <strong>the</strong> titanium bonding<br />
bases on <strong>the</strong> cast. The bar is placed on <strong>the</strong> titanium bonding bases and <strong>the</strong><br />
fit checked.<br />
If <strong>the</strong> bar is seated tension-free on <strong>the</strong> cast at <strong>the</strong> try-in, it can <strong>the</strong>n be<br />
bonded to <strong>the</strong> titanium bonding bases.<br />
BONDING THE CAST BAR TO THE TITANIUM BONDING BASES<br />
After completing <strong>the</strong> bar framework, <strong>the</strong> <strong>CAMLOG</strong> ® bar abutments are<br />
transferred from <strong>the</strong> cast to <strong>the</strong> implants and screwed in by hand.<br />
The titanium bonding bases are placed on <strong>the</strong> <strong>CAMLOG</strong> ® bar abutments<br />
and <strong>with</strong> <strong>the</strong> pros<strong>the</strong>tic screw, screwed on by hand.<br />
HYBRID RESTORATIONS WITH THE <strong>CAMLOG</strong> ® IMPLANT SYSTEM<br />
Insertion of <strong>CAMLOG</strong> ® bar abutments Placing <strong>the</strong> titanium bonding bases<br />
31
HYBRID RESTORATIONS WITH THE <strong>CAMLOG</strong> ® IMPLANT SYSTEM<br />
BAR RESTORATIONS<br />
The bar framework is <strong>the</strong>n placed on <strong>the</strong> titanium bonding bases and <strong>the</strong><br />
fit checked. The bar must be placed on <strong>the</strong> titanium bonding bases tensionfree.<br />
The bonding surfaces of <strong>the</strong> bar framework and titanium bases are <strong>the</strong>n<br />
conditioned based on <strong>the</strong> manufacturer’s specifications. We recommend<br />
carefully sandblasting <strong>the</strong> bonding surfaces before bonding. When bonding,<br />
care should be taken that <strong>the</strong> pros<strong>the</strong>tic screw does not come into contact<br />
<strong>with</strong> <strong>the</strong> bonding material. We recommend covering <strong>the</strong> internal hex<br />
of <strong>the</strong> screw head <strong>with</strong> wax. After <strong>the</strong> bonding material has cured, <strong>the</strong> pros<strong>the</strong>tic<br />
screws are loosened, <strong>the</strong> bar removed from <strong>the</strong> <strong>CAMLOG</strong> ® bar abutments,<br />
<strong>the</strong> excess bonding material carefully removed and <strong>the</strong> bar abutments<br />
removed. The new full denture is <strong>the</strong>n fabricated on <strong>the</strong> working<br />
cast.<br />
INSERTING THE BAR CONSTRUCTION<br />
The <strong>CAMLOG</strong> ® bar abutments are transferred from <strong>the</strong> working cast to <strong>the</strong><br />
<strong>CAMLOG</strong> ® implants and screwed in at <strong>the</strong> prescribed torques. The finished<br />
bar construction is transferred to <strong>the</strong> <strong>CAMLOG</strong> ® bar abutments and fixed<br />
definitely <strong>with</strong> new unused pros<strong>the</strong>tic screws, using a screwdriver (hex)<br />
<strong>with</strong> 15 Ncm. The newly created full denture is <strong>the</strong>n inserted and checked<br />
for proper fit.<br />
32<br />
CAST-ON TECHNIQUE<br />
BASE FOR BAR ABUTMENT, CAST-ON<br />
Cast bar version <strong>with</strong> prefabricated bar base made of high-melting cast-on<br />
alloy and burn-out plastic sleeve (POM) for cast-on technique. A pros<strong>the</strong>tic<br />
screw for bar abutment (hex) based on <strong>the</strong> diameter is used to fix <strong>the</strong> bar<br />
base on <strong>the</strong> <strong>CAMLOG</strong> ® bar abutment. The plastic sleeve of <strong>the</strong> bar base<br />
can be shortened occlusally to <strong>the</strong> height of <strong>the</strong> pros<strong>the</strong>tic screw. The overall<br />
height of <strong>the</strong> base is 13 mm.<br />
Base for bar abutment, cast-on<br />
Setting up <strong>the</strong> bar bases Shortened bar bases<br />
WAX-UP<br />
The bar wax-up is created based on <strong>the</strong> planning on <strong>the</strong> burn-out plastic<br />
sleeve and bar base directly. The wax thickness over <strong>the</strong> plastic sleeve<br />
should be at least 0.3 mm. The bar base consists of a non-oxidizing alloy.<br />
Do not cover <strong>the</strong> fine gold margin of <strong>the</strong> base <strong>with</strong> wax. Prefabricated bar<br />
components made of wax / plastic can also be used to fabricate a premilled<br />
bar construction.<br />
CAUTION<br />
Do not cover <strong>the</strong> fine gold margin of <strong>the</strong> bar base <strong>with</strong> wax. This can<br />
lead to a surplus of cast-on alloy on or over <strong>the</strong> margin on <strong>the</strong> implant<br />
shoulder support.
After wax-up of <strong>the</strong> bar framework, a suitable agent must be used to clean<br />
<strong>the</strong> fine gold margin and <strong>the</strong> area of <strong>the</strong> implant shoulder support of separating<br />
medium and wax particles (e.g. <strong>with</strong> a cotton swab soaked in alcohol).<br />
EMBEDDING AND CASTING<br />
The abutment is embedded according to <strong>the</strong> instruction manual of <strong>the</strong> muffle<br />
system used. We do not recommend <strong>the</strong> use of a wax wetting agents.<br />
The fine film from <strong>the</strong> agent can lead to a surplus of cast-on alloy on <strong>the</strong><br />
margin or on <strong>the</strong> implant shoulder support. When embedding, <strong>the</strong> correct<br />
placement of <strong>the</strong> wax-up in <strong>the</strong> casting muffle is of importance. Volume ratios<br />
and pin angles must be selected so that <strong>the</strong> required temperature for<br />
formation of a metallic connection is achieved. This is particularly important<br />
for voluminous casts.<br />
The investment compound must be matched <strong>with</strong> <strong>the</strong> cast-on alloy and <strong>the</strong><br />
casting alloy used. We recommend phosphate bound investment materials.<br />
The manufacturer's processing instructions must be observed and <strong>the</strong> mixing<br />
ratios and preheating times accurately observed. We recommend you<br />
do not use any investment materials for <strong>the</strong> quick heating processes (speed<br />
investment materials). The cast delay time must be kept as brief as possible.<br />
INSTRUCTIONS FOR THE CAST-ON ALLOYS<br />
The casting alloy may not exceed <strong>the</strong> liquidus temperature of 1350°C<br />
(2462°F) in its melting range. The melting range of <strong>the</strong> high-melting caston<br />
gold alloy lies between 1400°C– 1490°C (2552°F–2714°F).<br />
The casting alloy must contain gold in its components and be compatible<br />
<strong>with</strong> <strong>the</strong> high-melting cast-on gold alloy. Observe <strong>the</strong> instructions of <strong>the</strong><br />
alloy manufacturer.<br />
The use of o<strong>the</strong>r cast-on alloys is not recommended because gold alloys<br />
<strong>with</strong> nickel or cobalt components can destroy <strong>the</strong> base part. Components<br />
of an unsuitable alloy can lead to phases <strong>with</strong> reduced corrosion resistance,<br />
less stability or a low melting range thanks to "diffusion processes" in <strong>the</strong><br />
border zone "casting alloy/cast-on alloy".<br />
DEVESTMENT<br />
After casting, <strong>the</strong> cast object must be slowly cooled to room temperature<br />
and <strong>the</strong> object gently devested.<br />
HYBRID RESTORATIONS WITH THE <strong>CAMLOG</strong> ® IMPLANT SYSTEM<br />
IMPORTANT NOTE<br />
Never use sandblasting to devest <strong>the</strong> cast; this would destroy <strong>the</strong> precise<br />
fit on <strong>the</strong> <strong>CAMLOG</strong> ® bar abutment shoulder (precision fit reduced,<br />
poor margin fit)!<br />
We recommend gentle devestment in an ultrasonic bath <strong>with</strong> waterjet or<br />
stripping.<br />
CASTING QUALITY<br />
If <strong>the</strong> cast object exhibits casting defects after devestment such as incomplete<br />
distribution or casting fins/bubbles over <strong>the</strong> margin onto <strong>the</strong> implant<br />
shoulder support, <strong>the</strong> work should be repeated. The precision of <strong>the</strong> prefabricated<br />
bar base is severely affected and also <strong>the</strong> long-term success of <strong>the</strong><br />
pros<strong>the</strong>tic restoration. The bar framework must be seated tension-free on<br />
<strong>the</strong> <strong>CAMLOG</strong> ® bar abutments.<br />
The secondary framework, e.g. electroplating technique, is <strong>the</strong>n fabricated.<br />
INSERTING THE BAR CONSTRUCTION<br />
The <strong>CAMLOG</strong> ® bar abutments are transferred from <strong>the</strong> working cast to <strong>the</strong><br />
<strong>CAMLOG</strong> ® implants and screwed in <strong>with</strong> <strong>the</strong> prescribed torques. The finished<br />
bar construction is transferred to <strong>the</strong> <strong>CAMLOG</strong> ® bar abutments and<br />
fixed <strong>with</strong> new unused pros<strong>the</strong>tic screws, using a screwdriver (hex) <strong>with</strong><br />
15 Ncm. The newly created full denture is <strong>the</strong>n inserted and checked for<br />
proper fit.<br />
33
HYBRID RESTORATIONS WITH THE <strong>CAMLOG</strong> ® IMPLANT SYSTEM<br />
BAR RESTORATIONS<br />
LASER-WELDED BAR CONSTRUCTION<br />
BASE FOR BAR ABUTMENT, LASER-WELDABLE<br />
Laser-welded bar construction <strong>with</strong> prefabricated bar bases made of pure<br />
titanium (titanium Grade 4). A pros<strong>the</strong>tic screw for bar abutment (hex)<br />
based on <strong>the</strong> diameter is used to fix <strong>the</strong> bar base on <strong>the</strong> <strong>CAMLOG</strong> ® bar abutment.<br />
The height of <strong>the</strong> bar base is 5.3 mm.<br />
EXAMPLE:<br />
WORKING CAST WITH SOLDERING AIDS/BAR LAB ANALOGS<br />
FOR BAR ABUTMENTS (STAINLESS STEEL).<br />
The bar elements are cut accordingly and in consideration of a joining gap<br />
that is as small as possible fitted between <strong>the</strong> bar bases.<br />
After assembling all <strong>the</strong> components, <strong>the</strong> bar segments are welded toge<strong>the</strong>r<br />
<strong>with</strong> <strong>the</strong> bar copings under sufficient argon gas purging and <strong>the</strong> bar is highgloss<br />
polished. The bar must be seated tension-free on <strong>the</strong> <strong>CAMLOG</strong> ® bar<br />
abutments.<br />
34<br />
Base for bar abutment,<br />
laser-weldable<br />
IMPORTANT NOTE ABOUT LASER WELDING<br />
Blue discoloration on <strong>the</strong> welds must be avoided. These points to insufficient<br />
purging <strong>with</strong> argon gas and to oxygen uptake of <strong>the</strong> titanium.<br />
Brittleness and associated weakness in <strong>the</strong> weld is <strong>the</strong> result. Observe<br />
<strong>the</strong> operating instructions of <strong>the</strong> laser devices used!<br />
After completing <strong>the</strong> bar construction, <strong>the</strong> final bar pros<strong>the</strong>sis <strong>with</strong> base reinforcement<br />
out of metal is fabricated in <strong>the</strong> usual manner. The teeth are<br />
positioned based on <strong>the</strong> principle of modern complete dentures. An existing<br />
full denture can also be converted into a bar-retained pros<strong>the</strong>sis <strong>with</strong><br />
suitable bar matrices.<br />
Setting up <strong>the</strong> bar bases Bar bases <strong>with</strong> fitted prefabricated bar<br />
components made of pure titanium<br />
IMPORTANT NOTE<br />
The matrix should be placed before fabrication of <strong>the</strong> pros<strong>the</strong>sis <strong>with</strong> a<br />
suitable relief wire. Only <strong>the</strong>n is vertical translation of <strong>the</strong> pros<strong>the</strong>sis on<br />
<strong>the</strong> bar ensured.
INSERTING THE BAR CONSTRUCTION<br />
The <strong>CAMLOG</strong> ® bar abutments are transferred from <strong>the</strong> working cast to<br />
<strong>the</strong> <strong>CAMLOG</strong> ® implants and screwed in <strong>with</strong> <strong>the</strong> prescribed torques. The<br />
finished bar construction is transferred to <strong>the</strong> <strong>CAMLOG</strong> ® bar abutments<br />
and fixed <strong>with</strong> new unused pros<strong>the</strong>tic screws, using a screwdriver (hex) <strong>with</strong><br />
15 Ncm. The newly created full denture is <strong>the</strong>n inserted and checked for<br />
proper fit.<br />
SOLDERED BAR CONSTRUCTION<br />
BASE FOR BAR ABUTMENT, SOLDERABLE<br />
Soldered bar construction <strong>with</strong> prefabricated bar bases made of solderable<br />
gold alloy. A pros<strong>the</strong>tic screw for bar abutment (hex) is used to fix <strong>the</strong> bar<br />
base on <strong>the</strong> <strong>CAMLOG</strong> ® bar abutment. The height of <strong>the</strong> bar base is 5.3 mm.<br />
Base for bar abutment,<br />
solderable<br />
EXAMPLE:<br />
WORKING CAST WITH SOLDERING AIDS/BAR LAB ANALOGS<br />
FOR BAR ABUTMENT (STAINLESS STEEL).<br />
The bar elements are cut accordingly and in consideration of a joining gap<br />
that is as small as possible fitted between <strong>the</strong> bar bases. The bar components<br />
are mounted to residue-free burn-out plastic, <strong>the</strong> pros<strong>the</strong>tic screws<br />
loosen after curing and <strong>the</strong> bar lifted off <strong>the</strong> cast. Soldering aids/lab analogs<br />
(stainless steel) are inserted in <strong>the</strong> bar bases and hand tightened <strong>with</strong><br />
screws, hex, for bar abutments (thread M1.6 for Ø 3.3/3.8/4.3 mm; thread<br />
M2.0 for Ø 5.0/ 6.0mm; stainless steel.<br />
With <strong>the</strong> bar prepared for soldering, a soldering model is fabricated in <strong>the</strong><br />
conventional manner.<br />
Setting up <strong>the</strong> solderable<br />
bar bases<br />
Fixed bar components<br />
HYBRID RESTORATIONS WITH THE <strong>CAMLOG</strong> ® IMPLANT SYSTEM<br />
Bar bases <strong>with</strong> fitted prefabricated<br />
bar components made of solderable<br />
gold alloy<br />
Soldering aids/lab analogs <strong>with</strong> bar<br />
and screws, hex, for bar abutment<br />
NOTE<br />
The instruction manuals of <strong>the</strong> soldering material manufactures must be<br />
observed!<br />
35
HYBRID RESTORATIONS WITH THE <strong>CAMLOG</strong> ® IMPLANT SYSTEM<br />
BAR RESTORATIONS<br />
The soldering is carried out according to <strong>the</strong> instructions of <strong>the</strong> soldering<br />
material and solder manufacturers. To avoid deformation of <strong>the</strong> soldering<br />
model, we recommend preheating <strong>the</strong> soldering model in <strong>the</strong> preheating<br />
furnace at approx. 500-600°C (932–1112°F). The plastic burns uniformly by<br />
doing so. After preheating <strong>the</strong> model in <strong>the</strong> furnace, <strong>the</strong> embedded bar can<br />
be soldered. Then allow <strong>the</strong> soldering mode to cool to room temperature.<br />
The bar is devested in an ultrasonic bath and <strong>the</strong>n cleaned of oxides and<br />
flux residues in an acid bath.<br />
TIP: To protect <strong>the</strong> edges when trimming/polishing, <strong>the</strong> bar bases can be<br />
attached to soldering aids/bar lab analogs.<br />
The finished bar must be seated tension-free on <strong>the</strong> <strong>CAMLOG</strong> ® bar abutments.<br />
After completing <strong>the</strong> bar construction, <strong>the</strong> final bar pros<strong>the</strong>sis <strong>with</strong> base<br />
reinforcement out of metal is fabricated in <strong>the</strong> usual manner. The teeth are<br />
positioned based on <strong>the</strong> principle of modern complete dentures. An existing<br />
full denture can also be converted into a bar-retained pros<strong>the</strong>sis <strong>with</strong><br />
suitable bar matrices.<br />
36<br />
IMPORTANT NOTE<br />
Never use sandblasting to devest <strong>the</strong> bar; this would destroy <strong>the</strong> precise<br />
fit of <strong>the</strong> bar base on <strong>the</strong> <strong>CAMLOG</strong> ® bar abutment shoulder!<br />
IMPORTANT NOTE<br />
The matrix should be placed before fabrication of <strong>the</strong> pros<strong>the</strong>sis <strong>with</strong> a<br />
suitable relief wire. Only <strong>the</strong>n is vertical translation of <strong>the</strong> pros<strong>the</strong>sis on<br />
<strong>the</strong> bar ensured.<br />
INSERTING THE BAR CONSTRUCTION<br />
The <strong>CAMLOG</strong> ® bar abutments are transferred from <strong>the</strong> working cast to<br />
<strong>the</strong> <strong>CAMLOG</strong> ® implants and screwed in <strong>with</strong> <strong>the</strong> prescribed torques. The<br />
finished bar construction is transferred to <strong>the</strong> <strong>CAMLOG</strong> ® bar abutments<br />
and fixed <strong>with</strong> new unused pros<strong>the</strong>tic screws, using a screwdriver (hex)<br />
<strong>with</strong> 15 Ncm. The newly created full denture is <strong>the</strong>n inserted and checked<br />
for proper fit.<br />
Fabricating <strong>the</strong> soldering model<br />
Finished bar
RELINING OF A BAR-SUPPORTED FULL DENTURE<br />
If relining is necessary to retain <strong>the</strong> function of a bar-supported full denture,<br />
<strong>the</strong> holding pins for bars can be used.<br />
The holding pins for bars are used exclusively to attach a bar during <strong>the</strong><br />
relining impression taking for an indirect relining. The holding pins for bars<br />
hold <strong>the</strong> bar in <strong>the</strong> relining impression. It is not necessary to block out <strong>the</strong><br />
bar in <strong>the</strong> mouth; it is easily carried out on <strong>the</strong> relining model.<br />
The holding pins for bars are available in two sizes:<br />
HOLDING PIN FOR BAR, YELLOW, FOR THREAD M1.6<br />
Can be used for <strong>CAMLOG</strong> ® bar abutment Ø 3.3/3.8/4.3 mm<br />
and soldering aid/bar lab analog Ø 3.3/3.8/4.3 mm<br />
HOLDING PIN FOR BAR, BLUE, FOR THREAD M2.0<br />
Can be used for <strong>CAMLOG</strong> ® bar abutment Ø 5.0/6.0 mm and<br />
soldering aid/bar lab analog Ø 5.0/6.0 mm<br />
The holding pins for bars are for single use only and must be disinfected<br />
before use (no sterilization). See also <strong>the</strong> “Preparation Instructions for<br />
<strong>the</strong> <strong>CAMLOG</strong> ® /CONELOG ® <strong>Implant</strong> <strong>System</strong>", Art. No. J8000.0032.<br />
PROCESSING<br />
HYBRID RESTORATIONS WITH THE <strong>CAMLOG</strong> ® IMPLANT SYSTEM<br />
PREPARATION OF THE RELINING IMPRESSION TAKING<br />
The bar-supported pros<strong>the</strong>sis is removed from <strong>the</strong> mouth. A screwdriver<br />
(hex) is used to loosen and remove <strong>the</strong> pros<strong>the</strong>tic screws from <strong>the</strong> <strong>CAMLOG</strong> ®<br />
bar abutments.<br />
Take measures to protect against aspiration!<br />
INSERTING THE HOLDING PINS FOR BARS<br />
The holding pins for bars are selected based on <strong>the</strong> diameter of <strong>the</strong><br />
<strong>CAMLOG</strong> ® bar abutments. A screwdriver (hex) is used to grab <strong>the</strong> holding<br />
pins for bars and to push <strong>the</strong>m into <strong>the</strong> screw openings. Limited friction between<br />
<strong>the</strong> screwdriver and <strong>the</strong> holding pin for bars prevents loosening during<br />
application. The screwdriver can <strong>the</strong>n be easily removed. The bar is <strong>the</strong>n<br />
fixed <strong>with</strong> <strong>the</strong> holding pins for bars in <strong>the</strong> patient's mouth. It is important<br />
to check (e.g. occlusally pressing <strong>with</strong> a finger) <strong>the</strong> proper fit of all applied<br />
holding pins for bars just before taking <strong>the</strong> impression. Blocking out <strong>the</strong> bar<br />
is unnecessary.<br />
IMPRESSION TAKING<br />
The relining impression for bar-supported pros<strong>the</strong>sis can be taken as usual.<br />
Make sure that <strong>the</strong> impression material fills in under <strong>the</strong> bar component<br />
completely.<br />
The pros<strong>the</strong>sis impression can be removed after <strong>the</strong> prescribed setting time<br />
of <strong>the</strong> impression material. The bar incl. <strong>the</strong> holding pins for bars remains<br />
in <strong>the</strong> pros<strong>the</strong>sis impression surrounded by impression material.<br />
37
HYBRID RESTORATIONS WITH THE <strong>CAMLOG</strong> ® IMPLANT SYSTEM<br />
BAR RESTORATIONS<br />
PREPARING AND FABRICATING THE RELINING MODEL<br />
The soldering aid/bar lab analog that fits is selected based on <strong>the</strong> diameter<br />
used. It is inserted into <strong>the</strong> bar base and holds <strong>with</strong> <strong>the</strong> friction of <strong>the</strong> holding<br />
pin for bars. Ensure <strong>the</strong> proper fit of <strong>the</strong> soldering aid/bar lab analog in<br />
<strong>the</strong> bar base. Also use sticky wax or similar to hold <strong>the</strong> soldering aid/bar lab<br />
analog if necessary.<br />
The relining model is <strong>the</strong>n fabricated in <strong>the</strong> usual way.<br />
RELINING<br />
After fabricating <strong>the</strong> relining model, <strong>the</strong> bar is placed on <strong>the</strong> model and attached<br />
<strong>with</strong> pros<strong>the</strong>tic screws for bar abutments.<br />
The areas underneath are blocked out. The relining is <strong>the</strong>n finished in <strong>the</strong><br />
usual way based on <strong>the</strong> procedure for relining a bar-supported pros<strong>the</strong>sis.<br />
REPLACING THE BAR AND PROSTHESIS<br />
The bar is fixed in <strong>the</strong> patient's mouth using unused pros<strong>the</strong>tic screws for bar<br />
abutments. The bar is inserted and <strong>the</strong> pros<strong>the</strong>tic screws are tightened to<br />
<strong>the</strong> specified torque of 15 Ncm. The pros<strong>the</strong>sis is <strong>the</strong>n inserted and checked<br />
for proper seating and occlusion.<br />
38<br />
Holding pin for bar, bar base,<br />
soldering aid/bar lab analog
BALL ABUTMENT<br />
ANCHORING SYSTEM<br />
INTRODUCTION<br />
In implantological hybrid pros<strong>the</strong>tics, ball abutment restorations represent<br />
movable anchorings that allow rotational movements of <strong>the</strong> pros<strong>the</strong>sis in<br />
one or more directions respectively vertical translation movements. Ball<br />
abutments should generally be perpendicular to <strong>the</strong> occlusal plane to make<br />
axial loading of <strong>the</strong> implant possible.<br />
TASKS OF A BALL ANCHORING RESTORATION<br />
• Protecting <strong>the</strong> pros<strong>the</strong>sis against shearing and lifting forces<br />
• Shear distribution<br />
• Possible axial transfer of mastication forces between <strong>the</strong> pros<strong>the</strong>sis<br />
and implant<br />
• Resilience compensation through degrees of freedom<br />
INDICATIONS:<br />
• Resilient anchoring of implant-supported full dentures for <strong>the</strong><br />
edentulous maxilla and mandible in combination <strong>with</strong> 2 <strong>CAMLOG</strong> ®<br />
implants to secure a tangential rotation axis.<br />
• Anchoring of implant-supported full dentures for <strong>the</strong> edentulous<br />
maxilla and mandible in combination <strong>with</strong> 4 <strong>CAMLOG</strong> ® implants.<br />
CONTRAINDICATIONS:<br />
• Uneven number of implants per arch<br />
• Improperly placed implants that prevent a tangential rotation axis<br />
• Combination <strong>with</strong> o<strong>the</strong>r retention devices<br />
• Use <strong>with</strong> disparallel-placed implants <strong>with</strong> an angulation of more than<br />
10° to <strong>the</strong> implant axis<br />
PRODUCT DESCRIPTION<br />
HYBRID RESTORATIONS WITH THE <strong>CAMLOG</strong> ® IMPLANT SYSTEM<br />
<strong>CAMLOG</strong> ® ball abutments are color-coded and available for <strong>CAMLOG</strong> ® implants<br />
in <strong>the</strong> 3.3/3.8/4.3/5.0 mm diameters in various gingival heights.<br />
<strong>CAMLOG</strong> ® ball abutment sets are also available consisting of a <strong>CAMLOG</strong> ®<br />
ball abutment, red duplication aid/spacer, stabilizing ring and ball abutment<br />
analog. The ball diameter is 2.25 mm.<br />
Ball abutment plateau<br />
Gingival heights of <strong>CAMLOG</strong> ® ball abutments<br />
Driver for <strong>CAMLOG</strong> ® ball abutments<br />
Ball diameter 2.25 mm<br />
1.5 mm<br />
3 mm<br />
4.5 mm<br />
The driver for <strong>CAMLOG</strong> ® ball abutments, manual/wrench, is used to screw<br />
<strong>the</strong> <strong>CAMLOG</strong> ® ball abutments into its final position in <strong>the</strong> <strong>CAMLOG</strong> ® implants.<br />
The torque for <strong>CAMLOG</strong> ® ball abutment Ø 3.3 mm is 20 Ncm and<br />
for Ø 3.8/4.3/5.0 mm 30 Ncm.<br />
After insertion, <strong>the</strong> ball abutment plateau should be at least 1.0 mm supragingival.<br />
39
HYBRID RESTORATIONS WITH THE <strong>CAMLOG</strong> ® IMPLANT SYSTEM<br />
BALL ABUTMENT<br />
ANCHORING SYSTEM<br />
<strong>CAMLOG</strong> ® BALL ABUTMENT SET FOR IMPLANT DIAMETER 3.3 MM<br />
Art. No. J2250.3315 J2250.3330<br />
GH 1.5 mm 3.0 mm<br />
<strong>CAMLOG</strong> ® BALL ABUTMENT SET FOR IMPLANT DIAMETER 3.8 MM<br />
Art. No. . J2250.3815 J2250.3830 J2250.3845<br />
GH 1.5 mm 3.0 mm 4.5 mm<br />
<strong>CAMLOG</strong> ® BALL ABUTMENT SET FOR IMPLANT DIAMETER 4.3 MM<br />
Art. No. J2250.4315 J2250.4330 J2250.4345<br />
GH 1.5 mm 3.0 mm 4.5 mm<br />
<strong>CAMLOG</strong> ® BALL ABUTMENT SET FOR IMPLANT DIAMETER 5.0 MM<br />
Art. No. J2250.5015 J2250.5030 J2250.5045<br />
GH 1.5 mm 3.0 mm 4.5 mm<br />
GH: Gingival height<br />
40
<strong>CAMLOG</strong> ® BALL ABUTMENT FOR IMPLANT DIAMETER 3.3 MM<br />
Art. No. J2249.3315 J2249.3330<br />
GH 1.5 mm 3.0 mm<br />
<strong>CAMLOG</strong> ® BALL ABUTMENT FOR IMPLANT DIAMETER 3.8 MM<br />
Art. No. J2249.3815 J2249.3830 J2249.3845<br />
GH 1.5 mm 3.0 mm 4.5 mm<br />
<strong>CAMLOG</strong> ® BALL ABUTMENT FOR IMPLANT DIAMETER 4.3 MM<br />
Art. No. J2249.4315 J2249.4330 J2249.4345<br />
GH 1.5 mm 3.0 mm 4.5 mm<br />
<strong>CAMLOG</strong> ® BALL ABUTMENT FOR IMPLANT DIAMETER 5.0 MM<br />
Art. No. J2249.5015 J2249.5030 J2249.5045<br />
GH 1.5 mm 3.0 mm 4.5 mm<br />
GH: Gingival height<br />
The retention force of <strong>the</strong> matrix CM Dalbo ® Plus belonging to <strong>the</strong><br />
<strong>CAMLOG</strong> ® ball abutment is adjustable stepless from "weak" to "strong"<br />
through <strong>the</strong> lamella retention insert. This makes <strong>the</strong> <strong>CAMLOG</strong> ® ball abutment<br />
eminently suitable for implant-retained full dentures. If necessary, <strong>the</strong><br />
screwdriver/activator for ball abutment matrix CM Dalbo ® Plus can be used<br />
to unscrew <strong>the</strong> lamella retention insert for replacement.<br />
<strong>CAMLOG</strong> ® ball<br />
abutment <strong>with</strong> mounted<br />
matrix CM Dalbo ® Plus<br />
HYBRID RESTORATIONS WITH THE <strong>CAMLOG</strong> ® IMPLANT SYSTEM<br />
Screwdriver/activator for ball<br />
abutment matrix<br />
CM Dalbo ® Plus<br />
Lamella retention insert<br />
of <strong>the</strong> matrix<br />
CM Dalbo ® Plus<br />
41
HYBRID RESTORATIONS WITH THE <strong>CAMLOG</strong> ® IMPLANT SYSTEM<br />
BALL ABUTMENT<br />
ANCHORING SYSTEM<br />
SETTING THE RETENTION FORCE<br />
With <strong>the</strong> lamella retention insert at maximum, <strong>the</strong> retention force is approximately<br />
1200 g. The force is approximately 200 g on delivery. The force can<br />
be regulated by screwing <strong>the</strong> activator in and out.<br />
The special thread of <strong>the</strong> slotted lamella retention insert is slightly tapered<br />
when turning in to prevent accidental misadjustment.<br />
<strong>CAMLOG</strong> ® IMPRESSION TAKING OPTIONS<br />
After successful implant insertion, <strong>the</strong> impression can be taken in two versions:<br />
Impression taking over <strong>CAMLOG</strong> ® implant shoulder for<br />
fabrication of a new ball-retained full denture:<br />
Impression taken over <strong>the</strong> <strong>CAMLOG</strong> ® implant shoulder directly <strong>with</strong><br />
<strong>CAMLOG</strong> ® impression post, open or closed tray, before insertion of<br />
<strong>CAMLOG</strong> ® ball abutments for fabrication of a new pros<strong>the</strong>sis. The cast is<br />
<strong>the</strong>n fabricated <strong>with</strong> <strong>CAMLOG</strong> ® lab analogs. See also <strong>CAMLOG</strong> ® cast fabrication<br />
on page 13–15. Fur<strong>the</strong>r information is available in <strong>the</strong> working instruction<br />
"Impression Taking, Bite Registration and Temporary Restoration<br />
on <strong>CAMLOG</strong> ® <strong>Implant</strong>s", Art. No. J8000.0065.<br />
We recommend impression taking open tray because it can be combined<br />
<strong>with</strong> a functional impression to fabricate an extension pros<strong>the</strong>sis.<br />
BALL ABUTMENT ANALOG, incl. stabilizing ring<br />
Art. No. J3015.3300 J3015.3800 J3015.4300 J3015.5000<br />
<strong>Implant</strong> Ø 3.3 mm 3.8 mm 4.3 mm 5.0 mm<br />
42<br />
Lamella retention insert<br />
screwed all <strong>the</strong> way in<br />
Lamella retention insert<br />
screwed all <strong>the</strong> way out<br />
IMPORTANT NOTE<br />
The lamella retention insert must never extend<br />
out of <strong>the</strong> housing (see arrows), o<strong>the</strong>rwise it<br />
may come loose and <strong>the</strong> matrix will be lifted.<br />
Activation/Deactivation<br />
Impression taking over <strong>CAMLOG</strong> ® ball abutments for broadening<br />
of an existing full denture into a ball abutment-retained<br />
pros<strong>the</strong>sis and/or for relining impression taking of an existing ball<br />
abutment-retained full denture:<br />
Direct impression taking over <strong>the</strong> <strong>CAMLOG</strong> ® ball abutments. The cast is <strong>the</strong>n<br />
fabricated <strong>with</strong> <strong>the</strong> ball abutment analog. The ball abutment analog is available<br />
for implant diameters 3.3/3.8/4.3/5.0 mm incl. stabilizing ring.
FABRICATION OF A NEW BALL ABUTMENT-<br />
RETAINED FULL DENTURE WITH INTEGRATED<br />
METAL REINFORCEMENT<br />
SELECTION AND INSERTION OF<br />
THE <strong>CAMLOG</strong> ® BALL ABUTMENT<br />
After fabricating <strong>the</strong> cast <strong>with</strong> <strong>CAMLOG</strong> ® lab analogs, <strong>the</strong> <strong>CAMLOG</strong> ® ball<br />
abutments are inserted. In conformance <strong>with</strong> <strong>the</strong> specified implant diameters<br />
and gingival heights, <strong>the</strong> dental technician selects <strong>the</strong> <strong>CAMLOG</strong> ® ball<br />
abutments on <strong>the</strong> master cast and uses <strong>the</strong> driver for ball abutments to<br />
manually screw <strong>the</strong>m into <strong>the</strong> <strong>CAMLOG</strong> ® lab analog.<br />
Different abutment heights can be selected to compensate for differences<br />
in levels in <strong>the</strong> gingival margin and implants. The ball heads should be at a<br />
uniform level for <strong>the</strong> best possible retention effect. The ball abutment<br />
plateau should be approx. 1 mm supragingival.<br />
ALIGNING THE DUPLICATION AIDS/SPACER<br />
The included stabilizing rings (white) are placed over <strong>the</strong> <strong>CAMLOG</strong> ® ball<br />
abutments and <strong>the</strong> red duplication aids/spacer are clipped on. Thereby <strong>the</strong><br />
duplication aids/spacer are aligned parallel to <strong>the</strong> implant axis. If <strong>the</strong> implant<br />
axes diverge, <strong>the</strong> stabilizing rings are NOT used. The implant axial<br />
divergence must not exceed 10° per implant. For a uniform “engaging” of<br />
<strong>the</strong> matrices and uniform activating of <strong>the</strong> lamella retention inserts, <strong>the</strong><br />
removal and insertion direction of <strong>the</strong> denture is important. The duplication<br />
aids/spacer are placed parallel on <strong>the</strong> <strong>CAMLOG</strong> ® ball abutments in <strong>the</strong> common<br />
insertion direction and stabilized <strong>with</strong> wax. Alternatively, <strong>the</strong> matrix<br />
may be used instead of <strong>the</strong> duplication aid.<br />
HYBRID RESTORATIONS WITH THE <strong>CAMLOG</strong> ® IMPLANT SYSTEM<br />
Possible fabrication of <strong>the</strong> duplication cast <strong>with</strong> duplication aids<br />
or matrices CM Dalbo ® Plus<br />
< max 10°<br />
1mm<br />
43
HYBRID RESTORATIONS WITH THE <strong>CAMLOG</strong> ® IMPLANT SYSTEM<br />
BALL ABUTMENT<br />
ANCHORING SYSTEM<br />
DUPLICATING THE WORKING CAST<br />
After <strong>the</strong> alignment (paralleling) of <strong>the</strong> duplication aids, undercut sections<br />
are blocked out <strong>with</strong> wax. When using <strong>the</strong> matrix, it must be covered <strong>with</strong><br />
a thin coat of wax (0.3 mm) before duplication (bonding space).<br />
FABRICATING THE METAL REINFORCEMENT<br />
A metal reinforcement is waxed similarly to a telescopic frame work. The<br />
wax-up is checked using <strong>the</strong> silicone index. A perforation is provided for excess<br />
cement. Soft tissue contacts are integrated in <strong>the</strong> free-end area and<br />
between <strong>the</strong> implants.<br />
After casting and trimming of <strong>the</strong> metal reinforcement, <strong>the</strong> fit is checked on<br />
<strong>the</strong> master cast. The matrices are placed on <strong>the</strong> <strong>CAMLOG</strong> ® ball abutments.<br />
The metal reinforcement must be seated tension-free on <strong>the</strong> matrices and<br />
<strong>the</strong> parallelism may not be changed.<br />
44<br />
Wax-up of <strong>the</strong> metal reinforcement<br />
Finished duplication cast
BONDING THE MATRICES IN THE METAL REINFORCEMENT<br />
The bonding surfaces are conditioned. The manufacturer’s bonding directions<br />
must be observed. The matrices can be bonded to <strong>the</strong> framework. The<br />
lamella retention insert must be deactivated and insulated before bonding.<br />
When deactivated, <strong>the</strong> lamella retention insert must not extend above <strong>the</strong><br />
margin of <strong>the</strong> matrix, o<strong>the</strong>rwise <strong>the</strong> matrix will lift up from <strong>the</strong> <strong>CAMLOG</strong> ®<br />
ball abutment. The matrices are clipped to <strong>the</strong> <strong>CAMLOG</strong> ® ball abutments<br />
and aligned parallel, accordingly <strong>the</strong> position set during fabrication of <strong>the</strong><br />
duplicate cast.<br />
Bonding is performed <strong>with</strong> a metal attachment bond material accordingly<br />
<strong>the</strong> instruction by <strong>the</strong> manufacturer.<br />
SET-UP AND TRY-IN<br />
The teeth are set up <strong>with</strong> <strong>the</strong> silicone index on <strong>the</strong> metal reinforcement. The<br />
denture is completely waxed and prepared for try-in. The try-in is conducted<br />
<strong>with</strong> deactivated matrices. The vertical height, occlusion, articulation, tension-free<br />
seating and es<strong>the</strong>tics are checked during this process.<br />
FINISHING<br />
After <strong>the</strong> try-in, finishing is continued <strong>with</strong> heat- or cold-cured polymerization<br />
in <strong>the</strong> usual manner. The framework can be coated <strong>with</strong> pink opaquer<br />
beforehand. The matrix housing must be sealed to prevent entry of acrylic<br />
(wax, silicone, etc.). The ball abutment-retained full denture must be easy<br />
to clean and must function correctly to ensure long-term success.<br />
Bonding <strong>the</strong> matrices in <strong>the</strong> metal<br />
reinforcement<br />
HYBRID RESTORATIONS WITH THE <strong>CAMLOG</strong> ® IMPLANT SYSTEM<br />
Finished ball abutment-supported<br />
full denture<br />
45
HYBRID RESTORATIONS WITH THE <strong>CAMLOG</strong> ® IMPLANT SYSTEM<br />
BALL ABUTMENT<br />
ANCHORING SYSTEM<br />
INSERTION OF THE <strong>CAMLOG</strong> ® BALL ABUTMENT<br />
AND THE PROSTHESIS<br />
After removing <strong>the</strong> <strong>CAMLOG</strong> ® healing cap, <strong>the</strong> <strong>CAMLOG</strong> ® ball abutments<br />
are transferred from <strong>the</strong> working cast to <strong>the</strong> previously cleaned <strong>CAMLOG</strong> ®<br />
implant and <strong>the</strong> driver for ball abutment and <strong>the</strong> torque wrench are used to<br />
tighten <strong>the</strong> abutments in <strong>the</strong> implants based on <strong>the</strong> specified tightening<br />
torque.<br />
TIGHTENING TORQUE FOR <strong>CAMLOG</strong> ® BALL ABUTMENTS<br />
Ø 3.3 mm 20 Ncm<br />
Ø 3.8/4.3/5.0 mm 30 Ncm<br />
<strong>CAMLOG</strong> ® abutments must be retightened <strong>with</strong> <strong>the</strong> same torque after<br />
about five minutes to reach <strong>the</strong> maximum screw tension. This prevents<br />
screws from loosening to <strong>the</strong> extent possible.<br />
The screwdriver/activator for ball abutment matrix is used to set <strong>the</strong> required<br />
retention force of <strong>the</strong> lamella retention inserts and <strong>the</strong> pros<strong>the</strong>sis is<br />
inserted in <strong>the</strong> patient's mouth.<br />
46<br />
IMPORTANT NOTE<br />
Do not place <strong>the</strong> stabilizing ring in <strong>the</strong> mouth.<br />
The clinical insertion is completed <strong>with</strong> a check of <strong>the</strong> occlusion and articulation.
BROADENING OF AN EXISTING FULL<br />
DENTURE INTO A BALL ABUTMENT-RETAINED<br />
FULL DENTURE<br />
An existing mucosa-supported full denture can be converted into a ball<br />
abutment-retained pros<strong>the</strong>sis in principle, but this will weaken <strong>the</strong> pros<strong>the</strong>sis.<br />
Because it is known that <strong>the</strong> chewing force increases <strong>with</strong> implant-<br />
retained dentures, <strong>the</strong> denture can fracture <strong>with</strong>out metal reinforcement.<br />
This procedure can only be considered as a temporary solution.<br />
SELECTION AND INSERTION OF THE <strong>CAMLOG</strong> ® BALL ABUTMENTS<br />
After <strong>the</strong> <strong>CAMLOG</strong> ® implants have healed, <strong>the</strong> <strong>CAMLOG</strong> ® ball abutments<br />
are inserted. In conformance <strong>with</strong> <strong>the</strong> specified implant diameters and gingival<br />
heights, <strong>the</strong> clinician selects <strong>the</strong> <strong>CAMLOG</strong> ® ball abutments intraorally<br />
and uses <strong>the</strong> driver for ball abutment to screw <strong>the</strong>m into <strong>the</strong> previously<br />
cleaned <strong>CAMLOG</strong> ® implants. Information about torques, see page 46.<br />
Different abutment heights can be selected to compensate for differences<br />
in levels in <strong>the</strong> gingival margin and implants. The ball heads should be at a<br />
uniform level for <strong>the</strong> best possible retention effect. The ball abutment plateau<br />
should be approx. 1 mm supragingival.<br />
IMPRESSION TAKING OF THE <strong>CAMLOG</strong> ® BALL ABUTMENTS<br />
The impression is taken over <strong>the</strong> <strong>CAMLOG</strong> ® ball abutments directly <strong>with</strong>out<br />
accessories. The <strong>CAMLOG</strong> ® ball abutments must be fully overmolded and<br />
integrated <strong>with</strong> impression material. Silicone or polye<strong>the</strong>r are suitable impression<br />
materials.<br />
HYBRID RESTORATIONS WITH THE <strong>CAMLOG</strong> ® IMPLANT SYSTEM<br />
1mm<br />
47
HYBRID RESTORATIONS WITH THE <strong>CAMLOG</strong> ® IMPLANT SYSTEM<br />
BALL ABUTMENT<br />
ANCHORING SYSTEM<br />
After <strong>the</strong> impression is taken successfully, <strong>the</strong> clinician must communicate<br />
<strong>the</strong> implant diameters used for cast fabrication to <strong>the</strong> dental laboratory.<br />
Brass ball abutment analogs of <strong>the</strong> appropriate diameter are <strong>the</strong>n inserted<br />
in <strong>the</strong> impression <strong>with</strong>out stabilizing rings. The guide areas of <strong>the</strong> circular<br />
plateau ensure that <strong>the</strong> implant axis is transferred precisely to <strong>the</strong> master<br />
cast. The cast is fabricated in <strong>the</strong> usual manner <strong>with</strong> suitable material.<br />
INTEGRATING THE MATRICES<br />
Before placing <strong>the</strong> matrices, <strong>the</strong> lamella retention inserts are insulated <strong>with</strong><br />
vaseline. The matrices are positioned and aligned by <strong>the</strong> same procedure<br />
when fabricating a new ball abutment-retained full denture. The areas underneath<br />
are blocked out <strong>with</strong> plaster. No acrylic should get into <strong>the</strong> inner<br />
configuration of <strong>the</strong> matrices!<br />
The existing pros<strong>the</strong>sis base is hollow ground and perforated in <strong>the</strong> area of<br />
<strong>the</strong> matrices specifically. The perforation is used for visual control and to<br />
allow acrylic to escape. The matrix housings can be stained <strong>with</strong> pink opaquer<br />
as required after conditioning <strong>the</strong> surface.<br />
48<br />
NOTE<br />
After hollow grinding during <strong>the</strong> subsequent try-in on <strong>the</strong> cast, <strong>the</strong> pros<strong>the</strong>sis<br />
must not come into contact <strong>with</strong> <strong>the</strong> matrices and block outs!<br />
Integrating <strong>the</strong> ball abutment analogs in <strong>the</strong> impression<br />
Cast Fabrication
A cold-cured polymer is used to attach <strong>the</strong> matrix housings similar to a<br />
direct relining. The matrices must be completely wrapped <strong>with</strong> acrylic. After<br />
curing, <strong>the</strong> pros<strong>the</strong>sis is lifted <strong>with</strong> <strong>the</strong> polymerized matrices, trimmed and<br />
<strong>the</strong> inner configuration of <strong>the</strong> matrices cleaned.<br />
The clinician <strong>the</strong>n activates <strong>the</strong> lamella retention inserts <strong>with</strong> <strong>the</strong> screwdriver/activator<br />
for ball abutment matrix (see "Setting <strong>the</strong> retention force"<br />
on page 42), <strong>the</strong> occlusion checked and <strong>the</strong> finished pros<strong>the</strong>sis inserted in<br />
its final position.<br />
HYBRID RESTORATIONS WITH THE <strong>CAMLOG</strong> ® IMPLANT SYSTEM<br />
49
HYBRID RESTORATIONS WITH THE <strong>CAMLOG</strong> ® IMPLANT SYSTEM<br />
BALL ABUTMENT<br />
ANCHORING SYSTEM<br />
RELINING OF A BALL ABUTMENT-RETAINED<br />
FULL DENTURE<br />
The denture-bearing area must be checked at regular intervals and if<br />
necessary adjusted by relining to ensure that <strong>the</strong> ball-retained, soft tissuesupported<br />
denture retains its long-term function.<br />
IMPRESSION TAKING<br />
The denture base is prepared in accordance <strong>with</strong> <strong>the</strong> procedures for a relining<br />
impression. For easy removal of <strong>the</strong> relining impression, <strong>the</strong> lamella<br />
retention inserts must be deactivated in <strong>the</strong> matrices <strong>with</strong> <strong>the</strong> screwdriver/<br />
activator for ball abutment matrix before taking <strong>the</strong> impression. The lamella<br />
retention insert must not be extend out of <strong>the</strong> matrix housing (see "Setting<br />
<strong>the</strong> retention force"on page 42).<br />
The relining impression is taken over <strong>the</strong> <strong>CAMLOG</strong> ® ball abutments directly<br />
<strong>with</strong>out accessories. The <strong>CAMLOG</strong> ® ball abutments must be fully overmolded<br />
and integrated <strong>with</strong> impression material. Silicone or polye<strong>the</strong>r are<br />
suitable impression materials.<br />
CAST FABRICATION<br />
After <strong>the</strong> impression is taken successfully, <strong>the</strong> clinician must communicate<br />
<strong>the</strong> implant diameters used for cast fabrication to <strong>the</strong> dental laboratory.<br />
Brass ball abutment analogs of <strong>the</strong> appropriate diameter are <strong>the</strong>n inserted<br />
in <strong>the</strong> matrices in <strong>the</strong> impression <strong>with</strong>out stabilizing rings. The guide areas<br />
of <strong>the</strong> circular plateau ensure that <strong>the</strong> implant axis is transferred precisely<br />
to <strong>the</strong> master cast. The cast is fabricated in <strong>the</strong> usual manner <strong>with</strong> suitable<br />
material.<br />
50
RELINING<br />
NOTE<br />
Before relining, <strong>the</strong> inner configuration of <strong>the</strong> matrices must be insulated<br />
<strong>with</strong> Vaseline to prevent acrylic from getting into <strong>the</strong> matrices. This<br />
would destroy <strong>the</strong> matrices.<br />
The pros<strong>the</strong>sis is relined in <strong>the</strong> usual dental manner. After relining, <strong>the</strong> pros<strong>the</strong>sis<br />
is trimmed and <strong>the</strong> inner configuration of <strong>the</strong> matrices cleaned.<br />
The clinician <strong>the</strong>n activates <strong>the</strong> lamella retention inserts <strong>with</strong> <strong>the</strong> screwdriver/activator<br />
for ball abutment matrix (see "Setting <strong>the</strong> retention force"<br />
on page 42), <strong>the</strong> occlusion checked and <strong>the</strong> finished pros<strong>the</strong>sis inserted in<br />
its final position.<br />
FOLLOW-UP/RECALL<br />
HYBRID RESTORATIONS WITH THE <strong>CAMLOG</strong> ® IMPLANT SYSTEM<br />
Ball abutment-retained pros<strong>the</strong>ses should be checked for functional reliability<br />
initially at intervals of about three months. In doing so, harmful pros<strong>the</strong>tic<br />
movements can be detected early and eliminated by appropriate<br />
measures (replacement/activation/deactivation of matrices, relining, occlusion<br />
check). The pros<strong>the</strong>sis is cleaned and <strong>the</strong> patient instructed again under<br />
conditions of poor hygiene.<br />
NOTE<br />
Only clean <strong>the</strong> components of <strong>the</strong> ball abutments <strong>with</strong> suitable instruments.<br />
Metal instruments can damage <strong>the</strong>m.<br />
REPLACING THE LAMELLA RETENTION INSERT<br />
The retention force of <strong>the</strong> lamella retention insert may be reduced by stress<br />
or wear. To replace it, use <strong>the</strong> screwdriver/activator for ball abutment matrix<br />
to unscrew it counter-clockwise from <strong>the</strong> matrix housing (see "Setting <strong>the</strong><br />
retention force" on page 42). The new lamella retention insert is screwed<br />
in clockwise into <strong>the</strong> matrix housing. Make sure that it is placed axially. For<br />
a controlled adjustment of <strong>the</strong> retention force, <strong>the</strong> lamella retention insert<br />
is first screwed in completely and <strong>the</strong>n unscrewed one complete turn. This<br />
sets <strong>the</strong> retention force to about 200 g (basic setting). The total retention<br />
force can be individually adjusted at <strong>the</strong> time of insertion of <strong>the</strong> denture.<br />
51
HYBRID RESTORATIONS WITH THE <strong>CAMLOG</strong> ® IMPLANT SYSTEM<br />
LOCATOR ®<br />
ANCHORING SYSTEM<br />
PRODUCT DESCRIPTION<br />
The Locator ® anchoring system is intended for use in <strong>the</strong> tissue-borne and<br />
implant-retained pros<strong>the</strong>sis for resilient supported full dentures in <strong>the</strong> maxilla<br />
and mandible. The system can be used <strong>with</strong> implant divergences of up<br />
to 20° per implant (3.3 mm diameter <strong>CAMLOG</strong> ® Locator ® abutment – up<br />
to 10° divergence per implant). The self-aligning design of <strong>the</strong> Locator ®<br />
anchoring system supports <strong>the</strong> patient when inserting and seating <strong>the</strong> pros<strong>the</strong>sis.<br />
The design of <strong>the</strong> <strong>CAMLOG</strong> ® Locator ® abutment and replacement<br />
males provide double (dual) retention.<br />
The Locator ® anchoring system contains various replacement males <strong>with</strong><br />
different retention forces. The <strong>CAMLOG</strong> ® Locator ® abutments are available<br />
for implant diameters 3.3 mm in three gingival heights (1.0, 2.0 and<br />
3.0 mm), and for implant diameters 3.8, 4.3 and 5.0 mm in four gingival<br />
heights (1.0, 2.0, 3.0 and 4.0 mm).<br />
52<br />
High<br />
functional area<br />
1.52 mm<br />
Gingival height<br />
<strong>CAMLOG</strong> ® implant<br />
Diameter of <strong>the</strong><br />
functional area<br />
3.8 mm<br />
Dual retention<br />
Dual retention by a stamp<br />
in <strong>the</strong> replacement males and<br />
circular undercut of <strong>the</strong><br />
<strong>CAMLOG</strong> ® Locator ® abutment<br />
<strong>CAMLOG</strong> ® Locator ® abutment<br />
The Locator ® anchoring system can also be integrated in a full denture supported<br />
on <strong>CAMLOG</strong> ® implants:<br />
• For <strong>the</strong> fabrication of a new full denture <strong>with</strong> Locator ® retention<br />
components<br />
• Converting an existing full denture into a Locator ® -retained denture
HYBRID RESTORATIONS WITH THE <strong>CAMLOG</strong> ® IMPLANT SYSTEM<br />
LOCATOR ® SYSTEM COMPONENTS<br />
Art. No. Article <strong>Implant</strong> Ø in mm GH in mm<br />
J2253.3310<br />
J2253.3320<br />
J2253.3330<br />
J2253.3810<br />
J2253.3820<br />
J2253.3830<br />
J2253.3840<br />
J2253.4310<br />
J2253.4320<br />
J2253.4330<br />
J2253.4340<br />
J2253.5010<br />
J2253.5020<br />
J2253.5030<br />
J2253.5040<br />
J2253.0200<br />
J2253.0340<br />
J2253.0350<br />
J2253.0102<br />
J2253.0112<br />
J2253.0401<br />
J2253.0402<br />
J2253.1005<br />
J2253.1003<br />
J2253.1002<br />
J2253.2004<br />
J2253.2003<br />
J2253.2002<br />
<strong>CAMLOG</strong> ® Locator ® abutment<br />
<strong>CAMLOG</strong> ® Locator ® abutment<br />
<strong>CAMLOG</strong> ® Locator ® abutment<br />
<strong>CAMLOG</strong> ® Locator ® abutment<br />
Locator ® impression cap<br />
Locator ® analog<br />
Locator ® analog<br />
Locator ® block out spacer<br />
Locator ® processing replacement male<br />
Locator ® replacement male, clear, STRONG, Div.: 0°–10°<br />
Locator ® replacement male, pink, MEDIUM, Div.: 0°–10°<br />
Locator ® replacement male, blue, LIGHT, Div.: 0°–10°<br />
Locator ® replacement male for extended range, green, STRONG, Div.: 10°–20°<br />
Locator ® replacement male for extended range, orange, MEDIUM, Div.: 10°–20°<br />
Locator ® Locator<br />
replacement male for extended range, red, LIGHT, Div.: 10°–20°<br />
® male processing packages (2 units)<br />
Content per package: 1 Titanium housing <strong>with</strong><br />
processing replacement male, 1 Block out spacer<br />
white, 1 Replacement male clear, 1 Replacement<br />
male pink, 1 Replacement male blue<br />
Locator ® 3.3/3.8/4.3/5.0<br />
male processing packages for ex- 3.8/4.3/5.0<br />
tended range (2 units), Content per package:<br />
1 Titanium housing <strong>with</strong> processing replacement<br />
male, 1 Block out spacer white, 1 Replacement<br />
male green, 1 Replacement male orange,<br />
1 Replacement male red<br />
3.3/3.8/4.3/5.0<br />
3.3/3.8/4.3/5.0<br />
3.3<br />
3.8<br />
4.3<br />
5.0<br />
3.3/3.8/4.3/5.0<br />
3.3/3.8/4.3<br />
5.0<br />
1.0<br />
2.0<br />
3.0<br />
1.0<br />
2.0<br />
3.0<br />
4.0<br />
1.0<br />
2.0<br />
3.0<br />
4.0<br />
1.0<br />
2.0<br />
3.0<br />
4.0<br />
53
HYBRID RESTORATIONS WITH THE <strong>CAMLOG</strong> ® IMPLANT SYSTEM<br />
LOCATOR ®<br />
ANCHORING SYSTEM<br />
LOCATOR ® INSTRUMENTS<br />
Art. No. Article<br />
Locator ® J2253.0004<br />
parallel post<br />
J2253.0003<br />
J2253.0001<br />
J2253.0002<br />
LOCATOR ® INSTRUMENT<br />
The Locator ® instrument consists of three parts screwed toge<strong>the</strong>r. To remove<br />
a processing replacement male or a replacement male, <strong>the</strong> screw-on<br />
tip is loosened three turns counter-clockwise and introduced into <strong>the</strong> male.<br />
When removing, <strong>the</strong> male is held by <strong>the</strong> sharp retention edge of <strong>the</strong> tip. To<br />
remove <strong>the</strong> male from <strong>the</strong> tip, it is tightened again clockwise on <strong>the</strong> instrument.<br />
Retentive tip for<br />
removing males<br />
54<br />
Middle piece for<br />
repositioning males<br />
Gold-colored endpiece<br />
(abutment turning aid)<br />
To introduce a processing replacement male or a replacement male into <strong>the</strong><br />
titanium housing, <strong>the</strong> middle piece of <strong>the</strong> Locator ® instrument is used. The<br />
tip is unscrewed. The required male is positioned on <strong>the</strong> now visible end and<br />
pushed completely into <strong>the</strong> titanium housing. The gold-colored endpiece<br />
can also be unscrewed and can be used as to tighten <strong>the</strong> <strong>CAMLOG</strong> ® Locator ®<br />
abutment.<br />
Locator ® angle measurement guide<br />
Driver for Locator ® abutment, manual/wrench<br />
Locator ® instrument, threepart<br />
Manufacturer Locator ® :<br />
Zest Anchors, Inc.<br />
Escondido, CA 92029, USA<br />
Locator ® is a registered trademark<br />
of Zest Anchors, Inc.
PROCESSING<br />
INSERTION OF THE <strong>CAMLOG</strong> ® LOCATOR ® ABUTMENT<br />
To select <strong>the</strong> suitable <strong>CAMLOG</strong> ® Locator ® abutment, <strong>the</strong> implant diameter<br />
and thickness of <strong>the</strong> gingiva must be known. The thickness of <strong>the</strong> gingiva<br />
determines <strong>the</strong> required gingival height of <strong>the</strong> abutment. The exact height<br />
of <strong>the</strong> abutment is selected when <strong>the</strong> functional region extend out of <strong>the</strong><br />
surrounding tissue 1.5 mm.<br />
IMPORTANT NOTE<br />
The functional region must be at least 1.5 mm supragingival!<br />
After removing <strong>the</strong> <strong>CAMLOG</strong> ® healing cap, <strong>the</strong> inner configuration of <strong>the</strong><br />
<strong>CAMLOG</strong> ® implant is cleaned. The contact surfaces between implant and<br />
abutment must not be covered by bone and tissue. Only <strong>the</strong>n is proper seating<br />
of <strong>the</strong> abutment on <strong>the</strong> implant ensured.<br />
To insert <strong>the</strong> <strong>CAMLOG</strong> ® Locator ® abutment into <strong>the</strong> <strong>CAMLOG</strong> ® implant, <strong>the</strong><br />
gold-colored turning element of <strong>the</strong> Locator ® instrument or <strong>the</strong> driver for<br />
Locator ® abutment, manual/wrench, can be used. The driver for Locator ®<br />
abutment, manual/wrench, is used in conjunction <strong>with</strong> <strong>the</strong> torque wrench<br />
to tighten <strong>the</strong> abutment into its final position at <strong>the</strong> specified torque.<br />
TORQUE FOR <strong>CAMLOG</strong> ® LOCATOR ® ABUTMENT<br />
<strong>Implant</strong> Ø 3.3 mm 20 Ncm<br />
<strong>Implant</strong> Ø 3.8/4.3/5.0 mm 30 Ncm<br />
Note: <strong>CAMLOG</strong> ® Locator ® abutments must be retightened to <strong>the</strong> same<br />
torque after about five minutes.<br />
MEASURING THE IMPLANT AXES<br />
To measure <strong>the</strong> implant axes, <strong>the</strong> black parallel posts are positioned on <strong>the</strong><br />
fixed abutments. The detectable pressure point indicates <strong>the</strong> exact engagement.<br />
The Locator ® angle measurement guide can <strong>the</strong>n be used to determine<br />
<strong>the</strong> angle of <strong>the</strong> individual implant abutments to each o<strong>the</strong>r.<br />
Turning element of <strong>the</strong> Locator ®<br />
instrument<br />
HYBRID RESTORATIONS WITH THE <strong>CAMLOG</strong> ® IMPLANT SYSTEM<br />
min 1.5 mm<br />
Driver for Locator ® abutment,<br />
manual/wrench<br />
Angle measurement guide<br />
Parallel post<br />
55
HYBRID RESTORATIONS WITH THE <strong>CAMLOG</strong> ® IMPLANT SYSTEM<br />
LOCATOR ®<br />
ANCHORING SYSTEM<br />
FABRICATION OF A NEW LOCATOR ® -RETAINED<br />
FULL DENTURE<br />
IMPRESSION TAKING<br />
The impression is taken over <strong>the</strong> <strong>CAMLOG</strong> ® Locator ® abutments definitely<br />
integrated in <strong>the</strong> <strong>CAMLOG</strong> ® implants using <strong>the</strong> Locator ® impression cap.<br />
An impression cap is positioned on each <strong>CAMLOG</strong> ® Locator ® abutment. Pay<br />
attention to <strong>the</strong> proper seating of <strong>the</strong> impression cap. An impression of <strong>the</strong><br />
oral situation is <strong>the</strong>n taken using suitable impression materials such as<br />
silicone or polye<strong>the</strong>r materials. After <strong>the</strong> impression material has cured and<br />
<strong>the</strong> tray has been removed, <strong>the</strong> Locator ® impression caps remain in <strong>the</strong><br />
material.<br />
SELECTING THE REPLACEMENT MALES<br />
The determined values are used to select <strong>the</strong> suitable Locator ® replacement<br />
males:<br />
Locator ® male processing<br />
packages<br />
incl. titanium housing <strong>with</strong> black<br />
processing replacement male, block out<br />
spacer white and replacement males<br />
(clear, pink, blue)<br />
REPLACEMENT MALES FOR IMPLANT AXIS DIVERGENCES<br />
OF 0°–10° PER IMPLANT<br />
Color: clear<br />
Retention force: STRONG<br />
Color: pink<br />
Retention force: MEDIUM<br />
Color: blue<br />
Retention force: LIGHT<br />
The insertion of <strong>the</strong> Locator ® replacement males (are delivered in each male<br />
processing package) can be carried out in <strong>the</strong> dental lab or in <strong>the</strong> dental<br />
practice, according to <strong>the</strong> chosen integration method.<br />
56<br />
Locator ® male processing<br />
packages for extended range<br />
incl. titanium housing <strong>with</strong> black<br />
processing replacement male, block out<br />
spacer white and replacement males<br />
for extended range (green, orange, red)<br />
Locator ® impression cap<br />
REPLACEMENT MALES FOR IMPLANT AXIS DIVERGENCES<br />
OF 10°–20° PER IMPLANT,<br />
EXTENDED RANGE (NONLICENSED FOR<br />
IMPLANT Ø 3.3 MM)<br />
Color: green<br />
Retention force: STRONG<br />
Color: orange<br />
Retention force: MEDIUM<br />
Color: red<br />
Retention force: LIGHT
CAST FABRICATION<br />
After taking <strong>the</strong> impression, <strong>the</strong> cast is fabricated using Locator ® analogs,<br />
which are available in two sizes. The analogs are selected based on <strong>the</strong><br />
<strong>CAMLOG</strong> ® Locator ® abutments used.<br />
NOTE<br />
The <strong>CAMLOG</strong> ® Locator ® abutment diameters used are not apparent in<br />
<strong>the</strong> impression and must be communicated to <strong>the</strong> laboratory to select<br />
<strong>the</strong> Locator ® analogs.<br />
SELECTING THE LOCATOR ® ANALOG<br />
Locator ®<br />
impression cap<br />
Art. No. J2253.0340<br />
für Locator Ø 3.3/3.8/4.3 mm<br />
® Locator<br />
abutments<br />
® analog Art. No. J2253.0350<br />
Ø 5.0 mm<br />
The Locator ® analogs designed for <strong>the</strong> corresponding implant diameters are<br />
placed in <strong>the</strong> Locator ® impression caps in <strong>the</strong> impression. Pay attention to<br />
<strong>the</strong> proper seating of <strong>the</strong> analogs. The cast is <strong>the</strong>n fabricated <strong>with</strong> suitable<br />
model material.<br />
HYBRID RESTORATIONS WITH THE <strong>CAMLOG</strong> ® IMPLANT SYSTEM<br />
FABRICATING THE FULL DENTURE<br />
After fabricating <strong>the</strong> cast, <strong>the</strong> white block out spacers included in <strong>the</strong><br />
Locator ® male processing packages are pulled over <strong>the</strong> functional areas of<br />
<strong>the</strong> Locator ® analogs to prevent acrylic from getting into <strong>the</strong> titanium<br />
housings.<br />
White block out spacer<br />
The titanium housing <strong>with</strong> <strong>the</strong> black processing replacement male is placed<br />
on each analog over <strong>the</strong> previously placed block out spacer until <strong>the</strong> pressure<br />
point is reached.<br />
The titanium housing is attached by <strong>the</strong> black processing replacement male<br />
and <strong>the</strong> resilience of <strong>the</strong> denture determined.<br />
Black processing replacement male<br />
CAUTION<br />
Undercuts between <strong>the</strong> titanium housings and <strong>the</strong> surrounding tissue<br />
not covered by <strong>the</strong> block out spacers must be blocked out. Acrylic must<br />
not get into <strong>the</strong> titanium housing during fabrication!<br />
The full denture can now be fabricated in <strong>the</strong> conventional technology.<br />
57
HYBRID RESTORATIONS WITH THE <strong>CAMLOG</strong> ® IMPLANT SYSTEM<br />
LOCATOR ®<br />
ANCHORING SYSTEM<br />
INTEGRATION OF THE COLORED<br />
REPLACEMENT MALES<br />
After completing <strong>the</strong> full denture, <strong>the</strong> white block out spacers and black<br />
processing replacement males are removed from <strong>the</strong> titanium housings.<br />
The black processing replacement males are removed from <strong>the</strong> titanium<br />
housings using <strong>the</strong> Locator ® instrument. The screw-on tip is turned three<br />
rotations counter-clockwise. Then press <strong>the</strong> retentive tip into <strong>the</strong> black<br />
processing replacement male and remove <strong>the</strong> male.<br />
The middle piece of <strong>the</strong> Locator ® instrument is used to integrate <strong>the</strong> colored<br />
replacement male into <strong>the</strong> empty titanium housing. The tip of <strong>the</strong> tool is<br />
unscrewed, <strong>the</strong> replacement male positioned and pressed into <strong>the</strong> titanium<br />
housing.<br />
58<br />
NOTE<br />
The replacement males have no friction on <strong>the</strong> middle piece. Therefore,<br />
keep <strong>the</strong> middle piece perpendicular and press in <strong>the</strong> replacement male<br />
from <strong>the</strong> basal view.
CONVERTING AN EXISTING FULL DENTURE INTO<br />
A LOCATOR ® -RETAINED FULL DENTURE<br />
Locator ® components can also be integrated in an existing full denture.<br />
After final insertion of <strong>the</strong> <strong>CAMLOG</strong> ® Locator ® abutments in <strong>the</strong> <strong>CAMLOG</strong> ®<br />
implants (see page 55), <strong>the</strong> Locator ® impression caps are positioned on <strong>the</strong><br />
abutments. Note <strong>the</strong> proper seating.<br />
The existing pros<strong>the</strong>sis is <strong>the</strong>n hollow ground in <strong>the</strong> area of <strong>the</strong> impression<br />
caps.<br />
IMPORTANT NOTE<br />
The impression caps on <strong>the</strong> <strong>CAMLOG</strong> ® Locator ® abutments must not<br />
come into contact <strong>with</strong> <strong>the</strong> pros<strong>the</strong>sis when checking <strong>the</strong> fit in <strong>the</strong><br />
mouth.<br />
The impression taking in this case is identical to a relining and is taken using<br />
<strong>the</strong> hollow ground pros<strong>the</strong>sis directly over <strong>the</strong> impression caps. To ensure<br />
that <strong>the</strong> impression caps remain in <strong>the</strong> impression, we recommend using<br />
suitable impression material such as polye<strong>the</strong>r and silicone compounds.<br />
OPTION: With a small denture base, an impression can also be taken <strong>with</strong><br />
<strong>the</strong> titanium housings <strong>with</strong> black processing replacement males. The reduced<br />
retention in <strong>the</strong> impression must be taken into account.<br />
HYBRID RESTORATIONS WITH THE <strong>CAMLOG</strong> ® IMPLANT SYSTEM<br />
CAST FABRICATION<br />
The Locator ® analogs designed for <strong>the</strong> corresponding implant diameters are<br />
placed in <strong>the</strong> Locator ® impression caps in <strong>the</strong> impression. Pay attention to<br />
<strong>the</strong> proper seating of <strong>the</strong> analogs.<br />
NOTE<br />
The <strong>CAMLOG</strong> ® Locator ® abutment diameters used are not apparent in<br />
<strong>the</strong> impression and must be communicated to <strong>the</strong> laboratory to select<br />
<strong>the</strong> Locator ® analogs.<br />
The cast is <strong>the</strong>n fabricated <strong>with</strong> suitable model material.<br />
CONVERTING THE FULL DENTURE<br />
After fabricating <strong>the</strong> cast, <strong>the</strong> white block out spacers included in <strong>the</strong><br />
Locator ® male processing packages are pulled over <strong>the</strong> functional areas of<br />
<strong>the</strong> Locator ® analogs to prevent acrylic from getting into <strong>the</strong> titanium<br />
housings.<br />
White block out spacer<br />
The titanium housings <strong>with</strong> <strong>the</strong> black processing replacement males are<br />
placed on each analog over <strong>the</strong> previously placed block out spacer until <strong>the</strong><br />
pressure point is reached.<br />
59
HYBRID RESTORATIONS WITH THE <strong>CAMLOG</strong> ® IMPLANT SYSTEM<br />
LOCATOR ®<br />
ANCHORING SYSTEM<br />
The titanium housing is attached by <strong>the</strong> black processing replacement male<br />
and <strong>the</strong> resilience of <strong>the</strong> denture determined.<br />
60<br />
Titanium housing <strong>with</strong> black<br />
processing replacement male<br />
CAUTION<br />
Undercuts between <strong>the</strong> titanium housings and <strong>the</strong> surrounding tissue<br />
not covered by <strong>the</strong> block out spacers must be blocked out. Acrylic must<br />
not get into <strong>the</strong> titanium housings during adaptation!<br />
The titanium housings are <strong>the</strong>n polymerized into <strong>the</strong> existing full denture<br />
and <strong>the</strong> denture also relined if necessary.<br />
After trimming and polishing <strong>the</strong> denture, <strong>the</strong> black processing replacement<br />
males are removed and replaced by corresponding replacement male as<br />
described in "Integration of <strong>the</strong> colored replacement males" on page 58.<br />
The finished pros<strong>the</strong>sis is inserted and <strong>the</strong> occlusion checked.<br />
CONVERTING AN EXISTING FULL DENTURE<br />
INTO A LOCATOR ® -RETAINED FULL DENTURE<br />
IN THE DENTAL PRACTICE<br />
Locator ® components can also be integrated in an existing full denture in<br />
<strong>the</strong> dental practice. After final insertion of <strong>the</strong> <strong>CAMLOG</strong> ® Locator ® abutments<br />
in <strong>the</strong> <strong>CAMLOG</strong> ® implants (see page 55), <strong>the</strong> white block out spacers<br />
included in <strong>the</strong> Locator ® male processing packages are pulled over <strong>the</strong><br />
functional areas of <strong>the</strong> <strong>CAMLOG</strong> ® Locator ® abutments to prevent acrylic<br />
from getting into <strong>the</strong> titanium housings.<br />
CAUTION<br />
Undercuts between <strong>the</strong> titanium housings and <strong>the</strong> surrounding tissue<br />
not covered by <strong>the</strong> block out spacers must be blocked out. Acrylic must<br />
not get into <strong>the</strong> titanium housing during adaptation!<br />
WARNING!<br />
During intraoral use, products must be secured in general against aspiration<br />
and swallowing.<br />
The titanium housings <strong>with</strong> <strong>the</strong> black processing replacement males are positioned<br />
on each <strong>CAMLOG</strong> ® Locator ® abutment over <strong>the</strong> previously placed<br />
block out spacers until <strong>the</strong> pressure point is reached.<br />
The titanium housings are attached by <strong>the</strong> black processing replacement<br />
males and <strong>the</strong> resilience of <strong>the</strong> denture determined.<br />
The existing full denture is carefully prepared and perforated in <strong>the</strong> areas of<br />
<strong>the</strong> titanium housings. The denture must not come into contact during<br />
try-in. Contact <strong>with</strong> <strong>the</strong> housings can affect <strong>the</strong> exact positioning of <strong>the</strong><br />
denture in <strong>the</strong> mouth. Acrylic can pass through <strong>the</strong> perforations occlusally.
The titanium housing is polymerized <strong>with</strong> suitable self-curing polymer in<br />
accordance <strong>with</strong> <strong>the</strong> manufacturer's instructions. We recommend wetting<br />
<strong>the</strong> titanium housing <strong>with</strong> acrylic. The denture is <strong>the</strong>n inserted, <strong>the</strong> exact fit<br />
checked and <strong>the</strong> perforations filled <strong>with</strong> acrylic. After <strong>the</strong> acrylic has cured,<br />
<strong>the</strong> denture is removed from <strong>the</strong> mouth, acrylic overages removed and polished.<br />
The black processing replacement males are <strong>the</strong>n removed and replaced by<br />
corresponding replacement males as described in "Integration of <strong>the</strong> colored<br />
replacement males" on page 58. The finished pros<strong>the</strong>sis is inserted and <strong>the</strong><br />
occlusion checked.<br />
HYBRID RESTORATIONS WITH THE <strong>CAMLOG</strong> ® IMPLANT SYSTEM<br />
EXCHANGE OF THE REPLACEMENT MALES<br />
IN AN EXISTING FULL DENTURE<br />
The Locator ® instrument is used to replace <strong>the</strong> replacement males if needed.<br />
The screw-on tip is turned three rotations counter-clockwise. Press <strong>the</strong><br />
retentive tip into <strong>the</strong> replacement male and remove <strong>the</strong> male.<br />
The middle piece of <strong>the</strong> Locator ® instrument is used to integrate <strong>the</strong> colored<br />
replacement males in <strong>the</strong> empty titanium housing. The tip of <strong>the</strong> instrument<br />
is unscrewed, <strong>the</strong> replacement males positioned and pressed into <strong>the</strong> titanium<br />
housing.<br />
NOTE<br />
The titanium inserts have no friction on <strong>the</strong> middle piece. Therefore,<br />
keep <strong>the</strong> middle piece perpendicular and press in <strong>the</strong> replacement males<br />
from <strong>the</strong> basal view.<br />
See also "Integration of <strong>the</strong> colored replacement males" on page 58.<br />
61
HYBRID RESTORATIONS WITH THE <strong>CAMLOG</strong> ® IMPLANT SYSTEM<br />
LOCATOR ®<br />
ANCHORING SYSTEM<br />
RELINING OF A LOCATOR ® -RETAINED<br />
FULL DENTURE<br />
The colored replacement males are removed from <strong>the</strong> titanium housings in<br />
<strong>the</strong> denture and replaced by black processing replacement males using <strong>the</strong><br />
Locator ® instrument. See also "Exchange <strong>the</strong> replacement males in an existing<br />
full denture" on page 61.<br />
The processing replacement males fix and hold <strong>the</strong> denture during <strong>the</strong><br />
relining impression on <strong>the</strong> <strong>CAMLOG</strong> ® Locator ® abutments.<br />
The impression is taken <strong>with</strong> <strong>the</strong> denture in <strong>the</strong> conventional manner. Pay<br />
attention to <strong>the</strong> proper seating of <strong>the</strong> denture. Impression material must<br />
not get into <strong>the</strong> processing replacement males. After <strong>the</strong> impression is taken<br />
successfully, <strong>the</strong> black processing replacement males remain in <strong>the</strong> titanium<br />
housings of <strong>the</strong> denture. The relining impression is handed over to <strong>the</strong><br />
dental laboratory.<br />
62<br />
NOTE<br />
To select <strong>the</strong> matching Locator ® analogs for cast fabrication, <strong>the</strong> dental<br />
laboratory must be informed about <strong>the</strong> diameter of <strong>the</strong> existing<br />
<strong>CAMLOG</strong> ® Locator ® abutments.<br />
In <strong>the</strong> dental laboratory, <strong>the</strong> respective Locator ® analogs are inserted in <strong>the</strong><br />
black processing replacement males for cast fabrication (see also "Cast<br />
fabrication" on page 57).<br />
The cast is <strong>the</strong>n fabricated and <strong>the</strong> relining impression is secured in <strong>the</strong><br />
conventional manner.<br />
NOTE<br />
We recommend replacing <strong>the</strong> existing titanium housings in <strong>the</strong> denture.<br />
After opening <strong>the</strong> secured relining impression and removing of <strong>the</strong> impression<br />
from <strong>the</strong> cast, <strong>the</strong> black processing replacement males incl. <strong>the</strong> titanium<br />
housings are removed from <strong>the</strong> denture. The white block out spacers<br />
are placed over <strong>the</strong> functional areas of <strong>the</strong> Locator ® analogs on <strong>the</strong> cast.<br />
This prevents acrylic from getting into <strong>the</strong> titanium housings.<br />
A titanium housing <strong>with</strong> <strong>the</strong> black processing replacement male is placed<br />
on each analog over <strong>the</strong> previously placed block out spacer until <strong>the</strong> pressure<br />
point is reached. The titanium housing is attached by <strong>the</strong> black processing<br />
replacement males and <strong>the</strong> resilience determined.<br />
Titanium housing <strong>with</strong> black<br />
processing replacement males<br />
NOTE<br />
Undercuts between <strong>the</strong> titanium housings and <strong>the</strong> surrounding tissue<br />
not covered by <strong>the</strong> block out spacers must be blocked out. Acrylic must<br />
not get into <strong>the</strong> titanium housings when finishing!<br />
The denture is prepared for <strong>the</strong> relining and ground out in <strong>the</strong> area of <strong>the</strong><br />
Locator ® titanium housings. The titanium housings must not come into<br />
contact <strong>with</strong> <strong>the</strong> pros<strong>the</strong>sis when assembling <strong>the</strong> secured impression <strong>with</strong><br />
<strong>the</strong> cast. The pros<strong>the</strong>sis is relined in <strong>the</strong> conventional manner.<br />
After trimming and polishing, <strong>the</strong> black processing replacement males are<br />
removed and replaced by corresponding colored replacement males as<br />
described in "Integration of <strong>the</strong> colored replacement males" on page 58.<br />
The finished pros<strong>the</strong>sis is inserted and <strong>the</strong> occlusion checked.
DOUBLE CROWN<br />
RESTORATIONS<br />
INTRODUCTION<br />
For removable superstructures, we recommend inserting at least 6 implants<br />
in <strong>the</strong> maxilla and at least 4 implants in <strong>the</strong> mandible. The pros<strong>the</strong>sis design<br />
should prevent overloads by extensions. The tension-free seat of a secondary<br />
(double crown) or primary (bar) splinted structure on implants is called<br />
as "passive fit". With double crown constructions, this is obtained through<br />
intraoral bonding of <strong>the</strong> secondary copings (e.g. electroformed copings)<br />
to a tertiary framework. The tension-free seat of <strong>the</strong> superstructure is of<br />
paramount importance for <strong>the</strong> long-term prognosis of a pros<strong>the</strong>tic restoration.<br />
We recommend bonding secondary copings intraorally in <strong>the</strong> tertiary<br />
framework.<br />
PRODUCT DESCRIPTION<br />
The rotational stability of <strong>the</strong> <strong>CAMLOG</strong> ® Tube-in-Tube connection and<br />
high precision manufacturing make <strong>the</strong> <strong>CAMLOG</strong> ® abutments ideally<br />
suited for fabrication of double crown restorations. Two different methods<br />
are used for fabricating <strong>the</strong> secondary copings:<br />
• Electroformed secondary copings.<br />
• Cast secondary copings similar to <strong>the</strong> double crown technique.<br />
IMPRESSION TAKING AND CAST FABRICATION<br />
The impression for double crown restorations <strong>with</strong> <strong>CAMLOG</strong> ® universal,<br />
telescopic and gold-plastic abutments are taken <strong>with</strong> <strong>CAMLOG</strong> ® impression<br />
posts, open or closed tray.<br />
NOTE<br />
For double crown restorations <strong>with</strong> <strong>CAMLOG</strong> ® universal abutments PS,<br />
<strong>the</strong> impression is taken <strong>with</strong> <strong>CAMLOG</strong> ® impression posts PS, open or<br />
closed tray.<br />
For cast fabrication, <strong>CAMLOG</strong> ® lab analogs are used. For information about<br />
"Impression taking directly over <strong>the</strong> <strong>CAMLOG</strong> ® implant shoulder” and subsequent<br />
"Cast fabrication <strong>with</strong> <strong>the</strong> <strong>CAMLOG</strong> ® lab analog", see pages 12–15.<br />
HYBRID RESTORATIONS WITH THE <strong>CAMLOG</strong> ® IMPLANT SYSTEM<br />
CAST FABRICATION FOR MILLING TECHNIQUE<br />
For milling <strong>the</strong> <strong>CAMLOG</strong> ® abutments, we generally recommend creating a<br />
separate milling cast. The milling cast is fabricated by transferring <strong>the</strong><br />
<strong>CAMLOG</strong> ® lab analog positions from <strong>the</strong> working cast using <strong>CAMLOG</strong> ® impression<br />
posts, which are connected in a transfer construction <strong>with</strong> suitable<br />
acrylic. The construction is connected <strong>with</strong> acrylic in <strong>the</strong> retentive area of<br />
<strong>the</strong> impression posts. Acrylic must not get on <strong>the</strong> fixing screws.<br />
Working cast <strong>with</strong> <strong>CAMLOG</strong> ® lab<br />
analogs<br />
Placing <strong>the</strong> <strong>CAMLOG</strong> ® impression<br />
posts, open tray<br />
63
HYBRID RESTORATIONS WITH THE <strong>CAMLOG</strong> ® IMPLANT SYSTEM<br />
DOUBLE CROWN<br />
RESTORATIONS<br />
64<br />
Acrylic connection <strong>with</strong> transfer construction<br />
in <strong>the</strong> parallelometer<br />
Screwed fixation <strong>with</strong><br />
<strong>CAMLOG</strong> ® lab analog<br />
Loosening <strong>the</strong> <strong>CAMLOG</strong> ® impression posts<br />
After <strong>the</strong> acrylic cures, <strong>the</strong> <strong>CAMLOG</strong> ® impression posts are attached to<br />
<strong>CAMLOG</strong> ® lab analogs and <strong>the</strong> milling cast is created in super-hard dental<br />
stone. Pay attention to <strong>the</strong> correct diameter (color-coding).<br />
Fabricating <strong>the</strong> milling cast<br />
<strong>CAMLOG</strong> ® LAB SCREW (HEX)<br />
To fabricate <strong>the</strong> pros<strong>the</strong>tic restoration, we recommend using <strong>the</strong> <strong>CAMLOG</strong> ®<br />
lab screws (hex) exclusively for attaching <strong>the</strong> <strong>CAMLOG</strong> ® abutments to <strong>the</strong><br />
casts.<br />
Art. No. J4006.1601 J4006.2001<br />
<strong>CAMLOG</strong> ®<br />
Lab screws,<br />
hex<br />
Thread M 1.6 for implant M 2.0 for implant<br />
Ø 3.8/4.3 mm Ø 5.0/6.0 mm<br />
The <strong>CAMLOG</strong> ® lab screws are brown anodized and tightened by hand only.<br />
New unused <strong>CAMLOG</strong> ® abutment screws (hex) are used for final insertion<br />
of <strong>the</strong> restoration.
<strong>CAMLOG</strong> ® UNIVERSAL ABUTMENT AND<br />
<strong>CAMLOG</strong> ® UNIVERSAL ABUTMENT PS FOR<br />
PLATFORM SWITCHING<br />
Both <strong>CAMLOG</strong> ® universal abutments can be used for double crown<br />
restorations. The <strong>CAMLOG</strong> ® universal abutments are made of titanium<br />
alloy and can be custom trimmed. <strong>Implant</strong> divergences of max. 20° to <strong>the</strong><br />
implant axis can be compensated for by a suitably adapted forming. The<br />
color-coded <strong>CAMLOG</strong> ® universal abutments are available in diameters<br />
3.8/4.3/5.0/6.0 mm incl. <strong>CAMLOG</strong> ® abutment screws.<br />
HYBRID RESTORATIONS WITH THE <strong>CAMLOG</strong> ® IMPLANT SYSTEM<br />
<strong>CAMLOG</strong> ® UNIVERSAL ABUTMENT<br />
Art. No. K2211.3800 K2211.4300 K2211.5000 K2211.6000<br />
<strong>CAMLOG</strong> ® UNIVERSAL ABUTMENT PS<br />
Art. No. K2201.3800 K2201.4300 K2201.5000 K2201.6000<br />
NOTE<br />
The <strong>CAMLOG</strong> ® universal abutment <strong>with</strong> Ø 3.3 mm is not suitable for<br />
double crown restorations.<br />
<strong>CAMLOG</strong> ® TELESCOPE ABUTMENT<br />
The design of <strong>the</strong> <strong>CAMLOG</strong> ® telescope abutment enables <strong>the</strong> fabrication of<br />
double crowns even in heavily unparallel placement of implants. The customizable<br />
<strong>CAMLOG</strong> ® abutment has an occlusally widened cone angle of 5°.<br />
<strong>Implant</strong> divergences of max. 20° to <strong>the</strong> implant axis can be compensated<br />
IMPORTANT NOTES<br />
• All pros<strong>the</strong>tic components for platform switching have <strong>the</strong> PS label<br />
and K article number (K-Series).<br />
• The platform switching option for double crowns is only possible<br />
<strong>with</strong> <strong>the</strong> <strong>CAMLOG</strong> ® Universal Abutments PS on <strong>CAMLOG</strong> ®<br />
SCREW-LINE implants (K-Series).<br />
for by a suitably adapted forming. The color-coded <strong>CAMLOG</strong> ® universal<br />
abutment is available in diameters 3.8/4.3/5.0/6.0 mm incl. <strong>CAMLOG</strong> ® abutment<br />
screws.<br />
<strong>CAMLOG</strong> ® TELESCOPE ABUTMENT<br />
Art. No. K2212.3800 K2212.4300 K2212.5000 K2212.6000<br />
65
HYBRID RESTORATIONS WITH THE <strong>CAMLOG</strong> ® IMPLANT SYSTEM<br />
DOUBLE CROWN<br />
RESTORATIONS<br />
PROCESSING THE <strong>CAMLOG</strong> ® ABUTMENTS<br />
EXAMPLE OF THE <strong>CAMLOG</strong> ® UNIVERSAL ABUTMENT<br />
After fabricating <strong>the</strong> cast, <strong>the</strong> <strong>CAMLOG</strong> ® universal abutments are inserted<br />
into <strong>the</strong> <strong>CAMLOG</strong> ® lab analogs and fixed <strong>with</strong> <strong>the</strong> <strong>CAMLOG</strong> ® lab screw.<br />
A previously prepared silicone index is used to mark <strong>the</strong> height and axis<br />
alignments.<br />
The height of <strong>the</strong> abutments is first adjusted. The height of <strong>the</strong> circular functional<br />
surface must not fall below 5 mm, o<strong>the</strong>rwise sufficient retention<br />
strength of <strong>the</strong> construction cannot be achieved. The uniform insertion<br />
direction is <strong>the</strong>n determined and <strong>the</strong> abutments are machined <strong>with</strong> suitable<br />
abrasives in <strong>the</strong> parallelometer. The specified speeds of each abrasive used<br />
for titanium machining must be observed.<br />
Overheating <strong>the</strong> titanium leads to a very hard surface (alpha case layer) and<br />
should be avoided.<br />
For fabrication of double crowns using <strong>the</strong> electroplating technique, <strong>the</strong><br />
manufacturer's specifications must be observed. Cast fabrication of double<br />
crowns are prepared similar to <strong>the</strong> cone telescopic crown technique. To prevent<br />
<strong>the</strong> caps from rotating, <strong>the</strong> abutments are lightly ground in oval form.<br />
The surface must be homogeneous.<br />
66<br />
The space for <strong>the</strong> tertiary framework required to receive <strong>the</strong> secondary<br />
crowns can be tested at every phase of preparation <strong>with</strong> <strong>the</strong> silicone index<br />
<strong>with</strong> <strong>the</strong> denture teeth in position.<br />
Check of <strong>the</strong> space conditions <strong>with</strong> <strong>the</strong> silicone index on <strong>the</strong> working cast<br />
FABRICATING THE SECONDARY CROWNS<br />
The secondary crowns or superstructure are <strong>the</strong>n fabricated. The tensionfree<br />
seat of <strong>the</strong> superstructure is of paramount importance for <strong>the</strong> longterm<br />
success of an implant-pros<strong>the</strong>tic restoration. We recommend bonding<br />
<strong>the</strong> secondary copings intraorally in <strong>the</strong> tertiary framework (passive fit).<br />
NOTES<br />
Electroformed secondary copings<br />
Electroforming is conducted as specified by <strong>the</strong> manufacturer. The<br />
<strong>CAMLOG</strong> ® abutments are inserted into a <strong>CAMLOG</strong> ® lab analog of <strong>the</strong><br />
appropriate diameter and fixed <strong>with</strong> a <strong>CAMLOG</strong> ® lab screw. The thickness<br />
should be 0.2–0.3 mm. The special feature of <strong>the</strong> low layer thickness<br />
of <strong>the</strong> electroformed components and <strong>the</strong> resulting low stability of<br />
<strong>the</strong> secondary coping prevent direct polymerization in <strong>the</strong> acrylic<br />
denture base. For this reason, a tertiary framework must be fabricated<br />
over <strong>the</strong> secondary copings for reinforcement.<br />
Cast secondary copings<br />
The wall thickness of <strong>the</strong> secondary copings should be approx. 0.5 mm.<br />
Fabrication is similar to standard crown and bridge technique.<br />
CAUTION<br />
Do not mix up <strong>the</strong> <strong>CAMLOG</strong> ® abutments and secondary copings! We<br />
recommend a color buccal marker on <strong>the</strong> abutment, coping and working<br />
cast.
FABRICATING A TERTIARY FRAMEWORK<br />
FOR DOUBLE CROWN RESTORATIONS<br />
A metal framework is essential for stabilizing <strong>the</strong> acrylic base and securely<br />
retaining <strong>the</strong> secondary coping. To fabricate <strong>the</strong> tertiary framework, <strong>the</strong><br />
working cast is blocked out, <strong>the</strong> coping is waxed over (0.3 mm for bonding<br />
gap) and <strong>the</strong>n duplicated.<br />
The tertiary framework is built in wax on <strong>the</strong> duplicate cast <strong>with</strong> <strong>the</strong> silicone<br />
index as a control.<br />
The cervical margin of <strong>the</strong> secondary coping must be completely reproduced<br />
in metal.<br />
The tertiary framework can be fabricated from titanium or non-precious alloy.<br />
Then roughen (e.g. sandblasting) <strong>the</strong> adhesive bonding surfaces of <strong>the</strong><br />
secondary copings and tertiary framework to improve adhesion. The subsequent<br />
steps for complete fixation of <strong>the</strong> secondary components are done<br />
in <strong>the</strong> patient’s mouth.<br />
BONDING OF THE SECONDARY COPING INTRAORALLY<br />
We recommend bonding <strong>the</strong> secondary copings in <strong>the</strong> tertiary framework<br />
intraorally <strong>with</strong> a suitable metal bonding material. The modified <strong>CAMLOG</strong> ®<br />
abutments (primary crowns) are placed in <strong>the</strong> cleaned <strong>CAMLOG</strong> ® implants<br />
and <strong>the</strong> <strong>CAMLOG</strong> ® abutment screw is hand-tightened. The secondary copings<br />
are <strong>the</strong>n placed on <strong>the</strong> <strong>CAMLOG</strong> ® abutments. Then <strong>the</strong> tertiary framework<br />
is placed and <strong>the</strong> fit is checked <strong>with</strong> <strong>the</strong> secondary coping to ensure<br />
that it is seated securely and <strong>with</strong> an even cement gap.<br />
Overwaxing/blocking out<br />
<strong>the</strong> working cast<br />
HYBRID RESTORATIONS WITH THE <strong>CAMLOG</strong> ® IMPLANT SYSTEM<br />
Finished<br />
duplicate cast<br />
67
HYBRID RESTORATIONS WITH THE <strong>CAMLOG</strong> ® IMPLANT SYSTEM<br />
DOUBLE CROWN<br />
RESTORATIONS<br />
Follow <strong>the</strong> manufacturer’s instructions for bonding.<br />
After <strong>the</strong> metal bonding material has set, <strong>the</strong> framework is removed from<br />
<strong>the</strong> mouth <strong>with</strong> <strong>the</strong> secondary coping bonded in <strong>with</strong>out tension. The abutments<br />
are removed and sent to <strong>the</strong> dental laboratory for finishing <strong>the</strong><br />
secondary coping/<strong>CAMLOG</strong> ® abutment transition. If <strong>the</strong> bonded tertiary<br />
framework cannot be replaced on <strong>the</strong> master cast <strong>with</strong>out tension, <strong>the</strong> interfering<br />
abutment is removed from <strong>the</strong> master cast for fur<strong>the</strong>r procedures.<br />
The bonded points are trimmed (removal of excess material and filling of<br />
<strong>the</strong> gap if too little adhesive was used), <strong>the</strong> construction is coated <strong>with</strong> a<br />
denture-colored opaque layer to improve <strong>the</strong> cosmetic appearance<br />
(optional) and <strong>the</strong> denture is finished.<br />
INSERTION OF THE PROSTHETIC RESTORATION<br />
The modified <strong>CAMLOG</strong> ® abutments (primary crowns) are placed in <strong>the</strong><br />
cleaned <strong>CAMLOG</strong> ® implants and fixed <strong>with</strong> new unused <strong>CAMLOG</strong> ® abutment<br />
screws. The torque wrench and a screwdriver (hex) are used to tighten<br />
<strong>the</strong> screws in <strong>the</strong> implant to <strong>the</strong> specified torque of 20 Ncm.<br />
<strong>CAMLOG</strong> ® abutment screws must be retightened to <strong>the</strong> same torque after<br />
about five minutes to reach <strong>the</strong> maximum screw tension. This prevents<br />
screws from loosening.<br />
The screw channels can <strong>the</strong>n be sealed <strong>with</strong> suitable materials (e.g. composite)<br />
for hygiene reasons. The screw inner configurations are first filled<br />
<strong>with</strong> pliable removable material.<br />
TIP: When sealing <strong>the</strong> screw channel in <strong>the</strong> abutments (primary components),<br />
ensure that <strong>the</strong> final surface is concave. All acrylic residue must be<br />
removed to ensure that <strong>the</strong> pros<strong>the</strong>sis is perfectly seated.<br />
68
<strong>CAMLOG</strong> ® GOLD-PLASTIC ABUTMENT<br />
The <strong>CAMLOG</strong> ® gold-plastic abutment consists of a prefabricated cast-on<br />
base part made of a non-oxidizing, high-melting cast-on gold alloy and a<br />
screw channel made of burn-out plastic (POM). The screw channel represents<br />
a modeling aid and ensure a clean finish of <strong>the</strong> screw channel. The<br />
screw channel is color-coded, firmly connected to <strong>the</strong> base part and can be<br />
individually shortened occlusally.<br />
The <strong>CAMLOG</strong> ® gold-plastic abutment <strong>with</strong> <strong>the</strong> cast-on technique can be<br />
used to fabricate primary pillars for bridging implant axis divergences in <strong>the</strong><br />
double crown technique. The color-coded <strong>CAMLOG</strong> ® gold-plastic abutments<br />
are available in diameters 3.8/4.3/5.0/6.0 mm incl. <strong>CAMLOG</strong> ® abutment<br />
screws.<br />
HYBRID RESTORATIONS WITH THE <strong>CAMLOG</strong> ® IMPLANT SYSTEM<br />
<strong>CAMLOG</strong> ® GOLD-PLASTIC ABUTMENT<br />
Art. No. K2246.3800 K2246.4300 K2246.5000 K2246.6000<br />
Noble metal weight approx. 0,46 g approx. 0,65 g approx. 0,81 g approx. 0,89 g<br />
NOTE<br />
The <strong>CAMLOG</strong> ® gold-plastic abutment <strong>with</strong> Ø 3.3 mm is not suitable for<br />
double crown restorations.<br />
The high-melting cast-on gold alloy is only suitable for <strong>the</strong> cast-on procedure<br />
<strong>with</strong> high-gold alloys.<br />
PROCESSING THE <strong>CAMLOG</strong> ® GOLD-PLASTIC ABUTMENT<br />
MODIFICATION OF THE SCREW CHANNEL<br />
After fabricating <strong>the</strong> cast, <strong>the</strong> <strong>CAMLOG</strong> ® gold-plastic abutments are inserted<br />
into <strong>the</strong> <strong>CAMLOG</strong> ® lab analogs and fixed <strong>with</strong> <strong>the</strong> <strong>CAMLOG</strong> ® lab<br />
screw. A previously prepared silicone index is used to mark <strong>the</strong> required<br />
height on <strong>the</strong> plastic sleeve. The height of <strong>the</strong> circular functional surface<br />
must not fall below 5 mm, o<strong>the</strong>rwise sufficient retention strength of <strong>the</strong><br />
construction cannot be achieved.<br />
Gold-Plastic Abutment<br />
Screw channel<br />
made of burn-out<br />
plastic (POM)<br />
Base part made<br />
of high-melting cast-on<br />
gold alloy<br />
69
HYBRID RESTORATIONS WITH THE <strong>CAMLOG</strong> ® IMPLANT SYSTEM<br />
DOUBLE CROWN<br />
RESTORATIONS<br />
WAX-UP OF THE PRIMARY COMPONENTS<br />
The primary crowns are waxed up <strong>with</strong> <strong>the</strong> <strong>CAMLOG</strong> ® gold-plastic abutment<br />
similar to <strong>the</strong> conventional double crown technique. The minimum<br />
wax thickness over <strong>the</strong> base part must be 0.7 mm to achieve an optimal discharge<br />
behavior of <strong>the</strong> cast-on alloy.<br />
CAUTION<br />
Do not cover <strong>the</strong> fine gold margin (0.3 mm) <strong>with</strong> wax. This can lead to a<br />
surplus of cast-on alloy on <strong>the</strong> margin or on <strong>the</strong> implant shoulder support.<br />
After wax-up, a suitable agent must be used to clean <strong>the</strong> fine gold margin<br />
and <strong>the</strong> area of <strong>the</strong> implant shoulder support of separating medium and wax<br />
particles (e.g. <strong>with</strong> a cotton swab soaked in alcohol).<br />
EMBEDDING AND CASTING<br />
The abutment is embedded according to <strong>the</strong> instruction manual of <strong>the</strong> muffle<br />
system used. We do not recommend <strong>the</strong> use of a wax wetting agents.<br />
The fine film from <strong>the</strong> agent can lead to a surplus of cast-on alloy on <strong>the</strong><br />
margin or on <strong>the</strong> implant shoulder support. When embedding, <strong>the</strong> correct<br />
placement of <strong>the</strong> wax-up in <strong>the</strong> casting muffle is of importance. Volume ratios<br />
and pin angles must be selected so that <strong>the</strong> required temperature for<br />
formation of a metallic connection is achieved. This is particularly important<br />
for voluminous casts.<br />
70<br />
0.3 mm gold margin<br />
<strong>Implant</strong> shoulder support
The investment material must be matched <strong>with</strong> <strong>the</strong> cast-on alloy and <strong>the</strong><br />
casting alloy used. We recommend phosphate bound investment materials.<br />
The manufacturer's processing instructions must be observed and <strong>the</strong> mixing<br />
ratios and preheating times accurately observed. We recommend you<br />
do not use any quick heating processes (speed investment materials). The<br />
cast delay time must be kept as brief as possible.<br />
INSTRUCTIONS FOR THE CAST-ON ALLOYS<br />
The cast-on alloy may not exceed <strong>the</strong> liquidus temperature of 1350°C<br />
(2462°F) in its melting range. The melting range of <strong>the</strong> high-melting caston<br />
gold alloy of <strong>the</strong> abutment lies between 1400°C–1490°C (2552°F–<br />
2714°F).<br />
The cast-on alloy must be highly gold-bearing in its components and be<br />
compatible <strong>with</strong> <strong>the</strong> high-melting cast-on gold alloy. Observe <strong>the</strong> instructions<br />
of <strong>the</strong> alloy manufacturer.<br />
The use of o<strong>the</strong>r cast-on alloys is not recommended because gold alloys<br />
<strong>with</strong> nickel or cobalt components can destroy <strong>the</strong> base part.<br />
Components of an unsuitable alloy can lead to phases <strong>with</strong> reduced corrosion<br />
resistance, less stability or a low melting range thanks to "diffusion<br />
processes" in <strong>the</strong> border zone "casting alloy/cast-on alloy".<br />
DEVESTMENT<br />
After casting, <strong>the</strong> cast object must be slowly cooled to room temperature<br />
and <strong>the</strong> object gently devested.<br />
IMPORTANT NOTE<br />
Never use sandblasting to devest <strong>the</strong> cast; this would destroy <strong>the</strong> precise<br />
fit of <strong>the</strong> <strong>CAMLOG</strong> ® abutment on <strong>the</strong> <strong>CAMLOG</strong> ® implant shoulder!<br />
We recommend gentle devestment in an ultrasonic bath <strong>with</strong> waterjet or<br />
stripping.<br />
HYBRID RESTORATIONS WITH THE <strong>CAMLOG</strong> ® IMPLANT SYSTEM<br />
CASTING QUALITY<br />
If <strong>the</strong> cast object exhibits casting defects after devestment such as incomplete<br />
effluence or casting fins/bubbles over <strong>the</strong> margin onto <strong>the</strong> implant<br />
shoulder support, <strong>the</strong> work should be repeated. The precision of <strong>the</strong> prefabricated<br />
base part is severely affected and also <strong>the</strong> long-term success of <strong>the</strong><br />
pros<strong>the</strong>tic restoration.<br />
TRIMMING<br />
After casting, <strong>the</strong> <strong>CAMLOG</strong> ® gold-plastic abutments can be processed on<br />
a previously prepared milling cast <strong>with</strong> suitable abrasives in <strong>the</strong> parallelometer.<br />
71
HYBRID RESTORATIONS WITH THE <strong>CAMLOG</strong> ® IMPLANT SYSTEM<br />
DOUBLE CROWN<br />
RESTORATIONS<br />
For fabrication of double crowns using <strong>the</strong> electroplating technique, <strong>the</strong><br />
manufacturer's specifications must be observed. The preparation for <strong>the</strong><br />
cast fabrication of double crowns occurs similar to <strong>the</strong> cone-telescopic<br />
crown technique. To prevent <strong>the</strong> caps from rotating, <strong>the</strong> abutments are<br />
lightly ground in oval form. The surface must be homogeneous.<br />
The space for <strong>the</strong> tertiary framework required to receive <strong>the</strong> secondary<br />
crowns can be tested at every phase of preparation <strong>with</strong> <strong>the</strong> silicone index<br />
<strong>with</strong> <strong>the</strong> denture teeth in position.<br />
FABRICATING SECONDARY COPINGS<br />
The secondary crowns or superstructure are <strong>the</strong>n fabricated. The tensionfree<br />
seat of <strong>the</strong> superstructure is of paramount importance for <strong>the</strong> longterm<br />
success of an implant-pros<strong>the</strong>tic restoration. We recommend bonding<br />
<strong>the</strong> secondary copings intraorally into <strong>the</strong> tertiary framework (passive fit).<br />
72<br />
NOTES<br />
Electroformed secondary copings<br />
Electroforming is conducted as specified by <strong>the</strong> manufacturer. The<br />
<strong>CAMLOG</strong> ® abutments are inserted into a <strong>CAMLOG</strong> ® lab analog of <strong>the</strong><br />
appropriate diameter and fixed <strong>with</strong> a <strong>CAMLOG</strong> ® lab screw. The thickness<br />
should be 0.2–0.3 mm. The special feature of <strong>the</strong> low layer thickness<br />
of <strong>the</strong> electroformed components and <strong>the</strong> resulting low stability of<br />
<strong>the</strong> secondary coping prevent direct polymerization in <strong>the</strong> acrylic denture<br />
base. For this reason, a tertiary framework must be fabricated over<br />
<strong>the</strong> secondary copings for reinforcement.<br />
Cast secondary copings<br />
The wall thickness of <strong>the</strong> secondary copings should be approx. 0.5 mm.<br />
Fabrication is similar to standard crown and bridge technique.<br />
CAUTION<br />
Do not mix up <strong>the</strong> <strong>CAMLOG</strong> ® abutments and secondary copings! We<br />
recommend a color buccal marker on <strong>the</strong> abutment, coping and working<br />
cast.<br />
For information about "Fabricating a tertiary framework for double crown<br />
restorations", "Bonding of <strong>the</strong> secondary coping intraorally" and "Insertion<br />
of <strong>the</strong> pros<strong>the</strong>tic restoration", see pages 67–68.
ACCESSORIES AND<br />
PROSTHETIC INSTRUMENTS<br />
HYBRID RESTORATIONS WITH THE <strong>CAMLOG</strong> ® IMPLANT SYSTEM<br />
<strong>CAMLOG</strong> ® LAB ANALOGS FOR CAST FABRICATION<br />
Art. No. J3010.3300 J3010.3800 J3010.4300 J3010.5000 J3010.6000<br />
Ø mm 3.3 3.8 4.3 5.0 6.0<br />
<strong>CAMLOG</strong> ® LAB SCREWS (HEX) FOR SECURING <strong>CAMLOG</strong> ® ABUTMENTS TO THE CAST<br />
Art. No. Article<br />
J4006.1601 <strong>CAMLOG</strong> ® lab screw (hex), brown anodized,<br />
Thread M 1.6, for implant diameters 3.3/3.8/4.3 mm<br />
J4006.2001 <strong>CAMLOG</strong> ® lab screw (hex), brown anodized,<br />
Thread M 2.0, for implant diameters 5.0/6.0 mm<br />
SCREWDRIVER, HEX<br />
Art. No. Article<br />
J5316.0510 Screwdriver (hex),<br />
extra short<br />
J5316.0501 Screwdriver (hex),<br />
short<br />
J5316.0502 Screwdriver (hex),<br />
long<br />
UNIVERSAL HOLDER<br />
Art. No. Article<br />
J3709.0010 Universal holder, incl. 2 <strong>CAMLOG</strong> ® lab screws (thread M 1.6 and M 2.0)<br />
and each 1 <strong>CAMLOG</strong> ® abutment collect for implant diameters 3.3/3.8/4.3/5.0/6.0 mm<br />
J3709.0015 Universal holder<br />
REAMER FOR DILATING THE PLASTER MODEL, FOR UNIVERSAL HOLDER, incl. color-coded guide pin<br />
Art.-Nr. J3706.3300 J3706.3800 J3706.4300 J3706.5000 J3706.6000<br />
Ø mm 3.3 3.8 4.3 5.0 6.0<br />
REWORKING REAMER, FOR BASE FOR BAR ABUTMENTS<br />
Art. No. Article<br />
J3711.0010 Plane surface/cone seat, burn-out<br />
for implant diameters 3.3/3.8/4.3 mm<br />
J3711.0015 Plane surface/cone seat, burn-out<br />
for implant diameters 5.0/6.0 mm<br />
J3711.0020 Screw seat, burn-out<br />
for implant diameters 3.3/3.8/4.3 mm<br />
J3711.0025 Screw seat, burn-out<br />
for implant diameters 5.0/6.0 mm<br />
73
HYBRID RESTORATIONS WITH THE <strong>CAMLOG</strong> ® IMPLANT SYSTEM<br />
MATERIALS<br />
TITANIUM GRADE 4 PROPERTIES:<br />
Chemical structure (in %): O 0.4 max.<br />
Fe 0.3 max.<br />
C 0.1 max.<br />
N 0.05 max.<br />
H 0.0125 max.<br />
Ti > 99.0<br />
Mechanical properties: Tensile strength 680 MPa min.<br />
Elongation 10 %<br />
TITANIUM ALLOY TI6AI4V ELI PROPERTIES:<br />
Chemical structure (in %): AI 5.5–6.75 max.<br />
V 3.5–4.5 max.<br />
Fe 0.3 max.<br />
C 0.08 max.<br />
N 0.05 max.<br />
H 0.015 max.<br />
Ti ~ 90<br />
Mechanical properties: Tensile strength 860 MPa min.<br />
Elongation 10 %<br />
CAST-ON GOLD ALLOY PROPERTIES:<br />
GOLD PLASTIC ABUTMENT Chemical structure (in %): Au 60<br />
Pd 20<br />
Pt 19<br />
Ir 1<br />
Physical properties: Melting range 1400–1490 °C<br />
Density 17.5 g/cm3<br />
E-Modul 136 GPa<br />
Coefficient of <strong>the</strong>rmal expansion (20–500°C) 11.9 μm/m·°C<br />
Coefficient of <strong>the</strong>rmal expansion (20–600°C) 12.2 μm/m·°C<br />
Color white<br />
Mechanical properties: drawn<br />
Hardness HV5 > 215<br />
Tensile strength (Rm) > 750 MPa<br />
0.2% Elongation limit (Rp 0.2%) > 650 MPa<br />
Elongation at break > 2 %<br />
74
FURTHER<br />
DOCUMENTATION<br />
Fur<strong>the</strong>r information about <strong>CAMLOG</strong> ® products is available in <strong>the</strong> following<br />
documentations:<br />
• <strong>CAMLOG</strong> product catalog<br />
• <strong>CAMLOG</strong> working instructions<br />
• Preparation instructions<br />
• <strong>CAMLOG</strong> instruction manuals (included <strong>with</strong> <strong>CAMLOG</strong> ®<br />
products as package inserts)<br />
• www.camlog.com<br />
TRADEMARKS AND COPYRIGHT<br />
Protected brand names (trademarks) are not specially indicated. The absence<br />
of such indication does not mean that it is not a trademarked name.<br />
The publication <strong>with</strong> all its parts is protected by copyright. Any exploitation<br />
beyond <strong>the</strong> narrow limits of <strong>the</strong> copyright act is not permissible <strong>with</strong>out <strong>the</strong><br />
approval of <strong>CAMLOG</strong> Biotechnologies AG and is subject to legal sanctions.<br />
HYBRID RESTORATIONS WITH THE <strong>CAMLOG</strong> ® IMPLANT SYSTEM<br />
75
HEADQUARTERS<br />
<strong>CAMLOG</strong> Biotechnologies AG | Margare<strong>the</strong>nstrasse 38 | CH-4053 Basel | Switzerland<br />
Tel +41 61 565 41 00 | Fax +41 61 565 41 01 | info@camlog.com | www.camlog.com<br />
Manufacturer of <strong>CAMLOG</strong> ® products: ALTATEC GmbH, Maybachstraße 5, D-71299 Wimsheim, Germany<br />
+E219J800000711H<br />
+$0000017459H. Art.No. J8000.0071 Rev.0 08/2011