3130/3130xl Genetic Analyzers Getting Started Guide, Rev - Applied ...
3130/3130xl Genetic Analyzers Getting Started Guide, Rev - Applied ...
3130/3130xl Genetic Analyzers Getting Started Guide, Rev - Applied ...

You also want an ePaper? Increase the reach of your titles
YUMPU automatically turns print PDFs into web optimized ePapers that Google loves.
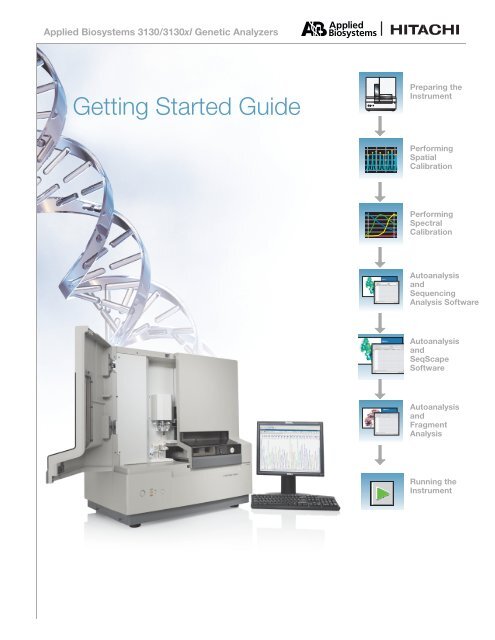
<strong>Applied</strong> Biosystems <strong>3130</strong>/<strong>3130</strong>xl <strong>Genetic</strong> <strong>Analyzers</strong><br />
<strong>Getting</strong> <strong>Started</strong> <strong>Guide</strong><br />
Preparing the<br />
Instrument<br />
Performing<br />
Spatial<br />
Calibration<br />
Performing<br />
Spectral<br />
Calibration<br />
Autoanalysis<br />
and<br />
Sequencing<br />
Analysis Software<br />
Autoanalysis<br />
and<br />
SeqScape<br />
Software<br />
Autoanalysis<br />
and<br />
Fragment<br />
Analysis<br />
Running the<br />
Instrument
© Copyright 2007, 2010 <strong>Applied</strong> Biosystems. All rights reserved.<br />
Information in this document is subject to change without notice. <strong>Applied</strong> Biosystems assumes no responsibility for any errors that may appear in this<br />
document. This document is believed to be complete and accurate at the time of publication. In no event shall <strong>Applied</strong> Biosystems be liable for incidental,<br />
special, multiple, or consequential damages in connection with or arising from the use of this document.<br />
NOTICE TO PURCHASER:<br />
This instrument is Authorized for use in DNA sequencing and fragment analysis. This authorization is included in the purchase price of this instrument and<br />
corresponds to the up-front fee component of a license under process claims of U.S. patents and under all process claims for DNA sequence and fragment<br />
analysis of U.S. patents now or hereafter owned or licensable by <strong>Applied</strong> Biosystems for which an Authorization is required, and under corresponding process<br />
claims in foreign counterparts of the foregoing for which an Authorization is required. The running royalty component of licenses may be purchased from<br />
<strong>Applied</strong> Biosystems or obtained by using Authorized reagents purchased from Authorized suppliers in accordance with the label rights accompanying such<br />
reagents. Purchase of this instrument does not itself convey to the purchaser a complete license or right to perform the above processes. This instrument is<br />
also licensed under U.S. patents and apparatus and system claims in foreign counterparts thereof. No rights are granted expressly, by implication or by<br />
estoppel under composition claims or under other process or system claims owned or licensable by <strong>Applied</strong> Biosystems. For more information regarding<br />
licenses, please contact the Director of Licensing at <strong>Applied</strong> Biosystems, 850 Lincoln Centre Drive, Foster City, California 94404, USA.<br />
<strong>Applied</strong> Biosystems <strong>3130</strong> <strong>Genetic</strong> Analyzer:<br />
Covered by one or more of U.S. Pats. Nos. RE37,606; RE37,941.<br />
<strong>Applied</strong> Biosystems <strong>3130</strong>xl <strong>Genetic</strong> Analyzer:<br />
Covered by one or more of U.S. Pats. Nos. RE37,606; RE37,941.<br />
NOTICE TO PURCHASER<br />
The purchase price of this <strong>Applied</strong> Biosystems <strong>3130</strong>/<strong>3130</strong>xl <strong>Genetic</strong> Analyzer includes a grant of a limited, non-transferable license under U.S. patent<br />
claims and method claims of its foreign counterparts, and element claims of its foreign counterparts, to use this particular instrument for electrophoresis<br />
methods employing fluorescence as a means of detection. No other licenses or rights are hereby conveyed either expressly, by implication, or estoppel<br />
including, but not limited to, any claims to a composition.<br />
The <strong>Applied</strong> Biosystems <strong>3130</strong> and <strong>3130</strong>xl <strong>Genetic</strong> <strong>Analyzers</strong> includes patented technology licensed from Hitachi, Ltd. as part of a strategic partnership<br />
between <strong>Applied</strong> Biosystems and Hitachi, Ltd., as well as patented technology of <strong>Applied</strong> Biosystems.<br />
Trademarks<br />
<strong>Applied</strong> Biosystems, AmpFlSTR, BigDye, Cofiler, GeneMapper, Identifiler, Profiler, Profiler Plus ID, SeqScape, SGM Plus, SNaPshot, and StockMarks are<br />
registered trademarks and AB (Design), Applera, Hi-Di, KB, POP, POP-4, POP-6, POP-7, SEfiler, and Yfiler are trademarks of <strong>Applied</strong> Biosystems or its<br />
subsidiaries in the U.S. and/or certain other countries.<br />
Dell is a registered trademark of Dell Computer Corporation.<br />
Microsoft, Windows, and Windows XP are registered trademarks of the Microsoft Corporation in the United States and other countries.<br />
Oracle is a registered trademark of the Oracle Corporation.<br />
All other trademarks are the sole property of their respective owners.<br />
Part Number 4352715 <strong>Rev</strong>. D<br />
06/2010<br />
DRAFT<br />
January 17, 2007 6:54 pm, <strong>3130</strong>_GSGFrntCvr.fm
DRAFT<br />
November 5, 2004 1:58 pm, Workflow_Z-fold_ t.fm<br />
Chapter 1<br />
Chapter 2<br />
Chapter 3<br />
Chapter 4<br />
Chapter 5<br />
Chapter 6<br />
Chapter 7<br />
Preparing the<br />
Instrument<br />
Performing a<br />
Spatial Calibration<br />
Performing a<br />
Spectral Calibration<br />
Autoanalysis and<br />
Sequencing Analysis<br />
Software<br />
Autoanalysis and<br />
SeqScape ®<br />
Software<br />
Autoanalysis<br />
and<br />
Fragment Analysis<br />
Running the<br />
Instrument<br />
Start the<br />
system<br />
Start a spatial<br />
calibration run<br />
Prepare spectral<br />
calibration chemistry<br />
Create protocols<br />
for automated<br />
sequencing analysis<br />
Create protocols<br />
for automated<br />
SeqScape Software<br />
analysis<br />
Create protocols<br />
for automated<br />
fragment analysis<br />
Prepare samples<br />
and<br />
plate assemblies<br />
Start Data Collection<br />
software<br />
Evaluate spatial<br />
calibration profile<br />
Create a spectral<br />
instrument protocol<br />
Create a<br />
Sequencing Analysis<br />
Plate Record<br />
Create a<br />
SeqScape Software Plate<br />
Record<br />
Create a GeneMapper ®<br />
Software<br />
Plate Record<br />
Place Plate onto<br />
Autosampler<br />
Check polymer block,<br />
select capillary array,<br />
and polymer<br />
Accept or reject<br />
spatial calibration<br />
Perform a<br />
spectral calibration<br />
Prepare buffer and<br />
fill reservoirs<br />
Evaluate the spectral<br />
calibration data<br />
Link the Plate Schedule a run Run the instrument<br />
<strong>Applied</strong> Biosystems <strong>3130</strong>/<strong>3130</strong>xl <strong>Genetic</strong> <strong>Analyzers</strong><br />
<strong>Getting</strong> <strong>Started</strong> <strong>Guide</strong> Workflow<br />
Activate a<br />
spectral calibration<br />
<strong>Applied</strong> Biosystems <strong>3130</strong>/<strong>3130</strong>xl <strong>Genetic</strong> <strong>Analyzers</strong> <strong>Getting</strong> <strong>Started</strong> <strong>Guide</strong> iii<br />
Set up for<br />
continuous<br />
operation
iv <strong>Applied</strong> Biosystems <strong>3130</strong>/<strong>3130</strong>xl <strong>Genetic</strong> <strong>Analyzers</strong> <strong>Getting</strong> <strong>Started</strong> <strong>Guide</strong><br />
DRAFT<br />
November 1, 2004 9:37 pm, Workflow_Z-fold_ t.fm
SAMPLE DOCUMENT<br />
November 3, 2004 9:51 am, <strong>3130</strong>GS<strong>Guide</strong>_TOC.fm<br />
Contents<br />
Preface ix<br />
How to Use This <strong>Guide</strong> . . . . . . . . . . . . . . . . . . . . . . . . . . . . . . . . . . . . . . . . . . . . . . . ix<br />
How to Obtain More Information . . . . . . . . . . . . . . . . . . . . . . . . . . . . . . . . . . . . . . . . . x<br />
How to Obtain Support . . . . . . . . . . . . . . . . . . . . . . . . . . . . . . . . . . . . . . . . . . . . . . . xi<br />
Safety xiii<br />
Safety Conventions Used in This Document . . . . . . . . . . . . . . . . . . . . . . . . . . . . . . xiv<br />
Symbols on Instruments . . . . . . . . . . . . . . . . . . . . . . . . . . . . . . . . . . . . . . . . . . . . . . xv<br />
Safety Labels on Instruments . . . . . . . . . . . . . . . . . . . . . . . . . . . . . . . . . . . . . . . . . xvi<br />
General Instrument Safety . . . . . . . . . . . . . . . . . . . . . . . . . . . . . . . . . . . . . . . . . . . . xvii<br />
Chemical Safety . . . . . . . . . . . . . . . . . . . . . . . . . . . . . . . . . . . . . . . . . . . . . . . . . . . . xviii<br />
Chemical Waste Safety . . . . . . . . . . . . . . . . . . . . . . . . . . . . . . . . . . . . . . . . . . . . . . . xx<br />
Electrical Safety . . . . . . . . . . . . . . . . . . . . . . . . . . . . . . . . . . . . . . . . . . . . . . . . . . . . xxi<br />
Physical Hazard Safety . . . . . . . . . . . . . . . . . . . . . . . . . . . . . . . . . . . . . . . . . . . . . . xxi<br />
Laser Safety . . . . . . . . . . . . . . . . . . . . . . . . . . . . . . . . . . . . . . . . . . . . . . . . . . . . . . . xxi<br />
Workstation Safety . . . . . . . . . . . . . . . . . . . . . . . . . . . . . . . . . . . . . . . . . . . . . . . . . xxii<br />
Safety and Electromagnetic Compatibility (EMC) Standards . . . . . . . . . . . . . . . . xxiii<br />
Chapter 1 Preparing the Instrument 1<br />
Instrument Description . . . . . . . . . . . . . . . . . . . . . . . . . . . . . . . . . . . . . . . . . . . . . . . . 2<br />
Application Summary Tables . . . . . . . . . . . . . . . . . . . . . . . . . . . . . . . . . . . . . . . . . . . . 3<br />
Barcode Readers . . . . . . . . . . . . . . . . . . . . . . . . . . . . . . . . . . . . . . . . . . . . . . . . . . . . . 6<br />
Starting the <strong>3130</strong>/<strong>3130</strong>xl <strong>Genetic</strong> Analyzer System . . . . . . . . . . . . . . . . . . . . . . . . . . 7<br />
Data Collection Software . . . . . . . . . . . . . . . . . . . . . . . . . . . . . . . . . . . . . . . . . . . . . . . 9<br />
Preparing the Instrument . . . . . . . . . . . . . . . . . . . . . . . . . . . . . . . . . . . . . . . . . . . . . . 11<br />
Preparing Buffer and Filling Reservoirs . . . . . . . . . . . . . . . . . . . . . . . . . . . . . . . . . . . 16<br />
Chapter 2 Performing a Spatial Calibration 21<br />
Spatial Calibration . . . . . . . . . . . . . . . . . . . . . . . . . . . . . . . . . . . . . . . . . . . . . . . . . . . 22<br />
Creating a Spatial Calibration File . . . . . . . . . . . . . . . . . . . . . . . . . . . . . . . . . . . . . . . 22<br />
Evaluating a Spatial Calibration File . . . . . . . . . . . . . . . . . . . . . . . . . . . . . . . . . . . . . 23<br />
Examples of Spatial Profiles . . . . . . . . . . . . . . . . . . . . . . . . . . . . . . . . . . . . . . . . . . . 25<br />
<strong>Applied</strong> Biosystems <strong>3130</strong>/<strong>3130</strong>xl <strong>Genetic</strong> <strong>Analyzers</strong> <strong>Getting</strong> <strong>Started</strong> <strong>Guide</strong> v
Chapter 3 Performing a Spectral Calibration 27<br />
Spectral Calibration . . . . . . . . . . . . . . . . . . . . . . . . . . . . . . . . . . . . . . . . . . . . . . . . . 28<br />
Preparing the Spectral Calibration Chemistry . . . . . . . . . . . . . . . . . . . . . . . . . . . . . . 31<br />
Loading Samples . . . . . . . . . . . . . . . . . . . . . . . . . . . . . . . . . . . . . . . . . . . . . . . . . . . 32<br />
Creating a Spectral Instrument Protocol . . . . . . . . . . . . . . . . . . . . . . . . . . . . . . . . . . 35<br />
Performing a Spectral Calibration . . . . . . . . . . . . . . . . . . . . . . . . . . . . . . . . . . . . . . . 37<br />
Evaluating the Spectral Calibration Data . . . . . . . . . . . . . . . . . . . . . . . . . . . . . . . . . 43<br />
Activating a Spectral Calibration . . . . . . . . . . . . . . . . . . . . . . . . . . . . . . . . . . . . . . . . 47<br />
Examples of Passing Sequencing Spectral Calibrations . . . . . . . . . . . . . . . . . . . . . 49<br />
Examples of Passing Fragment Analysis Spectral Calibrations . . . . . . . . . . . . . . . . 51<br />
Chapter 4 Autoanalysis and<br />
Sequencing Analysis Software 53<br />
Sequencing Analysis Software . . . . . . . . . . . . . . . . . . . . . . . . . . . . . . . . . . . . . . . . . 54<br />
About Plate Records and Sequencing Analysis . . . . . . . . . . . . . . . . . . . . . . . . . . . . 55<br />
Creating Protocols for Automated Sequencing Analysis . . . . . . . . . . . . . . . . . . . . . 59<br />
Analysis Protocol for Sequencing Analysis . . . . . . . . . . . . . . . . . . . . . . . . . . . . . . . . 62<br />
Results Group for Sequencing Analysis . . . . . . . . . . . . . . . . . . . . . . . . . . . . . . . . . . 70<br />
Filling Out a Sequencing Analysis Plate Record . . . . . . . . . . . . . . . . . . . . . . . . . . . . 77<br />
Chapter 5 Autoanalysis and SeqScape Software 81<br />
SeqScape Software . . . . . . . . . . . . . . . . . . . . . . . . . . . . . . . . . . . . . . . . . . . . . . . . . 82<br />
About Plate Records and Seqscape Software . . . . . . . . . . . . . . . . . . . . . . . . . . . . . 83<br />
Creating Protocols for Automated SeqScape Software Analysis . . . . . . . . . . . . . . . 88<br />
Filling Out a SeqScape Software Plate Record . . . . . . . . . . . . . . . . . . . . . . . . . . . 101<br />
Chapter 6 Autoanalysis and Fragment Analysis 105<br />
GeneMapper Software . . . . . . . . . . . . . . . . . . . . . . . . . . . . . . . . . . . . . . . . . . . . . . 106<br />
About GeneMapper Software Plate Records . . . . . . . . . . . . . . . . . . . . . . . . . . . . . 108<br />
Creating Protocols for Automated Fragment Analysis . . . . . . . . . . . . . . . . . . . . . . 112<br />
Creating a GeneMapper Software Plate Record . . . . . . . . . . . . . . . . . . . . . . . . . . . 123<br />
Chapter 7 Running the Instrument 127<br />
Preparing Samples and Plate Assemblies . . . . . . . . . . . . . . . . . . . . . . . . . . . . . . . 128<br />
Linking and Unlinking a Plate . . . . . . . . . . . . . . . . . . . . . . . . . . . . . . . . . . . . . . . . . 128<br />
Running the Instrument . . . . . . . . . . . . . . . . . . . . . . . . . . . . . . . . . . . . . . . . . . . . . . 130<br />
Controlling the Run . . . . . . . . . . . . . . . . . . . . . . . . . . . . . . . . . . . . . . . . . . . . . . . . . 133<br />
Set Up for Continuous Operation . . . . . . . . . . . . . . . . . . . . . . . . . . . . . . . . . . . . . . 134<br />
Working with Data in The Run History View . . . . . . . . . . . . . . . . . . . . . . . . . . . . . . 145<br />
Viewing Data from a Completed Run in the Data Collection Software . . . . . . . . . . 146<br />
vi <strong>Applied</strong> Biosystems <strong>3130</strong>/<strong>3130</strong>xl <strong>Genetic</strong> <strong>Analyzers</strong> <strong>Getting</strong> <strong>Started</strong> <strong>Guide</strong><br />
SAMPLE DOCUMENT<br />
November 3, 2004 9:51 am, <strong>3130</strong>GS<strong>Guide</strong>_TOC.fm
SAMPLE DOCUMENT<br />
November 3, 2004 9:51 am, <strong>3130</strong>GS<strong>Guide</strong>_TOC.fm<br />
Viewing Autoextraction Results . . . . . . . . . . . . . . . . . . . . . . . . . . . . . . . . . . . . . . . . 147<br />
Using Autoanalysis Manager Software . . . . . . . . . . . . . . . . . . . . . . . . . . . . . . . . . . 155<br />
Viewing Analyzed Data . . . . . . . . . . . . . . . . . . . . . . . . . . . . . . . . . . . . . . . . . . . . . . 160<br />
Appendix A Plate Mapping 161<br />
Injection Scheduling . . . . . . . . . . . . . . . . . . . . . . . . . . . . . . . . . . . . . . . . . . . . . . . . 161<br />
Capillary Array Map . . . . . . . . . . . . . . . . . . . . . . . . . . . . . . . . . . . . . . . . . . . . . . . . . 161<br />
96-Well Plate Mapping . . . . . . . . . . . . . . . . . . . . . . . . . . . . . . . . . . . . . . . . . . . . . . 162<br />
384-Well Plate Mapping . . . . . . . . . . . . . . . . . . . . . . . . . . . . . . . . . . . . . . . . . . . . . 163<br />
Index 3<br />
<strong>Applied</strong> Biosystems <strong>3130</strong>/<strong>3130</strong>xl <strong>Genetic</strong> <strong>Analyzers</strong> <strong>Getting</strong> <strong>Started</strong> <strong>Guide</strong> vii
viii <strong>Applied</strong> Biosystems <strong>3130</strong>/<strong>3130</strong>xl <strong>Genetic</strong> <strong>Analyzers</strong> <strong>Getting</strong> <strong>Started</strong> <strong>Guide</strong><br />
SAMPLE DOCUMENT<br />
November 3, 2004 9:51 am, <strong>3130</strong>GS<strong>Guide</strong>_TOC.fm
DRAFT<br />
November 3, 2004 9:51 am, Preface.fm<br />
How to Use This <strong>Guide</strong><br />
Purpose of This<br />
<strong>Guide</strong><br />
Preface<br />
The <strong>Applied</strong> Biosystems <strong>3130</strong>/<strong>3130</strong>xl <strong>Genetic</strong> <strong>Analyzers</strong> <strong>Getting</strong> <strong>Started</strong> <strong>Guide</strong> provides<br />
step-by-step instructions for preparing and analyzing a sample. It is designed to help you<br />
quickly learn how to use the <strong>Applied</strong> Biosystems <strong>3130</strong>/<strong>3130</strong>xl <strong>Genetic</strong> <strong>Analyzers</strong>.<br />
Audience This manual is written for principle investigators and laboratory staff who are planning<br />
to operate and maintain the <strong>Applied</strong> Biosystems <strong>3130</strong>/<strong>3130</strong>xl <strong>Genetic</strong> <strong>Analyzers</strong>.<br />
Assumptions This guide assumes you have the following background:<br />
• Familiarity with Microsoft ® Windows ® XP operating system.<br />
Knowledge of general techniques for handling DNA samples and preparing them<br />
for electrophoresis.<br />
A general understanding of hard drives, data storage, file transfers, and copying and<br />
pasting.<br />
If you want to integrate the <strong>3130</strong>/<strong>3130</strong>xl <strong>Genetic</strong> <strong>Analyzers</strong> into your existing laboratory<br />
data flow system, you need networking experience.<br />
Text Conventions This guide uses the following conventions:<br />
User Attention<br />
Words<br />
Bold indicates user action. For example:<br />
Type 0, then press Enter for each of the remaining fields.<br />
Italic text indicates new or important words and is also used for emphasis. For<br />
example:<br />
Before analyzing, always prepare fresh matrix.<br />
A right arrow bracket (>) separates successive commands you select from a dropdown<br />
or shortcut menu. For example:<br />
Select File > Open > Spot Set.<br />
Right-click the sample row, then select View Filter > View All Runs.<br />
Two user attention words appear in <strong>Applied</strong> Biosystems user documentation. Each word<br />
implies a particular level of observation or action as described below:<br />
Note – Provides information that may be of interest or help but is not critical to the<br />
use of the product.<br />
IMPORTANT! – Provides information that is necessary for proper instrument<br />
operation, accurate chemistry kit use, or safe use of a chemical.<br />
<strong>Applied</strong> Biosystems <strong>3130</strong>/<strong>3130</strong>xl <strong>Genetic</strong> <strong>Analyzers</strong> <strong>Getting</strong> <strong>Started</strong> <strong>Guide</strong> ix
Preface<br />
How to Obtain More Information<br />
Safety Alert<br />
Words<br />
Examples of the user attention words appear below:<br />
Note: The size of the column affects the run time.<br />
IMPORTANT! To verify your client connection to the database, you need a valid Oracle<br />
user ID and password.<br />
Safety alert words also appear in user documentation. For more information, see “Safety<br />
Alert Words” on page xiv.<br />
How to Obtain More Information<br />
Related<br />
Documentation<br />
Send Us Your<br />
Comments<br />
The following related document is shipped with the system:<br />
<strong>Applied</strong> Biosystems <strong>3130</strong>/<strong>3130</strong>xl <strong>Genetic</strong> <strong>Analyzers</strong> Maintenance, Troubleshooting,<br />
and Reference <strong>Guide</strong> (P/N 4352716) - Contains information on maintaining the<br />
instrument and computer system, troubleshooting tables to diagnose performance<br />
failures and advance reference content.<br />
<strong>Applied</strong> Biosystems <strong>3130</strong>/<strong>3130</strong>xl <strong>Genetic</strong> <strong>Analyzers</strong> Site Preparation <strong>Guide</strong><br />
(P/N 4352717) - Contains the space, environmental, and electrical requirements to<br />
support the <strong>3130</strong>/<strong>3130</strong>xl <strong>Genetic</strong> Analyzer system.<br />
<strong>Applied</strong> Biosystems 3730/3730xl DNA <strong>Analyzers</strong> and <strong>Applied</strong> Biosystems<br />
<strong>3130</strong>/<strong>3130</strong>xl <strong>Genetic</strong> <strong>Analyzers</strong> AB Navigator Software Administrator <strong>Guide</strong><br />
(P/N 4359472) - Contains information and procedures for the administrator<br />
maintaining the computer system and software files of the <strong>Applied</strong> Biosystems<br />
<strong>3130</strong>/<strong>3130</strong>xl <strong>Genetic</strong> <strong>Analyzers</strong>.<br />
<strong>Applied</strong> Biosystems <strong>3130</strong>/<strong>3130</strong>xl <strong>Genetic</strong> <strong>Analyzers</strong> Quick Reference Card<br />
(P/N 4362825) - Contains a flowchart on how to run your samples and instrument, a<br />
table of maintenance tasks, and a Data Collection software reference guide.<br />
Note: For additional documentation, see “How to Obtain Support” on page xi.<br />
<strong>Applied</strong> Biosystems welcomes your comments and suggestions for improving its user<br />
documents. You can e-mail your comments to:<br />
techpubs@appliedbiosystems.com<br />
x <strong>Applied</strong> Biosystems <strong>3130</strong>/<strong>3130</strong>xl <strong>Genetic</strong> <strong>Analyzers</strong> <strong>Getting</strong> <strong>Started</strong> <strong>Guide</strong><br />
DRAFT<br />
November 3, 2004 9:51 am, Preface.fm
DRAFT<br />
November 3, 2004 9:51 am, Preface.fm<br />
How to Obtain Support<br />
For the latest services and support information for all locations, go to<br />
http://www.appliedbiosystems.com, then click the link for Support.<br />
At the Support page, you can:<br />
Preface<br />
How to Obtain Support<br />
Search through frequently asked questions (FAQs)<br />
Submit a question directly to Technical Support<br />
Order <strong>Applied</strong> Biosystems user documents, MSDSs, certificates of analysis, and<br />
other related documents<br />
Download PDF documents<br />
Obtain information about customer training<br />
Download software updates and patches<br />
In addition, the Support page provides access to worldwide telephone and fax numbers<br />
to contact <strong>Applied</strong> Biosystems Technical Support and Sales facilities.<br />
<strong>Applied</strong> Biosystems <strong>3130</strong>/<strong>3130</strong>xl <strong>Genetic</strong> <strong>Analyzers</strong> <strong>Getting</strong> <strong>Started</strong> <strong>Guide</strong> xi
Preface<br />
How to Obtain Support<br />
xii <strong>Applied</strong> Biosystems <strong>3130</strong>/<strong>3130</strong>xl <strong>Genetic</strong> <strong>Analyzers</strong> <strong>Getting</strong> <strong>Started</strong> <strong>Guide</strong><br />
DRAFT<br />
November 3, 2004 9:51 am, Preface.fm
DRAFT<br />
November 3, 2004 9:51 am, Safety_fm<br />
Safety<br />
This safety section describes the following:<br />
Safety Conventions Used in This Document . . . . . . . . . . . . . . . . . . . . . . . . . . . . . . . . xiv<br />
Symbols on Instruments . . . . . . . . . . . . . . . . . . . . . . . . . . . . . . . . . . . . . . . . . . . . . . . . xv<br />
Safety Labels on Instruments . . . . . . . . . . . . . . . . . . . . . . . . . . . . . . . . . . . . . . . . . . . .xvi<br />
General Instrument Safety . . . . . . . . . . . . . . . . . . . . . . . . . . . . . . . . . . . . . . . . . . . . . xvii<br />
Chemical Safety . . . . . . . . . . . . . . . . . . . . . . . . . . . . . . . . . . . . . . . . . . . . . . . . . . . . .xviii<br />
Chemical Waste Safety . . . . . . . . . . . . . . . . . . . . . . . . . . . . . . . . . . . . . . . . . . . . . . . . . xx<br />
Electrical Safety . . . . . . . . . . . . . . . . . . . . . . . . . . . . . . . . . . . . . . . . . . . . . . . . . . . . . . xxi<br />
Physical Hazard Safety . . . . . . . . . . . . . . . . . . . . . . . . . . . . . . . . . . . . . . . . . . . . . . . . .xxi<br />
Laser Safety . . . . . . . . . . . . . . . . . . . . . . . . . . . . . . . . . . . . . . . . . . . . . . . . . . . . . . . . . .xxi<br />
Workstation Safety. . . . . . . . . . . . . . . . . . . . . . . . . . . . . . . . . . . . . . . . . . . . . . . . . . . . xxii<br />
Safety and Electromagnetic Compatibility (EMC) Standards . . . . . . . . . . . . . . . . . . xxiii<br />
<strong>Applied</strong> Biosystems <strong>3130</strong>/<strong>3130</strong>xl <strong>Genetic</strong> <strong>Analyzers</strong> <strong>Getting</strong> <strong>Started</strong> <strong>Guide</strong> xiii
Safety<br />
Safety Conventions Used in This Document<br />
Safety Conventions Used in This Document<br />
Safety Alert<br />
Words<br />
Four safety alert words appear in <strong>Applied</strong> Biosystems user documentation at points in<br />
the document where you need to be aware of relevant hazards. Each alert<br />
word–IMPORTANT, CAUTION, WARNING, DANGER–implies a particular level of<br />
observation or action, as defined below:<br />
Definitions<br />
IMPORTANT! – Indicates information that is necessary for proper instrument operation,<br />
accurate chemistry kit use, or safe use of a chemical.<br />
– Indicates a potentially hazardous situation that, if not avoided, may<br />
result in minor or moderate injury. It may also be used to alert against unsafe practices.<br />
– Indicates a potentially hazardous situation that, if not avoided,<br />
could result in death or serious injury.<br />
– Indicates an imminently hazardous situation that, if not avoided,<br />
will result in death or serious injury. This signal word is to be limited to the most extreme<br />
situations.<br />
Except for IMPORTANTs, each safety alert word in an <strong>Applied</strong> Biosystems document<br />
appears with an open triangle figure that contains a hazard symbol. These hazard<br />
symbols are identical to the hazard icons that are affixed to <strong>Applied</strong> Biosystems<br />
instruments (see “Safety Symbols” on page xvi).<br />
xiv <strong>Applied</strong> Biosystems <strong>3130</strong>/<strong>3130</strong>xl <strong>Genetic</strong> <strong>Analyzers</strong> <strong>Getting</strong> <strong>Started</strong> <strong>Guide</strong><br />
DRAFT<br />
November 3, 2004 9:51 am, Safety_fm
DRAFT<br />
November 3, 2004 9:51 am, Safety_fm<br />
Examples<br />
Symbols on Instruments<br />
Electrical<br />
Symbols on<br />
Instruments<br />
The following examples show the use of safety alert words:<br />
Safety<br />
Symbols on Instruments<br />
IMPORTANT! You must create a separate a Sample Entry Spreadsheet for each 96-well<br />
microtiter plate.<br />
The lamp is extremely hot. Do not touch the lamp until it has cooled<br />
to room temperature.<br />
CHEMICAL HAZARD. Formamide. Exposure causes eye, skin,<br />
and respiratory tract irritation. It is a possible developmental and birth defect hazard.<br />
Read the MSDS, and follow the handling instructions. Wear appropriate protective<br />
eyewear, clothing, and gloves.<br />
ELECTRICAL HAZARD. Failure to ground the instrument<br />
properly can lead to an electrical shock. Ground the instrument according to the provided<br />
instructions.<br />
The following table describes the electrical symbols that may be displayed on<br />
<strong>Applied</strong> Biosystems instruments.<br />
Symbol Description<br />
Indicates the On position of the main power switch.<br />
Indicates the Off position of the main power switch.<br />
Indicates the On/Off position of a push-push main power switch.<br />
Indicates a terminal that may be connected to the signal ground reference of<br />
another instrument. This is not a protected ground terminal.<br />
Indicates a protective grounding terminal that must be connected to earth<br />
ground before any other electrical connections are made to the instrument.<br />
Indicates a terminal that can receive or supply alternating current or voltage.<br />
Indicates a terminal that can receive or supply alternating or direct current or<br />
voltage.<br />
<strong>Applied</strong> Biosystems <strong>3130</strong>/<strong>3130</strong>xl <strong>Genetic</strong> <strong>Analyzers</strong> <strong>Getting</strong> <strong>Started</strong> <strong>Guide</strong> xv
Safety<br />
Safety Labels on Instruments<br />
Safety Symbols The following table describes the safety symbols that may be displayed on<br />
<strong>Applied</strong> Biosystems instruments. Each symbol may appear by itself or in combination<br />
with text that explains the relevant hazard (see “Safety Labels on Instruments” on<br />
page xvi). These safety symbols may also appear next to DANGERS, WARNINGS, and<br />
CAUTIONS that occur in the text of this and other product-support documents.<br />
Safety Labels on Instruments<br />
Symbol Description<br />
Indicates that you should consult the manual for further information and to<br />
proceed with appropriate caution.<br />
Indicates the presence of an electrical shock hazard and to proceed with<br />
appropriate caution.<br />
Indicates the presence of a hot surface or other high-temperature hazard and to<br />
proceed with appropriate caution.<br />
Indicates the presence of a laser inside the instrument and to proceed with<br />
appropriate caution.<br />
Indicates the presence of moving parts and to proceed with appropriate caution.<br />
The following CAUTION, WARNING, and DANGER statements may be displayed on<br />
<strong>Applied</strong> Biosystems instruments in combination with the safety symbols described in the<br />
preceding section.<br />
English Francais<br />
CAUTION Hazardous chemicals. Read the<br />
Material Safety Data Sheets (MSDSs) before<br />
handling.<br />
CAUTION Hazardous waste. Read the waste<br />
profile (if any) in the site preparation guide for<br />
this instrument before handling or disposal.<br />
CAUTION Hazardous waste. Refer to<br />
MSDS(s) and local regulations for handling<br />
and disposal.<br />
ATTENTION Produits chimiques dangeureux.<br />
Lire les fiches techniques de sûreté de<br />
matériels avant la manipulation des produits.<br />
ATTENTION Déchets dangereux. Lire les<br />
renseignements sur les déchets avant de les<br />
manipuler ou de les éliminer.<br />
ATTENTION Déchets dangereux. Lire les<br />
fiches techniques de sûreté de matériels et la<br />
régulation locale associées à la manipulation<br />
et l'élimination des déchets.<br />
WARNING Hot lamp. AVERTISSEMENT Lampe brûlante.<br />
WARNING Hot. Replace lamp with an<br />
<strong>Applied</strong> Biosystems lamp.<br />
AVERTISSEMENT Composants brûlants.<br />
Remplacer la lampe par une lampe<br />
<strong>Applied</strong> Biosystems.<br />
CAUTION Hot surface. ATTENTION Surface brûlante.<br />
DANGER High voltage. DANGER Haute tension.<br />
xvi <strong>Applied</strong> Biosystems <strong>3130</strong>/<strong>3130</strong>xl <strong>Genetic</strong> <strong>Analyzers</strong> <strong>Getting</strong> <strong>Started</strong> <strong>Guide</strong><br />
DRAFT<br />
November 3, 2004 9:51 am, Safety_fm
DRAFT<br />
November 3, 2004 9:51 am, Safety_fm<br />
General Instrument Safety<br />
Moving and<br />
Lifting the<br />
Instrument<br />
English Francais<br />
WARNING To reduce the chance of electrical<br />
shock, do not remove covers that require tool<br />
access. No user-serviceable parts are inside.<br />
Refer servicing to <strong>Applied</strong> Biosystems<br />
qualified service personnel.<br />
DANGER Class 3B laser radiation present<br />
when open and interlock defeated. Avoid<br />
direct exposure to laser beam.<br />
DANGER Class 3B laser radiation when<br />
open. Avoid direct exposure to laser beam.<br />
DANGER Class 2(II) laser radiation present<br />
when open and interlock defeated. Do not<br />
stare directly into the beam<br />
DANGER Class 2(II) laser radiation present<br />
when open. Do not stare directly into the<br />
beam.<br />
DANGER Class 2(II) LED when open and<br />
interlock defeated. Do not stare directly into<br />
the beam.<br />
DANGER Class 2(II) LED when open. Do not<br />
stare directly into the beam.<br />
Safety<br />
General Instrument Safety<br />
AVERTISSEMENT Pour éviter les risques<br />
d'électrocution, ne pas retirer les capots dont<br />
l'ouverture nécessite l'utilisation d'outils.<br />
L’instrument ne contient aucune pièce<br />
réparable par l’utilisateur. Toute intervention<br />
doit être effectuée par le personnel de service<br />
qualifié de <strong>Applied</strong> Biosystems.<br />
DANGER Class 3B rayonnement laser en cas<br />
d’ouverture et d’une neutralisation des<br />
dispositifs de sécurité. Eviter toute exposition<br />
directe avec le faisceau.<br />
DANGER Class 3B rayonnement laser en cas<br />
d’ouverture. Eviter toute exposition directe<br />
avec le faisceau.<br />
DANGER de Class 2(II) rayonnement laser en<br />
cas d'ouverture et d'une neutralisation des<br />
dispositifs de securite. Eviter toute exposition<br />
directe avec le faisceau.<br />
DANGER de Class 2(II) rayonnement laser en<br />
cas d'ouverture. Eviter toute exposition<br />
directe avec le faisceau.<br />
DANGER de Class 2(II) LED en cas<br />
d'ouverture et d'une neutralisation des<br />
dispositifs de securite. Eviter toute exposition<br />
directe avec le faisceau.<br />
DANGER de Class 2(II) LED en cas<br />
d'ouverture. Eviter toute exposition directe<br />
avec le faisceau.<br />
CAUTION Moving parts. ATTENTION Parties mobiles.<br />
PHYSICAL INJURY HAZARD. Use this product only as<br />
specified in this document. Using this instrument in a manner not specified by<br />
<strong>Applied</strong> Biosystems may result in personal injury or damage to the instrument.<br />
PHYSICAL INJURY HAZARD. The instrument is to be moved<br />
and positioned only by the personnel or vendor specified in the applicable site<br />
preparation guide. If you decide to lift or move the instrument after it has been installed,<br />
do not attempt to lift or move the instrument without the assistance of others, the use of<br />
appropriate moving equipment, and proper lifting techniques. Improper lifting can cause<br />
painful and permanent back injury. Depending on the weight, moving or lifting an<br />
instrument may require two or more persons.<br />
<strong>Applied</strong> Biosystems <strong>3130</strong>/<strong>3130</strong>xl <strong>Genetic</strong> <strong>Analyzers</strong> <strong>Getting</strong> <strong>Started</strong> <strong>Guide</strong> xvii
Safety<br />
Chemical Safety<br />
Moving and<br />
Lifting Stand-<br />
Alone Computers<br />
and Monitors<br />
Operating the<br />
Instrument<br />
Chemical Safety<br />
Chemical Hazard<br />
Warning<br />
Do not attempt to lift or move the computer or the monitor without<br />
the assistance of others. Depending on the weight of the computer and/or the monitor,<br />
moving them may require two or more people.<br />
Things to consider before lifting the computer and/or the monitor:<br />
Make sure that you have a secure, comfortable grip on the computer or the monitor<br />
when lifting.<br />
Make sure that the path from where the object is to where it is being moved is clear<br />
of obstructions.<br />
Do not lift an object and twist your torso at the same time.<br />
Keep your spine in a good neutral position while lifting with your legs.<br />
Participants should coordinate lift and move intentions with each other before<br />
lifting and carrying.<br />
Instead of lifting the object from the packing box, carefully tilt the box on its side<br />
and hold it stationary while someone slides the contents out of the box.<br />
Ensure that anyone who operates the instrument has:<br />
Received instructions in both general safety practices for laboratories and specific<br />
safety practices for the instrument.<br />
Read and understood all applicable Material Safety Data Sheets (MSDSs). See<br />
“About MSDSs” on page xviii.<br />
CHEMICAL HAZARD. Before handling any chemicals, refer to<br />
the Material Safety Data Sheet (MSDS) provided by the manufacturer, and observe all<br />
relevant precautions.<br />
CHEMICAL HAZARD. All chemicals in the instrument, including<br />
liquid in the lines, are potentially hazardous. Always determine what chemicals have<br />
been used in the instrument before changing reagents or instrument components. Wear<br />
appropriate eyewear, protective clothing, and gloves when working on the instrument.<br />
About MSDSs Chemical manufacturers supply current Material Safety Data Sheets (MSDSs) with<br />
shipments of hazardous chemicals to new customers. They also provide MSDSs with the<br />
first shipment of a hazardous chemical to a customer after an MSDS has been updated.<br />
MSDSs provide the safety information you need to store, handle, transport, and dispose<br />
of the chemicals safely.<br />
Each time you receive a new MSDS packaged with a hazardous chemical, be sure to<br />
replace the appropriate MSDS in your files.<br />
xviii <strong>Applied</strong> Biosystems <strong>3130</strong>/<strong>3130</strong>xl <strong>Genetic</strong> <strong>Analyzers</strong> <strong>Getting</strong> <strong>Started</strong> <strong>Guide</strong><br />
DRAFT<br />
November 3, 2004 9:51 am, Safety_fm
DRAFT<br />
November 3, 2004 9:51 am, Safety_fm<br />
Obtaining MSDSs You can obtain from <strong>Applied</strong> Biosystems the MSDS for any chemical supplied by<br />
<strong>Applied</strong> Biosystems. This service is free and available 24 hours a day.<br />
Chemical Safety<br />
<strong>Guide</strong>lines<br />
To obtain MSDSs:<br />
1. Go to https://docs.appliedbiosystems.com/msdssearch.html<br />
Safety<br />
Chemical Safety<br />
2. In the Search field, type in the chemical name, part number, or other information<br />
that appears in the MSDS of interest. Select the language of your choice, then click<br />
Search.<br />
3. Find the document of interest, right-click the document title, then select any of the<br />
following:<br />
Open – To view the document<br />
Print Target – To print the document<br />
Save Target As – To download a PDF version of the document to a destination<br />
that you choose<br />
4. To have a copy of a document sent by fax or e-mail, select Fax or Email to the left<br />
of the document title in the Search Results page, then click RETRIEVE<br />
DOCUMENTS at the end of the document list.<br />
5. After you enter the required information, click View/Deliver Selected Documents<br />
Now.<br />
To minimize the hazards of chemicals:<br />
Read and understand the Material Safety Data Sheets (MSDS) provided by the<br />
chemical manufacturer before you store, handle, or work with any chemicals or<br />
hazardous materials. (See “About MSDSs” on page xviii.)<br />
Minimize contact with chemicals. Wear appropriate personal protective equipment<br />
when handling chemicals (for example, safety glasses, gloves, or protective<br />
clothing). For additional safety guidelines, consult the MSDS.<br />
Minimize the inhalation of chemicals. Do not leave chemical containers open. Use<br />
only with adequate ventilation (for example, fume hood). For additional safety<br />
guidelines, consult the MSDS.<br />
Check regularly for chemical leaks or spills. If a leak or spill occurs, follow the<br />
manufacturer’s cleanup procedures as recommended on the MSDS.<br />
Comply with all local, state/provincial, or national laws and regulations related to<br />
chemical storage, handling, and disposal.<br />
<strong>Applied</strong> Biosystems <strong>3130</strong>/<strong>3130</strong>xl <strong>Genetic</strong> <strong>Analyzers</strong> <strong>Getting</strong> <strong>Started</strong> <strong>Guide</strong> xix
Safety<br />
Chemical Waste Safety<br />
Chemical Waste Safety<br />
Chemical Waste<br />
Hazard<br />
Chemical Waste<br />
Safety <strong>Guide</strong>lines<br />
HAZARDOUS WASTE. Refer to Material Safety Data Sheets and<br />
local regulations for handling and disposal.<br />
CHEMICAL WASTE HAZARD. Wastes produced by <strong>Applied</strong><br />
Biosystems instruments are potentially hazardous and can cause injury, illness, or death.<br />
To minimize the hazards of chemical waste:<br />
Read and understand the Material Safety Data Sheets (MSDSs) provided by the<br />
manufacturers of the chemicals in the waste container before you store, handle, or<br />
dispose of chemical waste.<br />
Provide primary and secondary waste containers. (A primary waste container holds<br />
the immediate waste. A secondary container contains spills or leaks from the<br />
primary container. Both containers must be compatible with the waste material and<br />
meet federal, state, and local requirements for container storage.)<br />
Minimize contact with chemicals. Wear appropriate personal protective equipment<br />
when handling chemicals (for example, safety glasses, gloves, or protective<br />
clothing). For additional safety guidelines, consult the MSDS.<br />
Minimize the inhalation of chemicals. Do not leave chemical containers open. Use<br />
only with adequate ventilation (for example, fume hood). For additional safety<br />
guidelines, consult the MSDS.<br />
Handle chemical wastes in a fume hood.<br />
After emptying the waste container, seal it with the cap provided.<br />
Dispose of the contents of the waste tray and waste bottle in accordance with good<br />
laboratory practices and local, state/provincial, or national environmental and health<br />
regulations.<br />
Waste Disposal If potentially hazardous waste is generated when you operate the instrument, you must:<br />
Characterize (by analysis if necessary) the waste generated by the particular<br />
applications, reagents, and substrates used in your laboratory.<br />
Ensure the health and safety of all personnel in your laboratory.<br />
Ensure that the instrument waste is stored, transferred, transported, and disposed of<br />
according to all local, state/provincial, and/or national regulations.<br />
IMPORTANT! Radioactive or biohazardous materials may require special handling, and<br />
disposal limitations may apply.<br />
xx <strong>Applied</strong> Biosystems <strong>3130</strong>/<strong>3130</strong>xl <strong>Genetic</strong> <strong>Analyzers</strong> <strong>Getting</strong> <strong>Started</strong> <strong>Guide</strong><br />
DRAFT<br />
November 3, 2004 9:51 am, Safety_fm
DRAFT<br />
November 3, 2004 9:51 am, Safety_fm<br />
Electrical Safety<br />
Safety<br />
Electrical Safety<br />
ELECTRICAL SHOCK HAZARD. Severe electrical shock can<br />
result from operating the <strong>Applied</strong> Biosystems <strong>3130</strong>/<strong>3130</strong>xl <strong>Genetic</strong> <strong>Analyzers</strong> without<br />
its instrument panels in place. Do not remove instrument panels. High-voltage contacts<br />
are exposed when instrument panels are removed from the instrument.<br />
Power ELECTRICAL HAZARD. Grounding circuit continuity is vital for<br />
the safe operation of equipment. Never operate equipment with the grounding conductor<br />
disconnected.<br />
Overvoltage<br />
Rating<br />
Physical Hazard Safety<br />
ELECTRICAL HAZARD. Use properly configured and approved<br />
line cords for the voltage supply in your facility.<br />
ELECTRICAL HAZARD. Plug the system into a properly<br />
grounded receptacle with adequate current capacity.<br />
The <strong>Applied</strong> Biosystems <strong>3130</strong>/<strong>3130</strong>xl <strong>Genetic</strong> <strong>Analyzers</strong> have an installation<br />
(overvoltage) category of II, and is classified as portable equipment.<br />
Moving Parts PHYSICAL INJURY HAZARD. Moving parts can crush and cut.<br />
Keep hands clear of moving parts while operating the instrument. Disconnect power<br />
before servicing the instrument.<br />
Laser Safety<br />
Laser<br />
Classification<br />
The <strong>Applied</strong> Biosystems <strong>3130</strong>/<strong>3130</strong>xl <strong>Genetic</strong> <strong>Analyzers</strong> use an Argon laser. Under<br />
normal operating conditions, the instrument laser is categorized as a Class I laser. When<br />
safety interlocks are disabled during certain servicing procedures, the laser can cause<br />
permanent eye damage, and, therefore, is classified under those conditions as a Class 3B<br />
laser.<br />
The <strong>Applied</strong> Biosystems <strong>3130</strong>/<strong>3130</strong>xl <strong>Genetic</strong> <strong>Analyzers</strong> has been tested to and<br />
complies with 21 CFR, 1040.10 and 1040.11, as applicable.”<br />
The <strong>Applied</strong> Biosystems <strong>3130</strong>/<strong>3130</strong>xl <strong>Genetic</strong> <strong>Analyzers</strong> have been tested to and<br />
complies with standard EN60825-1, “Radiation Safety of Laser Products, Equipment<br />
Classification, Requirements, and User’s <strong>Guide</strong>.”<br />
<strong>Applied</strong> Biosystems <strong>3130</strong>/<strong>3130</strong>xl <strong>Genetic</strong> <strong>Analyzers</strong> <strong>Getting</strong> <strong>Started</strong> <strong>Guide</strong> xxi
Safety<br />
Workstation Safety<br />
Laser Safety<br />
Requirements<br />
Additional Laser<br />
Safety<br />
Information<br />
Workstation Safety<br />
To ensure safe laser operation:<br />
The system must be installed and maintained by an <strong>Applied</strong> Biosystems Technical<br />
Representative.<br />
All instrument panels must be in place on the instrument while the instrument is<br />
operating. When all panels are installed, there is no detectable radiation present. If<br />
any panel is removed when the laser is operating (during service with safety<br />
interlocks disabled), you may be exposed to laser emissions in excess of the Class<br />
3B rating.<br />
Do not remove safety labels or disable safety interlocks.<br />
Refer to the user documentation provided with the laser for additional information on<br />
government and industry safety regulations.<br />
LASER HAZARD. Lasers can burn the retina causing permanent<br />
blind spots. Never look directly into the laser beam. Remove jewelry and other items that<br />
can reflect the beam into your eyes. Do not remove the instrument top or front panels.<br />
Wear proper eye protection and post a laser warning sign at the entrance to the laboratory<br />
if the top or front panels are removed for service.<br />
LASER BURN HAZARD. An overheated laser can cause severe<br />
burns if it comes in contact with the skin. DO NOT operate the laser when it cannot be<br />
cooled by its cooling fan. Always wear appropriate laser safety goggles.<br />
Correct ergonomic configuration of your workstation can reduce or prevent effects such<br />
as fatigue, pain, and strain. Minimize or eliminate these effects by configuring your<br />
workstation to promote neutral or relaxed working positions.<br />
MUSCULOSKELETAL AND REPETITIVE MOTION<br />
HAZARD. These hazards are caused by potential risk factors that include but are not<br />
limited to repetitive motion, awkward posture, forceful exertion, holding static unhealthy<br />
positions, contact pressure, and other workstation environmental factors.<br />
To minimize musculoskeletal and repetitive motion risks:<br />
Use equipment that comfortably supports you in neutral working positions and<br />
allows adequate accessibility to the keyboard, monitor, and mouse.<br />
Position the keyboard, mouse, and monitor to promote relaxed body and head<br />
postures.<br />
xxii <strong>Applied</strong> Biosystems <strong>3130</strong>/<strong>3130</strong>xl <strong>Genetic</strong> <strong>Analyzers</strong> <strong>Getting</strong> <strong>Started</strong> <strong>Guide</strong><br />
DRAFT<br />
November 3, 2004 9:51 am, Safety_fm
DRAFT<br />
November 3, 2004 9:51 am, Safety_fm<br />
Safety<br />
Safety and Electromagnetic Compatibility (EMC) Standards<br />
Safety and Electromagnetic Compatibility (EMC) Standards<br />
U.S. and<br />
Canadian Safety<br />
Standards<br />
Canadian EMC<br />
Standard<br />
European Safety<br />
and EMC<br />
Standards<br />
Australian EMC<br />
Standards<br />
This section provides information on:<br />
U.S. and Canadian Safety Standards<br />
Canadian EMC Standard<br />
European Safety and EMC Standards<br />
Australian EMC Standards<br />
This instrument has been tested to and complies with standard UL 3101-1, “Safety<br />
Requirements for Electrical Equipment for Laboratory Use, Part 1: General<br />
Requirements.”<br />
This instrument has been tested to and complies with standard CSA 1010.1, “Safety<br />
Requirements for Electrical Equipment for Measurement, Control, and Laboratory Use,<br />
Part 1: General Requirements.”<br />
This instrument has been tested to and complies with ICES-001, Issue 3: Industrial,<br />
Scientific, and Medical Radio Frequency Generators.<br />
Safety<br />
This instrument meets European requirements for safety (Low Voltage Directive<br />
73/23/EEC). This instrument has been tested to and complies with standards EN 61010-<br />
1:2001, “Safety Requirements for Electrical Equipment for Measurement, Control and<br />
Laboratory Use, Part 1: General Requirements” and EN 61010-2-010, “Particular<br />
Requirements for Laboratory Equipment for the Heating of Materials.”<br />
EMC<br />
This instrument meets European requirements for emission and immunity (EMC<br />
Directive 89/336/EEC). This instrument has been tested to and complies with standard<br />
EN 61326 (Class B), “Electrical Equipment for Measurement, Control and Laboratory<br />
Use – EMC Requirements.”<br />
This instrument has been tested to and complies with standard AS/NZS 2064, “Limits<br />
and Methods Measurement of Electromagnetic Disturbance Characteristics of Industrial,<br />
Scientific, and Medical (ISM) Radio-frequency Equipment.”<br />
<strong>Applied</strong> Biosystems <strong>3130</strong>/<strong>3130</strong>xl <strong>Genetic</strong> <strong>Analyzers</strong> <strong>Getting</strong> <strong>Started</strong> <strong>Guide</strong> xxiii
Safety<br />
Safety and Electromagnetic Compatibility (EMC) Standards<br />
xxiv <strong>Applied</strong> Biosystems <strong>3130</strong>/<strong>3130</strong>xl <strong>Genetic</strong> <strong>Analyzers</strong> <strong>Getting</strong> <strong>Started</strong> <strong>Guide</strong><br />
DRAFT<br />
November 3, 2004 9:51 am, Safety_fm
DRAFT<br />
November 3, 2004 9:51 am, 01_PrepInstrument.fm<br />
Notes<br />
Preparing the<br />
Instrument<br />
Performing a<br />
Spatial Calibration<br />
Performing a<br />
Spectral Calibration<br />
Autoanalysis<br />
and Sequencing<br />
Analysis<br />
Software<br />
Autoanalysis<br />
and<br />
SeqScape Software<br />
Autoanalysis<br />
and<br />
Fragment Analysis<br />
Running the<br />
Instrument<br />
Chapter 1<br />
Preparing the Instrument<br />
Start the<br />
system<br />
Start Data Collection<br />
software<br />
Check polymer block,<br />
select capillary array,<br />
and polymer<br />
Prepare buffer and<br />
fill reservoirs<br />
See page 7<br />
See page 9<br />
See page 12<br />
See page 16<br />
See page 2<br />
See page 2<br />
<strong>Applied</strong> Biosystems <strong>3130</strong>/<strong>3130</strong>xl <strong>Genetic</strong> <strong>Analyzers</strong> <strong>Getting</strong> <strong>Started</strong> <strong>Guide</strong> 1<br />
1
Notes<br />
Chapter 1 Preparing the Instrument<br />
Instrument Description<br />
Instrument Description<br />
Instrument Layout A typical laboratory layout is shown below.<br />
Monitor<br />
Keyboard<br />
tab<br />
caps<br />
lock<br />
shift<br />
control option<br />
CPU<br />
Mouse<br />
and<br />
pad<br />
esc F1 F2 F3 F4 F5 F6 F7 F8 F9 F10 F11 F12 F13 F14 F15<br />
num caps scroll<br />
lock lock lock<br />
_ +<br />
esc 1 2 3 4 5 6 7 8 9 0 - = delete<br />
help<br />
Q W E R T Y U I O P [ ]<br />
end<br />
A S D F G H<br />
" J K L '<br />
< > ? Z X C V B N M<br />
/<br />
page<br />
clear = *<br />
7 8 9<br />
4 5 6<br />
1 2 3<br />
0<br />
enter<br />
home<br />
page<br />
up<br />
return<br />
shift<br />
option control<br />
x<br />
<strong>3130</strong>/<strong>3130</strong>xl<br />
<strong>Genetic</strong> Analyzer<br />
2 <strong>Applied</strong> Biosystems <strong>3130</strong>/<strong>3130</strong>xl <strong>Genetic</strong> <strong>Analyzers</strong> <strong>Getting</strong> <strong>Started</strong> <strong>Guide</strong><br />
down<br />
+<br />
GR2462<br />
DRAFT<br />
November 3, 2004 9:51 am, 01_PrepInstrument.fm
DRAFT<br />
November 3, 2004 9:51 am, 01_PrepInstrument.fm<br />
Application Summary Tables<br />
Sequencing<br />
Resolution<br />
Performance and<br />
Specifications<br />
Notes<br />
Type of Run<br />
Chapter 1 Preparing the Instrument<br />
Application Summary Tables<br />
Decide what combination of capillary array and polymer from the table below matches<br />
your resolution and performance specifications.<br />
Capillary<br />
Length<br />
(cm)<br />
Polymer<br />
Type<br />
Module<br />
<strong>Applied</strong> Biosystems <strong>3130</strong>/<strong>3130</strong>xl <strong>Genetic</strong> <strong>Analyzers</strong> <strong>Getting</strong> <strong>Started</strong> <strong>Guide</strong> 3<br />
Run<br />
Time<br />
(min)<br />
24 hr Throughput<br />
(number of<br />
samples) KB<br />
Basecaller<br />
<strong>3130</strong> <strong>3130</strong>xl<br />
a b<br />
QV20 LOR<br />
<strong>Genetic</strong><br />
Analyzer<br />
<strong>Genetic</strong><br />
Analyzer<br />
Ultra rapid 36 POP-4 UltraSeq36_POP4 40 144 576 400<br />
POP-7 UltraSeq36_POP7 35 164 656 500<br />
Rapid 36 POP-6 RapidSeq36_POP6 60 96 384 500<br />
POP-7 RapidSeq36_POP7 96 384 600<br />
Fast 50 POP-7 FastSeq50_POP7 60 96 384 700<br />
Standard 50 POP-4 StdSeq50_POP4 100 56 224 600<br />
POP-6 StdSeq50_POP6 150 36 144 600<br />
POP-7 StdSeq50_POP7 120 48 192 850<br />
Long read 80 POP-4 LongSeq80_POP4 210 24 96 700<br />
POP-7 LongSeq80_POP7 170 32 128 950<br />
a Length of Read (LOR) is the usable range of high-quality or high-accuracy bases determined by Quality Values (QV) generated<br />
by KB Basecaller v1.2. The LOR is determined by using a sliding window of 20 bases, which has an average QV > 20.<br />
b 98.5% basecalling accuracy, less than 2% Ns.<br />
1
Notes<br />
Chapter 1 Preparing the Instrument<br />
Application Summary Tables<br />
Fragment<br />
Analysis<br />
Resolution<br />
Performance and<br />
Specifications<br />
Run Modules<br />
Decide what combination of capillary array and polymer from the table below matches<br />
your resolution and performance specifications. See “Fragment Analysis Kits and Run<br />
Modules” on page 5 for information on capillary, polymer, and run module.<br />
Capillary<br />
Length<br />
(cm)<br />
Polymer<br />
Type<br />
High Throughput, Small Size Fragment Analysis<br />
FragmentAnalysis22<br />
_POP4<br />
Run<br />
Time<br />
(min)<br />
24 hr Throughput (GT a )<br />
<strong>3130</strong><br />
Analyzer<br />
<strong>3130</strong>xl<br />
Analyzer<br />
Resolution<br />
(bp)<br />
Specification<br />
(SD) b<br />
22 POP-4 20 5,760 23,040 250 0.15<br />
SNP22_POP4 22 20 5,760 23,040 120 0.50<br />
Standard Fragment Analysis<br />
FragmentAnalysis36<br />
_POP4<br />
HIDFragmentAnalysis<br />
36_POP4<br />
36 POP-4 45 2,560 10,240 500 0.15<br />
45 2,560 10,240 500 0.15<br />
SNP36_POP4 30 3,840 15,360 120 0.50<br />
FragmentAnalysis36<br />
_POP7<br />
FragmentAnalysis50<br />
_POP4<br />
FragmentAnalysis50<br />
_POP6<br />
FragmentAnalysis50<br />
_POP7<br />
a 20 GT (Genotypes)/capillary/injection.<br />
b 1bp resolution at 99.99% accuracy.<br />
POP-7 35 3,290 13,170 500 0.15<br />
50 POP-4 65 1,760 7,040 500 0.15<br />
POP-6 90 1,200 4,800 500 0.15<br />
POP-7 50 2,300 9,220 500 0.15<br />
4 <strong>Applied</strong> Biosystems <strong>3130</strong>/<strong>3130</strong>xl <strong>Genetic</strong> <strong>Analyzers</strong> <strong>Getting</strong> <strong>Started</strong> <strong>Guide</strong><br />
DRAFT<br />
November 3, 2004 9:51 am, 01_PrepInstrument.fm
DRAFT<br />
November 3, 2004 9:51 am, 01_PrepInstrument.fm<br />
Fragment<br />
Analysis Kits and<br />
Run Modules<br />
Notes<br />
Application/Kit<br />
Chapter 1 Preparing the Instrument<br />
Application Summary Tables<br />
The table below lists the <strong>Applied</strong> Biosystem kit types, with the available run module(s)<br />
and dye sets.<br />
SNP22_POP4<br />
SNP36_POP4<br />
SNaPshot ® Multiplex System E5 E5<br />
Custom oligos D, F,<br />
G5<br />
Linkage Mapping Set (human)<br />
v2.5<br />
ABI PRISM ® Mouse Mapping Set<br />
v1.0<br />
4-Dye Stockmarks ® kits (bovine<br />
and canine)<br />
5-Dye Stockmarks ® kit (equine) G5<br />
AFLP ® kits F<br />
AmpFlSTR Kit Table<br />
HTSNP36_POP7<br />
Module<br />
<strong>Applied</strong> Biosystems <strong>3130</strong>/<strong>3130</strong>xl <strong>Genetic</strong> <strong>Analyzers</strong> <strong>Getting</strong> <strong>Started</strong> <strong>Guide</strong> 5<br />
FragmentAnalysis22_POP4<br />
FragmentAnalysis36_POP4<br />
D, F,<br />
G5<br />
FragmentAnalysis36_POP7<br />
D, F,<br />
G5<br />
FragmentAnalysis50_POP4<br />
D, F,<br />
G5<br />
FragmentAnalysis50_POP6<br />
D, F,<br />
G5<br />
FragmentAnalysis50_POP7<br />
D, F,<br />
G5<br />
D, G5 D, G5 D, G5 D, G5 D, G5 D, G5<br />
D, G5 D, G5 D, G5 D, G5 D, G5 D, G5<br />
4-Dye AmpFlSTR ® kits F<br />
5-Dye AmpFlSTR kits G5<br />
Kits<br />
AmpFlSTR COfiler ® Kit<br />
AmpFlSTR Profiler Plus ® Kit<br />
AmpFlSTR Profiler Plus ID Kit<br />
AmpFlSTR SGM Plus ® Kit<br />
Other 4-Dye AmpFlSTR Kits<br />
AmpFlSTR SEfiler Kit<br />
AmpFlSTR Identifiler ® Kit<br />
AmpFlSTR Yfiler Kit<br />
Other 5-Dye AmpFlSTR Kits<br />
F<br />
HIDFragmentAnalysis<br />
36_POP4<br />
F<br />
G5<br />
HIDFragmentAnalysis36_POP4<br />
1
Chapter 1 Preparing the Instrument<br />
Barcode Readers<br />
Barcode Readers<br />
External Barcode<br />
Readers<br />
Notes<br />
ELECTRICAL HAZARD. Power off the instrument and the<br />
computer before connecting an external barcode reader to the instrument.<br />
KEYENCE BL-80VE<br />
An external barcode reader can be used with the <strong>3130</strong>/<strong>3130</strong>xl instrument. With the<br />
KEYENCE BL-80VE (see photo above), which connects to the instrument computer<br />
keyboard, you can scan barcodes into any text box in the Data Collection software. The<br />
KEYENCE BL-80VE barcode reader uses an LED as a light source.<br />
6 <strong>Applied</strong> Biosystems <strong>3130</strong>/<strong>3130</strong>xl <strong>Genetic</strong> <strong>Analyzers</strong> <strong>Getting</strong> <strong>Started</strong> <strong>Guide</strong><br />
DRAFT<br />
November 3, 2004 9:51 am, 01_PrepInstrument.fm
DRAFT<br />
November 3, 2004 9:51 am, 01_PrepInstrument.fm<br />
Notes<br />
Chapter 1 Preparing the Instrument<br />
Starting the <strong>3130</strong>/<strong>3130</strong>xl <strong>Genetic</strong> Analyzer System<br />
Starting the <strong>3130</strong>/<strong>3130</strong>xl <strong>Genetic</strong> Analyzer System<br />
Starting the Computer Workstation<br />
IMPORTANT! You must start the computer<br />
workstation before starting the instrument.<br />
1. Power on the monitor.<br />
2. Power on the computer.<br />
3. In the Log On to Windows dialog box:<br />
a. Enter the user name.<br />
b. If applicable, enter a password.<br />
Note: If the computer is connected to a<br />
network, you do not need to log on to the<br />
network before starting the instrument.<br />
c. Click .<br />
R2491<br />
130<br />
ower button 1<br />
esc F1 F2 F3 F4 F5 F6 F7 F8 F9 F10 F11 F12 F13 F14 F15<br />
num caps scroll<br />
lock lock lock<br />
_ +<br />
esc 1 2 3 4 5 6 7 8 9 0 - = delete<br />
help<br />
Q W E R T Y U I O P [ ]<br />
end<br />
A S D F G H<br />
" J K L '<br />
< > ? Z X C V B N M<br />
/<br />
page<br />
clear = *<br />
7 8 9<br />
4 5 6<br />
1 2 3<br />
0<br />
enter<br />
<strong>Applied</strong> Biosystems <strong>3130</strong>/<strong>3130</strong>xl <strong>Genetic</strong> <strong>Analyzers</strong> <strong>Getting</strong> <strong>Started</strong> <strong>Guide</strong> 7<br />
tab<br />
caps<br />
lock<br />
tton 1<br />
tion<br />
shift<br />
control option<br />
return<br />
shift<br />
option control<br />
x<br />
home<br />
page<br />
up<br />
down<br />
home<br />
page<br />
up<br />
return<br />
shift<br />
option control<br />
F5 F6 F7 F8 F9 F10 F11 F12 F13 F14 F15<br />
num caps scroll<br />
lock lock lock<br />
_ +<br />
5 6 7 8 9 0 - = delete<br />
help<br />
R T Y U I O P [ ]<br />
end<br />
D F G H<br />
" J K L '<br />
< > ? X C V B N M<br />
/<br />
page<br />
clear = *<br />
7 8 9<br />
4 5 6<br />
1 2<br />
0<br />
x<br />
+<br />
3<br />
down<br />
enter<br />
+<br />
1
Notes<br />
Chapter 1 Preparing the Instrument<br />
Starting the <strong>3130</strong>/<strong>3130</strong>xl <strong>Genetic</strong> Analyzer System<br />
Starting the <strong>3130</strong>/<strong>3130</strong>xl <strong>Genetic</strong> Analyzer<br />
1. Ensure that the:<br />
Oven door is closed and locked<br />
Instrument doors are closed<br />
Note: If the doors are open during power on, the<br />
yellow light will continue to flash until you close<br />
the doors.<br />
2. Ensure that the computer is powered on.<br />
Note: The computer must be on and running to<br />
allow the instrument to copy the firmware from<br />
the computer.<br />
3. Power on the instrument by pressing the on/off<br />
button on the front of the instrument.<br />
Note: While the instrument is booting up and<br />
performing self-checks, the yellow status light<br />
blinks.<br />
4. Ensure the green status light is on and not<br />
flashing before proceeding.<br />
Note: If the green status light does not come on,<br />
start the Data Collection software and view the<br />
log. The pathway to the log is:<br />
E:\<strong>Applied</strong>Biosystems\UDC\DataCollection\<br />
Log\Instrument Name<br />
Status lights<br />
Press the on/off button to start the instrument<br />
8 <strong>Applied</strong> Biosystems <strong>3130</strong>/<strong>3130</strong>xl <strong>Genetic</strong> <strong>Analyzers</strong> <strong>Getting</strong> <strong>Started</strong> <strong>Guide</strong><br />
DRAFT<br />
November 3, 2004 9:51 am, 01_PrepInstrument.fm
DRAFT<br />
November 3, 2004 9:51 am, 01_PrepInstrument.fm<br />
Data Collection Software<br />
IMPORTANT! Do not rename the computer. The<br />
instrument computer was assigned a unique name<br />
before the <strong>3130</strong>/<strong>3130</strong>xl genetic analyzer Data<br />
Collection software was installed. Do not rename the<br />
computer once the Data Collection software has been<br />
installed. Doing so may cause the Data Collection<br />
software to malfunction.<br />
Starting the <strong>3130</strong>/<strong>3130</strong>xl Data Collection<br />
Software<br />
1. Select Start > All Programs > <strong>Applied</strong><br />
Biosystems > Data Collection > Run <strong>3130</strong><br />
Data Collection v3.0 or Run <strong>3130</strong>xl Data<br />
Collection v3.0 to display the Service Console.<br />
By default, all applications are off, indicated by<br />
the red circles. They launch automatically with<br />
the <strong>3130</strong>/<strong>3130</strong>xl Data Collection software.<br />
Notes<br />
As each application activates, the red circles (off)<br />
change to yellow triangles (activating), and then<br />
to green squares (on) when they are fully<br />
functional.<br />
When all the applications are running (displaying<br />
all green squares–this could take several<br />
minutes), the Foundation Data Collection<br />
window displays.<br />
Chapter 1 Preparing the Instrument<br />
Data Collection Software<br />
<strong>Applied</strong> Biosystems <strong>3130</strong>/<strong>3130</strong>xl <strong>Genetic</strong> <strong>Analyzers</strong> <strong>Getting</strong> <strong>Started</strong> <strong>Guide</strong> 9<br />
On<br />
Activating<br />
1
Notes<br />
Chapter 1 Preparing the Instrument<br />
Data Collection Software<br />
2. Click + to expand subfolders in the left tree pane.<br />
All application folders are now visible.<br />
Select items from this tree pane to open manager,<br />
viewer, and other program windows.<br />
3. Click + to expand subfolders in the left tree pane.<br />
All application folders are now visible.<br />
Select items from this tree pane to open manager,<br />
viewer, and other program windows.<br />
10 <strong>Applied</strong> Biosystems <strong>3130</strong>/<strong>3130</strong>xl <strong>Genetic</strong> <strong>Analyzers</strong> <strong>Getting</strong> <strong>Started</strong> <strong>Guide</strong><br />
DRAFT<br />
November 3, 2004 9:51 am, 01_PrepInstrument.fm
DRAFT<br />
November 3, 2004 9:51 am, 01_PrepInstrument.fm<br />
Preparing the Instrument<br />
Instrument Doors<br />
and Interior<br />
Notes<br />
Pump block<br />
Part Function<br />
Chapter 1 Preparing the Instrument<br />
Preparing the Instrument<br />
Anode buffer reservoir Contains 16 mL of 1X running buffer.<br />
Buffer and water<br />
reservoirs (four)<br />
Each contain 16 mL of 1X running buffer or water.<br />
Autosampler Holds the sample plates and reservoirs and moves to align<br />
the samples, water, or buffer with the capillaries.<br />
Capillary array Enables the separation of the fluorescent-labeled DNA<br />
fragments by electrophoresis. It is a replaceable unit<br />
composed of 4 or 16 silica capillaries.<br />
Detection cell block and<br />
heater<br />
Holds the capillaries in place for laser detection.<br />
Lower polymer block Contains the buffer valve, anode electrode, and anode<br />
buffer reservoir.<br />
Oven Maintains uniform capillary array temperature.<br />
Polymer delivery pump<br />
(PDP)<br />
Polymer delivery pump (PDP)<br />
Lower polymer block<br />
Anode buffer reservoir<br />
Pumps polymer into the array and performs maintenance<br />
procedures.<br />
Pump block Includes the displacement pump chamber, piston water<br />
seal, array attachment point (array port), and connection to<br />
the lower polymer block through the interconnect tube.<br />
<strong>Applied</strong> Biosystems <strong>3130</strong>/<strong>3130</strong>xl <strong>Genetic</strong> <strong>Analyzers</strong> <strong>Getting</strong> <strong>Started</strong> <strong>Guide</strong> 11<br />
GR2460<br />
Oven<br />
Detection cell block<br />
Capillary array<br />
Buffer and water<br />
reservoirs<br />
Autosampler<br />
1
Notes<br />
Chapter 1 Preparing the Instrument<br />
Preparing the Instrument<br />
Inspecting the Instrument<br />
1. Open the instrument doors.<br />
2. Perform the daily maintenance tasks -see<br />
Chapter 1 in the <strong>Applied</strong> Biosystems <strong>3130</strong>/<strong>3130</strong>xl<br />
<strong>Genetic</strong> <strong>Analyzers</strong> Maintenance,<br />
Troubleshooting and Reference <strong>Guide</strong>.<br />
3. Install clean drip trays.<br />
Polymer Delivery Pump<br />
Syringe fitting<br />
Water seal<br />
Waste fitting<br />
Water trap<br />
Mounting pin<br />
Piston<br />
Pump chamber<br />
Pump block<br />
Check valve<br />
Polymer supply tube<br />
Polymer supply<br />
bottle cap with<br />
hole<br />
Polymer<br />
supply bottle<br />
Electrode<br />
GR2459<br />
Mounting<br />
pin<br />
O-ring<br />
PDP motor<br />
Mounting pin<br />
PDP motor cover<br />
Capillary array tip<br />
Capillary array<br />
Capillary array knob<br />
Double-tapered ferrule<br />
Array port<br />
Interconnect tube<br />
Buffer valve pin<br />
Lower polymer block<br />
Mounting pin<br />
Overflow hole<br />
Buffer fill-line<br />
Anode buffer reservoir<br />
(16 mL anode reservoir)<br />
12 <strong>Applied</strong> Biosystems <strong>3130</strong>/<strong>3130</strong>xl <strong>Genetic</strong> <strong>Analyzers</strong> <strong>Getting</strong> <strong>Started</strong> <strong>Guide</strong><br />
DRAFT<br />
November 3, 2004 9:51 am, 01_PrepInstrument.fm
DRAFT<br />
November 3, 2004 9:51 am, 01_PrepInstrument.fm<br />
Inspecting the Instrument<br />
1. Open the instrument doors.<br />
2. Perform the daily maintenance tasks -see the<br />
<strong>Applied</strong> Biosystems <strong>3130</strong>/<strong>3130</strong>xl <strong>Genetic</strong><br />
<strong>Analyzers</strong> Maintenance, Troubleshooting and<br />
Reference <strong>Guide</strong> for more detail on maintenance.<br />
3. Install clean drip trays.<br />
Installing or Replacing the Capillary Array<br />
IMPORTANT! The capillary array length defined in<br />
the wizard must match the array length you are using<br />
for correct autoanalysis results.<br />
IMPORTANT! Wear gloves while<br />
handling polymer, the capillary array,<br />
septa, or buffer reservoirs.<br />
CHEMICAL HAZARD. POP<br />
polymer may cause eye, skin, and respiratory tract<br />
irritation. Please read the MSDS, and follow the<br />
handling instructions. Wear appropriate protective<br />
eyewear, clothing, and gloves. Use for research and<br />
development purposes only.<br />
1. Install a capillary array by clicking , selecting Install Array Wizard and<br />
following the prompts.<br />
Notes<br />
IMPORTANT! To install or replace an array that<br />
is a different length than the one you were using,<br />
reset the active spectral calibration (see page 47)<br />
or create a new spectral calibration for your dye<br />
set and array length combination (see page 37).<br />
2. Optional: Select Update Cap Array Info wizard<br />
to correct any errors or update capillary array and<br />
serial number information.<br />
Chapter 1 Preparing the Instrument<br />
Preparing the Instrument<br />
<strong>Applied</strong> Biosystems <strong>3130</strong>/<strong>3130</strong>xl <strong>Genetic</strong> <strong>Analyzers</strong> <strong>Getting</strong> <strong>Started</strong> <strong>Guide</strong> 13<br />
1
Chapter 1 Preparing the Instrument<br />
Preparing the Instrument<br />
When to Replenish or Change Polymer<br />
IMPORTANT! Always replace<br />
polymer that has been on the<br />
instrument longer than one week.<br />
Before Using the Polymer<br />
1. Remove the polymer from 4 °C storage.<br />
2. Loosen the cap and bring the polymer to room<br />
temperature.<br />
3. To dissolve deposits, tighten the cap and gently<br />
swirl the polymer.<br />
Replenishing the Polymer<br />
IMPORTANT! Wear gloves while<br />
handling polymer, the capillary array,<br />
septa, or buffer reservoirs.<br />
Notes<br />
Su M T W Th F S<br />
If polymer on the instrument... Then ...<br />
has been on less than one week and is in sufficient quantity<br />
to complete your runs a<br />
has been on less than one week, and insufficient in quantity<br />
to complete your runs<br />
has been on longer than one week<br />
is the wrong type (a change between POP-4, POP-6, and/or<br />
POP-7 polymers is required)<br />
CHEMICAL HAZARD. POP<br />
polymer may cause eye, skin, and respiratory tract<br />
irritation. Please read the MSDS, and follow the<br />
handling instructions. Wear appropriate protective<br />
eyewear, clothing, and gloves. Use for research and<br />
development purposes only.<br />
1. Click < Instrument Name> in the tree pane.<br />
Remove all bubbles, and then proceed with instrument<br />
preparation.<br />
Add fresh polymer to the polymer supply by following the<br />
Replenish Polymer Wizard.<br />
Replace the installed polymer type with a different type by<br />
following the Change Polymer Type Wizard.<br />
a A <strong>3130</strong>xl genetic analyzer run uses 50 to 80 µL of polymer and a <strong>3130</strong> genetic analyzer run uses ~25 to 40µL of polymer.<br />
14 <strong>Applied</strong> Biosystems <strong>3130</strong>/<strong>3130</strong>xl <strong>Genetic</strong> <strong>Analyzers</strong> <strong>Getting</strong> <strong>Started</strong> <strong>Guide</strong><br />
DRAFT<br />
November 3, 2004 9:51 am, 01_PrepInstrument.fm
DRAFT<br />
November 3, 2004 9:51 am, 01_PrepInstrument.fm<br />
2. Select Wizards > Replenish Polymer Wizard<br />
to replenish polymer.<br />
Notes<br />
IMPORTANT! The polymer type defined in the<br />
wizard must match the polymer type that you are<br />
using.<br />
Changing Polymer Type<br />
IMPORTANT! Wear gloves while<br />
handling polymer, the capillary array,<br />
septa, or buffer reservoirs.<br />
CHEMICAL HAZARD. POP<br />
polymer may cause eye, skin, and respiratory tract<br />
irritation. Please read the MSDS, and follow the<br />
handling instructions. Wear appropriate protective<br />
eyewear, clothing, and gloves. Use for research and<br />
development purposes only.<br />
1. Click < Instrument Name> in the tree pane.<br />
2. Select Wizards > Change Polymer Type<br />
Wizard to change to a different polymer.<br />
Chapter 1 Preparing the Instrument<br />
Preparing the Instrument<br />
<strong>Applied</strong> Biosystems <strong>3130</strong>/<strong>3130</strong>xl <strong>Genetic</strong> <strong>Analyzers</strong> <strong>Getting</strong> <strong>Started</strong> <strong>Guide</strong> 15<br />
1
Notes<br />
Chapter 1 Preparing the Instrument<br />
Preparing Buffer and Filling Reservoirs<br />
Preparing Buffer and Filling Reservoirs<br />
Required Materials<br />
CHEMICAL HAZARD. 10X<br />
<strong>Genetic</strong> Analyzer Buffer with EDTA may cause<br />
eye, skin, and respiratory tract irritation. Read the<br />
MSDS, and follow the handling instructions. Wear<br />
appropriate protective eyewear, clothing, and gloves.<br />
Required materials to prepare 1X running buffer:<br />
10X <strong>Genetic</strong> Analyzer Buffer (P/N 402824)<br />
Purified (distilled or deionized) water<br />
50 mL graduated cylinder<br />
Preparing Buffer for a Single Run<br />
1. Add 5 mL of 10X <strong>Genetic</strong> Analyzer buffer into a<br />
graduated cylinder.<br />
2. Add purified water to bring the total volume up<br />
to 50 mL.<br />
3. Mix well.<br />
Storing Buffer<br />
Store 1X running buffer at:<br />
2 to 8 °C for up to 1 month<br />
Room temperature for 1 week<br />
16 <strong>Applied</strong> Biosystems <strong>3130</strong>/<strong>3130</strong>xl <strong>Genetic</strong> <strong>Analyzers</strong> <strong>Getting</strong> <strong>Started</strong> <strong>Guide</strong><br />
50 mL<br />
total<br />
50 mL graduated cylinder<br />
Buffer Storage Conditions<br />
Option A Option B<br />
2 °C to<br />
8 °C<br />
Su M T W Th F S<br />
1 month<br />
20 °C to<br />
25 °C<br />
Su M T W Th F S<br />
7 days<br />
45 mL DI H 2O<br />
5 mL 10X <strong>Genetic</strong><br />
Analyzer buffer<br />
DRAFT<br />
November 3, 2004 9:51 am, 01_PrepInstrument.fm
DRAFT<br />
November 3, 2004 9:51 am, 01_PrepInstrument.fm<br />
Replacing Buffer and Water<br />
Replace the 1X running buffer in the anode and<br />
cathode buffer reservoirs daily, or before each batch<br />
of runs.<br />
IMPORTANT! Failing to replace buffer may lead to<br />
loss of resolution and data quality.<br />
IMPORTANT! To clean and refill the reservoirs, the<br />
autosampler is brought to the forward position,<br />
thereby leaving the capillary tips exposed to the air.<br />
Do not leave the autosampler in this position for an<br />
extended time because the capillaries can dry out and<br />
the array may be damaged.<br />
Filling the Water and Cathode Buffer<br />
Reservoirs<br />
IMPORTANT! Wear gloves while<br />
performing the following procedure,<br />
and any other time you handle the<br />
capillary array, septa, or buffer<br />
reservoirs.<br />
CHEMICAL HAZARD. 1✕<br />
<strong>Genetic</strong> Analyzer Buffer with EDTA may cause eye,<br />
skin, and respiratory tract irritation. Read the MSDS,<br />
and follow the handling instructions. Wear<br />
appropriate protective eyewear, clothing, and gloves.<br />
1. Verify the oven and instrument doors are closed.<br />
2. Press the Tray button on the outside of the<br />
instrument to bring the autosampler to the<br />
forward position<br />
3. Wait until the autosampler stops at the forward<br />
position, then open the instrument door.<br />
Notes<br />
Chapter 1 Preparing the Instrument<br />
Preparing Buffer and Filling Reservoirs<br />
Tray button<br />
<strong>Applied</strong> Biosystems <strong>3130</strong>/<strong>3130</strong>xl <strong>Genetic</strong> <strong>Analyzers</strong> <strong>Getting</strong> <strong>Started</strong> <strong>Guide</strong> 17<br />
1
Chapter 1 Preparing the Instrument<br />
Preparing Buffer and Filling Reservoirs<br />
4. Remove the cathode buffer and water reservoirs<br />
from the instrument.<br />
5. Dispose of remaining fluids and rinse out the<br />
reservoirs with deionized water.<br />
Notes<br />
Note: Follow your company’s waste disposal<br />
practices for appropriate disposal procedures.<br />
6. Rinse the cathode reservoir with 1X running<br />
buffer, and then fill to the line with 1X running<br />
buffer (about 16 mL).<br />
7. Fill the two water reservoirs to the line with<br />
quality deionized water (about 16 mL).<br />
Be sure that the septa fit<br />
securely and flush on the tops of the reservoirs to<br />
prevent damaging the capillary tips.<br />
8. Place a clean reservoir septa on each reservoir,<br />
and dry the outside of the reservoirs using a<br />
lint-free tissue wipe.<br />
9. Place the reservoirs into position on the<br />
autosampler as shown.<br />
10. Close the instrument doors.<br />
Note: Closing the doors returns the autosampler<br />
to the last known position, placing the tips of the<br />
capillaries in water or buffer.<br />
Water reservoir<br />
(waste)<br />
Cathode reservoir<br />
(1X running buffer)<br />
Remove<br />
18 <strong>Applied</strong> Biosystems <strong>3130</strong>/<strong>3130</strong> <strong>Genetic</strong> <strong>Analyzers</strong> <strong>Getting</strong> <strong>Started</strong> <strong>Guide</strong><br />
GR1857b<br />
Home position<br />
Fill line<br />
Water reservoir<br />
(rinse)<br />
Water reservoir<br />
(unused)<br />
DRAFT
DRAFT<br />
November 3, 2004 9:51 am, 01_PrepInstrument.fm<br />
Filling the Anode Buffer Reservoir<br />
Change the anode buffer:<br />
Notes<br />
Every 24 hours<br />
Before each run or batch of runs<br />
Every time you replenish the polymer or change<br />
polymer type<br />
CHEMICAL HAZARD. 1X<br />
<strong>Genetic</strong> Analyzer Buffer with EDTA may cause eye,<br />
skin, and respiratory tract irritation. Read the MSDS,<br />
and follow the handling instructions. Wear<br />
appropriate protective eyewear, clothing, and gloves.<br />
1. Remove the anode buffer reservoir by firmly<br />
pulling down and twisting slowly.<br />
2. Discard the used buffer appropriately.<br />
3. Clean and rinse the reservoir with deionized<br />
water, and then rinse with buffer.<br />
4. Fill the anode buffer reservoir to the fill line with<br />
fresh 1X running buffer (about 16 mL).<br />
Note: The meniscus should line up with the<br />
fill line.<br />
5. Put the anode buffer reservoir on the instrument.<br />
6. If the reservoir fills with fluid, repeat this<br />
procedure to discard and replace the running<br />
buffer.<br />
Note: The reservoir could fill during bubble<br />
removal.<br />
Chapter 1 Preparing the Instrument<br />
Preparing Buffer and Filling Reservoirs<br />
Change the Anode Buffer<br />
Every 24 hours Before each run<br />
or batch of runs<br />
<strong>Applied</strong> Biosystems <strong>3130</strong>/<strong>3130</strong>xl <strong>Genetic</strong> <strong>Analyzers</strong> <strong>Getting</strong> <strong>Started</strong> <strong>Guide</strong> 19<br />
GR2461<br />
Fill line<br />
1
Notes<br />
Chapter 1 Preparing the Instrument<br />
Preparing Buffer and Filling Reservoirs<br />
20 <strong>Applied</strong> Biosystems <strong>3130</strong>/<strong>3130</strong>xl <strong>Genetic</strong> <strong>Analyzers</strong> <strong>Getting</strong> <strong>Started</strong> <strong>Guide</strong><br />
DRAFT<br />
November 3, 2004 9:51 am, 01_PrepInstrument.fm
DRAFT<br />
November 3, 2004 9:51 am, 02_SpatialCal.fm<br />
Notes<br />
Preparing the<br />
Instrument<br />
Performing a<br />
Spatial Calibration<br />
Performing a<br />
Spectral Calibration<br />
Autoanalysis<br />
and Sequencing<br />
Analysis<br />
Software<br />
Autoanalysis<br />
and<br />
SeqScape Software<br />
Autoanalysis<br />
and<br />
Fragment Analysis<br />
Running the<br />
Instrument<br />
Chapter 2<br />
Performing a Spatial Calibration<br />
Start a spatial<br />
calibration run<br />
Evaluate spatial<br />
calibration profile<br />
Accept or reject<br />
spatial calibration<br />
See page 22<br />
See page 23<br />
See page 24<br />
<strong>Applied</strong> Biosystems <strong>3130</strong>/<strong>3130</strong>xl <strong>Genetic</strong> <strong>Analyzers</strong> <strong>Getting</strong> <strong>Started</strong> <strong>Guide</strong> 21<br />
2
Notes<br />
Chapter 2 Performing a Spatial Calibration<br />
Spatial Calibration<br />
Spatial Calibration<br />
When to Perform<br />
the Calibration<br />
The <strong>3130</strong>/<strong>3130</strong>xl genetic analyzer Data Collection software uses images collected during<br />
the spatial calibration to establish a relationship between the signal emitted by each<br />
capillary and the position where that signal falls on and is detected by the CCD camera.<br />
You are required to perform a spatial calibration when you:<br />
Install or replace a capillary array<br />
Temporarily remove the capillary array from the detection block<br />
Move the instrument<br />
Creating a Spatial Calibration File<br />
Positions (pixel)<br />
of each capillary<br />
1. In the tree pane of the Data Collection software, click<br />
GA Instruments > ga<strong>3130</strong> or ga<strong>3130</strong>xl > instrument<br />
name > Spatial Run Scheduler.<br />
Spatial<br />
profile<br />
Start, Accept<br />
or Reject<br />
Spatial profile<br />
22 <strong>Applied</strong> Biosystems <strong>3130</strong>/<strong>3130</strong>xl <strong>Genetic</strong> <strong>Analyzers</strong> <strong>Getting</strong> <strong>Started</strong> <strong>Guide</strong><br />
DRAFT<br />
November 3, 2004 9:51 am, 02_SpatialCal.fm
DRAFT<br />
November 3, 2004 9:51 am, 02_SpatialCal.fm<br />
2. In the Spatial Protocols section, select one of the<br />
following:<br />
If the capillaries contain fresh polymer,<br />
select Protocol > <strong>3130</strong>SpatialNoFill_1<br />
Otherwise, select Protocol<br />
> <strong>3130</strong>SpatialFill_1<br />
Notes<br />
Note: You do not need to fill the capillaries each<br />
time you perform a spatial calibration.<br />
3. Click .<br />
The calibration run lasts approximately:<br />
2 min. without filling the capillaries<br />
6 min. when filling the capillaries<br />
Note: The spatial profile window turns black<br />
when you start a spatial calibration.<br />
Evaluating a Spatial Calibration File<br />
1. Evaluate the spatial calibration profile using the<br />
following criteria:<br />
Peak<br />
Attribute<br />
Acceptable Criteria<br />
Height Similar heights for all peaks.<br />
Orange<br />
crosses<br />
One orange cross marking the top<br />
of every peak. No misplaced<br />
crosses.<br />
Shape Single sharp peak for each<br />
capillary.<br />
Small shoulders are acceptable.<br />
Spacing The difference between adjacent<br />
positions is 13 to 16 pixels.<br />
Theoretical spacing between<br />
capillaries is 15.<br />
Chapter 2 Performing a Spatial Calibration<br />
Evaluating a Spatial Calibration File<br />
Spatial calibration profile for <strong>3130</strong>xl system<br />
Spatial calibration profile for <strong>3130</strong> system<br />
Select one<br />
Start spatial calibration<br />
<strong>Applied</strong> Biosystems <strong>3130</strong>/<strong>3130</strong>xl <strong>Genetic</strong> <strong>Analyzers</strong> <strong>Getting</strong> <strong>Started</strong> <strong>Guide</strong> 23<br />
2
Notes<br />
Chapter 2 Performing a Spatial Calibration<br />
Evaluating a Spatial Calibration File<br />
2. Examine each row in the 16 or 4 Capillary<br />
Positions table and verify that the values in both<br />
the Left spacing and Right spacing columns<br />
range between 13 to 16 pixels.<br />
To move the cross:<br />
a. Type a new value in the Positions (pixels)<br />
box for the capillary of interest.<br />
b. Click outside of that box or press Enter.<br />
Accepting or Rejecting a Spatial<br />
Calibration<br />
If the calibration:<br />
Passed, click to write the<br />
calibration data to the database and .ini file.<br />
Failed, click , then see the <strong>Applied</strong><br />
Biosystems <strong>3130</strong>/<strong>3130</strong>xl <strong>Genetic</strong> <strong>Analyzers</strong><br />
Maintenance, Troubleshooting and<br />
Reference <strong>Guide</strong>.<br />
Left spacing and<br />
Right spacing<br />
columns<br />
Accept and<br />
Reject buttons<br />
24 <strong>Applied</strong> Biosystems <strong>3130</strong>/<strong>3130</strong>xl <strong>Genetic</strong> <strong>Analyzers</strong> <strong>Getting</strong> <strong>Started</strong> <strong>Guide</strong><br />
DRAFT<br />
November 3, 2004 9:51 am, 02_SpatialCal.fm
DRAFT<br />
November 3, 2004 9:51 am, 02_SpatialCal.fm<br />
Examples of Spatial Profiles<br />
Passing Profiles <strong>3130</strong> <strong>Genetic</strong> Analyzer<br />
Notes<br />
<strong>3130</strong>xl <strong>Genetic</strong> Analyzer<br />
Failing Profile <strong>3130</strong>xl <strong>Genetic</strong> Analyzer<br />
Chapter 2 Performing a Spatial Calibration<br />
Examples of Spatial Profiles<br />
<strong>Applied</strong> Biosystems <strong>3130</strong>/<strong>3130</strong>xl <strong>Genetic</strong> <strong>Analyzers</strong> <strong>Getting</strong> <strong>Started</strong> <strong>Guide</strong> 25<br />
2
Notes<br />
Chapter 2 Performing a Spatial Calibration<br />
Examples of Spatial Profiles<br />
26 <strong>Applied</strong> Biosystems <strong>3130</strong>/<strong>3130</strong>xl <strong>Genetic</strong> <strong>Analyzers</strong> <strong>Getting</strong> <strong>Started</strong> <strong>Guide</strong><br />
DRAFT<br />
November 3, 2004 9:51 am, 02_SpatialCal.fm
DRAFT<br />
November 16, 2004 2:09 pm, 03_SpectralCal.fm<br />
Notes<br />
Preparing the<br />
Instrument<br />
Performing a<br />
Spatial Calibration<br />
Performing a<br />
Spectral Calibration<br />
Autoanalysis<br />
and Sequencing<br />
Analysis<br />
Software<br />
Autoanalysis<br />
and<br />
SeqScape Software<br />
Autoanalysis<br />
and<br />
Fragment Analysis<br />
Running the<br />
Instrument<br />
Chapter 3<br />
Performing a Spectral Calibration<br />
Prepare spectral<br />
calibration chemistry<br />
Create a spectral<br />
instrument protocol<br />
Perform a spectral<br />
calibration<br />
Evaluate the spectral<br />
calibration data<br />
Activate a spectral<br />
calibration<br />
Seepage31<br />
Seepage35<br />
See page 37<br />
Seepage43<br />
Seepage47<br />
<strong>Applied</strong> Biosystems <strong>3130</strong>/<strong>3130</strong>xl <strong>Genetic</strong> <strong>Analyzers</strong> <strong>Getting</strong> <strong>Started</strong> <strong>Guide</strong> 27<br />
3
Notes<br />
Chapter 3 Performing a Spectral Calibration<br />
Spectral Calibration<br />
Spectral Calibration<br />
When to Perform<br />
the Calibration<br />
A spectral calibration creates a matrix that is used during a run to reduce raw data from<br />
the instrument to the 4-dye or 5-dye data stored in sample files. Performing a spectral<br />
calibration is similar to performing a sample run except that calibration standards are run<br />
in place of samples and a spectral calibration module is used in place of a run module.<br />
Perform a spectral calibration:<br />
• When you use a new dye set on the instrument<br />
When you change capillary array length (or polymer type for fragment analysis)<br />
After the laser or CCD camera has been realigned/replaced by a service engineer<br />
If you begin to see a decrease in spectral separation (pull-up and/or pull-down<br />
peaks) in the raw or analyzed data<br />
What Happens? Run the spectral standards in all 16 or 4 capillaries. The Data Collection software then:<br />
Changing<br />
Capillary Array<br />
Lengths and<br />
Polymer Type<br />
Supported<br />
Sequencing<br />
Chemistries<br />
Collects the data and stores it in 16 or 4 separate temporary files<br />
Analyzes the data and generates a matrix for each capillary<br />
Stores the spectral calibration data for the dye set run<br />
For each dye set, a unique spectral calibration is used for each different capillary array<br />
length.<br />
For every sequencing dye set, you must create a separate spectral calibration for<br />
each capillary array length you use.<br />
For every fragment analysis dye set, you must create a separate spectral calibration<br />
for each capillary array length and polymer type combination you use.<br />
See “Activating a Spectral Calibration” on page 47, on how to switch calibrations once<br />
calibrations are performed for each dye set on each capillary length.<br />
New basecaller, mobility files, and run modules will be developed for the <strong>3130</strong>/<strong>3130</strong>xl<br />
series instruments solely in support of the ABI PRISM ® BigDye ® Terminator v1.1 and<br />
v3.1chemistry kits. For more information, please contact <strong>Applied</strong> Biosystems Technical<br />
Support.<br />
ABI PRISM ® BigDye ® Terminator v1.0, v2.0 and v3.0 chemistry kits have been<br />
discontinued.<br />
28 <strong>Applied</strong> Biosystems <strong>3130</strong>/<strong>3130</strong>xl <strong>Genetic</strong> <strong>Analyzers</strong> <strong>Getting</strong> <strong>Started</strong> <strong>Guide</strong><br />
DRAFT<br />
November 16, 2004 2:09 pm, 03_SpectralCal.fm
DRAFT<br />
November 16, 2004 2:09 pm, 03_SpectralCal.fm<br />
Notes<br />
Types of<br />
Calibration<br />
Standards<br />
There are two types of spectral calibration standards:<br />
Chapter 3 Performing a Spectral Calibration<br />
Spectral Calibration<br />
Matrix standards for fragment analysis or sequencing - A tube that contains<br />
four or five fragments each labeled with a different single dye.<br />
BigDye ® v3.1 or BigDye ® v1.1 Terminator Sequencing Standard - A tube of a standard<br />
chemistry reaction that contains multiple labeled fragments in each of the four dyes<br />
Dye Set Tables Determine the correct dye set and matrix standard set for the application you are using<br />
by using the tables below.<br />
Sequencing Chemistry Dye Sets, Calibration Standards, and Chemistry File<br />
Sequencing Chemistry Dye Set Spectral Calibration Standard Chemistry File<br />
BigDye ® Terminator v3.1 Cycle<br />
Sequencing Kit<br />
ABI PRISM ® dGTP BigDye ®<br />
Terminator v 3.0 Cycle Sequencing<br />
Ready Reaction Kit a<br />
BigDye ® Terminator v1.1 Cycle<br />
Sequencing Kit<br />
ABI PRISM ® BigDye ® Primer Cycle<br />
Sequencing Kits<br />
ABI PRISM ® dGTP BigDye ®<br />
Terminator Cycle Sequencing Ready<br />
Reaction Kita ABI PRISM ® dRhodamine Terminator<br />
Cycle Sequencing Kit<br />
Z_BigDyeV3 BigDye ® v3.1 Matrix Standards Matrix Standard<br />
BigDye ® v3.1 Terminator<br />
Sequencing Standard<br />
Sequence Standard<br />
E_BigDyeV1 DS-01 Matrix Standards Matrix Standard<br />
BigDye ® v1.1 Terminator<br />
Sequencing Standard<br />
Sequence Standard<br />
dRhodamine Matrix Standards Kit Matrix Standard<br />
a dGTP kits are not supported on capillary electrophoresis instruments due to compressions on certain sequence context regions; you can<br />
run the kits if compression is not an issue.<br />
<strong>Applied</strong> Biosystems <strong>3130</strong>/<strong>3130</strong>xl <strong>Genetic</strong> <strong>Analyzers</strong> <strong>Getting</strong> <strong>Started</strong> <strong>Guide</strong> 29<br />
3
Notes<br />
Chapter 3 Performing a Spectral Calibration<br />
Spectral Calibration<br />
Fragment Analysis Dye Sets, Calibration Standards, and Chemistry File<br />
Fragment Analysis Chemistry Dye Set Spectral Calibration Standard Chemistry File<br />
Custom oligos D DS-30 Matrix Standards Matrix Standard<br />
ABI PRISM ® Mouse Mapping Set v1.0<br />
Custom oligos<br />
AFLP ® kits<br />
Stockmarks ® Kits 4-dye (bovine and<br />
canine)<br />
AmpFlSTR® COfiler® Kit<br />
AmpFlSTR® Profiler Plus® Kit<br />
AmpFlSTR® Profiler Plus® ID Kit<br />
AmpFlSTR® SGM Plus® Kit<br />
Other 4-Dye AmpFlSTR Kits<br />
D DS-31 Matrix Standards<br />
F DS-32 Matrix Standards<br />
ABI PRISM ® SNaPshot® Multiplex System E5 DS-02 Matrix Standards<br />
ABI PRISM® Linkage Mapping Set v2.5<br />
Stockmarks ® Kit 5-dye (equine)<br />
Custom Oligos<br />
AmpFlSTR® Identifiler® Kit<br />
AmpFlSTR® SEfiler Kit<br />
AmpFlSTR® Yfiler Kit<br />
Other 5-Dye AmpFlSTR Kits<br />
G5 DS-33 Matrix Standards<br />
30 <strong>Applied</strong> Biosystems <strong>3130</strong>/<strong>3130</strong>xl <strong>Genetic</strong> <strong>Analyzers</strong> <strong>Getting</strong> <strong>Started</strong> <strong>Guide</strong><br />
DRAFT<br />
November 16, 2004 2:09 pm, 03_SpectralCal.fm
DRAFT<br />
November 16, 2004 2:09 pm, 03_SpectralCal.fm<br />
Notes<br />
Chapter 3 Performing a Spectral Calibration<br />
Preparing the Spectral Calibration Chemistry<br />
Preparing the Spectral Calibration Chemistry<br />
Preparing the Calibration Standard<br />
1. Prepare one of the following:<br />
CHEMICAL HAZARD.<br />
Formamide causes eye, skin, and respiratory<br />
tract irritation. It is a possible reproductive and<br />
birth defect hazard. Read the MSDS, and follow<br />
the handling instructions. Wear appropriate<br />
protective eyewear, clothing, and gloves.<br />
ABI PRISM BigDye Terminator v1.1 or v3.1<br />
Sequencing Standard:<br />
– Remove a tube of the Sequencing<br />
Standard from the freezer.<br />
– Add 170 µL of Hi-Di formamide to<br />
resuspend the BigDye Terminator v1.1 or<br />
v3.1 Sequencing Standard.<br />
Sequencing or fragment analysis matrix<br />
standards:<br />
– Remove a tube of the matrix standard<br />
from the refrigerator.<br />
– Mix thoroughly, then spin briefly in a<br />
microcentrifuge.<br />
– Follow the matrix standard insert for<br />
matrix standard and Hi-Di formamide<br />
ratios.<br />
2. Vortex thoroughly.<br />
Briefly centrifuge the mixture.<br />
3. Heat the standard tube at 95 °C for 5 minutes to<br />
denature the DNA.<br />
4. Cool the tubes on ice for 2 minutes.<br />
<strong>Applied</strong> Biosystems <strong>3130</strong>/<strong>3130</strong>xl <strong>Genetic</strong> <strong>Analyzers</strong> <strong>Getting</strong> <strong>Started</strong> <strong>Guide</strong> 31<br />
Vortex<br />
00:00:05<br />
Notes<br />
Chapter 3 Performing a Spectral Calibration<br />
Loading Samples<br />
Loading Samples<br />
CHEMICAL HAZARD. All<br />
chemicals on the instrument, including liquid in the<br />
lines, are potentially hazardous. Please read the<br />
MSDS, and follow the handling instructions. Wear<br />
appropriate eyewear, protective clothing, and gloves<br />
when working on the instrument.<br />
or damaged plates.<br />
Do not use warped<br />
Note: The efficient way to lay out samples in a plate<br />
is illustrated here. See Appendix A, “Plate Mapping,”<br />
for the relationship between sample position and<br />
priority in scheduled injections.<br />
To load samples:<br />
1. Add the denatured samples to the wells of a 96or<br />
384-well reaction plate:<br />
If using a <strong>3130</strong>xl genetic analyzer:<br />
– 96-well plate – Add 10 µL of denatured<br />
standard to wells A1 through H2.<br />
– 384-well plate – Add 5 µL of denatured<br />
standard into alternating wells of the<br />
plate:<br />
Row 1: A1, C1, E1, …K1, M1, O1<br />
Row 2: Empty<br />
Row 3: A3, C3, E3, …K3, M3, O3<br />
If using <strong>3130</strong> genetic analyzer:<br />
– 96-well plate – Add 10 µL of denatured<br />
standard to wells A1, B1, C1 and D1.<br />
– 384-well plate – Add 5 µL of denatured<br />
standard into alternating wells of the<br />
plate:<br />
Row 1: A1, C1, E1 and G1<br />
Prepared standard<br />
(from step 4 on page 31)<br />
96-Well<br />
Plate<br />
<strong>3130</strong>xl<br />
instrument<br />
layout<br />
<strong>3130</strong><br />
instrument<br />
layout<br />
384-Well<br />
Plate<br />
<strong>3130</strong>xl<br />
instrument<br />
layout<br />
<strong>3130</strong><br />
instrument<br />
layout<br />
1 2 3 4 5 6 7 8 9 10 11 12<br />
A<br />
B<br />
C<br />
D<br />
E<br />
F<br />
G<br />
H<br />
Add 10 µL prepared standard<br />
1 2 3 4 5 6 7 8 9 10 11 12 13 14 15 16 17 18 19 20 21 22 23 24<br />
A<br />
B<br />
C<br />
D<br />
E<br />
F<br />
G<br />
H<br />
I<br />
J<br />
K<br />
L<br />
M<br />
N<br />
O<br />
P<br />
GR1316c<br />
Add 5 µL prepared standard<br />
into alternating wells<br />
32 <strong>Applied</strong> Biosystems <strong>3130</strong>/<strong>3130</strong>xl <strong>Genetic</strong> <strong>Analyzers</strong> <strong>Getting</strong> <strong>Started</strong> <strong>Guide</strong><br />
GR1315c<br />
DRAFT<br />
November 16, 2004 2:09 pm, 03_SpectralCal.fm
DRAFT<br />
November 16, 2004 2:09 pm, 03_SpectralCal.fm<br />
2. Seal the plate:<br />
Notes<br />
a. Place the plate on a clean, level surface.<br />
b. Lay the septa flat on the plate.<br />
c. Align the holes in the septa strip with the<br />
wells of the plate, then firmly press<br />
downward onto the plate.<br />
IMPORTANT!: Do not heat plates that are<br />
sealed with septa.<br />
3. To prevent damage to the capillary array, inspect<br />
the plate and septa to verify the septa fits snugly<br />
and flush on the plate.<br />
4. Briefly centrifuge the plate.<br />
5. Remove the plate from the centrifuge and verify<br />
that each sample is positioned correctly in the<br />
bottom of its well.<br />
If the reagents of any well contain bubbles or are<br />
not located at the bottom of the well, repeat<br />
steps 4 and 5.<br />
6. Leave the plate on ice until you are ready to<br />
prepare the plate assembly and place the<br />
assembly on the autosampler.<br />
Chapter 3 Performing a Spectral Calibration<br />
Loading Samples<br />
Chapter 3 Performing a Spectral Calibration<br />
Loading Samples<br />
7. Assemble the plate assembly:<br />
Notes<br />
a. Place the sample plate into the plate base.<br />
b. Snap the plate retainer onto the plate and<br />
plate base.<br />
8. Verify that the holes of the plate retainer and the<br />
septa strip are aligned. If not, re-assemble the<br />
plate assembly (see step 7).<br />
IMPORTANT! Damage to the array tips will<br />
occur if the plate retainer and septa strip holes do<br />
not align correctly.<br />
34 <strong>Applied</strong> Biosystems <strong>3130</strong>/<strong>3130</strong>xl <strong>Genetic</strong> <strong>Analyzers</strong> <strong>Getting</strong> <strong>Started</strong> <strong>Guide</strong><br />
GR2050b<br />
Plate retainer<br />
6a<br />
Plate base<br />
Assembled<br />
components<br />
6b<br />
Plate retainer<br />
holes and septa<br />
holes are not<br />
aligned<br />
DRAFT<br />
November 16, 2004 2:09 pm, 03_SpectralCal.fm
DRAFT<br />
November 16, 2004 2:09 pm, 03_SpectralCal.fm<br />
Creating a Spectral Instrument Protocol<br />
1. In the tree pane of the Data Collection software,<br />
click GA Instruments > ga<strong>3130</strong>xl or<br />
ga<strong>3130</strong> > Protocol Manager to open the<br />
Protocol Manager window.<br />
2. In the Instrument Protocols pane, click .<br />
The Protocol Editor dialog box opens.<br />
3. Complete the Protocol Editor dialog box.<br />
a. Type a name for the protocol.<br />
b. Type a description for the protocol<br />
(optional).<br />
c. Select Spectral in the Type drop-down list.<br />
d. Select the correct dye set for your run. See<br />
“Dye Set Tables” on page 29.<br />
Notes<br />
Chapter 3 Performing a Spectral Calibration<br />
Creating a Spectral Instrument Protocol<br />
Create instrument<br />
protocols here<br />
Create analysis<br />
protocols here<br />
<strong>Applied</strong> Biosystems <strong>3130</strong>/<strong>3130</strong>xl <strong>Genetic</strong> <strong>Analyzers</strong> <strong>Getting</strong> <strong>Started</strong> <strong>Guide</strong> 35<br />
3a<br />
3b<br />
3c<br />
3d<br />
3e<br />
3f<br />
3g<br />
3h<br />
3
Notes<br />
Chapter 3 Performing a Spectral Calibration<br />
Creating a Spectral Instrument Protocol<br />
e. Select the Polymer and Array Length from<br />
the appropriate drop-down list. See table,<br />
“Polymer, Array Length and Spectral Run<br />
Modules.”<br />
f. Select your chemistry file in the Chemistry<br />
drop-down list. Failure to select the correct<br />
chemistry file for your spectral calibration<br />
samples results in a failing spectral run. See<br />
“Dye Set Tables” on page 29 for matching<br />
chemistry files.<br />
Note: The chemistry file for fragment<br />
analysis dye sets defaults to the Matrix<br />
Standard.<br />
g. In the Run Module drop-down list, select<br />
the run module. See the table “Polymer,<br />
Array Length and Spectral Run Modules.”<br />
Note: The modules list is filtered based on<br />
the polymer type, then the array length you<br />
selected in step e. You may have only one<br />
run module option available.<br />
h. Click .<br />
Polymer, Array Length and Spectral Run Modules<br />
Polymer<br />
Type<br />
Array<br />
Length (cm)<br />
Run Module<br />
POP-4 22 Spect22_POP4<br />
36 Spect36_POP4<br />
SpectSQ36_POP4<br />
50 Spect50_POP4<br />
80 Spect80_POP4<br />
POP-6 36 Spect36_POP6<br />
50 Spect50_POP6<br />
POP-7 36 Spect36_POP7<br />
50 Spect50_POP7<br />
80 Spect80_POP7<br />
36 <strong>Applied</strong> Biosystems <strong>3130</strong>/<strong>3130</strong>xl <strong>Genetic</strong> <strong>Analyzers</strong> <strong>Getting</strong> <strong>Started</strong> <strong>Guide</strong><br />
DRAFT<br />
November 16, 2004 2:09 pm, 03_SpectralCal.fm
DRAFT<br />
November 16, 2004 2:09 pm, 03_SpectralCal.fm<br />
Performing a Spectral Calibration<br />
Creating the Plate Record<br />
1. In the tree pane of the Data Collection software,<br />
click GA Instruments > ga<strong>3130</strong>xl or<br />
<strong>3130</strong> > instrument name > Plate<br />
Manager.<br />
2. Click to open the New Plate dialog<br />
box.<br />
3. Complete the New Plate dialog box:<br />
a. Enter a name for the plate.<br />
Notes<br />
b. Optional: Enter a description for the plate<br />
record.<br />
c. In the Application drop-down list, select<br />
Spectral Calibration.<br />
d. In the Plate Type drop-down list, select 96-<br />
Well or 384-Well<br />
e. Enter a name for the owner.<br />
f. Enter a name for the operator.<br />
g. Click .<br />
4. In the Spectral Calibration Plate Editor dialog<br />
box:<br />
a. In the Sample Name column, enter a sample<br />
name, then click the next cell. The value<br />
100 automatically displays in the Priority<br />
column.<br />
b. Optional: In the Comments column, enter<br />
any additional comments or notations for<br />
the sample at the corresponding position of<br />
the plate.<br />
c. In the Instrument Protocol 1 column, select<br />
a protocol from the list or create a new<br />
protocol (see step 2 on page 35)<br />
5. Highlight the entire row.<br />
Chapter 3 Performing a Spectral Calibration<br />
Performing a Spectral Calibration<br />
Plate Manager<br />
4a 4b 4c<br />
<strong>Applied</strong> Biosystems <strong>3130</strong>/<strong>3130</strong>xl <strong>Genetic</strong> <strong>Analyzers</strong> <strong>Getting</strong> <strong>Started</strong> <strong>Guide</strong> 37<br />
3a<br />
3b<br />
3c<br />
3d<br />
3e<br />
3f<br />
3g<br />
3
Chapter 3 Performing a Spectral Calibration<br />
Performing a Spectral Calibration<br />
6. Select Edit > Fill Down Special.<br />
Notes<br />
Based on your plate type (96- or 384-well) and<br />
capillary array (16 or 4 capillaries), the software<br />
automatically fills in the appropriate well<br />
numbers for a single run.<br />
7. Click .<br />
You have successfully created the plate record<br />
for the spectral calibration plate.<br />
38 <strong>Applied</strong> Biosystems <strong>3130</strong>/<strong>3130</strong>xl <strong>Genetic</strong> <strong>Analyzers</strong> <strong>Getting</strong> <strong>Started</strong> <strong>Guide</strong><br />
DRAFT<br />
November 16, 2004 2:09 pm, 03_SpectralCal.fm
DRAFT<br />
November 16, 2004 2:09 pm, 03_SpectralCal.fm<br />
Placing the Plate Assembly into the<br />
Instrument<br />
1. Verify the oven and front doors are closed.<br />
2. Press the Tray button and wait for the<br />
autosampler to stop at the forward position.<br />
3. Open the front doors.<br />
4. Place the plate assembly on the autosampler in<br />
position A or B for the <strong>3130</strong>xl genetic analyzer<br />
and position B for the <strong>3130</strong> genetic analyzer.<br />
Notes<br />
Note: There is only one orientation for the plate,<br />
with the notched end of the plate base away<br />
from you.<br />
5. Ensure the plate assembly fits flat in the<br />
autosampler. Failure to do so may allow the<br />
capillary tips to lift the plate assembly off of the<br />
autosampler.<br />
6. Close the instrument doors.<br />
Note: Closing the doors returns the autosampler<br />
to the home position, placing the tips of the<br />
capillaries in buffer.<br />
Chapter 3 Performing a Spectral Calibration<br />
Performing a Spectral Calibration<br />
<strong>Applied</strong> Biosystems <strong>3130</strong>/<strong>3130</strong>xl <strong>Genetic</strong> <strong>Analyzers</strong> <strong>Getting</strong> <strong>Started</strong> <strong>Guide</strong> 39<br />
A<br />
<strong>3130</strong>xl genetic analyzer<br />
<strong>3130</strong> genetic analyzer<br />
B<br />
B<br />
GR2142<br />
GR2142<br />
3
Notes<br />
Chapter 3 Performing a Spectral Calibration<br />
Performing a Spectral Calibration<br />
Running the Spectral Calibration Plate<br />
1. In the tree pane of the Data Collection software,<br />
click GA Instruments > ga<strong>3130</strong>xl or<br />
<strong>3130</strong> > instrument name > Run<br />
Scheduler > Plate View.<br />
2. Search for your plate record. There are two<br />
options:<br />
Select Barcode in the Type of Search dropdown<br />
list.<br />
– In the Scan or Type Plate ID text box,<br />
type in the plate name and click Search<br />
to find the plate.<br />
– Or if you have a limited number of plates<br />
in the database, click .<br />
All plates in the database display in plate<br />
record section.<br />
Perform an advanced search by selecting<br />
Advanced in the Type of Search drop-down<br />
list.<br />
– Use the drop-down list to define search<br />
conditions for a category or multiple<br />
categories (Run Name, Results Group<br />
Name, Plate Name, etc.)<br />
Note: Your entry for Plate Name will also<br />
be set as the Plate ID.<br />
– For each category with a condition<br />
selected, type a value (primary search<br />
string) in the Value 1 column.<br />
– Click . All plates in the database<br />
that match the search criteria display in<br />
the plate record section.<br />
40 <strong>Applied</strong> Biosystems <strong>3130</strong>/<strong>3130</strong>xl <strong>Genetic</strong> <strong>Analyzers</strong> <strong>Getting</strong> <strong>Started</strong> <strong>Guide</strong><br />
DRAFT<br />
November 16, 2004 2:09 pm, 03_SpectralCal.fm
DRAFT<br />
November 16, 2004 2:09 pm, 03_SpectralCal.fm<br />
3. Link the plate.<br />
Notes<br />
a. Select the plate record you want to run.<br />
b. Click the plate position indicator that<br />
matches the plate you want linked.<br />
The plate map color will change from<br />
yellow to green when it is successfully<br />
linked.<br />
Note: The <strong>3130</strong> genetic analyzer has only<br />
one plate position (Bay B) to link a plate<br />
record.<br />
4. In the toolbar of the Data Collection software<br />
window, click to begin the run.<br />
5. The Processing Plates dialog box opens. Click<br />
.<br />
Note: The instrument may pause before running<br />
the plate to raise the oven temperature.<br />
Spectral Calibration Approximate Run<br />
Times<br />
Capillary Length<br />
(cm)<br />
Run Type<br />
Chapter 3 Performing a Spectral Calibration<br />
Performing a Spectral Calibration<br />
<strong>Applied</strong> Biosystems <strong>3130</strong>/<strong>3130</strong>xl <strong>Genetic</strong> <strong>Analyzers</strong> <strong>Getting</strong> <strong>Started</strong> <strong>Guide</strong> 41<br />
.<br />
Ramp Time<br />
(min)<br />
Approximate Total Run<br />
Time (min)<br />
22 Spec22_POP4 3 21<br />
36 Spec36_POP4 10 35<br />
SpecSQ36_POP4 10 48<br />
Spec36_POP6 10 54<br />
Spec36_POP7 5 30<br />
50 Spec50_POP4 7.5 110<br />
Spec50_POP6 10 95<br />
Spec50_POP7 7.5 52<br />
80 Spec80_POP4 10 140<br />
Spec80_POP7 10 120<br />
3a<br />
3b<br />
3
Chapter 3 Performing a Spectral Calibration<br />
Performing a Spectral Calibration<br />
Viewing the Pass/Fail Status After the Run<br />
After the spectral calibration run, the pass or fail<br />
status of each capillary is recorded in the Event Log<br />
section of the Instrument Status window.<br />
1. In the tree pane of the Data Collection software,<br />
click GA Instruments > ga<strong>3130</strong>xl or<br />
ga<strong>3130</strong> > instrument name ><br />
Instrument Status > Event Log.<br />
2. In the Event Messages section of the window,<br />
view the status of each capillary.<br />
Notes<br />
Note: The window below shows the dye set G5<br />
status results.<br />
Each capillary should have a Q-value above 0.95<br />
and a Condition number range shown in the<br />
table.<br />
Note: If the entire spectral calibration failed, see<br />
the <strong>Applied</strong> Biosystems <strong>3130</strong>/<strong>3130</strong>xl <strong>Genetic</strong><br />
<strong>Analyzers</strong> Maintenance, Troubleshooting and<br />
Reference <strong>Guide</strong> for troubleshooting<br />
information.<br />
Cap # Pass/fail status Q-value Condition Number<br />
Dye Set<br />
Acceptable<br />
Condition<br />
Number Range<br />
Q-Value<br />
Sequencing Analysis 0.95<br />
Z_BigDyeV3 3 to 5<br />
E_BigDyeV1<br />
Fragment Analysis<br />
D 4 to 8.5<br />
F 6 to 12<br />
E5 2.5 to 4<br />
G5 8.5 to 14.5<br />
Any 4- or 5-Dye<br />
set<br />
1 to 20 0.80<br />
42 <strong>Applied</strong> Biosystems <strong>3130</strong>/<strong>3130</strong>xl <strong>Genetic</strong> <strong>Analyzers</strong> <strong>Getting</strong> <strong>Started</strong> <strong>Guide</strong><br />
DRAFT<br />
November 16, 2004 2:09 pm, 03_SpectralCal.fm
DRAFT<br />
November 16, 2004 2:09 pm, 03_SpectralCal.fm<br />
Evaluating the Spectral Calibration Data<br />
IMPORTANT! Evaluate the spectral calibration profile<br />
for each capillary, even if the Spectral Calibration<br />
Results box indicates that they passed.<br />
Note: Pages 49 to 50 for examples of passing<br />
sequencing spectral calibration profiles. See pages 51<br />
to 52 for examples of passing fragment analysis<br />
spectral calibration profiles.<br />
Evaluating the Spectral Profile and Raw<br />
Data<br />
1. In the tree pane of the Data Collection software,<br />
click GA Instruments > ga<strong>3130</strong>xl or<br />
ga<strong>3130</strong> > instrument name > Spectral<br />
Viewer.<br />
Notes<br />
Plate diagram<br />
Click each cell<br />
to verify the<br />
spectral profile<br />
and raw data<br />
Chapter 3 Performing a Spectral Calibration<br />
Evaluating the Spectral Calibration Data<br />
Spectral<br />
profile<br />
Raw data<br />
(matrix<br />
standards)<br />
View, rename,<br />
or set the<br />
active<br />
spectral<br />
calibration for<br />
the selected<br />
dye set<br />
<strong>Applied</strong> Biosystems <strong>3130</strong>/<strong>3130</strong>xl <strong>Genetic</strong> <strong>Analyzers</strong> <strong>Getting</strong> <strong>Started</strong> <strong>Guide</strong> 43<br />
3
Notes<br />
Chapter 3 Performing a Spectral Calibration<br />
Evaluating the Spectral Calibration Data<br />
2. In the Dye Set drop-down list, select the dye set<br />
you just created.<br />
Note: If the spectral calibration failed (no<br />
spectral profiles are created), see the <strong>Applied</strong><br />
Biosystems <strong>3130</strong>/<strong>3130</strong>xl <strong>Genetic</strong> <strong>Analyzers</strong><br />
Maintenance, Troubleshooting and Reference<br />
<strong>Guide</strong> for more information.<br />
3. In the plate diagram, select a well on the plate<br />
diagram to view the capillary spectral results.<br />
Note: A failing capillary is automatically<br />
assigned the spectral profile of its nearest passing<br />
capillary.<br />
4. Evaluate the spectral profile and raw data for the<br />
selected capillary:<br />
a. Verify that the order of the peaks in the<br />
spectral profile from left to right are:<br />
– 4-dye: blue-green-yellow-red<br />
– 5-dye: blue-green-yellow-red-orange<br />
Do the peaks in<br />
the profile appear<br />
in the correct<br />
order?<br />
Then<br />
Yes Go to step b.<br />
No The calibration run<br />
has failed. See the<br />
<strong>Applied</strong><br />
Biosystems<br />
<strong>3130</strong>/<strong>3130</strong>xl<br />
<strong>Genetic</strong> <strong>Analyzers</strong><br />
Maintenance,<br />
Troubleshooting,<br />
and Reference<br />
<strong>Guide</strong>.<br />
Well A1<br />
Capillary status:<br />
Passed (dark green)<br />
Passed well elected (light green)<br />
Failed (tan)<br />
Failed well selected (light tan)<br />
Example of a 4-dye spectral profile<br />
Blue Green Yellow Red<br />
Blue Green Yellow Red Orange<br />
Example of a 5-dye spectral calibration profile<br />
44 <strong>Applied</strong> Biosystems <strong>3130</strong>/<strong>3130</strong>xl <strong>Genetic</strong> <strong>Analyzers</strong> <strong>Getting</strong> <strong>Started</strong> <strong>Guide</strong><br />
DRAFT<br />
November 16, 2004 2:09 pm, 03_SpectralCal.fm
DRAFT<br />
November 16, 2004 2:09 pm, 03_SpectralCal.fm<br />
Notes<br />
b. Verify that the order of the peaks in the raw<br />
data profile from left to right are:<br />
Sequencing<br />
– 4-dye: red-yellow-blue-green<br />
Fragment Analysis<br />
– 4-dye: red-yellow-green-blue<br />
– 5-dye: orange-red-yellow-green-blue<br />
Are peaks in the<br />
wrong order or<br />
extraneous<br />
peaks adversely<br />
affecting the<br />
spectral profile?<br />
Then<br />
Yes The calibration run<br />
has failed. See the<br />
<strong>Applied</strong><br />
Biosystems<br />
<strong>3130</strong>/<strong>3130</strong>xl<br />
<strong>Genetic</strong> <strong>Analyzers</strong><br />
Maintenance,<br />
Troubleshooting,<br />
and Reference<br />
<strong>Guide</strong>.<br />
No Go to step c.<br />
c. Verify that the peaks in the spectral profile<br />
do not contain gross overlaps, dips, or other<br />
irregularities (see “Magnifying the Spectral<br />
Profile or Raw Data” on page 46).<br />
Are the peaks<br />
separate and<br />
distinct?<br />
Then<br />
Yes The capillary has<br />
passed. Go to<br />
step 5.<br />
No The calibration run<br />
has failed. See the<br />
<strong>Applied</strong><br />
Biosystems<br />
<strong>3130</strong>/<strong>3130</strong>xl<br />
<strong>Genetic</strong> <strong>Analyzers</strong><br />
Maintenance,<br />
Troubleshooting,<br />
and Reference<br />
<strong>Guide</strong>.<br />
Chapter 3 Performing a Spectral Calibration<br />
Evaluating the Spectral Calibration Data<br />
Example of a 4-dye sequencing raw data profile<br />
Orange<br />
Example of a 5-dye fragment analysis raw data profile<br />
<strong>Applied</strong> Biosystems <strong>3130</strong>/<strong>3130</strong>xl <strong>Genetic</strong> <strong>Analyzers</strong> <strong>Getting</strong> <strong>Started</strong> <strong>Guide</strong> 45<br />
Red<br />
Yellow<br />
Red Yellow<br />
Blue Green<br />
Green<br />
Blue<br />
Peaks are distinct, regular and in the proper order – pass<br />
Red peak is not distinct, regular or in the proper order – fail<br />
3
Notes<br />
Chapter 3 Performing a Spectral Calibration<br />
Evaluating the Spectral Calibration Data<br />
5. Repeat steps 3 and 4 for each capillary in the<br />
array.<br />
6. Optional: Rename the spectral run. The spectral<br />
file default name is the day, date, and time of the<br />
run.<br />
a. Click .<br />
b. In the Rename Calibration dialog box, enter<br />
a descriptive name for the spectral<br />
calibration including the dye set, array<br />
length and polymer type (optional).<br />
c. Click .<br />
Magnifying the Spectral Profile or Raw Data<br />
1. In the tree pane of the Data Collection<br />
software, click<br />
GA Instruments > ga<strong>3130</strong>xl or<br />
ga<strong>3130</strong> > instrument<br />
name > Spectral Viewer.<br />
2. In the spectral profile or raw data display,<br />
click-drag the cursor to create a box<br />
around the area of interest.<br />
3. Release the mouse button.<br />
The Data Collection software displays the<br />
selected region.<br />
4. Press r to reset the view.<br />
Selecting an area to magnify in a spectral profile<br />
Magnified area of that spectral profile<br />
46 <strong>Applied</strong> Biosystems <strong>3130</strong>/<strong>3130</strong>xl <strong>Genetic</strong> <strong>Analyzers</strong> <strong>Getting</strong> <strong>Started</strong> <strong>Guide</strong><br />
DRAFT<br />
November 16, 2004 2:09 pm, 03_SpectralCal.fm
DRAFT<br />
November 16, 2004 2:09 pm, 03_SpectralCal.fm<br />
Activating a Spectral Calibration<br />
Setting an Active<br />
Spectral<br />
Calibration<br />
Notes<br />
Chapter 3 Performing a Spectral Calibration<br />
Activating a Spectral Calibration<br />
IMPORTANT! A run cannot start unless a calibration file that matches the dye set and<br />
capillary array length combination to be used for the run, is active.<br />
IMPORTANT! While the software does not force you to recalibrate spectrally after<br />
changing polymer types, it is strongly recommended that you perform a spectral<br />
calibration after a polymer type change.<br />
IMPORTANT! Whenever you install or replace an array or switch dye sets, you must<br />
either set the active spectral calibration for that dye set and array length combination or<br />
perform a new spectral calibration and then activate it.<br />
IMPORTANT! Every new spectral calibration is automatically the active one for that dye<br />
set.<br />
You may activate a previously created spectral calibration for a run as long as the<br />
calibration matches the dye set and array length combination (and, for fragment analysis,<br />
the polymer type) that you wish to use. Use an active spectral calibration for:<br />
Sequencing analysis applications that require a separate spectral calibration (for the<br />
same dye set) for different capillary array lengths and polymer type<br />
Fragment analysis applications that require a separate spectral calibration (for the<br />
same dye set) for different capillary array lengths and polymer type<br />
Repeat spectral calibrations where the original calibration is better than the second<br />
one<br />
1. In the tree pane of the Data Collection software, click<br />
GA Instruments > ga<strong>3130</strong>xl or ga<strong>3130</strong> > instrument<br />
name > Spectral Viewer.<br />
IMPORTANT! If the Spectral Viewer window is blank and deactivated, then either:<br />
–The spectral calibration for that dye set is not in the database<br />
or,<br />
–You changed the array length and you do not have a spectral calibration file<br />
activated for that dye set and array length combination.<br />
2. In the Dye Set drop-down list, select a dye set.<br />
<strong>Applied</strong> Biosystems <strong>3130</strong>/<strong>3130</strong>xl <strong>Genetic</strong> <strong>Analyzers</strong> <strong>Getting</strong> <strong>Started</strong> <strong>Guide</strong> 47<br />
3
Chapter 3 Performing a Spectral Calibration<br />
Activating a Spectral Calibration<br />
3. In the List of Calibrations for Dye Set drop-down<br />
list, select the spectral calibration you want to<br />
use. The spectral profile and raw data is<br />
displayed.<br />
4. If the spectral calibration is acceptable, then click<br />
. Otherwise, run a new spectral calibration.<br />
Notes<br />
48 <strong>Applied</strong> Biosystems <strong>3130</strong>/<strong>3130</strong>xl <strong>Genetic</strong> <strong>Analyzers</strong> <strong>Getting</strong> <strong>Started</strong> <strong>Guide</strong><br />
DRAFT<br />
November 16, 2004 2:09 pm, 03_SpectralCal.fm
DRAFT<br />
November 16, 2004 2:09 pm, 03_SpectralCal.fm<br />
Chapter 3 Performing a Spectral Calibration<br />
Examples of Passing Sequencing Spectral Calibrations<br />
Examples of Passing Sequencing Spectral Calibrations<br />
Dye Set Z Created<br />
from Matrix<br />
Standard<br />
Dye Set Z Created<br />
from a<br />
Sequencing<br />
Standard<br />
Notes<br />
<strong>Applied</strong> Biosystems <strong>3130</strong>/<strong>3130</strong>xl <strong>Genetic</strong> <strong>Analyzers</strong> <strong>Getting</strong> <strong>Started</strong> <strong>Guide</strong> 49<br />
3
Dye Set E Created<br />
from Matrix<br />
Standard Set<br />
DS-01<br />
Dye Set E Created<br />
from a<br />
Sequencing<br />
Standard<br />
Notes<br />
Chapter 3 Performing a Spectral Calibration<br />
Examples of Passing Sequencing Spectral Calibrations<br />
50 <strong>Applied</strong> Biosystems <strong>3130</strong>/<strong>3130</strong>xl <strong>Genetic</strong> <strong>Analyzers</strong> <strong>Getting</strong> <strong>Started</strong> <strong>Guide</strong><br />
DRAFT<br />
November 16, 2004 2:09 pm, 03_SpectralCal.fm
DRAFT<br />
November 16, 2004 2:09 pm, 03_SpectralCal.fm<br />
Chapter 3 Performing a Spectral Calibration<br />
Examples of Passing Fragment Analysis Spectral Calibrations<br />
Examples of Passing Fragment Analysis Spectral<br />
Calibrations<br />
Dye Set G5<br />
Created from<br />
Matrix Standard<br />
Set DS-33<br />
Dye Set F Created<br />
from Matrix<br />
Standard Set<br />
DS-32<br />
Notes<br />
<strong>Applied</strong> Biosystems <strong>3130</strong>/<strong>3130</strong>xl <strong>Genetic</strong> <strong>Analyzers</strong> <strong>Getting</strong> <strong>Started</strong> <strong>Guide</strong> 51<br />
3
Chapter 3 Performing a Spectral Calibration<br />
Examples of Passing Fragment Analysis Spectral Calibrations<br />
Dye Set D<br />
Created from<br />
Matrix Standard<br />
Set DS-30<br />
Dye Set E5<br />
Created from<br />
Matrix Standard<br />
Set DS-02<br />
Notes<br />
52 <strong>Applied</strong> Biosystems <strong>3130</strong>/<strong>3130</strong>xl <strong>Genetic</strong> <strong>Analyzers</strong> <strong>Getting</strong> <strong>Started</strong> <strong>Guide</strong><br />
DRAFT<br />
November 16, 2004 2:09 pm, 03_SpectralCal.fm
DRAFT<br />
November 3, 2004 9:51 am, 04_SWSetup_Seq.fm<br />
Notes<br />
Preparing the<br />
Instrument<br />
Performing a<br />
Spatial Calibration<br />
Performing a<br />
Spectral Calibration<br />
Autoanalysis<br />
and Sequencing<br />
Analysis<br />
Software<br />
Autoanalysis<br />
and<br />
SeqScape Software<br />
Autoanalysis<br />
and<br />
Fragment Analysis<br />
Running the<br />
Instrument<br />
Chapter 4<br />
Autoanalysis and<br />
Sequencing Analysis Software<br />
Create protocols<br />
for automated<br />
sequencing analysis<br />
Create a<br />
Sequencing Analysis<br />
Plate Record<br />
See page 59<br />
Seepage77<br />
<strong>Applied</strong> Biosystems <strong>3130</strong>/<strong>3130</strong>xl <strong>Genetic</strong> <strong>Analyzers</strong> <strong>Getting</strong> <strong>Started</strong> <strong>Guide</strong> 53<br />
4
Chapter 4 Autoanalysis and Sequencing Analysis Software<br />
Sequencing Analysis Software<br />
Sequencing Analysis Software<br />
Notes<br />
See the <strong>Applied</strong> Biosystems DNA Sequencing Analysis Software v5.1 User <strong>Guide</strong><br />
(P/N 4346366) for details on sequencing analysis or the Sequencing Analysis<br />
Software v5.2 User Bulletin titled New Features (P/N 4358355) for an update on<br />
Sequencing Analysis Software v5.2.<br />
Analyze your sequencing samples automatically using autoanalysis or manually.<br />
Autoanalysis Perform autoanalysis of sequencing samples using features of the <strong>3130</strong>/<strong>3130</strong>xl genetic<br />
analyzer Data Collection software and Sequencing Analysis Software v5.2 or higher.<br />
The Sequencing Analysis Software must be installed and registered with the<br />
<strong>3130</strong>/<strong>3130</strong>xl genetic analyzer Data Collection software before you can create files<br />
required for autoanalysis.<br />
Autoanalysis can only be performed on the same computer that collected the sample<br />
files. If you perform autoanalysis on samples, but wish to edit/review results on another<br />
computer, transfer the analysis protocol to the Sequencing Analysis Software database.<br />
To analyze samples on another computer, transfer the files to that location.<br />
Manual Analysis If the run is not set up for autoanalysis, see the <strong>Applied</strong> Biosystems DNA Sequencing<br />
Analysis Software v5.1 User <strong>Guide</strong> and the Sequencing Analysis Software v5.2 User<br />
Bulletin - New Features.<br />
File-Naming<br />
Convention<br />
Some alphanumeric characters are not valid for user names or file names. Do not use the<br />
characters below:<br />
spaces<br />
\ / : * ? " < > |<br />
IMPORTANT! An error message is displayed if you use any of these characters. You<br />
must remove the invalid character to continue.<br />
54 <strong>Applied</strong> Biosystems <strong>3130</strong>/<strong>3130</strong>xl <strong>Genetic</strong> <strong>Analyzers</strong> <strong>Getting</strong> <strong>Started</strong> <strong>Guide</strong><br />
DRAFT<br />
November 3, 2004 9:51 am, 04_SWSetup_Seq.fm
DRAFT<br />
November 3, 2004 9:51 am, 04_SWSetup_Seq.fm<br />
Notes<br />
Chapter 4 Autoanalysis and Sequencing Analysis Software<br />
About Plate Records and Sequencing Analysis<br />
About Plate Records and Sequencing Analysis<br />
Overview Plate records are data tables in the instrument database that contain the following<br />
information:<br />
When to Create a<br />
Plate Record<br />
About a<br />
Sequencing<br />
Analysis Plate<br />
Record<br />
Plate name, type, and owner<br />
Position of the sample on the plate (well number)<br />
Sample Name<br />
Mobility file (in Analysis Protocol)<br />
Comments about the plate and about individual samples<br />
Name of the run module and Dye set information (run modules specify the<br />
conditions to run the samples)<br />
Name of the Analysis Protocol<br />
Note: A plate record is similar to a sample sheet or an injection list that you may have<br />
used with other ABI PRISM ® instruments.<br />
Create a plate record for each plate of samples for the following types of runs:<br />
Spectral calibrations<br />
Sequencing Analysis Software<br />
SeqScape Software analysis<br />
GeneMapper ® software<br />
Mixed (sequencing and fragment analysis samples - see the <strong>Applied</strong> Biosystems<br />
<strong>3130</strong>/<strong>3130</strong>xl <strong>Genetic</strong> <strong>Analyzers</strong> Maintenance, Troubleshooting, and Reference<br />
<strong>Guide</strong> for creating a mixed plate record)<br />
For runs to begin, you must create a plate record for and link it to a plate loaded on the<br />
instrument. However, you can create plate records for new plates while a run is in<br />
progress.<br />
The Plate Editor displays an empty plate record for the application selected in the New<br />
Plate dialog box. The data fields within a given plate record vary depending on the<br />
selected application. This section describes the sequencing analysis plate record’s data<br />
fields.<br />
The table below describes required plate editor fields:<br />
Parameters Description See Page<br />
Instrument Protocol Contains the run module and dye set needed to run the<br />
instrument.<br />
Analysis Protocol Contains everything needed to analyze sequencing<br />
data.<br />
Results Group Defines the file type, the file name, file save locations,<br />
analysis software and autoanalysis.<br />
<strong>Applied</strong> Biosystems <strong>3130</strong>/<strong>3130</strong>xl <strong>Genetic</strong> <strong>Analyzers</strong> <strong>Getting</strong> <strong>Started</strong> <strong>Guide</strong> 55<br />
59<br />
62<br />
70<br />
4
Notes<br />
Chapter 4 Autoanalysis and Sequencing Analysis Software<br />
About Plate Records and Sequencing Analysis<br />
Elements of a Sequencing Analysis Plate Record<br />
Results Group<br />
Results Group<br />
Name<br />
Analysis software<br />
and autoanalysis<br />
File storage<br />
location<br />
File and run folder<br />
name preferences<br />
Plate Manager<br />
Plate Record<br />
Instrument Protocol<br />
Instrument<br />
Protocol Name<br />
Run type<br />
(Regular)<br />
Run module<br />
Dye set<br />
Analysis Protocol<br />
Analysis Protocol<br />
Name<br />
Basecaller and<br />
DyeSet/Primer file<br />
Bases called<br />
(pure or mixed)<br />
Assigning Quality<br />
Values (QVs)<br />
Post processing<br />
(clear range<br />
trimming)<br />
IMPORTANT! For data collection and autoanalysis to succeed, each run of samples must<br />
have an Instrument Protocol, an Analysis Protocol, and a Results Group assigned within<br />
a plate record.<br />
56 <strong>Applied</strong> Biosystems <strong>3130</strong>/<strong>3130</strong>xl <strong>Genetic</strong> <strong>Analyzers</strong> <strong>Getting</strong> <strong>Started</strong> <strong>Guide</strong><br />
DRAFT<br />
November 3, 2004 9:51 am, 04_SWSetup_Seq.fm
DRAFT<br />
November 3, 2004 9:51 am, 04_SWSetup_Seq.fm<br />
Notes<br />
A Blank<br />
Sequencing<br />
Analysis Plate<br />
Record<br />
Chapter 4 Autoanalysis and Sequencing Analysis Software<br />
About Plate Records and Sequencing Analysis<br />
1 2 3 4 5 6<br />
Columns inserted in a plate record for a sequencing analysis run<br />
Number and<br />
Column<br />
1. Sample Name Name of the sample<br />
Default is one sample run, to add<br />
additional runs see page 79<br />
Description<br />
2. Comment Comments about the sample (optional)<br />
3. Priority A default value of 100 to each sample. Changing the value to a<br />
smaller number increases the priority of that set of 16 or 4 samples to<br />
run before the others in the injection list.<br />
4. Results Group Some options:<br />
New: Opens the Results Group Editor dialog box<br />
Edit: Opens the Results Group Editor dialog box for the Results<br />
Group listed in the cell<br />
None: Sets the cell to have no selected Results Group<br />
Select one of the available Results groups from the list<br />
Note: You must have a Results Group selected for each sample<br />
entered in the Sample Name column.<br />
See “Results Group for Sequencing Analysis” on page 70.<br />
<strong>Applied</strong> Biosystems <strong>3130</strong>/<strong>3130</strong>xl <strong>Genetic</strong> <strong>Analyzers</strong> <strong>Getting</strong> <strong>Started</strong> <strong>Guide</strong> 57<br />
4
Notes<br />
Chapter 4 Autoanalysis and Sequencing Analysis Software<br />
About Plate Records and Sequencing Analysis<br />
Number and<br />
Column<br />
5. Instrument<br />
Protocol<br />
Description<br />
New: Opens the Protocol Editor dialog box.<br />
Edit: Opens the Protocol Editor dialog box for the Instrument<br />
Protocol listed in the cell.<br />
None: Sets the cell to have no selected protocol.<br />
List of Instrument Protocols: In alpha-numeric order.<br />
Note: You must have an Instrument Protocol selected for each<br />
sample entered in the Sample Name column.<br />
See “Instrument Protocol for Sequencing Analysis” on page 59.<br />
6. Analysis Protocol New: Opens the Analysis Protocol Editor dialog box.<br />
Edit: Opens the Analysis Protocol Editor dialog box for the<br />
Instrument Protocol listed in the cell.<br />
None: Sets the cell to have no selected protocol.<br />
List of Analysis Protocols: In alpha-numeric order<br />
Note: You must have an Analysis Protocol selected for each sample<br />
entered in the Sample Name column.<br />
See “Analysis Protocol for Sequencing Analysis” on page 62.<br />
58 <strong>Applied</strong> Biosystems <strong>3130</strong>/<strong>3130</strong>xl <strong>Genetic</strong> <strong>Analyzers</strong> <strong>Getting</strong> <strong>Started</strong> <strong>Guide</strong><br />
DRAFT<br />
November 3, 2004 9:51 am, 04_SWSetup_Seq.fm
DRAFT<br />
November 3, 2004 9:51 am, 04_SWSetup_Seq.fm<br />
Notes<br />
Chapter 4 Autoanalysis and Sequencing Analysis Software<br />
Creating Protocols for Automated Sequencing Analysis<br />
Creating Protocols for Automated Sequencing Analysis<br />
If the appropriate instrument protocol, analysis<br />
protocol, and results group have been created, proceed<br />
to “Filling Out a Sequencing Analysis Plate Record”<br />
on page 77.<br />
Instrument Protocol for Sequencing Analysis<br />
An instrument protocol contains all the settings<br />
necessary to run the instrument: the protocol name,<br />
type of run, run module, and dye set.<br />
Do not edit the instrument<br />
protocol currently being used, while the instrument is<br />
running.<br />
Creating an Instrument Protocol<br />
1. In the tree pane of the Data Collection software,<br />
click GA Instruments > ga<strong>3130</strong>xl or<br />
ga<strong>3130</strong> > Protocol Manager.<br />
Create instrument<br />
protocols here<br />
Create analysis<br />
protocols here<br />
<strong>Applied</strong> Biosystems <strong>3130</strong>/<strong>3130</strong>xl <strong>Genetic</strong> <strong>Analyzers</strong> <strong>Getting</strong> <strong>Started</strong> <strong>Guide</strong> 59<br />
4
Notes<br />
Chapter 4 Autoanalysis and Sequencing Analysis Software<br />
Creating Protocols for Automated Sequencing Analysis<br />
2. In the Instrument Protocol section, click<br />
.<br />
The Protocol Editor opens.<br />
3. Complete the Protocol Editor:<br />
a. Type a name for the protocol.<br />
b. Type a description for the protocol<br />
(optional).<br />
c. Select Regular in the Type drop-down list.<br />
d. Select the correct run module for your run.<br />
See “Sequencing Resolution Performance<br />
and Specifications” on page 3.<br />
Note: To customize a run module, see the<br />
<strong>Applied</strong> Biosystems <strong>3130</strong>/<strong>3130</strong>xl <strong>Genetic</strong><br />
<strong>Analyzers</strong> Maintenance, Troubleshooting,<br />
and Reference <strong>Guide</strong>.<br />
60 <strong>Applied</strong> Biosystems <strong>3130</strong>/<strong>3130</strong>xl <strong>Genetic</strong> <strong>Analyzers</strong> <strong>Getting</strong> <strong>Started</strong> <strong>Guide</strong><br />
3a<br />
3b<br />
3c<br />
3d<br />
3e<br />
3f<br />
DRAFT<br />
November 3, 2004 9:51 am, 04_SWSetup_Seq.fm
DRAFT<br />
November 3, 2004 9:51 am, 04_SWSetup_Seq.fm<br />
Notes<br />
e. Select the correct Dye Set for your run by<br />
using the table below.<br />
f. Click .<br />
Importing an Instrument Protocol<br />
1. Click in the Instrument Protocols pane<br />
of the Protocol Editor window to display the<br />
standard File Import dialog box.<br />
2. Navigate to the location of the .xml file you want<br />
to import.<br />
3. Select the .xml file and click Open.<br />
Exporting an Instrument Protocol<br />
1. In the Instrument Protocols pane, highlight the<br />
protocol you want to export.<br />
2. Click to display the standard File<br />
Export dialog box.<br />
3. Browse to the desired folder location.<br />
4. Click .<br />
Chemistry Dye Set<br />
BigDye ® Terminator v3.1 Cycle Sequencing Kit Z_BigDye<br />
ABI PRISM<br />
V3<br />
® dGTP BigDye ® Terminator v3.0<br />
Cycle Sequencing Ready Reaction Kit<br />
BigDye ® Terminator v1.1 Cycle Sequencing Kit E_BigDye<br />
ABI PRISM<br />
V1<br />
® dGTP BigDye ® Terminator Cycle<br />
Sequencing Kit*<br />
ABI PRISM ® dRhodamine Dye Terminator<br />
Cycle Sequencing Ready Reaction Kit<br />
ABI PRISM ® BigDye ® Primer Cycle Sequencing<br />
Kits<br />
Chapter 4 Autoanalysis and Sequencing Analysis Software<br />
Creating Protocols for Automated Sequencing Analysis<br />
POP-4<br />
Polymer<br />
POP-6<br />
Polymer<br />
POP-7 Polymer<br />
<strong>Applied</strong> Biosystems <strong>3130</strong>/<strong>3130</strong>xl <strong>Genetic</strong> <strong>Analyzers</strong> <strong>Getting</strong> <strong>Started</strong> <strong>Guide</strong> 61<br />
UltraSeq36<br />
StdSeq50<br />
LongSeq80<br />
RapidSeq36<br />
StdSeq50<br />
UltraSeq36<br />
RapidSeq36<br />
FastSeq50<br />
StdSeq50<br />
✓ ✓ ✓ ✓ ✓ ✓ ✓ ✓ ✓ ✓<br />
— — — — — — — — — —<br />
✓ ✓ ✓ ✓ ✓ ✓ ✓ ✓ ✓ ✓<br />
— — — — — — — — — —<br />
✓ ✓ ✓ ✓ ✓ — — — — —<br />
— — — ✓ ✓ — — — — —<br />
*dGTP kits are not supported on capillary electrophoresis instruments due to compressions on certain sequence context regions; you can<br />
run the kits if you do not care about the compression issues.<br />
LongSeq80<br />
4
Chapter 4 Autoanalysis and Sequencing Analysis Software<br />
Analysis Protocol for Sequencing Analysis<br />
Analysis Protocol for Sequencing Analysis<br />
An analysis protocol contains all the settings<br />
necessary for analysis and post processing:<br />
Notes<br />
Protocol name – The name, description of the<br />
analysis protocol, and the sequence file formats<br />
to be used<br />
Basecalling settings – The basecaller,<br />
DyeSet/Primer file, and analysis stop point to be<br />
used<br />
Mixed Bases (Optional) – When two bases are<br />
found at the same position. Define the percent<br />
value of the second highest to the highest peak<br />
Clear Range – The high quality sequence<br />
remaining after trimming low quality sequences<br />
typically found at the beginning and ends of the<br />
sequence. The clear range can be based on base<br />
positions, sample quality values, and/or number<br />
of ambiguities (Ns) present<br />
Note: If you created an appropriate analysis protocol<br />
in the Sequencing Analysis software, you can use it in<br />
Data Collection software.<br />
IMPORTANT! Do not delete an analysis protocol<br />
during a run while it is being used for that run.<br />
Autoanalysis will not be performed if you do so.<br />
Creating an Analysis Protocol<br />
See the <strong>Applied</strong> Biosystems DNA Sequencing Analysis<br />
Software v5.2 User <strong>Guide</strong> (P/N 4346366) for more<br />
information on analysis protocols.<br />
1. In the Analysis Protocol section of the Protocol<br />
Manager, click .<br />
If more than one analysis application is installed<br />
on the data collection computer, the Analysis<br />
Applications dialog box opens.<br />
Note: When you name your analysis protocol,<br />
assign a version name to help you distinguish<br />
your analysis protocols.<br />
62 <strong>Applied</strong> Biosystems <strong>3130</strong>/<strong>3130</strong>xl <strong>Genetic</strong> <strong>Analyzers</strong> <strong>Getting</strong> <strong>Started</strong> <strong>Guide</strong><br />
DRAFT<br />
November 3, 2004 9:51 am, 04_SWSetup_Seq.fm
DRAFT<br />
November 3, 2004 9:51 am, 04_SWSetup_Seq.fm<br />
2. Select Sequencing Analysis, then click<br />
to open the Analysis Protocol Editor dialog box.<br />
3. In the General tab:<br />
Notes<br />
a. Enter a unique name and description for the<br />
new protocol.<br />
b. Select the appropriate Sequence File<br />
formats settings.<br />
Option Creates…<br />
Write .Seq File<br />
check box<br />
Write Standard<br />
Chromatogram<br />
Format file<br />
(.scf)<br />
Write Phred<br />
(.phd.1) File<br />
A .seq file for printing the<br />
sequence as text file or for<br />
use in other software.<br />
Use ABI format with<br />
<strong>Applied</strong> Biosystems<br />
software.<br />
Use FASTA format with<br />
other software.<br />
A .scf file to use with other<br />
software. When created,<br />
the .scf extension is not<br />
appended to the file name.<br />
A .phd.1 file to use with<br />
other software if you used<br />
the KB basecaller.<br />
Chapter 4 Autoanalysis and Sequencing Analysis Software<br />
Analysis Protocol for Sequencing Analysis<br />
<strong>Applied</strong> Biosystems <strong>3130</strong>/<strong>3130</strong>xl <strong>Genetic</strong> <strong>Analyzers</strong> <strong>Getting</strong> <strong>Started</strong> <strong>Guide</strong> 63<br />
3a<br />
3b<br />
4
Chapter 4 Autoanalysis and Sequencing Analysis Software<br />
Analysis Protocol for Sequencing Analysis<br />
4. Select the Basecalling tab.<br />
Notes<br />
a. See “<strong>3130</strong>/<strong>3130</strong>xl <strong>Genetic</strong> Analyzer<br />
Basecaller and DyeSet/Primer Files” on<br />
page 66 to select your basecaller and<br />
DyeSet primer file.<br />
Note: Sequencing Analysis Software and<br />
<strong>3130</strong>/<strong>3130</strong>xl genetic analyzer Data<br />
Collection software filter .mob file choices<br />
to match the chosen .bcp file.<br />
b. In the Processed data pane, select True or<br />
Flat Profile.<br />
Option Used to display data as processed traces scaled...<br />
c. If desired, select one or more stop points for<br />
data analysis.<br />
d. Select your Threshold Quality option.<br />
Uniformly - the average height of peaks in the region of strongest signal is about<br />
equal to a fixed value. The profile of the processed traces will be very similar to<br />
that of the raw traces.<br />
Semi-locally - the average height of peaks in any region is about equal to a fixed<br />
value. The profile of the processed traces will be flat on an intermediate scale (><br />
about 40 bases).<br />
Note: This option is applied to data that is analyzed with the KB basecaller<br />
only. If you use the ABI basecaller, the profile option reverts to True Profile.<br />
Option Function<br />
With the KB basecaller, use this setting to assign a base to every<br />
position, as well as the QV.<br />
With the KB basecaller, use this setting to assign Ns to base with<br />
QVs less than the set point. The QV is still displayed.<br />
64 <strong>Applied</strong> Biosystems <strong>3130</strong>/<strong>3130</strong>xl <strong>Genetic</strong> <strong>Analyzers</strong> <strong>Getting</strong> <strong>Started</strong> <strong>Guide</strong><br />
4d<br />
4a<br />
4b<br />
4c<br />
DRAFT<br />
November 3, 2004 9:51 am, 04_SWSetup_Seq.fm
DRAFT<br />
November 3, 2004 9:51 am, 04_SWSetup_Seq.fm<br />
5. Select the Mixed Bases tab.<br />
Notes<br />
Note: This function is active with the KB<br />
Basecaller only.<br />
a. For mixed bases only, select Use Mixed<br />
Base Identification.<br />
b. Use the default setting of 25% or change the<br />
detection level by entering a new value or<br />
dragging the % line up or down.<br />
Note: Do not use less than 15% as your<br />
detection limit.<br />
6. Select the Clear Range tab.<br />
Note: The clear range is the region of sequence<br />
that remains after excluding the low-quality or<br />
error prone sequence at both the 5´ and 3´ ends.<br />
Select one or more Clear Range methods. If you<br />
apply multiple methods, the smallest clear range<br />
results.<br />
7. Click to save the protocol and close the<br />
Sequence Analysis Protocol Editor dialog box.<br />
Chapter 4 Autoanalysis and Sequencing Analysis Software<br />
Analysis Protocol for Sequencing Analysis<br />
Use with ABI and<br />
KB Basecallers<br />
Use with<br />
KB Basecaller<br />
Use with ABI and<br />
KB Basecallers<br />
<strong>Applied</strong> Biosystems <strong>3130</strong>/<strong>3130</strong>xl <strong>Genetic</strong> <strong>Analyzers</strong> <strong>Getting</strong> <strong>Started</strong> <strong>Guide</strong> 65<br />
5a<br />
5b<br />
4
Chapter 4 Autoanalysis and Sequencing Analysis Software<br />
Analysis Protocol for Sequencing Analysis<br />
<strong>3130</strong>/<strong>3130</strong>xl <strong>Genetic</strong> Analyzer Basecaller and DyeSet/Primer Files<br />
Basecaller and DyeSet/Primer Files Used with BigDye ® Terminator Chemistry and KB Basecalling<br />
Notes<br />
DNA Sequencing<br />
Chemistry<br />
BigDye ® Terminator v1.1<br />
Cycle Sequencing Kit<br />
BigDye ® Terminator v3.1<br />
Cycle Sequencing Kit<br />
Polymer<br />
KB Basecalling Run<br />
Module<br />
DyeSet/Primer Basecaller<br />
POP-4 UltraSeq36_POP4 KB_<strong>3130</strong>_POP4_BDTv1.mob KB.bcp<br />
StdSeq50_POP4<br />
LongSeq80_POP4<br />
POP-6 RapidSeq36_POP6 KB_<strong>3130</strong>_POP6_BDTv1.mob<br />
StdSeq50_POP6<br />
POP-7 UltraSeq36_POP7 KB_<strong>3130</strong>_POP7_BDTv1.mob<br />
RapidSeq36_POP7<br />
FastSeq50_POP7<br />
StdSeq50_POP7<br />
LongSeq80_POP7<br />
POP-4 UltraSeq36_POP4 KB_<strong>3130</strong>_POP4_BDTv3_.mob<br />
StdSeq50_POP4<br />
LongSeq80_POP4<br />
POP-6 RapidSeq36_POP6 KB_<strong>3130</strong>_POP6_BDTv3.mob<br />
StdSeq50_POP6<br />
POP-7 UltraSeq36_POP7 KB_<strong>3130</strong>_POP7_BDTv3.mob<br />
RapidSeq36_POP7<br />
FastSeq50_POP7<br />
StdSeq50_POP7<br />
LongSeq80_POP7<br />
Basecaller and DyeSet/Primer Files Used with BigDye ® Terminator Chemistry and ABI Basecalling<br />
DNA<br />
Sequencing<br />
Chemistry<br />
BigDye ®<br />
Terminator v1.1<br />
Kit<br />
Polymer<br />
ABI Basecalling Run<br />
Module<br />
POP-4 UltraSeq36_POP4 Basecaller-<br />
<strong>3130</strong>POP4UR.bcp<br />
LongSeq80_POP4 Basecaller-<br />
<strong>3130</strong>POP4_80cmv3.bcp<br />
POP-6 RapidSeq36_POP6 Basecaller-<br />
<strong>3130</strong>POP6RRv2.bcp<br />
StdSeq50_POP6 Basecaller-<br />
<strong>3130</strong>POP6SR.bcp<br />
Basecaller DyeSet/Primer<br />
DT<strong>3130</strong>POP4LR{BD}v1.<br />
mob<br />
DT<strong>3130</strong>POP6{BD}v2.mob<br />
66 <strong>Applied</strong> Biosystems <strong>3130</strong>/<strong>3130</strong>xl <strong>Genetic</strong> <strong>Analyzers</strong> <strong>Getting</strong> <strong>Started</strong> <strong>Guide</strong><br />
DRAFT<br />
November 3, 2004 9:51 am, 04_SWSetup_Seq.fm
DRAFT<br />
November 3, 2004 9:51 am, 04_SWSetup_Seq.fm<br />
Chapter 4 Autoanalysis and Sequencing Analysis Software<br />
Analysis Protocol for Sequencing Analysis<br />
Basecaller and DyeSet/Primer Files Used with BigDye ® Terminator Chemistry and ABI Basecalling (continued)<br />
BigDye<br />
Terminator v3.1<br />
Cycle<br />
Sequencing Kit<br />
ABI PRISM ®<br />
dRhodamine<br />
Dye Terminator<br />
Cycle<br />
Sequencing<br />
Ready Reaction<br />
Kit<br />
Dye Primer Chemistry<br />
Notes<br />
POP-4 UltraSeq36_POP4 Basecaller-<br />
<strong>3130</strong>POP4UR.bcp<br />
LongSeq80_POP4 Basecaller-<br />
<strong>3130</strong>POP4_80cmv3.bcp<br />
POP-6 RapidSeq36_POP6 Basecaller-<br />
<strong>3130</strong>POP6RRv2.bcp<br />
StdSeq50_POP6 Basecaller-<br />
<strong>3130</strong>POP6SRv2.bcp<br />
POP-4 UltraSeq36_POP4 Basecaller-<br />
<strong>3130</strong>APOP4UR.bcp<br />
LongSeq80_POP4 Basecaller-<br />
<strong>3130</strong>POP4_80cmv3.bcp<br />
POP-6 RapidSeq36_POP6 Basecaller-<br />
<strong>3130</strong>POP6RRv2.bcp<br />
StdSeq50_POP6 Basecaller-<br />
<strong>3130</strong>POP6SR.bcp<br />
Basecaller and DyeSet/Primer Files Used for Dye Primer Chemistry<br />
DNA<br />
Sequencing<br />
Chemistry<br />
ABI PRISM ®<br />
BigDye ® Primer<br />
Cycle<br />
Sequencing Kit<br />
Polymer<br />
ABI Basecalling Run<br />
Module<br />
POP-6 RapidSeq36_POP6 Basecaller-<br />
<strong>3130</strong>POP6RRv2.bcp<br />
StdSeq50_POP6 Basecaller-<br />
<strong>3130</strong>POP6SR.bcp<br />
DT<strong>3130</strong>POP4{BDv3}v1.m<br />
ob<br />
DT<strong>3130</strong>POP6{BDv3}v1.m<br />
ob<br />
DT<strong>3130</strong>POP4{dRhod}v2.<br />
mob<br />
DT<strong>3130</strong>POP6{dRhod}v2.<br />
mob<br />
Basecaller DyeSet/Primer<br />
DP<strong>3130</strong>POP6{BD<br />
-21M13}v1.mob<br />
DP<strong>3130</strong>POP6{BD<br />
-21M13<strong>Rev</strong>}v1.mob<br />
<strong>Applied</strong> Biosystems <strong>3130</strong>/<strong>3130</strong>xl <strong>Genetic</strong> <strong>Analyzers</strong> <strong>Getting</strong> <strong>Started</strong> <strong>Guide</strong> 67<br />
4
Chapter 4 Autoanalysis and Sequencing Analysis Software<br />
Analysis Protocol for Sequencing Analysis<br />
Editing and Deleting Analysis Protocols<br />
Editing an Analysis Protocol<br />
1. In the Analysis Protocols pane in the Analysis<br />
Protocol Manager, highlight the protocol you<br />
want to edit.<br />
2. Click .<br />
3. Make changes in the General, Basecalling,<br />
Mixed Bases and Clear Range tabs, if<br />
appropriate.<br />
4. Click to save the protocol and close the<br />
Analysis Protocol Editor dialog box.<br />
Deleting an Analysis Protocol<br />
IMPORTANT! Do not delete an analysis protocol<br />
during a run while it is being used for that run.<br />
Autoanalysis will not be performed if you do so. You<br />
must first delete any plate records using the analysis<br />
protocol before you can delete or modify the<br />
analysis protocol for these plate records.<br />
1. In the Analysis Protocols pane in the Analysis<br />
Protocol Manager, highlight the protocol you<br />
want to delete.<br />
2. Click to display the Deletion<br />
Confirmation dialog box.<br />
3. Click .<br />
Notes<br />
68 <strong>Applied</strong> Biosystems <strong>3130</strong>/<strong>3130</strong>xl <strong>Genetic</strong> <strong>Analyzers</strong> <strong>Getting</strong> <strong>Started</strong> <strong>Guide</strong><br />
DRAFT<br />
November 3, 2004 9:51 am, 04_SWSetup_Seq.fm
DRAFT<br />
November 3, 2004 9:51 am, 04_SWSetup_Seq.fm<br />
Exporting an Analysis Protocol<br />
1. In the Analysis Protocols pane in the Analysis<br />
Protocol Manager, highlight the protocol you<br />
want to export.<br />
2. Click to display the standard File<br />
Export dialog box.<br />
3. Browse to the desired folder location.<br />
4. Click Save.<br />
Importing an Analysis Protocol<br />
1. Click to display the standard File<br />
Import dialog box.<br />
2. Browse for the .xml file to import and click<br />
Open.<br />
Notes<br />
Note: For multiple applications, select the<br />
appropriate application to associate with the<br />
analysis protocol.<br />
Chapter 4 Autoanalysis and Sequencing Analysis Software<br />
Analysis Protocol for Sequencing Analysis<br />
<strong>Applied</strong> Biosystems <strong>3130</strong>/<strong>3130</strong>xl <strong>Genetic</strong> <strong>Analyzers</strong> <strong>Getting</strong> <strong>Started</strong> <strong>Guide</strong> 69<br />
4
Notes<br />
Chapter 4 Autoanalysis and Sequencing Analysis Software<br />
Results Group for Sequencing Analysis<br />
Results Group for Sequencing Analysis<br />
A Results Group is a component within Data<br />
Collection that organizes samples and certain user<br />
settings under a single name. It is called a Results<br />
Group because it is used to name, sort, and deliver<br />
samples that result from a run.<br />
Creating a Results Group<br />
1. In the tree pane of the Data Collection software,<br />
click GA Instruments > Results Group.<br />
2. Click to display the Results Group Editor<br />
window.<br />
3. Complete the General tab:<br />
a. Type a unique Results Group Name. The<br />
name can be used in grouping sample files.<br />
b. Type a Results Group Owner (optional).<br />
The owner name can be used in naming and<br />
sorting sample files.<br />
c. Type a Results Group Comment (optional).<br />
70 <strong>Applied</strong> Biosystems <strong>3130</strong>/<strong>3130</strong>xl <strong>Genetic</strong> <strong>Analyzers</strong> <strong>Getting</strong> <strong>Started</strong> <strong>Guide</strong><br />
3a<br />
3b<br />
3c<br />
DRAFT<br />
November 3, 2004 9:51 am, 04_SWSetup_Seq.fm
DRAFT<br />
November 3, 2004 9:51 am, 04_SWSetup_Seq.fm<br />
4. Select the Analysis tab, then:<br />
Notes<br />
a. Select Sequencing Analysis from the<br />
Analysis Type drop-down list.<br />
b. In the Analysis Actions section, select Do<br />
Autoanalysis, if you want your data<br />
automatically analyzed after a run.<br />
Note: Login ID and password are not<br />
required for Sequencing Analysis software.<br />
5. Select the Destination tab, then use the default<br />
destination or define a new location for data<br />
storage.<br />
To use … Then …<br />
default location* skip to step 6.<br />
custom location complete steps a-b.<br />
a. Click Use Custom Location, then click<br />
to navigate to a different save<br />
location.<br />
b. Click to test the Location path<br />
name connection:<br />
If it…<br />
Then a message box<br />
displays …<br />
Passes Test succeeded:<br />
.<br />
Fails Test failed:.<br />
*Sample File Destinations<br />
Chapter 4 Autoanalysis and Sequencing Analysis Software<br />
Results Group for Sequencing Analysis<br />
Locations where sample files are placed during extraction:<br />
Default Destination, default folder naming: E:\<strong>Applied</strong>BiosystemsUDC\DataCollection\data\\<br />
\run folder<br />
Default Destination, custom folder naming: E:\<strong>Applied</strong>BiosystemsUDC\DataCollection\data\top custom folder\<br />
subfolders, etc.<br />
Custom Destination, default folder naming: Destination\\\run folder<br />
Custom Destination, custom folder naming: Destination\top customer folder\subfolders, etc.<br />
<strong>Applied</strong> Biosystems <strong>3130</strong>/<strong>3130</strong>xl <strong>Genetic</strong> <strong>Analyzers</strong> <strong>Getting</strong> <strong>Started</strong> <strong>Guide</strong> 71<br />
4a<br />
4b<br />
5a<br />
5b<br />
5c<br />
4
Notes<br />
Chapter 4 Autoanalysis and Sequencing Analysis Software<br />
Results Group for Sequencing Analysis<br />
6. Select the Naming tab.<br />
Use the Naming tab to customize sample file and<br />
run folder names. You have two options:<br />
Use the default names for the folder and<br />
sample file.<br />
Use custom names for the folder and sample<br />
file. See “Optional: Completing Sample File<br />
Name Format Pane” on page 73 for<br />
elements of the Naming tab.<br />
Note: Sample name, run folder name, and path<br />
name, combined, can total no more than 250<br />
characters.<br />
Sample<br />
File Name<br />
Format pane<br />
Run Folder<br />
Name<br />
Format pane<br />
72 <strong>Applied</strong> Biosystems <strong>3130</strong>/<strong>3130</strong>xl <strong>Genetic</strong> <strong>Analyzers</strong> <strong>Getting</strong> <strong>Started</strong> <strong>Guide</strong><br />
DRAFT<br />
November 3, 2004 9:51 am, 04_SWSetup_Seq.fm
DRAFT<br />
November 3, 2004 9:51 am, 04_SWSetup_Seq.fm<br />
Optional: Completing Sample File Name<br />
Format Pane<br />
Note: The default sample file naming for sequencing<br />
analysis is:<br />
seq__.ab1<br />
1. Select the Naming tab.<br />
2. Type a prefix for the file name in the Prefix box.<br />
Your entry is shown in the Example line.<br />
3. Select the symbol that separates the Format<br />
elements in the file name from the Name<br />
Delimiter drop-down list. Only one delimiter<br />
symbol may be chosen.<br />
4. Click the Format list and then select the<br />
components that you want in the sample name.<br />
Notes<br />
Note: All the samples from a single run can be<br />
placed in the same run or results folder, so the<br />
name of every sample from a single run should<br />
be different. Most of the Format options are not<br />
different between samples, so select at least one<br />
of the options that make the sample names<br />
unique within a run.<br />
Chapter 4 Autoanalysis and Sequencing Analysis Software<br />
Results Group for Sequencing Analysis<br />
<strong>Applied</strong> Biosystems <strong>3130</strong>/<strong>3130</strong>xl <strong>Genetic</strong> <strong>Analyzers</strong> <strong>Getting</strong> <strong>Started</strong> <strong>Guide</strong> 73<br />
4
Notes<br />
Chapter 4 Autoanalysis and Sequencing Analysis Software<br />
Results Group for Sequencing Analysis<br />
If a unique identifier is not included in the name,<br />
a warning message displays. Select from the<br />
elements to make a unique sample file name.<br />
Examples are:<br />
– Well position<br />
– Capillary number<br />
– Run sequence number<br />
– Plate Quadrant<br />
Note: some identifiers, such as well position,<br />
capillary number and plate quadrant are not<br />
unique in multiple sample instances. Plate<br />
Quadrant is not a unique identifier for a 96-well<br />
plate.<br />
As you select the elements for the file name, they<br />
are placed in the Example line. An additional<br />
element drop-down menu displays allowing you<br />
the option of selecting an additional element.<br />
The names of the Format elements eventually<br />
truncate, but the Example field remains visible<br />
(up to 72 characters).<br />
Note: Resize the Results<br />
Group window horizontally<br />
to view the element options.<br />
Warning message<br />
74 <strong>Applied</strong> Biosystems <strong>3130</strong>/<strong>3130</strong>xl <strong>Genetic</strong> <strong>Analyzers</strong> <strong>Getting</strong> <strong>Started</strong> <strong>Guide</strong><br />
DRAFT<br />
November 3, 2004 9:51 am, 04_SWSetup_Seq.fm
DRAFT<br />
November 3, 2004 9:51 am, 04_SWSetup_Seq.fm<br />
5. Type the suffix for the file name in the Suffix<br />
box.<br />
Notes<br />
Note: The File Extension field displays the file<br />
extension generated from the Analysis Type<br />
specified on the Analysis tab (see page 71). For<br />
example, Sequencing Analysis produces sample<br />
files with an .ab1 extension.<br />
Optional: Run Folder/Sub-Folder Name<br />
Format Pane<br />
Note: The default run folder naming for sequencing<br />
analysis is Run___.<br />
Follow the same steps described for the Sample File<br />
Name Format pane (see page 73) to change the subfolder<br />
name within the run folder. Make the subfolder<br />
name unique, such as using the Run Folder<br />
name.<br />
Saving a Results Group<br />
Click from any tab once all the elements<br />
within the Results Group have been chosen.<br />
Note: Even if you create a custom run folder location,<br />
the system generates a separate default run folder that<br />
contains the log file.<br />
Importing and Exporting a Results Group<br />
Results Groups can be imported from, or exported to,<br />
XML files allowing sharing of identical Results<br />
Groups between instruments.<br />
Importing a Results Group<br />
1. In the tree pane of the Data Collection software,<br />
click GA Instruments > Results Group.<br />
2. Click to display the standard File<br />
Import dialog box.<br />
Chapter 4 Autoanalysis and Sequencing Analysis Software<br />
Results Group for Sequencing Analysis<br />
<strong>Applied</strong> Biosystems <strong>3130</strong>/<strong>3130</strong>xl <strong>Genetic</strong> <strong>Analyzers</strong> <strong>Getting</strong> <strong>Started</strong> <strong>Guide</strong> 75<br />
4
Chapter 4 Autoanalysis and Sequencing Analysis Software<br />
Results Group for Sequencing Analysis<br />
3. Navigate to the file you want to import.<br />
Notes<br />
Note: Import file type is .xml (XML file).<br />
4. Click .<br />
Exporting a Results Group<br />
1. In the tree pane of the Data Collection software,<br />
click GA Instruments > Results Group.<br />
2. Click the Results Group name to select it.<br />
3. Click .<br />
A standard file export dialog box displays with<br />
the chosen Results Group name.<br />
4. Navigate to the location where you want to save<br />
the exported file.<br />
5. Click .<br />
Note: If there is a name conflict with a Results<br />
Group that already exists at the save location,<br />
then duplicate the Results group. Duplication<br />
copies the settings into a similar Results Group<br />
without the risk of user error when copying it<br />
manually (see procedure below).<br />
Duplicating a Results Group<br />
1. Click the Results Group name.<br />
2. Click .<br />
Note: When you duplicate a Results Group, you<br />
are asked to type a name for the new Results<br />
Group and for the analysis application type.<br />
76 <strong>Applied</strong> Biosystems <strong>3130</strong>/<strong>3130</strong>xl <strong>Genetic</strong> <strong>Analyzers</strong> <strong>Getting</strong> <strong>Started</strong> <strong>Guide</strong><br />
DRAFT<br />
November 3, 2004 9:51 am, 04_SWSetup_Seq.fm
DRAFT<br />
November 3, 2004 9:51 am, 04_SWSetup_Seq.fm<br />
Notes<br />
Chapter 4 Autoanalysis and Sequencing Analysis Software<br />
Filling Out a Sequencing Analysis Plate Record<br />
Filling Out a Sequencing Analysis Plate Record<br />
Creating a Sequencing Analysis Plate<br />
Record<br />
1. In the tree pane of the Data Collection software,<br />
click GA Instruments > ga<strong>3130</strong>xl or<br />
ga<strong>3130</strong> > Plate Manager.<br />
2. Click to display the New Plate Dialog<br />
dialog box.<br />
3. Complete the information in the New Plate<br />
Dialog:<br />
a. Type a name for the plate.<br />
b. Type a description for the plate (optional).<br />
c. Select your sequencing application in the<br />
Application drop-down list.<br />
d. Select 96-well or 384-well in the Plate Type<br />
drop-down list.<br />
e. Type a name for the owner and operator.<br />
f. Click to open the Sequencing<br />
Analysis Plate Editor.<br />
<strong>Applied</strong> Biosystems <strong>3130</strong>/<strong>3130</strong>xl <strong>Genetic</strong> <strong>Analyzers</strong> <strong>Getting</strong> <strong>Started</strong> <strong>Guide</strong> 77<br />
3a<br />
3b<br />
3c<br />
3d<br />
3e<br />
3f<br />
3f<br />
4
Notes<br />
Chapter 4 Autoanalysis and Sequencing Analysis Software<br />
Filling Out a Sequencing Analysis Plate Record<br />
Completing a Sequencing Analysis Plate<br />
Record<br />
1. In the Sample Name column of a row, enter a<br />
sample name, then click the next cell. The value<br />
100 automatically displays in the Priority<br />
column.<br />
2. In the Comments column, enter any comments<br />
or notations for the sample.<br />
3. In the Priority column, change the priority value,<br />
if desired. A lower number for each 4 or 16 set,<br />
receives a higher run priority.<br />
4. In the Results Group 1 column, select a group<br />
from the drop-down list (see page 70) or create a<br />
new Results Group.<br />
5. In the Instrument Protocol 1 column, select a<br />
protocol from the drop-down list (see page 59) or<br />
create a new instrument protocol.<br />
6. In the Analysis Protocol 1 column, select a<br />
protocol from the drop-down list (see page 62) or<br />
create a new analysis protocol.<br />
7. Complete the plate record based on the samples<br />
loaded in your plate:<br />
For the single runs that use the same<br />
samples and protocols – Highlight the entire<br />
row, then select Edit > Fill Down Special.<br />
Based on your plate type (96- or 384-well)<br />
and capillary array (16 or 4 capillaries), the<br />
software automatically fills in the<br />
appropriate well numbers for a single run<br />
or<br />
For entire plates that use the same samples<br />
and protocols – Highlight the entire row,<br />
then select Edit > Fill Down to fill down<br />
the entire plate editor.<br />
For plates with different samples and<br />
protocols – complete the entries manually.<br />
1 2 3 4<br />
5 6<br />
78 <strong>Applied</strong> Biosystems <strong>3130</strong>/<strong>3130</strong>xl <strong>Genetic</strong> <strong>Analyzers</strong> <strong>Getting</strong> <strong>Started</strong> <strong>Guide</strong><br />
DRAFT<br />
November 3, 2004 9:51 am, 04_SWSetup_Seq.fm
DRAFT<br />
November 3, 2004 9:51 am, 04_SWSetup_Seq.fm<br />
8. To do more than one injection of the same<br />
sample, select Edit > Add Sample Run.<br />
Results Group, Instrument Protocol and Analysis<br />
Protocol columns are added to the right end of<br />
the plate record.<br />
9. Complete the columns for the additional runs.<br />
10. Click .<br />
Notes<br />
Note: After clicking OK in the Plate Editor, the<br />
completed plate record is stored in the Plate<br />
Manager database.The plate record can be<br />
searched for, edited, duplicated, exported, or<br />
deleted in the Plate Manager.<br />
Chapter 4 Autoanalysis and Sequencing Analysis Software<br />
Filling Out a Sequencing Analysis Plate Record<br />
<strong>Applied</strong> Biosystems <strong>3130</strong>/<strong>3130</strong>xl <strong>Genetic</strong> <strong>Analyzers</strong> <strong>Getting</strong> <strong>Started</strong> <strong>Guide</strong> 79<br />
4
Notes<br />
Chapter 4 Autoanalysis and Sequencing Analysis Software<br />
Filling Out a Sequencing Analysis Plate Record<br />
80 <strong>Applied</strong> Biosystems <strong>3130</strong>/<strong>3130</strong>xl <strong>Genetic</strong> <strong>Analyzers</strong> <strong>Getting</strong> <strong>Started</strong> <strong>Guide</strong><br />
DRAFT<br />
November 3, 2004 9:51 am, 04_SWSetup_Seq.fm
DRAFT<br />
November 3, 2004 9:51 am, 05_SWSetup_SeqScape.fm<br />
Notes<br />
Preparing the<br />
Instrument<br />
Performing a<br />
Spatial Calibration<br />
Performing a<br />
Spectral Calibration<br />
Autoanalysis<br />
and Sequencing<br />
Analysis<br />
Software<br />
Autoanalysis<br />
and<br />
SeqScape Software<br />
Autoanalysis<br />
and<br />
Fragment Analysis<br />
Running the<br />
Instrument<br />
Chapter 5<br />
Autoanalysis and<br />
SeqScape Software<br />
Create protocols<br />
for automated<br />
SeqScape Software Analysis<br />
Create a<br />
SeqScape Software<br />
Plate Record<br />
Seepage88<br />
Seepage101<br />
<strong>Applied</strong> Biosystems <strong>3130</strong>/<strong>3130</strong>xl <strong>Genetic</strong> <strong>Analyzers</strong> <strong>Getting</strong> <strong>Started</strong> <strong>Guide</strong> 81<br />
5
Notes<br />
Chapter 5 Autoanalysis and SeqScape Software<br />
SeqScape Software<br />
SeqScape Software<br />
Analyzing your sequencing samples may be done by autoanalysis or manual analysis.<br />
Autoanalysis Use the ABI PRISM ® SeqScape ® software to automatically analyze <strong>Applied</strong> Biosystems<br />
<strong>3130</strong>/<strong>3130</strong>xl <strong>Genetic</strong> <strong>Analyzers</strong> sequencing data. Perform autoanalysis only on the same<br />
instrument computer that collected the sample files. You can configure the software<br />
packages to perform data collection and then data analysis without requiring user<br />
interaction.<br />
Required<br />
Software<br />
Packages<br />
Install and register the SeqScape software with the <strong>3130</strong>/<strong>3130</strong>xl genetic analyzer Data<br />
Collection software before creating required files for autoanalysis.<br />
See Appendix B in the SeqScape Software User <strong>Guide</strong> v2.5 (P/N 4359442), for more<br />
details on setting up autoanalysis.<br />
Autoanalysis requires three software packages:<br />
<strong>3130</strong>/<strong>3130</strong>xl genetic analyzer Data Collection software<br />
The Data Collection software runs the instrument and collects fluorescent data from<br />
samples. For autoanalysis to occur, the software must communicate with<br />
downstream software.<br />
Analysis parameters used for data collection as well as that created in SeqScape<br />
software are accessible in Data Collection software.<br />
Autoanalysis Manager<br />
The Autoanalysis Manager software is part of the integration between the data<br />
collection, SeqScape, and GeneMapper ® software. It can queue messages and track<br />
their processing status. Each message is considered a batch job, whether it contains<br />
a single sample, samples from a result group, or an entire run of samples.<br />
Autoanalysis Manager is installed by Seqscape or GeneMapper software when<br />
loaded on a system with Data Collection software.<br />
A version of SeqScape software without a user interface<br />
This SeqScape software version is identical to the regular software version except<br />
that there is no user interface. The Autoanalysis Manager opens and uses this<br />
version of software to analyze the data in the projects.<br />
The automated processing version and the standard version of SeqScape software<br />
are installed from the SeqScape Software installation CD.<br />
IMPORTANT! When installing SeqScape software on a computer that is connected to a<br />
<strong>3130</strong>/<strong>3130</strong>xl genetic analyzer, the Data Collection software must be running. Otherwise,<br />
the SeqScape software does not register with the Data Service. See Chapter 2 in the<br />
SeqScape Software User <strong>Guide</strong> v2.5, for information on installing the software.<br />
82 <strong>Applied</strong> Biosystems <strong>3130</strong>/<strong>3130</strong>xl <strong>Genetic</strong> <strong>Analyzers</strong> <strong>Getting</strong> <strong>Started</strong> <strong>Guide</strong><br />
DRAFT<br />
November 16, 2004 2:09 pm, 05_SWSetup_SeqScape.fm
DRAFT<br />
November 3, 2004 9:51 am, 05_SWSetup_SeqScape.fm<br />
Importing Reports<br />
and Projects After<br />
Autoanalysis<br />
Notes<br />
File-Naming<br />
Convention<br />
Chapter 5 Autoanalysis and SeqScape Software<br />
About Plate Records and Seqscape Software<br />
In the SeqScape Software v2.5, select Tools > Options tab.You can set the options to<br />
automatically import:<br />
Reports after autoanalysis<br />
Projects after autoanalysis<br />
See the SeqScape Software User <strong>Guide</strong> v2.5 (P/N 4359442) for more details.<br />
Some alphanumeric characters are not valid for user names or file names. Do not use the<br />
invalid characters below:<br />
spaces<br />
\ / : * ? " < > |<br />
IMPORTANT! An error message is displayed if you use any of these characters. You<br />
must remove the invalid character to continue.<br />
Manual Analysis See the SeqScape Software User <strong>Guide</strong> v2.5 (P/N 4359442) for information on<br />
performing manual analysis.<br />
About Plate Records and Seqscape Software<br />
Requirements Successful automatic analysis requires that:<br />
When to Create a<br />
Plate Record<br />
SeqScape software is installed properly<br />
SeqScape software is registered and the appropriate user IDs have been created<br />
Autoanalysis Manager software is running<br />
The <strong>3130</strong>/<strong>3130</strong>xl genetic analyzer is set up to run, and samples are prepared<br />
Files for a Data Collection software plate record are available:<br />
– An instrument protocol<br />
– An analysis protocol<br />
– A results group assigned within a plate record<br />
Create a plate record for each plate of samples for the following types of runs:<br />
Spectral calibrations<br />
Sequencing Analysis Software<br />
SeqScape Software analysis<br />
GeneMapper ® software<br />
Mixed (sequencing and fragment analysis samples - see the <strong>Applied</strong> Biosystems<br />
<strong>3130</strong>/<strong>3130</strong>xl <strong>Genetic</strong> <strong>Analyzers</strong> Maintenance, Troubleshooting and Reference<br />
<strong>Guide</strong> for creating a mixed plate record)<br />
<strong>Applied</strong> Biosystems <strong>3130</strong>/<strong>3130</strong>xl <strong>Genetic</strong> <strong>Analyzers</strong> <strong>Getting</strong> <strong>Started</strong> <strong>Guide</strong> 83<br />
5
Notes<br />
Chapter 5 Autoanalysis and SeqScape Software<br />
About Plate Records and Seqscape Software<br />
SeqScape<br />
Software Plate<br />
Record Overview<br />
For runs to begin, you must create a plate record for and link it to a plate loaded on the<br />
instrument. However, you can create plate records for new plates while a run is in<br />
progress.<br />
The Plate Editor displays an empty plate record for the application selected in the New<br />
Plate dialog box. The data fields within a given plate record vary depending on the<br />
application. This section describes the SeqScape Plate Record’s data fields.<br />
IMPORTANT! For data collection and SeqScape software autoanalysis to succeed, each<br />
run of samples must have an instrument protocol, an analysis protocol, and a results<br />
group assigned within a plate record. You are also required to have a project, project<br />
template, and specimen information.<br />
The table below describes required plate editor fields.<br />
Parameters Description See Page<br />
Instrument Protocol Contains the run module and dye set needed to run<br />
the instrument.<br />
Created in Data Collection software.<br />
Analysis Protocol Contains everything needed to analyze sequencing<br />
data.<br />
Created in Data Collection software or SeqScape<br />
software. If you prefer to use analysis protocols<br />
created in SeqScape software, then select “Always<br />
use this protocol” - in the SeqScape software<br />
analysis defaults settings.<br />
Results Group Defines the file type, the file name, file save locations,<br />
default analysis protocols linked to sample injections,<br />
and user name and password.<br />
Created in Data Collection software.<br />
Project A group of related sequences that share the same<br />
reference or for which there is no explicit reference.<br />
Project Template Contains a reference data group (RDG), analysis<br />
defaults, and display settings.<br />
Specimen The container that holds all the sample data as<br />
assembled contigs from a biological source or PCR<br />
product<br />
84 <strong>Applied</strong> Biosystems <strong>3130</strong>/<strong>3130</strong>xl <strong>Genetic</strong> <strong>Analyzers</strong> <strong>Getting</strong> <strong>Started</strong> <strong>Guide</strong><br />
88<br />
92<br />
98<br />
See the<br />
SeqScape<br />
Software<br />
User <strong>Guide</strong><br />
v2.5 for more<br />
information<br />
DRAFT<br />
November 3, 2004 9:51 am, 05_SWSetup_SeqScape.fm
DRAFT<br />
November 3, 2004 9:51 am, 05_SWSetup_SeqScape.fm<br />
Elements of a<br />
SeqScape Plate<br />
Record<br />
Notes<br />
Data Collection<br />
software files:<br />
Results Group<br />
Results Group<br />
Name<br />
Analysis software<br />
and autoanalysis<br />
File storage<br />
location<br />
File and run folder<br />
name preferences<br />
Instrument Protocol<br />
Chapter 5 Autoanalysis and SeqScape Software<br />
About Plate Records and Seqscape Software<br />
Instrument<br />
Protocol Name<br />
Run type<br />
(Regular)<br />
Run module<br />
Dye set<br />
Plate Manager<br />
Plate Record<br />
Analysis Protocol*<br />
Analysis Protocol<br />
Name<br />
Basecaller and<br />
DyeSet/Primer file<br />
Bases called<br />
(pure or mixed)<br />
Assigning Quality<br />
Values (QVs)<br />
Post processing<br />
(clear range<br />
trimming)<br />
Filter settings<br />
SeqScape software<br />
files:<br />
Project Template<br />
- Analysis Protocol*<br />
- Analysis Defaults<br />
- RDG<br />
- Display Settings<br />
<strong>Applied</strong> Biosystems <strong>3130</strong>/<strong>3130</strong>xl <strong>Genetic</strong> <strong>Analyzers</strong> <strong>Getting</strong> <strong>Started</strong> <strong>Guide</strong> 85<br />
Project<br />
Specimen<br />
*You can create Analysis Protocols in either<br />
SeqScape or Data Colletion software<br />
5
Notes<br />
Chapter 5 Autoanalysis and SeqScape Software<br />
About Plate Records and Seqscape Software<br />
SeqScape<br />
Software Plate<br />
Record<br />
A Seqscape software plate record displaying the columns and descriptions is shown<br />
below.<br />
Number and Column Description<br />
1. Sample Name Name of the sample.<br />
1 2 3 4 5 6 7 8<br />
9<br />
2. Comment Comments about the sample (optional).<br />
3. Priority A default value of 100 to each sample. Changing the value to a smaller number<br />
causes that set of 16 or 4 samples to run to before the others in the injection list.<br />
4. Project Select one of the available Project from the list that was created in Data Collection or<br />
SeqScape software.<br />
5. Project Template Completed automatically based on the Project selected.<br />
Default is one sample run, to add runs<br />
see page 103<br />
6. Specimen Select one of the available Specimen from the list that was created in Data<br />
Collection or SeqScape software.<br />
86 <strong>Applied</strong> Biosystems <strong>3130</strong>/<strong>3130</strong>xl <strong>Genetic</strong> <strong>Analyzers</strong> <strong>Getting</strong> <strong>Started</strong> <strong>Guide</strong><br />
DRAFT<br />
November 3, 2004 9:51 am, 05_SWSetup_SeqScape.fm
DRAFT<br />
November 3, 2004 9:51 am, 05_SWSetup_SeqScape.fm<br />
Notes<br />
Chapter 5 Autoanalysis and SeqScape Software<br />
About Plate Records and Seqscape Software<br />
Number and Column Description<br />
7. Results Group Some options:<br />
New: Opens the Results Group Editor dialog box<br />
Edit: Opens the Results Group Editor dialog box for the Results Group listed in<br />
the cell<br />
None: Sets the cell to have no selected Results Group<br />
Select one of the available Results groups from the list<br />
Note: You must have a Results Group selected for each sample entered in the<br />
Sample Name column.<br />
See “Creating a Results Group” on page 98.<br />
8. Instrument Protocol New: Opens the Protocol Editor dialog box.<br />
Edit: Opens the Protocol Editor dialog box for the Instrument Protocol listed in<br />
the cell.<br />
None: Sets the cell to have no selected protocol.<br />
List of Instrument Protocols: In alpha-numeric order.<br />
Note: You must have an Instrument Protocol selected for each sample entered in<br />
the Sample Name column.<br />
See “Creating an Instrument Protocol” on page 88.<br />
9. Analysis Protocol New: Opens the Analysis Protocol Editor dialog box.<br />
Edit: Opens the Analysis Protocol Editor dialog box for the Instrument Protocol<br />
listed in the cell.<br />
None: Sets the cell to have no selected protocol.<br />
List of Analysis Protocols: In alpha-numeric order<br />
Note: You must have an Analysis Protocol selected for each sample entered in the<br />
Sample Name column.<br />
See “Creating an Analysis Protocol” on page 93.<br />
<strong>Applied</strong> Biosystems <strong>3130</strong>/<strong>3130</strong>xl <strong>Genetic</strong> <strong>Analyzers</strong> <strong>Getting</strong> <strong>Started</strong> <strong>Guide</strong> 87<br />
5
Notes<br />
Chapter 5 Autoanalysis and SeqScape Software<br />
Creating Protocols for Automated SeqScape Software Analysis<br />
Creating Protocols for Automated SeqScape Software<br />
Analysis<br />
If the appropriate SeqScape software protocols and<br />
results group have been created, proceed to “Filling<br />
Out a SeqScape Software Plate Record” on page 101.<br />
Instrument Protocol for SeqScape Software<br />
An instrument protocol contains all the necessary<br />
settings to run the instrument:<br />
Protocol name<br />
Type of run<br />
Run module<br />
Dye set<br />
Creating an Instrument Protocol<br />
1. In the tree pane of the Data Collection software,<br />
click GA Instruments > ga<strong>3130</strong> or<br />
ga<strong>3130</strong>xl > Protocol Manager.<br />
2. In the Instrument Protocols section, click<br />
to open the Protocol Editor.<br />
Create<br />
instrument<br />
Create analysis<br />
protocols here<br />
88 <strong>Applied</strong> Biosystems <strong>3130</strong>/<strong>3130</strong>xl <strong>Genetic</strong> <strong>Analyzers</strong> <strong>Getting</strong> <strong>Started</strong> <strong>Guide</strong><br />
DRAFT<br />
November 3, 2004 9:51 am, 05_SWSetup_SeqScape.fm
DRAFT<br />
November 3, 2004 9:51 am, 05_SWSetup_SeqScape.fm<br />
3. Complete the Protocol Editor:<br />
Notes<br />
a. Type a name for the protocol.<br />
b. Type a description for the protocol<br />
(optional).<br />
c. Select Regular in the Type drop-down list.<br />
d. Select the correct run module for your run.<br />
See “Sequencing Resolution Performance<br />
and Specifications” on page 3 to see a list of<br />
modules or the <strong>Applied</strong> Biosystems<br />
<strong>3130</strong>/<strong>3130</strong>xl <strong>Genetic</strong> <strong>Analyzers</strong><br />
Maintenance, Troubleshooting and<br />
Reference <strong>Guide</strong> to modify a default<br />
module.<br />
Chapter 5 Autoanalysis and SeqScape Software<br />
Creating Protocols for Automated SeqScape Software Analysis<br />
<strong>Applied</strong> Biosystems <strong>3130</strong>/<strong>3130</strong>xl <strong>Genetic</strong> <strong>Analyzers</strong> <strong>Getting</strong> <strong>Started</strong> <strong>Guide</strong> 89<br />
3a<br />
3b<br />
3c<br />
3d<br />
3e<br />
3f<br />
5
Notes<br />
Chapter 5 Autoanalysis and SeqScape Software<br />
Creating Protocols for Automated SeqScape Software Analysis<br />
e. Select the correct Dye Set for your run using<br />
the table below.<br />
f. Click .<br />
Chemistry Dye Set<br />
BigDye ® Terminator v3.1 Cycle Sequencing Kit Z_BigDye<br />
ABI PRISM<br />
V3<br />
® dGTP BigDye ® Terminator v3.0<br />
Cycle Sequencing Ready Reaction Kit<br />
BigDye ® Terminator v1.1 Cycle Sequencing Kit E_BigDye<br />
ABI PRISM<br />
V1<br />
® dGTP BigDye ® Terminator Cycle<br />
Sequencing Kit*<br />
ABI PRISM ® dRhodamine Dye Terminator Cycle<br />
Sequencing Ready Reaction Kit<br />
ABI PRISM ® BigDye ® Primer Cycle Sequencing<br />
Kits<br />
POP-4<br />
Polymer<br />
POP-6<br />
Polymer<br />
POP-7 Polymer<br />
90 <strong>Applied</strong> Biosystems <strong>3130</strong>/<strong>3130</strong>xl <strong>Genetic</strong> <strong>Analyzers</strong> <strong>Getting</strong> <strong>Started</strong> <strong>Guide</strong><br />
UltraSeq36<br />
StdSeq50<br />
LongSeq80<br />
RapidSeq36<br />
StdSeq50<br />
UltraSeq36<br />
RapidSeq36<br />
FastSeq50<br />
StdSeq50<br />
LongSeq80<br />
✓ ✓ ✓ ✓ ✓ ✓ ✓ ✓ ✓ ✓<br />
— — — — — — — — — —<br />
✓ ✓ ✓ ✓ ✓ ✓ ✓ ✓ ✓ ✓<br />
— — — — — — — — — —<br />
✓ ✓ ✓ ✓ ✓ — — — — —<br />
— — — ✓ ✓ — — — — —<br />
*dGTP kits are not supported on capillary electrophoresis instruments due to compressions on certain sequence context<br />
regions; you can run the kits if you do not care about the compression issues.<br />
DRAFT<br />
November 3, 2004 9:51 am, 05_SWSetup_SeqScape.fm
DRAFT<br />
November 3, 2004 9:51 am, 05_SWSetup_SeqScape.fm<br />
Importing an Instrument Protocol<br />
1. Click in the Instrument Protocols pane<br />
of the Protocol Editor window to display the<br />
standard File Import dialog box.<br />
2. Navigate to the location of the .xml file you want<br />
to import.<br />
3. Select the .xml file and click Open.<br />
Exporting an Instrument Protocol<br />
1. In the Instrument Protocols pane, highlight the<br />
protocol you want to export.<br />
2. Click to display the standard File<br />
Export dialog box.<br />
3. Browse to the desired folder location.<br />
4. Click .<br />
Notes<br />
Chapter 5 Autoanalysis and SeqScape Software<br />
Creating Protocols for Automated SeqScape Software Analysis<br />
<strong>Applied</strong> Biosystems <strong>3130</strong>/<strong>3130</strong>xl <strong>Genetic</strong> <strong>Analyzers</strong> <strong>Getting</strong> <strong>Started</strong> <strong>Guide</strong> 91<br />
5
Chapter 5 Autoanalysis and SeqScape Software<br />
Creating Protocols for Automated SeqScape Software Analysis<br />
Analysis Protocol for SeqScape Software<br />
Notes<br />
About Analysis<br />
Protocols<br />
An analysis protocol contains all the settings necessary for analysis and post processing:<br />
Protocol name – The name, description of the analysis protocol, and the sequence<br />
file formats to be used<br />
Basecalling settings – The basecaller, DyeSet/Primer file, and analysis stop point<br />
to be used<br />
Mixed Bases – (Optional) – When two bases are found at the same position. Define<br />
the percent value of the second highest to the highest peak<br />
Clear Range – The high quality sequence remaining after trimming low quality<br />
sequences typically found at the beginning and ends of the sequence. The clear<br />
range can be based on base positions, sample quality values, and/or number of<br />
ambiguities (Ns) present<br />
Filter – The settings that define which samples will be used in the assembly<br />
Note: If you created an appropriate analysis protocol in the SeqScape software, you can<br />
use it in the Data Collection software. See Appendix B in the SeqScape Software User<br />
<strong>Guide</strong> v2.5 (P/N 4359442) for more information on autoanalysis and analysis protocols.<br />
IMPORTANT! Do not delete the current analysis protocol being used, during a run.<br />
Autoanalysis will not be performed if you do so.<br />
IMPORTANT! You are required to select the Always use this Analysis Protocol in<br />
Analysis Defaults > Analysis Protocol in the Seqscape software if you want to use it for<br />
SeqScape analysis. See the SeqScape Software User <strong>Guide</strong> v2.5 (P/N 4359442) for more<br />
information.<br />
92 <strong>Applied</strong> Biosystems <strong>3130</strong>/<strong>3130</strong>xl <strong>Genetic</strong> <strong>Analyzers</strong> <strong>Getting</strong> <strong>Started</strong> <strong>Guide</strong><br />
DRAFT<br />
November 3, 2004 9:51 am, 05_SWSetup_SeqScape.fm
DRAFT<br />
November 3, 2004 9:51 am, 05_SWSetup_SeqScape.fm<br />
Creating an Analysis Protocol<br />
IMPORTANT! If you created an appropriate analysis<br />
protocol in SeqScape software, you can use it in the<br />
Data Collection software. You can also create an<br />
analysis protocol in the SeqScape software.<br />
1. In the Analysis Protocol section of the Protocol<br />
Manager, click .<br />
If more than one analysis application is installed<br />
on the data collection computer, the Analysis<br />
Applications dialog box opens.<br />
2. Select SeqScape, then click to open the<br />
Analysis Protocol Editor dialog box.<br />
3. In the General tab, enter a unique name and<br />
description (optional) for the new protocol.<br />
Notes<br />
Chapter 5 Autoanalysis and SeqScape Software<br />
Creating Protocols for Automated SeqScape Software Analysis<br />
<strong>Applied</strong> Biosystems <strong>3130</strong>/<strong>3130</strong>xl <strong>Genetic</strong> <strong>Analyzers</strong> <strong>Getting</strong> <strong>Started</strong> <strong>Guide</strong> 93<br />
5
Chapter 5 Autoanalysis and SeqScape Software<br />
Creating Protocols for Automated SeqScape Software Analysis<br />
4. Select the Basecalling tab, then:<br />
Notes<br />
a. Select the appropriate basecaller and<br />
DyeSet primer based on the chemistry,<br />
capillary array length and polymer type you<br />
are using. The dye set primer files displayed<br />
are based on the basecaller selected.<br />
See “<strong>3130</strong>/<strong>3130</strong>xl <strong>Genetic</strong> Analyzer<br />
Basecaller and DyeSet/Primer Files” on<br />
page 66 for a table on basecallers and<br />
dyeset/primer files.<br />
Note: SeqScape Software and the Data<br />
Collection software filter .mob file choices<br />
to match the chosen .bcp file.<br />
b. In the Processed data pane, select True or<br />
Flat Profile.<br />
Option Function<br />
c. If desired, select one or more stop points for<br />
data analysis.<br />
d. Select your Threshold Quality option.<br />
Displays data as processed traces scaled uniformly. The average peak height in<br />
the region of strongest signal is about equal to a fixed value. The profile of the<br />
processed traces is similar to that of the raw traces.<br />
Displays data as processed traces scaled semi-locally. The average peak height in<br />
any region is about equal to a fixed value. The profile of the processed traces is<br />
flat on an intermediate scale (> about 40 bases).<br />
Note: This option is applied to data analyzed with the KB basecaller only. If you<br />
use the ABI basecaller, the profile option reverts to True Profile.<br />
Option setting Function using KB basecaller<br />
Assigns a base to every position, as well as the QV.<br />
Assigns Ns to bases with QVs less than the set point. The QV will<br />
still be displayed.<br />
94 <strong>Applied</strong> Biosystems <strong>3130</strong>/<strong>3130</strong>xl <strong>Genetic</strong> <strong>Analyzers</strong> <strong>Getting</strong> <strong>Started</strong> <strong>Guide</strong><br />
DRAFT<br />
November 3, 2004 9:51 am, 05_SWSetup_SeqScape.fm
DRAFT<br />
November 3, 2004 9:51 am, 05_SWSetup_SeqScape.fm<br />
5. Select and fill in the Mixed Bases tab:<br />
Notes<br />
Note: This function is active with the KB<br />
basecaller only.<br />
a. For mixed bases only, select Use Mixed<br />
Base Identification.<br />
b. Use the default setting of 25% or change the<br />
detection level by entering a new value or<br />
dragging the % line up or down.<br />
Note: Do not use less than 15% as your<br />
detection limit.<br />
6. Select the Clear Range tab, then, if desired,<br />
select one or more stop points for data analysis.<br />
Select the recommended settings, which are the<br />
default settings:<br />
a. Use Quality values, fewer than 4 bases out<br />
of 20 have QVs less than 20.<br />
b. Use reference trimming.<br />
Note: The clear range is the region of the<br />
sequence that remains after excluding the lowquality<br />
or error-prone sequence at both the 5´ and<br />
3´ ends.<br />
Chapter 5 Autoanalysis and SeqScape Software<br />
Creating Protocols for Automated SeqScape Software Analysis<br />
<strong>Applied</strong> Biosystems <strong>3130</strong>/<strong>3130</strong>xl <strong>Genetic</strong> <strong>Analyzers</strong> <strong>Getting</strong> <strong>Started</strong> <strong>Guide</strong> 95<br />
5
Notes<br />
Chapter 5 Autoanalysis and SeqScape Software<br />
Creating Protocols for Automated SeqScape Software Analysis<br />
7. Select the Filter tab, then, if desired, change one<br />
or more of the settings.Select the recommended<br />
settings, which are the default settings:<br />
a. Maximum Mixed Bases (%): 20<br />
b. Maximum Ns (%): 10.0<br />
c. Minimum Clear Length (bp): 50<br />
d. Minimum Sample Score: 20<br />
8. Click to save the protocol and close the<br />
Analysis Protocol Editor dialog box.<br />
Editing an Analysis Protocol<br />
1. In the Analysis Protocols pane in the Analysis<br />
Protocol Manager, highlight the protocol you<br />
want to edit.<br />
2. Click .<br />
3. Make changes in the General, Basecalling,<br />
Mixed Bases and Clear Range tabs, as<br />
appropriate.<br />
4. Click to save the protocol and close the<br />
Analysis Protocol Editor dialog box.<br />
96 <strong>Applied</strong> Biosystems <strong>3130</strong>/<strong>3130</strong>xl <strong>Genetic</strong> <strong>Analyzers</strong> <strong>Getting</strong> <strong>Started</strong> <strong>Guide</strong><br />
DRAFT<br />
November 3, 2004 9:51 am, 05_SWSetup_SeqScape.fm
DRAFT<br />
November 3, 2004 9:51 am, 05_SWSetup_SeqScape.fm<br />
Deleting an Analysis Protocol<br />
IMPORTANT! Do not delete an analysis protocol<br />
during a run while it is being used for that run or<br />
Autoanalysis will not be performed. Also, you must<br />
first delete any plate records using the analysis<br />
protocol before you can delete or modify the<br />
analysis protocol for these plate records.<br />
1. In the Analysis Protocols pane in the Analysis<br />
Protocol Manager, highlight the protocol you<br />
want to delete.<br />
2. Click .<br />
The Deletion Confirmation dialog box displays.<br />
3. Click .<br />
Exporting an Analysis Protocol<br />
1. In the Analysis Protocols pane in the Analysis<br />
Protocol Manager, highlight the protocol you<br />
want to export.<br />
2. Click to display the standard File<br />
Export dialog box.<br />
3. Browse to the desired folder location.<br />
4. Click Save.<br />
Importing an Analysis Protocol<br />
1. Click to display the standard File<br />
Import dialog box.<br />
2. Browse to the .xml file to import and click Open.<br />
Notes<br />
Note: For multiple applications, select the<br />
appropriate application to associate with the<br />
analysis protocol.<br />
Chapter 5 Autoanalysis and SeqScape Software<br />
Creating Protocols for Automated SeqScape Software Analysis<br />
<strong>Applied</strong> Biosystems <strong>3130</strong>/<strong>3130</strong>xl <strong>Genetic</strong> <strong>Analyzers</strong> <strong>Getting</strong> <strong>Started</strong> <strong>Guide</strong> 97<br />
5
Notes<br />
Chapter 5 Autoanalysis and SeqScape Software<br />
Creating Protocols for Automated SeqScape Software Analysis<br />
Results Group for SeqScape Software<br />
A Results Group is a component within Data<br />
Collection that organizes samples and certain user<br />
settings under a single name. It is called a Results<br />
Group because it is used to name, sort, and deliver<br />
samples that result from a run.<br />
Creating a Results Group<br />
1. In the tree pane of the Data Collection software,<br />
click GA Instruments > Results Group.<br />
2. Click .<br />
The Results Group Editor window displays.<br />
3. Complete the General tab:<br />
a. Type a Results Group Name. The name can<br />
be used in naming and sorting sample files.<br />
It must be unique (see page for a list of<br />
accepted characters).<br />
b. Optional: Type a Results Group Owner. The<br />
owner name can be used in naming and<br />
sorting sample files.<br />
c. Optional: Type a Results Group Comment.<br />
4. Select the Analysis tab, then:<br />
a. Select SeqScape_ computer name in the<br />
Analysis Type drop-down list.<br />
b. Select Do Autoanalysis in the Analysis<br />
Actions section.<br />
c. Type a valid SeqScape Software Login ID<br />
and Password in the text boxes.<br />
Note: Failure to use the proper login and<br />
password causes your samples not to be<br />
analyzed automatically.<br />
98 <strong>Applied</strong> Biosystems <strong>3130</strong>/<strong>3130</strong>xl <strong>Genetic</strong> <strong>Analyzers</strong> <strong>Getting</strong> <strong>Started</strong> <strong>Guide</strong><br />
3a<br />
3b<br />
3c<br />
4a<br />
4b<br />
DRAFT<br />
November 3, 2004 9:51 am, 05_SWSetup_SeqScape.fm
DRAFT<br />
November 3, 2004 9:51 am, 05_SWSetup_SeqScape.fm<br />
5. Select the Destination tab, then use the default<br />
destination or define a new location for data<br />
storage.<br />
Notes<br />
To use … Then …<br />
default location* skip to step 6<br />
custom location complete steps a-c<br />
a. Click Use Custom Location, then click<br />
to navigate to a different save<br />
location.<br />
b. Click to test the Location path<br />
name connection:<br />
If it…<br />
Then a message box<br />
displays …<br />
Passes Test succeeded:<br />
.<br />
Fails Test failed:.<br />
6. Select the Naming tab, then define custom<br />
names for the sample file and the run folder<br />
name. See “Optional: Completing Sample File<br />
Name Format Pane” on page 73 for more<br />
detailed information.<br />
7. Click to save and close the Results<br />
Group Editor.<br />
*Sample File Destinations<br />
Chapter 5 Autoanalysis and SeqScape Software<br />
Creating Protocols for Automated SeqScape Software Analysis<br />
Locations where sample files are placed during extraction:<br />
Default Destination, default folder naming: E:\<strong>Applied</strong>BiosystemsUDC\DataCollection\data\\<br />
\run folder<br />
Default Destination, custom folder naming: E:\<strong>Applied</strong>BiosystemsUDC\DataCollection\data\top custom folder\<br />
subfolders, etc.<br />
Custom Destination, default folder naming: Destination\\\run folder<br />
Custom Destination, custom folder naming: Destination\top customer folder\subfolders, etc.<br />
<strong>Applied</strong> Biosystems <strong>3130</strong>/<strong>3130</strong>xl <strong>Genetic</strong> <strong>Analyzers</strong> <strong>Getting</strong> <strong>Started</strong> <strong>Guide</strong> 99<br />
5a<br />
5a<br />
5b<br />
5
Chapter 5 Autoanalysis and SeqScape Software<br />
Creating Protocols for Automated SeqScape Software Analysis<br />
Importing and Exporting a Results Group<br />
Note: Importing or exporting of SeqScape software<br />
Results Groups are not supported for transfer between<br />
separate computers.<br />
1. In the tree pane of the Data Collection software,<br />
click GA Instruments > Results Group.<br />
2. Click to open a File Import dialog box.<br />
3. Navigate to the file you want to import.<br />
Notes<br />
Note: Import file type is .xml (XML file).<br />
4. Click .<br />
Note: When you import or duplicate a Results<br />
Group, you are asked to type a name for the new<br />
Results Group and for the analysis application<br />
type.<br />
Exporting a Results Group<br />
1. In the tree pane of the Data Collection software,<br />
click GA Instruments > Results Group.<br />
2. Click the Results Group name to select it.<br />
3. Click .<br />
A standard File Export dialog box displays with<br />
the chosen Results Group name.<br />
4. Navigate to the location where you want to save<br />
the exported file.<br />
5. Click .<br />
Note: If there is a name conflict with a Results<br />
Group that already exists at the save location, the<br />
Results groups can be duplicated to copy settings<br />
into a similar Results Group without the risk of<br />
user error when copying it manually (see<br />
“Duplicating a Results Group” on page 100).<br />
Duplicating a Results Group<br />
1. Click the Results Group to select it.<br />
100 <strong>Applied</strong> Biosystems <strong>3130</strong>/<strong>3130</strong>xl <strong>Genetic</strong> <strong>Analyzers</strong> <strong>Getting</strong> <strong>Started</strong> <strong>Guide</strong><br />
DRAFT<br />
November 3, 2004 9:51 am, 05_SWSetup_SeqScape.fm
DRAFT<br />
November 3, 2004 9:51 am, 05_SWSetup_SeqScape.fm<br />
2. Click .<br />
Notes<br />
Note: When you import or duplicate a Results<br />
Group, you are asked to type a name for the new<br />
Results Group and for the analysis application<br />
type.<br />
Chapter 5 Autoanalysis and SeqScape Software<br />
Filling Out a SeqScape Software Plate Record<br />
Filling Out a SeqScape Software Plate Record<br />
Creating a SeqScape Software Plate<br />
Record<br />
1. Click the Plate Manager icon in the navigation<br />
pane.<br />
2. Click .<br />
The New Plate Dialog dialog box opens.<br />
3. Complete the New Plate dialog box:<br />
a. Type a name for the plate.<br />
b. Type a description for the plate (optional).<br />
c. Select SeqScape_computer name in the<br />
Application drop-down list.<br />
d. Select 96-well or 384-well in the Plate Type<br />
drop-down list.<br />
e. Type a name for the owner.<br />
f. Type a name for the operator.<br />
g. Click .<br />
The SeqScape Plate Editor opens.<br />
<strong>Applied</strong> Biosystems <strong>3130</strong>/<strong>3130</strong>xl <strong>Genetic</strong> <strong>Analyzers</strong> <strong>Getting</strong> <strong>Started</strong> <strong>Guide</strong> 101<br />
3a<br />
3b<br />
3c<br />
3d<br />
3e<br />
3f<br />
3g<br />
5
Notes<br />
Chapter 5 Autoanalysis and SeqScape Software<br />
Filling Out a SeqScape Software Plate Record<br />
Completing a SeqScape Software Plate<br />
Record<br />
1. In the Sample Name column of a row, enter a<br />
sample name, then click the next cell. The value<br />
100 automatically display in the Priority column.<br />
2. In the Comments column, enter any additional<br />
comments or notations for the sample.<br />
3. In the Priority column, change the priority value,<br />
if desired. A lower number for each 4 or 16 set,<br />
receives a higher run priority. (See the <strong>Applied</strong><br />
Biosystems <strong>3130</strong>/<strong>3130</strong>xl Maintenance,<br />
Troubleshooting, and Reference <strong>Guide</strong> for<br />
changing priority values).<br />
4. In the Project column, select a project from the<br />
drop-down list or create a new project with the<br />
corresponding project template.<br />
Based on the project you select, the project<br />
template is filled in automatically.<br />
5. In the Specimen column, select or create a<br />
specimen.<br />
6. In the Results Group 1 column, select a group<br />
from the drop-down list (see page 98).<br />
7. In the Instrument Protocol 1 column of the row,<br />
select a protocol from the drop-down list (see<br />
page 88).<br />
8. In the Analysis Protocol 1 column of the row,<br />
select a protocol from the drop-down list (see<br />
page 93).<br />
9. To complete the rest of the plate record based on<br />
the samples loaded in your plate, do one of the<br />
following:<br />
For the same samples and protocols –<br />
Highlight the entire row, then select Edit ><br />
Fill Down Special.<br />
Based your plate type (96- or 384-well) and<br />
capillary array (16 or 4 capillaries), the<br />
software automatically fills in the<br />
appropriate well numbers for a single run.<br />
1 2 3 4 5<br />
6 7 8<br />
102 <strong>Applied</strong> Biosystems <strong>3130</strong>/<strong>3130</strong>xl <strong>Genetic</strong> <strong>Analyzers</strong> <strong>Getting</strong> <strong>Started</strong> <strong>Guide</strong><br />
DRAFT<br />
November 3, 2004 9:51 am, 05_SWSetup_SeqScape.fm
DRAFT<br />
November 3, 2004 9:51 am, 05_SWSetup_SeqScape.fm<br />
Notes<br />
For the same samples and protocols –<br />
Highlight the entire row, then select Edit ><br />
Fill Down.<br />
For the different samples and protocols –<br />
Complete the entries manually.<br />
10. If you want to do more than one run, then select<br />
Edit > Add Sample Run.<br />
Additional Results Group, Instrument Protocol<br />
and Analysis Protocol columns are added to the<br />
right end of the plate record.<br />
Add additional runs by selecting Edit > Add<br />
Sample Run again.<br />
11. Complete the columns for the additional runs.<br />
12. Click to save, then close the plate record.<br />
Note: After clicking OK within the Plate Editor,<br />
the completed plate record is stored in the Plate<br />
Manager database.The plate record can be<br />
searched for, edited, exported, or deleted in the<br />
Plate Manager.<br />
For sample preparation and running the instrument,<br />
see Chapter 7, “Running the Instrument.”<br />
Chapter 5 Autoanalysis and SeqScape Software<br />
Filling Out a SeqScape Software Plate Record<br />
<strong>Applied</strong> Biosystems <strong>3130</strong>/<strong>3130</strong>xl <strong>Genetic</strong> <strong>Analyzers</strong> <strong>Getting</strong> <strong>Started</strong> <strong>Guide</strong> 103<br />
5
Notes<br />
Chapter 5 Autoanalysis and SeqScape Software<br />
Filling Out a SeqScape Software Plate Record<br />
104 <strong>Applied</strong> Biosystems <strong>3130</strong>/<strong>3130</strong>xl <strong>Genetic</strong> <strong>Analyzers</strong> <strong>Getting</strong> <strong>Started</strong> <strong>Guide</strong><br />
DRAFT<br />
November 3, 2004 9:51 am, 05_SWSetup_SeqScape.fm
DRAFT<br />
November 3, 2004 9:51 am, 06_SWSetup_FA.fm<br />
Notes<br />
Chapter 6<br />
Autoanalysis and Fragment Analysis<br />
Preparing the<br />
Instrument<br />
Performing a<br />
Spatial Calibration<br />
Performing a<br />
Spectral Calibration<br />
Autoanalysis<br />
and Sequencing<br />
Analysis<br />
Software<br />
Autoanalysis<br />
and<br />
SeqScape Software<br />
Autoanalysis<br />
and<br />
Fragment Analysis<br />
Running the<br />
Instrument<br />
Create protocols<br />
for automation<br />
Create a<br />
GeneMapper Software<br />
Plate Record<br />
See page 112<br />
Seepage123<br />
<strong>Applied</strong> Biosystems <strong>3130</strong>/<strong>3130</strong>xl <strong>Genetic</strong> <strong>Analyzers</strong> <strong>Getting</strong> <strong>Started</strong> <strong>Guide</strong> 105<br />
6
Notes<br />
Chapter 6 Autoanalysis and Fragment Analysis<br />
GeneMapper Software<br />
GeneMapper Software<br />
GeneMapper<br />
Software v3.7 and<br />
GeneMapper ID<br />
Software v3.2<br />
File-Naming<br />
Convention<br />
Analyze your fragment analysis samples automatically using autoanalysis or manually.<br />
Note: This chapter is written for both GeneMapper ® Software v3.7 or higher and<br />
GeneMapper ® ID Software v3.2. Graphic examples are from GeneMapper software<br />
v3.7.<br />
Perform autoanalysis of fragment analysis samples with features of the <strong>3130</strong>/<strong>3130</strong>xl<br />
Data Collection and GeneMapper software using the same instrument computer that<br />
collected the sample files or on a remote computer.<br />
Autoanalysis can be performed on the same instrument computer that collected the<br />
sample files or on another computer using the remote analysis feature of<br />
GeneMapper software.<br />
After autoanalysis, if you wish to edit/review results on another computer, then<br />
transfer the GeneMapper software project, analysis methods, size standards, panel,<br />
and bin set information to the other GeneMapper software database. All<br />
components need to be exported and imported individually.<br />
When completing the plate record, fill in the instrument protocol and other<br />
information for Data Collection software to complete the run.<br />
When creating a new Results Group for a set of samples to be autoanalyzed, check<br />
the Do Autoanalysis check box and enter the appropriate GeneMapper Software<br />
user name and password. For remote analysis, define a default location for sample<br />
file storage.<br />
Some alphanumeric characters are not valid for user names or file names. Do not use the<br />
invalid characters below:<br />
spaces<br />
\ / : * ? " < > |<br />
IMPORTANT! An error message is displayed if you use any of these characters. You<br />
must remove the invalid character to continue.<br />
Manual Analysis For information on manual analysis, see the GeneMapper Software v3.7 User <strong>Guide</strong><br />
(PN 4359413) or GeneMapper ID Software V3.1 User <strong>Guide</strong> (PN 4338775), or the User<br />
Bulletin titled GeneMapper ID Software v3.2, Subject: New Features and Installation<br />
Procedures for GeneMapper ID Software v3.2 (PN 4352543).<br />
106 <strong>Applied</strong> Biosystems <strong>3130</strong>/<strong>3130</strong>xl <strong>Genetic</strong> <strong>Analyzers</strong> <strong>Getting</strong> <strong>Started</strong> <strong>Guide</strong><br />
DRAFT<br />
November 3, 2004 9:51 am, 06_SWSetup_FA.fm
DRAFT<br />
November 3, 2004 9:51 am, 06_SWSetup_FA.fm<br />
About Fragment<br />
Analysis and Data<br />
Collection<br />
Notes<br />
GeneMapper-<br />
Generic<br />
GeneMapper-<br />
<br />
Chapter 6 Autoanalysis and Fragment Analysis<br />
GeneMapper Software<br />
When GeneMapper software is installed on a computer that has <strong>3130</strong>/<strong>3130</strong>xl genetic<br />
analyzer Data Collection software, two applications are available through the Results<br />
Group Editor (see page 115):<br />
GeneMapper-Generic<br />
GeneMapper-<br />
Use GeneMapper-Generic to generate .fsa files, without performing autoanalysis. When<br />
completing the Sample Sheet, fill in basic information for the Data Collection software<br />
to complete the run; all other GeneMapper software related fields are text entries. Text<br />
entries are useful if you are using other software analysis applications or choose to<br />
analyze your samples in GeneMapper software on another computer, but do not have the<br />
same entries in the GeneMapper software database stored on the Data Collection<br />
computer. For example, if you have a customized size standard definition on another<br />
GeneMapper software computer, you can type in that size standard name in the size<br />
standard text field and it will populate that column in your GeneMapper software<br />
project.<br />
Use GeneMapper- for autoanalysis. The Size Standard, Analysis<br />
Method, and Panel columns in the Sample Sheet window read directly from the<br />
GeneMapper software database. Create these components in GeneMapper software prior<br />
to setting up the plate record for a run. New entries cannot be created for these columns<br />
once you are in the plate editor dialog box. If you create a new GeneMapper software<br />
component while the plate record dialog box is open, the columns will not update. The<br />
plate record must be closed and reopened to update the GeneMapper<br />
software components. For more information see, “Creating Protocols for Automated<br />
Fragment Analysis” on page 112.<br />
<strong>Applied</strong> Biosystems <strong>3130</strong>/<strong>3130</strong>xl <strong>Genetic</strong> <strong>Analyzers</strong> <strong>Getting</strong> <strong>Started</strong> <strong>Guide</strong> 107<br />
6
Notes<br />
Chapter 6 Autoanalysis and Fragment Analysis<br />
About GeneMapper Software Plate Records<br />
About GeneMapper Software Plate Records<br />
When to Create a<br />
Plate Record<br />
A plate record is similar to a sample sheet or an injection list that you may have used<br />
with other ABI PRISM ® instruments.<br />
Plate records are data tables in the instrument database that store information about the<br />
plates and the samples such as:<br />
Plate name, type, and owner<br />
Position of the sample on the plate (well number)<br />
Comments about the plate and about individual samples<br />
Dye set information (in Instrument protocol)<br />
Name of the run module where run modules specify information about how samples<br />
are run (in Instrument protocol)<br />
Create a plate record for each plate of samples for the following types of runs:<br />
Spectral calibrations<br />
Sequencing Analysis Software<br />
SeqScape Software analysis<br />
GeneMapper ® software<br />
Mixed (sequencing and fragment analysis samples - see the <strong>Applied</strong> Biosystems<br />
<strong>3130</strong>/<strong>3130</strong>xl <strong>Genetic</strong> <strong>Analyzers</strong> Maintenance, Troubleshooting, and Reference<br />
<strong>Guide</strong> for creating a mixed plate record)<br />
For runs to begin, you must create a plate record for and link it to a plate loaded on the<br />
instrument. However, you can create plate records for new plates while a run is in<br />
progress.<br />
Files needed to create a GeneMapper software plate record:<br />
Parameters Description<br />
Instrument<br />
Protocol<br />
IMPORTANT! For data collection and auto-analysis to be successful, each run of<br />
samples must have an Instrument Protocol, a Results Group and files created in<br />
GeneMapper software assigned within a plate record.<br />
See<br />
Page<br />
Contains everything needed to run the instrument. 112<br />
Results Group Defines the file type, the file name, autoanalysis, and file save<br />
locations that are linked to sample injections.<br />
108 <strong>Applied</strong> Biosystems <strong>3130</strong>/<strong>3130</strong>xl <strong>Genetic</strong> <strong>Analyzers</strong> <strong>Getting</strong> <strong>Started</strong> <strong>Guide</strong><br />
115<br />
DRAFT<br />
November 3, 2004 9:51 am, 06_SWSetup_FA.fm
DRAFT<br />
November 3, 2004 9:51 am, 06_SWSetup_FA.fm<br />
Notes<br />
Elements of a GeneMapper software plate record<br />
Data Collection<br />
software files:<br />
Results Group<br />
Results Group<br />
Name<br />
Analysis software<br />
and autoanalysis<br />
File storage<br />
location<br />
File and run folder<br />
name preferences<br />
Chapter 6 Autoanalysis and Fragment Analysis<br />
About GeneMapper Software Plate Records<br />
Plate Manager<br />
Plate Record<br />
Instrument Protocol<br />
Instrument<br />
Protocol Name<br />
Run type<br />
(Regular)<br />
Run module<br />
Dye set<br />
GeneMapper software<br />
definitions:<br />
Size standard<br />
Analysis method<br />
Bin set<br />
<strong>Applied</strong> Biosystems <strong>3130</strong>/<strong>3130</strong>xl <strong>Genetic</strong> <strong>Analyzers</strong> <strong>Getting</strong> <strong>Started</strong> <strong>Guide</strong> 109<br />
Panel<br />
SNP Set<br />
6
Notes<br />
Chapter 6 Autoanalysis and Fragment Analysis<br />
About GeneMapper Software Plate Records<br />
1 2 3 4 5 6 7 8<br />
9 10 11<br />
Defaults to one sample run, to add additional runs see page 125<br />
Blank GeneMapper software plate record<br />
Columns inserted in a plate record for a fragment analysis run<br />
Number and Column Description<br />
1. Sample Name Name of the sample<br />
2. Comment Comments about the sample (optional)<br />
3. Priority A default value of 100 to each sample. Changing the value to a<br />
smaller number causes that set of 16 or 4 samples to run to<br />
before the others in the injection list.<br />
4. Sample Type Use to identify the sample as Sample, Positive Control, Allelic<br />
Ladder or Negative Control.<br />
5. Size Standard<br />
IMPORTANT! For GeneMapper- ONLY:<br />
Create the Size Standard, Panel, and Analysis<br />
Method in GeneMapper software before creating a<br />
new plate<br />
6. Panel<br />
IMPORTANT! For GeneMapper- ONLY:<br />
Create the Size Standard, Panel, and Analysis<br />
Method in GeneMapper software before creating a<br />
new plate<br />
GeneMapper-Generic (optional):<br />
Manually enter size standards in the text field<br />
GeneMapper-:<br />
Select a saved size standard from the drop-down list<br />
GeneMapper-Generic (optional):<br />
Manually enter panels in the text field<br />
GeneMapper-:<br />
Select a saved panel from the drop-down list<br />
110 <strong>Applied</strong> Biosystems <strong>3130</strong>/<strong>3130</strong>xl <strong>Genetic</strong> <strong>Analyzers</strong> <strong>Getting</strong> <strong>Started</strong> <strong>Guide</strong><br />
DRAFT<br />
November 3, 2004 9:51 am, 06_SWSetup_FA.fm
DRAFT<br />
November 3, 2004 9:51 am, 06_SWSetup_FA.fm<br />
7. Analysis Method<br />
Notes<br />
IMPORTANT! For GeneMapper ONLY:<br />
Create the Size Standard, Panel, and Analysis<br />
Method in GeneMapper software before creating a<br />
new plate<br />
8. SNP Set<br />
IMPORTANT! For GeneMapper ONLY:<br />
The SNP set, created in the GeneMapper software,<br />
links a SNP name to a marker name.<br />
9. Three User-defined columns Optional text entries<br />
Chapter 6 Autoanalysis and Fragment Analysis<br />
About GeneMapper Software Plate Records<br />
Number and Column Description<br />
GeneMapper-Generic (optional):<br />
Manually enter analysis methods in the text field<br />
GeneMapper-:<br />
Select a saved analysis method from the drop-down list<br />
GeneMapper-Generic (optional):<br />
Manually enter SNP set in the text field<br />
GeneMapper-<br />
10. Results Group Options:<br />
New: Opens the Results Group Editor dialog box<br />
Edit: Opens the Results Group Editor dialog box for the<br />
Results Group listed in the cell<br />
None: Sets the cell to have no selected Results Group<br />
Select one of the available Results groups from the list<br />
Note: You must select a Results Group for each sample<br />
entered in the Sample Name column.<br />
See “Results Group for Fragment Analysis” on page 115.<br />
11. Instrument Protocol Options:<br />
New: Opens the Protocol Editor dialog box.<br />
Edit: Opens the Protocol Editor dialog box for the<br />
Instrument Protocol listed in the cell.<br />
None: Sets the cell to have no selected protocol.<br />
List of Instrument Protocols: In alpha-numeric order.<br />
Note: You must select an Instrument Protocol for each<br />
sample entered in the Sample Name column.<br />
See “Results Group for Fragment Analysis” on page 115.<br />
<strong>Applied</strong> Biosystems <strong>3130</strong>/<strong>3130</strong>xl <strong>Genetic</strong> <strong>Analyzers</strong> <strong>Getting</strong> <strong>Started</strong> <strong>Guide</strong> 111<br />
6
Notes<br />
Chapter 6 Autoanalysis and Fragment Analysis<br />
Creating Protocols for Automated Fragment Analysis<br />
Creating Protocols for Automated Fragment Analysis<br />
If the appropriate fragment analysis protocols and<br />
results group have been created, proceed to “Creating<br />
a GeneMapper Software Plate Record” on page 123.<br />
Instrument Protocol for Fragment Analysis<br />
An instrument protocol contains all the settings<br />
necessary to run the instrument:<br />
Protocol name<br />
Type of run<br />
Run module<br />
Dye set<br />
Creating an Instrument Protocol<br />
1. In the tree pane of the Data Collection software,<br />
click GA Instruments > ga<strong>3130</strong>xl or<br />
ga<strong>3130</strong> > Protocol Manager.<br />
2. In the Instrument Protocols section, click<br />
to open the Protocol Editor.<br />
Create<br />
instrument<br />
Create analysis<br />
protocols here<br />
112 <strong>Applied</strong> Biosystems <strong>3130</strong>/<strong>3130</strong>xl <strong>Genetic</strong> <strong>Analyzers</strong> <strong>Getting</strong> <strong>Started</strong> <strong>Guide</strong><br />
DRAFT<br />
November 3, 2004 9:51 am, 06_SWSetup_FA.fm
DRAFT<br />
November 3, 2004 9:51 am, 06_SWSetup_FA.fm<br />
3. Complete the Protocol Editor:<br />
Notes<br />
a. Type a name for the protocol.<br />
b. Type a description for the protocol<br />
(optional).<br />
c. Select Regular in the Type drop-down list.<br />
d. Using the table below, select the run module<br />
for your run. To customize a run module,<br />
see the <strong>Applied</strong> Biosystems <strong>3130</strong>/<strong>3130</strong>xl<br />
<strong>Genetic</strong> <strong>Analyzers</strong> Maintenance,<br />
Troubleshooting, and Reference <strong>Guide</strong> on<br />
modifying a module.<br />
Application or Kit<br />
Capillary Array<br />
Length<br />
(cm)<br />
SNaPshot ® Multiplex System 22 SNP22_POP4_1<br />
LMS v2.5<br />
ABI PRISM ® Mouse Mapping<br />
Set v1.0<br />
Custom oligos<br />
Stockmarks<br />
AFLP ®<br />
AmpFlSTR ® COfiler ®<br />
AmpFlSTR Profiler Plus ®<br />
AmpFlSTR SGM Plus ®<br />
AmpFlSTR Profiler Plus ID<br />
AmpFlSTR SEfiler AmpFlSTR Yfiler Other 4-Dye AmpFlSTR<br />
AmpFlSTR Identifiler<br />
Other 5-Dye AmpFlSTR<br />
Chapter 6 Autoanalysis and Fragment Analysis<br />
Creating Protocols for Automated Fragment Analysis<br />
36 SNP36_POP4_1<br />
Run Module<br />
22 FragmentAnalysis22_POP4_1<br />
36 FragmentAnalysis36_POP4_1<br />
FragmentAnalysis36_POP7_1<br />
50 FragmentAnalysis50_POP4_1<br />
FragmentAnalysis50_POP6_1<br />
FragmentAnalysis50_POP7_1<br />
36 HIDFragmentAnalysis36_POP4_1<br />
<strong>Applied</strong> Biosystems <strong>3130</strong>/<strong>3130</strong>xl <strong>Genetic</strong> <strong>Analyzers</strong> <strong>Getting</strong> <strong>Started</strong> <strong>Guide</strong> 113<br />
3a<br />
3b<br />
3c<br />
3d<br />
3e<br />
3f<br />
6
Notes<br />
Chapter 6 Autoanalysis and Fragment Analysis<br />
Creating Protocols for Automated Fragment Analysis<br />
e. Using the table below, select the correct Dye<br />
Set for your run.<br />
f. Click .<br />
Importing an Instrument Protocol<br />
1. Click in the Instrument Protocols pane<br />
of the Protocol Editor window to display the<br />
standard File Import dialog box.<br />
2. Navigate to the location of the .xml file you want<br />
to import.<br />
3. Select the .xml file and click Open.<br />
Application or Kit Dye Set<br />
Matrix Standard<br />
Set<br />
Custom oligos D DS-30<br />
ABI PRISM Mouse Mapping Set v1.0<br />
Custom oligos<br />
AmpFlSTR COfiler<br />
AmpFlSTR Profiler Plus<br />
AmpFlSTR SGM Plus<br />
AmpFlSTR Profiler Plus ID<br />
Other 4-Dye AmpFlSTR<br />
AFLP<br />
Stockmarks -Canine and Bovine<br />
D DS-31<br />
F DS-32<br />
ABI PRISM SNaPshot Multiplex System E5 DS-02<br />
ABI PRISM Linkage Mapping Set v2.5<br />
Custom Oligos<br />
AmpFlSTR Identifiler<br />
AmpFlSTR SEfiler<br />
AmpFlSTR Yfiler<br />
Other 5-Dye AmpFlSTR<br />
Stockmarks-Equine<br />
G5 DS-33<br />
114 <strong>Applied</strong> Biosystems <strong>3130</strong>/<strong>3130</strong>xl <strong>Genetic</strong> <strong>Analyzers</strong> <strong>Getting</strong> <strong>Started</strong> <strong>Guide</strong><br />
DRAFT<br />
November 3, 2004 9:51 am, 06_SWSetup_FA.fm
DRAFT<br />
November 3, 2004 9:51 am, 06_SWSetup_FA.fm<br />
Exporting an Instrument Protocol<br />
1. In the Instrument Protocols pane, highlight the<br />
protocol you want to export.<br />
2. Click to display the standard File<br />
Export dialog box.<br />
3. Browse to the desired folder location.<br />
4. Click .<br />
Results Group for Fragment Analysis<br />
A Results Group is a component within Data<br />
Collection that organizes samples and certain user<br />
settings under a single name. It is called a Results<br />
Group because it is used to name, sort, and deliver<br />
samples that result from a run.<br />
Creating a Results Group for Autoanalysis<br />
1. In the tree pane of the Data Collection software,<br />
click GA Instruments > Results Group.<br />
2. Click to open the Results Group Editor<br />
window.<br />
Notes<br />
Chapter 6 Autoanalysis and Fragment Analysis<br />
Creating Protocols for Automated Fragment Analysis<br />
<strong>Applied</strong> Biosystems <strong>3130</strong>/<strong>3130</strong>xl <strong>Genetic</strong> <strong>Analyzers</strong> <strong>Getting</strong> <strong>Started</strong> <strong>Guide</strong> 115<br />
6
Notes<br />
Chapter 6 Autoanalysis and Fragment Analysis<br />
Creating Protocols for Automated Fragment Analysis<br />
3. Complete the General tab:<br />
a. Type a unique Results Group Name. The<br />
name can be used in naming and sorting<br />
sample files.<br />
b. Optional: Type a Results Group Owner. The<br />
owner name can be used in naming and<br />
sorting sample files.<br />
c. Optional: Type a Results Group Comment.<br />
4. Select the Analysis tab, then:<br />
a. Click Analysis Type and then select one of<br />
the following:<br />
If You Select ... Then ...<br />
None Only raw data files are<br />
generated.<br />
GeneMapper-<br />
Generic<br />
GeneMapper-<br />
<br />
Autoanalysis is not<br />
enabled and only .fsa files<br />
are generated.<br />
Autoanalysis of completed<br />
runs is enabled.<br />
Steps b, c, and d below<br />
apply only to<br />
GeneMapper- (not GeneMapper-<br />
Generic).<br />
116 <strong>Applied</strong> Biosystems <strong>3130</strong>/<strong>3130</strong>xl <strong>Genetic</strong> <strong>Analyzers</strong> <strong>Getting</strong> <strong>Started</strong> <strong>Guide</strong><br />
3a<br />
3b<br />
3c<br />
4a<br />
4c<br />
4d<br />
4b<br />
DRAFT<br />
November 3, 2004 9:51 am, 06_SWSetup_FA.fm
DRAFT<br />
November 3, 2004 9:51 am, 06_SWSetup_FA.fm<br />
Notes<br />
b. Select an option in the Analysis Actions<br />
section using the table below.<br />
If You Select … Then …<br />
Do Autoanalysis Samples are analyzed after each run of<br />
16 or 4 samples.<br />
Do Autoanalysis and<br />
Results Entry Group<br />
Complete<br />
c. Type the Login ID.<br />
d. Type the login password.<br />
Note: The login ID and password relate to the<br />
GeneMapper software UserName and Password.<br />
These items can only be created through the<br />
GeneMapper software Options Users tab.<br />
Autoanalysis will fail if the incorrect username<br />
and password are entered.<br />
5. Select the Destination tab, then use the default<br />
destination or define a new location for data<br />
storage.<br />
To use a … Then …<br />
default location* skip to step 6.<br />
custom location<br />
Use for remote analysis<br />
using GeneMapper v3.7<br />
*Sample File Destinations<br />
Samples are analyzed after all pending<br />
samples using the same results group<br />
have been run.<br />
complete steps a-b.<br />
Chapter 6 Autoanalysis and Fragment Analysis<br />
Creating Protocols for Automated Fragment Analysis<br />
Use with Setting from Automated<br />
Processing Tab (page 118)<br />
When every run completes<br />
Only when the result group is complete<br />
Locations where sample files are placed during extraction:<br />
Default Destination, default folder naming: E:\<strong>Applied</strong>BiosystemsUDC\DataCollection\data\\<br />
\run folder<br />
Default Destination, custom folder naming: E:\<strong>Applied</strong>BiosystemsUDC\DataCollection\data\top custom folder\<br />
subfolders, etc.<br />
Custom Destination, default folder naming: Destination\\\run folder<br />
Custom Destination, custom folder naming: Destination\top customer folder\subfolders, etc.<br />
<strong>Applied</strong> Biosystems <strong>3130</strong>/<strong>3130</strong>xl <strong>Genetic</strong> <strong>Analyzers</strong> <strong>Getting</strong> <strong>Started</strong> <strong>Guide</strong> 117<br />
5a<br />
5b<br />
5c<br />
6
Notes<br />
Chapter 6 Autoanalysis and Fragment Analysis<br />
Creating Protocols for Automated Fragment Analysis<br />
a. Click Use Custom Location, then click<br />
to navigate to a different save<br />
location.<br />
b. Click to test the Location path<br />
name connection:<br />
If it…<br />
Then a message box<br />
displays …<br />
Passes Test succeeded:<br />
.<br />
Fails Test failed:.<br />
6. Select the Naming tab to customize sample file<br />
and run folder names.<br />
Note: The default sample file naming for<br />
fragment analysis is:<br />
frag__.fsa<br />
Note: Sample name, run folder name, and path<br />
name, combined, can total no more than 250<br />
characters.<br />
For defining the elements of the Naming tab, see<br />
page 119.<br />
7. Select the Automated Processing tab.<br />
In “Autoanalysis is performed” select when you<br />
want your samples autoanalyzed using the table<br />
below.<br />
If You Select … Then …<br />
Only when the result group<br />
is complete<br />
8. Click to save the Results Group.<br />
Samples are analyzed after all pending<br />
samples using the same results group<br />
have been run.<br />
When every run completes Samples are analyzed after each run of<br />
16 or 4 samples.<br />
Sample File Name Format<br />
Run Folder Name Format pane<br />
Select an<br />
autoanalysis<br />
option<br />
Use with Settings from Analysis Tab<br />
(page 117)<br />
Do Autoanalysis and Results Entry<br />
Group Complete<br />
Do Autoanalysis<br />
118 <strong>Applied</strong> Biosystems <strong>3130</strong>/<strong>3130</strong>xl <strong>Genetic</strong> <strong>Analyzers</strong> <strong>Getting</strong> <strong>Started</strong> <strong>Guide</strong><br />
DRAFT<br />
November 3, 2004 9:51 am, 06_SWSetup_FA.fm
DRAFT<br />
November 3, 2004 9:51 am, 06_SWSetup_FA.fm<br />
Completing the Sample File Name Format Pane<br />
1. Type a prefix for the file name in the Prefix box.<br />
Anything that you type here is shown in the<br />
Example line.<br />
2. Click the Name Delimiter list choose the<br />
symbol that will separate the Format elements in<br />
the file name (see step 3 below). Only one<br />
delimiter symbol may be chosen.<br />
3. Click the Format list and then select the<br />
components that you want in the sample name.<br />
Notes<br />
Note: All the samples from a single run can be<br />
placed in the same run or results folder; the name<br />
of every sample from a single run should be<br />
different. Most of the Format options will not be<br />
different between samples; select at least one of<br />
the options to make the sample names unique<br />
within a run.<br />
If a unique identifier is not included in the name,<br />
a warning message displays.Select from the<br />
elements to make a unique sample file name.<br />
Examples are:<br />
– Well position<br />
– Capillary number<br />
– Run sequence number<br />
– Plate Quadrant<br />
Note: Some identifiers, such as well position,<br />
capillary number and plate quadrant are not<br />
unique in multiple sample instances. Plate<br />
Quadrant is not a unique identifier for a 96-well<br />
plate.<br />
Chapter 6 Autoanalysis and Fragment Analysis<br />
Creating Protocols for Automated Fragment Analysis<br />
Warning message<br />
<strong>Applied</strong> Biosystems <strong>3130</strong>/<strong>3130</strong>xl <strong>Genetic</strong> <strong>Analyzers</strong> <strong>Getting</strong> <strong>Started</strong> <strong>Guide</strong> 119<br />
6
Notes<br />
Chapter 6 Autoanalysis and Fragment Analysis<br />
Creating Protocols for Automated Fragment Analysis<br />
As you select the elements for the file name, they<br />
are placed in the Example line. An additional<br />
element drop-down menu displays allowing you<br />
the option of selecting an additional element.<br />
The names of the Format elements eventually<br />
truncate, but the Example field remains visible<br />
(up to 72 characters).<br />
4. Click the Suffix box (optional) and type the<br />
suffix for the file name.<br />
The File Extension field displays the file<br />
extension generated from the Analysis Type<br />
specified on the Analysis tab (see page 116). For<br />
example, Sequencing Analysis produces sample<br />
files with an .ab1 extension.<br />
Run Folder/Sub-Folder Name Format Pane<br />
Follow the same steps described above for the Sample<br />
File Name Format pane (see page 119) to change the<br />
sub-folder name within the run folder.<br />
120 <strong>Applied</strong> Biosystems <strong>3130</strong>/<strong>3130</strong>xl <strong>Genetic</strong> <strong>Analyzers</strong> <strong>Getting</strong> <strong>Started</strong> <strong>Guide</strong><br />
DRAFT<br />
November 3, 2004 9:51 am, 06_SWSetup_FA.fm
DRAFT<br />
November 3, 2004 9:51 am, 06_SWSetup_FA.fm<br />
Importing and Exporting a Results Group<br />
Importing or exporting of GeneMapper software<br />
Results Groups are not supported for transfer between<br />
separate computers.<br />
Importing a Results Group<br />
1. In the tree pane of the Data Collection software,<br />
click GA Instruments > Results Group.<br />
2. Click .<br />
A standard File Import dialog box displays.<br />
3. Navigate to the file you want to import.<br />
Notes<br />
Note: Import file type is .xml (XML file).<br />
4. Click .<br />
Note: When you import or duplicate a Results<br />
Group, you are asked to type a name for the new<br />
Results Group and for the analysis application<br />
type.<br />
Exporting a Results Group<br />
1. In the tree pane of the Data Collection software,<br />
click GA Instruments > Results Group.<br />
2. Click the Results Group name to select it.<br />
3. Click .<br />
A standard file export dialog box displays with<br />
the chosen Results Group name.<br />
4. Navigate to the location where you want to save<br />
the exported file.<br />
5. Click .<br />
Note: If there is a name conflict with a Results<br />
Group that already exists at the save location, the<br />
Results groups can be duplicated in order to copy<br />
settings into a similar Results Group without the<br />
risk of user error when copying it manually (see<br />
“Duplicating a Results Group” on page 122).<br />
Chapter 6 Autoanalysis and Fragment Analysis<br />
Creating Protocols for Automated Fragment Analysis<br />
<strong>Applied</strong> Biosystems <strong>3130</strong>/<strong>3130</strong>xl <strong>Genetic</strong> <strong>Analyzers</strong> <strong>Getting</strong> <strong>Started</strong> <strong>Guide</strong> 121<br />
6
Chapter 6 Autoanalysis and Fragment Analysis<br />
Creating Protocols for Automated Fragment Analysis<br />
Duplicating a Results Group<br />
1. Click the Results Group.<br />
2. Click .<br />
Notes<br />
Note: When you import or duplicate a Results<br />
Group, you are asked to type a name for the new<br />
Results Group and for the analysis application<br />
type.<br />
122 <strong>Applied</strong> Biosystems <strong>3130</strong>/<strong>3130</strong>xl <strong>Genetic</strong> <strong>Analyzers</strong> <strong>Getting</strong> <strong>Started</strong> <strong>Guide</strong><br />
DRAFT<br />
November 3, 2004 9:51 am, 06_SWSetup_FA.fm
DRAFT<br />
November 3, 2004 9:51 am, 06_SWSetup_FA.fm<br />
Notes<br />
Chapter 6 Autoanalysis and Fragment Analysis<br />
Creating a GeneMapper Software Plate Record<br />
Creating a GeneMapper Software Plate Record<br />
Creating the Plate Record for Autoanalysis<br />
1. In the tree pane of the Data Collection software,<br />
click GA Instruments > ga<strong>3130</strong>xl or<br />
ga<strong>3130</strong> > Plate Manager.<br />
2. Click to open New Plate Dialog.<br />
3. Complete the information in the New Plate<br />
Dialog:<br />
a. Type a name for the plate.<br />
b. Type a description for the plate (optional).<br />
c. Select your GeneMapper application in the<br />
Application drop-down list.<br />
d. Select 96-well or 384-well in the Plate Type<br />
drop-down list.<br />
e. Type a name for the owner.<br />
f. Type a name for the operator.<br />
g. Click .<br />
The GeneMapper software Plate Editor<br />
opens.<br />
<strong>Applied</strong> Biosystems <strong>3130</strong>/<strong>3130</strong>xl <strong>Genetic</strong> <strong>Analyzers</strong> <strong>Getting</strong> <strong>Started</strong> <strong>Guide</strong> 123<br />
3a<br />
3b<br />
3c<br />
3d<br />
3e<br />
3f<br />
3g<br />
6
Chapter 6 Autoanalysis and Fragment Analysis<br />
Creating a GeneMapper Software Plate Record<br />
Completing a GeneMapper Software Plate<br />
Record for Autoanalysis<br />
1. In the Sample Name column of a row, enter a<br />
sample name, then click the next cell. The value<br />
100 automatically display in the Priority column.<br />
2. In the Comment column, enter any additional<br />
comments or notations for the sample.<br />
3. In the Priority column, change the priority value,<br />
if desired.<br />
4. In the Sample Type column, select a sample type<br />
from the drop-down list.<br />
5. In the Size Standard column, select a size<br />
standard from the drop-down list.<br />
6. In the Panel column, select a panel from the<br />
drop-down list.<br />
7. In the Analysis Method column, select a method<br />
from the drop-down list.<br />
8. In the Snp Set column, select a SNP set from the<br />
drop-down lis if applicable, otherwise select<br />
None.<br />
9. Enter text for User-Defined columns 1 to 3.<br />
10. In the Results Group 1 column, create a new<br />
Results Group or select a group from the dropdown<br />
list (see page 115).<br />
11. In the Instrument Protocol 1 column, create a<br />
new instrument protocol or select a protocol from<br />
the drop-down list (see page 112).<br />
Notes<br />
1 2 3 4 5<br />
6 7 8<br />
9<br />
9 10<br />
11<br />
124 <strong>Applied</strong> Biosystems <strong>3130</strong>/<strong>3130</strong>xl <strong>Genetic</strong> <strong>Analyzers</strong> <strong>Getting</strong> <strong>Started</strong> <strong>Guide</strong><br />
DRAFT<br />
November 3, 2004 9:51 am, 06_SWSetup_FA.fm
DRAFT<br />
November 3, 2004 9:51 am, 06_SWSetup_FA.fm<br />
12. To complete the plate record:<br />
Notes<br />
For the same samples and protocols –<br />
Highlight the entire row, then select Edit ><br />
Fill Down Special.<br />
Based on your plate type (96- or 384-well)<br />
and capillary array (16 or 4 capillaries), the<br />
software automatically fills in the<br />
appropriate well numbers for a single run.<br />
For the same samples and protocols –<br />
Highlight the entire row, then select Edit ><br />
Fill Down.<br />
For the different samples and protocols –<br />
Complete the entries manually.<br />
13. To do more than one run, select Edit > Add<br />
Sample Run.<br />
Additional Results Group, Instrument Protocol<br />
and Analysis Protocol columns are added to the<br />
right end of the plate record.<br />
Add additional runs by selecting Edit > Add<br />
Sample Run again.<br />
14. Complete the columns for the additional runs.<br />
15. Click to save, then close the plate record.<br />
IMPORTANT! After clicking OK in the Plate<br />
Editor, the plate record is stored in the Plate<br />
Manager database and can now be located,<br />
edited, exported, or deleted.<br />
Chapter 6 Autoanalysis and Fragment Analysis<br />
Creating a GeneMapper Software Plate Record<br />
<strong>Applied</strong> Biosystems <strong>3130</strong>/<strong>3130</strong>xl <strong>Genetic</strong> <strong>Analyzers</strong> <strong>Getting</strong> <strong>Started</strong> <strong>Guide</strong> 125<br />
6
Notes<br />
Chapter 6 Autoanalysis and Fragment Analysis<br />
Creating a GeneMapper Software Plate Record<br />
126 <strong>Applied</strong> Biosystems <strong>3130</strong>/<strong>3130</strong>xl <strong>Genetic</strong> <strong>Analyzers</strong> <strong>Getting</strong> <strong>Started</strong> <strong>Guide</strong><br />
DRAFT<br />
November 3, 2004 9:51 am, 06_SWSetup_FA.fm
DRAFT<br />
November 16, 2004 12:37 pm, 07_RunInstrument.fm<br />
Notes<br />
Preparing the<br />
Instrument<br />
Performing a<br />
Spatial Calibration<br />
Performing a<br />
Spectral Calibration<br />
Autoanalysis<br />
and Sequencing<br />
Analysis<br />
Software<br />
Autoanalysis<br />
and<br />
SeqScape Software<br />
Autoanalysis<br />
and<br />
Fragment Analysis<br />
Running the<br />
Instrument<br />
Chapter 7<br />
Running the Instrument<br />
Prepare samples and<br />
Heading 1text<br />
plate assemblies<br />
Place Plate onto<br />
Heading 1text<br />
Autosampler<br />
Heading Link the Plate 1text<br />
Schedule Heading 1text a run<br />
Run Heading the instrument 1text<br />
Set up for<br />
continuous operation<br />
Seepage128<br />
Seepage128<br />
Seepage128<br />
Seepage129<br />
Seepage130<br />
Seepage134<br />
<strong>Applied</strong> Biosystems <strong>3130</strong>/<strong>3130</strong>xl <strong>Genetic</strong> <strong>Analyzers</strong> <strong>Getting</strong> <strong>Started</strong> <strong>Guide</strong> 127<br />
7
Notes<br />
Chapter 7 Running the Instrument<br />
Preparing Samples and Plate Assemblies<br />
Preparing Samples and Plate Assemblies<br />
<strong>Rev</strong>iew Table<br />
Generalized sample preparation and plate assembly<br />
procedures are discussed in Chapter 3, “Performing a<br />
Spectral Calibration,” on page 27.<br />
Topic... See<br />
Sample Preparation “Preparing the Calibration Standard” on page 31 and “Loading<br />
Samples” on page 32 to review handling samples.<br />
Follow your individual kit protocol to prepare sample load<br />
volume:<br />
10 to 30 µL for a 96-well plate<br />
5 to 15 µL for a 384-well plate<br />
Sealing plates and plate assembly “Seal the plate:” on page 33.<br />
Placing plate assemblies in the instrument “Placing the Plate Assembly into the Instrument” on page 39.<br />
Searching for plate records to link to a plate “Running the Spectral Calibration Plate” on page 40.<br />
Linking and Unlinking a Plate<br />
Link a plate on the autosampler to your newly created<br />
plate record before running the plate.<br />
Select the desired plate record, then click the plate<br />
position indicator corresponding to the plate position<br />
in the instrument. The plate position (A or B) displays<br />
in the link column.<br />
Note: The <strong>3130</strong> genetic analyzer has only one plate<br />
position (B) to link a plate record.<br />
The plate position indicator changes from yellow to<br />
green when linked and the green run button<br />
becomes active.<br />
128 <strong>Applied</strong> Biosystems <strong>3130</strong>/<strong>3130</strong>xl <strong>Genetic</strong> <strong>Analyzers</strong> <strong>Getting</strong> <strong>Started</strong> <strong>Guide</strong><br />
DRAFT<br />
November 16, 2004 12:37 pm, 07_RunInstrument.fm
DRAFT<br />
November 16, 2004 12:37 pm, 07_RunInstrument.fm<br />
Unlinking a Plate Record<br />
1. Click the plate record that you want to unlink.<br />
2. Click .<br />
Viewing the Run Schedule<br />
For more information on run scheduling and sample<br />
injection order, see “Plate Mapping” on page 161.<br />
To verify that runs are scheduled correctly:<br />
1. In the tree pane of the Data Collection software,<br />
click GA Instruments > ga<strong>3130</strong>xl or<br />
ga<strong>3130</strong> > instrument name > Run<br />
Scheduler > Run View.<br />
2. Select a row for any run. The corresponding<br />
wells to be injected for that run are highlighted in<br />
the plate diagram.<br />
Notes<br />
Chapter 7 Running the Instrument<br />
Linking and Unlinking a Plate<br />
<strong>Applied</strong> Biosystems <strong>3130</strong>/<strong>3130</strong>xl <strong>Genetic</strong> <strong>Analyzers</strong> <strong>Getting</strong> <strong>Started</strong> <strong>Guide</strong> 129<br />
2<br />
1<br />
7
Notes<br />
Chapter 7 Running the Instrument<br />
Running the Instrument<br />
Running the Instrument<br />
Starting the Run<br />
1. Verify that the active spectral calibration matches<br />
your dye set and capillary array length for all<br />
scheduled runs.<br />
To change the active spectral calibration, see<br />
“Activating a Spectral Calibration” on page 47.<br />
To create a new spectral calibration, see<br />
“Creating a Spectral Instrument Protocol” on<br />
page 35.<br />
2. Click the green button in the toolbar.<br />
3. The Processing Plates dialog box opens, then<br />
click .<br />
The software automatically performs a run<br />
validation:<br />
If the validation passes, the run starts<br />
If any of the validation test fails, the run<br />
does not start. Check the event log for<br />
information.<br />
130 <strong>Applied</strong> Biosystems <strong>3130</strong>/<strong>3130</strong>xl <strong>Genetic</strong> <strong>Analyzers</strong> <strong>Getting</strong> <strong>Started</strong> <strong>Guide</strong><br />
DRAFT<br />
November 16, 2004 12:37 pm, 07_RunInstrument.fm
DRAFT<br />
November 16, 2004 12:37 pm, 07_RunInstrument.fm<br />
Starting the Autoanalysis Manager for<br />
SeqScape and/or GeneMapper Software<br />
Use the Autoanalysis Manager (AAM) software with<br />
SeqScape ® and/or GeneMapper ® software to<br />
automatically analyze the data.<br />
1. Select Start > Programs > <strong>Applied</strong> Biosystems<br />
> Autoanalysis Manager > Autoanalysis<br />
Manager 3.0.<br />
Notes<br />
Note: Autoanalysis Manager does not start<br />
automatically. Open Autoanalysis Manager to<br />
receive messages from the data collection<br />
software for autoanalysis in SeqScape and/or<br />
GeneMapper software.<br />
The Autoanalysis Manager window opens.<br />
2. Quit the SeqScape and/or GeneMapper software.<br />
No other interaction with the AAM software is<br />
needed until the runs finish. See “Using<br />
Autoanalysis Manager Software” on page 155 on<br />
how to use the Autoanalysis Manager.<br />
Chapter 7 Running the Instrument<br />
Running the Instrument<br />
<strong>Applied</strong> Biosystems <strong>3130</strong>/<strong>3130</strong>xl <strong>Genetic</strong> <strong>Analyzers</strong> <strong>Getting</strong> <strong>Started</strong> <strong>Guide</strong> 131<br />
7
Basic Run Module<br />
Steps<br />
Notes<br />
Chapter 7 Running the Instrument<br />
Running the Instrument<br />
DNA Sequencing<br />
Run Times<br />
Automated module steps when the run starts<br />
Module Steps Approximate Time<br />
Turn Oven On N/A<br />
Wait for oven to equilibrate<br />
Initialize autosampler<br />
1 min 40 sec<br />
Fill Array 3-4 min<br />
PreRun 3 min<br />
Inject samples 10 to 30 sec<br />
Start separation<br />
Ramp voltage<br />
10 min<br />
Collect Data Variable<br />
Run ends:<br />
Leave oven on<br />
Laser to idle<br />
Total time prior to separation:<br />
Oven unheated: ~25 min<br />
Oven at set temperature: ~6.5 min<br />
Until next run starts<br />
To customize a run module, see the <strong>Applied</strong> Biosystems <strong>3130</strong>/<strong>3130</strong>xl <strong>Genetic</strong> <strong>Analyzers</strong><br />
Maintenance, Troubleshooting and Reference <strong>Guide</strong>.<br />
Note: The PostBatch Utility, which runs automatically, turns off both the oven and the<br />
laser at end of a batch of runs.<br />
Approximate run times of common DNA sequencing analysis runs<br />
Type of Run Run Module Run Time (min)<br />
Ultra rapid UltraSeq36_POP4 40<br />
UltraSeq36_POP7 35<br />
Rapid RapidSeq36_POP6 60<br />
RapidSeq36_POP7<br />
Fast FastSeq50_POP7 60<br />
Standard StdSeq50_POP4 100<br />
StdSeq50_POP6 150<br />
StdSeq50_POP7 120<br />
Long read LongSeq80_POP4 210<br />
LongSeq80_POP7 170<br />
132 <strong>Applied</strong> Biosystems <strong>3130</strong>/<strong>3130</strong>xl <strong>Genetic</strong> <strong>Analyzers</strong> <strong>Getting</strong> <strong>Started</strong> <strong>Guide</strong><br />
DRAFT<br />
November 16, 2004 12:37 pm, 07_RunInstrument.fm
DRAFT<br />
January 17, 2007 7:11 pm, 07_RunInstrument.fm<br />
Notes<br />
Fragment<br />
Analysis Run<br />
Times<br />
Controlling the Run<br />
Chapter 7 Running the Instrument<br />
Controlling the Run<br />
Approximate run times of common fragment analysis runs<br />
Type of Run Run Modules<br />
High Throughput, Small Size<br />
Fragment Analysis<br />
Run Time<br />
(min)<br />
FragmentAnalysis22_POP4 20<br />
SNP22_POP4 20<br />
Standard Fragment Analysis FragmentAnalysis36_POP4 45<br />
For the latest size standard modules (for example, run modules for the LIZ 1200 system),<br />
go to http://www.appliedbiosystems.com, then click the link for Support, then Software<br />
Downloads, then GeneScan Size Standards, then Run Modules.<br />
Using the Toolbar Use the toolbar at the top of the data collection software window to control the run.<br />
Click ... Description<br />
Start Run<br />
Stop<br />
Stop After Current Run<br />
HIDFragmentAnalysis36_POP4 45<br />
SNP36_POP4 30<br />
FragmentAnalysis36_POP7 35<br />
FragmentAnalysis50_POP4 65<br />
FragmentAnalysis50_POP6 90<br />
FragmentAnalysis50_POP7 50<br />
Starts the run<br />
Stops the current run, and all other<br />
scheduled runs<br />
Completes the current run, then stops<br />
all other scheduled runs<br />
<strong>Applied</strong> Biosystems <strong>3130</strong>/<strong>3130</strong>xl <strong>Genetic</strong> <strong>Analyzers</strong> <strong>Getting</strong> <strong>Started</strong> <strong>Guide</strong> 133<br />
7
Notes<br />
Chapter 7 Running the Instrument<br />
Set Up for Continuous Operation<br />
Set Up for Continuous Operation<br />
Overview Use the continuous run feature to create and link a plate during a run. You can:<br />
Adding or<br />
Replacing a Plate<br />
During a Run<br />
Click ... Description<br />
Skip to Next Run<br />
Pause Run<br />
Run one or more plates<br />
Remove the plate(s) once samples have run<br />
Link and run additional plates<br />
When using the continuous run feature:<br />
Stops the current run, then starts the<br />
other scheduled runs<br />
Pauses the current run a<br />
a Pausing the instrument for too long, especially after sample injection, will adversely<br />
affect data quality.<br />
Only mount or unmount plates when the instrument is paused.<br />
Create the plate record before pausing the instrument to make linking more<br />
efficient, reducing long pauses.<br />
Link new plates after a run has resumed.<br />
During a run, you can mount and unmount plates while the instrument is paused. The<br />
plate record can be created, then linked after the run has been resumed.<br />
If the plate is in use, see “Adding, Replacing, or Removing a Plate During a Run” on<br />
page 135.<br />
IMPORTANT! Pausing the instrument for too long, especially after sample injection, will<br />
affect data quality.<br />
134 <strong>Applied</strong> Biosystems <strong>3130</strong>/<strong>3130</strong>xl <strong>Genetic</strong> <strong>Analyzers</strong> <strong>Getting</strong> <strong>Started</strong> <strong>Guide</strong><br />
DRAFT<br />
January 17, 2007 7:11 pm, 07_RunInstrument.fm
DRAFT<br />
November 16, 2004 12:37 pm, 07_RunInstrument.fm<br />
Adding, Replacing, or Removing a Plate<br />
During a Run<br />
Replace a completed plate or add a new plate to an<br />
unused plate bay (<strong>3130</strong>xl genetic analyzer only).<br />
1. Prepare your plate and create the plate record.<br />
2. Click (Pause).<br />
In the Pause dialog box, read the pause warning,<br />
then click to pause the run.<br />
Notes<br />
The Resume run dialog box opens when the run<br />
is paused.<br />
IMPORTANT! Do not click OK to resume the<br />
run. Temporarily ignore the dialog box.<br />
3. Remove the old plate, if applicable.<br />
a. Press the Tray button to bring the<br />
autosampler forward.<br />
b. Open the instrument door.<br />
c. Remove the old plate.<br />
4. Mount the new plate.<br />
5. Close the door.<br />
6. Click OK in the Resume Run dialog box.<br />
7. In the Completed Run dialog box, click to<br />
continue if the samples have been injected, or<br />
click to abort the run and return the<br />
instrument to an idle state.<br />
IMPORTANT! If you click OK, the instrument<br />
will continue running the current run regardless<br />
of whether the samples have actually been<br />
injected or not. If the samples have not been<br />
injected, the samples will be injected from the<br />
new plate.<br />
Chapter 7 Running the Instrument<br />
Set Up for Continuous Operation<br />
<strong>Applied</strong> Biosystems <strong>3130</strong>/<strong>3130</strong>xl <strong>Genetic</strong> <strong>Analyzers</strong> <strong>Getting</strong> <strong>Started</strong> <strong>Guide</strong> 135<br />
7
Chapter 7 Running the Instrument<br />
Set Up for Continuous Operation<br />
8. Search for the plate record, then link the new<br />
plate.<br />
The new plate runs after the current plate<br />
completes all scheduled injections.<br />
Notes<br />
Note: If you unmount the currently running<br />
plate prior to the first frame of data being<br />
collected but after sample injection (clicked OK<br />
to continue), the plate status changes to<br />
processed even though the run is actually<br />
continuing.<br />
136 <strong>Applied</strong> Biosystems <strong>3130</strong>/<strong>3130</strong>xl <strong>Genetic</strong> <strong>Analyzers</strong> <strong>Getting</strong> <strong>Started</strong> <strong>Guide</strong><br />
DRAFT<br />
November 16, 2004 12:37 pm, 07_RunInstrument.fm
DRAFT<br />
November 16, 2004 12:37 pm, 07_RunInstrument.fm<br />
Viewing Data During a Run<br />
Run Scheduler ><br />
Plate View<br />
Notes<br />
Chapter 7 Running the Instrument<br />
Set Up for Continuous Operation<br />
In the tree pane of the Data Collection software, click<br />
GA Instruments > ga<strong>3130</strong>xl or ga<strong>3130</strong> > instrument name > Run<br />
Scheduler > Plate View.<br />
Note: The Run Scheduler and Plate View windows display the same<br />
information.<br />
<strong>Applied</strong> Biosystems <strong>3130</strong>/<strong>3130</strong>xl <strong>Genetic</strong> <strong>Analyzers</strong> <strong>Getting</strong> <strong>Started</strong> <strong>Guide</strong> 137<br />
7
Chapter 7 Running the Instrument<br />
Set Up for Continuous Operation<br />
Run Scheduler ><br />
Run View<br />
Notes<br />
In the tree pane of the Data Collection software, click<br />
GA Instruments > ga<strong>3130</strong>xl or ga<strong>3130</strong> > instrument name > Run<br />
Scheduler > Run View to monitor the status of the scheduled runs.<br />
Note: For default load maps, see Appendix A, “Plate Mapping.”<br />
138 <strong>Applied</strong> Biosystems <strong>3130</strong>/<strong>3130</strong>xl <strong>Genetic</strong> <strong>Analyzers</strong> <strong>Getting</strong> <strong>Started</strong> <strong>Guide</strong><br />
DRAFT<br />
November 16, 2004 12:37 pm, 07_RunInstrument.fm
DRAFT<br />
November 16, 2004 12:37 pm, 07_RunInstrument.fm<br />
Chapter 7 Running the Instrument<br />
Set Up for Continuous Operation<br />
Instrument Status In the tree pane of the Data Collection software, click<br />
GA Instruments > ga<strong>3130</strong>xl or ga<strong>3130</strong> > instrument name > Instrument<br />
Status to monitor the status of the instrument or the current run.<br />
Notes<br />
Open the Event Log to monitor<br />
system messages<br />
System Status changes from green to flashing<br />
red when errors occur, see Event Log.<br />
System Status must be<br />
‘Ready’ before a run starts<br />
Array and polymer information<br />
<strong>Applied</strong> Biosystems <strong>3130</strong>/<strong>3130</strong>xl <strong>Genetic</strong> <strong>Analyzers</strong> <strong>Getting</strong> <strong>Started</strong> <strong>Guide</strong> 139<br />
7
Notes<br />
Chapter 7 Running the Instrument<br />
Set Up for Continuous Operation<br />
Instrument Condition Sensor States Pane<br />
The color of the indicator provides a quick way to check the status of the item to the left.<br />
See the table below for a definition of each color.<br />
For...<br />
Events Box<br />
The Events box lists the:<br />
Instrument’s recent actions<br />
Status of each capillary as passed or failed at the end of a spectral calibration<br />
Calibration data at the end of a spatial calibration<br />
Some of the events listed in the Events box provide information for service engineers.<br />
Errors Box<br />
A green box<br />
indicates...<br />
A red box<br />
indicates...<br />
The Errors box lists errors that have occurred during the current run.<br />
A yellow box<br />
indicates...<br />
Laser Laser is off Laser is on Laser is idle<br />
EP Electrophoresis is off Electrophoresis is on —<br />
Oven Oven is off Oven is on —<br />
Front Doors Doors are closed Doors are open —<br />
Oven Door Door is closed Door is open —<br />
Autosampler Autosampler is homed Autosampler is forward —<br />
Some of the error messages provide information for service engineers. A “fatal” error<br />
usually requires that you restart the data collection software.<br />
140 <strong>Applied</strong> Biosystems <strong>3130</strong>/<strong>3130</strong>xl <strong>Genetic</strong> <strong>Analyzers</strong> <strong>Getting</strong> <strong>Started</strong> <strong>Guide</strong><br />
DRAFT<br />
November 16, 2004 12:37 pm, 07_RunInstrument.fm
DRAFT<br />
November 16, 2004 12:37 pm, 07_RunInstrument.fm<br />
Instrument Status<br />
> EPT Chart<br />
Notes<br />
Chapter 7 Running the Instrument<br />
Set Up for Continuous Operation<br />
In the tree pane of the Data Collection software, click GA Instruments ><br />
ga<strong>3130</strong>xl or ga<strong>3130</strong> > instrument name > Instrument Status > EPT<br />
Chart. The EPT chart displays real-time electrophoresis (EP) data during a run.<br />
<strong>Applied</strong> Biosystems <strong>3130</strong>/<strong>3130</strong>xl <strong>Genetic</strong> <strong>Analyzers</strong> <strong>Getting</strong> <strong>Started</strong> <strong>Guide</strong> 141<br />
7
Chapter 7 Running the Instrument<br />
Set Up for Continuous Operation<br />
Instrument Status<br />
> Event Log<br />
Notes<br />
In the tree pane of the Data Collection software, click GA Instruments ><br />
ga<strong>3130</strong>xl or ga<strong>3130</strong> > instrument name > Instrument Status > Event<br />
Log. The Event log itemizes events such as errors and general information for all data<br />
collection steps.<br />
Clear error messages by clicking Clear Errors. The System Status light flashes red until<br />
all errors are cleared. Take corrective action based on error message.<br />
Note: This view can also be used to monitor spectral calibration results in real time to<br />
verify the capillary-by-capillary processing status.<br />
Clear Errors changes the System status from red to green (ready state).<br />
142 <strong>Applied</strong> Biosystems <strong>3130</strong>/<strong>3130</strong>xl <strong>Genetic</strong> <strong>Analyzers</strong> <strong>Getting</strong> <strong>Started</strong> <strong>Guide</strong><br />
DRAFT<br />
November 16, 2004 12:37 pm, 07_RunInstrument.fm
DRAFT<br />
November 16, 2004 12:37 pm, 07_RunInstrument.fm<br />
Chapter 7 Running the Instrument<br />
Set Up for Continuous Operation<br />
Capillaries Viewer In the tree pane of the Data Collection software, click GA Instruments > ga<strong>3130</strong><br />
or ga<strong>3130</strong>xl > instrument name > Capillaries Viewer. Use the Capillary Viewer<br />
to examine the quality of the raw data during a run for several capillaries at once.<br />
Notes<br />
Check Boxes<br />
Select the check boxes of the capillaries to view their electropherograms. The capillaries<br />
are displayed in the order in which the boxes are checked. The more boxes that are<br />
selected, the slower the refresh window rate.<br />
Raw Data An electropherogram is a graph of relative dye concentration against time, plotted for<br />
each dye. The displayed raw data has been corrected for spectral overlap<br />
(multicomponented).<br />
How to Zoom<br />
To zoom in and out:<br />
Click individual colors to view or hide them<br />
1. Select a rectangular area over the area of interest by holding down the mouse<br />
button. Release the mouse button to zoom in.<br />
2. Click to return to full view.<br />
Select check boxes<br />
of capillaries to<br />
display<br />
Raw,<br />
multicomponented<br />
data<br />
<strong>Applied</strong> Biosystems <strong>3130</strong>/<strong>3130</strong>xl <strong>Genetic</strong> <strong>Analyzers</strong> <strong>Getting</strong> <strong>Started</strong> <strong>Guide</strong> 143<br />
7
Chapter 7 Running the Instrument<br />
Set Up for Continuous Operation<br />
Cap/Array Viewer In the tree pane of the Data Collection software, click GA Instruments > ga<strong>3130</strong><br />
or ga<strong>3130</strong>xl > instrument name > Cap/Array Viewer. Use the window during a<br />
run to examine the quality of your data, which is displayed as color data for the entire<br />
capillary array. You can view all the capillaries (vertical axis) as a function of time/scan<br />
numbers (horizontal axis).<br />
Notes<br />
Capillary<br />
order<br />
1<br />
4<br />
How to Zoom<br />
To zoom in and out:<br />
Click individual colors to view or hide them<br />
0 End<br />
1. Select a rectangular area over the area of interest by holding down the mouse<br />
button. Release the mouse button to zoom in.<br />
2. Click to return to full view.<br />
Raw data<br />
display for<br />
selected<br />
capillary (4)<br />
Electropherogram<br />
displays<br />
144 <strong>Applied</strong> Biosystems <strong>3130</strong>/<strong>3130</strong>xl <strong>Genetic</strong> <strong>Analyzers</strong> <strong>Getting</strong> <strong>Started</strong> <strong>Guide</strong><br />
DRAFT<br />
November 16, 2004 12:37 pm, 07_RunInstrument.fm
DRAFT<br />
November 16, 2004 12:37 pm, 07_RunInstrument.fm<br />
Working with Data in The Run History View<br />
Run History Components<br />
Elements of the<br />
Run History Utility<br />
Notes<br />
Chapter 7 Running the Instrument<br />
Working with Data in The Run History View<br />
Use the Run History utility only with completed runs stored in the local <strong>3130</strong>/<strong>3130</strong>xl<br />
genetic analyzer Data Collection database. It does not provide real-time viewing of<br />
collecting runs.<br />
In the left tree pane, click the icon next to the function to launch it.<br />
Elements Within the Run History Utility<br />
Icon Element Displays the...<br />
EPT Viewer Electrophoresis data of the run, such as voltage, current,<br />
and oven temperature profiles.<br />
Event Log Event messages associated with the run.<br />
Instrument<br />
Protocol<br />
Spatial<br />
Calibration<br />
Viewer<br />
Capillaries<br />
Viewer<br />
Cap/Array<br />
Viewer<br />
Spectral<br />
Viewer<br />
Instrument protocol and run module settings used for the<br />
run.<br />
Spatial calibration associated with the run.<br />
Individual electropherogram for each sample in the run.<br />
Array view of the run.<br />
Spectral calibration used for the run.<br />
Reextraction Extraction and analysis status for all samples in the run.<br />
See “Viewing Autoextraction Results” on page 147 for<br />
more details.<br />
Note: If Cleanup Database has been used, you cannot view processed data in Run History.<br />
<strong>Applied</strong> Biosystems <strong>3130</strong>/<strong>3130</strong>xl <strong>Genetic</strong> <strong>Analyzers</strong> <strong>Getting</strong> <strong>Started</strong> <strong>Guide</strong> 145<br />
7
Notes<br />
Chapter 7 Running the Instrument<br />
Viewing Data from a Completed Run in the Data Collection Software<br />
Viewing Data from a Completed Run in the Data Collection<br />
Software<br />
View data using two formats within the <strong>3130</strong>/<strong>3130</strong>xl<br />
genetic analyzer Data Collection software under the<br />
Run History icon:<br />
In the Cap/Array Viewer window (in much the<br />
same way that you might view the gel file output<br />
from an ABI PRISM ® slab gel instrument).<br />
In the Capillary Viewer window, capillary-bycapillary.<br />
Viewing Data from a Completed Run<br />
1. In the tree pane of the Data Collection software,<br />
click GA Instruments > ga<strong>3130</strong>xl or<br />
ga<strong>3130</strong> > Run History to select the run you<br />
want to view.<br />
2. Search for your run by either Barcode or<br />
Advanced search.<br />
3. After choosing the run, click the run history<br />
elements, such as Cap/Array Viewer or the<br />
Capillary Viewer from the left tree pane to look<br />
at the run data.<br />
146 <strong>Applied</strong> Biosystems <strong>3130</strong>/<strong>3130</strong>xl <strong>Genetic</strong> <strong>Analyzers</strong> <strong>Getting</strong> <strong>Started</strong> <strong>Guide</strong><br />
DRAFT<br />
November 16, 2004 12:37 pm, 07_RunInstrument.fm
DRAFT<br />
November 16, 2004 12:37 pm, 07_RunInstrument.fm<br />
Viewing Autoextraction Results<br />
Notes<br />
Chapter 7 Running the Instrument<br />
Viewing Autoextraction Results<br />
Overview After a run is completed, extraction and analysis is performed automatically, using the<br />
settings in the Plate Editor and the Results Group. View the results of extraction and<br />
analysis in the Reextraction Panel. Reextract samples with the same settings, or with<br />
different Analysis Protocols or Results Groups. This process can be useful for<br />
many reasons:<br />
Sample File<br />
Destinations<br />
Effects of<br />
Changes Made in<br />
the Reextraction<br />
Panel<br />
The destination location may not have been available during extraction.<br />
Some samples may have failed analysis and a different Analysis Protocol might be<br />
more successful.<br />
Samples might be saved in different locations, or with no analysis at all to<br />
save space.<br />
Sample names may need to be edited.<br />
Locate the Results Group’s Naming Tab and check the Destination Tab and Run Folder<br />
Name Format to find the sample file destination.<br />
Changes made in the Reextraction Panel to a Results Group, Analysis protocol, sample<br />
names, or Comments, also change in the original plate record. The original plate<br />
information is overwritten.<br />
<strong>Applied</strong> Biosystems <strong>3130</strong>/<strong>3130</strong>xl <strong>Genetic</strong> <strong>Analyzers</strong> <strong>Getting</strong> <strong>Started</strong> <strong>Guide</strong> 147<br />
7
Chapter 7 Running the Instrument<br />
Viewing Autoextraction Results<br />
Selecting and Queuing Samples for<br />
Extraction<br />
Queue individual samples for reextraction to<br />
experiment with different Analysis Protocols for<br />
samples that have failed initial extraction.<br />
1. Click (Run History).<br />
2. Enter the plate name for a plate that has been<br />
completed, or click Search. Plates that have runs<br />
still pending cannot be reextracted. All the runs<br />
from that plate appear in the window.<br />
3. Select a run from the list.<br />
4. Click (Reextraction) in the left tree pane to<br />
display the Reextraction window.<br />
5. Click the check boxes in the Extract column to<br />
select the samples to be reextracted.<br />
6. Click Extract to start the reextraction.<br />
Notes<br />
Note: Reextracted sample files are saved in the<br />
original folder that data was extracted to unless<br />
this destination was changed through the Results<br />
Group.<br />
148 <strong>Applied</strong> Biosystems <strong>3130</strong>/<strong>3130</strong>xl <strong>Genetic</strong> <strong>Analyzers</strong> <strong>Getting</strong> <strong>Started</strong> <strong>Guide</strong><br />
DRAFT<br />
November 16, 2004 12:37 pm, 07_RunInstrument.fm
DRAFT<br />
November 16, 2004 12:37 pm, 07_RunInstrument.fm<br />
Elements of the Reextraction Window<br />
All the samples are displayed with the results of<br />
extraction and analysis.<br />
Note: Sort the columns of the re-extraction panel by<br />
holding the shift key and then clicking on a column<br />
header.<br />
Reextraction Window for Sequencing Analysis<br />
Notes<br />
Use check boxes to<br />
select samples to<br />
be reextracted<br />
Select a run<br />
Click here to start extraction<br />
Chapter 7 Running the Instrument<br />
Viewing Autoextraction Results<br />
Results of extraction and analysis<br />
Use these buttons if several samples<br />
are highlighted<br />
<strong>Applied</strong> Biosystems <strong>3130</strong>/<strong>3130</strong>xl <strong>Genetic</strong> <strong>Analyzers</strong> <strong>Getting</strong> <strong>Started</strong> <strong>Guide</strong> 149<br />
7
Chapter 7 Running the Instrument<br />
Viewing Autoextraction Results<br />
Reextraction Window for Fragment Analysis<br />
Notes<br />
Use check boxes to select<br />
samples to be reextracted Select a run Results of extraction<br />
Click here to start extraction<br />
Use these buttons if several<br />
samples are highlighted<br />
150 <strong>Applied</strong> Biosystems <strong>3130</strong>/<strong>3130</strong>xl <strong>Genetic</strong> <strong>Analyzers</strong> <strong>Getting</strong> <strong>Started</strong> <strong>Guide</strong><br />
DRAFT<br />
November 16, 2004 12:37 pm, 07_RunInstrument.fm
DRAFT<br />
November 16, 2004 12:37 pm, 07_RunInstrument.fm<br />
Notes<br />
Chapter 7 Running the Instrument<br />
Viewing Autoextraction Results<br />
Results Column The results of extraction and analysis are color coded in the Results column. The<br />
following table lists the colors and their values for Sequencing Analysis.<br />
Color Value<br />
Red Extraction or analysis failed<br />
Note: Descriptive messages can be viewed by resizing the Results column to<br />
view all text.<br />
Yellow Warnings for extraction or analysis<br />
Note: Descriptive messages can be viewed by resizing the Results column to<br />
view all text.<br />
Green Successful extraction (with no analysis intended), or successful extraction<br />
and analysis.<br />
The Results column, by default, shows only the beginning of any processing message.<br />
The entire message and the sample file location can be viewed by expanding the cell.<br />
There is a tooltip view for each sample results message.<br />
Tooltip view. Access by placing the cursor over the sample of interest<br />
Drag the cell’s edge to expand the column<br />
<strong>Applied</strong> Biosystems <strong>3130</strong>/<strong>3130</strong>xl <strong>Genetic</strong> <strong>Analyzers</strong> <strong>Getting</strong> <strong>Started</strong> <strong>Guide</strong> 151<br />
7
Notes<br />
Chapter 7 Running the Instrument<br />
Viewing Autoextraction Results<br />
Expanded column<br />
Quality Column The Quality column represents the quality values for an entire sequence. Quality Values<br />
are only assigned to analyzed samples when using the KB Basecaller.<br />
Colors displayed and their associated value range<br />
The column is empty (white) if:<br />
Color Quality Value Range<br />
Red < 15<br />
Orange ≥ 15 and < 20<br />
Yellow ≥ 20 and < 30<br />
Green > 30<br />
Note: For more information on KB Basecaller and Quality Values, see the <strong>Applied</strong><br />
Biosystems DNA Sequencing Analysis Software v5.1 User <strong>Guide</strong>, PN 4346366.<br />
Analysis was not performed<br />
Analysis failed<br />
ABI Basecaller was used for analysis. This basecaller does not assign<br />
Quality Values.<br />
152 <strong>Applied</strong> Biosystems <strong>3130</strong>/<strong>3130</strong>xl <strong>Genetic</strong> <strong>Analyzers</strong> <strong>Getting</strong> <strong>Started</strong> <strong>Guide</strong><br />
DRAFT<br />
November 16, 2004 12:37 pm, 07_RunInstrument.fm
DRAFT<br />
November 16, 2004 12:37 pm, 07_RunInstrument.fm<br />
Results Group and Analysis Protocol<br />
Columns<br />
You can edit and make changes for reextraction to the<br />
Results Group and the Analysis Protocol (Analysis<br />
Method in the GeneMapper ® software).<br />
Note: Select an entire column in the Reextraction<br />
window by clicking on the column header. For<br />
example, clicking on the Extract column header<br />
selects all samples. Clicking the Uncheck or Check<br />
buttons at the bottom of the window, enables or<br />
disables the check boxes for each sample. The filldown<br />
command (Ctrl+D) works the same here as in<br />
the Plate Editor for easier information input.<br />
Sorting the Samples<br />
1. Hold down the shift key while clicking on the<br />
column header to sort samples according to the<br />
column properties.<br />
2. Shift-click again to sort them in reverse order.<br />
Sort by:<br />
Capillary number<br />
Well position<br />
Results<br />
Quality<br />
Extract column<br />
Notes<br />
Note: For example, bring all of the failed<br />
analysis or extraction samples to the top of the<br />
column. Now they can be viewed without having<br />
to scroll down to each sample individually.<br />
Chapter 7 Running the Instrument<br />
Viewing Autoextraction Results<br />
<strong>Applied</strong> Biosystems <strong>3130</strong>/<strong>3130</strong>xl <strong>Genetic</strong> <strong>Analyzers</strong> <strong>Getting</strong> <strong>Started</strong> <strong>Guide</strong> 153<br />
7
Chapter 7 Running the Instrument<br />
Viewing Autoextraction Results<br />
Reextracting Selected Samples<br />
1. Expand the Results column cells for any yellow<br />
or red results to see a description of the warning<br />
or failure.<br />
2. If desired, select a new Results Group, or edit the<br />
current one. Selecting a new Results Group<br />
allows you to turn off autoanalysis, change the<br />
samples and folder naming options, the location<br />
where they are placed, and the owner of the<br />
Results Group.<br />
3. If desired, change the Analysis Protocol to<br />
experiment with different ways of analyzing the<br />
sample, using a different basecaller for example.<br />
4. Check the check box in the Extract column for<br />
the samples you wish to extract again.<br />
5. Click Extract.<br />
Notes<br />
Note: Reextraction creates an entirely new<br />
sample file and does not replace the previously<br />
saved sample file. The presence of a previous<br />
sample file has no effect on the creation of a new<br />
sample file. If the same naming options that are<br />
used for reextraction are identical to those used<br />
previously, a number is appended to the<br />
filename. For example, if the first sample is,<br />
“sample 01.ab1” then the second sample would<br />
be, “sample 01 (1).ab1.”<br />
154 <strong>Applied</strong> Biosystems <strong>3130</strong>/<strong>3130</strong>xl <strong>Genetic</strong> <strong>Analyzers</strong> <strong>Getting</strong> <strong>Started</strong> <strong>Guide</strong><br />
DRAFT<br />
November 16, 2004 12:37 pm, 07_RunInstrument.fm
DRAFT<br />
November 16, 2004 12:37 pm, 07_RunInstrument.fm<br />
Using Autoanalysis Manager Software<br />
Notes<br />
Chapter 7 Running the Instrument<br />
Using Autoanalysis Manager Software<br />
Use Autoanalysis Manager software with SeqScape and/or GeneMapper software. The<br />
Autoanalysis Manager software is installed by the SeqScape or GeneMapper software<br />
installation CD.<br />
Autoanalysis occurs in the following sequence:<br />
1. When data collection software finishes a run, the Message Service sends the<br />
message “Run Completed.”<br />
2. The Autoanalysis Manager receives the message, and the job is submitted. The job<br />
appears in the General tab.<br />
3. The Autoanalysis Manager polls for jobs every 2 minutes and opens the automated<br />
processing version of SeqScape and/or GeneMapper software to analyze the data.<br />
4. At the end of analysis, the status in the Autoanalysis Manager is updated.<br />
Files Created The data collection software stores the sample files in the location specified in the results<br />
group. The Autoanalysis Manager copies the files into the Data Store for SeqScape or<br />
GeneMapper processing.<br />
Autoanalyzed<br />
Samples<br />
To maintain sufficient storage space on your hard drive, delete or transfer unnecessary<br />
sample files to a different network or CD.<br />
Note: If your GeneMapper or SeqScape software was opened during autoanalysis, then<br />
close your analysis application and relaunch the Autoanalysis Manager.<br />
Once an internal message from the instrument is received by the Autoanalysis Manager,<br />
it opens the automated processing version of SeqScape and/or GeneMapper software to<br />
autoanalyze the samples. The standard user version of SeqScape and/or GeneMapper<br />
software must be closed in order for autoanalysis to begin.<br />
<strong>Applied</strong> Biosystems <strong>3130</strong>/<strong>3130</strong>xl <strong>Genetic</strong> <strong>Analyzers</strong> <strong>Getting</strong> <strong>Started</strong> <strong>Guide</strong> 155<br />
7
Components<br />
Notes<br />
Chapter 7 Running the Instrument<br />
Using Autoanalysis Manager Software<br />
The Autoanalysis Manager has two or three tabs:<br />
General tab<br />
GeneMapper tab, if GeneMapper v3.7 or GeneMapper ID v3.2 software is installed<br />
SeqScape tab, if SeqScape software is installed<br />
General Tab The General tab shows the jobs that have been submitted and their status.<br />
Command Buttons in the General Tab<br />
Command Button Functions in the General Tab<br />
Button Name Function<br />
Delete Job Deletes an individual job/project from the Autoanalysis Manager<br />
list.<br />
Does not delete sample files, SeqScape or GeneMapper<br />
software project.<br />
Delete Completed Jobs Deletes all completed jobs/projects from the Autoanalysis<br />
Manager list. Only successful jobs are deleted.<br />
Does not delete sample files, SeqScape or GeneMapper<br />
software projects.<br />
Move Job Up The active job/project is always given a queue number of 1. Once<br />
Move Job Down<br />
job 1 is finished analyzing, job 2 becomes job 1 and all other<br />
numbers are changed accordingly. Use the Move Up/Down<br />
buttons if you want to rearrange the analysis order.<br />
156 <strong>Applied</strong> Biosystems <strong>3130</strong>/<strong>3130</strong>xl <strong>Genetic</strong> <strong>Analyzers</strong> <strong>Getting</strong> <strong>Started</strong> <strong>Guide</strong><br />
DRAFT<br />
November 16, 2004 12:37 pm, 07_RunInstrument.fm
DRAFT<br />
November 16, 2004 12:37 pm, 07_RunInstrument.fm<br />
Notes<br />
GeneMapper<br />
Software Tab<br />
Chapter 7 Running the Instrument<br />
Using Autoanalysis Manager Software<br />
The GeneMapper software tab shows the jobs that have been submitted and their status.<br />
Command Buttons in the GeneMapper Software Tab<br />
Command Button Functions in the GeneMapper Software Tab<br />
Button Name Function<br />
Configure Schedule Next Analysis Time:<br />
Enables you to set a start time for autoanalysis. Before this<br />
time arrives, autoanalysis of projects will not occur.<br />
Periods restricting automated analysis:<br />
Enables you to set times during which autoanalysis will not<br />
occur. Useful if you know that you are going to be reviewing<br />
data during a certain time period and don’t want to be<br />
bothered by the “Runs ready for processing” dialog box. Runs<br />
build up in the queue until the restricting time period is over at<br />
which time the runs will be autoanalyzed.<br />
Automatic Deletion of Completed Jobs:<br />
Enables you to set the software to automatically delete<br />
successfully completed jobs. Jobs that failed or have not been<br />
analyzed will not be deleted. Only the Autoanalysis Manager<br />
job is deleted, sample files and GeneMapper software projects<br />
are not.<br />
Edit Properties Enables you to change the following settings:<br />
Job/Project Name<br />
UserName: GeneMapper software UserName<br />
Password: Matching password for GeneMapper software<br />
UserName<br />
Queue position: Enter a new queue position number for the<br />
project<br />
<strong>Applied</strong> Biosystems <strong>3130</strong>/<strong>3130</strong>xl <strong>Genetic</strong> <strong>Analyzers</strong> <strong>Getting</strong> <strong>Started</strong> <strong>Guide</strong> 157<br />
7
Notes<br />
Chapter 7 Running the Instrument<br />
Using Autoanalysis Manager Software<br />
Button Name Function<br />
Requeue Job Samples that need to be autoanalyzed have queue numbers<br />
listed in the # column.<br />
Samples that are already analyzed or failed, have a blank cell<br />
in the # column.<br />
To resubmit a job for autoanalysis, use the Requeue Job<br />
button to assign a queue number to that job.<br />
Delete Job Deletes an individual job/project from the AutoAnalysis<br />
Manager list.<br />
Does not delete sample files or GeneMapper software project.<br />
Delete Completed Jobs Deletes all completed jobs/projects from the AutoAnalysis<br />
Manager list. Only successful jobs are deleted.<br />
Does not delete sample files or GeneMapper software<br />
projects.<br />
158 <strong>Applied</strong> Biosystems <strong>3130</strong>/<strong>3130</strong>xl <strong>Genetic</strong> <strong>Analyzers</strong> <strong>Getting</strong> <strong>Started</strong> <strong>Guide</strong><br />
DRAFT<br />
November 16, 2004 12:37 pm, 07_RunInstrument.fm
DRAFT<br />
November 16, 2004 12:37 pm, 07_RunInstrument.fm<br />
Notes<br />
SeqScape<br />
Software Tab<br />
Chapter 7 Running the Instrument<br />
Using Autoanalysis Manager Software<br />
The SeqScape software tab shows the jobs, project, and status information.<br />
Command Button Functions in the SeqScape Software Tab<br />
Button Name Function<br />
Details Displays the project in the navigation pane<br />
Resubmit Submits a job for analysis<br />
Edit Properties Edits the name and password (active only if analysis failed)<br />
Delete Deletes a job from the Autoanalysis Manager<br />
<strong>Applied</strong> Biosystems <strong>3130</strong>/<strong>3130</strong>xl <strong>Genetic</strong> <strong>Analyzers</strong> <strong>Getting</strong> <strong>Started</strong> <strong>Guide</strong> 159<br />
7
Chapter 7 Running the Instrument<br />
Viewing Analyzed Data<br />
Viewing Analyzed Data<br />
Locating Sample<br />
Files<br />
Viewing Sample<br />
Files<br />
Notes<br />
Analyzed sample files are extracted into a run folder defined in the Naming tab of your<br />
Results Group, and placed in a location defined in the Destination tab.<br />
The default location is:<br />
E:\<strong>Applied</strong>Biosystems\UDC\Data Collection\Data\ \\<br />
Locating Sample Files<br />
Locate the reextracted data in the location defined by the Results Group or the default<br />
destination location.<br />
Use the Sequencing Analysis, SeqScape, or the GeneMapper Software to view reextracted<br />
sample electropherogram data, both raw, and analyzed.<br />
Sample file type File extension<br />
Sequencing, SeqScape .ab1<br />
Fragment analysis .fsa<br />
160 <strong>Applied</strong> Biosystems <strong>3130</strong>/<strong>3130</strong>xl <strong>Genetic</strong> <strong>Analyzers</strong> <strong>Getting</strong> <strong>Started</strong> <strong>Guide</strong><br />
DRAFT<br />
November 16, 2004 12:37 pm, 07_RunInstrument.fm
DRAFT<br />
November 3, 2004 9:51 am, A_Appendix.fm<br />
Injection Scheduling<br />
Capillary Array Map<br />
Notes<br />
Appendix A<br />
Plate Mapping<br />
Samples are scheduled for injection based on their position in a 96-or 384-well plate and<br />
the capillary number. Study the appropriate plate mapping patterns described in “96-<br />
Well Plate Mapping” or “384-Well Plate Mapping” to arrange your samples according to<br />
your preferred injection priority.<br />
The injection schedule system is based on the:<br />
Order of the linked plates (<strong>3130</strong>xl instrument only). See page 128 for linking plate<br />
information.<br />
Sample priority value in the plate record.<br />
If all priorities are set to 100 (default), then runs are scheduled as outlined below. See the<br />
<strong>Applied</strong> Biosystems <strong>3130</strong>/<strong>3130</strong>xl <strong>Genetic</strong> <strong>Analyzers</strong> Maintenance, Troubleshooting, and<br />
Reference <strong>Guide</strong> on “Run Priority Scheduling”.<br />
The capillary numbers in the capillary array are shown in the layout below. The capillary<br />
array layout is the same for both 96- and 384-well plates.<br />
Capillary Number Layout<br />
<strong>Applied</strong> Biosystems <strong>3130</strong>/<strong>3130</strong>xl <strong>Genetic</strong> <strong>Analyzers</strong> <strong>Getting</strong> <strong>Started</strong> <strong>Guide</strong> 161
Appendix A<br />
96-Well Plate Mapping<br />
96-Well Plate Mapping<br />
Notes<br />
<strong>3130</strong>xl <strong>Genetic</strong><br />
Analyzer<br />
<strong>3130</strong> <strong>Genetic</strong><br />
Analyzer<br />
For a 96-well plate, injections are made from every well in two consecutive rows,<br />
starting with an odd row. A full 96-well plate requires six runs to inject all samples. See<br />
the examples below where samples (grey) and capillary number (number) positions can<br />
affect your number of runs.<br />
Efficient Sample Placement Inefficient Sample Placement<br />
Inject 48 samples using three runs Inject 32 samples using four runs<br />
H<br />
15<br />
16<br />
15<br />
16<br />
15<br />
16<br />
G<br />
13<br />
14<br />
13<br />
14<br />
13<br />
14<br />
F<br />
11<br />
12<br />
11<br />
12<br />
11<br />
12<br />
E<br />
9<br />
10<br />
9<br />
10<br />
9<br />
10<br />
D<br />
7<br />
8<br />
7<br />
8<br />
7<br />
8<br />
C<br />
5<br />
6<br />
5<br />
6<br />
5<br />
6<br />
B<br />
3<br />
4<br />
3<br />
4<br />
3<br />
4<br />
A<br />
1<br />
2<br />
1<br />
2<br />
1<br />
2<br />
1<br />
2 3 4 5 6<br />
For a 96-well plate, injections are made from four consecutive wells in a row. A full plate<br />
of 96 sample requires 24 runs to inject all samples once.<br />
In the following example of a 96-well plate, the gray circles represent samples and the<br />
number in the well indicates capillary number. It takes four runs to inject 16 samples.<br />
Run 2<br />
H<br />
4<br />
G<br />
3<br />
F<br />
2<br />
E<br />
1<br />
162 <strong>Applied</strong> Biosystems <strong>3130</strong>/<strong>3130</strong>xl <strong>Genetic</strong> <strong>Analyzers</strong> <strong>Getting</strong> <strong>Started</strong> <strong>Guide</strong><br />
Run 1<br />
Run 2<br />
Run 3<br />
Run 4 4 3 2 1 4 3 2 1<br />
Run 3<br />
D<br />
4<br />
C<br />
3<br />
B<br />
2<br />
H<br />
15<br />
16<br />
15<br />
16<br />
15<br />
16<br />
15<br />
16<br />
A<br />
1<br />
G<br />
13<br />
14<br />
13<br />
14<br />
13<br />
14<br />
13<br />
14<br />
1<br />
2 3<br />
F<br />
11<br />
12<br />
11<br />
12<br />
11<br />
12<br />
11<br />
12<br />
E<br />
9<br />
10<br />
9<br />
10<br />
9<br />
10<br />
9<br />
10<br />
D<br />
7<br />
8<br />
7<br />
8<br />
7<br />
8<br />
7<br />
8<br />
C<br />
5<br />
6<br />
5<br />
6<br />
5<br />
6<br />
5<br />
6<br />
Run 1<br />
B<br />
3<br />
4<br />
3<br />
4<br />
3<br />
4<br />
3<br />
4<br />
A<br />
1<br />
2<br />
1<br />
2<br />
1<br />
2<br />
1<br />
2<br />
1 2 3 4 5 6 7 8<br />
Run 1<br />
Run 2<br />
Run 3<br />
Run 4<br />
DRAFT<br />
November 3, 2004 9:51 am, A_Appendix.fm
DRAFT<br />
November 3, 2004 9:51 am, A_Appendix.fm<br />
384-Well Plate Mapping<br />
Notes<br />
<strong>3130</strong>xl <strong>Genetic</strong><br />
Analyzer<br />
<strong>3130</strong> <strong>Genetic</strong><br />
Analyzer<br />
Appendix A<br />
384-Well Plate Mapping<br />
For a 384-well plate, injections are made from every other well and every other row. A<br />
full plate of 384 samples requires 24 runs to inject all samples once.<br />
The example below is the injection pattern for the first four injections, starting with well<br />
A01. The light gray circles represent samples and the dark gray circles indicate the<br />
injection pattern.<br />
GR1316c<br />
GR1316c<br />
Run 1 Run 2<br />
O<br />
P<br />
Run 3<br />
M<br />
N<br />
O<br />
P<br />
A<br />
B<br />
C<br />
D<br />
E<br />
F<br />
G<br />
H<br />
I<br />
J<br />
K<br />
L<br />
M<br />
N<br />
K<br />
L<br />
A<br />
B<br />
C<br />
D<br />
E<br />
F<br />
G<br />
H<br />
I<br />
J<br />
For a 384-well plate, injections are made from every other well. A full plate of 384<br />
sample requires 96 runs to inject all samples once.<br />
The example below is the injection pattern for the first six injections, starting with well<br />
A01. The light gray circles represent samples and the dark gray circles indicate the<br />
injection pattern.<br />
A<br />
B<br />
C<br />
D<br />
E<br />
F<br />
G<br />
H<br />
I<br />
J<br />
K<br />
L<br />
M<br />
N<br />
O<br />
P<br />
1 2 3 4 5 6<br />
<strong>Applied</strong> Biosystems <strong>3130</strong>/<strong>3130</strong>xl <strong>Genetic</strong> <strong>Analyzers</strong> <strong>Getting</strong> <strong>Started</strong> <strong>Guide</strong> 163<br />
1 2 3 4 5 6<br />
1 2 3 4 5 6<br />
GR1316c<br />
GR1316c<br />
A<br />
B<br />
C<br />
D<br />
E<br />
F<br />
G<br />
H<br />
I<br />
J<br />
K<br />
L<br />
M<br />
N<br />
O<br />
P<br />
Run 4<br />
Run 1 Run 2 Run 3<br />
Run 4<br />
C<br />
D<br />
E<br />
F<br />
G<br />
H<br />
I<br />
J<br />
K<br />
L<br />
M<br />
N<br />
O<br />
P<br />
A<br />
B<br />
1 2 3 4 5 6<br />
O<br />
P<br />
A<br />
B<br />
C<br />
D<br />
E<br />
F<br />
G<br />
H<br />
I<br />
J<br />
K<br />
L<br />
M<br />
N<br />
O<br />
P<br />
Run 5<br />
A<br />
B<br />
C<br />
D<br />
E<br />
F<br />
G<br />
H<br />
I<br />
J<br />
K<br />
L<br />
M<br />
N<br />
O<br />
P<br />
A<br />
B<br />
C<br />
D<br />
E<br />
F<br />
G<br />
H<br />
I<br />
J<br />
K<br />
L<br />
M<br />
N<br />
1 2 3 4 5 6<br />
1 2 3 4 5 6<br />
O<br />
P<br />
A<br />
B<br />
C<br />
D<br />
E<br />
F<br />
G<br />
H<br />
I<br />
J<br />
K<br />
L<br />
M<br />
N<br />
Run 6<br />
1 2 3 4 5 6<br />
1 2 3 4 5 6<br />
A<br />
B<br />
C<br />
D<br />
E<br />
F<br />
G<br />
H<br />
I<br />
J<br />
K<br />
L<br />
M<br />
N<br />
O<br />
P<br />
1 2 3 4 5 6<br />
1 2 3 4 5 6
Appendix A<br />
384-Well Plate Mapping<br />
Notes<br />
164 <strong>Applied</strong> Biosystems <strong>3130</strong>/<strong>3130</strong>xl <strong>Genetic</strong> <strong>Analyzers</strong> <strong>Getting</strong> <strong>Started</strong> <strong>Guide</strong><br />
DRAFT<br />
November 3, 2004 9:51 am, A_Appendix.fm
SAMPLE DOCUMENT<br />
November 3, 2004 1:23 pm, <strong>3130</strong>User<strong>Guide</strong>_IX.fm<br />
Numerics<br />
<strong>3130</strong> basecaller and DyeSet/Primer files 66, 67<br />
A<br />
ABI PRISM ® BigDye® Primer Cycle Sequencing Kits<br />
table, dye sets and standards 29<br />
ABI PRISM ® dGTP BigDye® Terminator Cycle<br />
Sequencing Ready Reaction Kit, table of dye<br />
set and standards 29<br />
ABI PRISM ® dGTP BigDye® Terminator v 3.0 Cycle<br />
Sequencing Ready Reaction Kit<br />
table of dye set and standards 29<br />
ABI PRISM ® dRhodamine Terminator Cycle Sequencing<br />
Kit<br />
table of information 29<br />
Activating spectral calibration 47<br />
AmpFlSTR kits<br />
matrix standard 30<br />
table of dye sets, filter, modules 5<br />
analysis protocol<br />
deleting 68, 97<br />
editing 68, 96<br />
export 69, 97<br />
general description 55<br />
import 69, 97<br />
options 58<br />
options, SeqScape software 87<br />
analysis, manual 54, 83, 106<br />
analyzing GeneMapper Software data 160<br />
anode buffer reservoir<br />
filling 19<br />
function 11<br />
<strong>Applied</strong> Biosystems<br />
contacting xi<br />
customer feedback on documentation x<br />
Information Development department x<br />
Technical Support xi<br />
array length, polymer type, table 36<br />
array port, illustration of 12<br />
assembling the plate 34<br />
assumptions for using this guide ix<br />
Australian EMC standards xxiii<br />
autoanalysis<br />
Index<br />
GeneMapper Software, computer name 107<br />
manually, fragment analysis documentation 106<br />
manually, Seqscape software documentation 83<br />
manually, sequencing documentation 54<br />
sequencing 54<br />
Autoanalysis Manager<br />
components 155<br />
explained 82<br />
general tab 156<br />
starting 131<br />
using 155<br />
autoextraction<br />
overview 147<br />
Automated Processing tab 118<br />
automated SeqScape analysis 82<br />
automatic analysis, before you start 83<br />
autosampler 18<br />
function 11<br />
<strong>Applied</strong> Biosystems <strong>3130</strong>/<strong>3130</strong>xl <strong>Genetic</strong> <strong>Analyzers</strong> <strong>Getting</strong> <strong>Started</strong> <strong>Guide</strong> 165<br />
B<br />
barcode reader 6<br />
barcode, type of search 40<br />
basecaller and DyeSet/Primer files 66<br />
basecaller files 66, 67<br />
BigDye® Terminator chemistry, information tables 66<br />
BigDye® Terminator v3.1 Cycle Sequencing Kit<br />
table, dye set and standard 29<br />
biohazardous waste, handling xx<br />
bold text, when to use ix<br />
buffer<br />
hazards 32<br />
making 16<br />
buffer fill-line 12<br />
buffer reservoir, anode, illustration of 12<br />
buffer valve pin, illustration of 12<br />
C<br />
calibration standards<br />
types, fragment analysis 30<br />
types, sequencing 29<br />
Canadian safety standards xxiii<br />
cap/array viewer 144<br />
capillaries viewer 143
capillary array<br />
function 11<br />
illustration of 12<br />
installing or replacing 13<br />
capillary array knob and tip, illustration of 12<br />
capillary array length<br />
polymer type, table 36<br />
cathode buffer reservoir, filling 17<br />
CAUTION<br />
description xiv<br />
example xv<br />
Change Polymer Type Wizard, using 15<br />
characters<br />
acceptable 54, 83, 106<br />
check valve<br />
diagram of 12<br />
chemical safety xviii<br />
chemical safety guidelines xix<br />
chemical waste<br />
hazards xx<br />
safety xx<br />
safety guidelines xx<br />
chemical waste disposal, guidelines xx<br />
computer<br />
assigning a unique name 9<br />
starting 7<br />
condition number, spectral calibration 42<br />
conventions<br />
bold text ix<br />
IMPORTANTS! ix<br />
in this guide ix<br />
italic text ix<br />
menu commands ix<br />
Notes ix<br />
user attention words ix<br />
conventions, safety xiv<br />
creating<br />
analysis protocol for autoanalysis 62, 93<br />
GeneMapper Software plate record for<br />
autoanalysis 123<br />
SeqScape Software plate record 101<br />
Sequencing Analysis plate record for<br />
autoanalysis 77<br />
customer feedback, on <strong>Applied</strong> Biosystems<br />
documents x<br />
D<br />
DANGER<br />
description xiv<br />
example xv<br />
data<br />
how to zoom 143<br />
viewing 137<br />
viewing analyzed sequencing data 160<br />
viewing complete run 146<br />
Data Collection software<br />
starting 9<br />
data collection software, starting 9<br />
destinations 147<br />
detection cell block and heater<br />
function 11<br />
documentation<br />
GeneMapper Software User <strong>Guide</strong> (PN) 106<br />
related x<br />
double-tapered ferrule, illustration of 12<br />
dye primer chemistry, information table 67<br />
dye set<br />
fragment analysis 30, 114<br />
table, sequencing 29<br />
Dye Terminator chemistry, files 66<br />
DyeSet/Primer files 66, 67<br />
list of 64, 94<br />
E<br />
E dye set, sequencing kit table 61<br />
electrical hazard symbol xvi<br />
electrical safety xxi<br />
electrical shock hazards xxi<br />
electrical symbols, on instruments xv<br />
electrode, illustration of 12<br />
electromagnetic compatibility standards. See EMC<br />
standards<br />
electropherogram, definition 143<br />
EMC standards xxiii<br />
Australian xxiii<br />
Canadian xxiii<br />
European xxiii<br />
EPT chart 141<br />
ergonomic safety xxii<br />
errors box 140<br />
European EMC standards xxiii<br />
European safety standards xxiii<br />
event log 142<br />
icon, displays 145<br />
events, box 140<br />
F<br />
file extension 160<br />
file naming, invalid characters 54<br />
fill down special, function 38<br />
fill line, anode buffer reservoir 19<br />
filter set<br />
166 <strong>Applied</strong> Biosystems <strong>3130</strong>/<strong>3130</strong>xl <strong>Genetic</strong> <strong>Analyzers</strong> <strong>Getting</strong> <strong>Started</strong> <strong>Guide</strong><br />
SAMPLE DOCUMENT<br />
November 3, 2004 1:23 pm, <strong>3130</strong>User<strong>Guide</strong>_IX.fm
SAMPLE DOCUMENT<br />
November 3, 2004 1:23 pm, <strong>3130</strong>User<strong>Guide</strong>_IX.fm<br />
fragment analysis 5<br />
find all plate search 40<br />
fragment analysis<br />
data analysis 160<br />
filter set 5<br />
kit types 5<br />
passing profiles, spectral calibration 51<br />
run modules 113<br />
run, average time 133<br />
function 11<br />
G<br />
GeneMapper Software<br />
computer name 107<br />
elements 109<br />
generic 107<br />
instrument protocol 108<br />
plate records 108<br />
results group 108<br />
GeneMapper Software tab 157<br />
GeneMapper Software and GeneMapper ID<br />
Software 106<br />
general hazard symbol xvi<br />
guidelines<br />
chemical safety xix<br />
chemical waste disposal xx<br />
chemical waste safety xx<br />
waste disposal xx<br />
H<br />
hard drive space, automatic checking 132<br />
hazard icons<br />
accompanying safety alert words xiv<br />
components xiv<br />
described xiv<br />
in documents xiv<br />
on instruments xiv, xvi<br />
See also hazard symbols<br />
See also safety symbols<br />
hazard symbols<br />
electrical xvi<br />
general xvi<br />
hot surface xvi<br />
in documents xv<br />
laser hazard xvi<br />
moving parts xvi<br />
on instruments xvi<br />
See also hazard icons<br />
See also safety symbols<br />
hazards<br />
chemical waste xx<br />
electrical shock xxi<br />
laser xxi<br />
moving parts xxi<br />
moving/lifting instrument xvii<br />
physical xxi<br />
repetitive motion xxii<br />
<strong>Applied</strong> Biosystems <strong>3130</strong>/<strong>3130</strong>xl <strong>Genetic</strong> <strong>Analyzers</strong> <strong>Getting</strong> <strong>Started</strong> <strong>Guide</strong> 167<br />
I<br />
illustration of 12<br />
IMPORTANT<br />
description xiv<br />
example xv<br />
IMPORTANTS!, description ix<br />
Information Development department, contacting x<br />
Install Array Wizard<br />
using 13<br />
installation category xxi<br />
instrument<br />
condition, status 140<br />
diagram of interior 11<br />
documentation x<br />
EPT status 141<br />
layout 2<br />
operation 130<br />
setup 12<br />
starting the system 8<br />
instrument operational safety, instructions for xviii<br />
instrument protocol<br />
creating 35<br />
creating for SeqScape software 88<br />
creating, for fragment analysis 109, 112<br />
general description 55<br />
icon, displays 145<br />
options, SeqScape software 87<br />
options,s equencing 58<br />
instrument status 139<br />
interconnect tube 12<br />
invalid characters in names 54, 83, 106<br />
italic text, when to use ix<br />
K<br />
KB basecalling run modules 66<br />
L<br />
labels, instrument safety xvi<br />
laser hazard xxi<br />
symbol xvi<br />
warnings xxii<br />
laser safety xxi<br />
laser classification xxi<br />
requirements xxii<br />
Launching Data Collection software 9<br />
layout, instrument 2<br />
length of read, definition 3<br />
linking a plate 128
LOR definition 3<br />
lower polymer block 11<br />
lower polymer block, illustration of 12<br />
Luer fitting, illustration of 12<br />
M<br />
manual analysis, fragment analysis documentation 106<br />
manual analysis, Seqscape software documentation 83<br />
manual analysis, sequencing documentation 54<br />
matrix standard<br />
fragment analysis 30<br />
matrix standards<br />
fragment analysis 114<br />
preparing for sequencing 31<br />
sequencing 29<br />
menu commands, conventions for describing ix<br />
mixed plate record 55<br />
modules<br />
fragment analysis 4, 5<br />
KB basecalling 66<br />
sequencing 3<br />
spectral 36<br />
mounting pin, illustration of 12<br />
moving and lifting<br />
computer xviii<br />
monitor xviii<br />
moving and lifting instrument, safety xvii<br />
moving parts<br />
hazard xxi<br />
hazard symbol xvi<br />
safety xxi<br />
MSDSs<br />
description xviii<br />
obtaining xix<br />
referring to xix, xx<br />
when to review xviii<br />
N<br />
Naming<br />
tab, fragment analysis 118<br />
Notes, description ix<br />
O<br />
O-ring, illustration of 12<br />
oven<br />
function 11<br />
overflow hole, illustration of 12<br />
overvoltage category (rating) xxi<br />
overvoltage rating xxi<br />
P<br />
pausing a run 133<br />
PDP motor cover, illustration of 12<br />
physical hazard safety xxi<br />
physical hazards xxi<br />
piston, illustration of 12<br />
plate assembly<br />
diagram 34<br />
placing in instrument 39<br />
plate editor, filling in 37<br />
plate manager, access 37<br />
plate record<br />
creating 37<br />
creating for GeneMapper Software<br />
autoanalysis 123<br />
creating for SeqScape Software 101<br />
creating for Sequencing Analysis autoanalysis 77<br />
discussed 55, 83, 108<br />
elements, sequencing analysis 56<br />
linking and unlinking 128<br />
mixed 55<br />
search 40<br />
plate view 137<br />
plates<br />
linking and unlinking from plate records 128<br />
sealing 33<br />
polymer<br />
array length, table 36<br />
changing to new type 15<br />
replenishing or changing 14<br />
when to add or change 14<br />
polymer delivery pump<br />
diagram 12<br />
polymer supply bottle cap with hole, illustration of 12<br />
polymer supply bottle, illustration of 12<br />
polymer supply tube illustration of 12<br />
protocol manager, access 35<br />
pump block 12<br />
function 11<br />
pump chamber, illustration of 12<br />
Q<br />
quality column 152<br />
quality value range 152<br />
Q-value, spectral calibration 42<br />
R<br />
radioactive waste, handling xx<br />
reader, barcode 6<br />
168 <strong>Applied</strong> Biosystems <strong>3130</strong>/<strong>3130</strong>xl <strong>Genetic</strong> <strong>Analyzers</strong> <strong>Getting</strong> <strong>Started</strong> <strong>Guide</strong><br />
SAMPLE DOCUMENT<br />
November 3, 2004 1:23 pm, <strong>3130</strong>User<strong>Guide</strong>_IX.fm
SAMPLE DOCUMENT<br />
November 3, 2004 1:23 pm, <strong>3130</strong>User<strong>Guide</strong>_IX.fm<br />
reextraction<br />
editing Results Group, Analysis Protocol, Analysis<br />
Method 153<br />
results column 151<br />
selected samples 154<br />
selecting 148<br />
window elements 149<br />
reextraction panel<br />
effects of changes made in 147<br />
repetitive motion hazard xxii<br />
Replenish Polymer Wizard<br />
using 15<br />
reservoirs<br />
filling 17<br />
positions on the autosampler 18<br />
resolution<br />
fragment analysis 4<br />
results column, reextraction 151<br />
Results Group<br />
creating for sequencing analysis 70<br />
creating, fragment analysis 115<br />
creating, SeqScape software 98<br />
editor, GeneMapper 107<br />
general description 55<br />
importing and exporting 100<br />
options 57<br />
options, SeqScape software 165<br />
run<br />
fragment analysis 133<br />
requires plate record 55, 84, 108<br />
sensor states 140<br />
sequencing, average time 132<br />
starting 130<br />
starting, stopping, skipping, pausing 133<br />
viewing data 137<br />
run history utility 145<br />
run modules<br />
automated steps, description 132<br />
selecting for fragment analysis 113<br />
selecting spectral 36<br />
run schedule, viewing 129<br />
run scheduler<br />
spatial 22<br />
verifying schedule 129<br />
run time<br />
fragment analysis 4<br />
spectral calibration 41<br />
running buffer, making and storing 16<br />
S<br />
safety<br />
before operating the instrument xvii<br />
chemical xviii<br />
chemical waste xx<br />
conventions xiv<br />
electrical xxi<br />
ergonomic xxii<br />
instrument xvii<br />
instrument operation xviii<br />
laser xxi<br />
moving and lifting instrument xvii<br />
moving parts xxi<br />
physical hazard xxi<br />
standards xxiii<br />
workstation xxii<br />
safety alert words<br />
accompanying hazard icons xiv<br />
CAUTIONS xiv<br />
DANGERS xiv<br />
description xiv<br />
IMPORTANTS xiv<br />
WARNINGS xiv<br />
safety labels, on instruments xvi<br />
safety requirements, laser xxii<br />
safety standards<br />
Canadian xxiii<br />
European xxiii<br />
U.S. xxiii<br />
safety symbols<br />
on instruments xvi<br />
See also hazard symbols<br />
sample file 147<br />
default location 160<br />
type 160<br />
samples<br />
autoanalyzing 155<br />
loading 32<br />
sensor states 140<br />
SeqScape software tab 159<br />
SeqScape Software v2.5<br />
autoanalysis 82<br />
plate editor 84<br />
plate record elements 85<br />
user guide P/N 82<br />
sequencing<br />
automated, creating protocols 59<br />
automation, required files 55<br />
data, automating the analysis 82<br />
matrix standards 31<br />
passing profiles, spectral calibration 49<br />
plate editor 55<br />
run time 132<br />
specifications 3<br />
spectral run modules 36<br />
viewing analyzed data 160<br />
sequencing chemistry<br />
supported kits 28<br />
service console, using 9<br />
set (activate) spectral calibration 47<br />
<strong>Applied</strong> Biosystems <strong>3130</strong>/<strong>3130</strong>xl <strong>Genetic</strong> <strong>Analyzers</strong> <strong>Getting</strong> <strong>Started</strong> <strong>Guide</strong> 169
software, starting 9<br />
spatial calibration<br />
accepting or rejecting 24<br />
creating 22<br />
evaluating profiles 23<br />
examples of profiles 25<br />
viewer 145<br />
when required 22<br />
specifications<br />
fragment analysis 4<br />
sequencing 3<br />
spectral calibration<br />
creating plate record 37<br />
evaluating results 43<br />
pass/fail status 42<br />
passing profiles, fragment analysis 51<br />
passing profiles, sequencing 49<br />
performing a 37<br />
preparing standards for 31<br />
run times 41<br />
set spectral calibration 47<br />
when to perform 28<br />
spectral calibration standard, types 29<br />
spectral viewer 145<br />
spectral viewer, blank or deactivated 47<br />
standards<br />
EMC xxiii<br />
safety xxiii<br />
starting<br />
run 133<br />
spectral calibration run 40<br />
status<br />
instrument 139<br />
service console 9<br />
status lights<br />
on instrument startup 8<br />
stopping a run 133<br />
supported sequencing chemistry kits 28<br />
symbols<br />
hazard xvi<br />
hot surface xvi<br />
symbols on instruments<br />
electrical xv<br />
safety xvi<br />
T<br />
tables<br />
summary 3<br />
Technical Support, contacting xi<br />
text conventions ix<br />
toolbar 133<br />
training, information on xi<br />
U<br />
unlinking a plate 129<br />
Update Cap Array Info<br />
using 13<br />
US safety standards xxiii<br />
user attention words, described ix<br />
utility, run history 145<br />
V<br />
viewer<br />
cap/array 144<br />
capillaries 143<br />
icons and display information 145<br />
spectral 145<br />
W<br />
WARNING, description xiv<br />
waste disposal, guidelines xx<br />
water seal, illustration of 12<br />
water trap<br />
illustration of 12<br />
wizard<br />
Replenish Polymer Wizard, using 15<br />
Update Cap Array Info, using 13<br />
workstation safety xxii<br />
Z<br />
Z dye set, sequencing kit table 61<br />
170 <strong>Applied</strong> Biosystems <strong>3130</strong>/<strong>3130</strong>xl <strong>Genetic</strong> <strong>Analyzers</strong> <strong>Getting</strong> <strong>Started</strong> <strong>Guide</strong><br />
SAMPLE DOCUMENT<br />
November 3, 2004 1:23 pm, <strong>3130</strong>User<strong>Guide</strong>_IX.fm
Headquarters<br />
850 Lincoln Centre Drive<br />
Foster City, CA 94404 USA<br />
Phone: +1 650.638.5800<br />
Toll Free (In North America): +1 800.345.5224<br />
Fax: +1 650.638.5884<br />
Worldwide Sales and Support<br />
<strong>Applied</strong> Biosystems vast distribution and service<br />
network, composed of highly trained support and<br />
applications personnel, reaches 150 countries on six<br />
continents. For sales office locations and technical<br />
support, please call our local office or refer to our Web<br />
site at www.appliedbiosystems.com.<br />
<strong>Applied</strong> Biosystems is committed to providing the<br />
world’s leading technology and information for life<br />
scientists.<br />
6/2010<br />
Part Number 4352715 <strong>Rev</strong>. D