GeoVision V8.5 DVR Quick Guide (PDF) - Security Camera Systems
GeoVision V8.5 DVR Quick Guide (PDF) - Security Camera Systems
GeoVision V8.5 DVR Quick Guide (PDF) - Security Camera Systems

You also want an ePaper? Increase the reach of your titles
YUMPU automatically turns print PDFs into web optimized ePapers that Google loves.
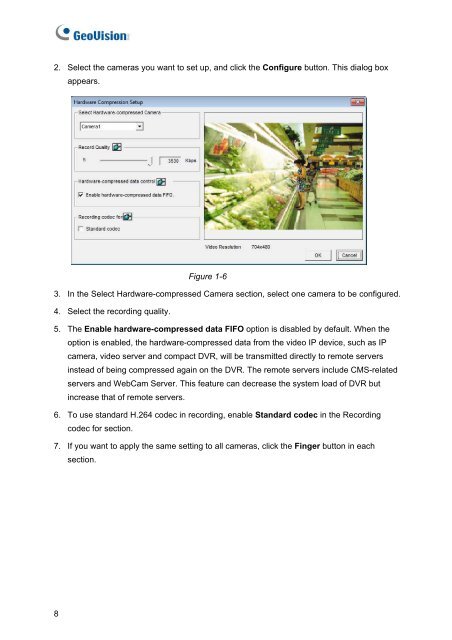
2. Select the cameras you want to set up, and click the Configure button. This dialog box<br />
appears.<br />
8<br />
Figure 1-6<br />
3. In the Select Hardware-compressed <strong>Camera</strong> section, select one camera to be configured.<br />
4. Select the recording quality.<br />
5. The Enable hardware-compressed data FIFO option is disabled by default. When the<br />
option is enabled, the hardware-compressed data from the video IP device, such as IP<br />
camera, video server and compact <strong>DVR</strong>, will be transmitted directly to remote servers<br />
instead of being compressed again on the <strong>DVR</strong>. The remote servers include CMS-related<br />
servers and WebCam Server. This feature can decrease the system load of <strong>DVR</strong> but<br />
increase that of remote servers.<br />
6. To use standard H.264 codec in recording, enable Standard codec in the Recording<br />
codec for section.<br />
7. If you want to apply the same setting to all cameras, click the Finger button in each<br />
section.