2 - Cash Registers
2 - Cash Registers
2 - Cash Registers

Create successful ePaper yourself
Turn your PDF publications into a flip-book with our unique Google optimized e-Paper software.
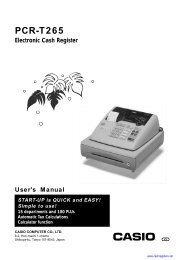
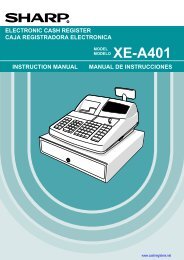
XE-A203<br />
ELECTRONIC CASH REGISTER<br />
CAJA REGISTRADORA ELECTRONICA<br />
MODEL<br />
MODELO<br />
XE-A203<br />
INSTRUCTION MANUAL MANUAL DE INSTRUCCIONES<br />
www.cashregisters.net
WARNING<br />
FCC Regulations state that any unauthorized changes or modifications to<br />
this equipment not expressly approved by the manufacturer could void<br />
the user’s authority to operate this equipment.<br />
Note: This equipment has been tested and found to comply with the<br />
limits for a Class A digital device, pursuant to Part 15 of the FCC Rules.<br />
These limits are designed to provide reasonable protection against<br />
harmful interference when this equipment is operated in a commercial<br />
environment.<br />
This equipment generates, uses, and can radiate radio frequency energy<br />
and, if not installed and used in accordance with the instruction manual,<br />
may cause harmful interference to radio communications. Operation of<br />
this equipment in a residential area is likely to cause harmful interference<br />
in which case the user will be required to correct the interference at his<br />
own expense.<br />
CAUTION<br />
The AC power socket-outlet should be installed near the equipment<br />
and should be easily accessible.<br />
FOR YOUR RECORDS<br />
Please record below the model number and serial number for easy<br />
reference in case of loss or theft. These numbers are located on the<br />
right side of the unit. Space is provided for further pertinent data.<br />
Model Number<br />
Serial Number<br />
Date of Purchase<br />
Place of Purchase<br />
www.cashregisters.net
INTRODUCTION<br />
Thank you very much for your purchase of the SHARP Electronic <strong>Cash</strong> Register, Model XE-A203.<br />
Please read this manual carefully before operating your machine in order to gain full understanding of<br />
functions and features.<br />
Please keep this manual for future reference. It will help you if you encounter any operational problems.<br />
CAUTION!<br />
Never install the batteries into the cash register before initializing it. Before you start operating the cash<br />
register, you must first initialize it, then install three new alkaline batteries LR6 (“AA” size) on the register.<br />
Otherwise, distorted memory contents and malfunction of the cash register will occur. For this procedure,<br />
please refer to page 7.<br />
IMPORTANT<br />
• On the printer, a cutter to cut the paper roll is mounted. Always be careful not to cut yourself by the<br />
cutter.<br />
• Install your register in a location that is not subject to direct radiation, unusual temperature changes,<br />
high humidity or exposed to water sources.<br />
Installation in such locations could cause damage to the cabinet and the electronic components.<br />
• Never operate the register with wet hands.<br />
The water could seep into the interior of the register and cause component failure.<br />
• When cleaning your register, use a dry, soft cloth. Never use solvents, such as benzine and/or<br />
thinner.<br />
The use of such chemicals will lead to discoloration or deterioration of the cabinet.<br />
• The register plugs into any standard wall outlet (120V AC ±10%).<br />
Other electrical devices on the same electrical circuit could cause the register to malfunction.<br />
• For protection against data loss, please install three alkaline batteries LR6 (“AA” size) after<br />
initializing the cash register. When handling the batteries, never fail to observe the followings:<br />
Incorrectly using batteries can cause them to burst or leak, possibly damaging the interior of the<br />
cash register.<br />
• Be sure that the the positive (+) and negative (-) poles of each battery are facing in the proper<br />
direction for installation.<br />
• Never mix batteries of different types.<br />
• Never mix old batteries and new ones.<br />
• Never leave dead batteries in the battery compartment.<br />
• Remove the batteries if you do not plan to use the cash register for long periods.<br />
• Should a battery leak, clean out the battery compartment immediately, taking care to avoid letting<br />
the battery fluid come into direct contact with your skin.<br />
• For battery disposal, follow the corresponding law in your country.<br />
• If the register malfunctions, call 1-800-BE-SHARP for service - do not try to repair the register<br />
yourself.<br />
• For a complete electrical disconnection, disconnect the main plug.<br />
Customer Service Hotline<br />
1-800-BE-SHARP<br />
SD logo is a trademark of the SD Card Association.<br />
For Easy Set-up, see<br />
“GETTING STARTED” (page 7).<br />
The Spanish version (summary of English version) is after the English version.<br />
La versión española (el resumen de la versión inglesa) sigue a la versión inglesa.<br />
www.cashregisters.net<br />
English<br />
English<br />
1
2<br />
CONTENTS<br />
INTRODUCTION ............................................................................................................................................1<br />
IMPORTANT ..................................................................................................................................................1<br />
CONTENTS....................................................................................................................................................2<br />
PARTS AND THEIR FUNCTIONS.................................................................................................................4<br />
1 External View..................................................................................................................................................4<br />
2 Printer .............................................................................................................................................................4<br />
3 Mode Switch and Mode Keys .........................................................................................................................5<br />
4 Keyboard.........................................................................................................................................................5<br />
5 Displays ..........................................................................................................................................................6<br />
6 Drawer Lock Key.............................................................................................................................................6<br />
GETTING STARTED......................................................................................................................................7<br />
FOR THE OPERATOR<br />
OVERVIEW OF FLOW OF DAILY SALES ENTRIES .................................................................................11<br />
BASIC SALES ENTRY ................................................................................................................................12<br />
1 Basic Sales Entry Example...........................................................................................................................12<br />
2 Error Warning................................................................................................................................................13<br />
3 Item Entries...................................................................................................................................................14<br />
Single item entries .................................................................................................................................14<br />
Repeat entries .......................................................................................................................................15<br />
Multiplication entries ..............................................................................................................................15<br />
Split pricing entries ................................................................................................................................16<br />
Single item cash sale (SICS) entry........................................................................................................17<br />
4 Displaying Subtotal .......................................................................................................................................17<br />
5 Finalization of Transaction............................................................................................................................17<br />
<strong>Cash</strong> or check tendering........................................................................................................................17<br />
<strong>Cash</strong> or check sale that does not require tender entry..........................................................................18<br />
Charge (credit) sale ...............................................................................................................................18<br />
Mixed-tender sale ..................................................................................................................................18<br />
6 Tax Calculation .............................................................................................................................................19<br />
Automatic tax.........................................................................................................................................19<br />
Manual tax .............................................................................................................................................19<br />
Tax delete..............................................................................................................................................19<br />
Tax status shift.......................................................................................................................................20<br />
OPTIONAL FEATURES...............................................................................................................................21<br />
1 Auxiliary Entries ............................................................................................................................................21<br />
Discount and premium entries using the percent key............................................................................21<br />
Discount and premium entries using the discount key ..........................................................................21<br />
Refund entries .......................................................................................................................................22<br />
Non-add code number entries and printing ...........................................................................................22<br />
2 Auxiliary Payment Treatment........................................................................................................................23<br />
Currency conversion..............................................................................................................................23<br />
Received-on Account and Paid-out Entries...........................................................................................24<br />
No sale (exchange)................................................................................................................................24<br />
3 Automatic Sequence Key (a key) Entries..................................................................................................24<br />
CORRECTION .............................................................................................................................................25<br />
1 Correction of the Last Entry (direct void) ......................................................................................................25<br />
2 Correction of the Next-to-last or Earlier Entry (indirect void) ........................................................................25<br />
3 Subtotal Void.................................................................................................................................................26<br />
4 Correction of Incorrect Entries not Handled by the Direct or Indirect Void Function.....................................26<br />
FOR THE MANAGER<br />
PRIOR TO PROGRAMMING ......................................................................................................................27<br />
BASIC FUNCTION PROGRAMMING (For Quick Start) ............................................................................27<br />
1 Date and Time Programming........................................................................................................................27<br />
2 Tax Programming for Automatic Tax Calculation Function...........................................................................28<br />
Tax programming using a tax rate.........................................................................................................28<br />
www.cashregisters.net
The tax table (applicable to the add-on tax) ..........................................................................................29<br />
Quantity for doughnut tax exempt (for Canadian tax system) ...............................................................31<br />
AUXILIARY FUNCTION PROGRAMMING .................................................................................................32<br />
1 Department Programming.............................................................................................................................32<br />
2 PLU (Price Look-Up) and Sub-department Programming ............................................................................33<br />
3 Miscellaneous Key Programming .................................................................................................................35<br />
Rate for %, & and V......................................................................................................................35<br />
Amount for - ......................................................................................................................................36<br />
Percent rate limitation for % and & ..................................................................................................36<br />
Function parameters for %, & and -.............................................................................................36<br />
Function parameters for V..................................................................................................................37<br />
Entry digit limit for r, R and t ....................................................................................................38<br />
Function parameters for C, c and A (when using as CA key).................................................38<br />
4 Text programming.........................................................................................................................................39<br />
ADVANCED PROGRAMMING ....................................................................................................................44<br />
1 Register Number and Consecutive Number Programming...........................................................................44<br />
2 Electronic Journal (EJ) Programming ...........................................................................................................45<br />
3 Various Function Selection Programming 1..................................................................................................47<br />
Function selection for miscellaneous keys ............................................................................................47<br />
Print format ............................................................................................................................................48<br />
Receipt print format ...............................................................................................................................48<br />
Function selection for tax.......................................................................................................................48<br />
Other programming................................................................................................................................49<br />
4 Various Function Selection Programming 2..................................................................................................51<br />
Power save mode..................................................................................................................................51<br />
Logo message print format....................................................................................................................51<br />
Online time out setting...........................................................................................................................52<br />
Thermal printer density..........................................................................................................................52<br />
Language selection................................................................................................................................53<br />
Training clerk specification for training mode ........................................................................................53<br />
AUTO key programming........................................................................................................................54<br />
5 Reading Stored Program ..............................................................................................................................54<br />
TRAINING MODE ..................................................................................................................................................56<br />
READING (X) AND RESETTING (Z) OF SALES TOTALS ........................................................................57<br />
EJ REPORT READING AND RESETTING .................................................................................................60<br />
OVERRIDE ENTRIES ..................................................................................................................................61<br />
CORRECTION AFTER FINALIZING A TRANSACTION (Void mode).......................................................61<br />
HOW TO USE AN SD MEMORY CARD......................................................................................................62<br />
1 What You Can Do with an SD Memory Card................................................................................................62<br />
2 In Case of SD Error.......................................................................................................................................63<br />
3 Inserting and Removing an SD Memory Card ..............................................................................................64<br />
4 Formatting an SD Memory Card ...................................................................................................................64<br />
5 Saving and Restoring All the Data................................................................................................................65<br />
6 Writing and Reading of Programming Data ..................................................................................................65<br />
7 Writing of Sales Data ....................................................................................................................................66<br />
8 Writing and Printing of Electronic Journal.....................................................................................................67<br />
OPERATOR MAINTENANCE......................................................................................................................68<br />
1 In Case of a Power Failure ...........................................................................................................................68<br />
2 In Case of Printer Error .................................................................................................................................68<br />
3 Cautions in Handling the Printer and Recording Paper ................................................................................68<br />
4 Replacing the Batteries.................................................................................................................................69<br />
5 Replacing the Paper Roll ..............................................................................................................................69<br />
6 Removing a Paper Jam ................................................................................................................................72<br />
7 Cleaning the Printer (Print Head / Sensor / Roller) .......................................................................................72<br />
8 Removing the Drawer ...................................................................................................................................72<br />
9 Opening the Drawer by Hand .......................................................................................................................72<br />
10 Before calling for service...............................................................................................................................73<br />
Error code table .....................................................................................................................................73<br />
SPECIFICATIONS .......................................................................................................................................74<br />
MANUAL DE INSTRUCCIONES (VERSION EN ESPAÑOL)<br />
www.cashregisters.net<br />
3
4<br />
PARTS AND THEIR FUNCTIONS<br />
1<br />
External View<br />
Front view Rear view<br />
Operator display<br />
Printer cover<br />
Receipt paper<br />
Keyboard<br />
Drawer<br />
Drawer lock<br />
2<br />
Printer<br />
Take-up spool<br />
Print roller arm<br />
Print roller<br />
release lever<br />
Inner cover<br />
SD card slot<br />
Customer display<br />
(Pop-up type)<br />
Power cord<br />
Mode switch<br />
USB port<br />
(Refer to page 64.)<br />
Use only the USB cable (manufactured by SHARP) supplied with the XE-A203 for the connection<br />
with a PC. Never use other cables.<br />
The printer is a one station type thermal printer, therefore it does not require any<br />
type of ink ribbon or cartridge.<br />
Lift the rear of the printer cover to remove. To re-install, hook the pawls on the<br />
cabinet and close.<br />
Caution: The paper cutter is mounted on the printer cover. Be careful not to<br />
cut yourself.<br />
Paper roll cradle<br />
Paper positioning guides<br />
Do not attempt to remove the paper roll<br />
with the print roller arm locked. This may<br />
result in damage to the printer and print<br />
head.<br />
www.cashregisters.net
3<br />
The mode switch can be operated by inserting one of the two supplied mode keys - manager (MA) and operator<br />
(OP) keys. These keys can be inserted or removed only in the “REG” or “OFF” position.<br />
4<br />
Mode Switch and Mode Keys<br />
MA<br />
OP<br />
REG<br />
OPX/Z MGR<br />
OFF<br />
X1/Z1<br />
VOID<br />
X2/Z2<br />
PGM<br />
Manager key (MA)<br />
Operator key (OP)<br />
Keyboard<br />
Keyboard layout<br />
RA<br />
RCPT<br />
/PO<br />
–<br />
CONV<br />
%1<br />
%2<br />
NUMBER<br />
VOID RFND<br />
DC<br />
ESC BS<br />
SHIFT<br />
SPACE<br />
Key names<br />
RA<br />
RCPT<br />
/PO<br />
VOID<br />
ESC<br />
CONV<br />
MA<br />
OP<br />
@/FOR<br />
The mode switch has these settings:<br />
OFF: This mode locks all register operations. (AC power turns off.)<br />
No change occurs to register data.<br />
OP X/Z: To take individual clerk X or Z reports, and to take flash reports.<br />
It can be used to toggle receipt state “ON” and “OFF” by pressing<br />
the R key.<br />
REG: For entering sales.<br />
PGM: To program various items.<br />
VOID: Enters into the void mode. This mode allows correction after<br />
finalizing a transaction.<br />
MGR: For manager’s entries. The manager can use this mode for an<br />
override entry.<br />
X1/Z1: To take the X/Z report for various daily totals<br />
X2/Z2: To take the X/Z report for periodic (weekly or monthly)<br />
consolidation<br />
•<br />
CL<br />
7 8 9<br />
4 5 6<br />
1 2 3<br />
0<br />
00<br />
PLU<br />
/SUB DEPT<br />
#<br />
4<br />
3<br />
2<br />
1<br />
DEPT<br />
SHIFT CLK#<br />
The small characters on the bottom or lower right in each key indicates functions or characters<br />
which can be used for character entries for text programming. For details, refer to page 39.<br />
Paper feed key<br />
Received-on account key<br />
Receipt print/Paid-out key<br />
Void key<br />
Escape key<br />
Conversion key<br />
%1 %2 Percent 1 and 2 keys<br />
RFND Refund key<br />
Discount key<br />
@/FOR<br />
•<br />
CL<br />
00 0<br />
PLU<br />
/SUB<br />
DEPT<br />
#<br />
DEPT<br />
SHIFT<br />
CLK#<br />
17<br />
1<br />
~<br />
Multiplication key<br />
Decimal point key<br />
Clear key<br />
A<br />
20<br />
B<br />
19<br />
C<br />
18<br />
D<br />
17<br />
E<br />
8<br />
7<br />
6<br />
5<br />
PLU/Sub-department key<br />
Department code entry key<br />
Department shift key<br />
Clerk code entry key<br />
32<br />
16<br />
F<br />
24<br />
G<br />
23<br />
H<br />
22<br />
I<br />
21<br />
~ 9 Numeric keys<br />
Department keys<br />
J<br />
12<br />
11<br />
10<br />
9<br />
K<br />
28<br />
L<br />
27<br />
M<br />
26<br />
N<br />
25<br />
O<br />
TAX<br />
16<br />
15<br />
14<br />
13<br />
TAX1 TAX2<br />
SHIFT SHIFT<br />
AUTO<br />
CHK<br />
CH<br />
P<br />
32<br />
Q<br />
31<br />
R<br />
30<br />
S<br />
29<br />
T<br />
Tax key<br />
Check key<br />
TAX<br />
U<br />
TAX1<br />
SHIFT<br />
V<br />
MDSE<br />
SBTL<br />
AUTO<br />
TAX2<br />
SHIFT<br />
CHK CH<br />
W<br />
X<br />
Y<br />
Z<br />
#/TM<br />
SBTL<br />
CA/AT/NS<br />
Tax 1 and 2 shift keys<br />
Automatic sequence key<br />
Charge key<br />
MDSE<br />
SBTL Merchandise subtotal key<br />
#/TM Non-add code/Time display<br />
SBTL<br />
/Subtotal key<br />
CA/AT/NS Total/Amount tender<br />
/No sale key<br />
www.cashregisters.net<br />
5
6<br />
5<br />
Operator display Customer display (Pop-up type)<br />
Amount: Appears in the far-right eight (max.) positions. When the amount is negative, the minus symbol “-”<br />
appears before the amount.<br />
Number of repeats for repetitive registrations:<br />
The number of repeats is displayed, starting at “2” and incremental with each repeat. When you<br />
have registered ten times, the display will show “0.”(2 → 3 ..... 9 → 0 → 1 → 2 ... )<br />
Receipt function status:<br />
The indicator “_” appears in the RCPT OFF position when the receipt function is in the OFF<br />
status.<br />
Time: Appears in the far-right six positions (hour-minute -“ ” or hour-minute -“ ”) in the OP X/Z, REG,<br />
or MGR mode. “ ” is displayed in the morning (AM), and “ ” in the afternoon (PM). In the REG<br />
or MGR mode, press the s key to display the time.<br />
Machine state symbols<br />
6<br />
Displays<br />
PLU/SUB<br />
DEPT REPEAT<br />
RCPT<br />
OFF<br />
DC<br />
SHIFT NUMBER<br />
: Appears during programming.<br />
: Appears when an error is detected.<br />
: Appears when the subtotal is displayed or when the amount tendered is smaller than the sales amount.<br />
: Appears when the V key is pressed to calculate a subtotal in foreign currency.<br />
: Appears when a transaction is finalized by pressing the A, C or c key.<br />
: Appears when the change due amount is displayed.<br />
: May appear in the far-left three positions at the timing of key entry when the electronic journal (EJ)<br />
memory is full. (Depending on programming.)<br />
: Appears when the voltage of the installed batteries is under the required level. You must replace with<br />
new ones within two days. Refer to page 69 for details.<br />
: Appears when the batteries are not installed, or the installed batteries are dead. You must replace with<br />
new ones immediately. Refer to page 69 for details.<br />
: May appear right below the eighth and ninth places at the timing of finalization of a transaction when the<br />
electronic journal (EJ) memory is nearly full.<br />
Also appears right below the tenth place when power save mode is effective.<br />
: Appears when the print roller arm is not locked.<br />
: Appears when the paper is not set or has run out.<br />
Drawer Lock Key<br />
Clerk code<br />
This key locks and unlocks the drawer. To lock it, turn 90<br />
degrees counterclockwise. To unlock it, turn 90 degrees<br />
clockwise.<br />
www.cashregisters.net
GETTING STARTED<br />
Please follow the procedure shown below. The batteries are not installed and the power is OFF.<br />
1<br />
Find a stable surface where the cash register is not subject to water sources or direct sunlight near an<br />
AC outlet.<br />
Unpack the cash register and make sure all accessories are included. For details of accessories, please refer to<br />
“Specifications” section.<br />
2<br />
Initializing the cash register<br />
In order for your cash register to operate properly, you must initialize it before programming for the first<br />
time. Follow this procedure.<br />
1. Insert the manager (MA) key into the mode switch and turn it to the REG<br />
position.<br />
2. Insert the plug into the AC outlet. The buzzer will sound three times.<br />
IMPORTANT: This operation must be performed without batteries installed.<br />
3. The cash register has now been initialized. The register display will show “0.00”<br />
with “ ”.<br />
3<br />
Installing the cash register<br />
If the buzzer does not sound when the plug is inserted, the initialization has not been done<br />
successfully. (This will occur when the voltage is still high because you operated the cash register<br />
just before starting initialization.) In this case, wait at least one minute after pulling out the plug,<br />
and insert the plug again.<br />
Installing batteries<br />
Three new alkaline batteries LR6 (“AA” size) must be installed in the cash register to prevent the data<br />
and user-programmed settings from being erased from the memory, when the AC cord is accidentally<br />
disconnected or in case of power failure. Once installed, the batteries will last approximately one year before<br />
needing replacement. At this time, the “ ” symbol will appear on the display to indicate the batteries are low<br />
and must be replaced within two days. If the no battery symbol “ ” appears, you must install the batteries at<br />
once.<br />
Install three new alkaline batteries LR6 (“AA” size) according to the procedure shown below with the AC cord<br />
connected and the mode switch set to the REG position:<br />
1. Push the printer cover forward and detach it.<br />
Be careful with the paper cutter, so as not to cut yourself.<br />
2. Open the battery compartment cover next to the paper roll cradle.<br />
REG<br />
OPX/Z MGR<br />
OFF<br />
X1/Z1<br />
VOID<br />
X2/Z2<br />
PGM<br />
www.cashregisters.net<br />
7
8<br />
3. Insert three new alkaline batteries LR6 (“AA” size) as illustrated at the right.<br />
When the batteries are properly installed “ ” on the display will disappear.<br />
4. Close the battery compartment cover.<br />
4<br />
Be sure to observe precautions shown on page 1 when handling<br />
batteries.<br />
Installing a paper roll<br />
Precaution: The paper cutter is mounted on the printer cover. Take caution when removing and<br />
installing the cover.<br />
The register can print receipts or journals. For the printer, you must install the paper roll provided with the<br />
register, even when you program the register for not printing receipts or journals.<br />
Install the paper roll according to the procedure shown below with the AC cord connected and the mode switch<br />
set to the REG position:<br />
1. Lift up the print roller release lever to unlock and open the<br />
print roller arm.<br />
2. Set a paper roll in the paper roll cradle as illustrated at the<br />
right.<br />
When setting a new paper roll in the paper roll<br />
cradle, be sure to cut the paper end behind the<br />
taped (or pasted) point in advance.<br />
3. Feed the end of the paper along with<br />
the paper positioning guides as<br />
illustrated at the right.<br />
Correct<br />
Paper positioning guides<br />
Print roller<br />
release lever<br />
To the printer<br />
Print roller arm<br />
Incorrect<br />
To the printer<br />
www.cashregisters.net
4. While holding down the paper, slowly close the print roller arm, and<br />
push down the arm until you hear a click locking the arm. Make<br />
sure securely you push down the center of the wing part of the arm<br />
as illustrated at the right. The paper will be fed automatically.<br />
If the print roller arm is not securely locked, the unit will<br />
not print correctly. If this problem occurs, open the arm,<br />
and close the arm as instructed above.<br />
5. When not using the take-up spool (using as receipt paper):<br />
• Cut off the excess paper using the edge of the inner cover, and<br />
replace the printer cover. Press the F key to make sure the<br />
paper end comes out of the printer cover and clean paper<br />
appears.<br />
If the paper end does not come out, open the printer<br />
cover, and pass the paper end between the paper cutter<br />
and the paper guide of the printer cover, and replace the<br />
cover.<br />
When using the take-up spool (using as journal paper):<br />
• Insert the end of the paper into the slit in the spool. (Press the F<br />
key to feed more paper if required.)<br />
• Wind the paper two or three turns around the spool shaft.<br />
• Set the spool on the bearing, and press the F key to take up<br />
excess slack in the paper.<br />
• Replace the printer cover.<br />
5<br />
When using a paper roll as journal paper, you must change<br />
the printing style. Refer to “Print Format” in “Various<br />
Function Selection Programming 1” section (Job code 6)<br />
for changing the printing style.<br />
Programming date, time and tax<br />
The cash register provides text languages of English, French and Spanish. It is preset to English.<br />
If you want to change the language, you must change it before programming. Refer to “Language<br />
selection” in “Various Function Selection Programming 2” section for changing the language.<br />
Before you can proceed with registration of sales, you must program:<br />
• date<br />
• time<br />
• tax<br />
Please refer to the BASIC FUNCTION PROGRAMMING section for details (page 27).<br />
www.cashregisters.net<br />
9
10<br />
6<br />
7<br />
Programming other necessary items<br />
While the cash register is pre-programmed so it can be used with minimal setup, it does provide you<br />
with optional functions. Before you start programming, please read through the sales operations section to<br />
understand optional functions. The main optional functions are listed below.<br />
• PLU (price lookup)<br />
• Consecutive number<br />
• Machine number<br />
• Receipt or journal printing selection (factory setting: receipt printing)<br />
• Power save mode (factory setting: goes into power save mode in 30 minutes)<br />
• Electronic journal (EJ) memory size (factory setting: 2000 lines are storable. Up to 3000 lines)<br />
The memory for electronic journal is commonly used for PLU. If you change the setting, the<br />
maximum number of PLU code will decrease from 1200 to 200.<br />
• Text programming for clerk name, department items, PLU/sub-department items, logo messages printed on<br />
the top or bottom of receipts, function texts and foreign currency symbol<br />
• Split pricing entry<br />
This is not factory preset. You must enable this function.<br />
• Foreign currency conversion rate<br />
You must set a conversion rate to use V key.<br />
• Preset unit price for departments and PLUs<br />
• Preset amount for -<br />
• Preset rates for %&<br />
You do not have to program these preset prices/amount/rates because you can enter during<br />
registration. It might be convenient to preset so you do not have to re-enter every time.<br />
• Amount entry digit limit for PO amount, RA amount, Manual tax amount<br />
The factory setting makes the maximum amount you can enter. You can program to limit the amount.<br />
• Key sequence for AUTO key<br />
• Online time out setting<br />
• Specification of clerk to be trained<br />
Department programming:<br />
The cash register is pre-programmed for departments as follows:<br />
Department: Allow open price entry, taxable status- taxable 1 for department 1 to 10, and non taxable<br />
for department 11 to 99<br />
When you use department 11 or above, and/or you apply taxable status other than taxable 1 for department 1 to<br />
10, you must change department settings. Please refer to the department programming section for<br />
programming details.<br />
Starting sales entries<br />
Now you are ready for sales registration.<br />
www.cashregisters.net
FOR THE OPERATOR<br />
OVERVIEW OF FLOW OF DAILY SALES ENTRIES<br />
Things to do before you start sales entries:<br />
• Make sure the power cord is securely inserted into the AC outlet.<br />
• Turn the mode switch to OP X/Z position, and check if time is correctly set.<br />
• Replace the drawer, if removed for safety.<br />
• Check if there is enough paper on roll.<br />
• Select receipt ON/OFF function.<br />
• Make any necessary programming for the day in PGM mode.<br />
For details, refer to BASIC SALES ENTRY, page 12. For drawer and paper roll, refer to OPERATOR<br />
MAINTENANCE, page 68 and for programming, refer to programming sections.<br />
Things you can do for sales entries:<br />
• Item entries<br />
• Item repeat entries<br />
• Item multiplication entries<br />
• Single item cash sale (SICS), if programmed.<br />
• Split pricing entries, if programmed.<br />
• Displaying subtotals<br />
• <strong>Cash</strong>/Check/Charge sale<br />
• <strong>Cash</strong> tendering in a foreign currency, if the currency conversion rate is programmed.<br />
• Manual tax entry<br />
• Discount or premium using %& and - key<br />
• Refund entry<br />
• No sale<br />
• Paid-out entries<br />
• Received on account entries<br />
• Printing non-add code number<br />
• Making corrections<br />
• Checking sales report<br />
For details of sales entry method, refer to BASIC SALES ENTRY (page 12) and OPTIONAL FEATURES<br />
(page 21). For details of correcting sales entries, refer to CORRECTION (page 25). For details on reading<br />
sales information, refer to READING (X) AND RESETTING (Z) OF SALES TOTAL (page 57).<br />
Things to do after you close your store:<br />
• Print sales reports, and clear sales data for the day.<br />
• Print Electronic Journal (EJ) reports, and clear Electronic Journal (EJ) data, if necessary.<br />
• Account money - comparing it with the amount in cash in drawer printed on the general report.<br />
• Remove the drawer for safety.<br />
• Turn the mode switch to OFF position.<br />
For details of reading sales information, refer to READING (X) AND RESETTING (Z) OF SALES TOTAL (page<br />
57) and EJ REPORT READING AND RESETTING (page 60). For details of removing the drawer and<br />
maintenance details, refer to OPERATOR MAINTENANCE (page 68).<br />
www.cashregisters.net<br />
11
12<br />
BASIC SALES ENTRY<br />
1<br />
Basic Sales Entry Example<br />
Listed below is a basic sales entry example when selling department items by cash. For operation details,<br />
please refer to each section.<br />
Mode switch setting<br />
1. Turn the mode switch to the REG position.<br />
Clerk assignment<br />
2. Enter your clerk code. (For example, clerk code is 1. Press the 1 and L key in<br />
this order.) The clerk code 1 is automatically selected just after initialization of the<br />
cash register.<br />
Item entries<br />
3. Enter the price for the first department item. (For example, for 15.00, enter 15: , and press the<br />
appropriate department key.)<br />
For department 17 to department 32, press the D key first before pressing the department key.<br />
For department 33 and above, enter the department code using numeric keys, and press the d key,<br />
REG<br />
OPX/Z MGR<br />
OFF<br />
X1/Z1<br />
VOID<br />
X2/Z2<br />
PGM<br />
then enter the price and press the d key again.<br />
4. Repeat step 3 for all the department items.<br />
Displaying subtotals<br />
5. Press the s key to display the amount due.<br />
Finalizing the transaction<br />
6. Enter the amount received from the customer. (You can omit this step if the amount tendered is the same as<br />
the subtotal.)<br />
7. Press the A key, and the change due is displayed (when the amount received was not entered, the total<br />
amount is displayed) and the drawer is opened.<br />
8. Tear off the receipt and give it to the customer with his or her change.<br />
9. Close the drawer.<br />
Clerk<br />
assignment<br />
Item<br />
entries<br />
Displaying<br />
subtotal<br />
Finalizing<br />
the transaction<br />
Key operation example<br />
1 L<br />
1500 !<br />
2300 "<br />
s<br />
5000<br />
A<br />
(In this example, the tax rate is set to 6.25%.)<br />
Print<br />
Graphic logo<br />
Date/Time/Clerk code number<br />
Register number<br />
/Consecutive number/Clerk name<br />
Items<br />
Price<br />
Merchandise Not printed when<br />
subtotal non-taxable items<br />
only are sold.<br />
Tax amount<br />
Tax status (T1: taxable 1)<br />
Total quantity<br />
Total amount<br />
<strong>Cash</strong> tendering/amount received<br />
Change<br />
www.cashregisters.net
Clerk assignment<br />
Prior to any item entries, clerks must enter their clerk codes into the register. However, the code entry may not<br />
be necessary when the same clerk handles the next transaction.<br />
■ Sign-on (in REG, MGR, VOID mode) ■ Sign-off (in REG, MGR, VOID mode)<br />
To display the signed-on clerk code<br />
Clerk code 1 to 25<br />
L<br />
Receipt ON/OFF function<br />
When you use the printer to issue receipts, you can disable receipt printing in the REG mode to save paper<br />
using the receipt ON/OFF function. To disable receipt printing, press the R key in the OP X/Z position. This<br />
key toggles the receipt printing status ON and OFF.<br />
To check the receipt printing status, turn the mode switch to the OP X/Z position or press the l key in the REG<br />
mode. When the function is in the OFF status, the receipt off indicator “_” is illuminated. Your register will print<br />
reports regardless of the receipt state, so the paper roll must be installed even when the receipt state is “OFF”.<br />
To issue a receipt when receipt ON/OFF function is set to OFF:<br />
If your customer wants a receipt after you finalized a transaction with the receipt ON/OFF function being OFF<br />
status, press the R key. This will produce a receipt. However, if more than 30 items were entered, the<br />
receipt will be issued in the format of summary receipt print.<br />
Power Save Mode<br />
The register will enter into power save mode when no entries are performed based on the pre-programmed time<br />
limit (by default, 30 minutes).<br />
When your register goes to the power save mode, all the display lights will turn off except the decimal point at<br />
the left-most position. Your register will return to the normal operation mode when any key is pressed or a mode<br />
is changed with the mode key. Please note when your register is recovered by a key entry, its key entry is<br />
invalid. After the recovery, start the key entry from the beginning.<br />
2<br />
Error Warning<br />
In the following examples, your register will go into an error state accompanied with a warning beep and the<br />
error symbol “ ” on the display. Clear the error state by pressing the l key and take proper action.<br />
Please refer to the error code table on page 73.<br />
• You enter over a 32-digit number (entry limit overflow): Cancel the entry and re-enter the correct number.<br />
• You make an error in key operation: Clear the error and continue operation.<br />
• You make an entry beyond a programmed amount entry limit: Check to see if the entered amount is correct. If<br />
it is correct, it can be rung up in the MGR mode. Contact your manager.<br />
• An including-tax subtotal exceeds eight digits: Delete the subtotal by pressing the l key and press the A ,<br />
C or c key to finalize the transaction.<br />
Error escape function<br />
When you want to quit a transaction due to an error or an unforeseen event, use the error escape function as<br />
shown below:<br />
Transaction<br />
To clear the error state<br />
l<br />
E E<br />
The transaction is voided (treated as a subtotal void) and the receipt is issued by this function. If you have<br />
already entered a tendered amount, the operation is finalized as a cash sale.<br />
L<br />
L<br />
www.cashregisters.net<br />
13
14<br />
3<br />
Single item entries<br />
Department entries<br />
The cash register provides a maximum of 99 departments for a merchandise classification. Group attributes,<br />
such as taxable status, are applied on items when they are entered to the departments.<br />
• When using the department keys (for department 1 to 32)<br />
For department 1 to 16, enter a unit price and press a department key. If you use a programmed unit price,<br />
press a department key only.<br />
For department 17 to 32, enter a unit price, press the D key and press a department key. If you use a<br />
programmed unit price, press the D key and press a department key.<br />
* 1 Less than the programmed upper limit amounts<br />
When zero is entered, only the sales quantity is<br />
added.<br />
* 2 For the optional departments 17 through 32,<br />
press the D key.<br />
• When using the department code entry key<br />
Enter a department(dept.) code and press the d key, then enter a unit price and press the d key again. If<br />
the dept. code is programmed to preset price entry style and a unit price is preset, your cash register will finish<br />
its registration operation.<br />
Dept. code<br />
(1 to 99)<br />
* 1 Less than the programmed upper limit<br />
amounts<br />
When zero is entered, only the sales<br />
quantity is added.<br />
PLU/sub-department entries<br />
For another merchandise classification, the cash register provides a maximum of 1200 PLUs/sub-departments.<br />
PLUs are used to call up preset prices by a code entry. Sub-departments are used to classify merchandise into<br />
smaller groups under the departments. Every PLU and sub-department has a code from 1 to 1200, and should<br />
belong to a department to obtain attributes of that department.<br />
The cash register is pre-programmed to PLU mode and zero for unit price. To use PLU entries, their preset unit<br />
prices should be previously programmed. (Refer to page 33.)<br />
To use sub-department entries, change to sub-department mode for the PLU codes.<br />
• PLU entries<br />
PLU code<br />
(1 to 1200)<br />
Item Entries<br />
When using a programmed unit price<br />
Unit price * 1<br />
(max. 7 digits)<br />
p<br />
• Sub-department (open PLU) entries<br />
PLU code p (1 to 1200)<br />
*<br />
D<br />
2<br />
When using a programmed unit price<br />
d d<br />
Unit price * 1<br />
(max. 7 digits)<br />
(In case only preset price entry is allowed.)<br />
Unit price *<br />
(max. 7 digits)<br />
Department key<br />
p<br />
* Less than the programmed upper limit<br />
amounts<br />
When zero is entered, only the sales<br />
quantity is added.<br />
www.cashregisters.net
Department entry<br />
PLU entry<br />
Sub-department<br />
entry<br />
Repeat entries<br />
Key operation example<br />
You can use this function for entering a sale of two or more of the same items. Repeat pressing a department<br />
key, d key or p key as shown on key operation example.<br />
Key operation example<br />
1200 ( (<br />
500 D ! !<br />
Department entry<br />
) )<br />
D " "<br />
50 d 1500 d d<br />
33 d d<br />
PLU entry<br />
2 p p<br />
11 p 1200 p p<br />
Sub-department<br />
A<br />
entry<br />
Multiplication entries<br />
1200 (<br />
500 D ! )<br />
D "<br />
50 d 1500 d<br />
33 d<br />
2 p<br />
11p1200p A<br />
When you sell a large quantity of items, it is convenient to use the multiplication entry method. Enter quantity<br />
using numeric keys and press the @ key before starting item entry as shown in the example below.<br />
Print<br />
Print<br />
When programmed to allow fractional quantity entries, you can enter up to four integers and three<br />
digit decimal, though the quantity is counted as one for sales reports. To enter a fractional quantity,<br />
use the decimal point key between integer and decimal, as 7P5 for entering 7.5.<br />
www.cashregisters.net<br />
15
16<br />
Department entry<br />
PLU entry<br />
Sub-department<br />
entry<br />
Split pricing entries<br />
This function is practical when the customer wants to purchase items normally sold in bulk.<br />
To utilize this function, you must change the pre-programmed or default programmed setting. Refer to “Various<br />
Function Selection Programming 1” (job code 70) for programming details.<br />
To make split pricing entries, follow the procedure below:<br />
Selling q'ty<br />
(Up to 4 digits)<br />
Department entry<br />
PLU entry<br />
Key operation example<br />
3 @ 1200 (<br />
5 @ 500 D !<br />
3 @ )<br />
5 @ D "<br />
3 @ 50 d 1500 d<br />
5 @ 33 d<br />
3 @ 2 p<br />
5@ 11p1200p A<br />
When using a programmed unit price<br />
@ Base q'ty<br />
(Up to 2 digits) @ Unit price<br />
per base q'ty<br />
Department key<br />
Key operation example<br />
7 @ 10 @<br />
600 *<br />
8 @ 12 @<br />
35 p A<br />
Dept. code d<br />
Print<br />
D<br />
(Only preset entry is allowed.)<br />
PLU code p<br />
PLU code p Unit price<br />
per base q'ty p<br />
Print<br />
Unit price<br />
per base q'ty<br />
d<br />
www.cashregisters.net
Single item cash sale (SICS) entry<br />
• This function is useful when a sale is for only one item and is for cash. This function is applicable only to those<br />
departments that have been set for SICS or to their associated PLUs or sub-departments.<br />
• The transaction is complete and the drawer opens as soon as you press the department key, d key or<br />
p key.<br />
4<br />
Key operation example<br />
For finishing<br />
the transaction<br />
250<br />
,<br />
Print<br />
If an entry to a department or PLU/sub-department set for SICS follows the ones to departments or<br />
PLUs/sub-departments not set for SICS, it does not finalize and results in a normal sale.<br />
The register provides three types of subtotals:<br />
Merchandise subtotal<br />
Press the m key at any point during a transaction. The net sale subtotal - not including tax - will appear in<br />
the display.<br />
Taxable subtotal<br />
Taxable 1 subtotal<br />
Press the T and s keys in this order at any point during a transaction. The sale subtotal of<br />
taxable 1 items will appear in the display.<br />
Taxable 2 subtotal<br />
Press the U and s keys in this order at any point during a transaction. The sale subtotal of<br />
taxable 2 items will appear in the display.<br />
Including-tax subtotal (full subtotal)<br />
Press the s key at any point during a transaction. The sale subtotal including tax and the symbol “ ” will<br />
appear in the display.<br />
5<br />
Displaying Subtotals<br />
Finalization of Transaction<br />
<strong>Cash</strong> or check tendering<br />
Press the s key to get an including tax subtotal, enter the amount tendered by your customer, then press<br />
the A key if it is a cash tender or press the C key if it is a check tender. When the amount tendered is<br />
greater than the amount of the sale, your register will show the change due amount and the symbol “ ” will light<br />
up. Otherwise the register will show a deficit and the symbol “ ” will light up. You now must make a correct<br />
tender entry.<br />
<strong>Cash</strong> tendering<br />
Key operation example<br />
s<br />
1000 A<br />
Print<br />
www.cashregisters.net<br />
17
18<br />
Check tendering<br />
Key operation example<br />
<strong>Cash</strong> or check sale that does not require entry<br />
Enter items and press the A key if it is a cash sale or press the C if it is a check sale. Your register will<br />
display the total sale amount.<br />
Charge (credit) sale<br />
Enter items and press the charge key (c).<br />
Mixed-tender sale<br />
s<br />
1000 C<br />
Key operation example<br />
300 +<br />
10 p A<br />
Key operation example<br />
2500 +<br />
3250 * c<br />
You can perform mixed-tendering of check and cash, cash and charge, and check and charge.<br />
Example: Your customer pays $9.50 in cash and $40.00 by charge for an including-tax subtotal of $49.50.<br />
Key operation example<br />
Print<br />
s<br />
950 A c<br />
Print<br />
Print<br />
In the case of check sale<br />
Print<br />
www.cashregisters.net
6<br />
Tax Calculation<br />
Automatic tax<br />
When the register is programmed with a tax rate (or tax table) and the tax status of an individual department is<br />
set for taxable, it computes the automatic tax on any item that is entered directly into the department or indirectly<br />
via a related PLU.<br />
Example: Selling five $6.70 items (dept. 1, taxable 1) and one $7.15 item (PLU no. 85, taxable 2) for cash<br />
Key operation example<br />
Print<br />
Manual tax<br />
The machine allows you to enter tax manually after it finalizes an item entry.<br />
Example: Selling an $8.00 item (dept. 12) for cash with 50 cents as tax<br />
Key operation example<br />
Tax delete<br />
5 @ 670 !<br />
85 p A<br />
800 (<br />
50 t A<br />
You can delete the automatic tax on the taxable 1 and taxable 2 subtotal of each transaction by pressing the t<br />
key after the subtotal is displayed.<br />
To delete taxable 1 subtotal, press T, s to get taxable 1 subtotal, and then press t to delete the<br />
subtotal.<br />
To delete taxable 2 subtotal, press U, s to get taxable 2 subtotal, and then press t to delete the<br />
subtotal.<br />
To delete all taxable (1-4) subtotal, press T, U, s and t in this order.<br />
Example: Selling a $7.25 item (dept. 1, taxable 1) and another $5.15 item (dept. 11, taxable 2) for cash and<br />
entering the sale as a non-taxable one<br />
Key operation example<br />
Print<br />
725 !<br />
515 /<br />
Ts t<br />
Us tA<br />
Print<br />
www.cashregisters.net<br />
19
20<br />
Tax status shift<br />
The machine allows you to shift the programmed tax status of each department or the PLU key by pressing the<br />
T and/or U keys before those keys. After each entry is completed, the programmed tax status of each<br />
key is resumed.<br />
Example: Selling the following items for cash with their programmed tax status reversed<br />
• One $13.45 item of dept. 16 (non-taxable) as a taxable 1 item<br />
• One $7.00 item of PLU no. 25 (non-taxable) as a taxable 1 and 2 item<br />
• One $4.00 item of dept. 11 (taxable 2) as a non-taxable item<br />
• Two $10.50 items of dept. 1 (taxable 1) as taxable 2 items<br />
Key operation example<br />
Print<br />
1345 T<<br />
25 TUp<br />
400 U/<br />
1050 TU! !A<br />
When Canadian tax system is applied:<br />
When using a tax status shift, the entry of a multi-taxable item for PST or GST will be prohibited.<br />
Please see below:<br />
In case of; Tax 1: PST, Tax 2: PST,<br />
Tax 3: PST, Tax 4: GST<br />
Taxable 1 and 2 item ········· prohibited<br />
Taxable 1 and 3 item········· prohibited<br />
Taxable 2 and 3 item ········· prohibited<br />
Taxable 1 and 4 item ············· allowed<br />
Taxable 2 and 4 item ············· allowed<br />
Taxable 3 and 4 item ············· allowed<br />
In case of; Tax 1: PST, Tax 2: PST,<br />
Tax 3: GST, Tax 4: GST<br />
Taxable 1 and 2 item ········· prohibited<br />
Taxable 1 and 3 item ············· allowed<br />
Taxable 2 and 3 item ············· allowed<br />
Taxable 1 and 4 item ············· allowed<br />
Taxable 2 and 4 item ············· allowed<br />
Taxable 3 and 4 item ········· prohibited<br />
www.cashregisters.net
OPTIONAL FEATURES<br />
1<br />
Auxiliary Entries<br />
Discount and premium entries using the percent key<br />
The percent key is used to apply a manually entered or preset discount or premium percent rate to individual<br />
items or to a merchandise subtotal. In the default setting, you can manually enter a discount percent rate to<br />
both individual items and merchandise subtotal. For manual entry of discount or premium percent rate, enter the<br />
rate (up to 100.00) with the numeric keys (you need a decimal point when you enter a fractional percent rate),<br />
and press a percent key. When using a preset rate (if programmed), just press a percent key.<br />
When entry limit is programmed for a percent key, you can not enter a rate over the limit (error code 34 will<br />
occur.)<br />
Percent calculation for the merchandise subtotal<br />
Key operation example<br />
4 @<br />
140 ><br />
570 * m<br />
10 % A<br />
Percent calculation for item entries<br />
Key operation example<br />
800 +<br />
7 P 5 %<br />
15 p &A<br />
(When premium and 15% are<br />
programmed for the & key)<br />
Discount and premium entries using the discount key<br />
The discount key is used to apply a manually entered or preset discount or premium amount to individual items<br />
or to a merchandise subtotal. In the default setting, you can manually enter a discount amount to both individual<br />
items and merchandise subtotal. For manual entry of discount or premium amounts, enter the amount with the<br />
numeric keys, and press the discount key. When using a preset amount (if programmed), press the discount<br />
key.<br />
When entry digit limit is programmed for the discount key, you can not enter an amount over the limit (error code<br />
34 will occur.)<br />
Print<br />
Print<br />
www.cashregisters.net<br />
21
22<br />
Discount for the merchandise subtotal<br />
Discount for item entries<br />
Refund entries<br />
Key operation example<br />
575 +<br />
10 p m<br />
100 - A<br />
Key operation example<br />
675 * -A<br />
(When a discount amount of<br />
$0.75 is programmed.)<br />
For departments 1 to 16, enter the refund amount and press the f key, and then press the corresponding<br />
department key and for departments 17 to 32, enter the refund amount and press the f key, then press the<br />
D key and press the corresponding department key (when using the preset price, omit entering the amount).<br />
In case of department 33 to 99, enter the department code and press f key and the d key, then enter the<br />
refund amount and press the d key if necessary.<br />
For a refund of a PLU item, enter the PLU code and press the f key, then press the p key.<br />
For a refund of a sub-department item, enter the PLU code and press the f key and p key, then enter<br />
the refund amount and press the p key.<br />
Key operation example<br />
250 f+<br />
33 fd100 d<br />
7 @<br />
13 fp<br />
15 fp150 p A<br />
Non-add code number entries and printing<br />
You can enter a non-add code number such as a customer’s code number and credit card number, a maximum<br />
of 16 digits, at any point during the entry of a sale. The cash register will print it at once.<br />
To enter a non-add code number, enter the number and press the s key.<br />
Print<br />
Print<br />
Print<br />
www.cashregisters.net
2<br />
Key operation example<br />
Currency conversion<br />
The register allows payment entries in a foreign currency (only cash payment is available). Pressing the V key<br />
creates a subtotal in the foreign currency.<br />
When using a programmed currency conversion rate, press the V key after item entries, then enter the<br />
tendered amount in foreign currency if not exact amount payment, and press the A key.<br />
When making a manual entry of currency conversion rate, after item entries, enter the conversion rate (0.0000 to<br />
9999.9999; you need a decimal point when you enter fractional conversion rate) and press the V key, then<br />
enter the tendered amount in foreign currency if not exact amount payment, and press the A key.<br />
In both cases, the change due will be displayed in domestic currency, and when the amount tendered is short,<br />
the deficit is shown in domestic currency.<br />
• Press the l key after pressing the V key to cancel payment in a foreign currency.<br />
• If programmed, a foreign currency symbol is printed when you use a prest rate.<br />
Applying preset conversion rate<br />
Currency<br />
conversion<br />
Amount<br />
tendered in<br />
foreign currency<br />
Applying manual conversion rate<br />
Key operation example<br />
Conversion rate<br />
1230 s<br />
1500 + c<br />
Auxiliary Payment Treatment<br />
Key operation example<br />
2300 +<br />
4650 *<br />
V<br />
10000 A<br />
(When a currency conversion<br />
rate of 0.7674 is programmed for<br />
the V key.)<br />
2300 +<br />
4650 *<br />
1 P 275 V<br />
10000 A<br />
Print<br />
Print<br />
Foreign currency symbol<br />
(Printed if programmed)<br />
Print<br />
Domestic currency<br />
Conversion rate<br />
Foreign currency<br />
Domestic currency<br />
www.cashregisters.net<br />
23
24<br />
Received-on Account and Paid-out Entries<br />
When you receive on account from a customer or when you pay an amount to a vendor, it is a good idea to use<br />
the r key or the R key respectively.<br />
For the received-on-account (RA) entry, enter the amount, and press the r key.<br />
For the paid-out (PO) entry, enter the amount and press the R key.<br />
<strong>Cash</strong> tendering only available for RA and PO operation.<br />
No sale (exchange)<br />
When you need to open the drawer with no sale, just press the A key. The drawer will open and printer will<br />
print “NO SALE” on the receipt or journal. If you let the machine print a non-add code number before pressing<br />
the A key, a no sale entry is achieved and a non-add code number is printed.<br />
3<br />
Key operation example<br />
12345 s<br />
4800 r<br />
Automatic Sequence Key (a key) Entries<br />
You can achieve a programmed transaction simply by pressing the a key.<br />
Key operation example<br />
(a = 500 *A )<br />
a<br />
Print<br />
Print<br />
www.cashregisters.net
CORRECTION<br />
1<br />
If you make an incorrect entry relating to a department, PLU/sub-department, percentage (% and &), discount<br />
(-) or refund, you can void this entry by pressing the v key immediately after the incorrect entry.<br />
2<br />
Correction of the Last Entry (direct void)<br />
Key operation example<br />
Correction of the Next-to-last or Earlier Entry (indirect void)<br />
You can void any incorrect department entry, PLU/sub-department entry or item refund entry made during a<br />
transaction if you find it before finalizing the transaction (e.g. pressing the A key). This function is<br />
applicable to department, PLU/sub-department and refund entries only.<br />
For the operation, press the v key just before you press a department key, d key or p key. For the<br />
refund indirect void, press the v key after you press the f key.<br />
Key operation example<br />
Correction<br />
of a<br />
department<br />
entry<br />
Correction<br />
of a PLU entry<br />
Correction of<br />
a refund entry<br />
1250 + v<br />
2 p v<br />
600 ' &v<br />
328 ,<br />
28 - v<br />
250 f+ vA<br />
1310 +<br />
1755 *<br />
10 p<br />
12 p<br />
250 f +<br />
825 *<br />
1310 v +<br />
12 v p<br />
250 f v + A<br />
Print<br />
Print<br />
www.cashregisters.net<br />
25
26<br />
3<br />
You can void an entire transaction. Once subtotal void is executed, the transaction is aborted and the register<br />
issues a receipt. This function does not work when more than 30 items have been entered.<br />
4<br />
Subtotal Void<br />
Key operation example<br />
Subtotal void<br />
1310 " "<br />
1755 +<br />
10 p<br />
35 p svs<br />
Correction of Incorrect Entries not Handled by the Direct or Indirect Void<br />
Function<br />
Any errors found after the entry of a transaction has been completed or during an amount tendered entry cannot<br />
be voided. These errors must be corrected by the manager.<br />
The following steps should be taken:<br />
1. If you are making the amount tendered entry, finalize the transaction.<br />
2. Make correct entries from the beginning.<br />
3. Hand the incorrect receipt to your manager for its cancellation.<br />
Print<br />
www.cashregisters.net
FOR THE MANAGER<br />
PRIOR TO PROGRAMMING<br />
Before starting sales entries, you must first program necessary items so that the cash register suits your sales<br />
manner. In this manual, there are three sections, BASIC FUNCTION PROGRAMMING where required items<br />
must be programmed, AUXILIARY FUNCTION PROGRAMMING where you can program for more convenient<br />
use of keys on the keyboard, and ADVANCED FUNCTION PROGRAMMING where various optional<br />
programming features are provided. Find the appropriate features for your needs, and make the necessary<br />
programming changes.<br />
You can select the language of text (English, French or Spanish) printed on receipts or journals.<br />
For the language selection, please refer to “Language Selection” described later in this section.<br />
Procedure for programming<br />
1. Check to see whether a paper roll is present in the machine. If there is not enough paper on the roll, replace<br />
it with a new one (refer to MAINTENANCE section for the replacement).<br />
2. Put the manager key in the mode switch and turn it to the PGM position.<br />
3. Program necessary items into the cash register.<br />
Every time you program an item, the cash register will print the setting. Please<br />
refer to print samples in each section.<br />
4. If necessary, issue programming reports for your reference.<br />
• On the procedures and key operation examples shown in the programming details, numbers such<br />
as “08262006” indicates the parameter which must be entered using the corresponding numeric<br />
keys.<br />
• Asterisks in the tables shown in the programming details indicate default settings.<br />
BASIC FUNCTION PROGRAMMING<br />
(For Quick Start)<br />
1<br />
Date and Time Programming<br />
Date<br />
For setting the date, enter the date in 8 digits using the month-day-year (MM/DD/YYYY) format, then press the<br />
s key.<br />
Date(MM/DD/YYYY) s<br />
Key operation example<br />
08262006 s<br />
(Aug. 26, 2006)<br />
Print<br />
REG<br />
OPX/Z MGR<br />
OFF<br />
X1/Z1<br />
VOID<br />
X2/Z2<br />
You can use the date format of day-month-year (DD/MM/YYYY) or year-month-day (YYYY/MM/DD)<br />
format. To change the format, refer to “Various Function Selection Programming 1” section (Job<br />
code 61).<br />
PGM<br />
Date<br />
www.cashregisters.net<br />
27
28<br />
Time<br />
For setting the time, enter the time in 4 digits (HHMM) using the 24-hour format. For example, when the time is<br />
set to 2:30 AM, enter 230; and when it is set to 2:30 PM, enter 1430.<br />
Time(max. 4 digits in 24-hour format) s<br />
2<br />
Key operation example<br />
In the display, current time is displayed in 12-hour format. For AM time, “ ” and for PM time “ ”<br />
will appear in the rightmost position with the current time. If you want to display time in the 24-hour<br />
format, refer to “Various Function Selection Programming 1” section (Job code 61).<br />
The cash register can support US and Canadian tax systems. If you use the Canadian tax system,<br />
you must first change the tax system, then program the tax rate or tax table and quantity for<br />
doughnut exempt which are described in this section. For changing your cash register’s tax<br />
system, please refer to “Various Function Selection Programming 1” section (job code 70).<br />
Before you can proceed with ringing sales transactions, you must first program the tax that is levied in<br />
accordance with the laws of your state. The cash register comes with the ability to program four different tax<br />
rates. In most states, you will only need to program Tax 1. However if you live in an area that has a separate<br />
local tax (such as a Parish tax) or a hospitality tax, the register can be programmed to calculate these separate<br />
taxes.<br />
When you program the tax status for a department, tax will be automatically added to sales of items assigned to<br />
the department according to the programmed tax status for the department. You can also enter tax manually.<br />
There are two tax programming methods. The tax rate method uses a straight percentage rate per dollar. The<br />
tax table method requires tax break information from your states or local tax offices. Use the method which is<br />
acceptable in your state. You can obtain necessary data for tax programming from your local tax office.<br />
Tax programming using a tax rate<br />
The percent rate specified here is used for tax calculation on taxable subtotals.<br />
Tax number (1 to 4)<br />
s 9 @<br />
@<br />
Tax rate<br />
(0.0000 to 100.0000)<br />
1430 s<br />
Tax Programming for Automatic Tax Calculation Function<br />
When the lowest taxable amount is zero<br />
To delete a tax rate, use the following sequence:<br />
Print<br />
Lowest taxable amount<br />
@ (0.01 to 999.99) s A<br />
Tax number (1 to 4)<br />
s 9 @ @ v A<br />
Time<br />
www.cashregisters.net
Example: Programming the tax rate 4% as tax rate 2 with tax exempt as 12¢<br />
Key operation example<br />
Print<br />
• If you make an incorrect entry before pressing the third @ key in programming a tax rate, cancel<br />
it with the l key.<br />
• You do not need to enter the trailing zeros of the tax rate (after the decimal point), but you do<br />
need to enter the decimal for fractions.<br />
• The lowest taxable amount setting is ignored when you select VAT system for Canadian tax.<br />
The tax table (applicable to the add-on tax)<br />
If you are in an area that uses a tax table for tax calculation, you can program the cash register accordingly. Tax<br />
table programming can be performed for Tax 1 through Tax 4.<br />
Sample tax table<br />
New Jersey tax table: 6%<br />
s 9 @<br />
2 @<br />
4 @<br />
12 s A<br />
Range of sales amount<br />
Taxes Minimum breakpoint Maximum breakpoint<br />
.00<br />
.01<br />
to .10<br />
.01 T .11 Q to .22<br />
.02<br />
.23<br />
to .38<br />
.03<br />
.39<br />
to .56<br />
.04<br />
.57<br />
to .72<br />
.05<br />
.73<br />
to .88<br />
.06<br />
.89<br />
to 1.10<br />
.07<br />
1.11 M1 to 1.22<br />
.08<br />
1.23<br />
to 1.38<br />
.09<br />
1.39<br />
to 1.56<br />
.10<br />
1.57<br />
to 1.72<br />
.11<br />
1.73<br />
to 1.88<br />
.12<br />
1.89<br />
to 2.10<br />
.13<br />
2.11 M2 to 2.22<br />
A: Difference between the<br />
minimum breakpoint and<br />
the next one (¢)<br />
–<br />
10 (0.11 - 0.01)<br />
12 (0.23 - 0.11)<br />
16 (0.39 - 0.23)<br />
18 (0.57 - 0.39)<br />
16 (0.73 - 0.57)<br />
16 (0.89 - 0.73)<br />
22 (1.11 - 0.89)<br />
12 (1.23 - 1.11)<br />
16 (1.39 - 1.23)<br />
18 (1.57 - 1.39)<br />
16 (1.73 - 1.57)<br />
16 (1.89 - 1.73)<br />
22 (2.11 - 1.89)<br />
B: Non-cyclic<br />
C: Cyclic-1<br />
D: Cyclic-2<br />
To program a tax table, first make a table like the one shown above right.<br />
From the tax table, calculate the differences between a minimum break point and the next one (A). Then, from<br />
the differences, find irregular cycles (B) and regular cycles (C and D). These cycles will show you the following<br />
items necessary to program the tax table:<br />
T: The tax amount collected on the minimum taxable amount (Q)<br />
Q: The minimum taxable amount<br />
M1: The maximum value of the minimum breakpoint on a regular cycle (C)<br />
We call this point “MAX point.”<br />
M2: The maximum value of the minimum breakpoint on a regular cycle (D)<br />
We call this point “MAX point.”<br />
M: Range of the minimum breakpoint on a regular cycle: difference between Q and M1 or between M1 and M2<br />
www.cashregisters.net<br />
29
30<br />
One- or two- *1 *2<br />
Rate s 8 @ @ @ M @<br />
To delete a tax table, use the following sequence:<br />
One- or two- *1 *2<br />
Rate s 8 @ @ @ M @ s<br />
*1 First figure:<br />
(1 or 0)<br />
Second figure:<br />
(1 to 4)<br />
The first figure to be entered depends upon whether the difference between a minimum<br />
breakpoint to be entered and the preceding minimum breakpoint is not less than $1.00 or<br />
more than 99¢. When the difference is not less than $1.00, enter “1,” and when it is not more<br />
than 99¢, enter “0” or nothing.<br />
The second figure depends upon whether your tax table is to be programmed as tax table 1,<br />
2, 3 or 4.<br />
*2 If the rate is fractional (e.g. 4-3/8%), then the fractional portion (3/8) would be converted to its decimal<br />
equivalent (i.e. .375) and the resulting rate of 4.375 would be entered. Note that the nominal rate (R) is<br />
generally indicated on the tax table.<br />
If you make an incorrect entry before entering the M in programming a tax table, cancel it with the<br />
l key; and if you make an error after entering the M, cancel it with the s key. Then program<br />
again from the beginning.<br />
• Limitations to the entry of minimum breakpoints<br />
The register can support a tax table consisting of no more than 72 breakpoints. (The maximum number of<br />
breakpoints is 36 when the breakpoint difference is $1.00 or more.) If the number of breakpoints exceeds the<br />
register’s table capacity, then the manual entry approach should be used.<br />
Example: Programming the sample tax table shown on the previous page as tax table 1<br />
Key operation example<br />
Print<br />
Tax rate<br />
M<br />
T<br />
Q<br />
The first<br />
cyclic<br />
portion<br />
M1<br />
(MAX point)<br />
digit number<br />
s 8 @<br />
1 @<br />
6 @<br />
100 @<br />
1 @<br />
11 @<br />
23 @<br />
39 @<br />
57 @<br />
73 @<br />
89 @<br />
111 @<br />
A<br />
digit number<br />
max. six digits<br />
(0.0001 - 99.9999%)<br />
max. six digits<br />
(0.0001 - 99.9999%)<br />
max. four<br />
digits<br />
max. four<br />
digits<br />
Minimum breakpoint<br />
T @ Q @ max. five digits @ A<br />
max. three<br />
digits<br />
max. five<br />
digits<br />
Repeat until the MAX point is entered.<br />
You do not need to enter the trailing zeros of the tax rate (after the decimal point) but you do need<br />
to enter the decimal point for fractions.<br />
www.cashregisters.net
• If the tax is not provided for every cent, modify the tax table by setting the tax for every cent<br />
in the following manner.<br />
When setting the tax, consider the minimum breakpoint corresponding to unprovided tax to be the same as the<br />
one corresponding to the tax provided on a large amount.<br />
Sample tax table Modification of the left tax table<br />
Example 8%<br />
Tax<br />
.00<br />
.01<br />
.02<br />
.03<br />
.04<br />
.06<br />
.09<br />
.10<br />
.11<br />
.12<br />
.14<br />
.17<br />
Minimum<br />
breakpoint<br />
.01<br />
.11<br />
.26<br />
.47<br />
.68<br />
.89<br />
1.11<br />
1.26<br />
1.47<br />
1.68<br />
1.89<br />
2.11<br />
From the modified tax table above;<br />
Rate = 8(%), T = $0.01 = 1¢, Q = $0.11 = 11¢, M1 = 1.11, M2 = 2.11, M = 100<br />
Quantity for doughnut tax exempt (for Canadian tax system)<br />
This option is available only when the Canadian tax system is selected.<br />
Q’ty for doughnut<br />
tax exempt<br />
s 19 @<br />
s A<br />
Example: To program the quantity “6”<br />
Key operation example<br />
Tax<br />
.00<br />
.01<br />
.02<br />
.03<br />
.04<br />
.05<br />
.06<br />
.07<br />
.08<br />
.09<br />
.10<br />
.11<br />
.12<br />
.13<br />
.14<br />
.15<br />
.16<br />
.17<br />
s 19 @<br />
6 s A<br />
Minimum<br />
breakpoint<br />
T<br />
.01<br />
.11<br />
.26<br />
.47<br />
.68<br />
.89<br />
.89<br />
Q<br />
1.11<br />
1.11<br />
1.11<br />
1.26<br />
1.47<br />
1.68<br />
1.89<br />
1.89<br />
M1<br />
2.11<br />
2.11<br />
2.11<br />
M2<br />
To program zero<br />
(max. 2 digits: 1 to 99)<br />
Print<br />
Breakpoint<br />
difference (¢)<br />
1<br />
10 (0.11-0.01)<br />
15 (0.26-0.11)<br />
21 (0.47-0.26)<br />
21 (0.68-0.47)<br />
21 (0.89-0.68)<br />
0 (0.89-0.89)<br />
22 (1.11-0.89)<br />
0 (1.11-1.11)<br />
0 (1.11-1.11)<br />
15 (1.26-1.11)<br />
21 (1.47-1.26)<br />
21 (1.68-1.47)<br />
21 (1.89-1.68)<br />
0 (1.89-1.89)<br />
22 (2.11-1.89)<br />
0 (2.11-2.11)<br />
0 (2.11-2.11)<br />
B: Non-cyclic<br />
C: Cyclic-1<br />
D: Cyclic-2<br />
www.cashregisters.net<br />
31
AUXILIARY FUNCTION PROGRAMMING<br />
1<br />
Department Programming<br />
Merchandise can be classified into a maximum of 99 departments. Items sold with use of the department keys<br />
can later be printed on a report that shows the quantities sold and sales amounts classified by department. The<br />
data is useful for making purchasing decisions and other store operations. Departments can be assigned to<br />
articles whose prices were set using PLU/sub-department function.<br />
When using a department key, you must set the parameters to specify the department status, such as positive<br />
or negative department. Prices can be assigned directly to departments for frequently purchased items, which<br />
enables you to enter the prices by simply pressing the department keys or dept. code entries.<br />
Department status<br />
*<br />
D<br />
ABCDEFGH Dept. key<br />
@<br />
A<br />
To set all zeros<br />
*To program departments 17 through 32, press the department shift key at this point.<br />
To program another department, start from the beginning without pressing the A key.<br />
For department 33-99:<br />
Dept. code d<br />
To set all zeros<br />
ABCDEFGH @ A<br />
Item: Selection: Entry:<br />
A Tax 4 status Taxable 1<br />
Non-taxable* 0<br />
B Tax 3 status Taxable 1<br />
Non-taxable* 0<br />
C Tax 2 status Taxable 1<br />
Non-taxable* 0<br />
D Tax 1 status Taxable (*for dept. 1 thru 10) 1<br />
Non-taxable (*for dept. 11 thru 99) 0<br />
E SICS / Normal SICS 1<br />
Normal* 0<br />
F Sign Negative department 1<br />
Positive department* 0<br />
G Entry digit limit 0-7 (default: 7)<br />
H Type of unit price entry Open and preset 3<br />
Preset only 2<br />
Open only* 1<br />
Inhibit department key 0<br />
Tax status (taxable 1 through 4 / non-taxable)<br />
• When any entry of a taxable department is made in a transaction, tax is automatically computed according to<br />
the associated tax table or rate.<br />
SICS (Single Item <strong>Cash</strong> Sale)<br />
• If an entry of a department programmed for SICS is made first, the sale will be finalized as a cash sale as<br />
soon as the department key is pressed. If the entry is made after entering a department not programmed for<br />
SICS, the sale will not be finalized until the A key is pressed.<br />
Entry digit limit<br />
32<br />
• Set the number of allowable digits for the maximum entry amount for each department. The limit is effective<br />
for operations in the REG mode and can be overridden in the MGR mode.<br />
www.cashregisters.net
Example: Programming department 2 as taxable 1, SICS, negative department, entry digit limit - 7 digits, and<br />
allowing open & preset entry. (ABCDEFGH: 00011173)<br />
Preset unit price<br />
To program another department, start from the beginning without pressing the A key.<br />
2<br />
Key operation example<br />
For department 33-99:<br />
Dept. code<br />
00011173 @<br />
"A<br />
To program zero<br />
Unit price<br />
(max. six digits)<br />
Key operation example<br />
Unit price d s<br />
1000 ! A<br />
*<br />
D<br />
To program zero<br />
Dept. key<br />
*To program departments 17 through 32, press the department shift key at this point.<br />
(max. six digits) A<br />
Even if a department is not programmed to allow the entry of preset unit prices in functional<br />
programming, the department is automatically changed to allow the entry of preset unit prices by<br />
this programming entry.<br />
PLU (Price Look-Up) and Sub-department Programming<br />
Unit price<br />
The PLU function allows speedy key entries whereby a price is automatically called up when a code is entered.<br />
The sub-department is a kind of “open PLU”, which requires you to enter a price after the PLU code is entered.<br />
A maximum of 1200 PLU/sub-department settings are possible. Each one belongs to a department and<br />
acquires the department’s parameters (tax status, SICS and sign).<br />
The cash register is preprogrammed so all 1200 codes are assigned as PLUs associated with department 1 and<br />
preset unit price “0”.<br />
Print<br />
Tax status<br />
Print<br />
Sign(F)<br />
From left, EGH<br />
A<br />
www.cashregisters.net<br />
33
34<br />
Unit price and associated department assignment<br />
* 2 PLU code<br />
p<br />
*1: To assign departments 17 through 32, press the department shift key at this point.<br />
When the associated department is department 33-99:<br />
* 2 PLU code<br />
*2: 1 through 1200 (Depending on the EJ memory size setting, up to 200)<br />
*3: For a sub-department, set the limit amount of unit price entry.<br />
To program the following PLU, start from entering a unit price or an associated department code without<br />
pressing the A key.<br />
To program another PLU, start from the beginning without pressing the A key.<br />
Key operation example<br />
1 p<br />
125 # A<br />
To delete a PLU code, use the following sequence:<br />
PLU/sub-department selection<br />
PLU code p v<br />
* 1 PLU code p<br />
*1: 1 through 1200 (Depending on the EJ memory size setting, up to 200)<br />
*2: 0 for sub-department or 1 for PLU (default: 1)<br />
Key operation example<br />
1 p<br />
0 sA<br />
*<br />
D<br />
1<br />
To program zero<br />
* Unit price<br />
(max. six digits)<br />
Associated<br />
Dept. key A<br />
3<br />
Associated<br />
* Unit price<br />
p dept. code d s<br />
3<br />
(1 to 99)<br />
PLU code<br />
To delete the following PLU<br />
To delete another PLU<br />
To program "0"<br />
s<br />
To program the following PLU<br />
To program another PLU<br />
Print<br />
A<br />
PLU/sub-dept.<br />
When you program the last PLU code, the programming sequence will be complete with a press of<br />
the s key.<br />
* 2 A<br />
To program zero<br />
(max. six digits) A<br />
Print<br />
A<br />
Unit price<br />
Associated dept.<br />
www.cashregisters.net
3<br />
The cash register provides miscellaneous keys such as % , & , - , f , r , R , V , t , C , c and<br />
A . While the cash register is pre-programmed so you can use these keys, you must set a currency<br />
conversion rate to use V key. You can also program these keys for more convenient use. Please refer to the<br />
data below for programming these keys. Factory setting is indicated with parentheses.<br />
% , &<br />
-<br />
f<br />
r , R<br />
V<br />
Miscellaneous Key Programming<br />
Percent rate (0.00%), tax status (non-taxable), sign (minus), item % and subtotal %<br />
entry* (both are allowed), percent rate limitation (100 %)<br />
Amount (0.00), tax status (non-taxable), sign (minus), item _ and subtotal _ entry*<br />
(both are allowed), entry digit limit (7 digits)<br />
Not necessary to program<br />
Entry digit limit (9 digits)<br />
Currency conversion rate (0.0000), currency conversion rate entry method - open or<br />
preset (both are enabled)<br />
Compulsory entry of amount tender (not compulsory), entry digit limit (8 digits), footer<br />
printing (not printed)<br />
(Manual tax) Entry digit limit (7 digits)<br />
C , c and A<br />
t<br />
* Item %/Item _ : Percent/discount calculation is applied to individual department and PLU/subdepartment.<br />
* Subtotal %/Subtotal _ : Percent/discount calculation is applied to subtotals.<br />
Rate for %, & and V<br />
To program zero<br />
*: Rate<br />
0.00 — 100.00 (% rate)<br />
0.0000 — 9999.9999 (Currency conversion rate)<br />
Key operation example<br />
10 P 25 %<br />
0 P 7674 V A<br />
%<br />
V<br />
*Rate or<br />
To program another rate<br />
&<br />
A<br />
You must use a decimal point when setting fractional rates.<br />
Print<br />
Percent rate<br />
Currency<br />
conversion rate<br />
www.cashregisters.net<br />
35
36<br />
Amount for -<br />
Percent rate limitation for % and &<br />
s @<br />
To program zero<br />
Discount amount (max. six digits) - A<br />
Key operation example<br />
200 - A<br />
29<br />
To program zero<br />
Percentage limit (0.00 -100.00%) or % & A<br />
• Percent entries that exceed the upper limit may be overridden in the MGR mode.<br />
• 10.00% can be entered as 10 or 10P00. The P key is needed only<br />
for fractional entry.<br />
Key operation example<br />
s 29 @<br />
15 P 00 % A<br />
Function parameters for %, & and -<br />
To program “0” for all items<br />
@<br />
%<br />
-<br />
*ABCDEFGH or<br />
To program for another key<br />
To program for another percent key<br />
&<br />
Print<br />
Print<br />
A<br />
Discount amount<br />
Percentage limit<br />
www.cashregisters.net
*: Item: Selection: Entry:<br />
A Tax 4 status Taxable 1<br />
Non-taxable* 0<br />
B Tax 3 status Taxable 1<br />
Non-taxable* 0<br />
C Tax 2 status Taxable 1<br />
Non-taxable* 0<br />
D Tax 1 status Taxable 1<br />
Non-taxable* 0<br />
E +/- sign + (premium) sign 0<br />
- (discount) sign* 1<br />
F Item % / Item _ Allow* 0<br />
Disallow 1<br />
G Subtotal % / Subtotal _ Allow* 0<br />
Disallow 1<br />
H Entry digit limit for discount key 0-7 (default: 7)<br />
When programming percent keys, always enter 0 for H.<br />
Tax status (taxable 1 through 4 / non-taxable)<br />
• When taxable is selected, tax is applied to the amount obtained after premium or discount calculation.<br />
+/- sign<br />
• Programming of the +/- sign assigns the premium or discount function for each key.<br />
Entry digit limit (For discount key only)<br />
• The entry digit limit is in effect for the REG mode operations but can be overridden in the MGR mode. The<br />
entry digit limit is represented by the number of allowable digit for the maximum entry amount for discount<br />
key.<br />
Key operation example<br />
00011006 @<br />
-A<br />
Function parameters for V<br />
To program “0” for all items<br />
*AB @ V A<br />
*: Item: Selection: Entry:<br />
A Open rate entry Allow* 0<br />
Disallow 1<br />
B Preset rate entry Allow* 0<br />
Disallow 1<br />
Key operation example<br />
00 @<br />
VA<br />
Print<br />
Tax status<br />
Print<br />
From left, FGH<br />
Sign(E)<br />
From left, AB<br />
www.cashregisters.net<br />
37
38<br />
Entry digit limit for r, R and t<br />
Entry digit limit<br />
• For rR, enter 0 to 9 (digits), and for t (manual tax), enter 0 to 7 (digits). By default, 9 for r and R<br />
and 7 for t are set.<br />
Entry digit limit is in effect for REG mode operation but can be overridden in MGR mode. The entry digit limit<br />
is represented by the number of allowable digits for maximum entry or total amount. When “0” is set, the<br />
operation of the corresponding key is prohibited.<br />
Key operation example<br />
4 @<br />
RA<br />
Function parameters for C, c and A (when using as CA key)<br />
* 1 To program “0” for all items<br />
ABC @<br />
*<br />
or s, C c A<br />
2<br />
To program for another key<br />
*1:Item: Selection: Entry:<br />
A Footer printing Allow 1<br />
Disallow* 0<br />
B Amount tendered entry Compulsory 1<br />
Non-compulsory (for the CA or CHK keys)* 0<br />
Inhibit (for the CH key)* 0<br />
C Entry digit limit 0-8 (default: 8)<br />
Footer printing<br />
• This option decides whether or not the machine should print a message at the bottom of a receipt when a<br />
specified media key is used. To program a footer logo message, refer to “Logo messages” section on page<br />
43.<br />
Amount tendered entry<br />
• You may select amount tendered, compulsory or optional, for the A and C keys.<br />
• You may select amount tendered, compulsory or inhibited, for the c key.<br />
Entry digit limit<br />
• For the c and C keys, program upper limit entry amount for the tendered amount. For the A key,<br />
program upper limit entry for total cash amount which can be handled on the register. The entry digit limit is<br />
in effect for REG mode operation but can be overridden in the MGR mode. The entry digit limit is represented<br />
by the number of allowable digits for the maximum entry or total amount. When “0” is set, the operation of the<br />
corresponding key is prohibited.<br />
Key operation example<br />
018 @<br />
CA<br />
@ r, R A<br />
(only for manual entry)<br />
or t<br />
Print<br />
* 2 :Press s key for CA key setting.<br />
Print<br />
ABC (A:0, B:1, C:8)<br />
www.cashregisters.net
4<br />
Text Programming<br />
The register allows you to program the text for clerk names, department item names, PLU/sub-department item<br />
names, and so on, if necessary. There are two ways for programming text: using character keys on the<br />
keyboard or entering character codes with numeric keys on the keyboard.<br />
Using character keys on the keyboard<br />
You can enter characters according to the small figures printed in the lower right position of the key tops. For<br />
the layout, please refer to “Keyboard” section on page 5.<br />
The following are used as control keys for character entry:<br />
H Toggles between upper-case and lower-case letters. By default, the upper-case letter is selected.<br />
Once the H key is pressed, you are locked in for entering lower-case letters. “_” lights up at the<br />
SHIFT position of the display when lower-case letters entry is selected.<br />
N Press the N key to enter numeric characters. For example to enter “1”, press the N and 1<br />
key. If you press the 1 key without pressing the N key, the cash register goes to character codes<br />
entry mode.<br />
Once the N key is pressed, you are locked in for entering numeric characters. “_” lights up at the<br />
NUMBER position of the display when numeric characters entry is selected.<br />
W Toggles between single-size and double-size characters. By default, the single-size character is<br />
selected. Once the W key is pressed, you are locked in for entering double size characters. “_” lights<br />
up at the DC position of the display when double-size characters entry is selected.<br />
B Backs up the cursor, erasing the character to the left.<br />
To program the word “Clerk01” with the letter “C” being double size.<br />
To make the letter “C” double size character Wg<br />
To make character size return to normal size W<br />
To toggle the characters to lower-case letters H<br />
hijk<br />
To enter numbers N01<br />
Entering character codes with numeric keys on the keyboard<br />
Numerals, letters and symbols are programmable by entering the character code and the : key. (If numeric<br />
characters entry is selected, that is, “_” lights up at the NUMBER position of the display, press the N key to<br />
release it.) Set the alphanumeric character code table on the next page. By doing this, you can program<br />
characters other than those on the key tops.<br />
• Double-size characters can be made by entering the character code 253.<br />
• All three digits of the character code MUST be entered (even if it starts with zero).<br />
To program the word “SHARP” in double-size characters<br />
253 : 083 : 072 : 065 : 082 : 080 :<br />
S H A R P<br />
When you press an appropriate number key (job code number) and press the P key for text entry just after you<br />
start programming with the s key, the cash register will be automatically ready for text entry.<br />
Listed below is an overview of what you can program and the allowable number of single sized characters for<br />
each text entry.<br />
• Department text 12 characters<br />
• PLU text (item label) 12 characters<br />
• Function text 8 characters<br />
• Logo message 6 lines and 24 characters for each line<br />
• Clerk name 8 characters<br />
• Foreign currency symbol 4 characters<br />
www.cashregisters.net<br />
39
40<br />
Alphanumeric character code table<br />
*(DC): Double-size character code<br />
: The shaded character cannot be displayed (displayed as space).<br />
The character “!!” (code 128) cannot be displayed (displayed as “!”).<br />
Code<br />
001<br />
002<br />
003<br />
004<br />
005<br />
006<br />
007<br />
008<br />
009<br />
010<br />
011<br />
012<br />
013<br />
014<br />
015<br />
016<br />
017<br />
018<br />
019<br />
020<br />
021<br />
022<br />
023<br />
024<br />
025<br />
026<br />
027<br />
028<br />
029<br />
030<br />
031<br />
032<br />
033<br />
034<br />
035<br />
036<br />
037<br />
038<br />
039<br />
040<br />
041<br />
042<br />
043<br />
044<br />
045<br />
Character<br />
á<br />
â<br />
ê<br />
î<br />
ì<br />
í<br />
ô<br />
ó<br />
û<br />
ú<br />
œ<br />
u<br />
ú<br />
o<br />
ó<br />
<br />
<br />
<br />
¨<br />
<br />
<br />
<br />
<br />
<br />
<br />
<br />
<br />
U<br />
Ú<br />
O<br />
Ó<br />
(space)<br />
!<br />
”<br />
#<br />
$<br />
%<br />
&<br />
’<br />
(<br />
)<br />
+<br />
,<br />
-<br />
Code<br />
046<br />
047<br />
048<br />
049<br />
050<br />
051<br />
052<br />
053<br />
054<br />
055<br />
056<br />
057<br />
058<br />
059<br />
060<br />
061<br />
062<br />
063<br />
064<br />
065<br />
066<br />
067<br />
068<br />
069<br />
070<br />
071<br />
072<br />
073<br />
074<br />
075<br />
076<br />
077<br />
078<br />
079<br />
080<br />
081<br />
082<br />
083<br />
084<br />
085<br />
086<br />
087<br />
088<br />
089<br />
090<br />
Character<br />
.<br />
/<br />
0<br />
1<br />
2<br />
3<br />
4<br />
5<br />
6<br />
7<br />
8<br />
9<br />
:<br />
;<br />
<<br />
=<br />
><br />
?<br />
@<br />
A<br />
B<br />
C<br />
D<br />
E<br />
F<br />
G<br />
H<br />
I<br />
J<br />
K<br />
L<br />
M<br />
N<br />
O<br />
P<br />
Q<br />
R<br />
S<br />
T<br />
U<br />
V<br />
W<br />
X<br />
Y<br />
Z<br />
Code<br />
091<br />
092<br />
093<br />
094<br />
095<br />
096<br />
097<br />
098<br />
099<br />
100<br />
101<br />
102<br />
103<br />
104<br />
105<br />
106<br />
107<br />
108<br />
109<br />
110<br />
111<br />
112<br />
113<br />
114<br />
115<br />
116<br />
117<br />
118<br />
119<br />
120<br />
121<br />
122<br />
123<br />
124<br />
125<br />
126<br />
127<br />
128<br />
129<br />
130<br />
131<br />
132<br />
133<br />
134<br />
135<br />
Character<br />
Ä<br />
Ö<br />
Ü<br />
^<br />
_<br />
a<br />
b<br />
c<br />
d<br />
e<br />
f<br />
g<br />
h<br />
i<br />
j<br />
k<br />
l<br />
m<br />
n<br />
o<br />
p<br />
q<br />
r<br />
s<br />
t<br />
u<br />
v<br />
w<br />
x<br />
y<br />
z<br />
{<br />
|<br />
}<br />
ß<br />
¢<br />
!!<br />
1<br />
2<br />
3<br />
4<br />
1/2<br />
F T<br />
←<br />
Code<br />
136<br />
137<br />
138<br />
139<br />
140<br />
141<br />
142<br />
143<br />
144<br />
145<br />
146<br />
147<br />
148<br />
149<br />
150<br />
151<br />
152<br />
153<br />
154<br />
155<br />
156<br />
157<br />
158<br />
159<br />
160<br />
161<br />
162<br />
163<br />
164<br />
165<br />
177<br />
178<br />
180<br />
181<br />
182<br />
183<br />
184<br />
185<br />
186<br />
187<br />
188<br />
189<br />
190<br />
191<br />
192<br />
Character<br />
→<br />
F<br />
T<br />
↓<br />
ç<br />
°<br />
¿<br />
ù<br />
à<br />
Æ<br />
ø<br />
Å<br />
¤ é<br />
è<br />
Pt<br />
i<br />
Ñ<br />
ò<br />
£<br />
¥<br />
°<br />
Á<br />
Í<br />
A<br />
a<br />
E<br />
e<br />
I<br />
i<br />
U<br />
u<br />
N<br />
n<br />
C<br />
S<br />
C<br />
▲<br />
▲<br />
´´<br />
´´<br />
´´<br />
´´<br />
193<br />
194<br />
195<br />
196<br />
197<br />
198<br />
199<br />
200<br />
201<br />
202<br />
203<br />
204<br />
205<br />
206<br />
207<br />
208<br />
209<br />
210<br />
211<br />
212<br />
213<br />
214<br />
215<br />
216<br />
217<br />
218<br />
219<br />
224<br />
225<br />
226<br />
227<br />
228<br />
229<br />
230<br />
231<br />
232<br />
233<br />
234<br />
235<br />
236<br />
237<br />
238<br />
253<br />
I<br />
G<br />
S<br />
G<br />
g<br />
K<br />
k<br />
L<br />
l<br />
Z<br />
D<br />
d<br />
C<br />
c<br />
P<br />
e<br />
s<br />
c<br />
z<br />
y<br />
u<br />
n<br />
r<br />
§<br />
Ø<br />
↑<br />
]<br />
[<br />
ä<br />
ö<br />
ü<br />
æ<br />
å<br />
É<br />
ñ<br />
*(DC)<br />
’<br />
.<br />
.<br />
.<br />
.<br />
.<br />
.<br />
.<br />
.<br />
.<br />
.<br />
.<br />
.<br />
”<br />
Code Character<br />
www.cashregisters.net
Department text<br />
s 1 P<br />
*To program departments 17 through 32, press the department shift key.<br />
PLU text (item label)<br />
Function text<br />
Key operation example<br />
Key operation example<br />
*<br />
D<br />
s 1 P !<br />
FRUIT s A<br />
(Programming FRUIT for dept.1)<br />
s 2 P<br />
1 p<br />
MELON s A<br />
(Programming MELON to PLU1)<br />
Dept. code<br />
(1 to 99)<br />
To program another dept.<br />
Dept. key<br />
d<br />
PLU code<br />
s 2 P p<br />
s P<br />
To program another PLU<br />
*Function no.<br />
3 (max. 2 digits) @<br />
To program another function text<br />
* Function no.: See “List of function texts” shown on the following page.<br />
To keep current setting<br />
Character keys<br />
(max.12 digits)<br />
Print<br />
To keep current setting<br />
Print<br />
s<br />
When the next PLU code immediately<br />
follows the one just entered<br />
Text<br />
programmed for<br />
dept. 1<br />
Text<br />
programmed for<br />
PLU code 1<br />
A<br />
Character keys<br />
(max.12 digits) s A<br />
To keep the current setting<br />
Character keys<br />
(max. 8 digits) s A<br />
www.cashregisters.net<br />
41
42<br />
List of function texts<br />
Function<br />
no.<br />
*<br />
*<br />
*<br />
1<br />
2<br />
3<br />
4<br />
5<br />
6<br />
7<br />
8<br />
9<br />
10<br />
11<br />
12<br />
13<br />
14<br />
15<br />
16<br />
17<br />
18<br />
19<br />
20<br />
21<br />
22<br />
23<br />
24<br />
25<br />
26<br />
27<br />
28<br />
29<br />
30<br />
31<br />
32<br />
33<br />
34<br />
35<br />
Key operation example<br />
Key or function<br />
s 3 P<br />
46 @<br />
CARD s A<br />
(Programming CARD for gross<br />
charge)<br />
Default<br />
setting<br />
(–)<br />
%1 %1<br />
%2 %2<br />
Net sales total NET1<br />
Net taxable 1 subtotal TAX1 ST<br />
Gross tax 1 total GRS TAX1<br />
Tax 1 total of refund entries RFD TAX1<br />
Net tax 1 total TAX1<br />
Exempt tax 1 TX1 EXPT<br />
Net taxable 2 subtotal TAX2 ST<br />
Gross tax 2 total GRS TAX2<br />
Tax 2 total of refund entries RFD TAX2<br />
Net tax 2 total TAX2<br />
Exempt tax 2 TX2 EXPT<br />
Net taxable 3 subtotal TAX3 ST<br />
Gross tax 3 total GRS TAX3<br />
Tax 3 total of refund entries RFD TAX3<br />
Net tax 3 total TAX3<br />
Exempt tax 3 TX3 EXPT<br />
Net taxable 4 subtotal TAX4 ST<br />
Gross tax 4 total GRS TAX4<br />
Tax 4 total of refund entries RFD TAX4<br />
Net tax 4 total TAX4<br />
Exempt tax 4 TX4 EXPT<br />
Gross manual tax total GRS MTAX<br />
Refund manual tax total RFD MTAX<br />
Net manual tax total M-TAX<br />
Exempt total from GST GST EXPT<br />
PST total PST TTL<br />
GST total GST TTL<br />
Tax total TTL TAX<br />
Net NET<br />
Sales total including tax total NET2<br />
Refund REFUND<br />
Item void VOID<br />
Function<br />
no.<br />
36<br />
37<br />
38<br />
39<br />
40<br />
41<br />
42<br />
43<br />
44<br />
45<br />
46<br />
47<br />
48<br />
49<br />
50<br />
51<br />
52<br />
53<br />
54<br />
55<br />
56<br />
57<br />
58<br />
59<br />
60<br />
61<br />
62<br />
63<br />
64<br />
65<br />
66<br />
67<br />
68<br />
69<br />
Print<br />
Key or function<br />
Default<br />
setting<br />
Void mode VOID<br />
Manager void MGR VD<br />
Subtotal void SBTL VD<br />
No sale NO SALE<br />
RA RA<br />
PO PO<br />
Customer counter TRANS CT<br />
Sales total NET 3<br />
<strong>Cash</strong> CASH<br />
Check CHECK<br />
Gross charge CHARGE<br />
Refund charge CHARGE–<br />
Currency conversion1 (Preset) CONV 1<br />
Currency conversion2 (Open) CONV 2<br />
<strong>Cash</strong> in drawer CID<br />
<strong>Cash</strong>+check in drawer CA+CH ID<br />
Check change CHK/CG<br />
Exempt VAT VAT EXPT<br />
(+)Dept. total DEPT TL<br />
(–)Dept. total DEPT(–)<br />
Subtotal SUBTOTAL<br />
Merchandise subtotal MDSE ST<br />
Total TOTAL<br />
Change CHANGE<br />
Items ITEMS<br />
Department report title DEPT<br />
PLU report title PLU<br />
Transaction report title TRANS.<br />
Clerk report title CLERK<br />
Hourly report title HOURLY<br />
Non add symbol #<br />
Copy receipt title COPY<br />
EJ report title EJ<br />
EJ report end title EJ END<br />
• The items marked with “ * ” are for Canada only.<br />
• The function no. 53 “Exempt VAT” is only effective for the Canadian tax system (2 GST, VAT<br />
type).<br />
www.cashregisters.net
Clerk names<br />
Clerk code<br />
Character keys<br />
s 5 P (1-25) @ (max. 8 digits) s<br />
Logo messages<br />
The register can print programmed messages on every receipt. On the standard model, the graphic logo is<br />
printed on the receipt. If you want to print logo messages, please change the logo message print format. (See<br />
page 51 for the programming details.) The options are listed below:<br />
* “Header 3-line message” type: 1 to 3<br />
“Footer 3-line message” type : 4 to 6<br />
“Header 6-line message” type: 1 to 6<br />
“Header 3-line and footer 3-line message” type: 1 to 6 (1 to 3 as header, 4 to 6 as footer)<br />
Logo print format (6 types)<br />
Graphic logo<br />
Default setting<br />
Key operation example<br />
s P<br />
Text 1st line<br />
Text 2nd line<br />
Text 3rd line<br />
s 5 P<br />
1 @<br />
DAVID s A<br />
To program another clerk<br />
*Line number<br />
4 (1-6) @<br />
Graphic logo<br />
Text 1st line<br />
Text 2nd line<br />
Text 3rd line<br />
Graphic logo<br />
Text 4th line<br />
Text 5th line<br />
Text 6th line<br />
Header 3-line message Footer 3-line<br />
message<br />
To keep current setting<br />
Print<br />
To keep the current setting<br />
Text 1st line<br />
Text 2nd line<br />
Text 3rd line<br />
Text 4th line<br />
Text 5th line<br />
Text 6th line<br />
Header 6-line<br />
message<br />
Text 1st line<br />
Text 2nd line<br />
Text 3rd line<br />
Text 4th line<br />
Text 5th line<br />
Text 6th line<br />
Header 3-line<br />
message and<br />
footer 3-line<br />
messages<br />
A<br />
Character keys<br />
(max. 24 digits) s A<br />
To program another line<br />
www.cashregisters.net<br />
43
44<br />
To print the logo message “THANK YOU” using double sized characters and centering on the third line.<br />
Key operation example<br />
s 4 P<br />
3 @<br />
SSS<br />
W THANK S YOU W<br />
SSS<br />
sA<br />
A 6-line logo message is pre-programmed when shipped. Begin entry from the first line when you<br />
initially program a logo message.<br />
Foreign currency symbol<br />
Foreign currency symbol for V key is printed with a foreign currency exchange amount.<br />
Key operation example<br />
Entry using<br />
character code<br />
s 6 P<br />
s 6 P<br />
S S S<br />
207 :<br />
s A<br />
Print<br />
To keep the current setting<br />
Character keys<br />
(max. 4 digits) s A<br />
Print<br />
ADVANCED PROGRAMMING<br />
1<br />
Register Number and Consecutive Number Programming<br />
Foreign currency<br />
symbol<br />
The register number and consecutive numbers are printed on every receipt or journal.<br />
When your store has two or more registers, it is practical to set separate register numbers for their identification.<br />
The consecutive number is increased by one each time a receipt is issued or when a journal print occurs.<br />
For consecutive number programming, enter a number (max. 4 digits) that is one less than the desired starting<br />
number.<br />
Register number<br />
Register number (one to six digits)<br />
s 1 @ s A<br />
Key operation example<br />
s 1 @<br />
123456 sA<br />
To set the register number “0”<br />
Print<br />
Register number<br />
www.cashregisters.net
2<br />
Consecutive numbers<br />
The cash register provides the electronic journal (EJ) function. By default, a maximum of 2000 lines can be<br />
stored in memory. If you want to store more journal data, you can expand to a maximum of 3000 lines, although<br />
the maximum number of PLUs is decreased to 200 codes because the memory is shared with PLU settings.<br />
You can also program various options for EJ, such as availability of EJ memory nearly full warning, availability of<br />
printing EJ data during a transaction, data type to be stored in memory, and printing format.<br />
For reading journal data, refer to “EJ REPORT READING AND RESETTING” (page 60).<br />
EJ memory type<br />
Key operation example<br />
s 2 @<br />
1000 sA<br />
Electronic Journal (EJ) Programming<br />
When this procedure is executed, EJ data is cleared, and PLU data (programming data and sales<br />
data) are reset to the default after all data is cleared even if the same memory type is selected.<br />
s 90 @ A<br />
*A<br />
*A: 0 for EJ 2000 lines and PLU 1200 codes (default)<br />
1 for EJ 3000 lines and PLU 200 codes<br />
Key operation example<br />
s 90 @<br />
1 A<br />
To begin the count from 0001<br />
A number (one to four digits) that is one<br />
s 2 @ less than the desired starting number s A<br />
Print<br />
Print<br />
Consecutive<br />
number<br />
www.cashregisters.net<br />
45
46<br />
Function parameters for EJ<br />
s 68 @ s<br />
*ABCDEFGH To set “00000000”<br />
A<br />
* Item: Selection: Entry:<br />
A Always enter 0. (Fixed position) 0<br />
B Always enter 0. (Fixed position) 0<br />
C Temporary EJ printing during a transaction Disallow 0<br />
Allow* 1<br />
D EJ printing and clearing EJ data when No* 0<br />
issuing general Z1 report Yes 1<br />
E PGM mode operation records type Details* 0<br />
Header information only 1<br />
F REG/MGR/VOID modes operation Details* 0<br />
records type Total 1<br />
G Compressing printing for EJ data No (normal size) 0<br />
Yes (small size)* 1<br />
H Action when EJ memory area is full Continue 0<br />
Warning (near full warning)* 1<br />
Lock (with near full warning) 2<br />
On the default setting, an asterisk is marked.<br />
Temporary EJ printing during a transaction<br />
• If selecting “yes”, you can print journal data of a current transaction recorded in EJ memory by pressing the<br />
R key during the transaction. To utilize this function completely, the cash register is programmed to receipt<br />
printing and set Receipt ON/OFF function to OFF.<br />
PGM mode operation records type<br />
• The header information only is printed during the program reading operation.<br />
The header information only is printed for X/Z reports.<br />
(Receipt sample for Header Information only)<br />
Action when EJ memory area is full<br />
• By default, when the memory for EJ becomes nearly full, the cash register shows decimal points at the 8th<br />
and 9th positions of the display (EJ memory nearly full message), and the cash register keeps storing new<br />
data while erasing the oldest data. When “0” is selected, the cash register will no longer show EJ memory<br />
nearly full message. When “2” is selected, the cash register shows EJ memory nearly full message and when<br />
the memory is totally full, the cash register locks the sales/data entry with a display of the memory full<br />
message “ ”. You will only be able to issue an EJ report.<br />
Key operation example<br />
s 68 @<br />
00100002 sA<br />
Print<br />
www.cashregisters.net
3<br />
Various Function Selection Programming 1<br />
The cash register provides various detailed functions listed below.<br />
• Function selection for miscellaneous keys<br />
• Print format<br />
• Receipt print format<br />
• Function selection for tax<br />
• Others<br />
For this programming, job code entry style is applied. You can continue programming until you press the A<br />
key for the programming described in this section. To continue programming, repeat from a job code entry.<br />
s @ *2<br />
*1 Enter job code using numeric keys specified in each section below.<br />
*2 Data entry details are listed on each table in each section below.<br />
Example: When programming for job code 5 as ABCDEFGH: 00000100.<br />
Key operation example<br />
s 5 @<br />
00000100 sA<br />
Function selection for miscellaneous keys<br />
* ABCDEFGH<br />
1Job code<br />
To set “00000000”<br />
s A<br />
Print<br />
Job code: 5<br />
* Item: Selection: Entry:<br />
A PO in REG mode Allow the PO operation in REG mode* 0<br />
Disallow it 1<br />
B RA in REG mode Allow the RA operation in REG mode* 0<br />
Disallow it 1<br />
C Subtotal void in REG mode Allow the REG mode subtotal void* 0<br />
Disallow it 1<br />
D Indirect void in REG mode Allow the REG mode indirect void* 0<br />
Disallow it 1<br />
E Direct void in REG mode Allow the REG mode direct void* 0<br />
Disallow it 1<br />
F Refund key availability Allow the REG mode refund entry* 0<br />
Disallow it 1<br />
G No sale in REG mode Allow the no sale operation in REG mode* 0<br />
Disallow it 1<br />
H Fractional quantity availability Allow fractional quantity entry 0<br />
Disallow it* 1<br />
www.cashregisters.net<br />
47
48<br />
Print format<br />
Job code: 6<br />
* Item: Selection: Entry:<br />
A Printing style Use the printer for journal printing 0<br />
Use the printer for receipt printing* 1<br />
B Receipt print format Total 0<br />
Detailed* 1<br />
C Time print on all receipts/journals Allow time printing* 0<br />
Disallow it 1<br />
D Date print on all receipts/journals Allow date printing* 0<br />
Disallow it 1<br />
E Consecutive no. print on Allow consecutive no. printing* 0<br />
all receipts/journals Disallow it 1<br />
F Always enter 0. (Fixed position) 0<br />
G Zero skip for PLU sales report Disallow zero skip 0<br />
Allow zero skip* 1<br />
H Zero skip for full sales, clerk and Disallow zero skip 0<br />
hourly reports Allow zero skip* 1<br />
Printing style<br />
• Even when receipt printing is selected, the journal rewind motor will be driven in PGM, OP X/Z, X1/Z1 and<br />
X2/Z2 modes so you can wind sales and programming reports.<br />
Receipt print format<br />
Job code: 7<br />
* Item: Selection: Entry:<br />
A Always enter 0. (Fixed position) 0<br />
B Always enter 0. (Fixed position) 0<br />
C Subtotal print with a press of subtotal key Disallow subtotal printing* 0<br />
Allow it 1<br />
D Merchandise print with a press of Disallow merchandise subtotal printing* 0<br />
merchandise subtotal key Allow it 1<br />
E Always enter 0. (Fixed position) 0<br />
F Always enter 0. (Fixed position) 0<br />
G Always enter 0. (Fixed position) 0<br />
H Number of purchases print Allow printing of number of purchases* 0<br />
Disallow it 1<br />
Function selection for tax<br />
Job code: 15<br />
* Item: Selection: Entry:<br />
A to F Always enter 0. (Fixed position) 0<br />
G Tax delete in REG mode availability Allow tax delete in REG mode* 0<br />
Disallow it 1<br />
H Manual tax entry in Allow manual tax entry in REG mode* 0<br />
REG mode availability Disallow it 1<br />
www.cashregisters.net
Other programming<br />
Job code: 61<br />
* Item: Selection: Entry:<br />
A Always enter 0. (Fixed position) 0<br />
B Always enter 0. (Fixed position) 0<br />
C Minus dept. and PLU/sub-dept. Disallow to program minus dept. and PLU/sub-dept. 0<br />
availability Allow it* 1<br />
D Fractional treatment Round off (4 down, 5 up)* 0<br />
Raising to unit 1<br />
Disregarding fractional treatment 2<br />
E Use of : key Use : key as 00 key* 0<br />
Use : key as 000 key 1<br />
F Time format Use 12-hour format* 0<br />
Use 24-hour format 1<br />
G Date format Use month-day-year format* 0<br />
Use day-month-year format 1<br />
Use year-month-day format 2<br />
H Position of decimal point (from right) (TAB) 0 to 3 (default 2)<br />
Job code: 62<br />
* Item: Selection: Entry:<br />
A Always enter 0. (Fixed position) 0<br />
B Error beep activation By lock error* 0<br />
By misoperation 1<br />
C Key touch sound availability Allow to sound* 0<br />
Disallow it 1<br />
D Buffered keyboard Yes* 0<br />
No 1<br />
E Void mode operation availability Allow void mode operation* 0<br />
Disallow it 1<br />
F Void mode entry data print in Z2 reports Allow printing of void mode entry data in Z2 reports* 0<br />
Disallow it 1<br />
G Void mode entry data print in Z1 reports Allow printing of void mode entry data in Z1 reports* 0<br />
Disallow it 1<br />
H Addition of hourly sales total data in No* 0<br />
void mode Yes 1<br />
Job code: 66<br />
* Item: Selection: Entry:<br />
A Printing a receipt after transaction Total only 0<br />
Details* 1<br />
B Amount printing when PLU/sub-dept. Disallow printing* 0<br />
unit price is zero Allow it 1<br />
C Subtotal printing for conversion of Allow printing* 0<br />
deficit Disallow it 1<br />
D Always enter 0. (Fixed position) 0<br />
E Compression printing on journals in Disallow compression printing (normal size) 0<br />
PGM, OP X/Z, X1/Z1 and X2/Z2 modes Allow compression printing (small size)* 1<br />
F Compression printing on journals in Disallow compression printing (normal size) 0<br />
REG, MGR and VOID modes Allow compression printing (small size)* 1<br />
G Logo message printing on journals Disallow logo message printing on journals* 0<br />
Allow logo message printing on journals 1<br />
H Footer printing Printing footer on all receipts* 0<br />
Printing footer with selected function key at the time of finalization 1<br />
Compression printing<br />
• This programming is valid only when journal printing is selected. This does not affect EJ printing. (For EJ 49<br />
programming, please refer to page 46.)<br />
www.cashregisters.net
50<br />
Job code: 70<br />
* Item: Selection: Entry:<br />
A Split pricing counting Quantity* 0<br />
Package 1<br />
B Multiplication/split pricing entry availability Allow multiplication entry only* 0<br />
Allow both of multiplication and split pricing 1<br />
C Always enter 0. (Fixed position) 0<br />
D Always enter 0. (Fixed position) 0<br />
E Tax printing when GST is VAT Allow tax printing* 0<br />
Disallow it 1<br />
F GST exempt printing on X/Z reports Allow printing of GST exempt* 0<br />
Disallow it 1<br />
GH Tax calculation system Auto tax* 00<br />
Canadian tax (tax type number) 01 through 11<br />
Tax calculation system<br />
• For US tax system, select “auto-tax”.<br />
• For Canadian tax, from the table below, specify a tax system suitable for your province (if necessary contact<br />
your local tax office for correct sales tax information) and for your type of retail business. In the cash register,<br />
four kinds of tax can be set and each tax is arranged to match GST or PST as follows:<br />
Tax 1: PST Tax 2: PST<br />
Tax 3: PST or GST Tax 4: GST<br />
Canadian tax Tax 4 method Tax 3 method Tax 2 and 1 method<br />
type number GST GST PST PST<br />
01 VAT VAT - Tax on tax<br />
02 VAT VAT - Tax on base<br />
03 VAT - Tax on tax Tax on tax<br />
04 VAT - Tax on base Tax on base<br />
05 Add on Tax - Tax on tax Tax on Tax<br />
06 Add on Tax - Tax on base Tax on base<br />
07 Add on Tax VAT - Tax on tax<br />
08 Add on Tax VAT - Tax on base<br />
09 Add on Tax Add on Tax - Tax on tax<br />
10 Add on Tax Add on Tax - Tax on base<br />
11 VAT - VAT (Tax on base) Tax on tax<br />
(The most common type for Canada is type number 06.)<br />
• To program a GST, use Tax 4; and to program two GSTs, use Tax 3 and 4. To program a PST,<br />
use Tax 1; to program two PSTs, use Tax 1 and 2; and to program three PSTs, use Tax 1, 2 and<br />
3.<br />
• The entry of a multi-taxable item for PST or GST is prohibited as follows for the Canadian tax<br />
system. When programming for departments, avoid programming the prohibited multi-taxable<br />
status.<br />
In case of; Tax 1: PST, Tax 2: PST,<br />
Tax 3: PST, Tax 4: GST<br />
Taxable 1 and 2 item ········· prohibited<br />
Taxable 1 and 3 item ········· prohibited<br />
Taxable 2 and 3 item ········· prohibited<br />
Taxable 1 and 4 item ············· allowed<br />
Taxable 2 and 4 item ············· allowed<br />
Taxable 3 and 4 item ············· allowed<br />
In case of; Tax 1: PST, Tax 2: PST,<br />
Tax 3: GST, Tax 4: GST<br />
Taxable 1 and 2 item ········· prohibited<br />
Taxable 1 and 3 item ············· allowed<br />
Taxable 2 and 3 item ············· allowed<br />
Taxable 1 and 4 item ············· allowed<br />
Taxable 2 and 4 item ············· allowed<br />
Taxable 3 and 4 item ········· prohibited<br />
www.cashregisters.net
4<br />
Various Function Selection Programming 2<br />
The cash register provides various options so you can use the register to suit your sales needs.<br />
In this section, you can program the following features (parameters within parentheses indicates default setting):<br />
• Power save mode (entering the power save mode in 30 minutes)<br />
• Logo message print format (graphic logo only)<br />
• Thermal printer density (standard density)<br />
• Online time out setting<br />
• Language selection (English)<br />
• Training clerk specification (none) - If you specify a clerk code who is trained for use on this cash register, the<br />
cash register will go into training mode when the clerk code is registered for sales entries. The sales<br />
operations done by the trained clerk does not affect sales total. For details, refer to TRAINING MODE section.<br />
Power save mode<br />
s 10 @ *ABCD s A<br />
* Item: Selection: Entry:<br />
A Entering power save mode Yes* 0<br />
when time is displayed No 1<br />
B-D Time(min.) to entering power save mode 001-254 or 999<br />
since no operation is made (Default 030)<br />
When 999 is set for B to D, entering into power save mode is inhibited.<br />
Key operation example<br />
s 10 @<br />
0060 sA<br />
Logo message print format<br />
You can select the number of lines for your logo message, and the position to print it on receipt or journal.<br />
s 11 @ *A To set “0”<br />
s A<br />
*A: Logo message type<br />
0: Header 3-line message without graphic logo<br />
1: Graphic logo only (default)<br />
2: Footer 3-line message with graphic logo<br />
3: Header 6-line message<br />
4: Header 3-line message with graphic logo<br />
5: Header 3-line message and footer 3-line message<br />
Key operation example<br />
s 11 @<br />
0 sA<br />
Print<br />
Print<br />
www.cashregisters.net<br />
51
52<br />
Online time out setting<br />
s 35 @ Time out (1 to 255 sec.) s A<br />
Default: 007<br />
Key operation example<br />
s 35 @<br />
30 sA<br />
Thermal printer density<br />
s 50 @<br />
* 50 is the default setting. To make the print darker, set a larger number, and to make the print lighter, set a<br />
smaller number.<br />
Key operation example<br />
s 50 @<br />
00 sA<br />
Print<br />
To set “0”<br />
*Printer density<br />
(00-99) s A<br />
Print<br />
www.cashregisters.net
Language selection<br />
s 88 @ *Language<br />
To set “0”<br />
(0, 2 or 3) A<br />
*Language: 0: English 2: French 3: Spanish (default: English)<br />
Key operation example<br />
s 88 @<br />
2 A<br />
When you change the language, the texts such as clerk names, logo messages and function texts<br />
(refer to page 42), which you programmed, will be reset to the default settings. The language<br />
selection must be made before programming clerk names, logo messages and function texts.<br />
Training clerk specification for training mode<br />
For the details of clerk training, please refer to “TRAINING MODE” on page 56.<br />
s 86 @<br />
Key operation example<br />
s 86 @<br />
25 sA<br />
Print<br />
To cancel<br />
Clerk code<br />
(1 to 25) s A<br />
Print<br />
www.cashregisters.net<br />
53
54<br />
AUTO key programming — Automatic sequence key —<br />
If you program frequently performed transactions or report sequences for the a key, you can recall those<br />
transactions and/or reports simply by pressing the a key in key operations.<br />
Programming for a ; entering a PLU 2 item (programmed unit price: 1.50) and a dept. 6 item (unit price: 1.00)<br />
5<br />
AUTO<br />
setting<br />
Delete<br />
Transaction a a A<br />
max. 25 times<br />
Key operation example<br />
a<br />
2 p 100 + aA<br />
Print<br />
When the a key has been programmed to execute a report job function, the mode switch must be<br />
in the appropriate position (OPX/Z for individual clerk reports, X1/Z1 for daily reports or X2/Z2 for<br />
weekly or monthly reports).<br />
Reading Stored Programs<br />
The machine allows you to read every program stored in the PGM mode.<br />
Key sequence for reading stored program<br />
Report name Key sequence<br />
Programming report 1 A<br />
Programming report 2 2 A<br />
Auto key programming report 1 A<br />
Printer density programming report 3 A<br />
PLU programming report Start PLU code @ End PLU code p<br />
• To stop reading programming report 1 or PLU programming report, turn the mode switch to the<br />
MGR position.<br />
• When printing is performed continuously, the printing may be intermitted several seconds. After<br />
the intermission, the printing will be restarted.<br />
www.cashregisters.net
Sample printouts<br />
1 Programming report 1<br />
Mode<br />
Dept. code<br />
Dept. text<br />
Dept. unit price w/sign<br />
Dept. function<br />
Minus department<br />
Tax status<br />
Function no.& its text<br />
Tax status<br />
Function parametrs (F-H)<br />
Discount amt. w/sign<br />
Function parametrs (F-H)<br />
Percent rate with sign<br />
Percent limit<br />
Entry digit limit<br />
Entry digit limit<br />
Function parameters (A-C)<br />
Function parameters<br />
Foreign currency<br />
symbol/Rate<br />
Logo Message<br />
Function selection for<br />
miscellaneous keys (A-H)<br />
Print format (A-H)<br />
Receipt print format(A-H)<br />
Power save mode(A-D)<br />
Logo message print format<br />
Function selection for tax (A-H)<br />
Doughnut tax exempt<br />
Online time out<br />
Thermal printer density<br />
Tax table<br />
Tax rate<br />
Min. taxable amount<br />
Clerk code/name<br />
www.cashregisters.net<br />
55
56<br />
2 Programming report 2<br />
3 Auto key programming report<br />
Job code<br />
A to H from the left<br />
* Job code #63, 64, 65, 67,<br />
69, 71, 72, 76, 77, 85, 87<br />
and 95 are fixed settings,<br />
for which you cannot<br />
change the settings.<br />
Training clerk specification<br />
Language selection<br />
EJ memory type<br />
4 Printer density programming report<br />
5 PLU programming report<br />
PLU code<br />
PLU text<br />
Entered Value<br />
Printer density<br />
Printing density<br />
example<br />
Range<br />
Mode parameter<br />
Unit price<br />
Associated<br />
dept. code<br />
TRAINING MODE<br />
Training mode is used when the operator or the manager practices register operations.<br />
When a clerk in training is selected, the machine automatically enters training mode. To specify a clerk to be<br />
trained, refer to “Training clerk specification for training mode” in the “ADVANCED PROGRAMMING” in page<br />
53. The training operation is valid only in REG, MGR and VOID mode.<br />
The corresponding clerk memory is only updated in training mode.<br />
Key operation example<br />
A clerk set in training 25 L<br />
1000 ><br />
3 @<br />
#<br />
A<br />
Print<br />
www.cashregisters.net
READING (X) AND RESETTING (Z)<br />
OF SALES TOTALS<br />
• Use the reading function (X) when you need to take a reading of sales information entered since the last reset.<br />
You can take this reading any number of times. It does not affect the register’s memory.<br />
• Use the resetting function (Z) when you need to clear the register’s memory. Resetting prints all sales<br />
information and clears the entire memory except for the GT1 through GT3, Training GT, reset count, and<br />
consecutive number.<br />
1<br />
Summary of Reading (X) and Resetting (Z) Reports<br />
X1 and Z1 reports: Daily sales reports<br />
X2 and Z2 reports: Periodic (monthly) consolidation reports<br />
When you take a X or Z report, turn the mode switch to the appropriate position referring to the column of “Mode<br />
switch position” shown on the table below, and use the following corresponding key sequence.<br />
Item<br />
Flash report:<br />
(Only display)<br />
To clear the<br />
display, press the<br />
l key or turn the<br />
mode switch to<br />
another position.<br />
Full sales report<br />
Individual clerk<br />
report<br />
Full clerk report<br />
PLU sales report<br />
Hourly report<br />
Mode switch position<br />
OPX/Z<br />
X<br />
--<br />
X, Z<br />
--<br />
--<br />
--<br />
X1/Z1<br />
--<br />
X1, Z1<br />
--<br />
X1, Z1<br />
X1, Z1<br />
X1, Z1<br />
X2/Z2<br />
--<br />
X2, Z2<br />
--<br />
--<br />
--<br />
--<br />
A key: Sales total<br />
Key operation<br />
Dept. code d : Department sales total<br />
For dept. 1 to 16; Dept. key ( ! to < )<br />
D<br />
For dept. 17 to 32; Dept. key ( ! to < )<br />
@ key: Amount of cash in drawer<br />
Reading: Resetting:<br />
A P A<br />
L P L<br />
Reading: Resetting:<br />
(The report of the current clerk)<br />
Reading:<br />
Reading:<br />
Resetting:<br />
L P L<br />
Start<br />
PLU code<br />
All PLUs<br />
@<br />
End<br />
PLU code p<br />
Resetting:<br />
All PLUs<br />
Start<br />
PLU code @<br />
End<br />
PLU code P p<br />
Reading: Resetting:<br />
s P s<br />
• When both sales quantities and sales amounts are zero, printing is skipped. If you do not want to<br />
skip, change the programming. (Refer to “Print format” of “Various Function Selection<br />
Programming 1”.)<br />
• “X” represents read symbol and “Z” represents reset symbol in the reports.<br />
• To stop reading and resetting the PLU sales report, turn the mode switch to the MGR position.<br />
The data will not be erased when you reset.<br />
• When printing is performed continuously, the printing may be intermitted several seconds. After<br />
the intermission, the printing will be restarted.<br />
www.cashregisters.net<br />
57
58<br />
2<br />
Daily Sales Totals<br />
Full sales report<br />
• Sample report<br />
*2<br />
Mode title*1<br />
Reset counter<br />
Net grand total(GT2-GT3)<br />
Manual tax total<br />
*3<br />
Grand total of plus<br />
Tax total<br />
registration<br />
Grand total of<br />
minus registration<br />
Grand total of training<br />
Net total without tax<br />
Net total with tax<br />
mode registration<br />
Dept. code<br />
Item counter and total<br />
Sales q'ty<br />
Sales amount<br />
Item percent 1<br />
counter and total<br />
“+” dept. counter<br />
and total<br />
“-” dept. counter<br />
and total<br />
Subtotal counter<br />
and total<br />
Subtotal percent 1<br />
counter and total<br />
Next sales total<br />
Taxable 1 total<br />
Gross tax 1 total<br />
Refund tax 1 total<br />
Net tax 1 total<br />
*1: When you take X1 report, “X1” is printed.<br />
*2: Printed in the Z1 report only.<br />
*3: When the Canadian tax system is selected, the following is printed here.<br />
Exempt total from GST<br />
PST total<br />
GST total<br />
REG-mode void counter<br />
and total<br />
Subtotal void counter and<br />
total<br />
Manager item void counter<br />
and total<br />
Void-mode transaction<br />
counter and total<br />
Refund counter and total<br />
Received on account<br />
counter and total<br />
Paid out counter and total<br />
No-sales counter<br />
Customer counter<br />
Sales total<br />
<strong>Cash</strong> counter and total<br />
Check sales counter and total<br />
Charge sales counter and total<br />
Charge refund counter and total<br />
Foreign currency total (preset)<br />
Foreign currency total (open)<br />
<strong>Cash</strong> in drawer<br />
<strong>Cash</strong> + check in drawer<br />
Change total for check tendering<br />
www.cashregisters.net
3<br />
Clerk reports<br />
Individual clerk report<br />
• Sample report<br />
Full clerk report<br />
The report prints in the same format as in the<br />
sample report of individual clerk, but all clerk’s sales<br />
data is sorted by clerk code number (from #1 to<br />
#25).<br />
Hourly report<br />
• Sample report<br />
Periodic Consolidation<br />
Full sales report<br />
• Sample report<br />
Mode title*<br />
Report title<br />
Clerk code<br />
Clerk name<br />
Customer counter<br />
Mode title*<br />
Report title<br />
Customer counter<br />
Sales total<br />
*: When you take Z1 report, “Z1” is printed.<br />
Mode title*1<br />
Reset counter of daily total<br />
Reset counter of periodic<br />
Grand total<br />
*2<br />
PLU sales report<br />
• Sample report<br />
PLU code<br />
Item label<br />
*: When you take Z1 report, “Z1” is printed.<br />
Mode title*<br />
Report title<br />
Range<br />
Sales q'ty and total<br />
Range sum<br />
The subsequent printouts are the same in format<br />
as in the X1/Z1 full sales report.<br />
*1: When you take X2 report, “X2” is printed.<br />
*2: Printed in the Z2 report only<br />
www.cashregisters.net<br />
59
60<br />
EJ REPORT READING AND RESETTING<br />
The cash register provides an electronic journal (EJ) function. This function is intended to record the journal<br />
data in memory instead of journal paper, and print the data as an EJ report. The register records the journal<br />
data in REG, PGM, VOID, X1/Z1 and X2/Z2 modes. By default, a maximum of 2000 lines are stored in memory,<br />
but you can expand it to 3000 lines. For details on EJ programming, please refer to “Electronic Journal<br />
Programming” section (page 45).<br />
Printing journal data on the way of a transaction<br />
You can print journal data of a current transaction recorded in EJ memory by pressing the R key during the<br />
transaction.<br />
This function is valid when the printing style is programmed to receipt, and the receipt ON/OFF<br />
function is set to OFF.<br />
• Sample print<br />
Reading and resetting the electronic journal data (Issuing EJ report)<br />
You can read the journal data stored in the EJ memory in journal format by performing the following procedure in<br />
the X1/Z1 or OP X/Z mode.<br />
To read all of the data:<br />
7:<br />
@<br />
To reset all of the data:<br />
7: P<br />
To read the last 10 records:<br />
710<br />
EJ report title<br />
EJ report end title<br />
A<br />
@<br />
@<br />
A<br />
A<br />
• With EJ memory, a maximum of 2000 (or 3000, if programmed)<br />
lines of data can be stored. When executing an all data<br />
reading, all of the data stored in the EJ memory will be printed.<br />
To save paper, compression print is available.<br />
• To stop reading or resetting the data, turn the mode switch to<br />
“MGR” position. The data will not be erased when resetting.<br />
• When printing is performed continuously, the printing may be<br />
intermitted several seconds. After the intermission, the printing<br />
will be restarted.<br />
• Sample EJ report<br />
Header<br />
information<br />
print<br />
www.cashregisters.net
OVERRIDE ENTRIES<br />
Programmed limit for functions (such as for maximum amounts) can be overridden by making an entry in the<br />
MGR mode.<br />
1. Turn the mode switch to the MGR position.<br />
2. Make an override entry.<br />
On this example, the register has been programmed not to allow<br />
discounts entries over $1.00.<br />
Key operation example<br />
REG-mode 1500 #<br />
entries 250 - ...Error<br />
l<br />
Turn the mode switch<br />
to the MGR position.<br />
250 -<br />
Return the mode switch<br />
to the REG position.<br />
A<br />
Print<br />
CORRECTION AFTER FINALIZING A<br />
TRANSACTION (Void mode)<br />
REG<br />
OPX/Z MGR<br />
OFF<br />
X1/Z1<br />
VOID<br />
X2/Z2<br />
When you need to void incorrect entries that clerks cannot correct (incorrect entries found after finalizing a<br />
transaction, or a transaction that cannot be corrected by direct or indirect void), follow this procedure:<br />
1. Turn the mode switch to the VOID position using the manager key (MA), to enter<br />
void mode.<br />
2. Repeat the entries that are recorded on the incorrect receipt. (All data for the<br />
incorrect receipt are removed from register memory; the voided amounts are<br />
added to the void-mode transaction totalizer.)<br />
Incorrect receipt<br />
PGM<br />
Cancellation receipt<br />
REG<br />
OPX/Z MGR<br />
OFF<br />
X1/Z1<br />
VOID<br />
X2/Z2<br />
PGM<br />
www.cashregisters.net<br />
61
62<br />
HOW TO USE AN SD MEMORY CARD<br />
1<br />
What You Can Do with an SD Memory Card<br />
You can exchange data through an SD memory card between your cash register and a PC when managing the<br />
data in your cash register by using the SHARP’s PC software “Customer Support Tool.”<br />
You can also save all necessary data in the cash register to an SD memory card for backup.<br />
This instruction manual describes only those operations needed on the cash register. For details, please refer to<br />
the help section in the “Customer Support Tool”.<br />
List of functions<br />
All data backup: With this function you can save all the sales data and programming data in the cash<br />
register to an SD memory card for backup. By loading the data saved to the SD memory<br />
card into the cash register you can restore it to its original state, if necessary.<br />
Programming data: With this function you can write all the programming data in the cash register onto an SD<br />
memory card. You can manage this data on a PC by using “Easy Programming Tool”<br />
contained in the Customer Support Tool. You can also load the programming data edited<br />
with “Easy Programming Tool” into the cash register through an SD memory card.<br />
Graphic logo: With this function you can load the graphic logo data created with “Easy Programming<br />
Tool” into the cash register through an SD memory card.<br />
Sales data: With this function you can write all the sales data of daily and periodic totals in the cash<br />
register onto an SD memory card. You can manage the data on a PC by using “Sales Total<br />
Reporting” contained in the Customer Support Tool.<br />
Electronic journal: With this function you can write the electronic journal data in the cash register onto an SD<br />
memory card. You can manage this data on a PC by using “Electronic Journal Print”<br />
contained in the Customer Support Tool. You can also load the data edited with “Electronic<br />
Journal Print” into the cash register through an SD memory card for printing.<br />
www.cashregisters.net
Recommended SD memory cards<br />
We recommend you to use the following SD memory cards. If you want to use other card models, please visit<br />
the Sharp web site: http://www.sharpusa.com.<br />
Recommended card models: SanDisk card models SDSDB-128-A10, SDSDB-256-A10, SDSDG-256-A10,<br />
SDSDB-512-A10 and SDSDG-512-A10<br />
2<br />
• The data stored in an SD memory card could be lost or distorted due to accidents or other issues.<br />
Sharp is not responsible for any damage incurred by lost data.<br />
• 128-Mbyte to 512-Mbyte SD memory cards are available and the relationship between the<br />
memory card capacity and the maximum holding period of sales data which can be saved in an<br />
SD memory card is as follows:<br />
Memory card capacity Sales data holding period *<br />
128MB 3 Months<br />
256MB 6 Months<br />
512MB 1 Year<br />
*: This period refers to the time period during which sales data can be stored in an SD memory card<br />
when additionally written onto it once a day.<br />
In Case of SD Error<br />
If an error occurs while data is transferred from your cash register to the inserted SD memory card and vice<br />
versa, it will be indicated by a corresponding error code shown on the operator display. Press the l key to<br />
clear the error, then take the corresponding action.<br />
SD error code table<br />
Display<br />
(Error code)<br />
Error status and action<br />
No SD memory card is found. Insert an SD memory card into the SD card slot or reinsert it correctly.<br />
The write-protect switch on the SD memory card is in the “PROTECTED” position. Set the switch on the<br />
“NOT PROTECTED” position.<br />
The SD memory card is full. Delete unwanted data from the card on a PC or replace the card with a new<br />
one. When using a new SD memory card, be sure to format it in advance.<br />
The SD memory card has no desired data. Replace it with another SD memory card containing the<br />
desired data.<br />
The data stored in the SD memory card is incorrect. Write correct data into the SD memory card on a<br />
PC.<br />
The maximum allowable number of times of sales data or EJ data writing is exceeded. Delete unwanted<br />
data from the SD memory card on a PC or replace the card with a new one. When using a new SD<br />
memory card, be sure to format it in advance.<br />
A power failure has occurred while the SD memory card is accessed. Perform the interrupted operation<br />
again from the beginning after power recovery.<br />
An error other than the above mentioned has occurred while the SD memory card is accessed. Perform<br />
the interrupted operation again from the beginning.<br />
www.cashregisters.net<br />
63
64<br />
3<br />
The SD card slot is located on the right side of your cash register and has a cover.<br />
Inserting an SD memory card<br />
Insert an SD memory card into the SD card slot with the printed SD<br />
logo facing upwards. Push the card in steady with a finger until it<br />
clicks and release it slowly.<br />
Removing the SD memory card<br />
Push the card in gently with a finger and release it. The card will<br />
come out.<br />
4<br />
Inserting and Removing an SD Memory Card<br />
• Be sure to check if the SD memory card has perfectly been inserted before closing the cover. If<br />
this instruction is not performed correctly, the card or SD card slot may be damaged.<br />
• When inserting or removing the SD memory card, be sure to release it slowly. Otherwise, the card<br />
may pop out and injure your finger.<br />
• Never touch or remove the SD memory card while it is accessed, otherwise the data stored in it<br />
may be damaged.<br />
• If a power failure occurs, the cash register is unplugged, or the mode switch is turned to another<br />
position while the SD memory card is accessed, the data stored in that card could be damaged.<br />
Formatting an SD Memory Card<br />
When you use a new SD memory card for the first time, be sure to format it on your cash register before<br />
writing programming data etc. to it.<br />
Never format any SD memory card that contains some data, otherwise all of the data stored on the card will be<br />
erased.<br />
Set the mode switch to the PGM position.<br />
The comfirmation message is printed.<br />
To execute<br />
s 140 @ s 1 A<br />
To cancel l<br />
* The message “ ” will appear and stay on the display until the SD memory card is completely<br />
formatted. When formatting is finalized, the message “***NORMAL END” will be printed. In case an error<br />
occurs, a corresponding error message will be printed.<br />
*<br />
www.cashregisters.net
5<br />
Saving (writing) all the data<br />
Restoring (reading) the saved data<br />
Set the mode switch to the PGM position.<br />
* The message “ ” will appear and stay on the display until all data is completely written or read.<br />
When writing or reading is finalized, the message “***NORMAL END” will be printed. In case an error occurs, a<br />
corresponding error message will be printed.<br />
6<br />
Saving and Restoring All the Data<br />
s 148 @ s 1 A<br />
To cancel l<br />
If you save all the data by using an SD memory card that contains some data, the existing data will<br />
be erased and replaced with newly saved data. If you need the existing data, use another SD<br />
memory card.<br />
Writing and Reading of Programming Data<br />
Reading the graphic logo data<br />
Set the mode switch to the PGM position.<br />
The comfirmation message is printed.<br />
To execute<br />
s 144 @ s 1 A<br />
To cancel l<br />
The comfirmation message is printed.<br />
To execute<br />
The comfirmation message is printed.<br />
To execute *<br />
s 145 @ s 1 A<br />
To cancel l<br />
* The message “ ” will appear and stay on the display until all data is completely read. When<br />
reading is finalized, the message “***NORMAL END” will be printed. In case an error occurs, a corresponding<br />
error message will be printed.<br />
*<br />
*<br />
www.cashregisters.net<br />
65
66<br />
Writing and reading all the programming data<br />
You can write all the programming data in the cash register onto an SD memory card (Writing). The existing<br />
programming data in the card will all be replaced with the newly written data at this time.<br />
You can also replace the programming data stored in the cash register with those stored in an SD memory card<br />
by loading the latter into the cash register(Reading).<br />
Writing<br />
Reading<br />
Set the mode switch to the PGM position.<br />
* The message “ ” will appear and stay on the display until all data is completely written or read.<br />
When writing or reading is finalized, the message “***NORMAL END” will be printed. In case an error occurs, a<br />
corresponding error message will be printed.<br />
7<br />
s 147 @ s 1 A<br />
To cancel l<br />
Writing of Sales Data<br />
Write all of the existing sales data (daily and periodic totals) into an SD memory card. You can write the data into<br />
the same card a maximum of 400 times unless the card becomes full.<br />
Set the mode switch to the X1/Z1 position.<br />
650 P<br />
The comfirmation message is printed.<br />
To execute *<br />
s 141 @ s 1 A<br />
To cancel l<br />
The comfirmation message is printed.<br />
To execute *<br />
The comfirmation message is printed.<br />
To execute<br />
@ s 1 A<br />
To cancel l<br />
* The message “ ” will appear and stay on the display until all data is completely written. When<br />
writing is finalized, the message “***NORMAL END” will be printed. In case an error occurs, a corresponding<br />
error message will be printed.<br />
*<br />
www.cashregisters.net
8<br />
Writing and Printing of Electronic Journal<br />
Writing of electronic journal<br />
Write electronic journal data in the EJ memory of your cash register onto an SD memory card (this will clear the<br />
memory). You can write the data into the same card a maximum of 400 times unless the card becomes full.<br />
Set the mode switch to the X1/Z1 position.<br />
750 P @ s 1 A<br />
To cancel l<br />
* The message “ ” will appear and stay on the display until all data is completely written. When<br />
writing is finalized, the message “***NORMAL END” will be printed. In case an error occurs, a corresponding<br />
error message will be printed.<br />
Printing of electronic journal<br />
You can print the electronic journal data saved last to an SD memory card by using the printer of your cash<br />
register.<br />
Set the mode switch to the X1/Z1 position.<br />
The comfirmation message is printed.<br />
The comfirmation message is printed.<br />
To execute<br />
To execute<br />
740 @ s 1 A<br />
To cancel l<br />
* The message “ ” will appear and stay on the display until all data is completely printed. When<br />
printing is finalized, the display will return to its initial state. In case an error occurs, a corresponding error<br />
message will be printed.<br />
*<br />
*<br />
www.cashregisters.net<br />
67
68<br />
OPERATOR MAINTENANCE<br />
1<br />
When power is lost, the machine retains its memory contents and all information on sales entries.<br />
• When a power failure is encountered in register idle state or during an entry,<br />
the machine returns to normal operation after power recovery.<br />
• When a power failure is encountered during a printing cycle, the register prints<br />
“========” and then carries out the correct printing procedure after power<br />
recovery. (See the sample print.)<br />
2<br />
If the printer runs out of paper, the printer will stall, and “PPPPPPPPPP” will appear on the display. Key entries<br />
will not be accepted. Refer to section 5 in this chapter, install a new roll, then press the l key. The printer will<br />
print the power failure symbol and resume printing.<br />
If the print roller arm is not locked, the printer stalls, “H” will appear on the extreme left of the display. Key<br />
entries will not be accepted. Push down the arm until it is securely locked, then press the l key. The printer<br />
will print the power failure symbol and resume printing.<br />
3<br />
In case of a Power Failure<br />
In Case of Printer Error<br />
Cautions in Handling the Printer and Recording Paper<br />
Cautions in handling the printer<br />
• Avoid dusty and humid environments, direct sunlight and iron powder. (A permanent magnet and<br />
electromagnet are used in this machine.)<br />
• Never pull the paper when the print roller arm is locked. First lift up the arm, and then remove the paper.<br />
• Never touch the surface of the print head and print roller.<br />
Cautions in handling the recording paper (thermal paper)<br />
• Use only the paper specified by SHARP.<br />
• Do not unpack the thermal paper until you are ready to use it.<br />
• Avoid heat. The paper will color at around 70°C.<br />
• Avoid dusty and humid storage places. Avoid direct sunlight.<br />
• The printed text on the paper can discolor under conditions of high humidity and temperature, exposure to the<br />
direct sunlight, contact with glue, thinner or a freshly copied blueprint, and heat caused by friction from<br />
scratching or other such means.<br />
• Be very careful when handling the thermal paper. If you want to keep a permanent record, copy the printed text<br />
with a photocopier.<br />
www.cashregisters.net
4<br />
This cash register displays a low battery symbol ( ) when the batteries are low, and displays a no battery<br />
symbol ( ) when batteries are extremely low or batteries are not installed.<br />
When the low battery symbol is displayed, replace the batteries with new ones as soon as possible. The<br />
existing batteries will be dead in about two days.<br />
When the no battery symbol is displayed, replace the batteries immediately. Otherwise, if the AC power cord is<br />
disconnected or a power failure occurs, all the programmed settings will be reset to the default settings and any<br />
data stored in memory will be cleared.<br />
While the no battery symbol is being displayed, do not turn the mode switch to any positions. Follow the battery<br />
replacement procedure below without changing the mode switch position. Otherwise, if the mode switch passes<br />
or is set to the OFF position, all the programmed settings will be reset to the default settings and any data stored<br />
in memory will be cleared.<br />
Be sure to observe precautions shown on page 1 when handling batteries.<br />
To replace the batteries:<br />
5<br />
Replacing the Batteries<br />
Replacing the Paper Roll<br />
1. Make sure that the cash register is plugged in.<br />
2. Remove the printer cover.<br />
3. Open the battery compartment cover next to the paper roll cradle and<br />
remove the old batteries.<br />
4. Install three new alkaline batteries LR6 (“AA” size) in the battery<br />
compartment. Be sure the positive and negative poles of each battery are<br />
facing in the proper direction. When they are installed correctly, the “ ” or<br />
“ ” symbol will disappear.<br />
5. Close the battery compartment cover.<br />
6. Replace the printer cover.<br />
Be sure to use paper rolls specified by SHARP.<br />
The use of any other paper rolls other than those specified could cause paper jamming, resulting in register<br />
malfunction.<br />
Paper specification<br />
Paper width: 2.25 ± 0.02 in (57.5 ± 0.5 mm)<br />
Max. outside diameter: 3.15 in (80 mm)<br />
Quality: Thermal paper<br />
• Be sure to set the paper roll prior to using your machine, otherwise it may cause a malfunction.<br />
Install the paper roll in the printer. Be careful to set the roll correctly.<br />
(How to set the paper roll)<br />
To the printer<br />
To the printer<br />
Correct<br />
Incorrect<br />
www.cashregisters.net<br />
69
70<br />
Removing the paper roll<br />
When a red dye appears on the paper roll, it is time to replace it. Replace the paper roll with a new one. If you<br />
plan on not using the register for an extended period of time, remove the paper roll, and store it in an appropriate<br />
place.<br />
Caution: The paper cutter is mounted on the printer cover. Be careful not to cut yourself.<br />
When not using the take-up spool (using as receipt paper):<br />
Print roller<br />
release lever<br />
When using the take-up spool (using as journal paper):<br />
Area to cut<br />
Installing the paper roll<br />
1. Remove the printer cover.<br />
2. Lift up the print roller release lever to unlock and open the print<br />
roller arm.<br />
3. Remove the paper roll from the paper roll cradle.<br />
Do not pull the paper through the printer.<br />
1. Turn the mode switch to a position other than OFF with the<br />
power cord connected.<br />
2. Remove the printer cover.<br />
3. Press the F key to advance the journal paper until its printed<br />
part is out of the way.<br />
4. Cut the paper and remove the take-up spool.<br />
5. Lift up the print roller release lever to unlock and open the print<br />
roller arm.<br />
6. Remove the paper roll from the paper roll cradle.<br />
Do not pull the paper through the printer.<br />
7. Remove the outer side of the take-up spool as shown<br />
on the left.<br />
8. Remove the printed journal roll from the take-up spool.<br />
Caution: The paper cutter is mounted on the printer cover. Be careful not to cut yourself.<br />
Installing the receipt paper roll:<br />
Paper positioning guides<br />
Print roller arm<br />
1. Turn the mode switch to a position other than<br />
OFF with the power cord connected.<br />
2. Remove the printer cover.<br />
3. Lift up the print roller release lever to unlock<br />
and open the print roller arm.<br />
4. Set the paper correctly in the paper roll<br />
cradle.<br />
5. Feed the end of the paper along with the<br />
paper positioning guides.<br />
www.cashregisters.net
Installing the journal paper roll:<br />
6. While holding down the paper, slowly close the print roller arm, and<br />
push down the arm until you hear a click locking the arm. Make<br />
sure securely you push down the center of the wing part of the arm<br />
as illustrated at the left. The paper will be fed automatically.<br />
If the print roller arm is not securely locked, the unit will<br />
not print correctly. If this problem occurs, open the arm,<br />
and close the arm as instructed above.<br />
7. Cut off the excess paper using the edge of the inner cover, and<br />
replace the printer cover. Press the F key to make sure the<br />
paper end comes out of the printer cover and clean paper appears.<br />
If the paper end does not come out, open the printer<br />
cover, and pass the paper end between the paper cutter<br />
and the paper guide of the printer cover, and replace the<br />
cover.<br />
1. Turn the mode switch to a position other than OFF with the power<br />
cord connected.<br />
2. Remove the printer cover.<br />
3. Lift up the print roller release lever to unlock and open the print<br />
roller arm.<br />
4. Set the paper correctly in the paper roll cradle.<br />
5. Feed the end of the paper along with the paper positioning guides.<br />
6. While holding down the paper, slowly close the print roller arm, and<br />
push down the arm until you hear a click locking the arm. Make<br />
sure securely you push down the center of the wing part of the arm<br />
as illustrated at the left. The paper will be fed automatically.<br />
7. Insert the end of the paper into the slit in the spool. (Press the F<br />
key to feed more paper if required.)<br />
8. Wind the paper two or three turns around the spool shaft.<br />
9. Set the spool on the bearing, and press the F key to take up<br />
excess slack in the paper.<br />
10. Replace the printer cover.<br />
You can wind the roll paper in OP X/Z, X1/Z1, and X2/Z2 modes even if you programmed so that<br />
the printer is used for issuance of receipts. This may be convenient to wind reports. In this case,<br />
set the roll paper to the take-up spool.<br />
www.cashregisters.net<br />
71
72<br />
6<br />
Caution: The paper cutter is mounted on the printer cover. Be careful not to cut yourself. Never touch<br />
the print head immediately after printing, as the head may still be hot.<br />
1. Remove the printer cover.<br />
2. Lift up the print roller release lever to unlock the print roller arm, and open the print roller arm.<br />
3. Remove the paper jam. Check for and remove any shreds of paper that may remain in the printer.<br />
4. Reset the paper roll correctly by following the steps in “Installing the paper roll”.<br />
7<br />
When the printed text is getting dark or faint, paper dust may be stuck to the print head, sensor and/or roller.<br />
Clean them as follows:<br />
8<br />
9<br />
Removing a Paper Jam<br />
Cleaning the Printer (Print Head / Sensor / Roller)<br />
Removing the Drawer<br />
Opening the Drawer by Hand<br />
Lever<br />
Print head<br />
Roller Sensor<br />
Coin case<br />
Caution:<br />
• Never touch the print head with a tool or anything hard<br />
as it may damage the head.<br />
• The paper cutter is mounted on the printer cover. Be<br />
careful not to cut yourself.<br />
1. Turn the mode switch to the OFF position.<br />
2. Remove the printer cover.<br />
3. Lift up the print roller release lever to unlock and open the<br />
print roller arm.<br />
4. Remove the paper roll referring to the “Removing the<br />
paper roll” section.<br />
5. Clean the print head with a cotton swab or soft rag<br />
moistened with ethyl alcohol or isopropyl alcohol. Clean<br />
the roller and the sensor in the same manner.<br />
6. Reset the paper roll correctly by following the steps in<br />
“Installing the paper roll”.<br />
The drawer in the register is detachable. After closing your business for the<br />
day, remove the drawer. To detach the drawer, pull it forward fully, and<br />
remove it by lifting it up. The 5-denomination coin case is detachable.<br />
The drawer automatically opens. However, when a power failure occurs or the<br />
machine becomes out of order, slide the lever located on the bottom of the<br />
machine in the direction of the arrow. (See the figure at the left.)<br />
The drawer will not open if it is locked with the key.<br />
www.cashregisters.net
10<br />
The malfunctions shown in the left-hand column below, labelled “Fault,” do not necessarily indicate functional<br />
faults of the machine. It is therefore advisable to refer to “Checking” shown in the right-hand column before<br />
calling for service.<br />
(1)<br />
Error code table<br />
Fault Checking<br />
The display shows symbols that do not make sense. • Has the machine been initialized properly as shown<br />
“GETTING STARTED”?<br />
(Note that initialization clears all the data and programmed<br />
settings stored in memory.)<br />
(2) The display won’t be illuminated even when<br />
• Is power supplied to the electrical outlet?<br />
the mode switch is turned to any other<br />
• Is the power cord plug out or loosely connected to the<br />
position than “OFF”.<br />
electrical outlet?<br />
(3) The display is illuminated, but the whole machine • Is a clerk code assigned to the register?<br />
refuses registrations.<br />
• Is the mode switch set properly at the “REG” position?<br />
(4) No receipt is issued. • Is the paper roll properly installed?<br />
• Is there a paper jam?<br />
• Is the receipt function in the “OFF” status?<br />
• Is the print roller arm securely locked?<br />
(5)<br />
(6)<br />
Before Calling for Service<br />
No journal paper is taken up. • Is the take-up spool installed on the bearing properly?<br />
• Is there a paper jam?<br />
• Is the journal printing selected in the printing style<br />
programming? (If the receipt printing is selected, the paper<br />
is not wound around the take-up spool.)<br />
Printing is unusual. • Is the print roller arm securely locked?<br />
• Is the paper roll properly installed?<br />
• Are the print head/sensor/roller clean?<br />
When the following error codes are displayed, press the l key and take a proper action according to the table<br />
below.<br />
Error<br />
code<br />
Error status Action<br />
E01 Registration error Make a correct key entry.<br />
E02 Misoperation error Make a correct key entry.<br />
E03 Undefined code is entered. Enter a correct code<br />
E07 Memory is full (in the a key programming). Program the a key within 25 steps.<br />
E11 Compulsory depression of the s key for<br />
direct finalization<br />
Press the s key and continue the operation.<br />
E12 Compulsory tendering Make a tendering operation.<br />
E32 No entry of a clerk code Make a clerk code entry.<br />
E34 Overflow limitation error Make a registration within a limit of entry.<br />
E35 The open price entry is inhibited. Make a preset price entry.<br />
E36 The preset price entry is inhibited. Make an open price entry.<br />
E37 The direct finalization is inhibited. Make a tendering operation.<br />
E67 Subtotal void is not allowed. Finalize the transaction, and correct the wrong entries in the<br />
void mode.<br />
www.cashregisters.net<br />
73
74<br />
SPECIFICATIONS<br />
Model: XE-A203<br />
Dimensions: 13.8 (W) x 16.9 (D) x 11.1 (H) in. (350 (W) x 430 (D) x 281 (H) mm)<br />
Weight: 17.6 Ib (8 kg)<br />
Power source: 120V AC ± 10%, 60 Hz<br />
Power consumption: Stand-by 7.7 W<br />
Operating 28 W (max.)<br />
Working temperature: 32 °F to 104 °F (0 °C to 40 °C)<br />
Electronics:<br />
Display:<br />
LSI (CPU) etc.<br />
Operator display: 7-segment display (10 positions)<br />
Customer display:<br />
Printer:<br />
7-segment display (7 positions)<br />
Type: One-station thermal printer<br />
Printing speed: Approx. 12 lines/second<br />
Printing capacity: 24 digits each for receipt and journal paper<br />
Other functions: • Graphic logo printing function<br />
• Logo message function<br />
• Receipt (ON-OFF) function, compression printing function<br />
Paper roll: Width: 2.25 ± 0.02 in (57.5 ± 0.5 mm)<br />
Max. diam.: 3.15 in (80 mm)<br />
Quality: High quality (0.06 to 0.08 mm thickness)<br />
<strong>Cash</strong> drawer: 4 slots for bill and 5 for coin denominations<br />
Accessories: Manager key 2<br />
Operator key 2<br />
Drawer lock key 2<br />
Paper roll 1<br />
Take-up spool 1<br />
USB cable (0GS5422580) * 1 1<br />
Customer support tool 1 disk<br />
Quick Start Guide 1 copy<br />
Instruction manual 1 copy<br />
Specifications and appearance subject to change without notice for improvement.<br />
*1 Use only the USB cable (manufactured by SHARP) supplied with the XE-A203 for the connection with a PC.<br />
In case you need a new USB cable, order the USB cable manufactured by SHARP Co. Ltd. (Part code: 0GS5422580) for<br />
use with the XE-A203.<br />
Use these labels with the department keys. Write department names on the labels and attach them to the<br />
department keys by first removing the transparent key covers. (Please make a copy of this page.)<br />
Example:<br />
2<br />
1<br />
18<br />
D<br />
17<br />
E<br />
17<br />
Candy<br />
Danish<br />
1 E<br />
6<br />
5<br />
22<br />
I<br />
21<br />
J<br />
10<br />
9<br />
26<br />
N<br />
25<br />
O<br />
14<br />
13<br />
30<br />
S<br />
29<br />
T<br />
4<br />
3<br />
20<br />
B<br />
19<br />
C<br />
8<br />
7<br />
24<br />
G<br />
23<br />
H<br />
12<br />
11<br />
28<br />
L<br />
27<br />
M<br />
16<br />
15<br />
32<br />
Q<br />
31<br />
R<br />
www.cashregisters.net
INTRODUCCION<br />
Le agradecemos la adquisición de la caja registradora electrónica SHARP modelo XE-A203.<br />
Sírvase leer este manual detenidamente antes de hacer funcionar la caja registradora para familiarizarse y<br />
comprender por completo sus funciones y características.<br />
Guarde este manual para futura referencia dado que le servirá de ayuda en caso de tener algún problema de<br />
funcionamiento con la caja registradora.<br />
¡PRECAUCION!<br />
• No instale nunca las pilas en la caja registradora antes de haberla inicializado. Antes de poner en<br />
funcionamiento la caja registradora, ésta deberá ser inicializada, y luego deben instalarse tres pilas alcalinas<br />
nuevas LR6 (tamaño “AA”) en la caja registradora. De lo contrario, se perturbará el contenido de la memoria<br />
y se producirá el mal funcionamiento de la caja registradora. Para ver los procedimientos, consulte la página<br />
4.<br />
• Emplee sólo el cable USB (fabricado por SHARP) suministrado con el XE-A203 para la conexión a un<br />
ordenador personal. No emplee nunca otros cables.<br />
IMPORTANTE<br />
• La impresora tiene instalado un cortador para cortar el papel del rollo. Tenga mucho cuidado de no<br />
cortarse con el cortador.<br />
• Instale la caja registradora en un lugar en el que no esté expuesta a radiaciones directas, cambios<br />
anormales de temperatura, alta humedad o en contacto con agua.<br />
Si la instala en estos lugares, podría originar daños en la caja y en los componentes electrónicos.<br />
• No opere nunca la caja registradora con las manos mojadas.<br />
El agua podría filtrarse al interior de la registradora y causar averías en sus componentes.<br />
• Cuando limpie la caja registradora, utilice un paño suave y seco. No use nunca líquidos volátiles<br />
como por ejemplo bencina y/o disolventes.<br />
La utilización de estos productos químicos hará que la caja pierda color o sufra daños.<br />
• La registradora debe enchufarse a cualquier tomacorriente normal de pared (120V CA ±10%).<br />
Otros aparatos eléctricos enchufados en el mismo circuito eléctrico pueden hacer que la registradora<br />
funcione mal.<br />
• Para protegerse contra la pérdida de datos, instale tres pilas alcalinas LR6 (tamaño “AA”) después<br />
de haber inicializado la caja registradora. Cuando manipule las pilas, no se olvide nunca de observar<br />
lo siguiente:<br />
Las pilas usadas incorrectamente pueden reventar o provocar pérdidas y dañar posiblemente el<br />
interior de la caja registradora.<br />
• Asegúrese de que los polos positivo (+) y negativo (-) de cada pila estén colocados en el sentido<br />
correcto para la instalación.<br />
• No mezcle nunca pilas de diferentes tipos.<br />
• No mezcle nunca pilas nuevas y usadas.<br />
• No deje nunca pilas agotadas en el compartimiento de las pilas.<br />
• Saque las pilas, si no piensa usar la caja registradora durante mucho tiempo.<br />
• Si una pila perdiera, limpie inmediatamente el compartimiento de las pilas, teniendo cuidado de<br />
que el líquido que sale de la pila no entre en contacto directo con la piel.<br />
• Para deshacerse de las pilas, siga las leyes vigentes en su país.<br />
• Si la caja registradora no funciona como debiera, solicite el servicio llamando al 1-800-BE-SHARP.<br />
No intente reparar la caja registradora usted mismo.<br />
• Para desconectar por completo la alimentación eléctrica, desenchufe la clavija del tomacorriente.<br />
Línea directa de asistencia a<br />
los clientes 1-800-BE-SHARP<br />
Para realizar la configuración<br />
con facilidad, vea el apartado<br />
“PARA EMPEZAR” (página 4).<br />
www.cashregisters.net<br />
English<br />
Español<br />
1
2<br />
INDICE<br />
INTRODUCCION............................................................................................................................................1<br />
IMPORTANTE................................................................................................................................................1<br />
INDICE ..........................................................................................................................................................2<br />
PARTES Y SUS FUNCIONES .......................................................................................................................3<br />
PARA EMPEZAR...........................................................................................................................................4<br />
REGISTRO BASICO DE VENTAS ................................................................................................................5<br />
1 Ejemplo de registro básico de ventas ...................................................................................................5<br />
2 Aviso de error ........................................................................................................................................6<br />
3 Registros de artículos ...........................................................................................................................6<br />
Registros de un solo artículo ..........................................................................................................6<br />
Registros repetidos ........................................................................................................................7<br />
Registros de multiplicación.............................................................................................................7<br />
Registros de precios divididos .......................................................................................................7<br />
Registros de venta en metálico de un solo artículo (SICS) ............................................................8<br />
4 Visualización de los subtotales .............................................................................................................8<br />
5 Finalización de una transacción ............................................................................................................8<br />
6 Cálculo de los impuestos ......................................................................................................................9<br />
CARACTERISTICAS OPCIONALES ............................................................................................................9<br />
1 Registros auxiliares ...............................................................................................................................9<br />
2 Tratos de pagos auxiliares ..................................................................................................................10<br />
3 Registros con tecla de secuencia automática (tecla a)....................................................................11<br />
CORRECCION .............................................................................................................................................11<br />
PROGRAMACION DE LAS FUNCIONES BASICAS (Para el inicio rápido) ............................................12<br />
1 Programación de la fecha y de la hora................................................................................................12<br />
2 Programación de los impuestos para la función de cálculo automático de los impuestos..................12<br />
PROGRAMACION DE FUNCIONES AUXILIARES ....................................................................................14<br />
1 Programación de secciones ................................................................................................................14<br />
2 Programación de PLU (codificación de precios) y subsección ...........................................................15<br />
3 Programación de teclas misceláneas..................................................................................................16<br />
4 Programación de texto ........................................................................................................................18<br />
PROGRAMACION AVANZADA ..................................................................................................................22<br />
1 Programación de número de caja registradora y de números consecutivos ......................................22<br />
2 Programación del registro diario electrónico (EJ) ...............................................................................22<br />
3 Programación 1 de selección de diversas funciones ..........................................................................23<br />
4 Programación 2 de selección de diversas funciones ..........................................................................26<br />
5 Lectura de programas almacenados...................................................................................................28<br />
MODO DE INSTRUCCION ..........................................................................................................................28<br />
LECTURA (X) Y REPOSICION (Z) DE LOS TOTALES DE VENTAS .......................................................29<br />
LECTURA Y REPOSICION DE INFORMES EJ ..........................................................................................30<br />
REGISTROS DE ANULACION....................................................................................................................31<br />
CORRECCION DESPUES DE FINALIZAR UNA TRANSACCION (Modo de cancelación).....................31<br />
COMO EMPLEAR UNA TARJETA DE MEMORIA SD ...............................................................................31<br />
MANTENIMIENTO PARA EL OPERADOR.................................................................................................34<br />
1 En caso de corte de la alimentación ...................................................................................................34<br />
2 En el caso de error de impresora ........................................................................................................34<br />
3 Precauciones al manejar la impresora ................................................................................................34<br />
4 Reemplazo de las pilas .......................................................................................................................34<br />
5 Reemplazo del rollo de papel..............................................................................................................35<br />
6 Extracción del papel atascado ............................................................................................................36<br />
7 Limpieza de la impresora (cabezal de impresión / sensor / rodillo) ....................................................36<br />
8 Extracción del cajón ............................................................................................................................37<br />
9 Abertura manual del cajón ..................................................................................................................37<br />
10 Antes de solicitar el servicio de un técnico..........................................................................................37<br />
www.cashregisters.net
PARTES Y SUS FUNCIONES<br />
1<br />
El selector de modo funciona insertando una de las dos llaves de modo suministradas: la llave del administrador<br />
(MA) y la del operador (OP). Estas llaves pueden insertarse o sacarse sólo cuando el selector esté en la<br />
posición “REG” u “OFF”.<br />
El selector de modo tiene estos ajustes:<br />
OFF: Este modo bloquea todas las operaciones de la caja. (La alimentación de CA está desconectada.)<br />
No hay cambios en los datos registrados.<br />
OP X/Z: Para sacar informes X o Z de dependiente individual, y para sacar informes rápidos. Puede usarse<br />
para alternar el estado “ON” u “OFF” de emisión de recibos pulsando la tecla R.<br />
REG: Para registrar ventas.<br />
PGM: Para programar diversos artículos.<br />
VOID: Para establecer la caja registradora en el modo de cancelación. Este modo permite la corrección<br />
después de haber finalizado una transacción.<br />
MGR: Para los registros del administrador. El administrador puede usar este modo para un registro de<br />
anulación.<br />
X1/Z1: Para sacar el informe X/Z de varios totales diarios.<br />
X2/Z2: Para sacar el informe X/Z de consolidación periódica (semanal o mensual).<br />
2<br />
Selector de modo y llaves de modo<br />
Visualizadores<br />
Importe: Aparece en las ocho posiciones (máx.) de la derecha. Cuando el importe es negativo, aparece el<br />
signo de menos “-” delante del importe.<br />
Número de repeticiones para registros repetitivos:<br />
Se visualiza el número de repeticiones, empezando por “2” y se incrementa con cada repetición.<br />
Cuando haya registrado diez veces, la visualización mostrará “0”. (2 → 3 ..... 9 → 0 → 1 → 2 ... )<br />
Estado de la función de recibo:<br />
Aparece el indicador “–” en la posición RCPT OFF cuando se pone la función de recibo en el<br />
estado OFF.<br />
Hora: Aparece en las seis posiciones de la derecha (hora-minutos-“ ” u hora-minutos-“ ”) en el modo<br />
OP X/Z, REG, o MGR. En los modos REG o MGR, pulse la tecla s para visualizar la hora.<br />
Símbolos del estado de la máquina<br />
: Aparece durante la programación.<br />
: Aparece cuando se detecta un error.<br />
: Aparece cuando se visualiza el subtotal o cuando se entrega un importe menor que el importe de las<br />
ventas.<br />
: Aparece cuando se pulsa la tecla V para calcular un subtotal en moneda extranjera.<br />
: Aparece cuando se finaliza una transacción pulsando la tecla A, C o c.<br />
: Aparece cuando se visualiza el importe del cambio.<br />
: Puede aparecer en las tres posiciones de la izquierda al efectuar una entrada de teclas cuando la<br />
memoria del registro diario electrónico (EJ) está llena. (Dependiendo de la programación.)<br />
: Aparece cuando la tensión de las pilas instaladas está por debajo del nivel necesario.<br />
: Aparece cuando las pilas no están instaladas, o cuando las pilas instaladas están gastadas.<br />
: Es posible que aparezca justo debajo de las posiciones octava y novena al realizar la finalización de una<br />
transacción cuando la memoria del registro diario electrónico (EJ) está casi llena.<br />
También aparece justo debajo de la décima posición cuando está activada el modo de ahorro de<br />
energía.<br />
: Aparece cuando el brazo del rodillo impresor no está bloqueado.<br />
: Aparece cuando no está colocado el papel o cuando se ha terminado.<br />
3<br />
www.cashregisters.net
PARA EMPEZAR<br />
Siga el procedimiento mostrado a continuación. Las pilas no están instaladas y la alimentación está<br />
desconectada.<br />
1. Inicialice la caja registradora<br />
Para que la caja registradora pueda funcionar correctamente, deberá inicializarla antes de ponerla en<br />
funcionamiento por primera vez. Siga el procedimiento siguiente.<br />
1. Inserte la llave de administrador (MA) en el selector de modo y gírelo a la posición REG.<br />
2. Enchufe la clavija a la toma de corriente de CA. El zumbador sonará tres veces.<br />
IMPORTANTE: Esta operación debe efectuarse antes de haber instalado las pilas.<br />
3. La caja registradora habrá quedado ahora inicializada.<br />
El visualizador de la caja registradora mostrará “0.00” con “ ”.<br />
2. Instale las pilas<br />
Las tres pilas alcalinas nuevas LR6 (tamaño “AA”) se deben colocar en la caja registradora para evitar que los<br />
datos y ajustes de programación se borren de la memoria, cuando se desconecte accidentalmente el cable de<br />
alimentación de CA, o en caso de un corte de corriente.<br />
Instale las tres pilas alcalinas nuevas LR6 (tamaño “AA”) de acuerdo con el siguiente procedimiento con el<br />
cable de CA enchufado y con el selector de modo puesto en la posición REG. Asegúrese de observar las<br />
precauciones indicadas en la página 1 sobre la manipulación de las pilas.<br />
1. Empuje la cubierta de la impresora hacia delante y sepárela.<br />
Tenga mucho cuidado con el cortador de papel, porque podría cortarse.<br />
2. Abra la cubierta del compartimiento de las pilas que se encuentra al lado del soporte del rollo de papel.<br />
3. Inserte tres pilas alcalinas nuevas LR6 (tamaño “AA”).<br />
Cuando las pilas están correctamente instaladas, desaparecerá “ ” del visualizador.<br />
4. Cierre la cubierta del compartimiento de las pilas.<br />
3. Instale un rollo de papel<br />
1. Levante la palanca de liberación del rodillo impresor para desbloquear y abrir el brazo del rodillo impresor.<br />
2. Ponga un rollo de papel en el soporte del rollo de papel.<br />
3. Haga avanzar el extremo del papel junto con las guías de papel.<br />
4. Mientras mantiene retenido el papel, cierre lentamente el brazo del rodillo impresor, y empuje el brazo hacia<br />
abajo hasta oír un sonido seco de confirmación. Asegúrese que empuja con seguridad el centro de la parte<br />
del ala del brazo. El papel avanzará automáticamente.<br />
Si el brazo del rodillo impresor no está bloqueado con seguridad, la unidad no podrá realizar<br />
correctamente la impresión. Si ocurre este problema, abra el brazo, y ciérrelo de nuevo como se ha<br />
indicado arriba.<br />
5. Cuando no emplee el carrete de toma (empleo como papel de recibos):<br />
• Corte el papel sobrante empleando el borde de la cubierta interior, y vuelva a colocar la cubierta de la<br />
impresora. Pulse la tecla F para asegurarse que el papel sale por la cubierta de la impresora y que<br />
aparece papel limpio.<br />
Cuando emplee el carrete de toma (empleo como papel de registro diario):<br />
• Inserte el extremo del papel en la ranura del carrete. (Pulse la tecla F para hacer avanzar más el papel si<br />
es necesario.)<br />
• Bobine el papel dos o tres vueltas en torno al eje del carrete.<br />
• Coloque el carrete en el rodamiento, y pulse la tecla F para tensar el papel.<br />
• Vuelva a colocar la cubierta de la impresora.<br />
4. Programe la fecha, la hora y los impuestos<br />
La caja registradora le ofrece los idiomas inglés, francés y español para el texto. El idioma<br />
preajustado es el inglés. Si desea cambiar el idioma, deberá cambiarlo antes de realizar la<br />
programación. Consulte el apartado de “Selección del idioma” de la sección “Programación 2 de<br />
selección de diversas funciones” para cambiar el idioma.<br />
Antes de poder seguir con el registro de las ventas, deberá programar:<br />
• la fecha • la hora • los impuestos<br />
Consulte la sección de PROGRAMACION DE LAS FUNCIONES BASICAS para encontrar más detalles (página 12).<br />
5. Programe otros elementos necesarios<br />
Aunque la caja registradora viene ya programada para poderla utilizar con la mínima configuración, la máquina<br />
le ofrece las funciones opcionales. Antes de comenzar la programación, lea la sección de operaciones de<br />
ventas para entender las funciones opcionales.<br />
4<br />
www.cashregisters.net
PARA EL OPERADOR<br />
REGISTRO BASICO DE VENTAS<br />
1<br />
Ejemplo de registro básico de ventas<br />
A continuación se muestra un ejemplo de registro básico de ventas de artículos de sección en metálico. Para<br />
los detalles de la operación, consulte cada sección respectiva.<br />
Ajuste del selector de modo<br />
1. Gire el selector de modo a la posición REG.<br />
Asignación de dependientes<br />
2. Introduzca su código de dependiente. (Por ejemplo, si el código de dependiente es<br />
el 1. Pulse las teclas 1 y L en este mismo orden.)<br />
Registros de artículos<br />
3. Introduzca el precio para el primer artículo de sección. (Por ejemplo, para 15,00, introduzca 15: , y<br />
pulse la tecla de la sección correspondiente.)<br />
Para las secciones 17 a la 32, pulse primero la tecla D antes de pulsar la tecla de la sección.<br />
Para la sección 33 y posteriores, introduzca el código de sección empleando las teclas numéricas, y<br />
pulse la tecla d , y luego introduzca el precio y pulse de nuevo la tecla d .<br />
4. Repita el paso 3 para todos los artículos de sección.<br />
Visualización de subtotales<br />
5. Pulse la tecla s para visualizar el importe a cobrar.<br />
Finalización de la transacción<br />
6. Introduzca el importe recibido del cliente. (Podrá omitir este paso si el importe recibido es el mismo que el<br />
subtotal.)<br />
7. Pulse la tecla A y se visualizará la vuelta (cuando no se ha introducido el importe recibido, se visualiza<br />
el importe total) y se abrirá el cajón.<br />
8. Corte el recibo y déselo al cliente con su vuelta.<br />
9. Cierre el cajón.<br />
Asignación de<br />
dependiente<br />
Registros<br />
de artículos<br />
Visualización<br />
del subtotal<br />
Ejemplo de operación de teclas<br />
Finalización<br />
de la transacción<br />
1 L<br />
1500 !<br />
2300 "<br />
s<br />
5000<br />
A<br />
(En este ejemplo, la tasa de impuestos está<br />
ajustada a 6,25%.)<br />
Impresión<br />
Membrete gráfico<br />
Fecha/hora/número de código de<br />
dependiente<br />
Número de caja registradora/número<br />
consecutivo/nombre de dependiente<br />
Artículos<br />
Precio<br />
REG<br />
OPX/Z MGR<br />
OFF<br />
X1/Z1<br />
VOID<br />
PGM<br />
X2/Z2<br />
Subtotal de No se imprime<br />
mercancías cuando sólo se<br />
Importe de venden artículos<br />
impuestos no imponibles.<br />
Estado de impuestos<br />
(T1: imponible 1)<br />
Cantidad total<br />
Importe total<br />
Pago en metálico/importe recibido<br />
Vuelta<br />
www.cashregisters.net<br />
5
6<br />
Función ON/OFF (de emisión/no emisión) de recibos<br />
Cuando emplea la impresora para emitir recibos, podrá inhabilitar la impresión de recibos en el modo REG.<br />
Pulse la tecla R en la posición OP X/Z. Esta tecla cambia el estado de impresión de recibos de ON a OFF.<br />
Para emitir un recibo cuando la función de recibo ON/OFF está desactivada (OFF):<br />
Si el cliente quiere el recibo después de haber finalizado la transacción con la función de recibo ON/OFF<br />
desactivada (OFF), pulse la tecla R .<br />
Modo de ahorro de energía<br />
La caja registradora se establecerá en el modo de ahorro de energía cuando no se efectúe ningún registro<br />
basándose en el límite de tiempo ya programado (ajuste inicial de 30 minutos). Cuando la caja registradora se<br />
establezca en el modo de ahorro de energía, se apagará toda la visualización excepto el punto decimal de la<br />
posición de la izquierda. La caja registradora volverá al modo de operación normal al pulsar alguna tecla o al<br />
cambiar un modo.<br />
2<br />
En los siguientes ejemplos, la caja registradora se coloca en estado de error haciendo sonar un aviso audible y<br />
visualizando el símbolo de error “ ” en el visualizador. Anule el estado de error pulsando la tecla l y tome<br />
las medidas oportunas.<br />
Consulte la tabla de códigos de error en la página 38.<br />
• Registra un número de más de 32 dígitos (desborde del límite de registro): Cancele el registro y vuelva a<br />
introducir un número correcto.<br />
• Se equivoca en la operación de teclas: Borre el error y continúe la operación.<br />
• Hace un registro más allá del límite de registro de importes programado: Vea si el importe registrado es<br />
correcto. Si es correcto, puede introducirse en el modo MGR. Llame al administrador.<br />
• Un subtotal con impuestos incluido excede de ocho dígitos: Borre el subtotal pulsando la tecla l y pulse la<br />
para finalizar la transacción.<br />
tecla A , C o c<br />
Función de escape de error<br />
Cuando desee abandonar una transacción debido a un error o a un imprevisto, emplee la función de escape de<br />
error como se muestra a continuación:<br />
La transacción se cancela (se trata como un subtotal cancelado) y se emite el recibo mediante esta función. Si<br />
ya había introducido el importe entregado para el pago, la operación se finaliza como una venta en metálico.<br />
3<br />
Aviso de error<br />
Transacción<br />
Registros de un solo artículo<br />
Registros de sección<br />
Para cancelar el estado de error<br />
Registros de artículos<br />
• Cuando se emplean las teclas de sección (para las secciones 1 a 32)<br />
Cuando utilice un precio unitario programado<br />
Precio unitario * 1<br />
(máx. 7 dígitos)<br />
l<br />
*<br />
D<br />
2<br />
E E<br />
Tecla de sección<br />
* 1 Menos que los importes de límite superior<br />
programado<br />
Cuando se introduce cero, sólo se añade<br />
la cantidad de ventas.<br />
* 2 Para las secciones opcionales 17 a 32,<br />
pulse la tecla D .<br />
www.cashregisters.net
• Cuando se emplea la tecla de registro de código de sección<br />
Código de sección<br />
(1 a 99)<br />
* 1 Menos que los importes de límite<br />
superior programado<br />
Cuando se introduce cero, sólo se<br />
añade la cantidad de ventas.<br />
Registros de PLU/subsecciones<br />
La caja registradora ya está programada para el modo PLU y cero para el precio unitario. Para emplear<br />
entradas de PLU, deberán haberse programado de antemano sus precios unitarios preajustados. (Consulte la<br />
página 15.) Para emplear los registros de subsecciones, cambie al modo de subsección para los códigos de PLU.<br />
• Registros de PLU<br />
Código de PLU<br />
(1 a 1.200)<br />
• Registros de subsección (PLU abierta)<br />
Código de PLU<br />
(1 a 1.200) p<br />
Registros repetidos<br />
* Menos que los importes de límite superior<br />
programado<br />
Cuando se introduce cero, sólo se añade<br />
la cantidad de ventas.<br />
Puede utilizar esta función para registrar una venta de dos o más artículos iguales. Repita la pulsación de una<br />
tecla de sección, tecla d o tecla p .<br />
Registros de multiplicación<br />
Cuando venda una gran cantidad de artículos, es conveniente emplear el método de registro de multiplicación.<br />
Introduzca la cantidad empleando las teclas numéricas y pulse la tecla @ antes de comenzar el registro de<br />
artículos.<br />
Registros de precios divididos<br />
Esta función es práctica cuando un cliente desea comprar artículos que normalmente se venden en lotes. Para<br />
emplear esta función, deberá cambiar el ajuste programado o el ajuste inicial. Consulte el apartado<br />
“Programación 1 de selección de diversas funciones” (código de tarea 70) para ver los detalles de la<br />
programación.<br />
Cant. de venta<br />
(hasta 4 dígitos)<br />
Cuando utilice un precio unitario programado<br />
d d<br />
p<br />
Precio unitario * 1<br />
(máx. 7 dígitos)<br />
(En caso de que sólo esté permitido<br />
el registro de precio preajustado.)<br />
Precio unitario*<br />
(máx. 7 dígitos)<br />
p<br />
Cuando emplee un precio unitario programado<br />
@ Cant. básica<br />
(hasta 2 dígitos) @ Precio unitario<br />
por cant. básica<br />
D<br />
Tecla de sección<br />
Código de sección d Precio unitario<br />
por cant. básica<br />
Código de PLU p<br />
d<br />
(Sólo se permite el registro<br />
preajustado.)<br />
Código de PLU Precio unitario<br />
p p<br />
por cant. básica<br />
www.cashregisters.net<br />
7
8<br />
Registros de venta en metálico de un solo artículo (SICS)<br />
• Esta función es útil cuando se vende solamente un artículo en metálico. Esta función es aplicable sólo a las<br />
secciones que se han ajustado para SICS o a sus PLU o subsecciones asociadas.<br />
• Se completa la transacción y el cajón se abre tan pronto como pulse la tecla de sección, la tecla d o la tecla<br />
p.<br />
4<br />
La caja registradora ofrece tres tipos de subtotales:<br />
Subtotal de mercancías<br />
Pulse la tecla m en cualquier momento durante la transacción. Aparecerá el subtotal de venta neto, sin<br />
incluir los impuestos, en el visualizador.<br />
Subtotal imponible<br />
Subtotal de imponible 1<br />
Pulse las teclas T y s en este orden en cualquier momento durante la transacción. Aparecerá<br />
el subtotal de venta de los artículos de imponible 1 en el visualizador.<br />
Subtotal de imponible 2<br />
Pulse las teclas U y s en este orden en cualquier momento durante la transacción. Aparecerá<br />
el subtotal de venta de los artículos de imponible 2 en el visualizador.<br />
Subtotal incluyendo los impuestos (subtotal completo)<br />
Pulse la tecla s en cualquier momento durante la transacción. Aparecerán el subtotal de venta con los<br />
impuestos incluidos y el símbolo “ ” en el visualizador.<br />
5<br />
Visualización de los subtotales<br />
Finalización de una transacción<br />
Importe recibido en metálico o cheque<br />
Pulse la tecla s para obtener un subtotal con impuestos incluidos, registre el importe entregado por el<br />
cliente, y entonces pulse la tecla A si el importe es en metálico o pulse la tecla C si el importe es un<br />
cheque. Cuando el importe recibido es mayor que el importe de la venta, la registradora le mostrará el importe<br />
del cambio y se encenderá el símbolo “ ”. De lo contrario, la registradora mostrará un déficit y se encenderá el<br />
símbolo “ ”. Ahora deberá hacer el registro correcto del importe recibido.<br />
Ventas en metálico o cheque que no necesitan un registro<br />
Registre los artículos y pulse la tecla A si se trata de una venta en metálico o pulse la tecla C si es una<br />
venta con cheque. La caja registradora visualizará el importe total de la venta.<br />
Venta a cargo en cuenta (crédito)<br />
Registre los artículos y pulse la tecla de cargo (c).<br />
Ventas con importe recibido mixto<br />
Podrá efectuar la mezcla de pagos con cheques y metálico, metálico y a cargo en cuenta, y cheque y a cargo<br />
en cuenta.<br />
Por ejemplo: Su cliente paga $9,50 en metálico y $40,00 a cargo a su cuenta para un subtotal de $49,50 con<br />
impuestos incluidos.<br />
Ejemplo de operación de teclas<br />
~ s 950 Ac<br />
www.cashregisters.net
6<br />
Impuestos automáticos<br />
Cuando se ha programado una tasa de impuestos (o tabla de impuestos) en la caja registradora y el estado de<br />
impuestos para una sección individual está ajustado a imponible, la caja calcula los impuestos automáticos para<br />
cualquier artículo que se introduzca directamente en la sección o indirectamente mediante una PLU<br />
relacionada.<br />
Impuestos manuales<br />
La máquina le permite introducir manualmente los impuestos después de haber terminado el registro de<br />
artículos.<br />
Ejemplo: Venta en metálico de un artículo de $8,00 (sección 12) con 50 centavos como impuestos<br />
800 ( 50 t A<br />
Borrado de los impuestos<br />
Podrá borrar los impuestos automáticos en el subtotal de imponible 1 y de imponible 2 de cada transacción<br />
pulsando la tecla t después de haberse visualizado el subtotal.<br />
Para efectuar el borrado del subtotal de imponible 1, pulse T, s para obtener el subtotal de imponible<br />
1, y entonces pulse t para borrar el subtotal.<br />
Para efectuar el borrado del subtotal de imponible 2, pulse U, s para obtener el subtotal de imponible<br />
2, y entonces pulse t para borrar el subtotal.<br />
Para borrar todo el subtotal de imponible (1-4), pulse T, U, s y t en este orden.<br />
Cambio del estado de impuestos<br />
La máquina le permitirá cambiar el estado de impuestos programado de cada tecla de sección o de PLU<br />
pulsando las teclas T y/o U antes de tales teclas. Después de completar cada registro, el estado de<br />
impuestos programado de cada tecla se repondrá al programado.<br />
CARACTERISTICAS OPCIONALES<br />
1<br />
Cálculo de los impuestos<br />
Ejemplo de operación de teclas<br />
Registros auxiliares<br />
Registros de descuento y recargo empleando la tecla de porcentaje<br />
La tecla de porcentaje se emplea para aplicar un porcentaje de descuento o recargo manualmente introducido o<br />
preajustado a artículos individuales o a un subtotal de mercancías. Para el registro manual del porcentaje de<br />
descuento o de recargo, introduzca el porcentaje (hasta 100,00) con las teclas numéricas (necesitará un punto<br />
decimal cuando introduzca una tasa porcentual fraccionaria), y pulse la tecla de porcentaje. Cuando emplee un<br />
porcentaje preajustado (si se ha programado), pulse tan sólo una tecla de porcentaje.<br />
www.cashregisters.net<br />
9
Cálculo porcentual para el subtotal de mercancías<br />
~ m 10 % A<br />
Cálculo porcentual para registros de artículos<br />
800 + 7 P 5 %A<br />
Registros de descuento y recargo empleando la tecla de descuento<br />
La tecla de descuento se emplea para aplicar un importe de descuento o recargo manualmente introducido o<br />
preajustado a artículos individuales o a un subtotal de mercancías. Para el registro manual de los importes de<br />
descuento o de recargo, introduzca el importe con las teclas numéricas, y pulse la tecla de descuento. Cuando<br />
emplee un importe preajustado (si se ha programado), pulse una tecla de descuento.<br />
Descuento para el subtotal de mercancías<br />
~ m 100 -A<br />
Descuento para registros de artículos<br />
Ejemplo de operación de teclas<br />
675 *-A<br />
Registros de devolución<br />
Para las secciones 1 a 16, introduzca el importe de devolución y pulse la tecla f, y luego pulse la tecla de la<br />
sección correspondiente, y para las secciones 17 a 32, introduzca el importe de devolución y pulse la tecla f,<br />
y luego pulse la tecla D y pulse la tecla de la sección correspondiente (cuando emplee el precio<br />
preajustado, omita la introducción del importe). En el caso de las secciones 33 a 99, introduzca el código de<br />
sección y pulse la tecla f y la tecla d, y luego introduzca el importe de devolución y pulse la tecla d<br />
cuando sea necesario.<br />
Para la devolución de un artículo de PLU, introduzca el código de PLU y pulse la tecla f, y luego pulse la<br />
tecla p.<br />
Para la devolución de un artículo de subsección, introduzca el código de PLU y pulse la tecla f y la tecla<br />
p, y luego introduzca el importe de devolución y pulse la tecla p.<br />
Registros e impresión de números de código de no suma<br />
Podrá introducir un número de código de no suma, como pueda ser un número de código de cliente o número<br />
de tarjeta de crédito, con un máximo de 16 dígitos, en cualquier momento durante el registro de una venta. La<br />
caja registradora lo imprimirá.<br />
Para introducir un número de código de no suma, introduzca el número y pulse la tecla s.<br />
2<br />
Ejemplo de operación de teclas<br />
Ejemplo de operación de teclas<br />
Ejemplo de operación de teclas<br />
Tratos de pagos auxiliares<br />
Conversión de divisas<br />
La caja registradora permite registros de pago con divisas (sólo está disponible el pago en metálico). Pulsando<br />
la tecla V se crea un subtotal en la divisa en cuestión.<br />
Cuando emplee una tasa de cambio de divisas programada, pulse la tecla V después de los registros de los<br />
artículos, e introduzca entonces el importe recibido en la divisa si no se trata de un pago con el importe justo, y<br />
pulse la tecla A.<br />
Cuando efectúe un registro manual de la tasa de cambio de divisas, después de los registros de todos los<br />
artículos, introduzca la tasa de cambio (0,0000 a 9999,9999; necesitará un punto decimal cuando introduzca<br />
una tasa de cambio fraccionaria), y pulse la tecla V, y luego introduzca el importe en la divisa en cuestión si<br />
no es un pago del importe justo, y pulse la tecla A.<br />
En ambos casos, la vuelta se visualizará en moneda nacional y, cuando el importe recibido sea insuficiente, el<br />
déficit se mostrará en moneda nacional.<br />
10<br />
www.cashregisters.net
• Pulse la tecla l después de pulsar la tecla V para cancelar el pago en una divisa.<br />
• Si se programa, se imprime un símbolo de moneda extranjera cuando emplea una tasa<br />
preajustada.<br />
Registros de recibido a cuenta y de pagado<br />
Cuando recibe un pago a cuenta o cuando usted paga a un abastecedor, es aconsejable emplear la tecla r o<br />
la tecla R respectivamente. Los pagos en metálico sólo están disponibles en la operación RA y PO.<br />
Para el registro de recibido a cuenta, introduzca el importe y pulse la tecla r.<br />
Para el registro de pagado, introduzca el importe y pulse la tecla R.<br />
Sin ventas (cambios)<br />
Cuando deba abrir el cajón para algo que no sea una venta, pulse tan sólo la tecla A. El cajón se abrirá y la<br />
registradora imprimirá “NO VENTA” en el registro diario o en el recibo.<br />
3<br />
Puede lograr una transacción programada pulsando simplemente la tecla a.<br />
CORRECCION<br />
1<br />
Si hace un registro incorrecto relativo a una sección, PLU/subsección, porcentaje (% y &), descuento (-) o<br />
devolución, puede cancelar este registro pulsando la tecla v inmediatamente después del registro incorrecto.<br />
2<br />
Podrá cancelar cualquier registro de sección incorrecto, registro de PLU/subsección o registro de devolución de<br />
artículo hechos durante una transacción, si lo encuentra antes de finalizar la transacción (por ejemplo, pulsando<br />
la tecla A). Esta función es aplicable sólo a los registros de sección, PLU/subsección y de devolución.<br />
Para la operación, pulse la tecla v justo antes de pulsar una tecla de sección, la tecla d, o la tecla p.<br />
Para la cancelación indirecta de devolución, pulse la tecla v después de haber pulsado la tecla f.<br />
3<br />
Registros con tecla de secuencia automática (tecla a)<br />
Corrección del último registro (cancelación directa)<br />
Corrección del registro siguiente al último o anterior (cancelación indirecta)<br />
Cancelación del subtotal<br />
Puede cancelar una transacción completa. Una vez ejecutada la cancelación del subtotal, la transacción se<br />
detiene y la registradora emite un recibo. Esta función no funciona cuando se han introducido más de 30<br />
artículos.<br />
Ejemplo de operación de teclas<br />
1310 " 10 psvs<br />
⎫<br />
⎪<br />
⎪<br />
⎬<br />
⎪<br />
⎪<br />
⎭<br />
Cancelación de subtotal<br />
www.cashregisters.net<br />
11
12<br />
PARA EL ADMINISTRADOR<br />
PROGRAMACION DE LAS<br />
FUNCIONES BASICAS (Para el inicio rápido)<br />
Para programar la caja registradora, ponga la llave del administrador en el selector de modo y gírela a la<br />
posición PGM.<br />
• Los asteriscos en las tablas mostradas en los detalles de programación indican los ajustes iniciales.<br />
1<br />
Fecha<br />
Para ajustar la fecha, introduzca la fecha con 8 dígitos empleando el formato de mes-día-año (MM/DD/AAAA), y<br />
pulse entonces la tecla s .<br />
Hora<br />
Para ajustar la hora, introduzca la hora con 4 dígitos (HHMM) empleando el formato de 24 horas. Por ejemplo,<br />
para ajustar la hora a las 2:30 AM, introduzca 230; y para ajustarla a las 2:30 PM, introduzca 1430.<br />
2<br />
Programación de la fecha y de la hora<br />
Ejemplo de operación de teclas<br />
Ejemplo de operación de teclas<br />
Programación de los impuestos para la función de cálculo automático de los impuestos<br />
Antes de poder proceder a transacciones de ventas, primero deberá programar los impuestos que se cargan de<br />
acuerdo con las leyes de su estado. En esta caja registradora pueden programarse cuatro tasas de impuestos<br />
distintas. En la mayor parte de estados, sólo será necesario programar los impuestos 1. Sin embargo, si vive en<br />
una zona que tiene impuestos locales propios o impuestos de hospitalidad, podrá programar la caja registradora<br />
para que calcule estos impuestos por separado.<br />
Cuando programe el estado de impuestos para una sección, los impuestos se añadirán automáticamente a los<br />
artículos de venta asignados a la sección de acuerdo con el estado de impuestos programado para la sección.<br />
También podrá introducir manualmente los impuestos.<br />
Hay dos métodos para programar los impuestos. El método de la tasa de impuestos emplea una tasa<br />
porcentual directa por dólar. El método de tabla de impuestos requiere la información detallada de impuestos<br />
para las oficinas de impuestos estatales o locales. Emplee el método que sea aceptable para su estado. Podrá<br />
obtener los datos necesarios en la oficina de impuestos local para efectuar la programación de los impuestos.<br />
Programación de los impuestos empleando una tasa de impuestos<br />
La tasa porcentual aquí especificada se emplea para calcular los impuestos sobre subtotales imponibles.<br />
Número de impuestos (1 a 4)<br />
s 9 @<br />
@<br />
Tasa de impuestos<br />
(0,0000 a 100,0000)<br />
08262006 s<br />
(Agosto 26, 2006)<br />
1430 s<br />
Cuando el importe imponible más bajo es cero<br />
Importe imponible más bajo<br />
@ (0,01 a 999,99) s A<br />
www.cashregisters.net
Ejemplo: Programación de la tasa de impuestos del 4% como tasa de impuestos 2 con exención de impuestos<br />
de 12¢<br />
Ejemplo de operación de teclas<br />
s 9 @ 2 @ 4 @ 12 sA<br />
Tabla de impuestos (aplicable al impuesto añadido)<br />
Si se encuentra en una localidad que emplea una tabla de impuestos para el cálculo de los impuestos, podrá<br />
programar consecuentemente la caja registradora. La programación de la tabla de impuestos puede efectuarse<br />
para impuestos 1 a impuestos 4.<br />
Tabla de impuestos de muestra<br />
Tabla de impuestos de New Jersey: 6%<br />
Margen de importe de venta<br />
Impuestos Punto de división mínimo Punto de división máximo<br />
.00<br />
.01<br />
a<br />
.10<br />
.01 T .11 Q a<br />
.22<br />
.02<br />
.23<br />
a<br />
.38<br />
.03<br />
.39<br />
a<br />
.56<br />
.04<br />
.57<br />
a<br />
.72<br />
.05<br />
.73<br />
a<br />
.88<br />
.06<br />
.89<br />
a 1.10<br />
.07<br />
1.11 M1 a 1.22<br />
.08<br />
1.23<br />
a 1.38<br />
.09<br />
1.39<br />
a 1.56<br />
.10<br />
1.57<br />
a 1.72<br />
.11<br />
1.73<br />
a 1.88<br />
.12<br />
1.89<br />
a 2.10<br />
.13<br />
2.11 M2 a 2.22<br />
Para programar una tabla de impuestos, primero haga una tabla como la tabla de la derecha arriba mostrada.<br />
Partiendo de la tabla de impuestos, calcule las diferencias entre el punto de división mínimo y el siguiente (A).<br />
Luego, partiendo de las diferencias, busque ciclos irregulares (B) y ciclos regulares (C y D). Estos ciclos le<br />
mostrarán los elementos necesarios para programar la tabla de impuestos:<br />
T: El importe de impuestos recolectados en el importe imponible mínimo (Q)<br />
Q: El importe imponible mínimo<br />
M1: El valor máximo del punto de división mínimo en un ciclo regular (C)<br />
A esto lo denominamos “punto MAX”.<br />
M2: El valor máximo del punto de división mínimo en un ciclo regular (D)<br />
A esto lo denominamos “punto MAX”.<br />
M: Margen del punto de división mínimo en un ciclo regular: diferencia entre Q y M1 o entre M1 y M2.<br />
Número de uno*1<br />
Tasa*2 s 8 @ @ @ M @<br />
o dos dígitos<br />
máx. de seis dígitos<br />
(0,0001 - 99,9999%)<br />
máx. de<br />
cuatro dígitos<br />
Punto de división mínimo<br />
T @ Q @ máx. de cinco dígitos @ A<br />
máx. de<br />
tres dígitos<br />
máx. de<br />
cinco dígitos<br />
A: Diferencia entre el<br />
punto de división mínimo<br />
y el siguiente (¢)<br />
–<br />
10 (0.11 - 0.01)<br />
12 (0.23 - 0.11)<br />
16 (0.39 - 0.23)<br />
18 (0.57 - 0.39)<br />
16 (0.73 - 0.57)<br />
16 (0.89 - 0.73)<br />
22 (1.11 - 0.89)<br />
12 (1.23 - 1.11)<br />
16 (1.39 - 1.23)<br />
18 (1.57 - 1.39)<br />
16 (1.73 - 1.57)<br />
16 (1.89 - 1.73)<br />
22 (2.11 - 1.89)<br />
Repetir hasta que se introduzca el punto MAX.<br />
B: No cíclico<br />
C: Cíclico 1<br />
D: Cíclico 2<br />
www.cashregisters.net<br />
13
14<br />
*1 Primer número:<br />
(1 ó 0)<br />
Segundo número:<br />
(1 a 4)<br />
Este primer número que se introduce depende de si la diferencia entre un punto de<br />
división mínimo a introducirse y el punto de división mínimo anterior no son de menos<br />
de $1,00 ni de más de 99¢. Cuando la diferencia no sea de menos de $1,00, introduzca<br />
“1”, y cuando no sea de más de 99¢, introduzca “0” o no introduzca nada.<br />
El segundo número depende de si su tabla de impuestos debe programarse como tabla<br />
de impuestos 1, 2, 3, ó 4.<br />
*2 Si la tasa es fraccionaria (por ejemplo 4-3/8%), la fracción (3/8) se convierte a su equivalente decimal (es<br />
decir, 0,375) y se introduce la tasa resultante de 4,375. Tenga presente que la tasa nominal (R)<br />
generalmente se indica en la tabla de impuestos.<br />
• Limitaciones para el registro de puntos de división mínimos<br />
La caja registradora puede trabajar con una tabla de impuestos que conste hasta de 72 puntos de división como<br />
máximo. (El número máximo de puntos de división es de 36 cuando la diferencia de puntos de división es de<br />
$1,00 o más.) Si el número de puntos de división excede la capacidad de tablas de la caja registradora, deberá<br />
emplear entonces el registro manual.<br />
PROGRAMACION DE FUNCIONES AUXILIARES<br />
1<br />
Programación de secciones<br />
La mercancía se puede clasificar en un máximo de 99 secciones.<br />
Estado de sección<br />
*<br />
D<br />
ABCDEFGH @<br />
Tecla de sección A<br />
Para ajustar todo ceros<br />
*Para programar las secciones 17 a 32, pulse la tecla de cambio de sección en este punto.<br />
Para las secciones 33 a 99:<br />
Para ajustar todo ceros<br />
Código de sección d ABCDEFGH @ A<br />
Para programar otra sección, comience desde el principio sin pulsar la tecla A.<br />
Elemento: Selección: Registro:<br />
A Estado de impuestos 4 Imponible 1<br />
No imponible* 0<br />
B Estado de impuestos 3 Imponible 1<br />
No imponible* 0<br />
C Estado de impuestos 2 Imponible 1<br />
No imponible* 0<br />
D Estado de impuestos 1 Imponible (*para las secciones 1 a 10) 1<br />
No imponible (*para las secciones 11 a 99) 0<br />
E SICS / Normal SICS 1<br />
Normal* 0<br />
F Signo Sección negativa 1<br />
Sección positiva* 0<br />
G Límite de dígitos de entrada 0-7 (ajuste inicial: 7)<br />
H Tipo de registros de precio unitario Abertura y preajuste 3<br />
Sólo preajuste 2<br />
Sólo abertura* 1<br />
Tecla de sección invalidada 0<br />
www.cashregisters.net
Estado de impuestos (imponible 1 a 4 / no imponible)<br />
• Cuando se efectúa un registro de una sección imponible en una transacción, los impuestos se calculan<br />
automáticamente de acuerdo con la tabla o tasa de impuestos asociada.<br />
SICS (Venta en metálico de un solo artículo)<br />
• Si se efectúa primero un registro de una sección programada para SICS, la venta se finalizará como venta de<br />
pago en metálico así que se pulse la tecla de la sección.<br />
Límite de dígitos de entrada<br />
• El límite es eficaz para operaciones en el modo REG y puede pasarse por alto en el modo MGR.<br />
Precio unitario preajustado<br />
Para programar otra sección, comience desde el principio sin pulsar la tecla A.<br />
2<br />
Para programar cero<br />
Para las secciones 33 a 99:<br />
Código de sección<br />
Para programar cero<br />
Precio unitario d s<br />
Programación de PLU (codificación de precios) y subsección<br />
La función de PLU permite realizar registros rápidos con las teclas en los que el precio se busca<br />
automáticamente al introducir un código. La subsección es un tipo de “PLU abierta”, que requiere que usted<br />
introduzca un precio detrás del código de PLU. Pueden realizarse un máximo de 1.200 ajustes de<br />
PLU/subsección. Cada una pertenece a una sección y adquiere los parámetros de la sección (estado de<br />
impuestos, SICS y signo).<br />
La caja registradora ya está programada de modo que los 1.200 códigos están asignados a las PLU asociadas<br />
con la sección 1 y precio unitario preajustado “0”.<br />
Asignación de precios unitarios y de secciones asociadas<br />
* 2 Código de PLU<br />
Precio unitario<br />
(máx. seis dígitos)<br />
*<br />
D<br />
Para borrar un código de PLU, emplee la secuencia siguiente:<br />
Código de PLU p v<br />
(máx. seis dígitos) A<br />
Para borrar la PLU siguiente<br />
Para borrar otra PLU<br />
Tecla de sección<br />
*Para programar las secciones 17 a 32, pulse la tecla de cambio de sección en este punto.<br />
p<br />
Para programar cero<br />
*<br />
D<br />
1<br />
*1: Para asignar las secciones 17 a 32, pulse la tecla de cambio de sección en este punto.<br />
Cuando la sección asociada es una de las secciones 33 a 99:<br />
* 2 Código de PLU<br />
A<br />
A<br />
Precio unitario* 3<br />
Tecla de sección<br />
(máx. seis dígitos) asociada A<br />
Para programar cero<br />
Código de<br />
Precio unitario* p sección asociada d s<br />
3<br />
(1 a 99)<br />
*2: 1 a 1.200 (Dependiendo del ajuste del tamaño de la memoria EJ, hasta 200)<br />
*3: Para una subsección, ajuste el importe de límite del registro de precio unitario.<br />
(máx. seis dígitos) A<br />
www.cashregisters.net<br />
15
16<br />
Selección de PLU/subsección<br />
*1: 1 a 1.200 (Dependiendo del ajuste del tamaño de la memoria EJ, hasta 200)<br />
*2: 0 para la subsección o 1 para PLU (ajuste inicial: 1)<br />
3<br />
Tasa para %, & y V<br />
*: Tasa<br />
0,00 – 100,00 (Tasa de porcentaje)<br />
0,0000 – 9999,9999 (Tasa de conversión de divisas)<br />
Importe para -<br />
Límite de tasa porcentual para % y &<br />
29<br />
Para programar cero<br />
Límite de porcentaje (0,00 - 100,00%) o % & A<br />
s @<br />
* 1 Para programar “0”<br />
Código de PLU p * 2A Programación de teclas misceláneas<br />
Para programar cero<br />
%<br />
V<br />
*Tasa o<br />
Para programar otra tasa<br />
&<br />
A<br />
s<br />
Para programar la PLU siguiente<br />
Para programar otra PLU<br />
Para programar cero<br />
Importe de descuento (máx. seis dígitos) - A<br />
Para programar otra tecla de porcentaje<br />
A<br />
Deberá emplear un punto decimal para<br />
ajustar tasas fraccionarias.<br />
• Los registros porcentuales que exceden al límite superior pueden suprimirse en el modo MGR.<br />
• 10,00% puede registrarse como 10 o 10P00. La tecla P es<br />
necesaria sólo para los registros fraccionarios.<br />
www.cashregisters.net
Parámetros de función para %, & y -<br />
Para programar “0” para todos los artículos<br />
*: Elemento: Selección: Registro:<br />
A Estado de impuestos 4 Imponible 1<br />
No imponible* 0<br />
B Estado de impuestos 3 Imponible 1<br />
No imponible* 0<br />
C Estado de impuestos 2 Imponible 1<br />
No imponible* 0<br />
D Estado de impuestos 1 Imponible 1<br />
No imponible* 0<br />
E Signo +/- Signo + (recargo) 0<br />
Signo - (descuento)* 1<br />
F % de artículo / _ de artículo Habilitar* 0<br />
Inhabilitar 1<br />
G % de subtotal / _ de subtotal Habilitar* 0<br />
Inhabilitar 1<br />
H Límite de dígitos de entrada para la tecla 0-7 (ajuste inicial: 7)<br />
de descuento<br />
Cuando se programen las teclas de porcentaje, introduzca siempre 0 para H.<br />
El límite de dígitos de entrada es eficaz para operaciones en el modo REG, pero puede suprimirse en el<br />
modo MGR.<br />
Parámetros de función para V<br />
*: Elemento: Selección: Registro:<br />
A Registro de tasa abierta Habilitar* 0<br />
Inhabilitar 1<br />
B Registro de tasa preajustada Habilitar* 0<br />
Inhabilitar 1<br />
Límite de dígitos de entrada para r, R y t<br />
Límite de dígitos de entrada<br />
@<br />
*ABCDEFGH o<br />
Para programar otra tecla<br />
%<br />
-<br />
Para programar “0” para todos los artículos<br />
*AB @ V A<br />
A<br />
@ r, R A<br />
(sólo para entrada manual)<br />
o t<br />
• Para rR, introduzca 0 a 9 (dígitos), y para t (impuestos manuales), introduzca 0 a 7 (dígitos). Como<br />
ajuste inicial, se ajustan 9 para r y R y 7 para t.<br />
El límite de dígitos de entrada es de hecho para operaciones en el modo REG, pero puede suprimirse en el<br />
modo MGR.<br />
&<br />
www.cashregisters.net<br />
17
18<br />
Parámetros de función para C, c y A (cuando se usa como tecla CA)<br />
*1:Elemento: Selección: Registro:<br />
A Impresión de pie del recibo Habilitar 1<br />
Inhabilitar* 0<br />
B Registro de importe recibido Obligatorio 1<br />
No obligatorio (para la tecla CA o CHK)* 0<br />
Invalidar (para la tecla CH)* 0<br />
C Límite de dígitos de entrada 0-8<br />
Impresión de pie del recibo<br />
• Esta opción decide si la registradora debe imprimir un mensaje en la parte inferior del recibo cuando se usa<br />
una de estas teclas de finalización especificada. Para programar un mensaje del membrete del pie de recibo,<br />
consulte la sección “Mensajes de membrete” en la página 21.<br />
Límite de dígitos de entrada<br />
• Para las teclas c y C, programe un importe de entrada de límite superior para el importe recibido. Para la<br />
tecla A, programe un importe de entrada de límite superior para el importe total en metálico que puede<br />
manipularse en la caja registradora.<br />
4<br />
* 1 Para programar “0” para todos los artículos<br />
ABC @<br />
*<br />
o s, C c A<br />
2<br />
Para programar otra tecla<br />
Programación de texto<br />
* 2 : Pulse la tecla s para ajustar la tecla CA.<br />
La caja registradora le permite programar el texto para los nombres de dependiente, nombres de artículos de<br />
sección, nombres de artículos de PLU/subsección, etc., cuando sea necesario. Hay dos formas de programar el<br />
texto: empleando las teclas de caracteres del teclado o introduciendo los códigos de los caracteres con las<br />
teclas numéricas del teclado.<br />
Empleo de las teclas de caracteres del teclado<br />
Podrá introducir caracteres de acuerdo con los caracteres pequeños que hay en la esquina inferior derecha de<br />
las teclas.<br />
Las teclas siguientes se emplean como teclas de control para la entrada de caracteres:<br />
H Cambia entre letras mayúsculas y minúsculas. El ajuste inicial es el de letras mayúsculas<br />
seleccionadas. Una vez se ha pulsado la tecla H, se fija la entrada para letras minúsculas. “_” se<br />
enciende en la posición SHIFT del visualizador cuando se selecciona la entrada de letras minúsculas.<br />
N Pulse la tecla N para introducir caracteres numéricos. Por ejemplo para introducir “1”, pulse la tecla<br />
N y la tecla 1. Si pulsa la tecla 1 sin pulsar la tecla N, la caja registradora se establece en<br />
el modo de entrada de códigos de caracteres.<br />
Una vez se ha pulsado la tecla N, se fija la entrada para caracteres numéricos. “_” se enciende en<br />
la posición NUMBER del visualizador cuando se selecciona la entrada de caracteres numéricos.<br />
W Cambia entre caracteres de tamaño normal y de tamaño doble. En el ajuste inicial se han seleccionado<br />
los caracteres de tamaño normal. Una vez se pulsa la tecla W, se fija la entrada para caracteres de<br />
tamaño doble. “_” se enciende en la posición DC del visualizador cuando se selecciona la entrada de<br />
caracteres de tamaño doble.<br />
B Hace retroceder el cursor, borrando el carácter de la izquierda.<br />
www.cashregisters.net
Para programar la palabra “Clerk01” con la letra “C” de tamaño doble.<br />
Para que la letra “C” sea de tamaño doble Wg<br />
Para que el tamaño de los caracteres vuelva al normal W<br />
Para cambiar a letras minúsculas H<br />
hijk<br />
Para introducir números N01<br />
Introducción de códigos de caracteres con las teclas numéricas del teclado<br />
Los números, las letras y los símbolos pueden programarse introduciendo el código de carácter y la tecla :.<br />
(Si se selecciona la entrada de caracteres numéricos, es decir, “_” se enciende en la posición NUMBER del<br />
visualizador, pulse la tecla N para que se apague.) Prepare la tabla de códigos de caracteres alfanuméricos<br />
de la página siguiente. De este modo, podrá programar caracteres distintos a los que hay en las teclas.<br />
• Pueden obtenerse caracteres de tamaño doble introduciendo el código de caracteres 253.<br />
• DEBEN introducirse los tres dígitos del código del carácter (aunque empiece con cero).<br />
Para programar la palabra “SHARP” en caracteres de tamaño doble.<br />
253 : 083 : 072 : 065 : 082 : 080 :<br />
S H A R P<br />
Cuando pulsa una tecla del número apropiado (número de código de tarea) y pulsa la tecla P para entrada de<br />
texto justo después de haber comenzado la programación con la tecla s, la caja registradora quedará<br />
automáticamente preparada para la entrada siguiente.<br />
Para los códigos de los caracteres alfanuméricos, consulte la tabla de la página 40 de la versión<br />
inglesa.<br />
Texto de sección<br />
s 1 P<br />
*<br />
D<br />
Código de sección<br />
(1 a 99)<br />
Para programar otra sección<br />
*Para programar las secciones 17 a 32, pulse la tecla de cambio de sección.<br />
Ejemplo de operación de teclas<br />
s 1 P!FRUTA sA (Programación de FRUTA para la sección 1)<br />
Texto de PLU (etiqueta de artículo)<br />
Tecla de<br />
sección<br />
d<br />
Código<br />
s 2 P de PLU p<br />
Para programar otra PLU<br />
Para mantener el ajuste vigente<br />
Teclas de caracteres<br />
(máx. 12 dígitos)<br />
Para mantener el ajuste vigente<br />
s<br />
Cuando el siguiente código de PLU sigue<br />
inmediatamente al que se acaba de introducir<br />
A<br />
Teclas de caracteres<br />
(máx. 12 dígitos) s A<br />
www.cashregisters.net<br />
19
Lista de textos de función<br />
Número<br />
de función<br />
*<br />
*<br />
*<br />
Texto de función<br />
s P<br />
1<br />
2<br />
3<br />
4<br />
5<br />
6<br />
7<br />
8<br />
9<br />
10<br />
11<br />
12<br />
13<br />
14<br />
15<br />
16<br />
17<br />
18<br />
19<br />
20<br />
21<br />
22<br />
23<br />
24<br />
25<br />
26<br />
27<br />
28<br />
29<br />
30<br />
31<br />
32<br />
33<br />
34<br />
35<br />
*Número de función<br />
3 (máx. 2 dígitos) @<br />
Tecla o función Ajuste inicial<br />
%1<br />
(–)<br />
%1<br />
%2 %2<br />
Total neto de ventas NETO 1<br />
Subtotal neto de imponible 1 TASABLE1<br />
Total bruto de impuestos 1 TAX1 GRS<br />
Total de impuestos 1 de registros de devoluciones TAX1 DEV<br />
Total neto de impuestos 1 TAX1<br />
Exención de impuestos 1 TX1 EXNT<br />
Subtotal neto de imponible 2 TASABLE2<br />
Total bruto de impuestos 2 TAX2 GRS<br />
Total de impuestos 2 de registros de devoluciones TAX2 DEV<br />
Total neto de impuestos 2 TAX2<br />
Exención de impuestos 2 TX2 EXNT<br />
Subtotal neto de imponible 3 TASABLE3<br />
Total bruto de impuestos 3 TAX3 GRS<br />
Total de impuestos 3 de registros de devoluciones TAX3 DEV<br />
Total neto de impuestos 3 TAX3<br />
Exención de impuestos 3 TX3 EXNT<br />
Subtotal neto de imponible 4 TASABLE4<br />
Total bruto de impuestos 4 TAX4 GRS<br />
Total de impuestos 4 de registros de devoluciones TAX4 DEV<br />
Total neto de impuestos 4 TAX4<br />
Exención de impuestos 4 TX4 EXNT<br />
Total bruto de impuestos manuales MTAX GRS<br />
Total de impuestos manuales de devoluciones MTAX DEV<br />
Total neto de impuestos manuales M-TAX<br />
Para programar el texto de otra función<br />
* Número de función: Vea la “Lista de textos de función” mostrada a continuación.<br />
Total de exención desde GST GST EXNT<br />
Total de PST PST TTL<br />
Total de GST GST TTL<br />
Total de impuestos TTL TAX<br />
Neto NETO<br />
Total de ventas incluyendo el total de impuestos NETO 2<br />
Devoluciones DEVOLUC.<br />
Cancelación de artículos ANUL ART<br />
Número<br />
de función<br />
Los elementos marcados con “ * ” son sólo para Canadá.<br />
20<br />
*<br />
36<br />
37<br />
38<br />
39<br />
40<br />
41<br />
42<br />
43<br />
44<br />
45<br />
46<br />
47<br />
48<br />
49<br />
50<br />
51<br />
52<br />
53<br />
54<br />
55<br />
56<br />
57<br />
58<br />
59<br />
60<br />
61<br />
62<br />
63<br />
64<br />
65<br />
66<br />
67<br />
68<br />
69<br />
Para mantener el ajuste vigente<br />
Teclas de caracteres<br />
(máx. 8 dígitos) s A<br />
Tecla o función Ajuste inicial<br />
Modo de cancelación ANULA<br />
Cancelación del administrador ANUL MGR<br />
Cancelación de subtotal ANUL ST<br />
Sin venta NO VENTA<br />
Recibido a cuenta RECI. CTA<br />
Pagos PAGOS<br />
Contador de clientes TRANSAC.<br />
Total de ventas NETO 3<br />
Metálico CAJA<br />
Cheque CHEQUE<br />
Cargo bruto CREDITO<br />
Cargo de devoluciones CREDITO–<br />
Conversión de divisas 1 (preajustada) DIVISA 1<br />
Conversión de divisas 2 (abierta) DIVISA 2<br />
Metálico en el cajón EFEC. CAJ<br />
Metálico+cheque en el cajón CACH CAJ<br />
Cambio de cheques CAMB. CH<br />
Exento de IVA IVA EXNT<br />
Total de secciones (+) DEPT TL<br />
Total de secciones (–) DEPT(–)<br />
Subtotal SUBTOTAL<br />
Subtotal de mercancías ST MERCA<br />
Total TOTAL<br />
Cambio CAMBIO<br />
Artículos ARTICULO<br />
Título de informe de secciones DEPT<br />
Título de informe de PLU PLU<br />
Título de informe de transacciones TRANS.<br />
Título de informe de dependientes EMPLEADO<br />
Título de informe horario HORARIO<br />
Símbolo de no adición #<br />
Título de copia de recibo COPIA<br />
Título de informe EJ EJ<br />
Título de fin de informe EJ FIN EJ<br />
www.cashregisters.net
Nombres de dependiente<br />
Código de<br />
Teclas de caracteres<br />
dependiente<br />
s 5 P @ (máx. 8 dígitos) s<br />
Mensajes de membrete<br />
La caja registradora puede imprimir mensajes programados en cada recibo. En el modelo estándar, se imprime<br />
el membrete gráfico en el recibo. Si desea imprimir mensajes de membrete, cambie el formato de impresión de<br />
mensajes de membrete. (Para los detalles de la programación, vea la página 27.) A continuación se enumeran<br />
las opciones:<br />
* Tipo de “Mensaje de 3 líneas de encabezamiento”: 1 a 3<br />
Tipo de “Mensaje de 3 líneas de pie de recibo”: 4 a 6<br />
Tipo de “Mensaje de 6 líneas de encabezamiento”: 1 a 6<br />
Tipo de “Mensaje de 3 líneas de encabezamiento y 3 líneas de pie de recibo”: 1 a 6 (1 a 3 como<br />
encabezamiento, 4 a 6 como pie de recibo)<br />
Símbolo de divisas<br />
(1-15)<br />
Para programar otro dependiente<br />
*Número<br />
de líneas<br />
s 4 P @<br />
(1-6)<br />
El símbolo de divisas para la tecla V se imprime con un importe de cambio de divisas.<br />
s 6 P<br />
Para mantener el ajuste vigente<br />
Para mantener el ajuste vigente<br />
Para mantener el ajuste vigente<br />
A<br />
Teclas de caracteres<br />
(máx. 24 dígitos) s A<br />
Para programar otra línea<br />
Teclas de caracteres<br />
(máx. 4 dígitos) s A<br />
www.cashregisters.net<br />
21
22<br />
PROGRAMACION AVANZADA<br />
1<br />
El número de caja registradora y los números consecutivos se imprimen en el recibo o en el registro diario.<br />
2<br />
Programación de número de caja registradora y de números consecutivos<br />
Número de caja registradora<br />
Número de caja registradora (de uno a seis dígitos)<br />
s 1 @ s A<br />
Números consecutivos<br />
Programación del registro diario electrónico (EJ)<br />
La caja registradora incorpora la función de registro diario electrónico (EJ). En el ajuste inicial, pueden<br />
almacenarse un máximo de 2.000 líneas en la memoria. Si desea almacenar más datos de registro diario, podrá<br />
ampliarla hasta un máximo de 3.000 líneas.<br />
Para leer los datos del registro diario, consulte el apartado de “LECTURA Y REPOSICION DE INFORMES EJ”<br />
(página 30).<br />
Tipo de memoria de EJ<br />
Cuando se ejecuta este procedimiento, los datos de EJ se borran y los datos de PLU (datos de<br />
programación y datos de ventas) se reponen a los valores de ajuste inicial después de haber<br />
borrado todos los datos aunque se seleccione el mismo tipo de la memoria.<br />
s 90 @ A<br />
*A<br />
*A: 0 para 2.000 líneas de EJ y 1.200 códigos de PLU (ajuste inicial)<br />
1 para 3.000 líneas de EJ y 200 códigos de PLU<br />
Parámetros de función para el EJ<br />
Para ajustar a “0” el número de la caja registradora<br />
Para empezar a contar desde 0001<br />
Un número (de uno a cuatro dígitos) que<br />
s 2 @ sea inferior en uno al número inicial deseado s A<br />
s 68 @ *ABCDEFGH Para ajustar “00000000”<br />
s A<br />
www.cashregisters.net
* Elemento: Selección: Registro:<br />
A Introduzca siempre 0. (Posición fija) 0<br />
B Introduzca siempre 0. (Posición fija) 0<br />
C Impresión temporal de EJ durante una Inhabilitar 0<br />
transacción Habilitar* 1<br />
D Impresión de EJ y borrado de datos de No* 0<br />
EJ cuando se emite el informe Z1 general Sí 1<br />
E Tipo de registros de operación en el Detalles* 0<br />
modo PGM Sólo información de encabezamiento 1<br />
F Tipo de registros de operación en el Detalles* 0<br />
modo REG/MGR/VOID Total 1<br />
G Impresión comprimida para datos de EJ No (tamaño normal) 0<br />
Sí (tamaño pequeño)* 1<br />
H Acción cuando el área de memoria de Continuar 0<br />
EJ está llena Avisar (aviso de casi llena)* 1<br />
Bloqueo (con aviso de casi llena) 2<br />
En el ajuste inicial, se marca un asterisco.<br />
Impresión temporal de EJ durante una transacción<br />
• Si selecciona “Sí”, podrá imprimir los datos del registro diario de la transacción actual registrada en la<br />
memoria de EJ pulsando la tecla R durante la transacción. Para emplear esta función por completo, la<br />
caja registradora está programada para la impresión del recibo y la función de activación/desactivación<br />
(ON/OFF) de recibo está desactivada (OFF).<br />
Tipo de registros de operación en el modo PGM<br />
• Se imprime sólo la información del encabezamiento durante la operación de lectura de datos de<br />
programación.<br />
Para informes X/Z, se imprime sólo la información del encabezamiento.<br />
Acción cuando el área de memoria de EJ está llena<br />
• Según el ajuste inicial, cuando la memoria para EJ está casi llena, la caja registradora muestra puntos<br />
decimales en las posiciones octava y novena del visualizador (mensaje de memoria EJ casi llena), y la caja<br />
registradora sigue almacenando nuevos datos mientras va borrando los más antiguos. Cuando se seleccione<br />
“0”, la caja registradora ya no mostrará el mensaje de memoria EJ casi llena. Cuando se seleccione “2”, la<br />
caja registradora mostrará el mensaje de memoria EJ casi llena y cuando se llene totalmente la memoria, la<br />
caja registradora bloqueará la entrada de ventas/datos con una visualización del mensaje de memoria llena<br />
“ ”. Sólo podrá emitir un informe EJ.<br />
3<br />
Programación 1 de selección de diversas funciones<br />
La caja registradora ofrece varias funciones detalladas como las que se mencionan a continuación.<br />
• Selección de función para teclas misceláneas<br />
• Formato de impresión<br />
• Formato de impresión de recibos<br />
• Selección de función para impuestos<br />
• Otras<br />
Para esta programación, se aplica el estilo de entrada de código de tarea. Podrá seguir la programación hasta<br />
que pulse la tecla A para la programación que se describe a continuación. Para seguir la programación,<br />
repita desde la entrada de un código de tarea.<br />
* ABCDEFGH<br />
1Código de tarea<br />
Para ajustar “00000000”<br />
s A<br />
s @ *2<br />
*1 Introduzca el código de tarea empleando las teclas numéricas especificadas en cada sección de abajo.<br />
*2 Los detalles de la entrada de datos se enumeran en cada tabla de cada sección de abajo.<br />
www.cashregisters.net<br />
23
Selección de función para teclas misceláneas<br />
Código de tarea: 5<br />
* Elemento: Selección: Registro:<br />
A PO en el modo REG Habilitar la operación PO en el modo REG* 0<br />
Inhabilitarla 1<br />
B RA en el modo REG Habilitar la operación RA en el modo REG* 0<br />
Inhabilitarla 1<br />
C Cancelación de subtotal en el modo Habilitar la cancelación de subtotal en el modo REG* 0<br />
REG Inhabilitarla 1<br />
D Cancelación indirecta en el modo REG Habilitar la cancelación indirecta en el modo REG* 0<br />
Inhabilitarla 1<br />
E Cancelación directa en el modo REG Habilitar la cancelación directa en el modo REG* 0<br />
Inhabilitarla 1<br />
F Disponibilidad de la tecla de Habilitar registros de devolución en el modo REG* 0<br />
devoluciones Inhabilitarlos 1<br />
G No venta en el modo REG Habilitar las operaciones de no venta en el modo REG* 0<br />
Inhabilitarlas 1<br />
H Disponibilidad de cantidades Habilitar el registro de cantidades fraccionarias 0<br />
fraccionarias Inhabilitarlo* 1<br />
Formato de impresión<br />
Código de tarea: 6<br />
* Elemento: Selección: Registro:<br />
A Estilo de impresión Empleo de la impresora para impresión del registro diario 0<br />
Empleo de la impresora para impresión de recibos* 1<br />
B Formato de impresión de recibos Total 0<br />
Detallado* 1<br />
C Impresión de la hora en todos los Habilitar la impresión de la hora* 0<br />
recibos/registro diario Inhabilitarla 1<br />
D Impresión de la fecha en todos los Habilitar la impresión de la fecha* 0<br />
recibos/registro diario Inhabilitarla 1<br />
E Impresión del N.° consecutivo en todos Habilitar la impresión del N.° consecutivo* 0<br />
los recibos/registro diario Inhabilitarla 1<br />
F Introduzca siempre 0. (Posición fija) 0<br />
G Salto de ceros para informe de ventas Inhabilitar el salto de ceros 0<br />
de PLU Habilitar el salto de ceros* 1<br />
H Salto de ceros para informes de ventas Inhabilitar el salto de ceros 0<br />
completas, de dependientes y horarios Habilitar el salto de ceros* 1<br />
Estilo de impresión<br />
• Incluso cuando se selecciona la impresión de recibos, el motor de rebobinado del registro diario será<br />
accionado en los modos PGM, OP X/Z, X1/Z1 y X2/Z2 para poder bobinar los informes de ventas y de<br />
programación.<br />
Formato de impresión de recibos<br />
Código de tarea: 7<br />
* Elemento: Selección: Registro:<br />
A Introduzca siempre 0. (Posición fija) 0<br />
B Introduzca siempre 0. (Posición fija) 0<br />
C Impresión de subtotal con una pulsación Inhabilitar la impresión de subtotales* 0<br />
de la tecla de subtotal Habilitarla 1<br />
D Impresión de mercancías con una pulsa- Inhabilitar la impresión de subtotal de mercancías* 0<br />
ción de la tecla de subtotal de mercancías Habilitarla 1<br />
E Introduzca siempre 0. (Posición fija) 0<br />
F Introduzca siempre 0. (Posición fija) 0<br />
G Introduzca siempre 0. (Posición fija) 0<br />
H Impresión del número de compras Habilitar la impresión del número de compras* 0<br />
24<br />
Inhabilitarla 1<br />
www.cashregisters.net
Selección de función para impuestos<br />
Código de tarea: 15<br />
* Elemento: Selección: Registro:<br />
A a F Introduzca siempre 0. (Posición fija) 0<br />
G Disponibilidad de borrado de los Habilitar el borrado de impuestos en el modo REG* 0<br />
impuestos en el modo REG Inhabilitarlo 1<br />
H Disponibilidad de entrada de impuestos Habilitar la entrada de impuestos manuales en el modo REG* 0<br />
manuales en el modo REG Inhabilitarla 1<br />
Otras programaciones<br />
Código de tarea: 61<br />
* Elemento: Selección: Registro:<br />
A Introduzca siempre 0. (Posición fija) 0<br />
B Introduzca siempre 0. (Posición fija) 0<br />
C Disponibilidad de sección y PLU/ Inhabilitar la programación de sección y PLU/subsección negativas 0<br />
subsección negativas Habilitarla* 1<br />
D Trato fraccionario Redondeo (4 por defecto, 5 por exceso)* 0<br />
Aumento a la unidad 1<br />
Descartar el trato fraccionario 2<br />
E Empleo de la tecla : Empleo de la tecla : como tecla 00* 0<br />
Empleo de la tecla : como tecla 000 1<br />
F Formato de la hora Empleo del formato de 12 horas* 0<br />
Empleo del formato de 24 horas 1<br />
G Formato de la fecha Empleo del formato de mes-día-año* 0<br />
Empleo del formato de día-mes-año 1<br />
Empleo del formato de año-mes-día 2<br />
H Posición del punto decimal (desde la 0 a 3<br />
derecha) (TAB) (ajuste inicial: 2)<br />
Código de tarea: 62<br />
* Elemento: Selección: Registro:<br />
A Introduzca siempre 0. (Posición fija) 0<br />
B Activación del pitido de error Por error de bloqueo* 0<br />
Por operación incorrecta 1<br />
C Disponibilidad del sonido de Habilitar el sonido* 0<br />
accionamiento de teclas Inhabilitarlo 1<br />
D Teclado con memoria intermedia Sí* 0<br />
No 1<br />
E Disponibilidad de la operación del Habilitar la operación del modo de cancelación* 0<br />
modo de cancelación Inhabilitarla 1<br />
F Impresión de datos de entradas en el<br />
modo de cancelación en los informes Z2<br />
Habilitar la impresión de datos de entradas en el<br />
modo de cancelación en los informes Z2*<br />
0<br />
Inhabilitarla 1<br />
G Impresión de datos de entradas en el<br />
modo de cancelación en los informes Z1<br />
Habilitar la impresión de datos de entradas en el<br />
modo de cancelación en los informes Z1*<br />
0<br />
Inhabilitarla 1<br />
H Adición de datos de total de ventas No* 0<br />
horario en el modo de cancelación Sí 1<br />
www.cashregisters.net<br />
25
26<br />
Código de tarea: 66<br />
* Elemento: Selección: Registro:<br />
A Impresión de un recibo después de la Sólo el total 0<br />
transacción Detalles* 1<br />
B Impresión del importe cuando el precio Inhabilitar la impresión* 0<br />
unitario de PLU/subsección es cero Habilitarla 1<br />
C Impresión del subtotal para conversión Habilitar la impresión* 0<br />
de déficit Inhabilitarla 1<br />
D Introduzca siempre 0. (Posición fija) 0<br />
E Impresión comprimida en el registro diario Inhabilitar la impresión comprimida (tamaño normal) 0<br />
en los modos PGM, OP X/Z, X1/Z1 y X2/Z2 Habilitar la impresión comprimida (tamaño pequeño)* 1<br />
F Impresión comprimida en el registro Inhabilitar la impresión comprimida (tamaño normal) 0<br />
diario en los modos REG, MGR y VOID Habilitar la impresión comprimida (tamaño pequeño)* 1<br />
G Impresión del mensaje del membrete Inhabilitar la impresión del mensaje del membrete en el registro diario* 0<br />
en el registro diario Habilitar la impresión del mensaje del membrete en el registro diario 1<br />
H Impresión de pie de recibo Impresión de pie de recibo en todos los recibos* 0<br />
Impresión de pie de recibo con la tecla de función<br />
seleccionada en el momento de la finalización<br />
1<br />
Impresión comprimida<br />
• Esta programación sólo es válida cuando se selecciona la impresión del registro diario. No afecta la<br />
impresión de EJ. (Para la programación de EJ, consulte la página 22.)<br />
Código de tarea: 70<br />
* Elemento: Selección: Registro:<br />
A Cómputo de precios divididos Cantidad* 0<br />
Paquete 1<br />
B Disponibilidad de entrada de precios Habilitar sólo la entrada de multiplicación* 0<br />
con multiplicación/división Habilitar la entrada de multiplicación y la de división de precios 1<br />
C Introduzca siempre 0. (Posición fija) 0<br />
D Introduzca siempre 0. (Posición fija) 0<br />
E Impresión de impuestos cuando GST Habilitar la impresión de impuestos* 0<br />
es IVA Inhabilitarla 1<br />
F Impresión de exención de GST en Habilitar la impresión de exención de GST* 0<br />
informes X/Z Inhabilitarla 1<br />
G y H Sistema de cálculo de impuestos Impuestos automáticos* 00<br />
Impuestos canadienses (número del tipo de impuestos) 01 a 11<br />
Sistema de cálculo de impuestos<br />
• Para el sistema de impuestos de EE.UU., seleccione “auto-tax” (impuestos automáticos).<br />
4<br />
Programación 2 de selección de diversas funciones<br />
Modo de ahorro de energía<br />
s 10 @ *ABCD s A<br />
* Elemento: Selección: Registro:<br />
A Entrar en el modo de ahorro de energía Sí* 0<br />
cuando se visualice la hora No 1<br />
B a D Tiempo (mín.) para entrar en el modo de ahorro de 001-254 ó 999<br />
energía desde que se efectuó la última operación (Ajuste inicial: 030)<br />
Cuando se ajusta 999 para B a D, se inhabilita el establecimiento en el modo de ahorro de<br />
energía.<br />
www.cashregisters.net
Formato de impresión del mensaje del membrete<br />
Podrá seleccionar el número de líneas del mensaje del membrete, y la posición en la que se imprime en el<br />
recibo o registro diario.<br />
s 11 @ *A Para ajustar “0”<br />
s A<br />
*A: Tipo de mensaje del membrete<br />
0: Mensaje de 3 líneas de encabezamiento sin membrete gráfico<br />
1: Sólo membrete gráfico (ajuste inicial)<br />
2: Mensaje de 3 líneas de pie de recibo con membrete gráfico<br />
3: Mensaje de 6 líneas de encabezamiento<br />
4: Mensaje de 3 líneas de encabezamiento con membrete gráfico<br />
5: Mensaje de 3 líneas de encabezamiento y mensaje de 3 líneas de pie de recibo<br />
Ajuste de fin de intervalo en línea<br />
Ajuste inicial: 007<br />
Densidad de impresora térmica<br />
* El ajuste inicial es 50. Para oscurecer la impresión, ajuste un número mayor, y para que sea más clara, ajuste<br />
un número menor.<br />
Selección del idioma<br />
s 35 @<br />
s 50 @<br />
*Idioma: 0: Inglés 2: Francés 3: Español (ajuste inicial: Inglés)<br />
Cuando cambie el idioma, los textos como los del nombre de dependiente, mensaje de membrete y<br />
los textos de funciones, que usted haya programado, se repondrán a los ajustes iniciales. Por lo<br />
tanto, antes de programar nombres de dependiente, mensajes de membrete y textos de funciones,<br />
se debe hacer la selección del idioma.<br />
Especificación de dependientes de instrucción para el modo de instrucción<br />
Para los detalles sobre la instrucción de dependientes, consulte el “MODO DE INSTRUCCION” en la página 28.<br />
s 86 @<br />
Tiempo vencido<br />
(1 a 255 seg.)<br />
Para ajustar “0”<br />
*Densidad de<br />
impresora (00-99) s A<br />
s 88 @ *Idioma<br />
Para ajustar “0”<br />
(0, 2 ó 3) A<br />
Para cancelar<br />
s<br />
A<br />
Código de dependiente<br />
(1 a 25) s A<br />
www.cashregisters.net<br />
27
28<br />
Programación de la tecla AUTO — Tecla de secuencia automática —<br />
Si se programan transacciones que se realizan con frecuencia o secuencias de informes para la tecla a ,<br />
puede volver a llamar estas transacciones y/o informes pulsando simplemente la tecla a en las operaciones<br />
de teclas.<br />
Programación para a ; registro de un artículo de PLU 2 (precio unitario programado: 1,50) y de un artículo de<br />
la sección 6 (precio unitario: 1,00)<br />
5<br />
Ejemplo de operación de teclas<br />
Ajuste<br />
AUTO<br />
Borrar<br />
Transacción a a A<br />
máx. 25 veces<br />
a<br />
2 p 100 + aA<br />
Lectura de programas almacenados<br />
La máquina le permitirá leer todos los programas almacenados en el modo PGM.<br />
Secuencia de las teclas para la lectura de programas almacenados<br />
Nombre del informe Secuencia de teclas<br />
Informe de programación 1 A<br />
Informe de programación 2 2 A<br />
Informe de programación de tecla automática 1 A<br />
Informe de programación de densidad de impresora 3 A<br />
Informe de programación de PLU Código inicial de PLU @ Código final de PLU p<br />
• Para detener la lectura del informe de programación 1 o del informe de programación de PLU,<br />
gire el selector de modo a la posición MGR.<br />
• Cuando se efectúa continuamente la impresión, se interrumpe una vez. Sin embargo, la<br />
impresión se reiniciará algunos segundos después.<br />
MODO DE INSTRUCCION<br />
El modo de instrucción se utiliza cuando el operador o el administrador practica las operaciones de la caja<br />
registradora.<br />
Cuando se selecciona un dependiente que está en instrucción, la máquina se establece automáticamente en el<br />
modo de instrucción. Para especificar un dependiente que deba recibir instrucción, consulte el apartado de<br />
“Especificación de dependientes de instrucción para el modo de instrucción” en “PROGRAMACION<br />
AVANZADA” en la página 27.<br />
La operación de instrucción sólo es válida en el modo REG, MGR y VOID.<br />
La memoria del dependiente correspondiente sólo se actualiza en el modo de instrucción.<br />
www.cashregisters.net
LECTURA (X) Y REPOSICION (Z) DE<br />
LOS TOTALES DE VENTAS<br />
• Utilice la función de lectura (X) cuando necesite leer la información de ventas registrada desde la última<br />
reposición. Puede obtener esta lectura todas las veces que quiera dado que no afecta a la memoria de la<br />
registradora.<br />
• Utilice la función de reposición (Z) cuando necesite borrar la memoria de la registradora. La reposición<br />
imprime toda la información de ventas y borra toda la memoria excepto para GT1 a GT3, GT de modo de<br />
instrucción, cuenta de reposición y número consecutivo.<br />
1<br />
Resumen de informes de lectura (X) y reposición (Z)<br />
Informes X1 y Z1: Informes de ventas diarias<br />
Informes X2 y Z2: Informes de consolidación periódica (mensual)<br />
Para hacer un informe X o Z, gire el selector de modo a la posición apropiada consultando la columna de<br />
“Posición del selector de modo” mostrada en la tabla de la página siguiente, y emplee la siguiente secuencia de<br />
teclas correspondiente.<br />
Elemento<br />
Informe rápido:<br />
(Sólo visualización)<br />
Para borrar la<br />
visualización,<br />
pulse la tecla l o<br />
gire el selector de<br />
modo a otra<br />
posición.<br />
Informe de ventas<br />
completo<br />
Informe de<br />
dependiente<br />
individual<br />
Informe de todos<br />
los dependientes<br />
Informe de ventas<br />
de PLU<br />
Informe horario<br />
Posición del selector de modo<br />
OPX/Z<br />
X<br />
--<br />
X, Z<br />
--<br />
--<br />
--<br />
X1/Z1<br />
--<br />
X1, Z1<br />
--<br />
X1, Z1<br />
X1, Z1<br />
X1, Z1<br />
X2/Z2<br />
--<br />
X2, Z2<br />
--<br />
--<br />
--<br />
--<br />
Tecla A : Total de ventas<br />
Operación de teclas<br />
Código de sección d : Total de ventas de sección<br />
Para las secciones 1 a 16; Tecla de sección ( ! a < )<br />
D<br />
Para las secciones 17 a 32; Tecla de sección ( ! a < )<br />
Tecla @ : Importe de metálico en el cajón<br />
Lectura: Reposición:<br />
A P A<br />
L P L<br />
Lectura: Reposición:<br />
(El informe del dependiente actual)<br />
Lectura:<br />
Lectura:<br />
Reposición:<br />
L P L<br />
Todas las PLU<br />
Código de<br />
PLU inicial @ Código de<br />
PLU final p<br />
Reposición:<br />
Todas las PLU<br />
Código de<br />
PLU inicial @ Código de<br />
PLU final P p<br />
Lectura: Reposición:<br />
s P s<br />
www.cashregisters.net<br />
29
30<br />
• Cuando las cantidades de ventas y los importes de ventas son cero, se pasa por alto la<br />
impresión. Si no desea que se pase por alto, cambie la programación. (Consulte el apartado de<br />
“Formato de impresión” de la sección “Programación 1 de selección de diversas funciones”.)<br />
• “X” representa el símbolo de lectura y “Z” representa el símbolo de reposición en los informes.<br />
• Para dejar de leer y reponer el informe de ventas de PLU, gire el selector de modo a la posición<br />
MGR. Los datos no se borrarán al efectuar la reposición.<br />
• Cuando se efectúa continuamente la impresión, se interrumpe una vez. Sin embargo, la<br />
impresión se reiniciará algunos segundos después.<br />
LECTURA Y REPOSICION DE INFORMES EJ<br />
La caja registradora está provista de una función de registro diario electrónico (EJ). Esta función sirve para<br />
registrar los datos del registro diario en una memoria en lugar de hacerlo en el papel de registro diario, y para<br />
imprimir los datos como un informe EJ. La caja registradora registra los datos de registro diario en los modos<br />
REG, PGM, VOID, X1/Z1 y X2/Z2. En el ajuste inicial, se pueden almacenar un máximo de 2.000 líneas en la<br />
memoria, pero usted podrá ampliarla hasta 3.000 líneas. Para los detalles sobre la programación de EJ,<br />
consulte la sección de “Programación del registro diario electrónico” (página 22).<br />
Impresión de los datos del registro diario en forma de una transacción<br />
Podrá imprimir los datos del registro diario de una transacción actual registrada en la memoria EJ pulsando la<br />
tecla R durante la transacción.<br />
Esta función es válida cuando se programa el estilo de impresión para recibos, y la función de<br />
activación/desactivación (ON/OFF) de recibo se ajusta a OFF (desactivación).<br />
Lectura y reposición de los datos del registro diario electrónico (emisión<br />
de informe EJ)<br />
Podrá leer los datos del registro diario almacenados en la memoria EJ en el formato del registro diario<br />
ejecutando el procedimiento siguiente en el modo X1/Z1 u OP X/Z.<br />
Para leer todos los datos:<br />
7: @ A<br />
Para leer los 10 registros últimos:<br />
710<br />
@<br />
A<br />
Para reponer todos los datos:<br />
7: P @ A<br />
• Para dejar de leer o reponer los datos, gire el selector de modo a la posición “MGR”. Los datos no<br />
se borrarán al efectuar la reposición.<br />
• Cuando se efectúa continuamente la impresión, se interrumpe una vez. Sin embargo, la<br />
impresión se reiniciará algunos segundos después.<br />
www.cashregisters.net
REGISTROS DE ANULACION<br />
El límite programado para las funciones (tales como importes máximos) puede anularse haciendo un registro de<br />
anulación en el modo MGR.<br />
1. Gire el selector de modo a la posición MGR.<br />
2. Haga el registro de anulación.<br />
CORRECCION DESPUES DE FINALIZAR UNA<br />
TRANSACCION (Modo de cancelación)<br />
Cuando necesite cancelar los registros incorrectos que los dependientes no pueden corregir (registros<br />
incorrectos que se encuentran después de finalizar una transacción, o una transacción que no puede corregirse<br />
mediante cancelación directa o indirecta), siga este procedimiento:<br />
1. Gire el selector de modo a la posición VOID empleando la llave del administrador (MA) para establecer la<br />
máquina en el modo de cancelación.<br />
2. Repita los registros anotados en el recibo incorrecto. (Todos los datos del recibo incorrecto se suprimirán de<br />
la memoria de la registradora y los importes cancelados se añadirán al totalizador de transacción del modo<br />
de cancelación.)<br />
COMO EMPLEAR UNA TARJETA DE<br />
MEMORIA SD<br />
Podrá cambiar datos mediante una tarjeta de memoria SD entre su caja registradora y un ordenador al manejar<br />
los datos de su caja registradora empleando la “Herramienta de ayuda a clientes” (Customer Support Tool) de<br />
software de ordenador SHARP.<br />
También podrá memorizar todos los datos necesarios de la caja registradora en una tarjeta de memoria SD<br />
para mayor seguridad.<br />
Este manual de instrucciones describe sólo esas operaciones necesarias en la caja registradora. Para más<br />
detalles, consulte la sección de ayuda en la “Herramienta de ayuda a clientes”.<br />
Inserción y extracción de una tarjeta de memoria SD<br />
La ranura de la tarjeta SD está al lado derecho de la caja registradora y tiene una cubierta.<br />
Inserción de una tarjeta de memoria SD<br />
Inserte una tarjeta de memoria SD en la ranura de la tarjeta SD con el logotipo SD impreso encarado hacia<br />
arriba. Empuje la tarjeta con el dedo hasta oír un sonido seco y suéltela lentamente.<br />
Extracción de la tarjeta de memoria SD<br />
Empuje suavemente la tarjeta con el dedo y suéltela. La tarjeta saldrá.<br />
• Cuando se inserte o extraiga la tarjeta de memoria SD, asegúrese de soltarla lentamente. De lo<br />
contrario, es posible que la tarjeta salga súbitamente y hiera el dedo.<br />
• No toque ni extraiga nunca la tarjeta de memoria SD mientras se esté accediendo. De lo<br />
contrario, podrían dañarse los datos almacenados en ella.<br />
• Si ocurre un apagón, se desenchufa la caja registradora, o se gira el selector de modo a una<br />
posición diferente mientras se está accediendo a la tarjeta de memoria SD, podrían dañarse los<br />
datos almacenados en esa tarjeta.<br />
www.cashregisters.net<br />
31
32<br />
Formateo de una tarjeta de memoria SD<br />
Cuando emplee una tarjeta de memoria SD nueva por primera vez, asegúrese de formatearla en su caja<br />
registradora antes de escribir los datos de programación en ella.<br />
No formatee nunca ninguna tarjeta de memoria SD que contenga datos. De lo contrario, se borrarán todos los<br />
datos almacenados en la tarjeta.<br />
Ajuste el selector de modo en la posición PGM.<br />
* El mensaje “ ” aparecerá y se quedará en el visualizador hasta que se formatee completamente<br />
la tarjeta de memoria SD. Cuando se finalize el formateo, se imprimirá el mensaje “***NORMAL END”. Si<br />
ocurre un error, se imprimirá el mensaje de error correspondiente.<br />
Memorización y restauración de todos los datos<br />
Ajuste el selector de modo en la posición PGM.<br />
Memorización (escritura) de todos los datos<br />
144<br />
s @ s<br />
148<br />
Restauración (lectura) de los datos memorizados<br />
Si memoriza todos los datos empleando una tarjeta de memoria SD que contenga datos, los datos<br />
existentes se borrarán y se reemplazarán por los datos memorizados nuevamente. Si necesita los<br />
datos existentes, emplee otra tarjeta de memoria SD.<br />
Lectura de los datos de logotipos gráficos<br />
Ajuste el selector de modo en la posición PGM.<br />
Se imprime el mensaje de confirmación.<br />
Para ejecutar<br />
s 140 @ s 1 A<br />
Para cancelar l<br />
Se imprime el mensaje de confirmación.<br />
Para ejecutar<br />
1<br />
Para cancelar<br />
Se imprime el mensaje de confirmación.<br />
Para ejecutar<br />
A<br />
l<br />
s 145 @ s 1 A<br />
Para cancelar l<br />
*<br />
www.cashregisters.net
Escritura y lectura de todos los datos de programación<br />
Podrá escribir todos los datos de programación de la caja registradora en una tarjeta de memoria SD<br />
(Escritura). Los datos existentes de programación de la tarjeta se reemplazarán por los datos escritos<br />
nuevamente.<br />
También podrá reemplazar los datos de programación almacenados en la caja registradora por los<br />
almacenados en una tarjeta de memoria SD cargando ésta en la caja registradora (Lectura).<br />
Ajuste el selector de modo en la posición PGM.<br />
Escritura<br />
141<br />
s @ s<br />
147<br />
Lectura<br />
Escritura de datos de ventas<br />
Escriba todos los datos existentes de ventas (totales diario y periódico) en una tarjeta de memoria SD. Podrá<br />
escribir los datos en la misma tarjeta un máximo de 400 veces a menos que la tarjeta quede llena.<br />
Ajuste el selector de modo en la posición X1/Z1.<br />
650 P<br />
Escritura de registro diario electrónico<br />
Escriba datos de registro diario electrónico de la memoria de EJ de su caja registradora en una tarjeta de<br />
memoria SD (esto borrará la memoria). Podrá escribir los datos en la misma tarjeta un máximo de 400 veces a<br />
menos que la tarjeta quede llena.<br />
Ajuste el selector de modo en la posición X1/Z1.<br />
750 P @ s 1 A<br />
l<br />
Impresión de registro diario electrónico<br />
Se imprime el mensaje de confirmación.<br />
Se imprime el mensaje de confirmación.<br />
@ s 1 A<br />
Para cancelar l<br />
Se imprime el mensaje de confirmación.<br />
Podrá imprimir los datos de registro diario electrónico memorizados la última vez en una tarjeta de memoria SD<br />
empleando la impresora de su caja registradora.<br />
Ajuste el selector de modo en la posición X1/Z1.<br />
Se imprime el mensaje de confirmación.<br />
Para ejecutar<br />
Para ejecutar<br />
1<br />
Para cancelar<br />
Para ejecutar<br />
Para ejecutar<br />
Para cancelar<br />
740 @ s 1 A<br />
Para cancelar l<br />
A<br />
l<br />
www.cashregisters.net<br />
33
34<br />
MANTENIMIENTO PARA EL OPERADOR<br />
1<br />
En caso de corte de la alimentación<br />
Si se corta la alimentación, la registradora retiene el contenido de su memoria y toda la información sobre las<br />
entradas de ventas.<br />
• Cuando el corte de la alimentación ocurre en el estado libre de la registradora o cuando está realizando una<br />
entrada, la máquina retorna al funcionamiento normal después de recuperarse la alimentación.<br />
• Cuando el corte de la alimentación ocurre durante un ciclo de impresión, la registradora imprime “========”<br />
y lleva a cabo después el procedimiento de impresión correcto después de recuperarse la alimentación.<br />
2<br />
Si se termina el papel de la impresora, se parará la impresora, y aparecerá “PPPPPPPPPP” en el visualizador.<br />
No pueden aceptarse los registros de teclas. Instale el rollo de papel nuevo, y luego pulse la tecla l.<br />
Si el brazo del rodillo impresor no está bloqueado, se parará la impresora y aparecerá “H” en el extremo<br />
izquierdo del visualizador. No pueden aceptarse los registros de teclas. Empuje el brazo hacia abajo hasta que<br />
se bloquee con seguridad, y entonces pulse la tecla l. La impresora imprimirá el símbolo de falla de la<br />
alimentación y reanudará la impresión.<br />
3<br />
En el caso de error de impresora<br />
Precauciones al manejar la impresora<br />
• Evite los lugares polvorientos y húmedos, la luz directa del sol y el polvo metálico. (En esta máquina se<br />
emplean un imán permanente y un electroimán.)<br />
• No tire nunca del papel cuando esté bloqueado el brazo del rodillo impresor. Levante primero el brazo, y luego<br />
quite el papel.<br />
• No toque nunca la superficie del cabezal de impresión ni el rodillo impresor.<br />
4<br />
Reemplazo de las pilas<br />
Esta caja registradora muestra un símbolo de pilas gastadas ( ) cuando las pilas están casi gastadas, y<br />
visualiza un símbolo de que no hay pilas ( ) cuando las pilas están demasiado gastadas o cuando no se han<br />
instalado las pilas.<br />
Cuando se visualice el símbolo de pilas gastadas, reemplace las pilas por otras nuevas lo antes posible. Las<br />
pilas existentes se gastarán por completo en unos dos días.<br />
Cuando se visualice el símbolo de que no hay pilas, reemplace inmediatamente las pilas. De lo contrario, si se<br />
desenchufa el cable de alimentación de CA o si ocurre un corte de la corriente, todos los ajustes programados<br />
se repondrán a los ajustes de fábrica y se borrarán los datos almacenados en la memoria.<br />
Mientras se está visualizando el mensaje que indica que no hay pilas, no gire el selector de modo a ninguna<br />
posición. Siga el procedimiento del reemplazo de las pilas de abajo sin cambiar la posición del selector de<br />
modo. De lo contrario, si el selector de modo pasa o está puesto en la posición OFF, todos los ajustes<br />
programados se repondrán a los ajustes predeterminados y se borrarán los datos almacenados en la memoria.<br />
Para reemplazar las pilas:<br />
1. Asegúrese de que la caja registradora está enchufada.<br />
2. Extraiga la cubierta de la impresora.<br />
3. Abra la cubierta del compartimiento de las pilas que se encuentra al lado del soporte del rollo de papel y<br />
extraiga las pilas gastadas.<br />
4. Instale tres pilas alcalinas nuevas LR6 (tamaño “AA”) en el compartimiento de las pilas. Asegúrese de que<br />
las polaridades positiva y negativa de cada pila estén encaradas en la dirección adecuada.<br />
Cuando las pilas estén correctamente instaladas, desaparecerá el símbolo “ ” o “ ”.<br />
www.cashregisters.net
5. Cierre la cubierta del compartimiento de las pilas.<br />
6. Vuelva a colocar la cubierta de la impresora.<br />
5<br />
Reemplazo del rollo de papel<br />
Utilice siempre rollos de papel especificados por SHARP.<br />
Si usa otros rollos de papel que no sean los especificados, pueden originarse atascos de papel y funcionar mal<br />
la registradora.<br />
(Forma de colocar el rollo de papel)<br />
Correcto<br />
A la impresora<br />
Incorrecto<br />
Extracción del rollo de papel<br />
Cuando aparezca tinta de color rojo en el rollo de papel, será indicación de que tiene que cambiarlo. Sustituya<br />
el rollo de papel por uno nuevo. Si no piensa utilizar la registradora durante mucho tiempo, extraiga el rollo de<br />
papel y guárdelo en el lugar apropiado.<br />
Precaución: El cortador de papel está montado en la cubierta. Tenga cuidado de no cortarse.<br />
Cuando no emplee el carrete de toma:<br />
A la impresora<br />
1. Extraiga la cubierta de la impresora.<br />
2. Levante la palanca de liberación del rodillo impresor para desbloquear y abrir el brazo del rodillo impresor.<br />
3. Extraiga el rollo de papel del soporte del rollo de papel.<br />
No tire del papel por la impresora.<br />
Cuando emplee el carrete de toma:<br />
1. Gire el selector de modo a una posición que no sea la posición OFF con el cable de alimentación enchufado.<br />
2. Extraiga la cubierta de la impresora.<br />
3. Pulse la tecla F para hacer avanzar el papel de registro diario hasta que la parte impresa salga del paso.<br />
4. Corte el papel y extraiga el carrete de toma.<br />
5. Levante la palanca de liberación del rodillo impresor para desbloquear y abrir el brazo del rodillo impresor.<br />
6. Extraiga el rollo de papel del soporte del rollo de papel.<br />
7. Extraiga el lado exterior del carrete de toma.<br />
8. Extraiga el rollo de registro diario impreso del carrete de toma.<br />
Instalación del rollo de papel<br />
Precaución: El cortador de papel está montado en la cubierta de la impresora. Tenga cuidado de no<br />
cortarse.<br />
1. Gire el selector de modo a una posición que no sea la posición OFF con el cable de alimentación enchufado.<br />
2. Extraiga la cubierta de la impresora.<br />
3. Levante la palanca de liberación del rodillo impresor para desbloquear y abrir el brazo del rodillo impresor.<br />
4. Coloque correctamente el papel en el soporte del rollo de papel.<br />
5. Haga avanzar el extremo del papel junto con las guías de papel.<br />
6. Mientras mantiene retenido el papel, cierre lentamente el brazo del rodillo impresor, y empuje el brazo hacia<br />
abajo hasta oír un sonido seco de confirmación. Asegúrese que empuja con seguridad el centro de la parte<br />
del ala del brazo. El papel avanzará automáticamente.<br />
Si el brazo del rodillo impresor no está bloqueado con seguridad, la unidad no podrá realizar<br />
correctamente la impresión. Si ocurre este problema, abra el brazo, y ciérrelo de nuevo como se<br />
ha indicado arriba.<br />
www.cashregisters.net<br />
35
36<br />
7. Cuando no emplee el carrete de toma (empleo como papel de recibos):<br />
• Corte el papel sobrante empleando el borde de la cubierta interior, y vuelva a colocar la cubierta de la<br />
impresora. Pulse la tecla F para asegurarse que el papel sale por la cubierta de la impresora y que<br />
aparece papel limpio.<br />
Cuando emplee el carrete de toma (empleo como papel de registro diario):<br />
• Inserte el extremo del papel en la ranura del carrete. (Pulse la tecla F para hacer avanzar más el papel si<br />
es necesario.)<br />
• Bobine el papel dos o tres vueltas en torno al eje del carrete.<br />
• Coloque el carrete en el rodamiento, y pulse la tecla F para tensar el papel.<br />
• Vuelva a colocar la cubierta de la impresora.<br />
6<br />
Podrá bobinar el papel de rollo en los modos OP X/Z, X1/Z1 y X2/Z2 aunque haya programado<br />
para utilizar la impresora para emisión de recibos. Esto puede ser conveniente para bobinar los<br />
informes. En este caso, ajuste el papel de rollo en el carrete de toma.<br />
Extracción del papel atascado<br />
Precaución: El cortador de papel está montado en la cubierta. Tenga cuidado de no cortarse. No toque<br />
nunca el cabezal de impresión inmediatamente después de imprimir, porque éste estará<br />
aún caliente.<br />
1. Extraiga la cubierta de la impresora.<br />
2. Levante la palanca de liberación del rodillo impresor para desbloquear y abrir el brazo del rodillo impresor.<br />
3. Extraiga el papel atascado. Compruebe si quedan restos de papel en la impresora y, si los hubiera, quítelos.<br />
4. Ponga correctamente el rollo de papel siguiendo los pasos mencionados en “Instalación del rollo de papel”.<br />
7<br />
Limpieza de la impresora (cabezal de impresión / sensor / rodillo)<br />
Cuando el texto impreso se oscurece o aparece borroso, el polvo del papel puede pegarse en el cabezal de<br />
impresión, el sensor y/o el rodillo. Límpielos de la forma siguiente:<br />
Precaución:<br />
• No toque nunca el cabezal de impresión con una herramienta ni nada que sea duro porque podría<br />
estropear el cabezal.<br />
• El cortador de papel está montado en la cubierta de la impresora. Tenga cuidado de no cortarse.<br />
Cabezal de impresión<br />
Rodillo Sensor<br />
1. Gire el selector de modo a la posición OFF.<br />
2. Extraiga la cubierta de la impresora.<br />
3. Levante la palanca de liberación del rodillo impresor para<br />
desbloquear y abrir el brazo del rodillo impresor.<br />
4. Extraiga el rollo de papel consultando la sección<br />
“Extracción del rollo de papel”.<br />
5. Limpie el cabezal de impresión con un palillo de algodón o<br />
un paño blando humedecido en alcohol etílico o alcohol<br />
isopropílico. Limpie el rodillo y el sensor de la misma<br />
manera.<br />
6. Ponga correctamente el rollo de papel siguiendo los<br />
pasos mencionados en “Instalación del rollo de papel”.<br />
www.cashregisters.net
8<br />
9<br />
10<br />
Extracción del cajón<br />
Abertura manual del cajón<br />
Palanca<br />
Caja de<br />
monedas<br />
El cajón de la caja registradora es extraíble. Después de terminar la jornada<br />
laboral, extraiga el cajón. Para extraer el cajón, tire del mismo<br />
completamente hacia delante y extráigalo levantándolo. La caja de monedas<br />
de 5 denominaciones también es extraíble.<br />
El cajón se abre automáticamente. Sin embargo, cuando haya un fallo o corte<br />
de la corriente o la registradora quede fuera de servicio, deslice la palanca<br />
situada en la parte inferior de la registradora en la dirección de la flecha. (Vea<br />
la figura a la izquierda.)<br />
El cajón no se abrirá, sin embargo, si está cerrado con la llave.<br />
Los casos de mal funcionamiento de la columna de la izquierda de la tabla siguiente, indicados bajo el título<br />
“Fallo”, no son necesariamente averías de la registradora. Se recomienda pues consultar la sección<br />
“Comprobación” de la columna de la derecha antes de llamar al servicio técnico.<br />
(1)<br />
Fallo Comprobación<br />
El visualizador muestra los símbolos que no<br />
tienen ningún sentido.<br />
• ¿Se ha inicializado correctamente la máquina como se<br />
muestra en “PARA EMPEZAR”?<br />
(Tenga presente que la inicialización borra todos los datos y<br />
ajustes programados que están almacenados en la memoria.)<br />
(2) El visualizador no se ilumina aunque el selector • ¿Se suministra alimentación en la toma de corriente?<br />
de modo esté colocado en cualquier otra • ¿Está la clavija del cable de alimentación desenchufada o<br />
posición que no sea “OFF”.<br />
mal conectada a la toma de corriente?<br />
(3) El visualizador se ilumina, pero la registradora • ¿Está el código del dependiente asignado a la registradora?<br />
no responde a los registros.<br />
• ¿Está el selector de modo bien colocado en la posición “REG”?<br />
(4) No se emiten recibos. • ¿Está el rollo de papel bien instalado?<br />
• ¿Hay algún atasco de papel?<br />
• ¿Está la función de recibos en el estado “OFF”?<br />
• ¿Está la palanca de liberación del rodillo impresor bloqueado con<br />
seguridad?<br />
(5)<br />
(6)<br />
Antes de solicitar el servicio de un técnico<br />
No sale el papel del registro diario. • ¿Está el carrete de toma bien instalado en el rodamiento?<br />
• ¿Hay algún atasco de papel?<br />
• ¿Se ha seleccionado la impresión del registro diario en la<br />
programación del estilo de impresión? (Si se ha seleccionado la<br />
impresión de recibos, el papel no se bobinará en torno al carrete<br />
de toma.)<br />
La impresión no es normal. • ¿Está la palanca de liberación del rodillo impresor bloqueado con<br />
seguridad?<br />
• ¿Está el rollo de papel correctamente instalado?<br />
• ¿Están limpios el cabezal de impresión/sensor/rodillo?<br />
www.cashregisters.net<br />
37
38<br />
Tabla de códigos de error<br />
Cuando se visualicen los siguientes códigos de error, pulse la tecla l y tome la acción apropiada de acuerdo<br />
con la tabla siguiente.<br />
Código<br />
de error<br />
Ejemplo:<br />
2<br />
1<br />
18<br />
D<br />
17<br />
E<br />
Leche<br />
Pan<br />
1<br />
6<br />
5<br />
17<br />
E<br />
22<br />
I<br />
21<br />
J<br />
Estado de error Acción<br />
E01 Error de registro Haga el registro con las teclas correctas.<br />
E02 Error de operación incorrecta Haga el registro con las teclas correctas.<br />
E03 Se ha introducido un código no definido. Introduzca un código correcto.<br />
E07 La memoria está llena (en la programación de la tecla a). Programe la tecla a con 25 pasos.<br />
E11 Pulsación obligatoria de la tecla s para finalización Pulse la tecla s y prosiga la operación.<br />
E12<br />
directa<br />
Importe recibido obligatorio Efectúe una operación de importe recibido.<br />
E32 Falta el registro de un código de dependiente. Efectúe un registro de código de dependiente.<br />
E34 Error de límite de rebose Haga el registro dentro del límite de registro.<br />
E35 La entrada de precio abierto está inhibida. Haga un registro de precio preajustado.<br />
E36 La entrada de precio preajustado está inhibida. Haga un registro de precio abierto.<br />
E37 La finalización directa está inhibida. Haga una operación de importe recibido.<br />
E67 No se permite la cancelación del subtotal. Finalice la transacción y corrija las entradas erróneas<br />
en el modo de cancelación.<br />
Emplee estas etiquetas con las teclas de sección. Escriba los nombres de sección en las etiquetas y adhiéralas<br />
a las teclas de sección sacando primero las cubiertas transparentes de las teclas. (Haga una copia de esta<br />
página.)<br />
10<br />
9<br />
26<br />
N<br />
25<br />
O<br />
14<br />
13<br />
30<br />
S<br />
29<br />
T<br />
4<br />
3<br />
20<br />
B<br />
19<br />
C<br />
8<br />
7<br />
24<br />
G<br />
23<br />
H<br />
12<br />
11<br />
28<br />
L<br />
27<br />
M<br />
16<br />
15<br />
32<br />
Q<br />
31<br />
R<br />
www.cashregisters.net
LIMITED WARRANTY<br />
SHARP ELECTRONICS CORPORATION warrants to the first consumer purchaser that this Sharp<br />
brand product (the "Product"), when shipped in its original container, will be free from defective<br />
workmanship and materials and agrees that it will, at its option, either repair the defect or replace the<br />
defective Product or part thereof at no charge to the purchaser for parts or labor for the time<br />
period(s) set forth below.<br />
This warranty does not apply to any appearance items of the Product nor to the additional excluded<br />
item(s) set forth below nor to any product the exterior of which has been damaged or defaced, which<br />
has been subjected to misuse, abnormal service or handling or which has been altered or modified<br />
in design or construction.<br />
In order to enforce the rights under this limited warranty, the purchaser should follow the steps set<br />
forth below and provide proof of purchase to the servicer.<br />
The limited warranty described herein is in addition to whatever implied warranties may be granted<br />
to purchasers by law. ALL IMPLIED WARRANTIES INCLUDING THE WARRANTIES OF<br />
MERCHANTABILITY AND FITNESS FOR USE ARE LIMITED TO THE PERIOD(S) FROM THE<br />
DATE OF PURCHASE SET FORTH BELOW. Some states do not allow limitations on how long an<br />
implied warranty lasts, so the above limitation may not apply to you.<br />
Neither the sales personnel of the seller nor any other person is authorized to make any warranties<br />
other than those described herein or to extend the duration of any warranties beyond the time period<br />
described herein on behalf of Sharp.<br />
The warranties described herein shall be the sole and exclusive warranties granted by Sharp and<br />
shall be the sole and exclusive remedy available to the purchaser. Correction of defects, in the<br />
manner and for the period of time described herein, shall constitute complete fulfillment of all<br />
liabilities and responsibilities of Sharp to the purchaser with respect to the Product and shall<br />
constitute full satisfaction of all claims, whether based on contract, negligence, strict liability or<br />
otherwise. In no event shall Sharp be liable, or in any way responsible, for any damages or defects<br />
in the Product which were caused by repairs or attempted repairs performed by anyone other than<br />
an authorized servicer. Nor shall Sharp be liable, or in any way responsible, for any incidental or<br />
consequential economic or property damage. Some states do not allow the exclusion or incidental or<br />
consequential damages, so the above exclusion may not apply to you.<br />
THE WARRANTY GIVES YOU SPECIFIC LEGAL RIGHTS. YOU MAY ALSO HAVE OTHER<br />
RIGHTS WHICH VARY FROM STATE TO STATE.<br />
Your Product: XE series Electronic <strong>Cash</strong> Register<br />
Warranty Period of this Product: One (1) year for parts and ninety (90) days parts and labor from<br />
the date of purchase.<br />
Additional items excluded from Any consumable items such as paper supplied with the Product.<br />
warranty coverage:<br />
Where to obtain service: At a Sharp Authorized Servicer located in the United States. To<br />
find the location of the nearest Sharp Authorized Servicer, call<br />
toll free at 1-800-BE-SHARP.<br />
What to do to obtain service: Ship (prepaid) or carry your Product to a Sharp Authorized<br />
Servicer. Be sure to have proof of purchase available. If you ship<br />
or mail the Product, be sure it is packaged carefully.<br />
TO OBTAIN SUPPLIES, ACCESSORIES OR PRODUCT INFORMATION, CALL 1-800-BE-SHARP.<br />
www.cashregisters.net
SHARP ELECTRONICS CORPORATION<br />
Sharp Plaza, Mahwah, New Jersey 07430-2135<br />
1-800-BE-SHARP<br />
For additional information and product registration,<br />
please visit www.sharpusa.com<br />
Printed in China / Impreso en China<br />
(TINSZ2554RCZZ) ➀<br />
www.cashregisters.net