Manuales de instrucciones - Monacor
Manuales de instrucciones - Monacor
Manuales de instrucciones - Monacor
You also want an ePaper? Increase the reach of your titles
YUMPU automatically turns print PDFs into web optimized ePapers that Google loves.
F<br />
B<br />
CH<br />
I<br />
18<br />
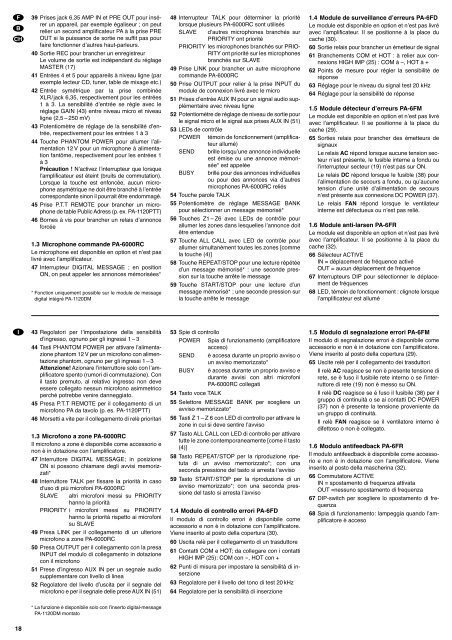
39 Prises jack 6,35 AMP IN et PRE OUT pour insérer<br />
un appareil, par exemple égaliseur ; on peut<br />
relier un second amplificateur PA à la prise PRE<br />
OUT si la puissance <strong>de</strong> sortie ne suffit pas pour<br />
faire fonctionner dʼautres haut-parleurs.<br />
40 Sortie REC pour brancher un enregistreur<br />
Le volume <strong>de</strong> sortie est indépendant du réglage<br />
MASTER (17)<br />
41 Entrées 4 et 5 pour appareils à niveau ligne (par<br />
exemple lecteur CD, tuner, table <strong>de</strong> mixage etc.)<br />
42 Entrée symétrique par la prise combinée<br />
XLR/jack 6,35, respectivement pour les entrées<br />
1 à 3. La sensibilité dʼentrée se règle avec le<br />
réglage GAIN (43) entre niveau micro et niveau<br />
ligne (2,5 – 250 mV)<br />
43 Potentiomètre <strong>de</strong> réglage <strong>de</strong> la sensibilité dʼentrée,<br />
respectivement pour les entrées 1 à 3<br />
44 Touche PHANTOM POWER pour allumer lʼalimentation<br />
12 V pour un microphone à alimentation<br />
fantôme, respectivement pour les entrées 1<br />
à 3<br />
Précaution ! Nʼactivez lʼinterrupteur que lorsque<br />
lʼamplificateur est éteint (bruits <strong>de</strong> commutation).<br />
Lorsque la touche est enfoncée, aucun microphone<br />
asymétrique ne doit être branché à lʼentrée<br />
correspondante sinon il pourrait être endommagé.<br />
45 Prise P.T.T REMOTE pour brancher un microphone<br />
<strong>de</strong> table Public Adress (p. ex. PA-1120PTT)<br />
46 Bornes à vis pour brancher un relais dʼannonce<br />
forcée<br />
1.3 Microphone comman<strong>de</strong> PA-6000RC<br />
Le microphone est disponible en option et nʼest pas<br />
livré avec lʼamplificateur.<br />
47 Interrupteur DIGITAL MESSAGE ; en position<br />
ON, on peut appeler les annonces mémorisées*<br />
* Fonction uniquement possible sur le module <strong>de</strong> message<br />
digital intégré PA-1120DM<br />
43 Regolatori per lʼimpostazione <strong>de</strong>lla sensibilità<br />
dʼingresso, ognuno per gli ingressi 1 – 3<br />
44 Tasti PHANTOM POWER per attivare lʼalimentazione<br />
phantom 12 V per un microfono con alimentazione<br />
phantom, ognuno per gli ingressi 1 – 3<br />
Attenzione! Azionare lʼinterruttore solo con lʼamplificatore<br />
spento (rumori di commutazione). Con<br />
il tasto premuto, al relativo ingresso non <strong>de</strong>ve<br />
essere collegato nessun microfono asimmetrico<br />
perché potrebbe venire danneggiato.<br />
45 Presa P.T.T REMOTE per il collegamento di un<br />
microfono PA da tavolo (p. es. PA-1120PTT)<br />
46 Morsetti a vite per il collegamento di relè prioritari<br />
1.3 Microfono a zone PA-6000RC<br />
Il microfono a zone è disponibile come accessorio e<br />
non è in dotazione con lʼamplificatore.<br />
47 Interruttore DIGITAL MESSAGE; in posizione<br />
ON si possono chiamare <strong>de</strong>gli avvisi memo rizzati*<br />
48 Interruttore TALK per fissare la priorità in caso<br />
dʼuso di più microfoni PA-6000RC<br />
SLAVE altri microfoni messi su PRIORITY<br />
hanno la priorità<br />
PRIORITY i microfoni messi su PRIORITY<br />
hanno la priorità rispetto ai microfoni<br />
su SLAVE<br />
49 Presa LINK per il collegamento di un ulteriore<br />
microfono a zone PA-6000RC<br />
50 Presa OUTPUT per il collegamento con la presa<br />
INPUT <strong>de</strong>l modulo di collegamento in dotazione<br />
con il microfono<br />
51 Prese dʼingresso AUX IN per un segnale audio<br />
supplementare con livello di linea<br />
52 Regolatore <strong>de</strong>l livello dʼuscita per il segnale <strong>de</strong>l<br />
microfono e per il segnale <strong>de</strong>lle prese AUX IN (51)<br />
* La funzione è disponibile solo con lʼinserto digital-message<br />
PA-1120DM montato<br />
48 Interrupteur TALK pour déterminer la priorité<br />
lors que plusieurs PA-6000RC sont utilisés<br />
SLAVE dʼautres microphones branchés sur<br />
PRIORITY ont priorité<br />
PRIORITY les microphones branchés sur PRIO-<br />
RITY ont priorité sur les microphones<br />
branchés sur SLAVE<br />
49 Prise LINK pour brancher un autre microphone<br />
comman<strong>de</strong> PA-6000RC<br />
50 Prise OUTPUT pour relier à la prise INPUT du<br />
module <strong>de</strong> connexion livré avec le micro<br />
51 Prises dʼentrée AUX IN pour un signal audio supplémentaire<br />
avec niveau ligne<br />
52 Potentiomètre <strong>de</strong> réglage <strong>de</strong> niveau <strong>de</strong> sortie pour<br />
le signal micro et le signal aux prises AUX IN (51)<br />
53 LEDs <strong>de</strong> contrôle<br />
POWER témoin <strong>de</strong> fonctionnement (amplificateur<br />
allumé)<br />
SEND brille lorsquʼune annonce individuelle<br />
est émise ou une annonce mémorisée*<br />
est appelée<br />
BUSY brille pour <strong>de</strong>s annonces individuelles<br />
ou pour <strong>de</strong>s annonces via dʼautres<br />
microphones PA-6000RC reliés<br />
54 Touche parole TALK<br />
55 Potentiomètre <strong>de</strong> réglage MESSAGE BANK<br />
pour sélectionner un message mémorisé*<br />
56 Touches Z1 – Z6 avec LEDs <strong>de</strong> contrôle pour<br />
allumer les zones dans lesquelles lʼannonce doit<br />
être entendue<br />
57 Touche ALL CALL avec LED <strong>de</strong> contrôle pour<br />
allumer simultanément toutes les zones [comme<br />
la touche (4)]<br />
58 Touche REPEAT/STOP pour une lecture répétée<br />
dʼun message mémorisé* : une secon<strong>de</strong> pression<br />
sur la touche arrête le message<br />
59 Touche START/STOP pour une lecture dʼun<br />
message mémorisé* ; une secon<strong>de</strong> pression sur<br />
la touche arrête le message<br />
53 Spie di controllo<br />
POWER Spia di funzionamento (amplificatore<br />
acceso)<br />
SEND è accesa durante un proprio avviso o<br />
un avviso memorizzato*<br />
BUSY è accesa durante un proprio avviso e<br />
durante avvisi con altri microfoni<br />
PA-6000RC collegati<br />
54 Tasto voce TALK<br />
55 Selettore MESSAGE BANK per scegliere un<br />
avviso memorizzato*<br />
56 Tasti Z 1 – Z 6 con LED di controllo per attivare le<br />
zone in cui si <strong>de</strong>ve sentire lʼavviso<br />
57 Tasto ALL CALL con LED di controllo per attivare<br />
tutte le zone contemporaneamente [come il tasto<br />
(4)]<br />
58 Tasto REPEAT/STOP per la riproduzione ripetuta<br />
di un avviso memorizzato*; con una<br />
seconda pressione <strong>de</strong>l tasto si arresta lʼavviso<br />
59 Tasto START/STOP per la riproduzione di un<br />
avviso memorizzato*; con una seconda pressione<br />
<strong>de</strong>l tasto si arresta lʼavviso<br />
1.4 Modulo di controllo errori PA-6FD<br />
Il modulo di controllo errori è disponibile come<br />
accessorio e non è in dotazione con lʼamplificatore.<br />
Viene inserito al posto <strong>de</strong>lla copertura (30).<br />
60 Uscita relè per il collegamento di un trasduttore<br />
61 Contatti COM e HOT; da collegare con i contatti<br />
HIGH IMP (25): COM con -, HOT con +<br />
62 Punti di misura per impostare la sensibilità di in -<br />
serzione<br />
63 Regolatore per il livello <strong>de</strong>l tono di test 20 kHz<br />
64 Regolatore per la sensibilità di inserzione<br />
1.4 Module <strong>de</strong> surveillance dʼerreurs PA-6FD<br />
Le module est disponible en option et nʼest pas livré<br />
avec lʼamplificateur. Il se positionne à la place du<br />
cache (30).<br />
60 Sortie relais pour brancher un émetteur <strong>de</strong> signal<br />
61 Branchements COM et HOT : à relier aux con -<br />
nexions HIGH IMP (25) : COM à –, HOT à +<br />
62 Points <strong>de</strong> mesure pour régler la sensibilité <strong>de</strong><br />
réponse<br />
63 Réglage pour le niveau du signal test 20 kHz<br />
64 Réglage pour la sensibilité <strong>de</strong> réponse<br />
1.5 Module détecteur dʼerreurs PA-6FM<br />
Le module est disponible en option et nʼest pas livré<br />
avec lʼamplificateur. Il se positionne à la place du<br />
cache (29).<br />
65 Sorties relais pour brancher <strong>de</strong>s émetteurs <strong>de</strong><br />
signaux<br />
Le relais AC répond lorsque aucune tension secteur<br />
nʼest présente, le fusible interne a fondu ou<br />
lʼinterrupteur secteur (19) nʼest pas sur ON.<br />
Le relais DC répond lorsque le fusible (38) pour<br />
lʼalimentation <strong>de</strong> secours a fondu, ou quʼaucune<br />
tension dʼune unité dʼalimentation <strong>de</strong> secours<br />
nʼest présente aux connexions DC POWER (37).<br />
Le relais FAN répond lorsque le ventilateur<br />
interne est défectueux ou nʼest pas relié.<br />
1.6 Module anti-larsen PA-6FR<br />
Le module est disponible en option et nʼest pas livré<br />
avec lʼamplificateur. Il se positionne à la place du<br />
cache (32).<br />
66 Sélecteur ACTIVE<br />
IN = déplacement <strong>de</strong> fréquence activé<br />
OUT = aucun déplacement <strong>de</strong> fréquence<br />
67 Interrupteurs DIP pour sélectionner le déplacement<br />
<strong>de</strong> fréquences<br />
68 LED, témoin <strong>de</strong> fonctionnement : clignote lorsque<br />
lʼamplificateur est allumé<br />
1.5 Modulo di segnalazione errori PA-6FM<br />
Il modulo di segnalazione errori è disponibile come<br />
accessorio e non è in dotazione con lʼamplificatore.<br />
Viene inserito al posto <strong>de</strong>lla copertura (29).<br />
65 Uscite relè per il collegamento <strong>de</strong>i trasduttori<br />
Il relè AC reagisce se non è presente tensione di<br />
rete, se è fuso il fusibile rete interno o se lʼinterruttore<br />
di rete (19) non è messo su ON.<br />
Il relè DC reagisce se è fuso il fusibile (38) per il<br />
gruppo di continuità o se ai contatti DC POWER<br />
(37) non è presente la tensione proveniente da<br />
un gruppo di continuità.<br />
Il relè FAN reagisce se il ventilatore interno è<br />
difettoso o non è collegato.<br />
1.6 Modulo antifeedback PA-6FR<br />
Il modulo antifeedback è disponibile come accessorio<br />
e non è in dotazione con lʼamplificatore. Viene<br />
inserito al posto <strong>de</strong>lla mascherina (32).<br />
66 Commutatore ACTIVE<br />
IN = spostamento di frequenza attivata<br />
OUT =nessuno spostamento di frequenza<br />
67 DIP-switch per scegliere lo spostamento di frequenza<br />
68 Spia di funzionamento: lampeggia quando lʼamplificatore<br />
è acceso


