You also want an ePaper? Increase the reach of your titles
YUMPU automatically turns print PDFs into web optimized ePapers that Google loves.
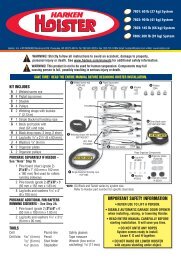
Assembly<br />
3<br />
In this step, the first main foil extrusion is slipped onto the headstay and<br />
connected to the top foil.<br />
Select a 7' (2.13 m) foil and slide it onto the headstay<br />
over the threaded stud and connectors and up to the<br />
top foil piece.<br />
Tip: Do not force the foil over the connectors. If you feel resistence,<br />
check the foil and connectors carefully for burrs and dirt. The best way<br />
to see dirt or burrs is to look into the foil while pointing it towards a<br />
light source. Be sure that the connectors at the bottom of the wire are<br />
spaced with enough room to align properly inside the foil section.<br />
Coat the exposed half of the connector with red Loctite.<br />
Push the foil over the connector until the holes align.<br />
Coat connector screws with red Loctite. Insert into the<br />
connector and tighten.<br />
Tip: The connector screw holes should align with the foil holes when<br />
the foil is pushed tightly against the foil above. If the foil does not slip<br />
onto the connector easily, check the alignment of the joint. It may be<br />
necessary to hold the 7' (2.13 m) foil up to achieve proper alignment.<br />
Norseman/Sta-Lok Instructions<br />
Because the lower end of the wire is open you will simply slide<br />
the foil onto the stay and assemble as described.<br />
Rod Instructions<br />
Rod installations are identical to swaged wire at this point. You<br />
may find that the rod is difficult to lay flat and two people may<br />
be required to hold the rod straight while foils are slipped up<br />
the headstay. The curves in the rod may make it more difficult<br />
to slide extrusions over the connectors. The straighter the rod<br />
can be held, the more easily foils will pass over connectors.<br />
January 1999 Unit 1 MKIII 18