Data Projector - ソニー製品情報
Data Projector - ソニー製品情報
Data Projector - ソニー製品情報

You also want an ePaper? Increase the reach of your titles
YUMPU automatically turns print PDFs into web optimized ePapers that Google loves.
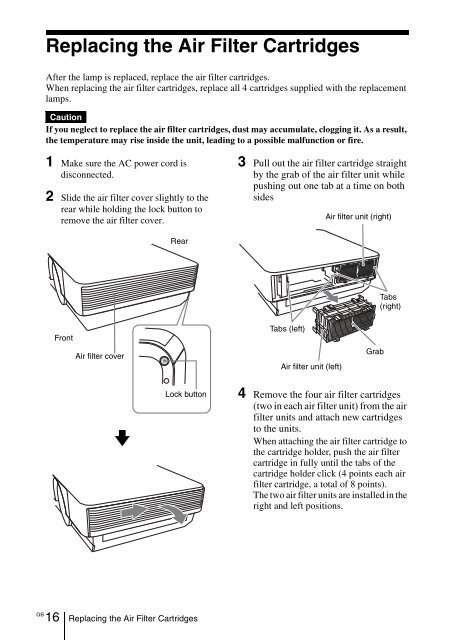
Replacing the Air Filter Cartridges<br />
After the lamp is replaced, replace the air filter cartridges.<br />
When replacing the air filter cartridges, replace all 4 cartridges supplied with the replacement<br />
lamps.<br />
Caution<br />
If you neglect to replace the air filter cartridges, dust may accumulate, clogging it. As a result,<br />
the temperature may rise inside the unit, leading to a possible malfunction or fire.<br />
1 Make sure the AC power cord is<br />
disconnected.<br />
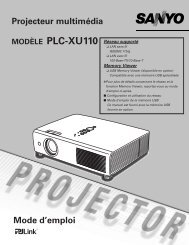
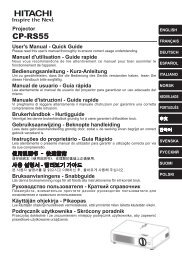
2 Slide the air filter cover slightly to the<br />
rear while holding the lock button to<br />
remove the air filter cover.<br />
3 Pull out the air filter cartridge straight<br />
by the grab of the air filter unit while<br />
pushing out one tab at a time on both<br />
sides<br />
Air filter unit (right)<br />
Rear<br />
Tabs<br />
(right)<br />
Front<br />
Air filter cover<br />
Tabs (left)<br />
Air filter unit (left)<br />
Grab<br />
v<br />
Lock button<br />
4 Remove the four air filter cartridges<br />
(two in each air filter unit) from the air<br />
filter units and attach new cartridges<br />
to the units.<br />
When attaching the air filter cartridge to<br />
the cartridge holder, push the air filter<br />
cartridge in fully until the tabs of the<br />
cartridge holder click (4 points each air<br />
filter cartridge, a total of 8 points).<br />
The two air filter units are installed in the<br />
right and left positions.<br />
GB<br />
16 Replacing the Air Filter Cartridges