Data Projector - ソニー製品情報
Data Projector - ソニー製品情報
Data Projector - ソニー製品情報

You also want an ePaper? Increase the reach of your titles
YUMPU automatically turns print PDFs into web optimized ePapers that Google loves.
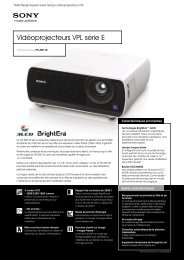
C VPLL-ZM101 *1 : Attaching the<br />
shading sheet<br />
Before attaching the projection lens to the<br />
projector, it is required to attach the shading<br />
sheet supplied with the lens adapter after<br />
attaching the lens adapter.<br />
1 Remove the two screws from the lens<br />
adapter.<br />
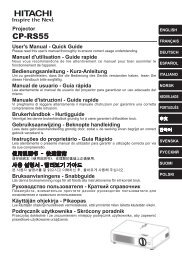
Removing<br />
1 Loosen the four screws that secure the<br />
front panel (1), and remove the front<br />
panel, pulling it forward (2).<br />
2 Loosen the four screws that secure the<br />
projection lens then pull it out straight.<br />
When loosening the screws, support the<br />
lens with your hands so that it will not<br />
fall.<br />
Screws<br />
Screws<br />
2 Fit the shading sheet to the projection<br />
lens as illustrated and fasten it to the<br />
lens with the two screws.<br />
Shading<br />
sheet<br />
Note<br />
If the lens was shifted with lens shift<br />
adjustment, the screws may be too<br />
constricted to loosened. In such a case,<br />
adjust to shift the lens to the center position<br />
(page 11).<br />
*1: VPL-FX500L only.<br />
GB<br />
22 Attaching/Removing the Projection Lens