
Create successful ePaper yourself
Turn your PDF publications into a flip-book with our unique Google optimized e-Paper software.
GB<br />
GB<br />
28<br />
Control Panel Lock Function<br />
You can lock the control panel by pressing the<br />
PROZESS (cycle) key and then pressing the FARBE<br />
(colour) key. When the control panel is locked<br />
(16), all of the control keys except PROZESS<br />
(cycle ) and FARBE (colour) are inactive. This feature<br />
helps prevent unintentional disruption of<br />
the program and unsupervised use of the unit<br />
by children.<br />
You can unlock the control panel by pressing the<br />
PROZESS (cycle ) key and then the FARBE (colour )<br />
key. If you do not set the control keys lock function,<br />
the control keys will be automatically<br />
locked after five minutes. You must unlock (16)<br />
the control panel to operate the bread maker.<br />
Environment<br />
The machine can function effectively in a wide<br />
range of temperatures, but temperature differences<br />
may cause variations in the loaf size.<br />
We recommend a room temperature between<br />
15-34°C.<br />
Warning Display<br />
• If the display (19) shows “H HH” after the<br />
program has been started, the temperature<br />
inside is too high. The program must be<br />
stopped. Then open the lid and let the machine<br />
cool down for 10 to 20 minutes.<br />
• If the display (19) shows “E E0” or “E E1”<br />
after you press START / STOPP (start / stop),<br />
the temperature sensor is malfunctioning.<br />
Please have the sensor checked by a qualified<br />
technician.<br />
HOW TO MAKE BREAD<br />
1. Place the bread pans (6 / 8) in position and<br />
press down until they click into place. Attach<br />
the kneading blades (7 / 9) to the drive<br />
shaft. We recommend filling the hole with<br />
heat-resisting margarine prior to attaching<br />
the blades to prevent the dough from sticking.<br />
This also makes it easier to remove the<br />
bread.<br />
2. Place the ingredients in the bread pan (6 / 8).<br />
Please follow the sequence described in the<br />
recipe. Usually, the water or liquid substance<br />
is added first, followed by sugar, salt and flour,<br />
and always finishing with the yeast or baking<br />
powder as the last ingredient.<br />
Note: See recipes for details on how much<br />
flour and rising agent to use.<br />
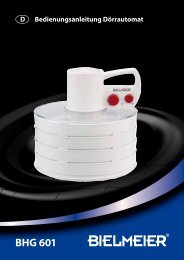
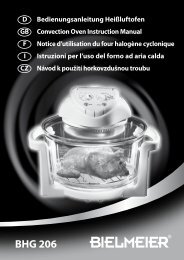
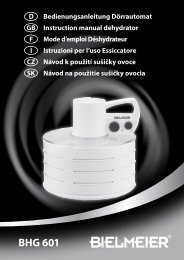
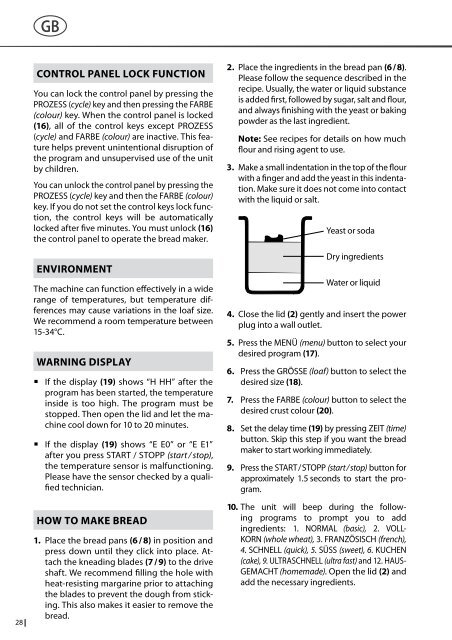
3. Make a small indentation in the top of the flour<br />
with a finger and add the yeast in this indentation.<br />
Make sure it does not come into contact<br />
with the liquid or salt.<br />
Yeast or soda<br />
Dry ingredients<br />
Water or liquid<br />
4. Close the lid (2) gently and insert the power<br />
plug into a wall outlet.<br />
5. Press the MENÜ (menu) button to select your<br />
desired program (17).<br />
6. Press the GRÖSSE (loaf) button to select the<br />
desired size (18).<br />
7. Press the FARBE (colour) button to select the<br />
desired crust colour (20).<br />
8. Set the delay time (19) by pressing ZEIT (time)<br />
button. Skip this step if you want the bread<br />
maker to start working immediately.<br />
9. Press the START / STOPP (start / stop) button for<br />
approximately 1.5 seconds to start the program.<br />
10. The unit will beep during the following<br />
programs to prompt you to add<br />
ingredients: 1. NORMAL (basic), 2. VOLL-<br />
KORN (whole wheat), 3. FRANZÖSISCH (french),<br />
4. SCHNELL (quick), 5. SÜSS (sweet), 6. KUCHEN<br />
(cake), 9. ULTRASCHNELL (ultra fast) and 12. HAUS-<br />
GEMACHT (homemade). Open the lid (2) and<br />
add the necessary ingredients.<br />
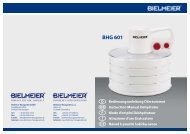
Tips & Tricks<br />
Tip<br />
With smaller quantities, the dough often<br />
cannot disperse evenly into the bread pan and<br />
builds up on one side, which results in an uneven<br />
baking process.<br />
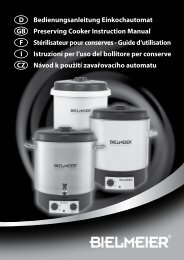
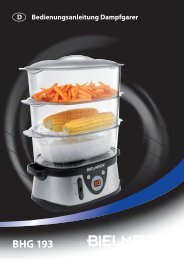
To get a beautiful loaf of bread, you should<br />
spread the dough into the pan with a dough<br />
scraper (13) after the completion of the second<br />
kneading process KNETEN 2 (knead 2) (15).<br />
If the dough sticks to the scraper (13), dip it<br />
briefly in flour.<br />
11. The length of the baking process depends<br />
on the program (17), loaf size (18) and colour<br />
(20). To check the baking process, press the<br />
LICHT (light) button and look through the<br />
view windows (3) – do not open the lid (2)!<br />
Note: Steam may escape through the vent in<br />
the lid during baking. This is normal.<br />
Not sure if your bread is baked thoroughly?<br />
Insert a wooden skewer into the bread. If the<br />
bread doesn’t stick to it, it is ready!<br />
12. The bread maker will beep when the program<br />
is finished. Press the START / STOPP (start / stop)<br />
button for approximately 1.5 seconds to stop<br />
the process and take out the bread. Open the<br />
lid (2) and use oven mitts to remove the bread<br />
pan (6 / 8).<br />
Caution: The bread pan and bread may be<br />
very hot! Always handle with care.<br />
13. Let the bread pan (6 / 8) cool down before<br />
removing the bread. Then, use the dough<br />
scraper (13) to gently loosen the sides of the<br />
bread from the pan.<br />
14. Turn the bread pan (6 / 8) upside down over<br />
a wire cooling rack or clean cooking surface<br />
and shake gently until the bread falls out.<br />
15. Let the bread cool for about 20 minutes before<br />
slicing.<br />
Note: It is recommended to slice the bread<br />
with an electric cutter; if you use a fruit knife<br />
or kitchen knife, the bread may be subject to<br />
deformation.<br />
16. If you are out of the room or if you do not<br />
press the START / STOPP (start / stop) button<br />
at the end of the program, the bread will be<br />
kept warm automatically for 1 hour. When<br />
WARMHALTEN (keep warm) is finished, the<br />
appliance will beep 10 times.<br />
17. When the appliance is not in use, unplug the<br />
power cord.<br />
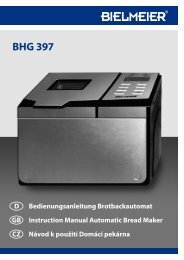
Note: Before slicing the loaf, use the hook (12) to<br />
remove the kneading blades (7 / 9) hidden on the<br />
bottom of loaf. The loaf is hot; never remove the<br />
kneading blade with your hands.<br />
Note: If bread has not been completely eaten up,<br />
advise you to store the remained bread in sealed<br />
plastic bag or vessel.<br />
Bread can be stored at room temperature for<br />
about three days.<br />
To store the bread for a longer time, put it in a<br />
sealed plastic bag or vessel and place it in the<br />
refrigerator (maximum storage time = 10 days).<br />
Since homemade bread contains no preservatives,<br />
the storage time is generally no longer than<br />
that of bakery bread.<br />
SPECIAL INTRODUCTION<br />
For quick (4. SCHNELL) AND <br />
ULTRA FAST (9. ULTRA SCHNELL) BREADS<br />
Quick breads are made with baking powder or<br />
baking soda that is activated by moisture and<br />
heat. For perfect quick breads, all liquids should<br />
be placed in the bottom of the bread pan (6 / 8),<br />
and dry ingredients should be placed on top.<br />
During the initial mixing of quick breads, dry ingredients<br />
may collect in the corners of the pan.<br />
It is necessary to help the machine mix in order<br />
to avoid flour clumps.<br />
About ultra fast program <br />
(9. ULTRASCHNELL)<br />
The bread maker can bake a loaf within 1 hour<br />
38 minutes with the rapid program. Please note<br />
that it should be hot water of 48 – 50°C; you must<br />
use a cooking thermometer to measure the temperature.<br />
29