XC-IS22CD M-IS22 S-IS22 - Service.pioneer-eur.com - Pioneer
XC-IS22CD M-IS22 S-IS22 - Service.pioneer-eur.com - Pioneer
XC-IS22CD M-IS22 S-IS22 - Service.pioneer-eur.com - Pioneer
Create successful ePaper yourself
Turn your PDF publications into a flip-book with our unique Google optimized e-Paper software.
ENHANCE<br />
BASS<br />
OPEN/<br />
STEREO CD TUNER DECK <strong>XC</strong>-<strong><strong>IS22</strong>CD</strong><br />
CLOSE<br />
FOLDER/TRACK<br />
TREBLE<br />
4 Getting started Mise en marche<br />
STANDBY<br />
/ON DIMER MUTE DISP<br />
TUNER LINE1.2<br />
1 2 3 CLEAR<br />
4 5 6 >10<br />
7 8 9 10/0<br />
SLEEP PROGRAM RANDOM REPEAT<br />
MONO<br />
OPEN/CLOSE<br />
SONUD MODE<br />
VOL<br />
Improving poor FM<br />
reception<br />
If you’re listening to an FM station in<br />
stereo but the reception is weak, you<br />
can improve the sound quality by<br />
switching to mono:<br />
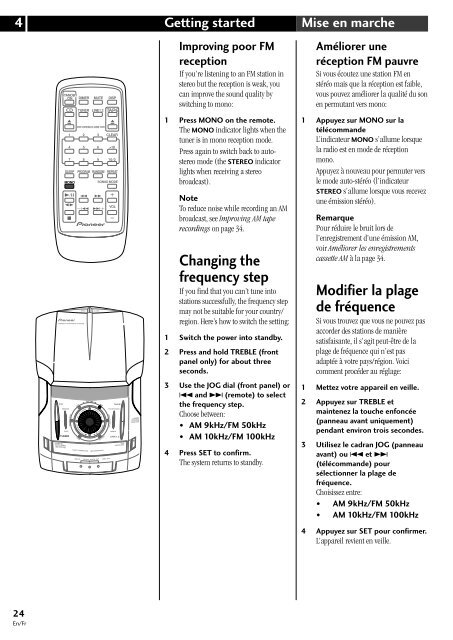
1 Press MONO on the remote.<br />
The MONO indicator lights when the<br />
tuner is in mono reception mode.<br />
Press again to switch back to autostereo<br />
mode (the STEREO indicator<br />
lights when receiving a stereo<br />
broadcast).<br />
Note<br />
To reduce noise while recording an AM<br />
broadcast, see Improving AM tape<br />
recordings on page 34.<br />
Changing the<br />
frequency step<br />
If you find that you can’t tune into<br />
stations successfully, the frequency step<br />
may not be suitable for your country/<br />
region. Here’s how to switch the setting:<br />
1 Switch the power into standby.<br />
2 Press and hold TREBLE (front<br />
panel only) for about three<br />
seconds.<br />
Améliorer une<br />
réception FM pauvre<br />
Si vous écoutez une station FM en<br />
stéréo mais que la réception est faible,<br />
vous pouvez améliorer la qualité du son<br />
en permutant vers mono:<br />
1 Appuyez sur MONO sur la<br />
télé<strong>com</strong>mande<br />
L’indicat<strong>eur</strong> MONO s’allume lorsque<br />
la radio est en mode de réception<br />
mono.<br />
Appuyez à nouveau pour permuter vers<br />
le mode auto-stéréo (l’indicat<strong>eur</strong><br />
STEREO s’allume lorsque vous recevez<br />
une émission stéréo).<br />
Remarque<br />
Pour réduire le bruit lors de<br />
l’enregistrement d’une émission AM,<br />
voir Améliorer les enregistrements<br />
cassette AM à la page 34.<br />
Modifier la plage<br />
de fréquence<br />
Si vous trouvez que vous ne pouvez pas<br />
accorder des stations de manière<br />
satisfaisante, il s’agit peut-être de la<br />
plage de fréquence qui n’est pas<br />
adaptée à votre pays/région. Voici<br />
<strong>com</strong>ment procéder au réglage:<br />
CD<br />
TUNER<br />
DOLBY NR<br />
ON/OFF(DEMO)<br />
!<br />
REVERSE MODE<br />
DISP<br />
1<br />
ASES<br />
· 4<br />
2<br />
–<br />
·TUNING –<br />
ST.MEMORY• STOP 7<br />
FRONT LOADINGTRAY<br />
LINE2 IN OPTICAL<br />
VOL. /JOG + 3<br />
+TUNING<br />
6<br />
· ¢<br />
SET<br />
· ¡<br />
PLAY/PAUSE<br />
REC/STOP<br />
MECHANISM DECK<br />
TIMER/CLOCK ADJ<br />
DIGITAL OUT LINE2 OUT<br />
TAPE<br />
LINE1.2<br />
TAPE<br />
OPEN/CLOSE<br />
0<br />
3 Use the JOG dial (front panel) or<br />
4 and ¢ (remote) to select<br />
the frequency step.<br />
Choose between:<br />
• AM 9kHz/FM 50kHz<br />
• AM 10kHz/FM 100kHz<br />
4 Press SET to confirm.<br />
The system returns to standby.<br />
1 Mettez votre appareil en veille.<br />
2 Appuyez sur TREBLE et<br />
maintenez la touche enfoncée<br />
(panneau avant uniquement)<br />
pendant environ trois secondes.<br />
3 Utilisez le cadran JOG (panneau<br />
avant) ou 4 et ¢<br />
(télé<strong>com</strong>mande) pour<br />
sélectionner la plage de<br />
fréquence.<br />
Choisissez entre:<br />
• AM 9kHz/FM 50kHz<br />
• AM 10kHz/FM 100kHz<br />
4 Appuyez sur SET pour confirmer.<br />
L’appareil revient en veille.<br />
24<br />
En/Fr


