Kalzip® zipping machine
Kalzip® zipping machine
Kalzip® zipping machine

Create successful ePaper yourself
Turn your PDF publications into a flip-book with our unique Google optimized e-Paper software.
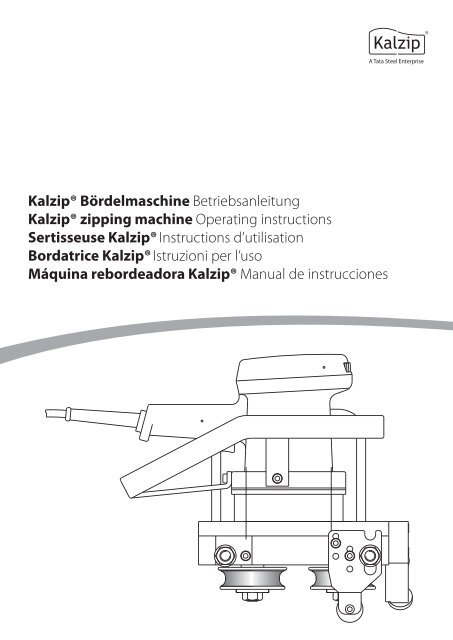
<strong>Kalzip®</strong> Bördelmaschine Betriebsanleitung<br />
<strong>Kalzip®</strong> <strong>zipping</strong> <strong>machine</strong> Operating instructions<br />
Sertisseuse <strong>Kalzip®</strong> Instructions d’utilisation<br />
Bordatrice <strong>Kalzip®</strong> Istruzioni per l‘uso<br />
Máquina rebordeadora <strong>Kalzip®</strong> Manual de instrucciones
Deutsch Seite 4<br />
English Page 22<br />
Français Page 40<br />
Italiano Pagina 58<br />
Español Pagina 76<br />
Español Italiano Français English Deutsch
Deutsch<br />
Español Italiano Français English<br />
Kalzip Bördelmaschine<br />
Vorwort<br />
Sehr geehrter Kunde!<br />
Vielen Dank, dass Sie sich für eine Bördelmaschine aus<br />
unserem Hause entschieden haben! Wir bitten Sie, diese<br />
Anleitung sorgfältig und in Ruhe zu lesen. Achten Sie insbesondere<br />
auf die Sicherheitshinweise im Text und auf<br />
das Kapitel „Sicherheitshinweise“.<br />
Dies ist die Voraussetzung für:<br />
• sichere Handhabung der Maschine,<br />
• gute Arbeitsergebnisse und<br />
• möglichst störungsfreien Bördelbetrieb.<br />
Sollten Sie Fragen haben, auf die Sie in dieser Anleitung<br />
keine Antwort finden, rufen Sie uns an, wir helfen Ihnen<br />
gerne weiter. Unsere Produkte werden stets weiterentwickelt,<br />
daher können geringfügige Abweichungen zwischen Ihrem<br />
Gerät und den Darstellungen in dieser Betriebsanleitung<br />
bestehen.<br />
4 Kalzip<br />
Bei Fragen oder Problemen helfen wir Ihnen gerne weiter.<br />
Wir stehen Ihnen unter<br />
Kalzip GmbH<br />
August-Horch-Str. 20-22<br />
56070 Koblenz<br />
Deutschland<br />
Tel. +49 (0) 261 98 34 0<br />
Fax +49 (0) 261 98 34 100<br />
E-Mail: germany@kalzip.com<br />
zur Verfügung. Für Anregungen und Verbesserungsvorschläge<br />
sind wir stets offen.<br />
Wir wünschen Ihnen viel Erfolg.<br />
2010 Kalzip GmbH<br />
Alle Rechte vorbehalten. Nachdruck, auch auszugs -<br />
weise, nur mit schriftlicher Genehmigung der Firma<br />
Kalzip gestattet.
Inhaltsverzeichnis<br />
Kalzip Bördelmaschine<br />
EG-Konformitäts-Erklärung 6<br />
1. Allgemeines 7<br />
1.1 Anschrift, Ersatzteilbestellung und Kundendienst 7<br />
1.2 Inhaltliche Änderungen 7<br />
1.3 Urheberrecht 7<br />
2. Technische Daten 7<br />
3. Lieferumfang 8<br />
4. Rechtliche Bestimmungen 8<br />
4.1 Bestimmungsgemäße Verwendung 8<br />
4.2 Vorhersehbare Fehlanwendung 8<br />
4.3 Gewährleistung und Haftung 8<br />
4.4 Rücksendung und Abwicklung 8<br />
5. Sicherheitshinweise 9<br />
6. Aufbau 10<br />
7. Inbetriebnahme und Betrieb 13<br />
7.1 Elektrischer Anschluss 13<br />
7.2 Elektronik 14<br />
7.3 Der Bördelvorgang 14<br />
7.4 Handhabung der Maschine 15<br />
7.5 Demontage (Aufbördelvorgang) 15<br />
8. Wartung und Pflege der Bördelmaschine 16<br />
8.1 Pflege 16<br />
8.2 Wechseln der Seitenrollen 16<br />
9. Einstellung prüfen 17<br />
10. Verfügbare Rollensätze 17<br />
11. Gebogenes Kalzip Profil 17<br />
12. Doppelschalige Lichtbahnen 17<br />
13. Reparaturen 17<br />
14. Ersatzteile 18<br />
Seite<br />
Kalzip 5<br />
Deutsch<br />
Español Italiano Français English
Deutsch<br />
Español Italiano Français English<br />
Kalzip Bördelmaschine<br />
EG-Konformitäts-Erklärung<br />
im Sinne der EG-Maschinenrichtlinie 2006/42/EG, Anhang II Teil A.<br />
Der Hersteller: Kalzip GmbH, August-Horch-Str. 20-22, D-56070 Koblenz<br />
erklärt hiermit, dass die Bauart der Bördelmaschine zum Bördeln von Kalzip ® Elementen:<br />
6 Kalzip<br />
Typ: Kalzip ® Bördelmaschine<br />
Handelsbezeichnung: Bördelmaschine<br />
allen einschlägigen Bestimmungen der EG-Maschinenrichtlinie (2006/42/EG) entspricht.<br />
Die Maschine entspricht weiterhin allen Bestimmungen der EG-EMV-Richtlinie (2004/108/EG)<br />
sowie der EG-Niederspannungsrichtlinie 2006/95/EG.<br />
Folgende harmonisierte Normen wurden angewandt:<br />
EN ISO 12100-1: 2003<br />
+A1: 2009<br />
EN ISO 12100-2: 2003<br />
+A1: 2009<br />
Sicherheit von Maschinen –<br />
Grundbegriffe allgemeine Gestaltungsleitsätze<br />
Teil 1: Grundsätzliche Terminologie, Methodik<br />
Sicherheit von Maschinen –<br />
Grundbegriffe allgemeine Gestaltungsleitsätze<br />
Teil 2: Technische Leitsätze und Spezifikationen<br />
EN ISO 13857: 2008 Sicherheit von Maschinen –<br />
Sicherheitsabstände gegen das Erreichen von Gefahrstellen<br />
mit den unteren und oberen Gliedmaßen<br />
EN 60745-1: 2009 Handgeführte motorbetriebene Elektrowerkzeuge –<br />
Sicherheit –<br />
Teil 1: Allgemeine Anforderungen<br />
EN 61000-6-2: 2005 Elektromagnetische Verträglichkeit (EMV) –<br />
Teil 6-2: Fachgrundnormen –<br />
Störfestigkeit für Industriebereiche<br />
EN 61000-6-4: 2007 Elektromagnetische Verträglichkeit (EMV) –<br />
Teil 6-4: Fachgrundnormen – Fachgrundnorm –<br />
Störaussendungen für Industriebereiche<br />
Bevollmächtigter für die Zusammenstellung der relevanten technischen Unterlagen ist:<br />
Herr Dipl.-Ing. (FH) Christoph Bonn, Kalzip GmbH, August-Horch-Str. 20-22, D-56070 Koblenz<br />
Dr. Jörg Schwall, Geschäftsführung<br />
Koblenz, 01.02.2010<br />
Kalzip GmbH<br />
August-Horch-Str. 20-22, D-56070 Koblenz<br />
Ort, Datum Unterschrift Angaben zum Unterzeichner
1. Allgemeines<br />
1.1 Anschrift, Ersatzteilbestellung<br />
und Kundendienst<br />
Kalzip GmbH<br />
August-Horch-Str. 20-22<br />
56070 Koblenz<br />
Deutschland<br />
Tel. +49 (0) 261 98 34 0<br />
Fax +49 (0) 261 98 34 100<br />
E-Mail: germany@kalzip.com<br />
1.2 Inhaltliche Änderungen<br />
Inhaltliche Änderungen behalten wir uns vor.<br />
Die Firma Kalzip haftet nicht für etwaige Fehler<br />
in dieser Dokumentation. Eine Haftung für mittelbare<br />
Schäden, die im Zusammenhang mit der<br />
Lieferung oder dem Gebrauch dieser Dokumentation<br />
entstehen, ist ausgeschlossen, soweit<br />
dies gesetzlich zulässig ist.<br />
2. Technische Daten<br />
Eingangsspannung 230 - 240 V ~50/60 Hz<br />
Leistungsaufnahme 1010 W (Dauerbetrieb)<br />
Drehzahl der Antriebswelle<br />
(im Leerlauf)<br />
Gewicht 14,5 kg<br />
Emissionswerte:<br />
Schalldruckpegel 84 dB(A)<br />
Schalleistungspegel 95 dB(A)<br />
Messunsicherheitszuschlag K = 3 dB<br />
250 - 600 min-1<br />
elektronisch regelbar<br />
1.3 Urheberrecht<br />
Kalzip Bördelmaschine<br />
Das Urheberrecht an dieser Gebrauchsanweisung<br />
verbleibt bei der Firma Kalzip. Diese Betriebsan<br />
leitung ist nur für den Betreiber und dessen<br />
Personal bestimmt.<br />
Die Gebrauchsanweisung darf weder vollständig<br />
noch teilweise<br />
• vervielfältigt,<br />
• verbreitet oder<br />
• unbefugten Dritten zugänglich gemacht werden.<br />
Zuwiderhandlungen können strafrechtliche Folgen<br />
nach sich ziehen.<br />
Schwingungsgesamtwerte (Vektorsumme dreier<br />
Richtungen) ermittelt entsprechend EN 60745:<br />
Schwingungsemissionswert<br />
(3-achsig)<br />
a h = 3,5 m/s²<br />
Unsicherheit K = 1,5 m/s²<br />
Geeignet zum Verbördeln folgender Profiltafelgrößen:<br />
Kalzip Typ Kalzip 50,<br />
Blechdicke 0,7 - 1,2 mm<br />
Kalzip 65,<br />
Blechdicke 0,7 - 1,2 mm<br />
Kalzip AF/AS 65,<br />
Blechdicke 0,7 - 1,2 mm<br />
Kalzip 7<br />
Deutsch<br />
Español Italiano Français English
Deutsch<br />
Español Italiano Français English<br />
Kalzip Bördelmaschine<br />
3. Lieferumfang<br />
• Bördelmaschine mit Antrieb<br />
• Aufbördelgerät<br />
• Transportkiste mit Einsatz<br />
• Rollensatz 0,7 - 1,0<br />
• Betriebsanleitung<br />
4. Rechtliche Bestimmungen<br />
4.1 Bestimmungsgemäße Verwendung<br />
8 Kalzip<br />
Ihre Bördelmaschine darf ausschließlich zum<br />
Verbördeln von Profiltafeltypen, wie in Kap. 2<br />
„Technische Daten“ genannt, verwendet werden.<br />
Die für die Statik wichtige Verbundwirkung und<br />
die Regendichtigkeit der Kalzip Profiltafeln wird<br />
nur bei richtiger Funktion der Bördelmaschine<br />
erreicht.<br />
Zur bestimmungsgemäßen Verwendung gehört auch die<br />
regelmäßige Reinigung und Pflege.<br />
Eine andere als die vorgegebene bestimmungsgemäße<br />
Verwendung ist grundsätzlich vorher mit dem Hersteller<br />
abzustimmen.<br />
4.2 Vorhersehbare Fehlanwendung<br />
Niemals die Bördelmaschine alleine fahren lassen!<br />
Es besteht die Gefahr, dass die Maschine selbsttätig<br />
über den Dachfirst fährt, dann herabstürzt<br />
und somit Personenschäden verursacht. Sicherstellen,<br />
dass sich am Ende des Dachfirstes eine<br />
Barriere oder zweite Person befindet!<br />
4.3 Gewährleistung und Haftung<br />
Wenden Sie sich wegen eventueller Garantieansprüche<br />
direkt an uns. Die Garantie für<br />
die Bördelmaschine samt Zubehör beinhaltet<br />
Mate rial- und Fertigungsfehler für die Dauer<br />
von 12 Monaten, gerechnet vom Datum auf der<br />
Rechnung. Die Garantie kann nur in Verbindung<br />
mit dem Kaufbeleg in Anspruch genommen<br />
werden.<br />
Mängel, die unter den Garantieanspruch fallen, werden<br />
im Rahmen dieser Garantiebedingungen behoben. Darüber<br />
hinaus wird keine Garantie gewährleistet, wenn der Be-<br />
treiber die Funktionen des Gerätes durch Nichtbeachtung<br />
dieser Betriebsanleitung, nicht bestimmungsgemäße<br />
An wendung oder durch Fremdeingriff gefährdet. In diesen<br />
Fällen geht die Haftung auf den Betreiber über.<br />
Die Garantieleistungen sind auch hinfällig, wenn andere als<br />
von uns autorisierte Personen Einstellungen oder Veränderungen<br />
vorgenommen haben. Bei gültigem Garantieanspruch<br />
leisten wir Reparatur. Die Wahl darüber, an welchem Ort<br />
die Leistung erbracht bzw. zur Verfügung gestellt wird,<br />
liegt bei uns.<br />
Die vorstehende Garantie besitzt ausschließlichen Charakter<br />
und ersetzt sämtliche sonstigen schriftlichen, mündlichen<br />
oder indirekten Garantien. Für das Produkt stellt sie den<br />
einzigen Anspruch des Käufers und die einzige Haftung<br />
unsererseits dar. Wir schließen alle indirekten Garantie ansprüche,<br />
die sich aus der Handhabung des Gerätes ergeben,<br />
aus.<br />
Auf keinen Fall übernehmen wir die Haftung für irgendwelche<br />
Neben- oder Folgeschäden, welche aus oder in Verbindung<br />
mit der Benutzung oder Anwendung des gelieferten Produktes<br />
entstehen.<br />
4.4 Rücksendung und Abwicklung<br />
Jeder Garantieanspruch muss während der<br />
Garantiezeit geltend gemacht werden und rechtzeitig<br />
bei uns eingehen.<br />
Falls ein Produkt zur Reparatur und/oder zur Einstellung<br />
eingesandt werden muss, ist zuvor unsere Einwilligung<br />
erforderlich. Jegliches zur Prüfung und/oder zur Garantiereparatur<br />
eingesandte Material sollte für das von uns<br />
angegebene Transportmittel versichert sein.<br />
Die alleinige Verantwortung für die Bestimmung von Ur sache<br />
und Natur eines Fehlers und die endgültige Entscheidung<br />
hierüber liegt in jedem Fall ausschließlich bei uns. Unfreie<br />
Sendungen / Pakete werden nicht angenommen!
5. Sicherheitshinweise<br />
Beachten Sie bitte unbedingt die folgenden Sicherheitshinweise,<br />
um Beschädigungen des Gerätes und Verletzungen<br />
des Anwenders zu verhindern!<br />
Lesen Sie alle Sicherheitshinweise und Anweisungen.<br />
Versäumnisse bei der Einhaltung der Sicherheitshinweise<br />
und Anweisungen können elektrischen Schlag, Brand und /<br />
oder schwere Verletzungen verursachen.<br />
Die Bördelmaschine darf nur von unterwiesenem oder<br />
geschultem Personal in Betrieb genommen, bedient<br />
und gewartet werden!<br />
Die Maschine ist nach dem aktuellen Stand der Technik<br />
und den anerkannten technischen Regeln gebaut. Dennoch<br />
können bei seiner Verwendung Gefahren für Leib und<br />
Leben des Benutzers oder Dritter bzw. Beeinträchtigungen<br />
an der Maschine oder an anderen Sachwerten entstehen.<br />
Besondere Hinweise zum Umgang mit der Maschine sind<br />
erforderlich.<br />
Bei der manuellen Positionierung (Handhabung) der<br />
Bördelmaschine auf den Kalzip Bahnen sind Stoß- und<br />
Quetschgefahren nicht auszuschließen.<br />
Verletzungsgefahr! Lebensgefahr!<br />
Oberster Grundsatz: Sofort nach dem Verlegen jede<br />
Bahn verbördeln! Nur so erhält das System sein Tragvermögen<br />
und die erforderliche Sicherheit gegen Windkräfte.<br />
Die noch nicht verbördelte Bahn darf nicht betreten werden.<br />
Die Bördelmaschine muss voll schließen und die Rollensätze<br />
müssen richtig montiert sein.<br />
Halten Sie das Gerät von Kindern fern!<br />
Wartungs- und Reinigungsarbeiten dürfen nur bei abgeschalteter<br />
Bördelmaschine und gezogenem Kabelstecker<br />
durchgeführt werden. Beachten Sie unbedingt<br />
die Sicherheitshinweise in Kapitel 5.<br />
Die Maschine vor Schmutz und Feuchtigkeit schützen,<br />
nicht im Regen stehenlassen.<br />
Gegen Herabfallen sichern und niemals ohne Handgriff<br />
arbeiten.<br />
Beim Verbördeln an Dachrändern und Durchbrüchen sind<br />
die Unfallverhütungsvorschriften einzuhalten.<br />
Kalzip Bördelmaschine<br />
Der Betrieb ist für Netzanschluss mit getrennter Erdung<br />
vorgesehen. Bei langen Zuleitungen sind die Leitungsquerschnitte<br />
so groß zu wählen, dass für den Betrieb<br />
230 Volt zur Verfügung stehen.<br />
Der Anschlussstecker des Elektrowerkzeuges muss<br />
in die Steckdose passen. Der Stecker darf in keiner<br />
Weise verändert werden. Verwenden Sie keine Adapterstecker<br />
gemeinsam mit schutzgeerdeten Elektrowerkzeugen.<br />
Unveränderte Stecker und passende Steckdosen<br />
verringern das Risiko eines elektrischen Schlages.<br />
Zweckentfremden Sie das Kabel nicht, um das Elektrowerkzeug<br />
zu tragen, aufzuhängen oder um den Stecker<br />
aus der Steckdose zu ziehen. Halten Sie das Kabel fern<br />
von Hitze, Öl, scharfen Kanten oder sich bewegenden<br />
Geräteteilen. Beschädigte oder verwickelte Kabel erhöhen<br />
das Risiko eines elektrischen Schlages.<br />
Seien Sie aufmerksam, achten Sie darauf, was Sie tun,<br />
und gehen Sie mit Vernunft an die Arbeit mit einem<br />
Elektrowerkzeug. Benutzen Sie kein Elektrowerkzeug,<br />
wenn Sie müde sind oder unter dem Einfluss von Drogen,<br />
Alkohol oder Medikamenten stehen. Ein Moment<br />
der Unachtsamkeit beim Gebrauch des Elektrowerkzeuges<br />
kann zu ernsthaften Verletzungen führen.<br />
Tragen Sie persönliche Schutzausrüstung. Das Tragen<br />
persönlicher Schutzausrüstung, wie rutschfeste Sicherheitsschuhe,<br />
Schutzhelm oder Gehörschutz, je nach Art<br />
und Einsatz des Elektrowerkzeuges, verringert das Risiko<br />
von Verletzungen.<br />
Vermeiden Sie eine unbeabsichtigte Inbetriebnahme.<br />
Vergewissern Sie sich, dass das Elektrowerkzeug ausgeschaltet<br />
ist, bevor Sie es an die Stromversorgung<br />
und / oder den Akku anschließen, es aufnehmen oder<br />
tragen. Wenn Sie beim Tragen des Elektrowerkzeuges den<br />
Finger am Schalter haben oder das Gerät eingeschaltet an<br />
die Stromversorgung anschließen, kann dies zu Unfällen<br />
führen.<br />
Entfernen Sie Einstellwerkzeuge oder Schraubenschlüssel,<br />
bevor Sie das Elektrowerkzeug einschalten.<br />
Ein Werkzeug oder Schlüssel, der sich in einem drehenden<br />
Geräteteil befindet, kann zu Verletzungen führen.<br />
Arbeiten Sie mit dem Gerät nur, wenn die Arbeitsstelle<br />
ausreichend beleuchtet ist. Niemals in der Dämmerung<br />
ohne Beleuchtung arbeiten.<br />
Kalzip 9<br />
Deutsch<br />
Español Italiano Français English
Deutsch<br />
Español Italiano Français English<br />
Kalzip Bördelmaschine<br />
Sorgen Sie dafür, dass der Arbeitsbereich stets freigehalten<br />
wird.<br />
Benutzen Sie kein Elektrowerkzeug, dessen Schalter<br />
defekt ist. Ein Elektrowerkzeug, das sich nicht mehr ein-<br />
oder ausschalten lässt, ist gefährlich und muss repariert<br />
werden.<br />
Die Maschine ist nicht für das Zubördeln von Hand<br />
vorgesehen.<br />
Das Gerät ist nicht für den Einsatz in Ex-Bereichen<br />
zugelassen!<br />
Im Automatikbetrieb (bei ebenen Unterkonstruktionen),<br />
muss der Gefahrenbereich und die Bördelmaschine<br />
ständig durch den Bediener eingesehen werden können.<br />
Bei festgestelltem Taster (Druckknopf) kann ungewollter<br />
6. Aufbau<br />
10 Kalzip<br />
1.1 1.2<br />
Wiederanlauf der Bördelmaschine nach Wiederkehr der<br />
Energie bei Stromausfall erfolgen.<br />
Alle Wartungs- und Reparaturarbeiten, die ein Öffnen des<br />
Motor- und Getriebegehäuses erfordern, dürfen nur von<br />
einer autorisierten Kundendienst-Werkstatt durchgeführt<br />
werden.<br />
Warten und Reinigen Sie das Gerät entsprechend den<br />
Anweisungen in Kapitel 8 und lassen Sie vor allem die nach<br />
BetrSichV vorgeschriebenen regelmäßigen Prüfungen für<br />
Elektrowerkzeuge von einer zugelassenen Elektrofachkraft<br />
durchführen.<br />
Führen Sie einen Rollenwechsel oder sonstige Einstellungen<br />
oder Umbauten nur bei gezogenem Netzstecker<br />
durch!<br />
1.3<br />
1.4<br />
Bördelmaschine Antrieb<br />
1.1 Drehzahlregler<br />
1.2 seitlicher Arretierknopf<br />
1.3 Ein- / Ausschalter<br />
1.4 Schutzring
DDF 4-0<br />
DDF 2-1<br />
DDF 2-2<br />
DDF 3-4/ 3-5<br />
DDF 7-0<br />
DDF 4-1<br />
DDF 4-2/4-3<br />
DFF 5-0<br />
DFF 5-5<br />
DFF 5-3<br />
DDF 5-4<br />
Bördelmaschine Vorderansicht<br />
DDF 2-1 Gehäuseoberteil Antriebsseite<br />
DDF 2-2 Gehäuseunterteil Antriebsseite<br />
DDF 2-3 Gehäuseoberteil Gegenseite<br />
DDF 2-4 Gehäuseunterteil Gegenseite<br />
DDF 3-4 / 3-5 Schraube / Scheibe für Rollenhalter<br />
DDF 3-6 Laufrolle breit<br />
DDF 3-7 Bolzen für breite Laufrolle<br />
DDF 3-8 Scheibe für breite Laufrolle<br />
DDF 3-9 Mutter für breite Laufrolle<br />
DDF 4-0 Rollenhalter vorne Antriebsseite<br />
DDF 4-1 Laufrolle vorne Mitte<br />
20<br />
20<br />
130 140<br />
150<br />
ab Mitte Bördel 20<br />
310<br />
290<br />
Arbeitsraum Bördelmaschine<br />
320<br />
Kalzip Bördelmaschine<br />
DDF 4-2 / 4-3 Schraube / Scheibe<br />
für Laufrolle vorne Mitte<br />
DDF 5-0 Rollenhalter vorne Gegenseite<br />
DDF 5-1 Schraube für Rollenhalter vorne<br />
DDF 5-2 Scheiben für Rollenhalter vorne<br />
DDF 5-3 Laufrolle schmal, vorne<br />
DDF 5-4 Schraube für Laufrolle schmal, vorne<br />
DDF 5-5 Scheibe für Laufrolle schmal, vorne<br />
DDF 7-0 Spannstange<br />
DDF 8-0 Spannbügel mit Excenter<br />
DDF 8-1 Kerbstift<br />
DDF 5-1<br />
DDF 5-2<br />
DDF 2-3<br />
DDF 2-4<br />
DDF 8-0<br />
DDF 8-1<br />
DDF 3-7<br />
DDF 3-6<br />
DDF 3-8<br />
DDF 3-9<br />
Kalzip 11<br />
Deutsch<br />
Español Italiano Français English
Deutsch<br />
Español Italiano Français English<br />
Kalzip Bördelmaschine<br />
Mit * gekennzeichnete Elemente bezeichnen Einzelteile ab Maschinennummer 1600<br />
Bördelmaschine Seitenansicht<br />
DDF 3-12 Universalrollenhalter für<br />
Kalzip 50/65 und Kalzip AF 65<br />
DDF 4-0 Rollenhalter vorne, Antreibsseite<br />
DDF 5-0 Rollenhalter vorne, Gegenseite<br />
DDF 6-0 Reibplatte<br />
DDF 6-1 Schraube für Reibplatte<br />
DDF 6-2 Scheibe für Reibplatte<br />
DDF 7-1 Mutter für Spannstange<br />
DDF 7-2 Scheibe für Spannstange<br />
DDF 16-1 Rolle STD 0,7 - 1,0 vorne<br />
DDF 16-2 Rolle STD 0,7 - 1,0 hinten<br />
DDF 17-1 Rolle 1,2 vorne<br />
DDF 17-2 Rolle 1,2 hinten<br />
DDF 18-1 Lichtbahnrolle vorne<br />
DDF 18-2 Lichtbahnrolle hinten<br />
DDF 23-0 Schrauben für Antriebsbefestigung<br />
DDF 30-0 Scheiben für Antriebsbefestigung<br />
12 Kalzip<br />
DDF 74 - 0<br />
DDF 76 - 0<br />
DDF 91- 0<br />
DDF 134-0*<br />
DDF 90-0<br />
DDF 89-0*<br />
DDF 133-0*<br />
DDF 6-0<br />
DDF 7-1<br />
DDF 7-2<br />
DDF 16-2<br />
DDF 17-2<br />
DDF 18-2<br />
DDF 6-2<br />
DDF 6-2<br />
Bis Maschinennummer 1599<br />
DDF 75 - 0<br />
DDF 137 -0*<br />
DDF 95 -0<br />
DDF 139 -0*<br />
DDF 77-0<br />
DDF 138 -0*<br />
DDF 109 -0<br />
DDF 163 -0*<br />
DDF 23 -0<br />
DDF 30 -0<br />
DDF 113 -0<br />
DDF 4 -0<br />
DDF 5 -0<br />
DDF 3 -12<br />
DDF 16-1<br />
DDF 17-1<br />
DDF 18-1<br />
DDF 74-0 Schaltgriff<br />
DDF 75-0 Kappe<br />
DDF 76-0 Linsenschrauben für Schaltgriff<br />
DDF 77-0 Linsenschrauben für Kappe<br />
DDF 89-0 Schalter<br />
DDF 90-0 Kabel mit Stecker<br />
DDF 91-0 Knickschutz<br />
DDF 95-0 Kohlehalter mit Kohle<br />
DDF 109-0 Schutzring<br />
DDF 113-0 Innensechskantschraube<br />
Ab Maschinennummer 1600<br />
DDF 133-0 Schalter<br />
DDF 134-0 Knickschutz<br />
DDF 137-0 Motorgehäusedeckel<br />
DDF 138-0 Linsenschrauben für Kappe<br />
DDF 139-0 Kohlehalter mit Kohle<br />
DDF 163-0 Schutzring
Abweichend zur Standard Bördelmaschine gibt<br />
es noch eine Bördelmaschine mit abgewinkeltem<br />
Antrieb für verengte Platzverhältnisse.<br />
Bördelmaschine – Ausführung mit abgewinkeltem Antrieb<br />
7. Inbetriebnahme und Betrieb<br />
Vor Inbetriebnahme der Bördelmaschine den<br />
Sicherheitsbügels auf festen Sitz kontrollieren<br />
und prüfen, dass keine losen Befestigungs mittel<br />
vorhanden sind!<br />
Mit der Inbetriebnahme und Bedienung darf erst<br />
begonnen werden, wenn alle Voraussetzungen<br />
zum Einhalten der Betriebsanleitung geschaffen<br />
sind und das verantwortliche Personal die Betriebsanleitung<br />
gelesen und verstanden hat.<br />
7.1 Elektrischer Anschluss<br />
Die Netzspannung muss mit der Spannung auf dem Leistungsschild<br />
übereinstimmen. Anschließen und Lösen der<br />
Netzanschlussleitung siehe 7.1.<br />
Schalten Sie die Maschine vor dem Anschließen<br />
oder Lösen der Netzanschlussleitung<br />
stets aus!<br />
Kalzip Bördelmaschine<br />
Anschließen und Lösen der Netzanschlussleitung<br />
Der Schalter (6, 1.3) dient als Ein- / Ausschalter (drücken =<br />
EIN, loslassen = AUS). Für Dauerbetrieb kann er mit dem<br />
seitlichen Arretierknopf (6, 1.2) eingerastet werden. Durch<br />
nochmaliges Drücken des Schalters wird die Arretierung<br />
wieder gelöst.<br />
Kalzip 13<br />
Deutsch<br />
Español Italiano Français English
Deutsch<br />
Español Italiano Français English<br />
Kalzip Bördelmaschine<br />
7.2 Elektronik<br />
Der Antrieb hat eine Vollwellenelektronik mit den folgenden Eigenschaften:<br />
Sanftanlauf Der elektronisch geregelte Sanftanlauf sorgt für ruckfreien Anlauf der Maschine.<br />
Drehzahlregelung Zwischen 250 und 600 min -1 lässt sich die Motordrehzahl mit dem Drehzahl regler<br />
(6, 1.1) stufenlos einstellen.<br />
konstante Drehzahl Die vorgewählte Motor-Drehzahl wird elektronisch konstant gehalten. Dadurch<br />
wird auch bei Belastung eine gleichbleibende Geschwindigkeit erreicht.<br />
Temperatursicherung Extreme Überlastung im Dauereinsatz führt zur Erhitzung des Motors. Zum Schutz<br />
vor Überhitzung (Durchbrennen des Motors) ist eine elektronische Temperaturüberwachung<br />
eingebaut. Vor Erreichen einer kritischen Motort emperatur schaltet die<br />
Sicherheits-Elektronik den Motor ab. Nach einer Abkühlzeit von ca. 3 - 5 Minuten<br />
ist die Maschine wieder betriebsbereit und voll belastbar. Bei laufender Maschine<br />
(Leerlauf) reduziert sich die Abkühlzeit erheblich.<br />
7.3 Der Bördelvorgang<br />
Aus Sicherheitsgründen und zur Er zielung der für die Tragfähigkeit<br />
und Begehbarkeit erforderlichen Verbundwirkung<br />
ist jede Kalzip Profiltafel sofort nach der Verlegung zu verbördeln.<br />
Zur Befestigung von Kalzip Profiltafeln werden<br />
Klipps verwendet, die von den Bördeln umfasst und vom<br />
nächsten Element überdeckt werden. Es ist darauf zu achten,<br />
dass der kleine Bördel in den Klippkopf eingerastet ist,<br />
da es sonst zu Fehlbördelungen kommen kann.<br />
14 Kalzip<br />
Arbeiten Sie nicht mit der Maschine, wenn die<br />
Elektronik defekt ist, da dies zu überhöhten<br />
Drehzahlen führen kann. Eine fehlerhafte Elektronik<br />
erkennen Sie am fehlenden Sanftanlauf,<br />
an einem erhöhten Leerlaufgeräusch oder<br />
daran, dass keine Drehzahlregelung möglich<br />
ist.<br />
Jede Kalzip Profiltafel ist sofort nach der<br />
Ver legung zu verbördeln.<br />
Die Bördelmaschine ist auch in der Ausführung<br />
mit abgewinkeltem Antrieb (siehe 6)<br />
erhältlich!
7.4 Handhabung der Maschine<br />
Um allen Anforderungen der hohen Beanspruchung<br />
bei gewerblichem Einsatz gerecht<br />
zu werden, wurde die Maschine mit einem<br />
Schutzring (6, 1.4), der das Motorgehäuse<br />
vor extremen Stoßbelastungen schützt, ausgestattet<br />
Im Automatikbetrieb (bei ebenen Unterkonstruktionen),<br />
muss der Gefahrenbereich<br />
und die Bördelmaschine ständig durch den<br />
Bediener eingesehen werden können.<br />
Die geschlossene Maschine kann im Tippbetrieb auf den<br />
Bördel der Kalzip Profiltafel eingefädelt werden. Ein vorheriges<br />
Schließen der Bördel mit der Handschließzange<br />
erleichtert den Vorgang. Die Geschwindigkeit der Bördelmaschine<br />
kann mittels Stellrad am Handgriff verändert<br />
werden.<br />
Bei ebenen Unterkonstruktionen kann die Maschine im<br />
Automatikbetrieb üblicherweise bei leichter Handführung<br />
selbständig alleine laufen. Bei unebenen oder gerundeten<br />
Dächern kann eine manuelle deutlichere Führung erforderlich<br />
werden. An der Abmessung des fertigen Bördels kann<br />
die ordnungsgemäße Funktion der Bördelmaschine überprüft<br />
werden.<br />
7.5 Demontage (Aufbördelvorgang)<br />
Zum Aufbördeln der Kalzip Profiltafeln wird das Aufbördelgerät<br />
in die Nut an der Rückseite der Bördelmaschine<br />
gesteckt. Vorher muss der überdeckende<br />
Bördel mit geeignetem Werkzeug (z. B. Schraubendreher)<br />
etwas geöffnet werden.<br />
Das Aufbördelgerät einhängen und die richtige Höhenjustierung<br />
überprüfen. Vor dem Einfädeln der Keilrolle den<br />
großen Bördel mit einem Schraubendreher etwas öffnen.<br />
Dann die Keilrolle im Tippbetrieb einfädeln. Die Einstellung<br />
erfolgt mittels Gewindestift DDF 10-5.<br />
Die Keilrolle öffnet den großen Bördel und die Kalzip Profiltafel<br />
kann heraus genommen werden. Sollen die Kalzip<br />
Profiltafeln ein weiteres Mal verbördelt werden, muss das<br />
Aufbördelgerät so eingestellt werden, dass sie gerade<br />
noch ausgebaut werden können.<br />
DDF 10- 4 DDF 10- 3<br />
Bördelmaschine Antrieb<br />
DDF 10- 5<br />
DDF 10- 1<br />
DDF 10- 2<br />
DDF 10-1 Halter für Keilrolle<br />
DDF 10-2 Keilrolle<br />
DDF 10-3 Schraube Gewinde links<br />
DDF 10-4 Schraube Gewinde rechts<br />
DDF 10-5 Gewindestift<br />
Kalzip Bördelmaschine<br />
Kalzip 15<br />
Deutsch<br />
Español Italiano Français English
Deutsch<br />
Español Italiano Français English<br />
Kalzip Bördelmaschine<br />
8. Wartung und Pflege der Bördelmaschine<br />
8.1 Pflege<br />
16 Kalzip<br />
Mit der Pflege darf erst begonnen werden,<br />
wenn alle Voraussetzungen zum Einhalten<br />
der Betriebsanleitung geschaffen sind und<br />
das verantwortliche Personal die Betriebsanleitung<br />
gelesen und verstanden hat.<br />
Vor allen Wartungsarbeiten an der Maschine<br />
stets den Netzstecker aus der Steckdose<br />
ziehen!<br />
Alle Wartungs- und Reparaturarbeiten, die<br />
ein Öffnen des Motor- oder Getriebegehäuses<br />
erfordern, dürfen nur von einer autorisierten<br />
Kundendienst-Werkstatt durchgeführt werden.<br />
Mit einem Minimum an Wartung und Pflege wird die Bördelmaschine<br />
viele Jahre arbeiten. Alle Achsen sind mit<br />
wartungsfreien Kugellagern ausgerüstet.<br />
Zur Sicherstellung der Luftzirkulation müssen<br />
die Kühlluftöffnungen im Motorgehäuse<br />
stets frei und sauber gehalten werden.<br />
Je nach Beanspruchung sind die Lager der äußeren Führungsrollen<br />
(6, DDF 3-6; DDF 5-3; DDF 4-1) mit leichtem<br />
Maschinenöl zu pflegen.<br />
Bei geöffneter Maschine Zahnräder auf Fremdkörper und<br />
Schmutz kontrollieren und ggf. reinigen. Bördelrollen regelmäßig<br />
säubern und leicht einölen.<br />
Nur so ist eine einwandfreie Verbördelung zu erreichen.<br />
Spannstangen (6, DDF 7-0) im Bereich der Exzenter ölen,<br />
so dass auf der Oberfläche ein leichter Ölfilm sichtbar<br />
bleibt.<br />
Der Antrieb ist mit selbstabschaltenden Spezialkohlen<br />
ausgerüstet. Sind diese abgenutzt, erfolgt eine automatische<br />
Stromunterbrechung und die Maschine kommt<br />
zum Stillstand.<br />
8.2 Wechseln der Seitenrollen<br />
Unsere Bördelmaschine mit Universalrollenhalter (6, DDF<br />
3-12) ist zur Verarbeitung von Profilen Kalzip 50, 65 sowie<br />
von Profil Kalzip AF 65/AS 65 geeignet.<br />
Führen Sie einen Rollenwechsel nur bei<br />
gezogenem Netzstecker durch!<br />
Umrüstung der Bördelmaschine zwischen den Profilen<br />
Kalzip 50, Kalzip 65 und Kalzip AF 65/AS 65:<br />
1. Zum Verstellen der Seitenrollen erforderliches<br />
Werkzeug: Innensechskantschlüssel 5 mm<br />
2. Spannbügel waagerecht umlegen<br />
3. Innensechskantschrauben (1) zur Befestigung<br />
der Universalrollenhalter (2) entfernen<br />
4. Universalrollenhalter verschieben:<br />
• nach oben für Kalzip 50<br />
• in die Mitte für Kalzip 65<br />
• nach unten für Kalzip AF 65/AS 65<br />
Innensechskantschrauben wieder eindrehen<br />
und fest anschrauben.<br />
(1)<br />
(2)<br />
Ab Maschinennummer 1170 ist der Universalrollenhalter<br />
(6, DDF 3-12) serien mäßig<br />
verbaut.
9. Einstellung prüfen<br />
1. Verschlussflächen reinigen. Spannstangen<br />
(6, DDF 7-0) mittels der beiden Muttern (DDF 7-1)<br />
so einstellen, dass die Maschine voll geschlossen<br />
werden kann.<br />
2. Alle Führungsrollen (6, DDF 3-6; DDF 5-3; DDF 4-1)<br />
auf Leichtlauf und richtige Stellung prüfen.<br />
3. Bördelversuch machen<br />
10. Verfügbare Rollensätze<br />
• für 0,7 - 1,0 mm, Bez. 0,7 - 1,0<br />
• für 1,2 mm, Bez. 1.2<br />
• für Lichtbahnen Bez. L<br />
Eine falsche Montage der verschiedenen Rollensätze ist<br />
normalerweise nicht möglich. Verwenden Sie immer alle<br />
vier Rollen eines Types. Zum Wechseln des Rollensatzes<br />
erforderliches Werkzeug: Ringschlüssel 19 mm<br />
11. Gebogenes Kalzip Profi l<br />
Bei gebogenem Kalzip Profil kann es erforderlich sein, die<br />
Bördelmaschine umzubauen.<br />
• Knickgerundete Bahnen:<br />
Laufrollen (6, DDF 3-12) müssen immer entfernt werden.<br />
• Walzgerundete Bahnen:<br />
Bei weniger als 2 m Radius müssen die Führungsrollen<br />
(6, DDF 4-0) entfernt werden.<br />
12. Doppelschalige Lichtbahnen<br />
Die Führungsrollen müssen entfernt werden.<br />
13. Reparaturen<br />
Reparaturen am und im umschließenden<br />
Gehäuse dürfen nur vom Maschinenhersteller<br />
vorgenommen werden.<br />
Bei selbst vorgenommenen Reparaturen erlischt die<br />
Garantie. Der Hersteller übernimmt für keine Haftung<br />
für unsachgemäß vorgenommene Reparaturen, und<br />
daraus resultierende Schäden.<br />
Kalzip Bördelmaschine<br />
Kalzip 17<br />
Deutsch<br />
Español Italiano Français English
Deutsch<br />
Español Italiano Français English<br />
Kalzip Bördelmaschine<br />
14. Ersatzteile<br />
Ersatzteilliste 1<br />
18 Kalzip<br />
Ersatzteillisten für die Bördelmaschine finden<br />
Sie auf den folgenden Seiten.<br />
DDF 3-12<br />
DDF 3-6<br />
DDF 3-7<br />
DDF 3-8<br />
DDF 3-9<br />
DDF 3-0-6 Universalrollenhalter kompl. für<br />
Kalzip 65/50 mm und Kalzip AF 65<br />
DDF 3-6 Laufrolle breit<br />
DDF 3-7 Bolzen für breite Laufrolle<br />
DDF 3-8 Scheibe für breite Laufrolle<br />
DDF 3-9 Mutter für breite Laufrolle<br />
DDF 3-0-6<br />
DDF 5-4<br />
DDF 5-5<br />
DDF 5-3<br />
DDF 3-12 Universalrollenhalter für Kalzip 65/50 mm<br />
und Kalzip AF 65<br />
DDF 5-3 Laufrolle schmal, vorne<br />
DDF 5-4 Schraube für Laufrolle schmal, vorne<br />
DDF 5-5 Schraube für Laufrolle, schmal, vorne
DDF 2-1<br />
DDF 2-2<br />
DDF 3-4 / 3-5<br />
DDF 7-0<br />
DDF 4-2 / 4-3<br />
DDF 4-1<br />
Ersatzteilliste 2<br />
DDF 2-1 Gehäuseoberteil Antriebsseite<br />
DDF 2-2 Gehäuseunterteil Antriebsseite<br />
DDF 2-3 Gehäuseoberteil Gegenseite<br />
DDF 2-4 Gehäuseunterteil Gegenseite<br />
DDF 3-4 / 3-5 Schraube / Scheibe für Rollenhalter<br />
DDF 4-0 Rollenhalter vorne Antriebsseite<br />
DDF 4-1 Laufrolle vorne Mitte<br />
Kalzip Bördelmaschine<br />
DDF 4-0<br />
DDF 5-1<br />
DDF 5-2<br />
DDF 2-3<br />
DDF 2-4<br />
DDF 8-0<br />
DDF 8-1<br />
DDF 5-0<br />
DDF 4-2 / 4-3 Schraube / Scheibe für Laufrolle vorne Mitte<br />
DDF 5-0 Rollenhalter vorne Gegenseite<br />
DDF 5-1 Schraube für Rollenhalter vorne<br />
DDF 5-2 Scheibe für Rollenhalter vorne<br />
DDF 7-0 Spannstange<br />
DDF 8-0 Spannbügel für Excenter<br />
DDF 8-1 Kerbstift<br />
Kalzip 19<br />
Deutsch<br />
Español Italiano Français English
Deutsch<br />
Español Italiano Français English<br />
Kalzip Bördelmaschine<br />
Ersatzteilliste 3<br />
DDF 6-0 Reibplatte<br />
DDF 6-1 Schraube für Reibplatte<br />
DDF 6-2 Scheibe für Reibplatte<br />
DDF 7-1 Mutter für Spannstange<br />
DDF 7-2 Scheibe für Spannstange<br />
DDF 16-1 Rolle VA 0,7-1,0 vorne<br />
DDF 16-2 Rolle VA 0,7-1,0 hinten<br />
DDF 17-1 Rolle VA 1,2 vorne<br />
DDF 17-2 Rolle VA 1,2 hinten<br />
DDF 18-1 Rolle VA L vorne<br />
DDF 18-2 Rolle VA L hinten<br />
DDF 23-0 Schrauben für Antriebsbefestigung<br />
20 Kalzip<br />
DDF 74-0<br />
DDF 76-0<br />
DDF 90-0<br />
DDF 89-0<br />
DDF 6-0<br />
DDF 6-1<br />
DDF 6-2<br />
DDF 7-1<br />
DDF 7-2<br />
DDF 16-2<br />
DDF 17-2<br />
DDF 18-2<br />
DDF 92-0<br />
DDF 16-1<br />
DDF 17-1<br />
DDF 18-1<br />
DDF 30-0 Scheiben für Antriebsbefestigung<br />
DDF 74-0 Schaltgriff<br />
DDF 75-0 Kappe<br />
DDF 76-0 Linsenschrauben für Schaltgriff<br />
DDF 77-0 Linsenschraube für Kappe<br />
DDF 89-0 Schalter<br />
DDF 90-0 Kabel mit Stecker<br />
DDF 92-0 Knickschutz<br />
DDF 95-0 Kohlehalter mit Kohle<br />
DDF 109-0 Schutzring<br />
DDF 113-0 Innensechskantschraube<br />
DDF 95-0<br />
DDF 75-0<br />
DDF 77-0<br />
DDF 109-0<br />
DDF 113-0<br />
DDF 23-0<br />
DDF 30-0
Ersatzteilliste 4<br />
DDF 21-0 Antriebswelle<br />
DDF 22-0 Antriebsritzel (Z = 17)<br />
DDF 11-1 Keil für Zahnrad (kurz)<br />
DDF 11-6 Distanzscheibe für Welle<br />
DDF 15-0 Zahnrad 51 Zähne<br />
DDF 11-5 Seegerring für Welle<br />
DDF 11-7 Kugellager<br />
Ersatzteilliste 5<br />
DDF 21-0<br />
DDF 22-0<br />
DDF 14-0<br />
DDF 11-4<br />
DDF 37 Zylinderstift für Gehäuse<br />
DDF 7-4 Buchse lang für Spannstange<br />
DDF 7-3 Buchse kurz für Spannstange<br />
DDF 13-0 Welle für Bördelrolle vorne<br />
Gewinde 13.5 lang, ø 20,0<br />
DDF 11-2 Keil für Rolle (lang)<br />
DDF 11-3 Scheibe für Welle<br />
DDF 11-4 Mutter für die Welle<br />
DDF 14-0 Welle für die Bördelrolle hinten<br />
Gewinde 13.5 lang, ø 15,87<br />
DDF 37<br />
DDF 7-4<br />
DDF 7-3<br />
DDF 2-5<br />
DDF 2-6<br />
DDF 9-0<br />
DDF 11-1<br />
DDF 11-6<br />
DDF 15-0<br />
DDF 11-5<br />
DDF 11-7<br />
DDF 13-0<br />
DDF 11-2<br />
DDF 11-3<br />
DDF 2-5 Schrauben für Gehäuse<br />
DDF 2-6 Scheiben für Gehäuse<br />
DDF 9-0 Druckfeder<br />
Kalzip Bördelmaschine<br />
Kalzip 21<br />
Deutsch<br />
Español Italiano Français English
Deutsch<br />
Español Italiano Français English<br />
Kalzip <strong>zipping</strong> <strong>machine</strong><br />
Foreword<br />
Dear customer!<br />
Thank you very much for purchasing a <strong>zipping</strong> <strong>machine</strong><br />
from our company! Please read these instructions carefully<br />
and unhurriedly. Pay particular attention to the safety instructions<br />
in the text and to the chapter entitled “Safety<br />
instructions”.<br />
This is the prerequisite for:<br />
• safe handling of the <strong>machine</strong>,<br />
• good work results and<br />
• the smoothest possible <strong>zipping</strong> operation.<br />
If you should have any questions to which you cannot<br />
find an answer in these instructions, just call us – we will<br />
be only too pleased to help you. Our products are subject<br />
to continuous development, therefore there may be slight<br />
differences between your equipment and the illustrations<br />
in these operating instructions.<br />
22 Kalzip<br />
We will be pleased to help you if you have any questions<br />
or problems. We are at your disposal at<br />
Kalzip GmbH<br />
August-Horch-Str. 20-22<br />
D-56070 Koblenz<br />
P.O. Box 100316<br />
D-56033 Koblenz<br />
T +49 (0) 261 - 98 34-0<br />
F +49 (0) 261 - 98 34-100<br />
E germany@kalzip.com<br />
We are always willing to listen to proposals and suggestions<br />
for improvement.<br />
We wish you every success.<br />
2010 Kalzip GmbH<br />
All rights reserved. Reproduction, even of extracts, is allowed<br />
only with the written permission of the Kalzip company.
Kalzip <strong>zipping</strong> <strong>machine</strong><br />
Table of contents Page<br />
EC conformity declaration 24<br />
1. General 25<br />
1.1 Address, spare parts orders and customer service 25<br />
1.2 Amendments to the contents 25<br />
1.3 Copyright 25<br />
2. Technical data 25<br />
3. Scope of supply 26<br />
4. Legal regulations 26<br />
4.1 Appropriate use 26<br />
4.2 Foreseeable misuse 26<br />
4.3 Warranty and liability 26<br />
4.4 Returns and procedure 26<br />
5. Safety instructions 27<br />
6. Structure 28<br />
7. Start-up and operation 31<br />
7.1 Electrical connection 31<br />
7.2 Electronics 32<br />
7.3 The <strong>zipping</strong> procedure 32<br />
7.4 Handling the <strong>machine</strong> 33<br />
7.5 Disassembly (un<strong>zipping</strong> procedure) 33<br />
8. Service and maintenance of the <strong>zipping</strong> <strong>machine</strong> 34<br />
8.1 Maintenance 34<br />
8.2 Exchanging the side rollers 34<br />
9. Checking the settings 35<br />
10. Available roller sets 35<br />
11. Curved Kalzip profiled sheet 35<br />
12. Double skin translucent sheets 35<br />
13. Repairs 35<br />
14. Spare parts 36<br />
Kalzip 23<br />
Deutsch<br />
Español Italiano Français English
Deutsch<br />
Español Italiano Français English<br />
Kalzip <strong>zipping</strong> <strong>machine</strong><br />
24 Kalzip<br />
EC conformity declaration<br />
within the meaning of the EC <strong>machine</strong>ry directive<br />
2006/42/EC, Appendix II Part A.<br />
The manufacturer: Kalzip GmbH, August-Horch-Str. 20-22, D-56070 Koblenz<br />
hereby declares that the design of the <strong>zipping</strong> <strong>machine</strong> for the <strong>zipping</strong> of Kalzip ® elements:<br />
Type: Kalzip ® <strong>zipping</strong> <strong>machine</strong><br />
Trade name: Zipping <strong>machine</strong><br />
conforms to all relevant regulations of the EC Machinery Directive (2006/42/EC).<br />
The <strong>machine</strong> further conforms to all regulations of the EC EMC Directive (2004/108/EC) and of the EC Low-Voltage<br />
Directive 2006/95/EC.<br />
The following harmonised standards were applied:<br />
EN ISO 12100-1: 2003<br />
+A1: 2009<br />
EN ISO 12100-2: 2003<br />
+A1: 2009<br />
Safety of <strong>machine</strong>ry –<br />
Basic concepts, general principles for design<br />
Part 1: Basic terminology, methodology<br />
Safety of <strong>machine</strong>ry –<br />
Basic concepts, general principles for design<br />
Part 2: Technical principles and specifications<br />
EN ISO 13857: 2008 Safety of <strong>machine</strong>ry –<br />
Safety distances to prevent hazard zones being<br />
reached by upper and lower limbs<br />
EN 60745-1: 2009 Hand-held motor-operated electric tools –<br />
Safety –<br />
Part 1: General requirements<br />
EN 61000-6-2: 2005 Electromagnetic compatibility (EMC) –<br />
Part 6 - 2: Generic standards –<br />
Immunity for industrial environments<br />
EN 61000-6-4: 2007 Electromagnetic compatibility (EMC) –<br />
Part 6 - 4: Generic standards – generic standard –<br />
Emission standards for industrial environments<br />
The person authorised for the compilation of the relevant technical documents is:<br />
Dipl.-Ing. (FH) Christoph Bonn, Kalzip GmbH, August-Horch-Str. 20-22, D-56070 Koblenz<br />
Dr. Jörg Schwall, Managing Director<br />
Koblenz, 1/2/2010<br />
Kalzip GmbH<br />
August-Horch-Str. 20-22, D-56070 Koblenz<br />
Place, date Signature Name of the signatory
1. General<br />
1.1 Address, spare parts orders<br />
and customer service<br />
Kalzip GmbH<br />
August-Horch-Str. 20-22 · D-56070 Koblenz<br />
P.O. Box 100316 · D-56033 Koblenz<br />
T +49 (0) 261 - 98 34-0<br />
F +49 (0) 261 - 98 34-100<br />
E germany@kalzip.com<br />
1.2 Amendments to the contents<br />
We reserve the right to amend the contents. The<br />
Kalzip company accepts no liability for any errors<br />
in this documentation. Liability for indirect<br />
damage arising in conjunction with the supply<br />
or the use of this documentation is excluded, as<br />
far as this is legally permissible.<br />
2. Technical data<br />
Input voltage 230 - 240 V ~50/60 Hz<br />
Power consumption 1010 W<br />
(continuous operation)<br />
Drive shaft speed (idling) 250 - 600 rpm<br />
electronically controllable<br />
Weight 14.5 kg<br />
Emission values:<br />
Sound pressure level 84 dB(A)<br />
Sound power level 95 dB(A)<br />
Measuring inaccuracy<br />
supplement<br />
K = 3 dB<br />
1.3 Copyright<br />
Kalzip <strong>zipping</strong> <strong>machine</strong><br />
The copyright to these operating instructions<br />
is retained by the Kalzip company. These<br />
operating instructions are intended only for the<br />
operator and its personnel.<br />
The operating instructions must not be<br />
• duplicated,<br />
• distributed or<br />
• made accessible to unauthorised third parties,<br />
neither in full nor in part.<br />
Infringements may result in prosecution.<br />
Total oscillation values (Vector sum of three<br />
directions) determined according to EN 60745:<br />
Oscillation emission value<br />
(3-axis)<br />
a h = 3.5 m/s²<br />
Inaccuracy K = 1.5 m/s²<br />
Suitable for <strong>zipping</strong> the following profiled sheet sizes:<br />
Kalzip type Kalzip 50,<br />
sheet thickness:<br />
0.7 - 1.2 mm<br />
Kalzip 65,<br />
sheet thickness:<br />
0.7 - 1.2 mm<br />
Kalzip AF/AS 65,<br />
sheet thickness:<br />
0.7 - 1.2 mm<br />
Kalzip 25<br />
Deutsch<br />
Español Italiano Français English
Deutsch<br />
Español Italiano Français English<br />
Kalzip <strong>zipping</strong> <strong>machine</strong><br />
3. Scope of supply<br />
• Zipping <strong>machine</strong> with drive<br />
• Un<strong>zipping</strong> device<br />
• Transportation crate with insert<br />
• Roller set 0.7 - 1.0<br />
• Operating instructions<br />
4. Legal regulations<br />
4.1 Appropriate use<br />
26 Kalzip<br />
Your <strong>zipping</strong> <strong>machine</strong> may be used exclusively<br />
to zip the types of profiled sheets named in<br />
chapter 2, “Technical data”. The composite<br />
action important for structural strength and the<br />
rainproof property of the Kalzip profiled sheets<br />
can only be achieved if the <strong>zipping</strong> <strong>machine</strong><br />
works correctly.<br />
Use for the intended purpose also includes regular cleaning<br />
and maintenance.<br />
Use for any purpose other than the specified intended<br />
purpose must be agreed with the manufacturer beforehand.<br />
4.2 Foreseeable misuse<br />
Never allow the <strong>zipping</strong> <strong>machine</strong> to drive alone!<br />
There is a danger of the <strong>machine</strong> driving on its<br />
own over the roof ridge, then falling and thus<br />
causing personal injuries. Make sure that there<br />
is a barrier or a second person at the end of the<br />
roof ridge!<br />
4.3 Warranty and liability<br />
Contact us directly in the event of any warranty<br />
claims. The warranty for the <strong>zipping</strong> <strong>machine</strong>,<br />
including accessories, covers material and manufacturing<br />
defects for the duration of 12 months,<br />
starting from the date on the invoice. Warranty<br />
claims can only be made in conjunction with<br />
the proof of purchase.<br />
Defects covered by the warranty will be rectified within<br />
the context of these warranty conditions. Beyond that,<br />
no warranty claims will be accepted if the operator<br />
endangers the functions of the equipment by disregarding<br />
these operating instructions, using the <strong>machine</strong> other than<br />
for its intended purpose, or as a result of external interference.<br />
The operator is liable in such cases.<br />
The warranty is also rendered void if persons other than<br />
those authorised by us have made adjustments or changes.<br />
We will perform repairs in the case of valid warranty<br />
claims. The choice of the place where the performance is<br />
rendered or made available shall be at our discretion.<br />
The above warranty is exclusive and replaces all other written,<br />
verbal or indirect warranties. For the product it represents<br />
the only claim on the part of the purchaser and the<br />
only liability on our part. We exclude all indirect warranty<br />
claims that result from the handling of the equipment.<br />
In no case will we accept liability for any secondary or<br />
consequential damages arising in conjunction with the<br />
use or application of the product supplied.<br />
4.4 Returns and procedure<br />
Any warranty claims must be asserted during the<br />
warranty period and must be received by us in<br />
good time.<br />
If a product has to be sent in for repair and/or adjustment, our<br />
consent must be obtained beforehand. Any material sent in<br />
for examination and/or warranty repairs should be insured for<br />
the means of transport specified by us.<br />
The exclusive responsibility for the determination of the cause<br />
and nature of an error and the final decision regarding this is<br />
exclusively ours in all cases.<br />
Carriage forward shipments / packages will not be accepted!
5. Safety instructions<br />
It is absolutely essential to take note of the following safety<br />
information in order to prevent damage to the equipment<br />
and injuries to the user!<br />
Read all safety information and instructions. Neglecting<br />
to adhere to the safety information and instructions<br />
can lead to electric shocks, fire and/or severe injuries.<br />
The <strong>zipping</strong> <strong>machine</strong> may only be put into operation,<br />
used and serviced by instructed or trained personnel!<br />
The <strong>machine</strong> is built according to the current state of the<br />
art and recognised technical rules. Nevertheless dangers<br />
to the life and limb of the user or third parties or impairment<br />
to the <strong>machine</strong> or other property can arise through its use.<br />
Special instructions on the handling of the <strong>machine</strong> are<br />
necessary.<br />
Knocks and crushing hazards cannot be ruled out when<br />
manually positioning (handling) the <strong>zipping</strong> <strong>machine</strong> on<br />
the Kalzip sheets.<br />
Risk of injury! Mortal danger!<br />
Highest principle: Zip each sheet immediately after<br />
laying! Only in this way does the system achieve its load<br />
capacity and the requisite security against wind forces.<br />
Sheets that have not yet been zipped must not be stepped<br />
on.<br />
The <strong>zipping</strong> <strong>machine</strong> must close fully and the roller sets<br />
must be installed correctly.<br />
Keep the equipment away from children!<br />
Maintenance and cleaning work may only be carried out<br />
when the <strong>zipping</strong> <strong>machine</strong> is switched off and its mains<br />
plug is disconnected. It is essential to pay attention to<br />
the safety instructions in chapter 5.<br />
Protect the <strong>machine</strong> against dirt and moisture and do<br />
not leave it standing in the rain.<br />
Secure it against falling and never work without the<br />
handle.<br />
The rules for the prevention of accidents must be adhered<br />
to when <strong>zipping</strong> at the edges of roofs and at penetrations.<br />
Kalzip <strong>zipping</strong> <strong>machine</strong><br />
The operation is intended for a mains connection with<br />
a separate earth. In the case of long supply cables,<br />
the cable cross-sections are to be large enough so that<br />
230 volts are available for operation.<br />
The connecting plug of the electric tool must fit the<br />
socket. The plug must not be modified in any way.<br />
Do not use adaptor plugs together with electric tools<br />
with a protective earth. Unmodified plugs and matching<br />
sockets reduce the risk of an electric shock.<br />
Do not misuse the cable in order to carry or hang up<br />
the electric tool or to pull the plug out of the socket.<br />
Keep the cable away from heat, oil, sharp edges or<br />
moving equipment components. Damaged or entangled<br />
cables increase the risk of an electric shock.<br />
Be alert, pay attention to what you are doing and work<br />
sensibly with electric tools. Do not use electric tools if<br />
you are tired or under the influence of drugs, alcohol<br />
or medicines. One careless moment when using the electric<br />
tool can lead to serious injuries.<br />
Wear personal protective equipment. The wearing of<br />
personal protective equipment, such as non-slip safety<br />
shoes, safety helmets or ear protectors, depending on the<br />
type and use of the electric tool, reduces the risk of injuries.<br />
Avoid unintentional start-up. Make sure that the electric<br />
tool is switched off before connecting it to the<br />
power supply and/or battery, and before picking it up<br />
or carrying it. If you have your finger on the switch when<br />
carrying the electric tool or if the device is switched on<br />
when connecting it to the electricity supply, this can lead<br />
to accidents.<br />
Remove adjusting tools or wrenches before switching<br />
the electric tool on. A tool or a key in a turning component<br />
can lead to injuries.<br />
Work with the equipment only if the workplace is adequately<br />
lit. Never work in twilight without lighting.<br />
Ensure that the working area is always kept clear.<br />
Do not use an electric tool if its switch is defective.<br />
An electric tool that can no longer be switched on or off<br />
is dangerous and must be repaired.<br />
The <strong>machine</strong> is not intended for manual <strong>zipping</strong>.<br />
Kalzip 27<br />
Deutsch<br />
Español Italiano Français English
Deutsch<br />
Español Italiano Français English<br />
Kalzip <strong>zipping</strong> <strong>machine</strong><br />
The equipment is not certified for the use in explosive areas!<br />
In automatic operating mode (on even sub-structures),<br />
the danger zone and the <strong>zipping</strong> <strong>machine</strong> must constantly<br />
be within the operator’s field of view.<br />
If the button is latched (pushbutton), the <strong>zipping</strong> <strong>machine</strong><br />
can inadvertently restart when power is restored following<br />
a power cut.<br />
Any maintenance and repair work requiring the motor and<br />
gearbox casing to be opened may only be carried out by<br />
an authorised customer service centre.<br />
6. Structure<br />
28 Kalzip<br />
1.1 1.2<br />
Service and clean the equipment according to the instructions<br />
in chapter 8 and, above all, have the regular inspections<br />
for electric power tools prescribed by the German Operational<br />
Safety Ordinance (BetrSichV) carried out by a qualified<br />
electrician.<br />
Only perform a roller exchange or other adjustments or<br />
modifications with the mains plug disconnected!<br />
Drive<br />
1.3<br />
1.4<br />
1.1 Speed controller<br />
1.2 Lateral locking button<br />
1.3 On / off switch<br />
1.4 Protective ring
DDF 4-0<br />
DDF 2-1<br />
DDF 2-2<br />
DDF 3-4/ 3-5<br />
DDF 7-0<br />
DDF 4-1<br />
DDF 4-2/4-3<br />
DFF 5-0<br />
DFF 5-5<br />
DFF 5-3<br />
DDF 5-4<br />
20<br />
Zipping <strong>machine</strong> – front view<br />
DDF 2-1 Upper part of casing – driving side<br />
DDF 2-2 Lower part of casing – driving side<br />
DDF 2-3 Upper part of casing – non-driving side<br />
DDF 2-4 Lower part of casing – non-driving side<br />
DDF 3-4 / 3-5 Screw / washer for roller holder<br />
DDF 3-6 Large contact roller<br />
DDF 3-7 Bolt for large contact roller<br />
DDF 3-8 Washer for large contact roller<br />
DDF 3-9 Nut for large contact roller<br />
DDF 4-0 Front roller holder driving side<br />
DDF 4-1 Central front contact roller<br />
130 140<br />
from centre of the flange 20<br />
150<br />
20<br />
310<br />
290<br />
Zipping <strong>machine</strong> workspace<br />
320<br />
Kalzip <strong>zipping</strong> <strong>machine</strong><br />
DDF 4-2 / 4-3 Screw/washer for central front<br />
contact roller<br />
DDF 5-0 Front roller holder non-driving side<br />
DDF 5-1 Screw for front roller holder<br />
DDF 5-2 Washers for front roller holder<br />
DDF 5-3 Small front contact roller<br />
DDF 5-4 Screw for front small contact roller<br />
DDF 5-5 Washer for front small contact roller<br />
DDF 7-0 Tension bar<br />
DDF 8-0 Tension bar with eccentric shaft<br />
DDF 8-1 Notching pivot<br />
DDF 5-1<br />
DDF 5-2<br />
DDF 2-3<br />
DDF 2-4<br />
DDF 8-0<br />
DDF 8-1<br />
DDF 3-7<br />
DDF 3-6<br />
DDF 3-8<br />
DDF 3-9<br />
Kalzip 29<br />
Deutsch<br />
Español Italiano Français English
Deutsch<br />
Español Italiano Français English<br />
Kalzip <strong>zipping</strong> <strong>machine</strong><br />
Elements marked with an asterisk * denote individual parts from <strong>machine</strong> number 1600 onwards<br />
Zipping <strong>machine</strong> – side view<br />
DDF 3-12 Universal roller holder for Kalzip 50/65<br />
and Kalzip AF 65<br />
DDF 4-0 Front roller holder driving side<br />
DDF 5-0 Front roller holder non-driving side<br />
DDF 6-0 Friction disc<br />
DDF 6-1 Screw for friction disc<br />
DDF 6-2 Washer for friction disc<br />
DDF 7-1 Nut for tension bar<br />
DDF 7-2 Washer for tension bar<br />
DDF 16-1 Front roller STD 0.7 - 1.0<br />
DDF 16-2 Back roller STD 0.7 - 1.0<br />
DDF 17-1 Front roller 1.2<br />
DDF 17-2 Back roller 1.2<br />
DDF 18-1 Front translucent sheet roller<br />
DDF 18-2 Back translucent sheet roller<br />
DDF 23-0 Screws for drive attachment<br />
DDF 30-0 Washers for drive attachment<br />
30 Kalzip<br />
DDF 74 - 0<br />
DDF 76 - 0<br />
DDF 91- 0<br />
DDF 134-0*<br />
DDF 90-0<br />
DDF 89-0*<br />
DDF 133-0*<br />
DDF 6-0<br />
DDF 7-1<br />
DDF 7-2<br />
DDF 16-2<br />
DDF 17-2<br />
DDF 18-2<br />
DDF 6-2<br />
DDF 6-2<br />
Up to <strong>machine</strong> number 1599<br />
DDF 75 - 0<br />
DDF 137 -0*<br />
DDF 95 -0<br />
DDF 139 -0*<br />
DDF 77-0<br />
DDF 138 -0*<br />
DDF 109 -0<br />
DDF 163 -0*<br />
DDF 23 -0<br />
DDF 30 -0<br />
DDF 113 -0<br />
DDF 4 -0<br />
DDF 5 -0<br />
DDF 3 -12<br />
DDF 16-1<br />
DDF 17-1<br />
DDF 18-1<br />
DDF 74-0 Switch bar<br />
DDF 75-0 Cap<br />
DDF 76-0 Lens screws for switch bar<br />
DDF 77-0 Lens screws for cap<br />
DDF 89-0 Switch<br />
DDF 90-0 Cable with plug<br />
DDF 91-0 Cable protection sleeve<br />
DDF 95-0 Brush holder with carbon brush<br />
DDF 109-0 Protective ring<br />
DDF 113-0 Hexagon socket screw<br />
From <strong>machine</strong> number 1600 onward<br />
DDF 133-0 Switch<br />
DDF 134-0 Cable protection sleeve<br />
DDF 137-0 Motor casing cover<br />
DDF 138-0 Lens screws for cap<br />
DDF 139-0 Brush holder with carbon brush<br />
DDF 163-0 Protective ring
Deviating from the standard <strong>zipping</strong> <strong>machine</strong><br />
there is also a <strong>zipping</strong> <strong>machine</strong> with an angled<br />
drive for use in confined spaces.<br />
Zipping <strong>machine</strong> – version with angled drive<br />
7. Start-up and operation<br />
Before starting up the <strong>zipping</strong> <strong>machine</strong>, check<br />
that the safety bracket is tight and that there<br />
are no loose fixings!<br />
Start-up and operation may only be commenced<br />
if all prerequisites for compliance with the operating<br />
instructions have been fulfilled and the responsible<br />
personnel have read and understood<br />
the operating instructions.<br />
7.1 Electrical connection<br />
The mains voltage must correspond to the voltage shown<br />
on the rating plate. See 7.1 regarding connection and disconnection<br />
of the mains cable.<br />
Always switch the <strong>machine</strong> off before connecting<br />
or disconnecting the mains cable!<br />
Kalzip <strong>zipping</strong> <strong>machine</strong><br />
Connection and disconnection of the mains cable<br />
The switch (6, 1.3) serves as the on / off switch (press =<br />
ON, release = OFF). For continuous operation it can<br />
be latched with the lateral locking button (6, 1.2). The<br />
latching is released by pressing the switch again.<br />
Kalzip 31<br />
Deutsch<br />
Español Italiano Français English
Deutsch<br />
Español Italiano Français English<br />
Kalzip <strong>zipping</strong> <strong>machine</strong><br />
7.2 Electronics<br />
The drive has full wave electronics with the following characteristics:<br />
Soft start The electronically controlled soft start ensures that the <strong>machine</strong> starts up without jerks.<br />
Speed control The motor speed can be adjusted infinitely between 250 and 600 rpm using the speed<br />
controller (6, 1.1).<br />
Constant speed The preselected motor speed is kept constant electronically. This enables a constant<br />
speed to be achieved even under load.<br />
Temperature protection Extreme overloading in continuous operation leads to the motor heating up. An electronic<br />
temperature monitor is installed to protect against overheating (burning out of the motor).<br />
The safety circuit switches the motor off before a critical motor temperature is reached.<br />
After a cooling period of approx. 3 - 5 minutes the <strong>machine</strong> is ready for operation<br />
again and is fully loadable. The cooling period is shortened significantly if the <strong>machine</strong><br />
is running (idling).<br />
7.3 The <strong>zipping</strong> procedure<br />
For safety reasons and for the achievement of the composite<br />
action necessary for load capacity and suitability<br />
for stepping on, each Kalzip profiled sheet must be<br />
zipped immediately after being laid. Clips are used to fix<br />
the Kalzip profiled sheets; the clips are encompassed by<br />
the flanges and covered by the next element. It must be<br />
ensured that the small flange is latched in the clip head,<br />
as otherwise faulty <strong>zipping</strong> may result.<br />
32 Kalzip<br />
Do not work with the <strong>machine</strong> if electronics<br />
are defective, since this can lead to excessive<br />
speeds. Defective electronics can be recognised<br />
by the lack of a soft start, by increased<br />
idling noise or by the fact that no speed<br />
control is possible.<br />
Each Kalzip profiled sheet must be zipped<br />
immediately after laying.<br />
The <strong>zipping</strong> <strong>machine</strong> is also available in<br />
a version with an angled drive (see 6)!
7.4 Handling the <strong>machine</strong><br />
In order to meet all requirements for the high<br />
stresses in professional use, the <strong>machine</strong> is<br />
equipped with a protective ring (6, 1.4) that<br />
protects the motor casing against extreme<br />
shocks.<br />
In automatic operating mode (on even substructures),<br />
the danger zone and the <strong>zipping</strong><br />
<strong>machine</strong> must constantly be within the operator’s<br />
field of view.<br />
The closed <strong>machine</strong> can be fed onto the flange of the<br />
Kalzip profiled sheet in jogging mode. Prior <strong>zipping</strong> of the<br />
flanges with the manual closing pliers facilitates this procedure.<br />
The speed of the <strong>zipping</strong> <strong>machine</strong> can be changed<br />
by means of the adjusting wheel on the handle.<br />
On even sub-substructures the <strong>machine</strong> can normally<br />
run alone in automatic mode with light manual guidance.<br />
Stronger manual guidance can be necessary on uneven<br />
or rounded roofs. The proper function of the <strong>zipping</strong> <strong>machine</strong><br />
can be checked by the dimension of the finished<br />
flange.<br />
7.5 Disassembly (un<strong>zipping</strong> procedure)<br />
In order to unzip the Kalzip profiled sheets, the un<strong>zipping</strong><br />
device is inserted into the groove on the rear side<br />
of the <strong>zipping</strong> <strong>machine</strong>. Before that the covering flange<br />
must be opened somewhat using a suitable tool (e.g.<br />
screwdriver).<br />
Hook in the un<strong>zipping</strong> device and check that the height<br />
adjustment is correct. Before feeding in the tapered roller,<br />
open the large flange a little using a screwdriver. Then feed<br />
in the tapered roller in jogging mode. The adjustment is<br />
carried out by means of the grub screw DDF 10-5. The<br />
tapered roller opens the large flange and the Kalzip profiled<br />
sheet can be removed from it.<br />
If the Kalzip profiled sheet is to be zipped again, then the<br />
un<strong>zipping</strong> device must be adjusted such that it is only just<br />
possible to remove it.<br />
Drive<br />
DDF 10- 5<br />
DDF 10- 1<br />
DDF 10- 2<br />
DDF 10- 4 DDF 10- 3<br />
DDF 10-1 Holder for tapered roller<br />
DDF 10-2 Tapered roller<br />
DDF 10-3 Screw left threaded<br />
DDF 10-4 Screw right threaded<br />
DDF 10-5 Threaded pivot<br />
Kalzip <strong>zipping</strong> <strong>machine</strong><br />
Kalzip 33<br />
Deutsch<br />
Español Italiano Français English
Deutsch<br />
Español Italiano Français English<br />
Kalzip <strong>zipping</strong> <strong>machine</strong><br />
8. Service and maintenance of the <strong>zipping</strong> <strong>machine</strong><br />
8.1 Maintenance<br />
34 Kalzip<br />
The maintenance of the <strong>machine</strong> may only<br />
be commenced if all prerequisites for compliance<br />
with the operating instructions have<br />
been fulfilled and the responsible personnel<br />
have read and understood the operating instructions.<br />
Always disconnect the mains plug from the<br />
socket before carrying out any maintenance<br />
work on the <strong>machine</strong>!<br />
Any maintenance and repair work requiring<br />
the motor or gearbox casing to be opened<br />
may only be carried out by an authorised<br />
customer service centre.<br />
The <strong>zipping</strong> <strong>machine</strong> will work for many years with a minimum<br />
of servicing and maintenance. All axles are equipped<br />
with maintenance-free ball bearings.<br />
In order to ensure the air circulation, the<br />
cooling air openings in the motor casing<br />
must always be kept clear and clean.<br />
Depending upon the load, the bearings of the outer guide<br />
rollers (6, DDF 3-6; DDF 5-3; DDF 4-1) must be lubricated<br />
with light <strong>machine</strong> oil.<br />
With the <strong>machine</strong> open, check the gear wheels for foreign<br />
bodies and dirt and clean them if necessary. Regularly<br />
clean and lightly oil the <strong>zipping</strong> rollers.<br />
Only in this way can perfect <strong>zipping</strong> can be achieved.<br />
Oil the tension bars (6, DDF 7-0) in the area of the eccentric<br />
shaft so that a light film of oil remains visible on the<br />
surface.<br />
The drive is equipped with special self-deactivating brushes.<br />
If these are worn out, the current is automatically interrupted<br />
and the <strong>machine</strong> comes to a standstill.<br />
8.2 Exchanging the side rollers<br />
Our <strong>zipping</strong> <strong>machine</strong> with universal roller holder (6, DDF<br />
3-12) is suitable for the processing of Kalzip 50, 65 profiled<br />
sheets and Kalzip AF 65/AS 65 profiled sheets.<br />
Exchange the rollers only with the mains plug<br />
disconnected!<br />
Converting the <strong>zipping</strong> <strong>machine</strong> between the Kalzip<br />
50, Kalzip 65 and Kalzip AF 65/AS 65 profiled sheets:<br />
1. Tools required to adjust the side rollers:<br />
Hexagon socket spanner 5 mm<br />
2. Push the tension bar into a horizontal position<br />
3. Remove the socket head screws (1) for the<br />
attachment of the universal roller holders (2)<br />
4. Displace the universal roller holder:<br />
• upwards for Kalzip 50<br />
• to the centre for Kalzip 65<br />
• downwards for Kalzip AF 65/AS 65<br />
Screw the hexagon socket screws back in and<br />
tighten them firmly.<br />
(1)<br />
(2)<br />
The universal roller holder (6, DDF 3-12) is<br />
installed as standard from <strong>machine</strong> number<br />
1170 onwards.
9. Checking the settings<br />
1. Clean the closure surfaces. Adjust the tension bars<br />
(6, DDF 7-0) by means of the two nuts (DDF 7-1) such<br />
that the <strong>machine</strong> can be completely closed.<br />
2. Check that all guide rollers (6, DDF 3-6; DDF 5-3;<br />
DDF 4-1) move freely and are correctly adjusted.<br />
3. Perform a trial <strong>zipping</strong> operation<br />
10. Available roller sets<br />
• for 0.7 - 1.0 mm, nom. 0.7 – 1.0<br />
• for 1.2 mm, nom. 1.2<br />
• for translucent sheets, nom. L<br />
Wrong fixing of the various roller sets is under normal<br />
circumstances not possible. Always use all four rollers<br />
of one type. Tools required to change the roller set:<br />
Ring spanner 19 mm<br />
11. Curved Kalzip profi led<br />
sheet<br />
Modification of the <strong>zipping</strong> <strong>machine</strong> may be necessary for<br />
working on curved Kalzip profiled sheets.<br />
• Crimp-curved sheets:<br />
Contact rollers (6, DDF 3-12) must be always removed.<br />
• Roll-curved sheets:<br />
The guide rollers (6, DDF 4-0) must be removed if the<br />
radii are less than 2 m.<br />
12. Double skin translucent sheets<br />
The guide rollers must be removed.<br />
13. Repairs<br />
Repairs to and inside the casing may only be<br />
carried out by the <strong>machine</strong> manufacturer. Repairs<br />
carried out by the user render the warranty void.<br />
The manufacturer accepts no liability for repairs<br />
carried out improperly and any damage resulting<br />
therefrom.<br />
Kalzip <strong>zipping</strong> <strong>machine</strong><br />
Kalzip 35<br />
Deutsch<br />
Español Italiano Français English
Deutsch<br />
Español Italiano Français English<br />
Kalzip <strong>zipping</strong> <strong>machine</strong><br />
14. Spare parts<br />
Spare parts list 1<br />
36 Kalzip<br />
Spare parts lists for the <strong>zipping</strong> <strong>machine</strong> can<br />
be found on the following pages.<br />
DDF 3-12<br />
DDF 3-6<br />
DDF 3-7<br />
DDF 3-8<br />
DDF 3-9<br />
DDF 3-0-6 Universal roller holder, complete, for<br />
Kalzip 65/50 mm and Kalzip AF 65<br />
DDF 3-6 Large contact roller<br />
DDF 3-7 Bolt for large contact roller<br />
DDF 3-8 Washer for large contact roller<br />
DDF 3-9 Nut for large contact roller<br />
DDF 3-0-6<br />
DDF 5-4<br />
DDF 5-5<br />
DDF 5-3<br />
DDF 3-12 Universal roller holder for Kalzip 65/50 mm<br />
and Kalzip AF 65<br />
DDF 5-3 Small front contact roller<br />
DDF 5-4 Screw for front small contact roller<br />
DDF 5-5 Screw for front small contact roller
DDF 2-1<br />
DDF 2-2<br />
DDF 3-4 / 3-5<br />
DDF 7-0<br />
DDF 4-2 / 4-3<br />
DDF 4-1<br />
Spare parts list 2<br />
DDF 2-1 Upper part of casing – driving side<br />
DDF 2-2 Lower part of casing – driving side<br />
DDF 2-3 Upper part of casing – non-driving side<br />
DDF 2-4 Lower part of casing – non-driving side<br />
DDF 3-4 / 3-5 Screw/washer for roller holder<br />
DDF 4-0 Front roller holder driving side<br />
DDF 4-1 Central front contact roller<br />
Kalzip <strong>zipping</strong> <strong>machine</strong><br />
DDF 4-0<br />
DDF 5-1<br />
DDF 5-2<br />
DDF 2-3<br />
DDF 2-4<br />
DDF 8-0<br />
DDF 8-1<br />
DDF 5-0<br />
DDF 4-2 / 4-3 Screw/washer for central front contact roller<br />
DDF 5-0 Front roller holder non-driving side<br />
DDF 5-1 Screw for front roller holder<br />
DDF 5-2 Washer for front roller holder<br />
DDF 7-0 Tension bar<br />
DDF 8-0 Tension bar for eccentric shaft<br />
DDF 8-1 Notching pivot<br />
Kalzip 37<br />
Deutsch<br />
Español Italiano Français English
Deutsch<br />
Español Italiano Français English<br />
Kalzip <strong>zipping</strong> <strong>machine</strong><br />
Spare parts list 3<br />
DDF 6-0 Friction disc<br />
DDF 6-1 Screw for friction disc<br />
DDF 6-2 Washer for friction disc<br />
DDF 7-1 Nut for tension bar<br />
DDF 7-2 Washer for tension bar<br />
DDF 16-1 Front roller VA 0.7 - 1.0<br />
DDF 16-2 Back roller VA 0.7 - 1.0<br />
DDF 17-1 Front roller VA 1.2<br />
DDF 17-2 Back roller VA 1.2<br />
DDF 18-1 Front roller VA L<br />
DDF 18-2 Back roller VA L<br />
DDF 23-0 Screws for drive attachment<br />
38 Kalzip<br />
DDF 74-0<br />
DDF 76-0<br />
DDF 90-0<br />
DDF 89-0<br />
DDF 6-0<br />
DDF 6-1<br />
DDF 6-2<br />
DDF 7-1<br />
DDF 7-2<br />
DDF 16-2<br />
DDF 17-2<br />
DDF 18-2<br />
DDF 92-0<br />
DDF 16-1<br />
DDF 17-1<br />
DDF 18-1<br />
DDF 30-0 Washers for drive attachment<br />
DDF 74-0 Switch bar<br />
DDF 75-0 Cap<br />
DDF 76-0 Lens screws for switch bar<br />
DDF 77-0 Lens screw for cap<br />
DDF 89-0 Switch<br />
DDF 90-0 Cable with plug<br />
DDF 92-0 Cable protection sleeve<br />
DDF 95-0 Brush holder with carbon brush<br />
DDF 109-0 Protective ring<br />
DDF 113-0 Hexagon socket screw<br />
DDF 95-0<br />
DDF 75-0<br />
DDF 77-0<br />
DDF 109-0<br />
DDF 113-0<br />
DDF 23-0<br />
DDF 30-0
DDF 21-0<br />
DDF 22-0<br />
DDF 14-0<br />
DDF 11-4<br />
Spare parts list 4<br />
DDF 21-0 Drive shaft<br />
DDF 22-0 Drive pinion (17 teeth)<br />
DDF 11-1 Key for gear wheel (short)<br />
DDF 11-6 Spacer for shaft<br />
DDF 15-0 Gear wheel, 51 teeth<br />
DDF 11-5 Circlip for shaft<br />
DDF 11-7 Ball bearing<br />
Spare parts list 5<br />
DDF 37 Cylindrical pin for casing<br />
DDF 7-4 Bushing, long, for tension bar<br />
DDF 7-3 Bushing, short, for tension bar<br />
DDF 13-0 Shaft for front <strong>zipping</strong> roller,<br />
thread 13.5 long, ø 20.0<br />
DDF 11-2 Key for roller (long)<br />
DDF 11-3 Washer for shaft<br />
DDF 11-4 Nut for shaft<br />
DDF 14-0 Shaft for back <strong>zipping</strong> roller,<br />
thread 13.5 long, ø 15.87<br />
DDF 37<br />
DDF 7-4<br />
DDF 7-3<br />
DDF 2-5<br />
DDF 2-6<br />
DDF 9-0<br />
DDF 2-5 Screws for casing<br />
DDF 2-6 Washers for casing<br />
DDF 9-0 Compression spring<br />
DDF 11-1<br />
DDF 11-6<br />
DDF 15-0<br />
DDF 11-5<br />
DDF 11-7<br />
DDF 13-0<br />
DDF 11-2<br />
DDF 11-3<br />
Kalzip <strong>zipping</strong> <strong>machine</strong><br />
Kalzip 39<br />
Deutsch<br />
Español Italiano Français English
Deutsch<br />
Español Italiano Français English<br />
Sertisseuse Kalzip<br />
Avant-propos<br />
Cher client,<br />
Nous vous remercions d’avoir opté pour une sertisseuse<br />
de notre marque ! Nous vous prions de bien vouloir lire<br />
attentivement les présentes instructions d’utilisation. Observez<br />
plus particulièrement les consignes de sécurité<br />
données dans le texte ainsi qu’au chapitre « Consignes<br />
de sécurité ».<br />
Il s’agit de la condition préalable non pour :<br />
• la manipulation sûre de la <strong>machine</strong>,<br />
• de bons résultats de travail et<br />
• un sertissage exempt de défauts.<br />
Si vous avez encore des questions suite à la lecture de ces<br />
instructions d’utilisation, n’hésitez pas à nous téléphoner,<br />
nous restons volontiers à votre disposition pour y répondre.<br />
Nos produits font l’objet d’un développement permanent,<br />
c’est pourquoi il peut y avoir de légères différences entre<br />
votre appareil et les photos de ces instructions d’utilisation.<br />
40 Kalzip<br />
Nous restons volontiers à votre disposition en cas de<br />
question ou de problème. Voici nos coordonnées :<br />
Kalzip GmbH<br />
August-Horch-Str. 20-22<br />
D-56070 Coblence<br />
Postfach 100316<br />
D-56033 Coblence<br />
T +49 (0) 261 - 98 34-0<br />
F +49 (0) 261 - 98 34-100<br />
E germany@kalzip.com<br />
Nous sommes à votre disposition ! Toutes vos remarques<br />
et suggestions d’amélioration sont les bienvenues.<br />
Nous vous souhaitons beaucoup de succès.<br />
2010 Kalzip GmbH<br />
Tous droits réservés. Toute reproduction même partielle<br />
est interdite sans l’autorisation écrite de la société Kalzip.
Table des matières<br />
Sertisseuse Kalzip<br />
Déclaration de conformité CE 42<br />
1. Généralités 43<br />
1.1 Adresse, commande de pièces de rechange et service clientèle 43<br />
1.2 Modifications du contenu 43<br />
1.3 Droits d’auteur 43<br />
2. Caractéristiques techniques 43<br />
3. Livraison 44<br />
4. Dispositions légales 44<br />
4.1 Utilisation conforme 44<br />
4.2 Application incorrecte prévisible 44<br />
4.3 Garantie et responsabilité 44<br />
4.4 Retour et règlement 44<br />
5. Consignes de sécurité 45<br />
6. Construction 46<br />
7. Mise en service et utilisation 49<br />
7.1 Branchement électrique 49<br />
7.2 Système électronique 50<br />
7.3 Sertissage 50<br />
7.4 Manipulation de la <strong>machine</strong> 51<br />
7.5 Démontage (processus de dessertissage) 51<br />
8. Maintenance et entretien de la sertisseuse 52<br />
8.1 Entretien 52<br />
8.2 Remplacement des galets latéraux 52<br />
9. Contrôle du réglage 53<br />
10. Jeux de galets disponibles 53<br />
11. Profilé cintré Kalzip 53<br />
12. Bacs translucides double paroi 53<br />
13. Réparations 53<br />
14. Pièces de rechange 54<br />
Page<br />
Kalzip 41<br />
Deutsch<br />
Français English<br />
Español Italiano
Deutsch<br />
Español Italiano Français English<br />
Sertisseuse Kalzip<br />
42 Kalzip<br />
Déclaration de conformité CE<br />
au sens de la Directive CE relatives aux<br />
<strong>machine</strong>s 2006/42/CE, annexe II partie A.<br />
Le fabricant : Kalzip GmbH, August-Horch-Str. 20-22, D-56070 Coblence<br />
déclare par la présente que la construction de la sertisseuse pour éléments Kalzip ® :<br />
type : sertisseuse Kalzip ®<br />
désignation commerciale : sertisseuse<br />
satisfait à toutes les dispositions applicables de la Directive CE relative aux <strong>machine</strong>s (2006/42/CE).<br />
La <strong>machine</strong> répond en outre aux dispositions de la Directive CE sur la compatibilité électromagnétique<br />
(2004/108/CE) ainsi qu’à la Directive CE basse tension 2006/95/CE.<br />
Les normes harmonisées ci-dessous ont été appliquées :<br />
EN ISO 12100-1: 2003<br />
+A1: 2009<br />
EN ISO 12100-2: 2003<br />
+A1: 2009<br />
Sécurité des <strong>machine</strong>s –<br />
Notions fondamentales, principes généraux de construction<br />
Partie 1 : Terminologie de base, méthodologie<br />
Sécurité des <strong>machine</strong>s –<br />
Notions fondamentales, principes généraux de construction<br />
Partie 2 : Principes et spécifications techniques<br />
EN ISO 13857: 2008 Sécurité des <strong>machine</strong>s –<br />
Distances de sécurité empêchant les membres supérieurs et inférieurs<br />
d’atteindre les zones dangereuses<br />
EN 60745-1: 2009 Outils électroportatifs à moteur –<br />
Sécurité –<br />
Partie 1 : Règles générales<br />
EN 61000-6-2: 2005 Compatibilité électromagnétique (CEM) –<br />
Partie 6 - 2 : Normes génériques –<br />
Immunité pour les environnements industriels<br />
EN 61000-6-4: 2007 Compatibilité électromagnétique (CEM) –<br />
Partie 6 - 4 : Normes génériques – Norme générique –<br />
Émissivité pour les environnements industriels<br />
Responsable pour la rédaction des documents techniques correspondants :<br />
Ing. Dipl. (FH) Christoph Bonn, Kalzip GmbH, August-Horch-Str. 20-22, D-56070 Coblence<br />
Dr. Jörg Schwall, Direction<br />
Coblence, le 01/02/2010<br />
Kalzip GmbH<br />
August-Horch-Str. 20-22, D-56070 Koblenz<br />
Lieu, date Signature Fonction du signataire
1. Généralités<br />
1.1 Adresse, commande de pièces<br />
de rechange et service clientèle<br />
Kalzip GmbH<br />
August-Horch-Str. 20-22<br />
D-56070 Coblence<br />
Postfach 100316 · D-56033 Coblence<br />
T +49 (0) 261 - 98 34-0<br />
F +49 (0) 261 - 98 34-100<br />
E germany@kalzip.com<br />
1.2 Modifications du contenu<br />
Nous nous réservons le droit d’apporter des<br />
modifications au contenu. La société Kalzip<br />
n’assume aucune responsabilité pour les éventuelles<br />
erreurs dans cette documentation. La<br />
responsabilité en cas de dommages consécutifs<br />
en relation avec la livraison ou l’utilisation de<br />
cette documentation est exclue pour autant que<br />
cela soit juridiquement admis.<br />
2. Caractéristiques techniques<br />
Tension d‘alimentation 230 - 240 V ~50/60 Hz<br />
Puissance absorbée 1010 W<br />
(fonctionnement continu)<br />
Vitesse de rotation de l’arbre<br />
d’entraînement (à vide)<br />
Poids 14,5 kg<br />
Valeurs d‘émission :<br />
Niveau de pression<br />
acoustique<br />
Niveau de puissance<br />
acoustique<br />
Majoration pour<br />
incertitude de mesure<br />
250 - 600 tr/min<br />
réglage électronique<br />
84 dB(A)<br />
95 dB(A)<br />
K = 3 dB<br />
1.3 Droits d’auteur<br />
Sertisseuse Kalzip<br />
Les droits d’auteur liés à ces instructions d’utilisation<br />
restent la propriété de la société Kalzip.<br />
Ces instructions d’utilisation sont destinées de<br />
manière exclusive à l’exploitant et à son personnel.<br />
Même partiellement, ces instructions d’utilisation ne<br />
peuvent pas être<br />
• reproduites,<br />
• distribuées ni<br />
• rendues accessibles à des tiers.<br />
Toute infraction peut entraîner des poursuites pénales.<br />
Valeurs des vibrations globales (somme vectorielle<br />
de trois directions) calculées conformément à la<br />
norme EN 60745 :<br />
Valeur d’émission de<br />
vibrations (3 axes)<br />
a h = 3,5 m/s²<br />
Incertitude K = 1,5 m/s²<br />
Conçu pour le sertissage des bacs profilés des<br />
tailles ci-dessous :<br />
Modèle Kalzip Kalzip 50,<br />
calibre de tôle<br />
0,7 - 1,2 mm<br />
Kalzip 65,<br />
calibre de tôle<br />
0,7 - 1,2 mm<br />
Kalzip AF/AS 65,<br />
calibre de tôle<br />
0,7 - 1,2 mm<br />
Kalzip 43<br />
Deutsch<br />
Français English<br />
Español Italiano
Deutsch<br />
Español Italiano Français English<br />
Sertisseuse Kalzip<br />
3. Livraison<br />
• Sertisseuse avec moteur<br />
• Outil de dessertissage<br />
• Coffret de transport avec insert<br />
• Jeu de galets 0,7 - 1,0<br />
• Instructions d’utilisation<br />
4. Dispositions légales<br />
4.1 Utilisation conforme<br />
Votre sertisseuse ne peut être utilisée que pour le sertissage<br />
des bacs profilés des modèles donnés au chapitre<br />
2 « Caractéristiques techniques ». L’assemblage requis<br />
pour la statique et l’étanchéité aux eaux de pluie des<br />
bacs profilés Kalzip ne peut être obtenu que si la sertisseuse<br />
fonctionne correctement.<br />
L’utilisation conforme comprend également le nettoyage<br />
et la maintenance réguliers.<br />
Toute autre utilisation doit faire l’objet d’une concertation<br />
préalable avec le fabricant.<br />
4.2 Application incorrecte prévisible<br />
44 Kalzip<br />
Ne jamais laisser la sertisseuse avancer toute<br />
seule ! La <strong>machine</strong> risque en effet de se déplacer<br />
d’elle-même sur le faîtage puis de chuter et<br />
de causer des blessures aux personnes. Veiller<br />
à ce qu’il y ait une barrière ou une seconde personne<br />
à l’autre extrémité du faîtage !<br />
4.3 Garantie et responsabilité<br />
En cas de recours à la garantie, veuillez nous<br />
contacter directement. La garantie pour la sertisseuse<br />
et ses accessoires – y compris les vices<br />
de matériau et de fabrication – est de 12 mois<br />
à partir de la date de facturation. Le droit à la<br />
garantie n’est accordé que sur présentation de<br />
la preuve d’achat.<br />
Les défauts qui tombent sous le coup de la garantie sont<br />
supprimés dans le cadre des conditions d’application de<br />
la garantie. Par ailleurs, la garantie devient caduque si<br />
l’exploitant nuit au fonctionnement de l’appareil par le<br />
non-respect des instructions d’utilisation, l’utilisation non<br />
conforme ou une intervention externe. L’exploitant est dans<br />
ces cas le seul responsable.<br />
Les prestations de la garantie sont également caduques si<br />
des personnes non autorisées par nos soins procèdent à<br />
des réglages ou à des modifications de la <strong>machine</strong>. Si le<br />
recours à la garantie est valide, nous procédons aux réparations.<br />
Nous nous réservons le choix du lieu de l’exécution<br />
ou de la mise à disposition des prestations.<br />
La présente garantie s’applique à titre exclusif et remplace<br />
toutes les autres garanties écrites, orales ou indirectes.<br />
En ce qui concerne le produit, elle représente le seul droit<br />
de l’acheteur ainsi que la seule responsabilité de notre<br />
part. Nous rejetons tout droit indirect à la garantie qui découle<br />
de la manipulation de l’appareil.<br />
Nous n’assumons en aucun cas la responsabilité pour tout<br />
dommage secondaire ou consécutif découlant de ou en<br />
rapport avec l’utilisation ou l’exploitation du produit livré.<br />
4.4 Retour et règlement<br />
Tout recours à la garantie doit être introduit en<br />
temps opportun pendant la période de garantie.<br />
Si un produit doit être retourné pour réparation et / ou réglage,<br />
il faut tout d’abord nous en demander l’autorisation.<br />
Tout matériel retourné pour contrôle et / ou réparations<br />
sous garantie doit être protégé par le moyen de transport<br />
que nous aurons spécifié.<br />
La détermination de la cause et de la nature d’un défaut<br />
ainsi que la décision finale sont de notre ressort exclusif.<br />
Nous n’acceptons pas les envois / paquets non affranchis !
5. Consignes de sécurité<br />
Veuillez respecter les consignes de sécurité suivantes afin<br />
d’éviter d’endommager l’appareil et de causer des blessures<br />
à l’utilisateur !<br />
Lire toutes les consignes de sécurité et les instructions.<br />
Toute négligence dans le respect des consignes de sécurité<br />
et des instructions peut entraîner un choc électrique, un incendie<br />
et / ou des blessures graves.<br />
La sertisseuse ne peut être mise en service, utilisée et<br />
entretenue que par du personnel instruit ou formé !<br />
La <strong>machine</strong> a été construite dans les règles de l’art,<br />
conformément aux règlements techniques reconnus. Son<br />
utilisation peut cependant entraîner des dangers pour<br />
la santé et la vie de l’utilisateur ou de tiers, ou encore<br />
endommager la <strong>machine</strong> ou d’autres biens corporels.<br />
La manipulation de la <strong>machine</strong> nécessite des indications<br />
particulières.<br />
Lors du positionnement manuel (manipulation) de la sertisseuse<br />
sur les éléments Kalzip, il y a un risque de choc et<br />
d’écrasement.<br />
Danger de blessures ! Danger de mort !<br />
Principe fondamental : procéder au sertissage dès la<br />
pose de chaque élément !<br />
C’est la seule méthode pour que le système déploie toute<br />
sa capacité de charge et offre la résistance requise aux efforts<br />
du vent. Il est interdit de marcher sur des éléments<br />
qui ne sont pas encore sertis.<br />
La sertisseuse doit se refermer complètement et les<br />
galets doivent être montés correctement.<br />
Garder les enfants à distance de l’appareil !<br />
Les travaux de maintenance et de nettoyage ne peuvent<br />
être effectués que sur une sertisseuse hors service et<br />
dont la fiche est débranchée. Respecter les consignes<br />
de sécurité données au chapitre 5.<br />
Garder la <strong>machine</strong> à l’abri des crasses et de l’humidité,<br />
ne pas la laisser sous la pluie.<br />
Protéger la <strong>machine</strong> contre les chutes et ne jamais<br />
travailler sans poignée.<br />
Lors du sertissage sur les rives et les percées, respecter<br />
les prescriptions de prévention des accidents.<br />
Sertisseuse Kalzip<br />
L’exploitation est prévue pour un branchement sur réseau<br />
avec terre séparée. Dans le cas de longs câbles d’alimentation,<br />
choisir une section de câble qui soit suffisante<br />
pour une exploitation sur du 230 Volt.<br />
La fiche de l’outil électrique doit être compatible avec<br />
la prise. La fiche ne peut en aucun cas être modifiée.<br />
Ne pas utiliser de fiches adaptatrices pour des outils<br />
électriques mis à la terre. Les fiches originales et les prises<br />
correspondantes réduisent le risque de choc électrique.<br />
Ne pas détourner le câble de sa destination en l’utilisant<br />
pour porter ou accrocher l’appareil ou en tirant dessus<br />
pour le débrancher. Garder le câble à l’abri de la chaleur,<br />
de l’huile, des arêtes vives ou de composants mobiles.<br />
Des câbles endommagés ou tordus augmentent le risque<br />
d’un choc électrique.<br />
Il convient de rester prudent, de regarder ce que l’on<br />
fait et de manipuler correctement les outils électriques<br />
lors des travaux. Ne pas utiliser l’outillage électrique en<br />
cas de fatigue ou sous l’influence de drogues, d’alcool<br />
ou de médicaments. Un moment d’inattention pendant<br />
l’utilisation de l’outillage électrique peut entraîner des graves<br />
blessures.<br />
Porter un équipement de protection individuelle. Selon<br />
le type d’outil électrique et son utilisation, le port d’un<br />
équipement de protection individuelle (chaussures antidérapantes,<br />
casque de protection ou protection de l’ouïe)<br />
réduit le risque de blessures.<br />
Éviter toute mise en service intempestive. Veiller à ce<br />
que l’outil électrique soit bien désactivé avant de le<br />
brancher sur le réseau et / ou le chargeur, de le saisir<br />
ou de le porter. Si vous portez l’appareil en gardant le<br />
doigt sur la gâchette ou si l’appareil est branché sur le<br />
courant avec la gâchette enfoncée, cela peut entraîner<br />
des accidents.<br />
Enlever tous les outils de réglage et les clés de serrage<br />
avant de mettre l’outil électrique en marche. Un outil ou<br />
une clé qui se trouverait dans un composants rotatif risque<br />
de causer des blessures.<br />
On ne peut travailler avec l’appareil que si l’emplacement<br />
de travail est suffisamment éclairé. Ne jamais travailler<br />
dans l’obscurité sans éclairage ad hoc.<br />
Veiller à ce que la zone de travail reste toujours libre.<br />
Kalzip 45<br />
Deutsch<br />
Français English<br />
Español Italiano
Deutsch<br />
Español Italiano Français English<br />
Sertisseuse Kalzip<br />
Ne pas utiliser un outil électrique dont l’interrupteur<br />
est défectueux. Un outil électrique qui ne peut être mis<br />
en marche ou à l’arrêt est dangereux et doit être réparé.<br />
La <strong>machine</strong> n’est pas prévue pour le sertissage à la main.<br />
L’appareil n’est pas conçu pour une utilisation dans des<br />
zones Ex !<br />
En mode automatique (sur des supports plans), l’utilisateur<br />
doit pouvoir surveiller en permanence la zone à risques et<br />
la sertisseuse.<br />
Si la gâchette est bloquée (bouton poussoir), la sertisseuse<br />
peut se remettre en marche de manière intempestive suite<br />
au rétablissement du courant après une panne.<br />
6. Construction<br />
46 Kalzip<br />
1.1 1.2<br />
Tous les travaux de maintenance et de réparation qui exigent<br />
l’ouverture du moteur ou du carter ne peuvent être effectués<br />
que par un atelier agréé du service clientèle.<br />
Entretenir et nettoyer l’appareil conformément aux<br />
instructions données au chapitre 8 et faire procéder aux<br />
contrôles réguliers prescrits par le décret BetrSichV sur<br />
la sécurité de l’exploitation des outils électriques, cela<br />
par un électricien agréé.<br />
Ne procéder au remplacement des galets ou à tout autre<br />
réglage ou modification que si la fiche est débranchée !<br />
Moteur<br />
1.3<br />
1.4<br />
1.1 Régulateur de vitesse<br />
1.2 Bouton de blocage latéral<br />
1.3 Gâchette On / Off<br />
1.4 Anneau de protection
DDF 4-0<br />
DDF 2-1<br />
DDF 2-2<br />
DDF 3-4/ 3-5<br />
DDF 7-0<br />
DDF 4-1<br />
DDF 4-2/4-3<br />
DFF 5-0<br />
DFF 5-5<br />
DFF 5-3<br />
DDF 5-4<br />
20<br />
Sertisseuse – vue de face<br />
130 140<br />
à partir du centre<br />
du sertissage<br />
150<br />
20<br />
DDF 2-1 Partie supérieure de boîtier côté moteur<br />
DDF 2-2 Partie inférieure de boîtier côté moteur<br />
DDF 2-3 Partie supérieure de boîtier côté opposé<br />
DDF 2-4 Partie inférieure de boîtier côté opposé<br />
DDF 3-4 / 3-5 Vis / rondelle pour support de galet<br />
DDF 3-6 Galet large<br />
DDF 3-7 Axe pour galet large<br />
DDF 3-8 Rondelle pour galet large<br />
DDF 3-9 Écrou pour galet large<br />
DDF 4-0 Support de galet avant côté moteur<br />
DDF 4-1 Galet avant central<br />
310<br />
290<br />
zone de travail de la <strong>machine</strong><br />
320<br />
Sertisseuse Kalzip<br />
DDF 5-1<br />
DDF 5-2<br />
DDF 2-3<br />
DDF 2-4<br />
DDF 8-0<br />
DDF 8-1<br />
DDF 3-7<br />
DDF 3-6<br />
DDF 3-8<br />
DDF 3-9<br />
DDF 4-2 / 4-3 Vis / rondelle pour galet avant central<br />
DDF 5-0 Support de galet avant côté opposé<br />
DDF 5-1 Vis pour support de galet avant<br />
DDF 5-2 Rondelle pour support de galet avant<br />
DDF 5-3 Galet étroit avant<br />
DDF 5-4 Vis pour galet étroit avant<br />
DDF 5-5 Rondelle pour galet étroit avant<br />
DDF 7-0 Tige de serrage<br />
DDF 8-0 Étrier de serrage avec excentrique<br />
DDF 8-1 Goupille fendue<br />
20<br />
Kalzip 47<br />
Deutsch<br />
Français English<br />
Español Italiano
Deutsch<br />
Español Italiano Français English<br />
Sertisseuse Kalzip<br />
Les éléments marqués d’un * se rapportent à des pièces détachées à partir du n° <strong>machine</strong> 1600<br />
Sertisseuse – vue de côté<br />
DDF 3-12 Support de galet universel pour<br />
Kalzip 50/65 et Kalzip AF 65<br />
DDF 4-0 Support de galet avant côté moteur<br />
DDF 5-0 Support de galet avant côté opposé<br />
DDF 6-0 Plateau de friction<br />
DDF 6-1 Vis pour plateau de friction<br />
DDF 6-2 Rondelle pour plateau de friction<br />
DDF 7-1 Écrou pour tige de serrage<br />
DDF 7-2 Rondelle pour tige de serrage<br />
DDF 16-1 Galet STD 0,7 - 1,0 avant<br />
DDF 16-2 Galet STD 0,7 - 1,0 arrière<br />
DDF 17-1 Galet 1,2 avant<br />
DDF 17-2 Galet 1,2 arrière<br />
DDF 18-1 Galet avant pour bac translucide<br />
DDF 18-2 Galet arrière pour bac translucide<br />
DDF 23-0 Vis de fixation du moteur<br />
DDF 30-0 Rondelle de fixation du moteur<br />
48 Kalzip<br />
DDF 74 - 0<br />
DDF 76 - 0<br />
DDF 91- 0<br />
DDF 134-0*<br />
DDF 90-0<br />
DDF 89-0*<br />
DDF 133-0*<br />
DDF 6-0<br />
DDF 7-1<br />
DDF 7-2<br />
DDF 16-2<br />
DDF 17-2<br />
DDF 18-2<br />
DDF 6-2<br />
DDF 6-2<br />
Jusqu’au n° <strong>machine</strong> 1599<br />
DDF 75 - 0<br />
DDF 137 -0*<br />
DDF 95 -0<br />
DDF 139 -0*<br />
DDF 77-0<br />
DDF 138 -0*<br />
DDF 109 -0<br />
DDF 163 -0*<br />
DDF 23 -0<br />
DDF 30 -0<br />
DDF 113 -0<br />
DDF 4 -0<br />
DDF 5 -0<br />
DDF 3 -12<br />
DDF 16-1<br />
DDF 17-1<br />
DDF 18-1<br />
DDF 74-0 Poignée de commande<br />
DDF 75-0 Capot<br />
DDF 76-0 Vis à tête bombée pour poignée de commande<br />
DDF 77-0 Vis à tête bombée pour capot<br />
DDF 89-0 Gâchette<br />
DDF 90-0 Câble avec fiche<br />
DDF 91-0 Passe-câble<br />
DDF 95-0 Porte-balais avec balais<br />
DDF 109-0 Anneau de protection<br />
DDF 113-0 Vis à six pans creux<br />
À partir du n° <strong>machine</strong> 1600<br />
DDF 133-0 Gâchette<br />
DDF 134-0 Passe-câble<br />
DDF 137-0 Capot de bloc moteur<br />
DDF 138-0 Vis à tête bombée pour capot<br />
DDF 139-0 Porte-balais avec balais<br />
DDF 163-0 Anneau de protection
Outre la sertisseuse standard, il existe également<br />
une sertisseuse avec moteur 90° pour<br />
les espaces plus restreints.<br />
Sertisseuse – exécution avec moteur 90°<br />
7. Mise en service et utilisation<br />
Avant de mettre la sertisseuse en service, contrôler<br />
l’assise solide de l’étrier de sécurité et vérifier<br />
s’il n’y a pas de vis de fixation lâches !<br />
On ne peut procéder à la mise en service et à<br />
l’utilisation que si toutes les conditions permettant<br />
de respecter les instructions d’utilisation<br />
sont réunies et si le personnel responsable a lu<br />
et compris ces instructions.<br />
7.1 Branchement électrique<br />
La tension réseau doit correspondre à la tension indiquée<br />
sur la plaque signalétique. (Dé)brancher le câble de raccordement<br />
au réseau, voir 7.1.<br />
Avant de (dé)brancher le câble de raccordement<br />
au réseau, toujours couper la <strong>machine</strong> !<br />
Sertisseuse Kalzip<br />
(Dé)brancher le câble de raccordement au réseau<br />
La gâchette (6, 1.3) sert de bouton On / Off (presser = ON,<br />
relâcher = OFF). Pour un fonctionnement en continu, clipser<br />
le bouton de blocage latéral (6, 1.2). Une nouvelle<br />
pression sur la gâchette permet de déverrouiller celle-ci.<br />
Kalzip 49<br />
Deutsch<br />
Français English<br />
Español Italiano
Deutsch<br />
Español Italiano Français English<br />
Sertisseuse Kalzip<br />
7.2 Système électronique<br />
Le moteur est équipé d’une électronique à ondes pleines qui présente les caractéristiques ci-dessous :<br />
Démarrage progressif Le démarrage progressif électronique garantit le démarrage sans à-coups de la <strong>machine</strong>.<br />
Réglage de la vitesse La vitesse de rotation du moteur peut être réglée en continu entre 250 et 600 tr/min au<br />
moyen du régulateur de vitesse (6, 1.1).<br />
Vitesse constante La vitesse de rotation sélectionnée pour le moteur est maintenue constante par<br />
l’électronique. Ceci garantit une vitesse constante même sous charge.<br />
Protection thermique Une sollicitation extrême lors d’un fonctionnement continu entraîne une surchauffe du<br />
moteur. Une surveillance électronique de température est intégrée afin de protéger le<br />
moteur contre la surchauffe (moteur grillé). Avant d’atteindre une température critique pour<br />
le moteur, le système électronique de sécurité coupe ce dernier. Après une durée de<br />
refroidissement de 3 à 5 minutes, la <strong>machine</strong> est à nouveau prête à fonctionner à pleine<br />
charge. Si la <strong>machine</strong> tourne (ralenti), la durée de refroidissement est considérablement<br />
réduite.<br />
7.3 Sertissage<br />
Pour des raisons de sécurité et pour obtenir l’assemblage<br />
requis pour la capacité portante et la praticabilité, les<br />
bacs profilés Kalzip doivent être sertis immédiatement<br />
après leur pose. Les bacs profilés Kalzip sont fixés au<br />
moyen de pattes de fixation sur lesquelles reposent les<br />
collets et qui sont recouvertes par l’élément suivant. Il<br />
faut veiller à ce que le collet intérieur soit bien clipsé<br />
dans la tête de la patte de fixation sous peine d’entraîner<br />
un sertissage incorrect.<br />
50 Kalzip<br />
Ne pas travailler avec la <strong>machine</strong> si le système<br />
électronique est défectueux, ceci peut<br />
entraîner des vitesses excessives. Un système<br />
électronique défectueux se reconnaît<br />
à l’absence de démarrage progressif, aux<br />
bruits accrus au ralenti et à l’absence de<br />
régulation de vitesse.<br />
Les bacs profilés Kalzip doivent être sertis<br />
immédiatement après leur pose.<br />
La sertisseuse est également disponible<br />
dans un modèle à moteur 90° (voir 6) !
7.4 Manipulation de la <strong>machine</strong><br />
Pour répondre aux exigences d’une sollicitation<br />
élevée dans les applications industrielles,<br />
la <strong>machine</strong> est équipée d’un anneau de protection<br />
(6, 1.4) qui protège le bloc moteur<br />
contre les chocs.<br />
En mode automatique (sur des supports plans),<br />
l’utilisateur doit pouvoir surveiller en permanence<br />
la zone à risques et la sertisseuse.<br />
La <strong>machine</strong> fermée peut être enfilée sur les collets des bacs<br />
profilés Kalzip en mode pas à pas. Ce processus est plus<br />
simple si le collet a préalablement été serré avec la pince<br />
manuelle de sertissage. La vitesse de la sertisseuse peut<br />
être réglée au moyen de la roulette sur la poignée.<br />
Sur un support plan, la <strong>machine</strong> peut normalement avancer<br />
toute seule en mode automatique, il suffit de la guider<br />
légèrement à la main. Sur des toitures irrégulières ou arrondies,<br />
un guidage manuel plus franc peut être requis.<br />
Le fonctionnement correct de la sertisseuse peut être vérifié<br />
sur base des dimensions du collet fini.<br />
7.5 Démontage (processus de dessertissage)<br />
Pour démonter les bacs profilés Kalzip, il faut mettre<br />
l’outil de dessertissage en place dans la rainure au<br />
dos de la sertisseuse. Le collet extérieur doit préalablement<br />
être ouvert au moyen d’un outil approprié<br />
(p.ex. un tournevis).<br />
Accrocher l’outil de dessertissage et vérifier si le réglage<br />
en hauteur est correct. Avant d’enfiler le galet conique,<br />
ouvrir légèrement le collet extérieur au moyen d’un tournevis.<br />
Enfiler ensuite le galet conique en mode pas à pas.<br />
Le réglage s’effectue via la tige filetée DDF 10-5. Le galet<br />
conique ouvre le collet extérieur et le bac profilé Kalzip<br />
peut ensuite être enlevé.<br />
Si les bacs profilés Kalzip doivent à nouveau être sertis,<br />
l’outil de dessertissage doit être réglé selon une ouverture<br />
que permette tout juste l’enlèvement des bacs profilés.<br />
DDF 10- 4 DDF 10- 3<br />
Moteur<br />
DDF 10- 5<br />
DDF 10- 1<br />
DDF 10- 2<br />
DDF 10-1 Support pour galet conique<br />
DDF 10-2 Galet conique<br />
DDF 10-3 Vis à filetage gauche<br />
DDF 10-4 Vis à filetage droit<br />
DDF 10-5 Tige filetée<br />
Sertisseuse Kalzip<br />
Kalzip 51<br />
Deutsch<br />
Français English<br />
Español Italiano
Deutsch<br />
Español Italiano Français English<br />
Sertisseuse Kalzip<br />
8. Maintenance et entretien de la sertisseuse<br />
8.1 Entretien<br />
52 Kalzip<br />
On ne peut procéder à l’entretien que si toutes<br />
les conditions permettant de respecter<br />
les instructions d’utilisation sont réunies et<br />
si le personnel responsable a lu et compris<br />
ces instructions.<br />
Avant d’entamer des travaux de maintenance<br />
sur la <strong>machine</strong>, toujours débrancher la fiche<br />
de la prise !<br />
Tous les travaux de maintenance et de réparation<br />
qui exigent l’ouverture du moteur ou<br />
du carter ne peuvent être effectués que par<br />
un atelier agréé du service clientèle.<br />
Pour autant qu’elle fasse l’objet d’un minimum de maintenance<br />
et d’entretien, la sertisseuse pourra fonctionner efficacement<br />
pendant de longues années. Tous les axes sont<br />
pourvus de roulements à billes exempts de maintenance.<br />
Pour garantir la circulation de l’air, les ouvertures<br />
d’aération du bloc moteur doivent rester<br />
libres et propres.<br />
Selon l’utilisation, les paliers de galets de guidage extérieurs<br />
(6, DDF 3-6 ; DDF 5-3 ; DDF 4-1) doivent être lubrifiés<br />
avec de l’huile pour <strong>machine</strong>s.<br />
Si la <strong>machine</strong> est ouverte, contrôler s’il n’y a pas de crasses<br />
ni de corps étrangers sur les roues dentées, nettoyer le<br />
cas échéant. Nettoyer régulièrement des galets de sertissage<br />
et les lubrifier légèrement.<br />
Ceci permet de garantir un sertissage impeccable. Lubrifier<br />
les tiges de serrage (6, DDF 7-0) au niveau de l’excentrique<br />
de manière à former un léger film d’huile en surface.<br />
Le moteur est équipé de balais spéciaux à arrêt automatique.<br />
S’ils sont usés, cela entraîne une coupure automatique du<br />
courant et la <strong>machine</strong> s’arrête.<br />
8.2 Remplacement des galets latéraux<br />
Notre sertisseuse à support de galet universel<br />
(6, DDF 3-12) est conçue pour le traitement des profilés<br />
Kalzip 50, 65 et du profilé Kalzip AF 65/AS 65.<br />
Les galets ne peuvent être remplacés que<br />
si la fiche est tirée !<br />
Équiper la sertisseuse pour les profilés Kalzip 50,<br />
Kalzip 65 et Kalzip AF 65/AS 65 :<br />
1. Outil requis pour régler les galets latéraux :<br />
clé à six pans 5 mm<br />
2. Abaisser l’étrier de serrage à l’horizontale<br />
3. Enlever les vis à six pans creux (1) pour la fixation<br />
des galets universels (2)<br />
4. Décaler le support de galet universel :<br />
• vers le haut pour les profilés Kalzip 50<br />
• au centre pour les profilés Kalzip 65<br />
• vers le bas pour les profilés Kalzip AF 65/AS 65<br />
Resserrer les vis à six pans creux à fond.<br />
(1)<br />
(2)<br />
À partir du n° de <strong>machine</strong> 1170, le support de<br />
galet universel (6, DDF 3-12) est aménagé de<br />
série.
9. Contrôle du réglage<br />
1. Nettoyer les surfaces de fermeture. Régler les<br />
tiges de serrage (6, DDF 7-0) à l’aide des deux<br />
écrous (DDF 7-1) de manière que la <strong>machine</strong> se<br />
referme complètement.<br />
2. Contrôler le fonctionnement régulier et le bon<br />
positionnement de tous les galets de guidage<br />
(6, DDF 3-6 ; DDF 5-3 ; DDF 4-1).<br />
3. Procéder à un essai de sertissage<br />
10. Jeux de galets disponibles<br />
• pour 0,7 - 1,0 mm, désignation 0,7 - 1,0<br />
• pour 1,2 mm, désignation 1.2<br />
• pour bacs translucides désignation L<br />
Le montage incorrect des différents jeux de galets est<br />
normalement impossible. Toujours utiliser quatre galets<br />
du même type. Outil nécessaire pour changer le jeu de<br />
galets : clé polygonale 19 mm<br />
11. Profi lé cintré Kalzip<br />
Avec des profilés cintrés Kalzip, il peut être nécessaire de<br />
modifier la sertisseuse.<br />
• Éléments précintrés par croquage :<br />
toujours enlever les galets (6, DDF 3-12).<br />
• Éléments cintrés par laminage :<br />
si le rayon est inférieur à 2 m, il faut enlever les galets<br />
de guidage (6, DDF 4-0).<br />
12. Bacs translucides double paroi<br />
Il faut enlever les galets de guidage.<br />
13. Réparations<br />
Les réparations sur et dans le bloc moteur ne<br />
peuvent être effectuées que par le fabricant des<br />
<strong>machine</strong>s.<br />
Toute réparation effectuée de son propre chef entraîne<br />
l’annulation de la garantie. Le fabricant n’assume aucune<br />
responsabilité pour des réparations incorrectement effectuées<br />
ni pour les dommages qui en résultent.<br />
Sertisseuse Kalzip<br />
Kalzip 53<br />
Deutsch<br />
Français English<br />
Español Italiano
Deutsch<br />
Español Italiano Français English<br />
Sertisseuse Kalzip<br />
14. Pièces de rechange<br />
54 Kalzip<br />
Vous trouverez les listes des pièces de<br />
rechange pour la sertisseuse dans les pages<br />
suivantes.<br />
DDF 3-12<br />
DDF 3-6<br />
DDF 3-7<br />
DDF 3-8<br />
DDF 3-9<br />
Liste de pièces de rechange 1<br />
DDF 3-0-6 Support de galet universel complet pour<br />
Kalzip 65/50 mm et Kalzip AF 65<br />
DDF 3-6 Galet large<br />
DDF 3-7 Axe pour galet large<br />
DDF 3-8 Rondelle pour galet large<br />
DDF 3-9 Écrou pour galet large<br />
DDF 3-0-6<br />
DDF 5-4<br />
DDF 5-5<br />
DDF 5-3<br />
DDF 3-12 Support de galet universel pour<br />
Kalzip 65/50 mm et Kalzip AF 65<br />
DDF 5-3 Galet étroit avant<br />
DDF 5-4 Vis pour galet étroit avant<br />
DDF 5-5 Vis pour galet étroit avant
DDF 2-1<br />
DDF 2-2<br />
DDF 3-4 / 3-5<br />
DDF 7-0<br />
DDF 4-2 / 4-3<br />
DDF 4-1<br />
Liste de pièces de rechange 2<br />
DDF 2-1 Partie supérieure de boîtier côté moteur<br />
DDF 2-2 Partie inférieure de boîtier côté moteur<br />
DDF 2-3 Partie supérieure de boîtier côté opposé<br />
DDF 2-4 Partie inférieure de boîtier côté opposé<br />
DDF 3-4 / 3-5 Vis / rondelle pour support de galet<br />
DDF 4-0 Support de galet avant côté moteur<br />
DDF 4-1 Galet avant central<br />
Sertisseuse Kalzip<br />
DDF 4-0<br />
DDF 5-1<br />
DDF 5-2<br />
DDF 2-3<br />
DDF 2-4<br />
DDF 8-0<br />
DDF 8-1<br />
DDF 5-0<br />
DDF 4-2 / 4-3 Vis / rondelle pour galet avant central<br />
DDF 5-0 Support de galet avant côté opposé<br />
DDF 5-1 Vis pour support de galet avant<br />
DDF 5-2 Rondelle pour support de galet avant<br />
DDF 7-0 Tige de serrage<br />
DDF 8-0 Étrier de serrage pour excentrique<br />
DDF 8-1 Goupille fendue<br />
Kalzip 55<br />
Deutsch<br />
Français English<br />
Español Italiano
Deutsch<br />
Español Italiano Français English<br />
Sertisseuse Kalzip<br />
Liste de pièces de rechange 3<br />
DDF 6-0 Plateau de friction<br />
DDF 6-1 Vis pour plateau de friction<br />
DDF 6-2 Rondelle pour plateau de friction<br />
DDF 7-1 Écrou pour tige de serrage<br />
DDF 7-2 Rondelle pour tige de serrage<br />
DDF 16-1 Galet VA 0,7 - 1,0 avant<br />
DDF 16-2 Galet VA 0,7 - 1,0 arrière<br />
DDF 17-1 Galet VA 1,2 avant<br />
DDF 17-2 Galet VA 1,2 arrière<br />
DDF 18-1 Galet VA L avant<br />
DDF 18-2 Galet VA L arrière<br />
DDF 23-0 Vis de fixation du moteur<br />
56 Kalzip<br />
DDF 74-0<br />
DDF 76-0<br />
DDF 90-0<br />
DDF 89-0<br />
DDF 6-0<br />
DDF 6-1<br />
DDF 6-2<br />
DDF 7-1<br />
DDF 7-2<br />
DDF 16-2<br />
DDF 17-2<br />
DDF 18-2<br />
DDF 92-0<br />
DDF 16-1<br />
DDF 17-1<br />
DDF 18-1<br />
DDF 30-0 Rondelle de fixation du moteur<br />
DDF 74-0 Poignée de commande<br />
DDF 75-0 Capot<br />
DDF 76-0 Vis à tête bombée pour poignée<br />
de commande<br />
DDF 77-0 Vis à tête bombée pour capot<br />
DDF 89-0 Gâchette<br />
DDF 90-0 Câble avec fiche<br />
DDF 92-0 Passe-câble<br />
DDF 95-0 Porte-balais avec balais<br />
DDF 109-0 Anneau de protection<br />
DDF 113-0 Vis à six pans creux<br />
DDF 95-0<br />
DDF 75-0<br />
DDF 77-0<br />
DDF 109-0<br />
DDF 113-0<br />
DDF 23-0<br />
DDF 30-0
DDF 21-0<br />
DDF 22-0<br />
DDF 14-0<br />
DDF 11-4<br />
Liste de pièces de rechange 4<br />
DDF 21-0 Arbre d’entraînement<br />
DDF 22-0 Pignon d’entraînement (Z = 17)<br />
DDF 11-1 Goupille pour roue dentée (courte)<br />
DDF 11-6 Disque d‘écartement pour arbre<br />
DDF 15-0 Roue dentée 51 dents<br />
DDF 11-5 Circlips pour arbre<br />
DDF 11-7 Roulement à billes<br />
Liste de pièces de rechange 5<br />
DDF 37 Goupille cylindrique pour boîtier<br />
DDF 7-4 Douille longue pour tige de serrage<br />
DDF 7-3 Douille courte pour tige de serrage<br />
Sertisseuse Kalzip<br />
DDF 13-0 Arbre fileté pour galet de sertissage avant,<br />
longueur 13,5, ø 20,0<br />
DDF 11-2 Goupille pour galet (long)<br />
DDF 11-3 Rondelle pour arbre<br />
DDF 11-4 Écrou pour arbre<br />
DDF 14-0 Arbre fileté pour galet de sertissage arrière,<br />
longueur 13,5, ø 15,87<br />
DDF 37<br />
DDF 7-4<br />
DDF 7-3<br />
DDF 2-5<br />
DDF 2-6<br />
DDF 9-0<br />
DDF 11-1<br />
DDF 11-6<br />
DDF 15-0<br />
DDF 11-5<br />
DDF 11-7<br />
DDF 13-0<br />
DDF 11-2<br />
DDF 11-3<br />
DDF 2-5 Vis pour boîtier<br />
DDF 2-6 Rondelle pour boîtier<br />
DDF 9-0 Ressort de pression<br />
Kalzip 57<br />
Deutsch<br />
Français English<br />
Español Italiano
Deutsch<br />
Español Italiano Français<br />
English<br />
Bordatrice Kalzip<br />
Premessa<br />
Gentile cliente,<br />
la ringraziamo per avere acquistato una delle nostre bordatrici.<br />
La invitiamo a leggere attentamente il presente<br />
manuale di istruzioni, prestando particolare attenzione alle<br />
indicazioni sulla sicurezza presenti nel testo e nel capitolo<br />
„Indicazioni di sicurezza“.<br />
Il rispetto di queste indicazioni è un presupposto necessario<br />
per:<br />
• un uso sicuro della macchina,<br />
• buoni risultati di lavoro e<br />
• un funzionamento della bordatrice pressoché esente<br />
da guasti.<br />
Qualora avesse domande per le quali le istruzioni non forniscono<br />
una risposta, la invitiamo a telefonarci. Saremo<br />
lieti di aiutarla. I nostri prodotti sono soggetti a un continuo<br />
processo di perfezionamento, pertanto l‘apparecchio da<br />
lei acquistato può differire leggermente dalle figure riportate<br />
nelle istruzioni per l‘uso.<br />
58 Kalzip<br />
In caso di domande o problemi saremo lieti di aiutarla.<br />
Può contattarci all‘indirizzo<br />
Kalzip GmbH<br />
August-Horch-Str. 20-22<br />
D-56070 Koblenz<br />
P.O. Box 100316<br />
D-56033 Koblenz<br />
T +49 (0) 261 - 98 34-0<br />
F +49 (0) 261 - 98 34-100<br />
E germany@kalzip.com<br />
Accettiamo sempre volentieri consigli e proposte di<br />
miglioramento.<br />
Le auguriamo molto successo<br />
2010 Kalzip GmbH<br />
Tutti i diritti riservati. Ristampa, anche parziale,<br />
consentita solo su autorizzazione scritta di Kalzip.
Sommario<br />
Bordatrice Kalzip<br />
Pagina<br />
Dichiarazione di conformità CE 60<br />
1. Informazioni generali 61<br />
1.1 Indirizzo, ordinazione di ricambi e servizio di assistenza clienti 61<br />
1.2 Modifiche ai contenuti 61<br />
1.3 Diritti d‘autore 61<br />
2. Dati tecnici 61<br />
3. Dotazione 62<br />
4. Normative 62<br />
4.1 Uso previsto 62<br />
4.2 Errori di impiego prevedibili 62<br />
4.3 Garanzia e responsabilità 62<br />
4.4 Rispedizione e svolgimento 62<br />
5. Indicazioni di sicurezza 63<br />
6. Struttura 64<br />
7. Messa in funzione ed esercizio 67<br />
7.1 Collegamento elettrico 67<br />
7.2 Elettronica 68<br />
7.3 La procedura di bordatura 68<br />
7.4 Funzionamento della macchina 69<br />
7.5 Smontaggio (apertura delle bordature) 69<br />
8. Manutenzione e cura della bordatrice 70<br />
8.1 Cura 70<br />
8.2 Sostituzione dei rulli laterali 70<br />
9. Controllo della messa a punto 71<br />
10. Set di rulli disponibili 71<br />
11. Profilo Kalzip curvo 71<br />
12. Panelli traslucidi con doppio strato 71<br />
13. Riparazioni 71<br />
14. Parti di ricambio 72<br />
GmbH 59<br />
Deutsch<br />
Español Italiano Français English
Deutsch<br />
Español Italiano Français<br />
English<br />
Bordatrice Kalzip<br />
Dichiarazione di conformità CE<br />
ai sensi della direttiva macchine CE 2006/42/CE, appendice II parte A.<br />
Il produttore: Kalzip GmbH, August-Horch-Str. 20-22, D-56070 Koblenz<br />
dichiara con la presente che la tipologia costruttiva della bordatrice per bordare elementi Kalzip:<br />
60 Kalzip<br />
Tipo: bordatrice Kalzip<br />
Denominazione commerciale: Bordatrice<br />
è conforme a tutte le disposizioni vigenti della direttiva macchine CE (2006/42/CE).<br />
La macchina è conforme altresì a tutte le disposizioni della direttiva CEM CE (2004/108/CE)<br />
e della direttiva Bassa tensione CE 2006/95/CE.<br />
Sono state applicate le norme armonizzate seguenti:<br />
EN ISO 12100-1: 2003<br />
+A1: 2009<br />
EN ISO 12100-2: 2003<br />
+A1: 2009<br />
Sicurezza del macchinario –<br />
Termini e definizioni, principi generali di progettazione<br />
Parte 1: Terminologia di base, metodologia<br />
Sicurezza del macchinario –<br />
Termini e definizioni, principi generali di progettazione<br />
Parte 2: Principi tecnici e specifiche<br />
EN ISO 13857: 2008 Sicurezza del macchinario –<br />
Distanze di sicurezza per impedire il raggiungimento<br />
di zone pericolose con gli arti superiori e inferiori<br />
EN 60745-1: 2009 Sicurezza degli utensili elettrici a motore portatili –<br />
Sicurezza -<br />
Parte 1: Requisiti generali<br />
EN 61000-6-2: 2005 Compatibilità elettromagnetica (CEM) –<br />
Parte 6 - 2: Norme generiche –<br />
Immunità per gli ambienti industriali<br />
EN 61000-6-4: 2007 Compatibilità elettromagnetica (CEM) –<br />
Parte 6 - 4: Norme generiche – Norma generica –<br />
Emissioni per gli ambienti industriali<br />
Persona autorizzata della redazione dei documenti tecnici rilevanti:<br />
Ing. dipl. (FH) Christoph Bonn, Kalzip GmbH, August-Horch-Str. 20-22, D-56070 Koblenz<br />
Dr. Jörg Schwall, Dirigente<br />
Coblenza, 01.02.2010<br />
Kalzip GmbH<br />
August-Horch-Str. 20-22, D-56070 Koblenz<br />
Luogo, data Firma Dati del firmatario
1. Informazioni generali<br />
1.1 Indirizzo, ordinazione di ricambi<br />
e servizio di assistenza clienti<br />
Kalzip GmbH<br />
August-Horch-Str. 20-22 · D-56070 Koblenz<br />
P.O. Box 100316 · D-56033 Koblenz<br />
T +49 (0) 261 - 98 34-0<br />
F +49 (0) 261 - 98 34-100<br />
E germany@kalzip.com<br />
1.2 Modifiche ai contenuti<br />
Ci riserviamo il diritto di apportare modifiche<br />
ai contenuti. La Kalzip non si assume alcuna<br />
responsabilità per eventuali errori presenti in<br />
questa documentazione. Si esclude qualsiasi<br />
responsabilità per danni indiretti derivanti dalla<br />
fornitura o dall‘uso della presente documentazione,<br />
entro i limiti previsti dalla legge.<br />
2. Dati tecnici<br />
Tensione d‘ingresso 230 - 240 V ~50/60 Hz<br />
Potenza assorbita 1010 W<br />
(funzionamento continuo)<br />
Numero di giri dell‘albero di<br />
comando (a vuoto)<br />
Peso 14,5 kg<br />
Valore di emissione:<br />
Livello di pressione acustica 84 dB(A)<br />
Livello di potenza sonora 95 dB(A)<br />
Tolleranza per incertezza<br />
di misura<br />
250 - 600 giri/min<br />
a regolazione elettronica<br />
K = 3 dB<br />
1.3 Diritti d‘autore<br />
Bordatrice Kalzip<br />
I diritti d‘autore del presente manuale di istruzioni<br />
sono di proprietà di Kalzip. Le presenti<br />
istruzioni per l‘uso sono destinate esclusivamente<br />
al gestore e al relativo personale.<br />
È vietato<br />
• riprodurre,<br />
• diffondere o<br />
• rendere accessibile a terzi non autorizzati il manuale<br />
di istruzioni, né per intero né in parte.<br />
Le violazioni di questo divieto possono comportare<br />
conseguenze penali.<br />
Valore totale di vibrazioni (somma di vettori in tre<br />
direzioni) rilevato ai sensi della norma EN 60745:<br />
Valore di emissione delle<br />
vibrazioni (3 assi)<br />
a h = 3,5 m/s²<br />
Incertezza K = 1,5 m/s²<br />
Predisposta per la bordatura di pannelli profilati<br />
delle dimensioni seguenti:<br />
Tipo Kalzip Kalzip 50,<br />
spessore lamiera<br />
0,7 - 1,2 mm<br />
Kalzip 65,<br />
spessore lamiera<br />
0,7 - 1,2 mm<br />
Kalzip AF/AS 65,<br />
spessore lamiera<br />
0,7 - 1,2 mm<br />
GmbH 61<br />
Deutsch<br />
Español Italiano Français English
Deutsch<br />
Español Italiano Français<br />
English<br />
Bordatrice Kalzip<br />
3. Dotazione<br />
• Bordatrice con dispositivo di comando<br />
• Dispositivo di sbordatura<br />
• Custodia per il trasporto con inserto<br />
• Set di rulli 0,7 - 1,0<br />
• Istruzioni per l‘uso<br />
4. Normative<br />
4.1 Uso previsto<br />
62 Kalzip<br />
La bordatrice deve essere utilizzata esclusivamente<br />
per la bordatura dei pannelli profilati<br />
descritti nel cap. 2 „Dati tecnici“. Il compound<br />
necessario per la statica e l‘impermeabilità dei<br />
pannelli profilati Kalzip sono garantiti soltanto<br />
da un buon funzionamento della bordatrice.<br />
L‘uso previsto della macchina comprende anche una<br />
pulizia e una manutenzione regolari.<br />
Un utilizzo diverso da quello previsto, in genere deve<br />
essere concordato preventivamente con il produttore.<br />
4.2 Errori di impiego prevedibili<br />
Evitare di lasciare la bordatrice in funzione da<br />
sola! Si può correre il pericolo che l‘apparecchio<br />
oltrepassi da solo il colmo del tetto, quindi<br />
cada e causi lesioni alle persone. Predisporre<br />
una barriera o incaricare una seconda persona<br />
di rimanere all‘estremità del tetto!<br />
4.3 Garanzia e responsabilità<br />
Rivolgersi direttamente a noi per eventuali<br />
richieste di interventi in garanzia. La garanzia<br />
della bordatrice e di tutti gli accessori copre<br />
i difetti di materiale e fabbricazione per una<br />
durata di 12 mesi, a partire dalla data della<br />
fattura. La garanzia è valida solo in presenza<br />
della prova di acquisto.<br />
I difetti compresi negli interventi in garanzia verranno<br />
eliminati in conformità alle nostre condizioni di garanzia.<br />
Inoltre, la garanzia viene invalidata qualora il gestore comprometta<br />
le funzioni dell‘apparecchio non rispettando le<br />
presenti istruzioni per l‘uso, usandolo in modo non corretto<br />
o facendo effettuare riparazioni da personale non autorizzato.<br />
In questi casi la responsabilità ricade sul gestore.<br />
La garanzia perde la propria validità anche se persone<br />
non autorizzate da noi effettuano regolazioni o modifiche<br />
all‘apparecchio. Le riparazioni vengono effettuate da noi<br />
in caso di richieste di intervento in garanzia valide. Spetta<br />
a noi, però, decidere il luogo in cui effettuare l‘intervento.<br />
La garanzia di cui sopra ha carattere esclusivo e sostituisce<br />
qualsiasi altra garanzia scritta, orale o indiretta, e rappresenta<br />
l‘unico diritto dell‘acquirente e l‘unica responsabilità<br />
da parte nostra nei confronti del prodotto. Si escludono tutti<br />
gli interventi in garanzia indiretti derivanti dall‘uso dell‘apparecchio.<br />
Il produttore non si assume alcuna responsabilità per<br />
qualsiasi danno collaterale o indiretto, derivante da o in<br />
combinazione con l‘utilizzo o l‘applicazione del prodotto<br />
fornito.<br />
4.4 Rispedizione e svolgimento<br />
Qualsiasi richiesta di intervento in garanzia deve<br />
essere presentata durante il periodo di garanzia<br />
e deve pervenirci tempestivamente.<br />
Se un prodotto deve essere inviato per la riparazione e/o<br />
la regolazione, richiedere prima la nostra autorizzazione.<br />
Qualsiasi materiale inviato per un controllo e/o per la riparazione<br />
in garanzia dovrebbe essere assicurato per il mezzo<br />
di trasporto da noi indicato.<br />
In ogni caso, noi siamo gli unici responsabili per la determinazione<br />
della causa e della natura di un difetto con la<br />
facoltà di prendere la decisione definitiva in merito.<br />
Spedizioni/pacchi in porto assegnato non saranno accettati!
5. Indicazioni di sicurezza<br />
Si prega di osservare rigorosamente le seguenti indicazioni<br />
di sicurezza per evitare danni all‘apparecchio e lesioni<br />
all‘utente.<br />
Leggere tutte le indicazioni di sicurezza e le istruzioni.<br />
Il mancato rispetto delle indicazioni di sicurezza e delle<br />
istruzioni può causare scosse elettriche, incendi e/o lesioni<br />
gravi.<br />
Solo personale debitamente addestrato o istruito può<br />
mettere in funzione, utilizzare ed effettuare interventi<br />
di manutenzione sulla bordatrice.<br />
La macchina è costruita secondo l‘attuale stato della<br />
tecnica e in linea con le regole della tecnica riconosciute.<br />
Tuttavia il suo utilizzo può causare pericoli per la vita e<br />
la salute dell‘utente o di terzi o compromettere il funzionamento<br />
della macchina o di altri beni materiali. Si prega<br />
di prestare particolare attenzione durante l‘uso della macchina.<br />
Durante il posizionamento manuale della bordatrice sui<br />
panelli Kalzip, sussistono pericoli di urto e schiacciamento.<br />
Pericolo di lesioni! Pericolo di morte!<br />
Importante! Ogni panello, dopo essere stato posato,<br />
deve essere bordato.<br />
Soltanto in questo modo il sistema è portante e resiste alle<br />
spinte del vento. I panelli non ancora bordati non possono<br />
essere calpestati.<br />
La bordatrice deve chiudersi completamente e i set di<br />
rulli devono essere montati correttamente.<br />
Tenere l‘apparecchio lontano dalla portata dei bambini!<br />
Gli interventi di pulizia e manutenzione devono essere<br />
effettuati solo con la bordatrice spenta e dopo avere<br />
staccato la spina. Leggere con attenzione le indicazioni<br />
di sicurezza al capitolo 5.<br />
Proteggere la bordatrice dallo sporco e dall‘umidità.<br />
Non lasciare la macchina sotto la pioggia.<br />
Assicurare la bordatrice per evitare che cada e non<br />
usarla mai senza manico.<br />
Quando si bordano le estremità del tetto e le aperture,<br />
rispettare le norme per la prevenzione di infortuni sul<br />
lavoro.<br />
Bordatrice Kalzip<br />
L‘esercizio della macchina prevede un allacciamento alla<br />
rete con messa a terra separata. Se i cavi per l‘alimentazione<br />
sono molto lunghi, scegliere cavi di sezione più<br />
grande, che consentano alla macchina di raggiungere<br />
230 Volt.<br />
La spina dell‘utensile elettrico deve entrare correttamente<br />
nella presa. Evitare assolutamente di modificare<br />
la spina. Non utilizzare adattatori insieme a utensili<br />
elettrici collegati a terra. Spine originali e prese adeguate<br />
riducono il rischio di scosse elettriche.<br />
Non utilizzare il cavo per scopi diversi da quello previsto,<br />
ovvero per trasportare l‘utensile elettrico o appenderlo,<br />
ed evitare di tirare il cavo per staccare la spina dalla<br />
presa. Tenere il cavo lontano da calore, olio, bordi taglienti<br />
o parti dell‘apparecchio in movimento. I cavi<br />
danneggiati o intrecciati aumentano il rischio di scossa<br />
elettrica.<br />
Prestare attenzione, eseguire le operazioni con la<br />
massima cautela e utilizzare gli utensili elettrici in<br />
modo assennato. Non utilizzare utensili elettrici quando<br />
si è stanchi o sotto l‘influsso di droghe, alcool o<br />
farmaci. Un solo attimo di disattenzione durante l‘uso<br />
dell‘utensile elettrico può causare lesioni gravi.<br />
Indossare i dispositivi di protezione individuale. Indossando<br />
i dispositivi di protezione individuale, come scarpe<br />
di sicurezza antiscivolo, casco o protezione dell‘udito,<br />
in funzione del tipo e dell‘impiego dell‘utensile elettrico,<br />
si riduce il rischio di procurarsi lesioni personali.<br />
Evitare l‘accensione involontaria dell‘utensile. Assicurarsi<br />
che l‘utensile elettrico sia spento, prima di collegarlo<br />
all‘alimentazione elettrica e/o alla batteria, afferrarlo o<br />
trasportarlo. Se durante il trasporto dell‘utensile elettrico<br />
si mette il dito sull‘interruttore o si collega l‘apparecchio<br />
acceso all‘alimentazione elettrica, possono verificarsi incidenti.<br />
Rimuovere utensili di regolazione o chiavi per dadi prima<br />
di accendere l‘utensile elettrico. Un utensile o una chiave<br />
che si trovano in una parte rotante dell‘apparecchio possono<br />
causare lesioni.<br />
Lavorare con l‘apparecchio solo in un luogo di lavoro<br />
sufficientemente illuminato. Non lavorare mai al crepuscolo<br />
in condizioni di scarsa illuminazione.<br />
Assicurarsi che l‘area di lavoro sia sempre libera.<br />
GmbH 63<br />
Deutsch<br />
Español Italiano Français English
Deutsch<br />
Español Italiano Français<br />
English<br />
Bordatrice Kalzip<br />
Non utilizzare utensili elettrici con interruttori difettosi.<br />
Gli utensili elettrici che non si accendono o non si<br />
spengono sono pericolosi e devono essere riparati.<br />
La macchina non e previsto per la bordatura manuale.<br />
L‘apparecchio non è predisposto per l‘impiego in zone<br />
a rischio di esplosione.<br />
In modalità automatica (con sottostrutture planari),<br />
l‘area di pericolo e la bordatrice devono essere tenute<br />
costantemente sotto controllo dall‘operatore.<br />
Se il pulsante rimane premuto, la bordatrice può riavviarsi<br />
inavvertitamente in caso di ritorno dell‘energia<br />
elettrica dopo una mancanza di corrente.<br />
6. Struttura<br />
64 Kalzip<br />
1.1 1.2<br />
Tutti gli interventi di manutenzione e riparazione, che richiedono<br />
l‘apertura dell‘alloggiamento del motore e della<br />
trasmissione, devono essere effettuati presso un‘officina<br />
autorizzata per l‘assistenza ai clienti.<br />
Eseguire la manutenzione e pulire l‘apparecchio in<br />
base alle istruzioni contenute nel capitolo 8 e fare eseguire<br />
da un elettricista autorizzato in particolare i regolari<br />
controlli previsti per gli utensili elettrici dal decreto<br />
sulla sicurezza di funzionamento BetrSichV.<br />
Sostituire i rulli o effettuare altre regolazioni o trasformazioni<br />
solo dopo avere staccato la spina di alimentazione<br />
di rete.<br />
1.3<br />
1.4<br />
Dispositivo di comando<br />
1.1 Regolatore del numero di giri<br />
1.2 Pulsante di arresto laterale<br />
1.3 Interruttore on / off<br />
1.4 Anello di protezione
DDF 4-0<br />
DDF 2-1<br />
DDF 2-2<br />
DDF 3-4/ 3-5<br />
DDF 7-0<br />
DDF 4-1<br />
DDF 4-2/4-3<br />
DFF 5-0<br />
DFF 5-5<br />
DFF 5-3<br />
DDF 5-4<br />
20<br />
Bordatrice – Vista anteriore<br />
130 140<br />
a partire dal<br />
centro bordatura<br />
150<br />
20<br />
DDF 2-1 Involucro superiore del lato di comando<br />
DDF 2-2 Involucro inferiore del lato di comando<br />
DDF 2-3 Involucro superiore del lato opposto<br />
DDF 2-4 Involucro inferiore del lato opposto<br />
DDF 3-4 / 3-5 Vite / rondella per il supporto rulli<br />
DDF 3-6 Rotella larga di aggancio<br />
DDF 3-7 Perno per rotella larga di aggancio<br />
DDF 3-8 Rondella per rotella larga di aggancio<br />
DDF 3-9 Dado per rotella larga di aggancio<br />
DDF 4-0 Supporto rulli del lato di comando anteriore<br />
DDF 4-1 Rotella di aggancio anteriore-centrale<br />
310<br />
290<br />
Spazio di azione della bordatrice<br />
320<br />
Bordatrice Kalzip<br />
DDF 5-1<br />
DDF 5-2<br />
DDF 2-3<br />
DDF 2-4<br />
DDF 8-0<br />
DDF 8-1<br />
DDF 3-7<br />
DDF 3-6<br />
DDF 3-8<br />
DDF 3-9<br />
DDF 4-2 / 4-3 Viti / rondella per la rotella di aggancio<br />
anteriore – centrale<br />
DDF 5-0 Supporto rulli del lato opposto anteriore<br />
DDF 5-1 Vite per il supporto rulli anteriore<br />
DDF 5-2 Rondelle per il supporto rulli anteriore<br />
DDF 5-3 Rotella stretta di aggancio, anteriore<br />
DDF 5-4 Vite per rotella stretta di aggancio, anteriore<br />
DDF 5-5 Rondella per rotella stretta di aggancio,<br />
anteriore<br />
DDF 7-0 Tirante<br />
DDF 8-0 Staffa di fissaggio con eccentrico<br />
DDF 8-1 Spina sagomata<br />
20<br />
GmbH 65<br />
Deutsch<br />
Español Italiano Français English
Deutsch<br />
Español Italiano Français<br />
English<br />
Bordatrice Kalzip<br />
Gli elementi contrassegnati con * si riferiscono a componenti singoli della macchina a partire dal numero di serie 1600<br />
Bordatrice – Vista laterale<br />
DDF 3-12 Supporto rulli universale per<br />
Kalzip 50/65 e Kalzip AF 65<br />
DDF 4-0 Supporto rulli anteriore, lato di comando<br />
DDF 5-0 Supporto rulli anteriore, lato opposto<br />
DDF 6-0 Piastra di frizione<br />
DDF 6-1 Vite per la piastra di frizione<br />
DDF 6-2 Rondella per la piastra di frizione<br />
DDF 7-1 Dado per il tirante<br />
DDF 7-2 Rondella per il tirante<br />
DDF 16-1 Rullo STD 0,7 - 1,0 anteriore<br />
DDF 16-2 Rullo STD 0,7 - 1,0 posteriore<br />
DDF 17-1 Rullo 1,2 anteriore<br />
DDF 17-2 Rullo 1,2 posteriore<br />
DDF 18-1 Rullo del panello traslucido anteriore<br />
DDF 18-2 Rullo del panello traslucido posteriore<br />
DDF 23-0 Viti per il fissaggio del dispositivo<br />
di comando<br />
DDF 30-0 Rondelle per il fissaggio del dispositivo<br />
di comando<br />
66 Kalzip<br />
DDF 74 - 0<br />
DDF 76 - 0<br />
DDF 91- 0<br />
DDF 134-0*<br />
DDF 90-0<br />
DDF 89-0*<br />
DDF 133-0*<br />
DDF 6-0<br />
DDF 7-1<br />
DDF 7-2<br />
DDF 16-2<br />
DDF 17-2<br />
DDF 18-2<br />
DDF 6-2<br />
DDF 6-2<br />
DDF 75 - 0<br />
DDF 137 -0*<br />
DDF 95 -0<br />
DDF 139 -0*<br />
DDF 77-0<br />
DDF 138 -0*<br />
DDF 109 -0<br />
DDF 163 -0*<br />
DDF 23 -0<br />
DDF 30 -0<br />
DDF 113 -0<br />
DDF 4 -0<br />
DDF 5 -0<br />
DDF 3 -12<br />
DDF 16-1<br />
DDF 17-1<br />
DDF 18-1<br />
Fino alla macchina con numero di serie 1599<br />
DDF 74-0 Maniglia del commutatore<br />
DDF 75-0 Cappa<br />
DDF 76-0 Viti a testa cilindrica con calotta per la<br />
maniglia del commutatore<br />
DDF 77-0 Viti a testa cilindrica con calotta per la cappa<br />
DDF 89-0 Interruttore<br />
DDF 90-0 Cavo con spina<br />
DDF 91-0 Protezione antipiega<br />
DDF 95-0 Porta-spazzola con spazzole di carbone<br />
DDF 109-0 Anello di protezione<br />
DDF 113-0 Vite a esagono cavo<br />
A partire dalla macchina con numero di serie 1600<br />
DDF 133-0 Interruttore<br />
DDF 134-0 Protezione antipiega<br />
DDF 137-0 Coperchio dell‘involucro del motore<br />
DDF 138-0 Viti a testa cilindrica con calotta per la cappa<br />
DDF 139-0 Porta-spazzola con spazzole di carbone<br />
DDF 163-0 Anello di protezione
Oltre alla bordatrice standard, esiste anche<br />
una bordatrice con dispositivo di comando<br />
inclinato per spazi ridotti.<br />
Bordatrice – Versione con dispositivo di comando inclinato<br />
7. Messa in funzione ed esercizio<br />
Prima di mettere in funzione la bordatrice, controllare<br />
che la staffa di sicurezza sia correttamente<br />
in sede e che non siano presenti elementi<br />
di fissaggio staccati!<br />
La macchina può essere messa in funzione e<br />
utilizzata solo quando i presupposti stabiliti<br />
dalle istruzioni per l‘uso sono soddisfatti e il<br />
personale responsabile ha letto e compreso il<br />
manuale.<br />
7.1 Collegamento elettrico<br />
La tensione di rete deve coincidere con la tensione riportata<br />
sulla targhetta. Per collegare e scollegare il cavo di<br />
allacciamento alla rete vedere la 7.1.<br />
Spegnere sempre la macchina prima di collegare<br />
o scollegare il cavo di allacciamento<br />
alla rete!<br />
Bordatrice Kalzip<br />
Collegamento e scollegamento del cavo di allacciamento<br />
alla rete<br />
L‘interruttore (6, 1.3) serve per accendere/spegnere la<br />
macchina (premere per accendere, rilasciare per spegnere).<br />
Per attivare il funzionamento continuo della macchina,<br />
l‘interruttore può essere bloccato con il pulsante di arresto<br />
laterale (6, 1.2). Premendo nuovamente l‘interruttore, il<br />
pulsante di arresto si sgancia.<br />
GmbH 67<br />
Deutsch<br />
Español Italiano Français English
Deutsch<br />
Español Italiano Français<br />
English<br />
Bordatrice Kalzip<br />
7.2 Elettronica<br />
Il dispositivo di comando dispone di un sistema di regolazione<br />
elettronica a onde piene con le seguenti caratteristiche:<br />
Avviamento dolce L‘avviamento dolce regolato elettronicamente garantisce un avvio della macchina<br />
senza strappi.<br />
Regolazione del<br />
numero di giri<br />
7.3 La procedura di bordatura<br />
Per motivi di sicurezza e per raggiungere la capacità di<br />
portata e la praticabilità necessaria, ogni pannello profilato<br />
Kalzip deve essere bordato immediatamente dopo essere<br />
stato posato. Per fissare i pannelli profilati Kalzip si usano<br />
delle clip assicurate con la bordatrice e quindi coperte dal<br />
pannello successivo. Fare attenzione che la bordatura<br />
piccola sia inserita a scatto nella testa della clip; in caso<br />
contrario potrebbe verificarsi un errore nella bordatura.<br />
68 Kalzip<br />
Tra 250 e 600 giri/min, il regolatore (6, 1.1) permette di regolare il numero di giri del<br />
motore in continuo.<br />
Numero di giri costante Il numero di giri preselezionato del motore viene tenuto elettronicamente su un<br />
valore costante. In questo modo viene raggiunta una velocità uniforme anche in<br />
caso di sollecitazione della macchina.<br />
Sicurezza termica I sovraccarichi estremi durante il funzionamento continuo possono causare il<br />
surriscaldamento del motore. Per proteggere il motore dal surriscaldamento (bruciatura<br />
del motore), la macchina è dotata di un sistema elettronico di controllo della<br />
temperatura. Prima che il motore raggiunga una temperatura critica, l‘elettronica di<br />
sicurezza spegne il motore. Dopo un tempo di raffreddamento di circa 3 - 5 minuti,<br />
la macchina è di nuovo pronta per l‘uso e utilizzabile a pieno regime. Con la macchina<br />
in funzione (a vuoto), il tempo di raffreddamento si riduce notevolmente.<br />
Se l‘elettronica presenta difetti, si sconsiglia di<br />
non lavorare con la macchina, poiché in questo<br />
caso si possono raggiungere regimi del motore<br />
eccessivi. Un‘elettronica difettosa si riconosce<br />
dalla mancanza di avviamento dolce, da un<br />
elevato rumore di funzionamento a vuoto o<br />
dall‘impossibilità di regolare il numero di giri.<br />
Ogni pannello profilato Kalzip deve essere<br />
immediatamente bordato dopo essere stato<br />
posato.<br />
La bordatrice è disponibile anche nella versione<br />
con dispositivo di comando inclinato<br />
(ved. 6).
7.4 Funzionamento della macchina<br />
Per soddisfare tutti i requisiti previsti per le<br />
alte sollecitazioni provocate dall‘uso professionale,<br />
la macchina è stata provvista di un<br />
anello di protezione (6, 1.4) che protegge<br />
l‘involucro del motore da urti molto violenti.<br />
In modalità automatica (con sottostrutture<br />
planari), l‘area di pericolo e la bordatrice<br />
devono essere tenute costantemente sotto<br />
controllo dall‘operatore.<br />
La macchina chiusa può essere infilata manualmente sulla<br />
bordatura del pannello profilato Kalzip. Una preventiva<br />
chiusura della bordatura utilizzando la pinza manuale facilita<br />
il procedimento. La velocità della bordatrice può essere<br />
modificata grazie alla rotella di regolazione posizionata sul<br />
manico.<br />
Se la sottostruttura è planare, la macchina può essere<br />
impostata in modalità automatica, quindi può lavorare da<br />
sola con una semplice guida manuale. Se la sottostruttura<br />
non è planare o addirittura è curva, si rende necessaria<br />
una guida manuale più forte. Misurando la bordatura ultimata<br />
è possibile monitorare se la bordatrice funziona<br />
regolarmente.<br />
7.5 Smontaggio (apertura delle bordature)<br />
Per aprire le bordature dei pannelli profilati Kalzip si<br />
inserisce nella scanalatura (sul lato posteriore) della<br />
bordatrice il dispositivo di sbordatura. Prima però,<br />
bisogna sollevare leggermente la bordatura coperta<br />
con un attrezzo adeguato (ad es. un cacciavite).<br />
Dopo aver agganciato il dispositivo di sbordatura, controllare<br />
che questo sia stato posizionato all’altezza giusta. Prima<br />
di infilare il rullo a cuneo nella bordatura più ampia, aprirla<br />
leggermente con un cacciavite. Inserire il rullo a cuneo<br />
manualmente a piccoli passi. La messa a punto avviene<br />
per mezzo della vite senza testa DDF 10-5. Il rullo a cuneo<br />
apre la bordatura più ampia in modo tale che il pannello<br />
profilato Kalzip possa essere estratto.<br />
Se i pannelli profilati Kalzip devono essere bordati ancore<br />
una volta, il dispositivo di sbordatura deve essere regolato<br />
in modo tale che questi possano essere appena smontati.<br />
DDF 10- 4 DDF 10- 3<br />
Dispositivo di comando<br />
DDF 10- 5<br />
DDF 10- 1<br />
DDF 10- 2<br />
DDF 10-1 Supporto del rullo a cuneo<br />
DDF 10-2 Rullo a cuneo<br />
DDF 10-3 Vite filettata sinistra<br />
DDF 10-4 Vite filettata destra<br />
DDF 10-5 Vite senza testa<br />
Bordatrice Kalzip<br />
GmbH 69<br />
Deutsch<br />
Español Italiano Français English
Deutsch<br />
Español Italiano Français<br />
English<br />
Bordatrice Kalzip<br />
8. Manutenzione e cura della bordatrice<br />
8.1 Cura<br />
70 Kalzip<br />
La macchina può essere sottoposta a manutenzione<br />
solo quando i presupposti stabiliti<br />
dalle istruzioni per l‘uso sono soddisfatti e il<br />
personale responsabile ha letto e compreso<br />
il manuale.<br />
Prima di qualsiasi intervento di manutenzione<br />
alla macchina, staccare sempre la spina di alimentazione<br />
dalla presa!<br />
Tutti gli interventi di manutenzione e riparazione,<br />
che richiedono l‘apertura dell‘alloggia mento<br />
del motore o della trasmissione, devono essere<br />
effettuati presso un‘officina autorizzata per<br />
l‘assistenza ai clienti.<br />
Sono sufficienti una manutenzione e una cura minime della<br />
bordatrice per garantire un funzionamento perfetto per<br />
lungo tempo. Ognuno degli assi della macchina bordatrice<br />
è composto da cuscinetti a sfera che non hanno bisogno<br />
di alcuna manutenzione.<br />
Per garantire la circolazione dell‘aria, le aperture<br />
di ventilazione dell‘involucro del motore<br />
devono essere tenute sempre libere e pulite.<br />
In base al carico di lavoro, i cuscinetti dei rulli guida esterni<br />
(6, DDF 3-6; DDF 5-3; DDF 4-1) possono essere lubrificati<br />
leggermente con olio per macchine.<br />
A macchina aperta, ispezionare gli ingranaggi e all’occorrenza<br />
pulirli e liberarli da eventuali corpi estranei. Pulire<br />
e oliare regolarmente i rulli di bordatura. Solo in questo<br />
modo si può assicurare una bordatura perfetta.<br />
Oliare i tiranti (6, DDF 7-0) nella zona dell‘eccentrico,<br />
facendo in modo che sulla superficie rimanga un leggero<br />
strato di olio.<br />
Il dispositivo di comando è dotato di spazzole di carbone<br />
speciali autoestinguenti. Quando questi si usurano, la<br />
corrente si interrompe automaticamente e la macchina<br />
si arresta.<br />
8.2 Sostituzione dei rulli laterali<br />
La nostra bordatrice con supporto rulli universale (6,<br />
DDF 3-12) è adatta alla lavorazione di profili Kalzip 50,<br />
65 e Kalzip AF 65/AS 65.<br />
Sostituire i rulli solo dopo avere staccato la<br />
spina di alimentazione di rete.<br />
Adattare la bordatrice se si passa dai pannelli profilati<br />
Kalzip 50, a Kalzip 65 e Kalzip AF 65/AS 65:<br />
1. Utensile necessario per la regolazione dei rulli laterali:<br />
Chiave per vite a esagono cavo da 5 mm<br />
2. Posizionare in senso orizzontale la staffa di fissaggio<br />
3. Rimuovere le viti a esagono cavo (1) per il fissaggio<br />
del supporto rulli universale (2)<br />
4. Spostare il supporto rulli universale:<br />
• in alto per Kalzip 50<br />
• a metà per Kalzip 65<br />
• in basso per Kalzip AF 65/AS 65<br />
Inserire di nuovo la vite a esagono cavo e avvitare<br />
fermamente.<br />
(1)<br />
(2)<br />
Sulla macchina con numero di serie 1170<br />
il supporto rulli universale (6, DDF 3-12) è<br />
montato di serie.
9. Controllo della messa a punto<br />
1. Pulire i coperchi. Regolare i tiranti (6, DDF 7-0) con<br />
entrambi i dadi (DDF 7-1) in modo tale che la macchina<br />
sia chiusa completamente.<br />
2. Controllare che i rulli guida (6, DDF 3-6; DDF 5-3;<br />
DDF 4-1) scorrano correttamente e si trovino nella<br />
posizione giusta.<br />
3. Fare una prova di bordatura<br />
10. Set di rulli disponibili<br />
• per 0,7 - 1,0 mm, ovvero 0,7 - 1,0<br />
• per 1,2 mm, ovvero 1,2<br />
• per i panelli traslucidi, ovvero L<br />
Generalmente è impossibile montare in modo sbagliato i<br />
diversi set di rulli. Impiegare sempre tutti i 4 rulli dello<br />
stesso tipo. Utensile necessario per sostituire il set di rulli:<br />
chiave ad anello da 19 mm<br />
11. Profi lo Kalzip curvo<br />
Per bordare i pannelli profilati Kalzip curvi è necessario<br />
trasformare la bordatrice.<br />
• Guide con curva pieghevole:<br />
le rotelle di aggancio (6, DDF 3-12) devono essere<br />
sempre smontate.<br />
• Guide cilindriche:<br />
smontare i rulli guida (6, DDF 4-0) se il raggio è<br />
inferiore a 2 m.<br />
12. Panelli traslucidi con doppio strato<br />
I rulli guida devono essere smontati.<br />
13. Riparazioni<br />
Le riparazioni all‘involucro e all‘interno dell‘involucro<br />
che racchiude la macchina devono essere<br />
effettuate esclusivamente dal produttore.<br />
Eventuali riparazioni fatte da sé rendono nulla la garanzia.<br />
Il produttore non si assume alcuna responsabilità per<br />
riparazioni improprie e per i danni da esse risultanti.<br />
Bordatrice Kalzip<br />
GmbH 71<br />
Deutsch<br />
Español Italiano Français English
Deutsch<br />
Español Italiano Français<br />
English<br />
Bordatrice Kalzip<br />
14. Parti di ricambio<br />
72 Kalzip<br />
L‘elenco delle parti di ricambio per la bordatrice<br />
è riportato nelle pagine seguenti.<br />
DDF 3-12<br />
DDF 3-6<br />
DDF 3-7<br />
DDF 3-8<br />
DDF 3-9<br />
Elenco parti di ricambio 1<br />
DDF 3-0-6 Supporto rulli universale compl. per<br />
Kalzip 65/50 mm e Kalzip AF 65<br />
DDF 3-6 Rotella larga di aggancio<br />
DDF 3-7 Perno per rotella larga di aggancio<br />
DDF 3-8 Rondella per rotella larga di aggancio<br />
DDF 3-9 Dado per rotella larga di aggancio<br />
DDF 3-0-6<br />
DDF 5-4<br />
DDF 5-5<br />
DDF 5-3<br />
DDF 3-12 Supporto rulli universale per<br />
Kalzip 65/50 mm e Kalzip AF 65<br />
DDF 5-3 Rotella stretta di aggancio, anteriore<br />
DDF 5-4 Vite per rotella stretta di aggancio, anteriore<br />
DDF 5-5 Vite per rotella stretta di aggancio, anteriore
DDF 2-1<br />
DDF 2-2<br />
DDF 3-4 / 3-5<br />
DDF 7-0<br />
DDF 4-2 / 4-3<br />
DDF 4-1<br />
Elenco parti di ricambio 2<br />
DDF 2-1 Involucro superiore del lato di comando<br />
DDF 2-2 Involucro inferiore del lato di comando<br />
DDF 2-3 Involucro superiore del lato opposto<br />
DDF 2-4 Involucro inferiore del lato opposto<br />
DDF 3-4 / 3-5 Vite / rondella per il supporto rulli<br />
DDF 4-0 Supporto rulli del lato di comando anteriore<br />
DDF 4-1 Rotella di aggancio anteriore-centrale<br />
Bordatrice Kalzip<br />
DDF 4-0<br />
DDF 5-1<br />
DDF 5-2<br />
DDF 2-3<br />
DDF 2-4<br />
DDF 8-0<br />
DDF 8-1<br />
DDF 5-0<br />
DDF 4-2 / 4-3 Viti/rondella per la rotella di aggancio<br />
anteriore – centrale<br />
DDF 5-0 Supporto rulli del lato opposto anteriore<br />
DDF 5-1 Vite per il supporto rulli anteriore<br />
DDF 5-2 Rondella per il supporto rulli anteriore<br />
DDF 7-0 Tirante<br />
DDF 8-0 Staffa di fissaggio con eccentrico<br />
DDF 8-1 Spina sagomata<br />
GmbH 73<br />
Deutsch<br />
Español Italiano Français English
Deutsch<br />
Español Italiano Français<br />
English<br />
Bordatrice Kalzip<br />
Elenco parti di ricambio 3<br />
DDF 6-0 Piastra di frizione<br />
DDF 6-1 Vite per la piastra di frizione<br />
DDF 6-2 Rondella per la piastra di frizione<br />
DDF 7-1 Dado per il tirante<br />
DDF 7-2 Rondella per il tirante<br />
DDF 16-1 Rullo VA 0,7 - 1,0 anteriore<br />
DDF 16-2 Rullo VA 0,7 - 1,0 posteriore<br />
DDF 17-1 Rullo VA 1,2 anteriore<br />
DDF 17-2 Rullo VA 1,2 posteriore<br />
DDF 18-1 Rullo VA L anteriore<br />
DDF 18-2 Rullo VA L posteriore<br />
DDF 23-0 Viti per il fissaggio del dispositivo<br />
di comando<br />
74 Kalzip<br />
DDF 74-0<br />
DDF 76-0<br />
DDF 90-0<br />
DDF 89-0<br />
DDF 6-0<br />
DDF 6-1<br />
DDF 6-2<br />
DDF 7-1<br />
DDF 7-2<br />
DDF 16-2<br />
DDF 17-2<br />
DDF 18-2<br />
DDF 92-0<br />
DDF 16-1<br />
DDF 17-1<br />
DDF 18-1<br />
DDF 95-0<br />
DDF 75-0<br />
DDF 77-0<br />
DDF 109-0<br />
DDF 113-0<br />
DDF 23-0<br />
DDF 30-0<br />
DDF 30-0 Rondelle per il fissaggio del dispositivo<br />
di comando<br />
DDF 74-0 Maniglia del commutatore<br />
DDF 75-0 Cappa<br />
DDF 76-0 Viti a testa cilindrica con calotta per la<br />
maniglia del commutatore<br />
DDF 77-0 Vite a testa cilindrica con calotta per la cappa<br />
DDF 89-0 Interruttore<br />
DDF 90-0 Cavo con spina<br />
DDF 92-0 Antipiega<br />
DDF 95-0 Porta-spazzola con spazzole di carbone<br />
DDF 109-0 Anello di protezione<br />
DDF 113-0 Vite a esagono cavo
DDF 21-0<br />
DDF 22-0<br />
DDF 14-0<br />
DDF 11-4<br />
Elenco parti di ricambio 4<br />
DDF 21-0 Albero di comando<br />
DDF 22-0 Pignone di comando (Z = 17)<br />
DDF 11-1 Cuneo per ruota dentata (corto)<br />
DDF 11-6 Disco distanziatore per albero<br />
DDF 15-0 Ruota dentata a 51 denti<br />
DDF 11-5 Anello Seeger per albero<br />
DDF 11-7 Cuscinetto a sfere<br />
Elenco parti di ricambio 5<br />
DDF 37 Spina cilindrica per involucro<br />
DDF 7-4 Bussola lunga per tirante<br />
DDF 7-3 Bussola corta per tirante<br />
Bordatrice Kalzip<br />
DDF 13-0 Albero per rullo di bordatura anteriore,<br />
filettatura lunga 13,5, ø 20,0<br />
DDF 11-2 Cuneo per rullo (lungo)<br />
DDF 11-3 Rondella per albero<br />
DDF 11-4 Dado per albero<br />
DDF 14-0 Albero per rullo di bordatura posteriore,<br />
filettatura lunga 13,5, ø 15,87<br />
DDF 37<br />
DDF 7-4<br />
DDF 7-3<br />
DDF 2-5<br />
DDF 2-6<br />
DDF 9-0<br />
DDF 11-1<br />
DDF 11-6<br />
DDF 15-0<br />
DDF 11-5<br />
DDF 11-7<br />
DDF 13-0<br />
DDF 11-2<br />
DDF 11-3<br />
DDF 2-5 Viti per involucro<br />
DDF 2-6 Rondelle per involucro<br />
DDF 9-0 Molla di compressione<br />
GmbH 75<br />
Deutsch<br />
Español Italiano Français English
Deutsch<br />
Español Italiano Français English<br />
Máquina rebordeadora Kalzip<br />
Prólogo<br />
Estimado cliente:<br />
Muchas gracias por haber adquirido una máquina rebordeadora<br />
de nuestra empresa. Le recomendamos leer este<br />
manual de instrucciones detenidamente y con tranquilidad.<br />
Observe especialmente las indicaciones de seguridad a<br />
lo largo del texto y en el capítulo “Indicaciones de seguridad”.<br />
Esto es una condición previa para:<br />
• una manipulación segura de la máquina,<br />
• buenos resultados de trabajo y<br />
• un funcionamiento sin fallos de la máquina rebordeadora.<br />
Póngase en contacto con nosotros si tiene preguntas<br />
para las cuales no encuentra respuesta en este manual.<br />
Estaremos encantados de ayudarle. Nuestros productos<br />
están en continuo desarrollo, por tal motivo es posible<br />
que existan ligeras diferencias entre su aparato y las<br />
representaciones que encontrará en este manual de<br />
instrucciones.<br />
76 Kalzip<br />
Estaremos encantados de ayudarle si tiene preguntas o<br />
problemas. Estamos a su disposición en<br />
Kalzip GmbH<br />
August-Horch-Str. 20-22<br />
D-56070 Koblenz<br />
P.O. Box 100316<br />
D-56033 Koblenz<br />
T +49 (0) 261 - 98 34-0<br />
F +49 (0) 261 - 98 34-100<br />
E germany@kalzip.com<br />
Estamos abiertos a todas las sugerencias y recomendaciones<br />
de mejora.<br />
Le deseamos mucho éxito.<br />
Ó 2010 Kalzip GmbH<br />
Reservados todos los derechos. No se autoriza la<br />
reproducción total o parcial de este documento sin<br />
autorización escrita de la empresa Kalzip.
Índice<br />
Máquina rebordeadora Kalzip<br />
Pagina<br />
Declaración de conformidad CE 78<br />
1. Generalidades 79<br />
1.1 Dirección, pedido de piezas de repuesto y servicio al cliente 79<br />
1.2 Modificaciones del contenido 79<br />
1.3 Derecho de propiedad intelectual 79<br />
2. Datos técnicos 79<br />
3. Volumen de suministro 80<br />
4. Disposiciones legales 80<br />
4.1 Uso conforme al empleo previsto 80<br />
4.2 Prevención de una utilización incorrecta 80<br />
4.3 Garantía y responsabilidad 80<br />
4.4 Envío y tramitación 80<br />
5. Indicaciones de seguridad 81<br />
6. Estructura 82<br />
7. Puesta en marcha y funcionamiento 85<br />
7.1 Conexión eléctrica 85<br />
7.2 Sistema electrónico 86<br />
7.3 El proceso de rebordeado 86<br />
7.4 Manipulación de la máquina 87<br />
7.5 Desmontaje (procedimiento para abrir rebordes) 87<br />
8. Mantenimiento y conservación de la máquina rebordeadora 88<br />
8.1 Conservación 88<br />
8.2 Cambio de los rodillos laterales 88<br />
9. Comprobación del ajuste 89<br />
10. Juegos de rodillos disponibles 89<br />
11. Perfil Kalzip curvado 89<br />
12. Paneles translúcidos de doble capa 89<br />
13. Reparaciones 89<br />
14. Repuestos 90<br />
GmbH 77<br />
Deutsch<br />
Español Italiano Français English
Deutsch<br />
Español Italiano Français English<br />
Máquina rebordeadora Kalzip<br />
Declaración de conformidad CE<br />
según la Directiva sobre máquinas 2006/42/CE, anexo II parte A.<br />
El fabricante: Kalzip GmbH, August-Horch-Str. 20-22, D-56070 Koblenz<br />
declara por la presente, que la construcción de la máquina rebordeadora para el<br />
rebordeado de elementos Kalzip ® :<br />
78 Kalzip<br />
Tipo: Máquina rebordeadora Kalzip ®<br />
Denominación comercial: Máquina rebordeadora<br />
cumple con todas las disposiciones pertinentes de la Directiva CE sobre máquinas (2006/42/CE).<br />
La máquina cumple además con todas las disposiciones de la Directiva CE de compatibilidad<br />
electromagnética (2004/108/CE) así como de la Directiva CE de baja tensión 2006/95/CE.<br />
Se emplearon las siguientes normas armonizadas:<br />
EN ISO 12100-1: 2003<br />
+A1: 2009<br />
EN ISO 12100-2: 2003<br />
+A1: 2009<br />
Seguridad de máquinas –<br />
Conceptos básicos, principios generales para el diseño<br />
Parte 1: Terminología básica, metodología<br />
Seguridad de máquinas –<br />
Conceptos básicos, principios generales para el diseño<br />
Parte 2: Principios técnicos y especificaciones<br />
EN ISO 13857: 2008 Seguridad de máquinas –<br />
Distancias de seguridad para prevenir el atrapamiento<br />
de los miembros superiores e inferiores<br />
EN 60745-1: 2009 Herramientas manuales eléctricas accionadas por motor eléctrico –<br />
Seguridad –<br />
Parte 1: Requisitos generales<br />
EN 61000-6-2: 2005 Compatibilidad electromagnética (CEM) –<br />
Parte 6 - 2: Normas genéricas –<br />
Inmunidad en entornos industriales<br />
EN 61000-6-4: 2007 Compatibilidad electromagnética (CEM) –<br />
Parte 6 - 4: Normas genéricas – norma genérica –<br />
emisiones en entornos industriales<br />
Responsable para la realización de la documentación técnica relevante:<br />
Dipl.-Ing. (FH) Christoph Bonn, Kalzip GmbH, August-Horch-Str. 20-22, D-56070 Koblenz<br />
Dr. Jörg Schwall, Director General<br />
Coblenza, 01/02/2010<br />
Kalzip GmbH<br />
August-Horch-Str. 20-22, D-56070 Koblenz<br />
Lugar y fecha Firma Datos del firmante
1. Generalidades<br />
1.1 Dirección, pedido de piezas de<br />
repuesto y servicio al cliente<br />
Kalzip GmbH<br />
August-Horch-Str. 20-22<br />
D-56070 Koblenz<br />
P.O. Box 100316 · D-56033 Koblenz<br />
T +49 (0) 261 - 98 34-0<br />
F +49 (0) 261 - 98 34-100<br />
E germany@kalzip.com<br />
1.2 Modificaciones del contenido<br />
Nos reservamos el derecho a realizar modificaciones<br />
del contenido. La empresa Kalzip no<br />
se hace responsable de posibles errores en<br />
esta documentación. Queda descartada la<br />
responsabilidad por daños mediatos que estén<br />
en relación con el suministro o la utilización de<br />
esta documentación, siempre que esto esté<br />
legalmente permitido.<br />
2. Datos técnicos<br />
Tensión de entrada 230 - 240 V ~50/60 Hz<br />
Potencia absorbida 1010 W<br />
(funcionamiento continuo)<br />
Número de revoluciones<br />
del árbol de transmisión<br />
(sin carga)<br />
Peso 14,5 kg<br />
Valores de emisión:<br />
Nivel de presión acústica 84 dB(A)<br />
Nivel de potencia acústica 95 dB(A)<br />
Factor de inseguridad<br />
de medición<br />
250 - 600 rpm<br />
regulable electrónicamente<br />
K = 3 dB<br />
1.3 Derecho de propiedad intelectual<br />
Máquina rebordeadora Kalzip<br />
El derecho de propiedad intelectual de este<br />
manual de instrucciones corresponde a la<br />
empresa Kalzip. Este manual de instrucciones<br />
está destinado al explotador y a su personal.<br />
El manual de instrucciones no puede ser<br />
• reproducido,<br />
• distribuido o<br />
• puesto a disposición de personas no autorizadas ni<br />
total ni parcialmente<br />
Cualquier infracción puede tener consecuencias penales.<br />
Valores totales de vibración (suma vectorial en tres<br />
direcciones) determinados según EN 60745:<br />
Valor de emisión de<br />
vibración (3 ejes)<br />
a h = 3,5 m/s²<br />
Inseguridad K = 1,5 m/s²<br />
Adecuado para el rebordeado de los siguientes<br />
tamaños de paneles perfilados:<br />
Kalzip Typ Kalzip 50,<br />
espesor de chapa<br />
0,7 - 1,2 mm<br />
Kalzip 65,<br />
espesor de chapa<br />
0,7 - 1,2 mm<br />
Kalzip AF/AS 65,<br />
espesor de chapa<br />
0,7 - 1,2 mm<br />
GmbH 79<br />
Deutsch<br />
Español Italiano Français English
Deutsch<br />
Español Italiano Français English<br />
Máquina rebordeadora Kalzip<br />
3. Volumen de suministro<br />
• Máquina rebordeadora con motor<br />
• Útil de apertura de bandejas<br />
• Caja de transporte con inserto<br />
• Juego de rodillos 0,7 - 1,0<br />
• Manual de instrucciones<br />
4. Disposiciones legales<br />
4.1 Uso conforme al empleo previsto<br />
80 Kalzip<br />
Su máquina rebordeadora sólo puede utilizarse<br />
exclusivamente para el rebordeado de paneles<br />
perfilados, tal como se describen en el cap. 2<br />
„Datos técnicos“. El efecto de unión, importante<br />
desde el punto de vista estático, y la estanqueidad<br />
a la lluvia de los paneles perfilados Kalzip,<br />
sólo se consigue si la máquina rebordeadora<br />
funciona correctamente.<br />
El uso conforme al empleo previsto también comprende la<br />
conservación y la limpieza periódicas.<br />
Cualquier utilización no conforme al empleo previsto tiene<br />
que ser consultada previamente con el fabricante.<br />
4.2 Prevención de una utilización incorrecta<br />
Nunca permita que la rebordeadora se mueva<br />
sola. Existe el peligro de que la máquina se<br />
desplace sola por la cumbrera, se caiga y por<br />
lo tanto ocasione daños a personas. Asegúrese<br />
de que al final de la cumbrera se disponga de<br />
una barrera o se encuentre presente una segunda<br />
persona.<br />
4.3 Garantía y responsabilidad<br />
Póngase en contacto con nosotros por cualquier<br />
posible reclamación dentro de la garantía. La<br />
garantía de la máquina rebordeadora y sus accesorios<br />
cubre fallos de material y de fabricación<br />
por un periodo de 12 meses a partir de la fecha<br />
de la factura. Sólo pueden hacerse valer los<br />
derechos de garantía si se presenta el correspondiente<br />
comprobante de compra.<br />
Las deficiencias cubiertas por los derechos de garantía<br />
serán subsanadas en el marco de estas condicionas de<br />
garantía. Los derechos de garantía se extinguen si el<br />
explotador ha puesto en peligro las funciones del aparato,<br />
ya sea por incumplimiento de este manual de instrucciones,<br />
por un uso no conforme al empleo previsto o por intervenciones<br />
de terceros. En estos casos la responsabilidad<br />
queda en manos del explotador.<br />
Los derechos de garantía también se extinguen si personas<br />
no autorizadas por nosotros realizaron ajustes o cambios.<br />
Únicamente realizamos reparaciones para garantías válidas.<br />
Nos reservamos el derecho de determinar el lugar donde<br />
se realizará o prestará el servicio.<br />
La presente garantía es de carácter exclusivo y sustituye<br />
cualquier otra garantía escrita, oral o indirecta. Para el<br />
producto, esta garantía representa los únicos derechos<br />
del comprador y nuestra única responsabilidad. Quedan<br />
excluidos los derechos de garantía indirectos provenientes<br />
de la manipulación del aparato.<br />
En ningún caso asumimos la responsabilidad por daños<br />
secundarios, colaterales o consecuentes, ocasionados<br />
por o en relación a la utilización o aplicación del producto<br />
suministrado.<br />
4.4 Envío y tramitación<br />
Cualquier reclamación en garantía debe realizarse<br />
en el periodo de garantía y presentarse a tiempo.<br />
Si un producto tiene que ser enviado para su reparación<br />
y/o ajuste, es necesario contar primero<br />
con nuestro consentimiento. Cualquier material enviado<br />
para su inspección y/o para una reparación en garantía<br />
debe estar asegurado para el medio de transporte indicado<br />
por nosotros.<br />
En cualquier caso tenemos la responsabilidad general<br />
exclusiva para determinar la causa y la naturaleza del fallo<br />
y tomar una decisión final al respecto.<br />
No aceptamos envíos / paquetes sin franquear.
5. Indicaciones de seguridad<br />
Es imprescindible cumplir con las siguientes indicaciones<br />
de seguridad para evitar daños en el aparato y lesiones<br />
en el usuario.<br />
Lea todas las instrucciones y las indicaciones de<br />
seguridad. El incumplimiento de las instrucciones e<br />
indicaciones de seguridad puede ocasionar descargas<br />
eléctricas, incendios y/o lesiones graves.<br />
La máquina rebordeadora sólo puede ser utilizada,<br />
operada y mantenida por personal debidamente instruido.<br />
La máquina ha sido construida según los conocimientos<br />
técnicos actuales y las normas técnicas reconocidas.<br />
Sin embargo, su empleo puede conllevar riesgos de daños<br />
corporales y de muerte del usuario o terceros o<br />
desperfectos en el aparato u otros daños materiales. Son<br />
necesarias indicaciones especiales para el uso y la manipulación<br />
del aparato.<br />
No se pueden descartar peligros de choque y aplastamiento<br />
para un posicionamiento (una manipulación) manual<br />
de la máquina rebordeadora sobre bandejas Kalzip.<br />
¡Riesgo de lesiones! ¡Peligro de muerte!<br />
Fundamental: ¡rebordear cada bandeja inmediatamente<br />
después de su colocación!<br />
Sólo entonces el sistema cuenta con su capacidad de<br />
carga y la seguridad necesaria contra las fuerzas del viento.<br />
Las bandejas que aún no han sido rebordeadas no pueden<br />
ser pisadas.<br />
La máquina rebordeadora tiene que cerrar completamente<br />
y los juegos de rodillos tienen que estar montados<br />
correctamente.<br />
¡Mantenga el aparato alejado de los niños!<br />
Los trabajos de mantenimiento y limpieza sólo pueden<br />
realizarse con la máquina rebordeadora desconectada<br />
y desenchufada. Es imprescindible tener en cuanta las<br />
indicaciones de seguridad del capítulo 5.<br />
Proteger el aparato de la suciedad y la humedad, no<br />
dejarlo en la lluvia.<br />
Asegurarlo contra caídas y no utilizarlo nunca sin el<br />
mango.<br />
En las zonas de bordes y huecos de cubierta se tienen<br />
que cumplir las normas de prevención de accidentes.<br />
Máquina rebordeadora Kalzip<br />
Para el funcionamiento está prevista la conexión a la<br />
red eléctrica con toma de tierra independiente. Deben<br />
utilizarse cables de diámetro grande para cableados<br />
largos, de forma que quede asegurado el suministro de<br />
230 Voltios para el funcionamiento del aparato.<br />
La toma de corriente debe corresponderse con el<br />
enchufe de la herramienta eléctrica. No está permitido<br />
realizar modificaciones en el enchufe. No emplee<br />
adaptadores de enchufe junto con herramientas eléctricas<br />
con protección a tierra. Los enchufes sin modificaciones<br />
y las tomas de corriente adecuadas reducen el<br />
riesgo de descargas eléctricas.<br />
No utilice el cable para cargar o colgar la herramienta<br />
eléctrica o para desenchufarla. Mantenga el cable alejado<br />
del calor, del aceite, de cantos filosos o de partes<br />
móviles de aparatos. Los cables dañados o enredados<br />
aumentan el riesgo de una descarga eléctrica.<br />
Al trabajar con una herramienta eléctrica tenga mucho<br />
cuidado, preste atención a lo que hace y realice el trabajo<br />
de forma razonada. No utilice herramientas eléctricas<br />
si se encuentra cansado o está bajo los efectos de<br />
drogas, alcohol o medicamentos. Un momento de descuido<br />
en el empleo de la herramienta eléctrica puede tener<br />
como consecuencia lesiones graves.<br />
Utilice equipamiento de protección personal. Dependiendo<br />
de la aplicación de la herramienta eléctrica, utilice<br />
equipamiento de protección personal como calzado de<br />
protección antideslizante, casco de protección o protección<br />
auditiva; esto disminuye el riesgo de lesiones.<br />
Evite la puesta en marcha accidental del aparato. Asegúrese<br />
de que la herramienta eléctrica esté apagada<br />
antes de enchufarla a la alimentación eléctrica y/o a<br />
una batería recargable, antes de cargarla o transportarla.<br />
Existe riesgo de accidente si carga la herramienta<br />
eléctrica con el dedo puesto en el interruptor de encendido<br />
o conecta el aparato encendido a la alimentación eléctrica.<br />
Quite cualquier herramienta de ajuste o llave antes de<br />
encender la herramienta eléctrica. Una herramienta o<br />
llave que se encuentre en una parte giratoria del aparato<br />
puede ocasionar lesiones.<br />
Sólo trabaje con el aparato si el lugar de trabajo está suficientemente<br />
iluminado. Nunca trabaje sin iluminación<br />
al atardecer o al amanecer.<br />
Asegúrese de que la zona de trabajo siempre esté libre.<br />
GmbH 81<br />
Deutsch<br />
Español Italiano Français English
Deutsch<br />
Español Italiano Français English<br />
Máquina rebordeadora Kalzip<br />
No utilice una herramienta eléctrica cuyo interruptor<br />
esté defectuoso. Una herramienta eléctrica que ya no<br />
pueda encenderse o apagarse es peligrosa y tiene que<br />
ser reparada.<br />
La máquina no está diseñada para el rebordeado<br />
manual.<br />
¡No está permitida la utilización del aparato en zonas<br />
con riesgo de explosión!<br />
En modo automático (para subestructuras planas), la<br />
rebordeadora y la zona de peligro tienen que mantenerse<br />
siempre visibles para el operario.<br />
Si se utiliza el bloqueo del pulsador (botón a presión),<br />
la máquina rebordeadora puede entrar en funcionamiento<br />
accidentalmente al retornar la energía eléctrica<br />
luego de un corte en el suministro de energía.<br />
6. Estructura<br />
82 Kalzip<br />
1.1 1.2<br />
Todos los trabajos de mantenimiento y reparación que<br />
requieren la apertura del motor o de la carcasa del engranaje,<br />
sólo pueden ser realizados por un taller de servicio<br />
al cliente autorizado.<br />
Realice el mantenimiento y la limpieza del aparato<br />
según las instrucciones del capítulo 8 y haga realizar l<br />
os controles obligatorios según las disposiciones de<br />
seguridad industrial por un electricista autorizado.<br />
¡El cambio de rodillos y cualquier otro ajuste o modificación<br />
deben realizarse con el aparato desenchufado!<br />
1.3<br />
1.4<br />
Accionamiento<br />
1.1 Regulador de velocidad<br />
1.2 Botón de bloqueo lateral<br />
1.3 Encendido/apagado<br />
1.4 Anillo de protección
DDF 4-0<br />
DDF 2-1<br />
DDF 2-2<br />
DDF 3-4/ 3-5<br />
DDF 7-0<br />
DDF 4-1<br />
DDF 4-2/4-3<br />
DFF 5-0<br />
DFF 5-5<br />
DFF 5-3<br />
DDF 5-4<br />
20<br />
Máquina rebordeadora – vista frontal<br />
130 140<br />
a partir eje<br />
central reborde<br />
150<br />
20<br />
DDF 2-1 Parte superior de la carcasa,<br />
lado del accionamiento<br />
DDF 2-2 Parte inferior de la carcasa,<br />
lado del accionamiento<br />
DDF 2-3 Parte superior de la carcasa, lado contrario<br />
DDF 2-4 Parte inferior de la carcasa, lado contrario<br />
DDF 3-4 / 3-5 Tornillo / arandela de soporte de rodillo<br />
DDF 3-6 Rodillo ancho<br />
DDF 3-7 Perno para rodillo ancho<br />
DDF 3-8 Arandela para rodillo ancho<br />
DDF 3-9 Tuerca para rodillo ancho<br />
DDF 4-0 Soporte de rodillo, parte delantera,<br />
lado del accionamiento<br />
DDF 4-1 Rodillo, parte delantera central<br />
310<br />
290<br />
Espacio de trabajo de la máquina rebordeadora<br />
Máquina rebordeadora Kalzip<br />
320<br />
DDF 5-1<br />
DDF 5-2<br />
DDF 2-3<br />
DDF 2-4<br />
DDF 8-0<br />
DDF 8-1<br />
DDF 3-7<br />
DDF 3-6<br />
DDF 3-8<br />
DDF 3-9<br />
DDF 4-2 / 4-3 Tornillo / arandela de rodillo,<br />
parte delantera central<br />
DDF 5-0 Soporte de rodillo, parte delantera,<br />
lado contrario<br />
DDF 5-1 Tornillo para soporte de rodillo,<br />
parte delantera<br />
DDF 5-2 Arandelas para soporte de rodillo,<br />
parte delantera<br />
DDF 5-3 Rodillo estrecho, parte delantera<br />
DDF 5-4 Tornillo para rodillo estrecho, parte delantera<br />
DDF 5-5 Arandela para rodillo estrecho, parte delantera<br />
DDF 7-0 Barra de tensado<br />
DDF 8-0 Barra de tensado con base excéntrica<br />
DDF 8-1 Pasador estriado<br />
20<br />
GmbH 83<br />
Deutsch<br />
Español Italiano Français English
Deutsch<br />
Español Italiano Français English<br />
Máquina rebordeadora Kalzip<br />
Los elementos marcados con * indican componentes individuales a partir del número de máquina 1600<br />
Máquina rebordeadora – vista lateral<br />
DDF 3-12 Soporte universal de rodillo para<br />
Kalzip 50/65 y Kalzip AF 65<br />
DDF 4-0 Soporte de rodillo, parte delantera,<br />
lado del accionamiento<br />
DDF 5-0 Soporte de rodillo, parte delantera,<br />
lado contrario<br />
DDF 6-0 Placa de fricción<br />
DDF 6-1 Tornillo para placa de fricción<br />
DDF 6-2 Arandela para placa de fricción<br />
DDF 7-1 Tuerca para barra de tensado<br />
DDF 7-2 Arandela para barra de tensado<br />
DDF 16-1 Rodillo STD 0,7 - 1,0, parte delantera<br />
DDF 16-2 Rodillo STD 0,7 - 1,0, parte trasera<br />
DDF 17-1 Rodillo 1,2, parte delantera<br />
DDF 17-2 Rodillo 1,2, parte trasera<br />
DDF 18-1 Rodillo para paneles translúcidos,<br />
parte delantera<br />
DDF 18-2 Rodillo para paneles translúcidos,<br />
parte trasera<br />
DDF 23-0 Tornillos para fijación del motor<br />
DDF 30-0 Arandelas para fijación del motor<br />
84 Kalzip<br />
DDF 74 - 0<br />
DDF 76 - 0<br />
DDF 91- 0<br />
DDF 134-0*<br />
DDF 90-0<br />
DDF 89-0*<br />
DDF 133-0*<br />
DDF 6-0<br />
DDF 7-1<br />
DDF 7-2<br />
DDF 16-2<br />
DDF 17-2<br />
DDF 18-2<br />
DDF 6-2<br />
DDF 6-2<br />
Hasta número de máquina 1599<br />
DDF 75 - 0<br />
DDF 137 -0*<br />
DDF 95 -0<br />
DDF 139 -0*<br />
DDF 77-0<br />
DDF 138 -0*<br />
DDF 109 -0<br />
DDF 163 -0*<br />
DDF 23 -0<br />
DDF 30 -0<br />
DDF 113 -0<br />
DDF 4 -0<br />
DDF 5 -0<br />
DDF 3 -12<br />
DDF 16-1<br />
DDF 17-1<br />
DDF 18-1<br />
DDF 74-0 Empuñadura con interruptor<br />
DDF 75-0 Tapa<br />
DDF 76-0 Tornillos alomados para empuñadura<br />
con interruptor<br />
DDF 77-0 Tornillos alomados para tapa<br />
DDF 89-0 Interruptor<br />
DDF 90-0 Cable con enchufe<br />
DDF 91-0 Protector de cable<br />
DDF 95-0 Soporte de escobilla con escobilla<br />
DDF 109-0 Anillo de protección<br />
DDF 113-0 Tornillo Allen<br />
A partir del número de máquina 1600<br />
DDF 133-0 Interruptor<br />
DDF 134-0 Protector de cable<br />
DDF 137-0 Tapa de la carcasa del motor<br />
DDF 138-0 Tornillos alomados para tapa<br />
DDF 139-0 Soporte de escobilla con escobilla<br />
DDF 163-0 Anillo de protección
Además de la máquina rebordeadora estándar,<br />
se encuentra disponible una máquina rebordeadora<br />
con motor en ángulo para operaciones<br />
en espacios estrechos.<br />
Máquina rebordeadora – Diseño con motor en ángulo<br />
7. Puesta en marcha y funcionamiento<br />
Antes de la puesta en marcha de la máquina<br />
rebordeadora comprobar el firme asiento de<br />
la barra de seguridad y controlar que no haya<br />
elementos de fijación sueltos.<br />
La puesta en marcha y la operación sólo se<br />
pueden efectuar si se cumplen todas las condiciones<br />
previas estipuladas en el manual de<br />
instrucciones y el personal responsable ha leído<br />
y comprendido el manual de instrucciones.<br />
7.1 Conexión eléctrica<br />
La tensión de la red eléctrica se tiene que corresponder<br />
con la tensión indicada en la placa de características del<br />
aparato. Véase la 7.1 para la conexión y desconexión del<br />
cable de conexión a la red eléctrica.<br />
Apague siempre la máquina antes de conectar<br />
o desconectar el cable de conexión a la red<br />
eléctrica.<br />
Máquina rebordeadora Kalzip<br />
Conexión y desconexión del cable de conexión a la<br />
red eléctrica<br />
El interruptor (6, 1.3) sirve para el encendido/apagado<br />
(presionado = ENCENDIDO, sin presionar = APAGADO).<br />
Para un funcionamiento continuo se puede encastrar<br />
el botón de bloqueo lateral (6, 1.2). Para desbloquearlo<br />
presione nuevamente el interruptor.<br />
GmbH 85<br />
Deutsch<br />
Español Italiano Français English
Deutsch<br />
Español Italiano Français English<br />
Máquina rebordeadora Kalzip<br />
7.2 Sistema electrónico<br />
El accionamiento cuenta con un sistema electrónico de onda plena que presenta las siguientes características:<br />
Arranque suave El arranque suave de regulación electrónica permite un arranque de la máquina sin<br />
sacudidas.<br />
Regulación de la velocidad La velocidad del motor se puede ajustar de forma continua entre 250 y 600 rpm<br />
mediante el regulador de velocidad (6, 1.1).<br />
Velocidad constante La velocidad del motor preseleccionada se mantiene constante electrónicamente.<br />
De esta forma se logra una velocidad constante también con carga.<br />
Seguridad térmica Una sobrecarga extrema en funcionamiento continuo provoca un calentamiento del<br />
motor. La máquina está equipada con un sistema electrónico de control de temperatura<br />
para evitar que el motor se sobrecaliente (se funda). El sistema electrónico de<br />
seguridad apaga el motor antes de alcanzar una temperatura crítica del motor. Luego<br />
de un periodo de enfriamiento de aprox. 3 - 5 min, la máquina está nuevamente<br />
preparada para el funcionamiento y puede volver a cargarse al máximo. El tiempo de<br />
enfriamiento se reduce considerablemente con la máquina en marcha (sin carga).<br />
7.3 El proceso de rebordeado<br />
Por motivos de seguridad y para lograr el efecto de unión<br />
necesario para la capacidad de carga y la transitabilidad es<br />
imprescindible rebordear cada panel perfilado Kalzip inmediatamente<br />
después de su colocación. Para la fijación de los<br />
paneles perfilados Kalzip se emplean clips, que se encajan<br />
en los rebordes y se cubren con el siguiente elemento. Se<br />
debe prestar atención a que el reborde pequeño esté encajado<br />
en la cabeza del clip, ya que en caso contrario el reborde<br />
puede quedar mal ejecutado, o sea, defectuoso.<br />
86 Kalzip<br />
No utilice la máquina si el sistema electrónico<br />
está defectuoso ya que esto puede provocar<br />
velocidades excesivas. Puede reconocer que<br />
existe un fallo en el sistema electrónico si no<br />
funciona el arranque suave, si existe un ruido<br />
excesivo de marcha sin carga o si no puede<br />
regular la velocidad.<br />
Rebordear cada panel perfilado Kalzip inmediatamente<br />
después de su colocación<br />
También se encuentra disponible un modelo<br />
de máquina rebordeadora con motor en ángulo<br />
(véase 6).
7.4 Manipulación de la máquina<br />
Para cumplir con todos los requisitos de<br />
aplicaciones industriales de altas solicitaciones,<br />
la máquina está equipada con un anillo<br />
de protección (6, 1.4), que protege la carcasa<br />
del motor frente a cargas de impacto extremas.<br />
En modo automático (para subestructuras<br />
planas), la rebordeadora y la zona de peligro<br />
tienen que mantenerse siempre visibles para<br />
el operario.<br />
La máquina cerrada se puede encajar mediante operación<br />
a impulsos en el reborde del panel perfilado Kalzip. El<br />
procedimiento se facilita si se cierran antes los rebordes<br />
con la pinza de cierre manual. La velocidad de la rebordeadora<br />
se puede ajustar mediante la rueda de ajuste que<br />
se encuentra en la empuñadura.<br />
Para subestructuras planas, la máquina puede desplazarse<br />
de forma autónoma en modo automático siendo habitualmente<br />
guiada ligeramente con la mano. Para cubiertas<br />
que no son planas o son curvadas puede ser necesario<br />
un guiado manual más firme.<br />
El funcionamiento correcto de la máquina rebordeadora<br />
puede controlarse mediante las dimensiones del reborde<br />
terminado.<br />
7.5 Desmontaje (procedimiento para abrir rebordes)<br />
Para abrir de nuevo los paneles perfilados Kalzip se<br />
tiene que introducir el útil de apertura de bandejas<br />
en la ranura de la parte trasera de la máquina rebordeadora.<br />
Antes se debe abrir parcialmente el reborde<br />
superior de forma manual con una herramienta adecuada<br />
(p. ej. un destornillador).<br />
Colocar el útil de apertura de bandejas y comprobar el<br />
correcto ajuste de la altura. Abrir parcialmente el reborde<br />
grande con un destornillador antes de encajar el rodillo<br />
cónico en el reborde. Luego encajar el rodillo cónico mediante<br />
operación a impulsos. El ajuste se realiza mediante<br />
el tornillo prisionero DDF 10-5. El rodillo cónico abre el<br />
reborde grande y el panel perfilado Kalzip puede ser desmontado.<br />
En el caso de querer reutilizar los paneles perfilados Kalzip,<br />
al abrir el reborde se tiene que ajustar el aparato para abrir<br />
rebordes de tal manera que la apertura sea apenas suficiente<br />
para el desmontaje.<br />
DDF 10- 4 DDF 10- 3<br />
Accionamiento<br />
DDF 10- 5<br />
DDF 10- 1<br />
DDF 10- 2<br />
DDF 10-1 Soporte de rodillo cónico<br />
DDF 10-2 Rodillo cónico<br />
DDF 10-3 Tornillo rosca izquierda<br />
DDF 10-4 Tornillo rosca derecha<br />
DDF 10-5 Tornillo prisionero<br />
Máquina rebordeadora Kalzip<br />
GmbH 87<br />
Deutsch<br />
Español Italiano Français English
Deutsch<br />
Español Italiano Français English<br />
Máquina rebordeadora Kalzip<br />
8. Mantenimiento y conservación<br />
de la máquina rebordeadora<br />
8.1 Conservación<br />
88 Kalzip<br />
La conservación sólo se puede efectuar si<br />
se cumplen todas las condiciones previas<br />
estipuladas en el manual de instrucciones y<br />
el personal responsable ha leído y comprendido<br />
el manual de instrucciones.<br />
Desenchufe siempre la máquina antes de<br />
realizar cualquier trabajo de mantenimiento.<br />
Todos los trabajos de mantenimiento y reparación<br />
que requieren la apertura del motor o<br />
de la carcasa del engranaje, sólo pueden ser<br />
realizados por un taller de servicio al cliente<br />
autorizado.<br />
La máquina rebordeadora funcionará durante muchos<br />
años si se cumple con un mínimo de mantenimiento y<br />
conservación. Todos los ejes cuentan con rodamientos<br />
de bolas que no requieren mantenimiento.<br />
Para asegurar la circulación de aire hay que<br />
mantener libres y limpias las aberturas de<br />
ventilación de la carcasa del motor.<br />
Según las solicitaciones, los cojinetes de los rodillos guía<br />
exteriores (6, DDF 3-6; DDF 5-3; DDF 4-1) deben lubricarse<br />
con aceite ligero para máquinas.<br />
Con la máquina abierta se tiene que controlar si las ruedas<br />
dentadas están libres de cuerpos extraños y/o suciedad<br />
y, dado el caso, se tienen que limpiar. Los rodillos de cierre<br />
del reborde se tienen que limpiar y lubricar ligeramente de<br />
forma periódica.<br />
Sólo así se podrá realizar un cerramiento de reborde<br />
correcto.<br />
Las barras de tensado (6, DDF 7-0) en la zona del eje de<br />
la base excéntrica se tienen que lubricar de tal manera,<br />
que en la superficie quede una película visible de aceite.<br />
El accionamiento está equipado con escobillas especiales<br />
de apagado automático. Si están desgastadas, se corta<br />
automáticamente la corriente y la máquina se detiene.<br />
8.2 Cambio de los rodillos laterales<br />
Nuestra máquina rebordeadora con soporte universal de<br />
rodillo (6, DDF 3-12) es adecuada para trabajar con perfiles<br />
Kalzip 50, 65, así como con perfiles Kalzip AF 65/AS 65.<br />
Para cambiar los rodillos, la máquina debe<br />
estar siempre desenchufada.<br />
Reajuste de la máquina rebordeadora para perfiles<br />
Kalzip 50, Kalzip 65 y Kalzip AF 65/AS 65:<br />
1. Herramientas necesarias para el ajuste de los rodillos<br />
laterales: Llave Allen 5 mm<br />
2. Colocar la barra de tensado en posición horizontal<br />
3. Quitar los tornillos Allen (1) que sujetan el soporte<br />
universal de rodillo (2)<br />
4. Desplazar el soporte universal de rodillo<br />
• hacia arriba para Kalzip 50<br />
• hacia el centro para Kalzip 65<br />
• hacia abajo para Kalzip AF 65/AS 65<br />
Atornillar de nuevo los tornillos Allen fijamente.<br />
(1)<br />
(2)<br />
A partir del número de máquina 1170, el soporte<br />
universal de rodillo (6, DDF 3-12) viene<br />
montado de serie.
9. Comprobación del ajuste<br />
1. Limpiar las superficies de cierre. Ajustar las barras de<br />
tensado (6, DDF 7-0) con ambas tuercas (DDF 7-1) de<br />
forma que la máquina pueda cerrarse completamente.<br />
2. Comprobar si todos los rodillos de guía (6, DDF 3-6;<br />
DDF 5-3; DDF 4-1) se encuentran en la posición correcta<br />
y se pueden mover fácilmente.<br />
3. Realizar una prueba de rebordeado<br />
10. Juegos de rodillos disponibles<br />
• para 0,7 - 1,0 mm, den. 0,7 - 1,0<br />
• para 1,2 mm, den. 1.2<br />
• para paneles translúcidos, den. L<br />
En circunstancias normales no es posible la colocación<br />
errónea de los diferentes juegos de rodillos. Utilice siempre<br />
los cuatros rodillos de un tipo. Herramienta necesaria<br />
para cambiar el juego de rodillos: Llave de estrella 19 mm<br />
11. Perfil Kalzip curvado<br />
Puede ser necesario tener que realizar modificaciones en<br />
la máquina rebordeadora para perfiles Kalzip curvados.<br />
• Bandejas curvadas por golpeteado:<br />
Quitar siempre los rodillos (6, DDF 3-12).<br />
• Bandejas curvadas por laminación:<br />
Quitar los rodillos de guía (6, DDF 4-0) para un radio<br />
menor de 2 m.<br />
12. Paneles translúcidos de doble capa<br />
Hay que quitar los rodillos de guía.<br />
13. Reparaciones<br />
Las reparaciones de y en la carcasa sólo<br />
pueden ser realizadas por el fabricante de<br />
la máquina.<br />
La garantía se extingue si se realizan reparaciones por<br />
cuenta propia. El fabricante no asume ninguna responsabilidad<br />
por reparaciones realizadas de forma inadecuada,<br />
ni por los daños derivados de éstas.<br />
Máquina rebordeadora Kalzip<br />
GmbH 89<br />
Deutsch<br />
Español Italiano Français English
Deutsch<br />
Español Italiano Français English<br />
Máquina rebordeadora Kalzip<br />
14. Repuestos<br />
90 Kalzip<br />
En las siguientes páginas encontrará listas de<br />
piezas de repuesto para la máquina rebordeadora.<br />
DDF 3-12<br />
DDF 3-6<br />
DDF 3-7<br />
DDF 3-8<br />
DDF 3-9<br />
Lista de piezas de repuesto 1<br />
DDF 3-0-6 Soporte universal de rodillo completo para<br />
Kalzip 65/50 mm y Kalzip AF 65<br />
DDF 3-6 Rodillo ancho<br />
DDF 3-7 Perno para rodillo ancho<br />
DDF 3-8 Arandela para rodillo ancho<br />
DDF 3-9 Tuerca para rodillo ancho<br />
DDF 3-0-6<br />
DDF 5-4<br />
DDF 5-5<br />
DDF 5-3<br />
DDF 3-12 Soporte universal de rodillo para<br />
Kalzip 65/50 mm y Kalzip AF 65<br />
DDF 5-3 Rodillo estrecho, parte delantera<br />
DDF 5-4 Tornillo para rodillo estrecho, parte delantera<br />
DDF 5-5 Tornillo para rodillo estrecho, parte delantera
DDF 2-1<br />
DDF 2-2<br />
DDF 3-4 / 3-5<br />
DDF 7-0<br />
DDF 4-2 / 4-3<br />
DDF 4-1<br />
Lista de piezas de repuesto 2<br />
DDF 2-1 Parte superior de la carcasa,<br />
lado del accionamiento<br />
DDF 2-2 Parte inferior de la carcasa,<br />
lado del accionamiento<br />
DDF 2-3 Parte superior de la carcasa, lado contrario<br />
DDF 2-4 Parte inferior de la carcasa, lado contrario<br />
DDF 3-4 / 3-5 Tornillo / arandela de soporte de rodillo<br />
DDF 4-0 Soporte de rodillo, parte delantera,<br />
lado del accionamiento<br />
DDF 4-1 Rodillo, parte delantera central<br />
Máquina rebordeadora Kalzip<br />
DDF 4-0<br />
DDF 5-1<br />
DDF 5-2<br />
DDF 2-3<br />
DDF 2-4<br />
DDF 8-0<br />
DDF 8-1<br />
DDF 5-0<br />
DDF 4-2 / 4-3 Tornillo/arandela de rodillo,<br />
parte delantera central<br />
DDF 5-0 Soporte de rodillo, parte delantera,<br />
lado contrario<br />
DDF 5-1 Tornillo para soporte de rodillo,<br />
parte delantera<br />
DDF 5-2 Arandela para soporte de rodillo,<br />
parte delantera<br />
DDF 7-0 Barra de tensado<br />
DDF 8-0 Barra de tensado con base excéntrica<br />
DDF 8-1 Pasador estriado<br />
GmbH 91<br />
Deutsch<br />
Español Italiano Français English
Deutsch<br />
Español Italiano Français English<br />
Máquina rebordeadora Kalzip<br />
Lista de piezas de repuesto 3<br />
DDF 6-0 Placa de fricción<br />
DDF 6-1 Tornillo para placa de fricción<br />
DDF 6-2 Arandela para placa de fricción<br />
DDF 7-1 Tuerca para barra de tensado<br />
DDF 7-2 Arandela para barra de tensado<br />
DDF 16-1 Rodillo VA 0,7 - 1,0, parte delantera<br />
DDF 16-2 Rodillo VA 0,7 - 1,0, parte trasera<br />
DDF 17-1 Rodillo VA 1,2, parte delantera<br />
DDF 17-2 Rodillo VA 1,2, parte trasera<br />
DDF 18-1 Rodillo VA L, parte delantera<br />
DDF 18-2 Rodillo VA L, parte trasera<br />
DDF 23-0 Tornillos para fijación del motor<br />
92 Kalzip<br />
DDF 74-0<br />
DDF 76-0<br />
DDF 90-0<br />
DDF 89-0<br />
DDF 6-0<br />
DDF 6-1<br />
DDF 6-2<br />
DDF 7-1<br />
DDF 7-2<br />
DDF 16-2<br />
DDF 17-2<br />
DDF 18-2<br />
DDF 92-0<br />
DDF 16-1<br />
DDF 17-1<br />
DDF 18-1<br />
DDF 95-0<br />
DDF 75-0<br />
DDF 77-0<br />
DDF 109-0<br />
DDF 113-0<br />
DDF 23-0<br />
DDF 30-0<br />
DDF 30-0 Arandelas para fijación del motor<br />
DDF 74-0 Empuñadura con interruptor<br />
DDF 75-0 Tapa<br />
DDF 76-0 Tornillos alomados para empuñadura<br />
con interruptor<br />
DDF 77-0 Tornillo alomado para tapa<br />
DDF 89-0 Interruptor<br />
DDF 90-0 Cable con enchufe<br />
DDF 92-0 Protector de cable<br />
DDF 95-0 Soporte de escobilla con escobilla<br />
DDF 109-0 Anillo de protección<br />
DDF 113-0 Tornillo Allen
DDF 21-0<br />
DDF 22-0<br />
DDF 14-0<br />
DDF 11-4<br />
Lista de piezas de repuesto 4<br />
DDF 21-0 Árbol de transmisión<br />
DDF 22-0 Piñón de accionamiento (D = 17)<br />
DDF 11-1 Chaveta para rueda dentada (corta)<br />
DDF 11-6 Arandela distanciadota para árbol<br />
DDF 15-0 Rueda dentada de 51 dientes<br />
DDF 11-5 Anillo de retención para árbol<br />
DDF 11-7 Rodamiento de bolas<br />
Lista de piezas de repuesto 5<br />
DDF 37 Pasador cilíndrico para carcasa<br />
DDF 7-4 Casquillo largo para barra de tensado<br />
DDF 7-3 Casquillo corto para barra de tensado<br />
Máquina rebordeadora Kalzip<br />
DDF 13-0 Árbol para rodillo de cierre de reborde,<br />
parte delantera, rosca long. 13.5, ø 20,0<br />
DDF 11-2 Chaveta para rodillo (larga)<br />
DDF 11-3 Arandela para árbol<br />
DDF 11-4 Tuerca para árbol<br />
DDF 14-0 Árbol para rodillo de cierre de reborde,<br />
parte trasera, rosca long. 13.5, ø 15,87<br />
DDF 37<br />
DDF 7-4<br />
DDF 7-3<br />
DDF 2-5<br />
DDF 2-6<br />
DDF 9-0<br />
DDF 11-1<br />
DDF 11-6<br />
DDF 15-0<br />
DDF 11-5<br />
DDF 11-7<br />
DDF 13-0<br />
DDF 11-2<br />
DDF 11-3<br />
DDF 2-5 Tornillos para carcasa<br />
DDF 2-6 Arandelas para carcasa<br />
DDF 9-0 Muelle de compresión<br />
GmbH 93<br />
Deutsch<br />
Español Italiano Français English
www.kalzip.com<br />
The product and technical information contained in<br />
this document is accurate according to our knowledge<br />
at the time of publication. Details do not<br />
refer to any specific application and cannot give<br />
rise to any claim for compensation. From time to<br />
time our product range may alter as a result of our<br />
continued commitment to product innovation and<br />
development. Kalzip cannot guarantee that printed<br />
literature will contain the most recent updates; the<br />
latest editions are available to download at www.<br />
kalzip.com.<br />
Copyright 2010<br />
Kalzip GmbH<br />
Part of Tata Steel Europe Ltd.<br />
Kalzip GmbH<br />
August-Horch-Str. 20-22<br />
56070 Koblenz<br />
P.O. Box 100316<br />
56033 Koblenz<br />
T: +49 (0) 261 9834 0<br />
F: +49 (0) 261 9834 100<br />
E: germany@kalzip.com<br />
www.kalzip.com<br />
The address of your nearest local sales office can be found on our website: www.kalzip.com<br />
adhoc media gmbh:1011:09/2010