ml510 cover.qxp - Chamberlain
ml510 cover.qxp - Chamberlain
ml510 cover.qxp - Chamberlain
- No tags were found...

You also want an ePaper? Increase the reach of your titles
YUMPU automatically turns print PDFs into web optimized ePapers that Google loves.
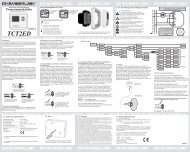
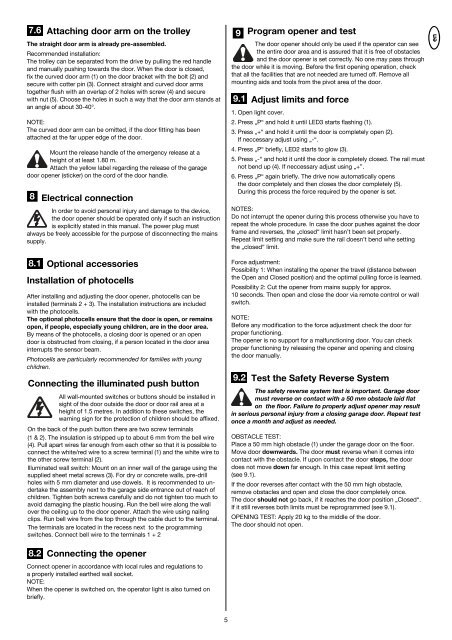
7.6Attaching door arm on the trolleyThe straight door arm is already pre-assembled.Recommended installation:The trolley can be separated from the drive by pulling the red handleand manually pushing towards the door. When the door is closed,fix the curved door arm (1) on the door bracket with the bolt (2) andsecure with cotter pin (3). Connect straight and curved door armstogether flush with an overlap of 2 holes with screw (4) and securewith nut (5). Choose the holes in such a way that the door arm stands atan angle of about 30-40°.NOTE:The curved door arm can be omitted, if the door fitting has beenattached at the far upper edge of the door.Mount the release handle of the emergency release at aheight of at least 1.80 m.Attach the yellow label regarding the release of the garagedoor opener (sticker) on the cord of the door handle.8Electrical connectionIn order to avoid personal injury and damage to the device,the door opener should be operated only if such an instructionis explicitly stated in this manual. The power plug mustalways be freely accessible for the purpose of disconnecting the mainssupply.8.1Optional accessoriesInstallation of photocellsAfter installing and adjusting the door opener, photocells can beinstalled (terminals 2 + 3). The installation instructions are includedwith the photocells.The optional photocells ensure that the door is open, or remainsopen, if people, especially young children, are in the door area.By means of the photocells, a closing door is opened or an opendoor is obstructed from closing, if a person located in the door areainterrupts the sensor beam.Photocells are particularly recommended for families with youngchildren.Connecting the illuminated push buttonAll wall-mounted switches or buttons should be installed insight of the door outside the door or door rail area at aheight of 1.5 metres. In addition to these switches, thewarning sign for the protection of children should be affixed.On the back of the push button there are two screw terminals(1 & 2). The insulation is stripped up to about 6 mm from the bell wire(4). Pull apart wires far enough from each other so that it is possible toconnect the white/red wire to a screw terminal (1) and the white wire tothe other screw terminal (2).Illuminated wall switch: Mount on an inner wall of the garage using thesupplied sheet metal screws (3). For dry or concrete walls, pre-drillholes with 5 mm diameter and use dowels. It is recommended to undertakethe assembly next to the garage side entrance out of reach ofchildren. Tighten both screws carefully and do not tighten too much toavoid damaging the plastic housing. Run the bell wire along the wallover the ceiling up to the door opener. Attach the wire using nailingclips. Run bell wire from the top through the cable duct to the terminal.The terminals are located in the recess next to the programmingswitches. Connect bell wire to the terminals 1 + 299.1Adjust limits and force1. Open light <strong>cover</strong>.2. Press „P“ and hold it until LED3 starts flashing (1).3. Press „+“ and hold it until the door is completely open (2).If neccessary adjust using „-“.4. Press „P“ briefly, LED2 starts to glow (3).5. Press „-“ and hold it until the door is completely closed. The rail mustnot bend up (4). If neccessary adjust using „+”.6. Press „P“ again briefly. The drive now automatically opensthe door completely and then closes the door completely (5).During this process the force required by the opener is set.NOTES:Do not interrupt the opener during this process otherwise you have torepeat the whole procedure. In case the door pushes against the doorframe and reverses, the „closed“ limit hasn’t been set properly.Repeat limit setting and make sure the rail doesn’t bend whe settingthe „closed“ limit.Force adjustment:Possibility 1: When installing the opener the travel (distance betweenthe Open and Closed position) and the optimal pulling force is learned.Possibility 2: Cut the opener from mains supply for approx.10 seconds. Then open and close the door via remote control or wallswitch.NOTE:Before any modification to the force adjustment check the door forproper functioning.The opener is no support for a malfunctioning door. You can checkproper functioning by releasing the opener and opening and closingthe door manually.9.2Program opener and testThe door opener should only be used if the operator can seethe entire door area and is assured that it is free of obstaclesand the door opener is set correctly. No one may pass throughthe door while it is moving. Before the first opening operation, checkthat all the facilities that are not needed are turned off. Remove allmounting aids and tools from the pivot area of the door.Test the Safety Reverse SystemThe safety reverse system test is important. Garage doormust reverse on contact with a 50 mm obstacle laid flaton the floor. Failure to properly adjust opener may resultin serious personal injury from a closing garage door. Repeat testonce a month and adjust as needed.OBSTACLE TEST:Place a 50 mm high obstacle (1) under the garage door on the floor.Move door downwards. The door must reverse when it comes intocontact with the obstacle. If upon contact the door stops, the doordoes not move down far enough. In this case repeat limit setting(see 9.1).If the door reverses after contact with the 50 mm high obstacle,remove obstacles and open and close the door completely once.The door should not go back, if it reaches the door position „Closed“.If it still reverses both limits must be reprogrammed (see 9.1).OPENING TEST: Apply 20 kg to the middle of the door.The door should not open.en8.2Connecting the openerConnect opener in accordance with local rules and regulations toa properly installed earthed wall socket.NOTE:When the opener is switched on, the operator light is also turned onbriefly.5