2 Appuyez sur le bouton supérieur ou inférieur de la - Alpine Europe
2 Appuyez sur le bouton supérieur ou inférieur de la - Alpine Europe
2 Appuyez sur le bouton supérieur ou inférieur de la - Alpine Europe

You also want an ePaper? Increase the reach of your titles
YUMPU automatically turns print PDFs into web optimized ePapers that Google loves.
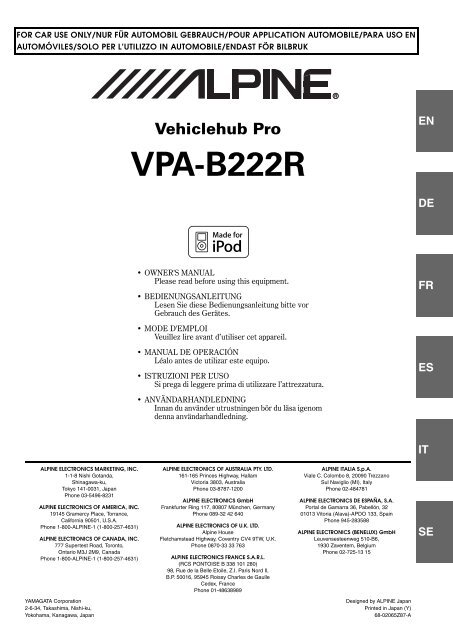
FOR CAR USE ONLY/NUR FÜR AUTOMOBIL GEBRAUCH/POUR APPLICATION AUTOMOBILE/PARA USO ENAUTOMÓVILES/SOLO PER L’UTILIZZO IN AUTOMOBILE/ENDAST FÖR BILBRUKRVehic<strong>le</strong>hub ProENVPA-B222RDE• OWNER'S MANUALP<strong>le</strong>ase read before using this equipment.• BEDIENUNGSANLEITUNGLesen Sie diese Bedienungsan<strong>le</strong>itung bitte vorGebrauch <strong>de</strong>s Gerätes.FR• MODE D'EMPLOIVeuil<strong>le</strong>z lire avant d’utiliser cet appareil.• MANUAL DE OPERACIÓNLéalo antes <strong>de</strong> utilizar este equipo.• ISTRUZIONI PER L’USOSi prega di <strong>le</strong>ggere prima di utilizzare l’attrezzatura.ES• ANVÄNDARHANDLEDNINGInnan du använ<strong>de</strong>r utrustningen bör du läsa igenom<strong>de</strong>nna användarhand<strong>le</strong>dning.ITALPINE ELECTRONICS MARKETING, INC.1-1-8 Nishi Gotanda,Shinagawa-ku,Tokyo 141-0031, JapanPhone 03-5496-8231ALPINE ELECTRONICS OF AMERICA, INC.19145 Gramercy P<strong>la</strong>ce, Torrance,California 90501, U.S.A.Phone 1-800-ALPINE-1 (1-800-257-4631)ALPINE ELECTRONICS OF CANADA, INC.777 Supertest Road, Toronto,Ontario M3J 2M9, CanadaPhone 1-800-ALPINE-1 (1-800-257-4631)ALPINE ELECTRONICS OF AUSTRALIA PTY. LTD.161-165 Princes Highway, Hal<strong>la</strong>mVictoria 3803, AustraliaPhone 03-8787-1200ALPINE ELECTRONICS GmbHFrankfurter Ring 117, 80807 München, GermanyPhone 089-32 42 640ALPINE ELECTRONICS OF U.K. LTD.<strong>Alpine</strong> H<strong>ou</strong>seF<strong>le</strong>tchamstead Highway, Coventry CV4 9TW, U.K.Phone 0870-33 33 763ALPINE ELECTRONICS FRANCE S.A.R.L.(RCS PONTOISE B 338 101 280)98, Rue <strong>de</strong> <strong>la</strong> Bel<strong>le</strong> Etoi<strong>le</strong>, Z.I. Paris Nord Il,B.P. 50016, 95945 Roissy Char<strong>le</strong>s <strong>de</strong> Gaul<strong>le</strong>Ce<strong>de</strong>x, FrancePhone 01-48638989ALPINE ITALIA S.p.A.Via<strong>le</strong> C. Colombo 8, 20090 TrezzanoSul Naviglio (MI), ItalyPhone 02-484781ALPINE ELECTRONICS DE ESPAÑA, S.A.Portal <strong>de</strong> Gamarra 36, Pabellón, 3201013 Vitoria (A<strong>la</strong>va)-APDO 133, SpainPhone 945-283588ALPINE ELECTRONICS (BENELUX) GmbHLeuvensesteenweg 510-B6,1930 Zaventem, BelgiumPhone 02-725-13 15SEYAMAGATA Corporation2-6-34, Takashima, Nishi-ku,Yokohama, Kanagawa, JapanDesigned by ALPINE JapanPrinted in Japan (Y)68-02065Z87-A
FRANÇAISContenuMo<strong>de</strong> d’emploiAVERTISSEMENTAVERTISSEMENT .................................... 4ATTENTION .............................................. 4PRÉCAUTIONS ........................................ 5Mise en r<strong>ou</strong>teCaractéristiques ................................................ 6Liste <strong>de</strong>s accessoires ........................................ 6Mise en service <strong>de</strong> l’appareil ............................ 6Mise s<strong>ou</strong>s et hors tension ................................. 6Affichage <strong>de</strong> <strong>la</strong> s<strong>ou</strong>rce <strong>de</strong> l’appareil <strong>sur</strong> <strong>le</strong>moniteur ..................................................... 6Changement <strong>de</strong> s<strong>ou</strong>rce ..................................... 6Rég<strong>la</strong>ge du volume ........................................... 7Réduction instantanée du volume .................... 7RadioÉc<strong>ou</strong>te <strong>de</strong> <strong>la</strong> radio ............................................. 7Mémorisation manuel<strong>le</strong> <strong>de</strong>s stations ................ 8Mémorisation automatique <strong>de</strong>s stations ........... 8Syntonisation d’une station préréglée .............. 8Fonctionnement RDSActivation <strong>ou</strong> désactivation <strong>de</strong>s fréquencesalternatives (AF) ........................................... 9Réception d’informations r<strong>ou</strong>tières .................. 9Accord PTY (type <strong>de</strong> programme) ................... 9Recherche <strong>de</strong> programme ............................... 10Réception d’informations r<strong>ou</strong>tières pendant <strong>la</strong><strong>le</strong>cture d’un CD <strong>ou</strong> d’un programmeradio ............................................................ 10Mo<strong>de</strong> Priority News (Priorité auxinformations) ............................................... 10Affichage du radio texte ................................. 10Autres fonctions pratiquesRég<strong>la</strong>ge du son ................................................11Rég<strong>la</strong>ge <strong>de</strong> <strong>la</strong> ba<strong>la</strong>nce ..................................11Rég<strong>la</strong>ge du Fa<strong>de</strong>r .........................................11Rég<strong>la</strong>ge <strong>de</strong> <strong>la</strong> comman<strong>de</strong> <strong>de</strong>s aigus .............11Rég<strong>la</strong>ge <strong>de</strong> <strong>la</strong> comman<strong>de</strong> <strong>de</strong>s graves ...........11Rég<strong>la</strong>ge du subwoofer .................................12Activation et désactivation du cont<strong>ou</strong>r ........12Activation <strong>ou</strong> désactivation <strong>de</strong> <strong>la</strong> fonctionDefeat (suppression) ................................12Rég<strong>la</strong>ge du volume du guidage vocal ..........12Fonction moniteur arrière ...............................12Changement <strong>de</strong> <strong>la</strong> fonction du capteur <strong>de</strong>télécomman<strong>de</strong> ..........................................13ConfigurationConfiguration généra<strong>le</strong>Opération <strong>de</strong> configuration généra<strong>le</strong> ...............13Fonction <strong>de</strong> démonstration ..........................14Rég<strong>la</strong>ge <strong>de</strong> l’affichage <strong>de</strong> l’heure ................14Rég<strong>la</strong>ge <strong>de</strong> l’heure .......................................14Rég<strong>la</strong>ge <strong>de</strong> l’heure d’été ..............................14Fonction <strong>de</strong> guidage sonore .........................14Activation <strong>ou</strong> désactivation <strong>de</strong> <strong>la</strong> vibration <strong>de</strong>l’appareil <strong>de</strong> comman<strong>de</strong> ...........................14Rég<strong>la</strong>ge du défi<strong>le</strong>ment .................................14Affichage <strong>de</strong> l’heure du RDS ......................15Rég<strong>la</strong>ge <strong>de</strong>s niveaux <strong>de</strong> signal <strong>de</strong> <strong>la</strong>s<strong>ou</strong>rce .......................................................15Rég<strong>la</strong>ge PI SEEK ........................................15Réception <strong>de</strong> stations RDS régiona<strong>le</strong>s(loca<strong>le</strong>s) ....................................................15Changement <strong>de</strong> <strong>la</strong> <strong>la</strong>ngue d’affichage du PTY(type <strong>de</strong> programme) ................................15P<strong>ou</strong>r passer aux polices <strong>de</strong> caractèresrusses ........................................................151-FR
Configuration systèmeOpération <strong>de</strong> configuration du système .......... 15Utilisation <strong>de</strong> l’entrée <strong>de</strong>s enceintes ............... 16Rég<strong>la</strong>ge du mo<strong>de</strong> d’entrée <strong>de</strong>s enceintes ..... 16Affichage du niveau sonore d’entrée <strong>de</strong>senceintes ................................................... 16Rég<strong>la</strong>ge <strong>de</strong> l’interruption <strong>de</strong> <strong>la</strong> navigation/<strong>de</strong> <strong>la</strong>voix d’entrée <strong>de</strong>s enceintes ...................... 17Rég<strong>la</strong>ge du niveau <strong>de</strong> détection <strong>de</strong>l’interruption <strong>de</strong> l’entrée <strong>de</strong>s enceintes .... 17Rég<strong>la</strong>ge du niveau d’interruption <strong>de</strong> <strong>la</strong> voixd’entrée <strong>de</strong>s enceintes .............................. 17Rég<strong>la</strong>ge du type d’interruption <strong>de</strong> <strong>la</strong> voixd’entrée <strong>de</strong>s enceintes .............................. 17Rég<strong>la</strong>ge du canal <strong>de</strong> <strong>la</strong> détection <strong>de</strong>l’interruption <strong>de</strong>s enceintes ...................... 17Raccor<strong>de</strong>ment du système <strong>de</strong> navigation ........ 18Rég<strong>la</strong>ge du mo<strong>de</strong> <strong>de</strong> navigation .................. 18Rég<strong>la</strong>ge du volume <strong>de</strong> l’interruption du son <strong>de</strong><strong>la</strong> navigation ............................................. 18Raccor<strong>de</strong>ment d’un dispositif d’entrée externe(AUX) .......................................................... 18Rég<strong>la</strong>ge du mo<strong>de</strong> AUX ............................... 18Désignation <strong>de</strong>s appareils externes ............. 18Rég<strong>la</strong>ge du niveau sonore <strong>de</strong> l’entréeexterne ...................................................... 18Raccor<strong>de</strong>ment du moniteur arrière ................. 18Rég<strong>la</strong>ge <strong>de</strong> <strong>la</strong> sortie du moniteur externe .... 18Rég<strong>la</strong>ge <strong>de</strong> l’affichage du mo<strong>de</strong>VISUALIZER .......................................... 18Raccor<strong>de</strong>ment d’un subwoofer ....................... 19Mise en et hors service du subwoofer ......... 19Rég<strong>la</strong>ge <strong>de</strong> l’appareil <strong>de</strong> comman<strong>de</strong> ............... 19Rég<strong>la</strong>ge <strong>de</strong> <strong>la</strong> c<strong>ou</strong><strong>le</strong>ur d’illumination <strong>de</strong>st<strong>ou</strong>ches <strong>de</strong> l’appareil <strong>de</strong> comman<strong>de</strong> ......... 19Activation et désactivation <strong>de</strong> l’illumination<strong>de</strong>s t<strong>ou</strong>ches <strong>de</strong> l’appareil <strong>de</strong>comman<strong>de</strong> ................................................ 19Rég<strong>la</strong>ge <strong>de</strong> <strong>la</strong> luminosité <strong>de</strong>s t<strong>ou</strong>ches <strong>de</strong>l’appareil <strong>de</strong> comman<strong>de</strong> ........................... 19Autres rég<strong>la</strong>ges ............................................... 19Rég<strong>la</strong>ge du mo<strong>de</strong> d’interruption <strong>de</strong> l’apparei<strong>le</strong>xterne ...................................................... 19Rég<strong>la</strong>ge <strong>de</strong> <strong>la</strong> position <strong>de</strong> l’affichage .......... 19Utilisation du CD/MP3/WMA(en option)Lecture du CD/MP3/WMA ............................ 20Recherche <strong>de</strong> dossier <strong>ou</strong> <strong>de</strong> fichier ................. 20M.I.X. (<strong>le</strong>cture aléatoire) ................................ 21Lecture répétitive ............................................ 21Utilisation d’un DVD/CD vidéo(en option)Lecture <strong>de</strong> DVD/CD vidéo ............................. 22P<strong>ou</strong>r afficher l’écran du mo<strong>de</strong> DVD ........... 22Si un écran <strong>de</strong> menu s’affiche ..................... 22Lecture d’arrêts <strong>sur</strong> image (pauses) ............... 22Recherche du début d’un chapitre <strong>ou</strong> d’unepiste ............................................................. 23Recherche rapi<strong>de</strong> vers l’avant <strong>ou</strong> versl’arrière ........................................................ 23Affichage <strong>de</strong> l’écran du menu principal(DVD seu<strong>le</strong>ment) ........................................ 23Changement <strong>de</strong> disques (seu<strong>le</strong>ment si unchangeur DVD est raccordé) ....................... 23Arrêt <strong>de</strong> <strong>la</strong> <strong>le</strong>cture (PRE STOP) ..................... 23Arrêt <strong>de</strong> <strong>la</strong> <strong>le</strong>cture ........................................... 23Lecture répétitive du chapitre, <strong>de</strong> <strong>la</strong> piste <strong>ou</strong> dutitre .............................................................. 23Changement <strong>de</strong> piste audio ............................ 24Changement <strong>de</strong> s<strong>ou</strong>s-titre (<strong>la</strong>ngue <strong>de</strong>s<strong>ou</strong>s-titrage) (DVD seu<strong>le</strong>ment) ................... 24Changement d’ang<strong>le</strong> (DVD seu<strong>le</strong>ment) ......... 24Changement à partir du menu du disque .... 24iPod ® (en option)Lecture ............................................................ 25Recherche <strong>de</strong> <strong>la</strong> chanson que v<strong>ou</strong>s s<strong>ou</strong>haitezéc<strong>ou</strong>ter ......................................................... 25Recherche par liste d’éc<strong>ou</strong>te ....................... 25Recherche par nom d’artiste ....................... 26Recherche par nom d’album ....................... 26Lecture aléatoire Shuff<strong>le</strong> (M.I.X.) .................. 27Lecture répétitive ............................................ 27Système <strong>de</strong> navigation (en option)Affichage <strong>de</strong> l’écran <strong>de</strong> navigation ................. 27Activation et désactivation du mo<strong>de</strong> <strong>de</strong>navigation .................................................... 27Écran <strong>de</strong> <strong>la</strong> carte ............................................. 28Affichage <strong>de</strong> <strong>la</strong> position actuel<strong>le</strong> ................. 28Défi<strong>le</strong>ment <strong>de</strong> <strong>la</strong> carte ................................. 28Modification <strong>de</strong> l’échel<strong>le</strong> <strong>de</strong> <strong>la</strong> carte ........... 28Écran <strong>de</strong> menus .............................................. 282-FR
Utilisation du téléviseur (en option)Fonctionnement du téléviseur ........................ 28Mémorisation automatique <strong>de</strong>s chaînes ......... 29Changement <strong>de</strong> <strong>la</strong> s<strong>ou</strong>rce audio ...................... 29Utilisation du téléviseur numérique(en option)Fonctionnement du téléviseur numérique ...... 29Utilisation <strong>de</strong> l’écran du gui<strong>de</strong> é<strong>le</strong>ctronique <strong>de</strong>sprogrammes (EPG) ..................................... 30Mémorisation automatique <strong>de</strong>s chaînes ......... 30Affichage <strong>de</strong> l’écran <strong>de</strong> menu ........................ 30Appareil auxiliaire (en option)Fonctionnement <strong>de</strong>s appareils auxiliaires(en option) ................................................... 30Système usinierFonctionnement du système usinier (mo<strong>de</strong>d’entrée <strong>de</strong>s enceintes) ................................ 31Processeur audio externe (en option)Procédure <strong>de</strong> rég<strong>la</strong>ge du son DolbySurr<strong>ou</strong>nd ...................................................... 32Rég<strong>la</strong>ge <strong>de</strong>s enceintes ..................................... 32Rég<strong>la</strong>ge du mo<strong>de</strong> MX du processeur audioexterne ......................................................... 33Rég<strong>la</strong>ge du mo<strong>de</strong> X-OVER ............................ 33Rég<strong>la</strong>ge <strong>de</strong> <strong>la</strong> correction manuel<strong>le</strong> du temps(TCR) .......................................................... 34Changement <strong>de</strong> phase ..................................... 34Rég<strong>la</strong>ges <strong>de</strong> l’égaliseur graphique .................. 35Rég<strong>la</strong>ges <strong>de</strong> l’égaliseur paramétrique ............. 35Rég<strong>la</strong>ge <strong>de</strong> <strong>la</strong> comman<strong>de</strong> <strong>de</strong>s basses .............. 36Rég<strong>la</strong>ge BASS COMP. ................................ 36Rég<strong>la</strong>ge <strong>de</strong> l’accentuation <strong>de</strong>s graves ......... 36Configuration <strong>de</strong>s enceintes ........................... 36Rég<strong>la</strong>ge du Dolby Digital ............................... 37Rég<strong>la</strong>ge <strong>de</strong> l’image ac<strong>ou</strong>stique ................... 37Mixage <strong>de</strong>s sons graves vers <strong>le</strong> cana<strong>la</strong>rrière ....................................................... 37Rég<strong>la</strong>ge <strong>de</strong> <strong>la</strong> puissance du son à un volumeé<strong>le</strong>vé ......................................................... 38Rég<strong>la</strong>ge <strong>de</strong>s niveaux <strong>de</strong>s enceintes ............. 38Rég<strong>la</strong>ge du niveau DVD ................................. 38Mémorisation <strong>de</strong>s rég<strong>la</strong>ges ............................. 38Rappel d’un prérég<strong>la</strong>ge .................................. 39Utilisation du mo<strong>de</strong> Pro Logic II ................... 39Rég<strong>la</strong>ge PCM linéaire .....................................39Utilisation <strong>de</strong>s t<strong>ou</strong>ches tacti<strong>le</strong>sFonctions principa<strong>le</strong>s ......................................40Fonctions <strong>de</strong> <strong>la</strong> radio .......................................40Fonctionnement RDS ......................................41Fonctions <strong>de</strong> <strong>la</strong> configuration ..........................41Utilisation du CD/MP3/WMA ........................42Utilisation <strong>de</strong> DVD/CD vidéo .........................43Utilisation <strong>de</strong> l’iPod ® ......................................44Fonctions du téléviseur ...................................44Utilisation du téléviseur numérique ................45InformationsEn cas <strong>de</strong> problème .........................................46Caractéristiques techniques .............................47Instal<strong>la</strong>tion etRaccor<strong>de</strong>mentsAvertissement ....................................... 48Attention ................................................ 48Précautions ........................................... 48Instal<strong>la</strong>tion ......................................................49Raccor<strong>de</strong>ments (schéma <strong>de</strong> câb<strong>la</strong>ge duVPA-B222R) ...............................................52Exemp<strong>le</strong> <strong>de</strong> système ........................................543-FR
Mo<strong>de</strong> d’emploiAVERTISSEMENTAVERTISSEMENTCe symbo<strong>le</strong> désigne <strong>de</strong>s instructionsimportantes. Le non-respect <strong>de</strong> ces instructionspeut entraîner <strong>de</strong> graves b<strong>le</strong>s<strong>sur</strong>es, voire <strong>la</strong>mort.INSTALLER L’APPAREIL CORRECTEMENT DE FACON A CEQUE LE CONDUCTEUR NE PUISSE PAS REGARDER LA TV/VIDEO TANT QUE LA VOITURE N’EST PAS A L’ARRET ET LEFREIN A MAIN ACTIONNE.Il est dangereux <strong>de</strong> regar<strong>de</strong>r <strong>la</strong> télévision/vidéo t<strong>ou</strong>t en conduisantun véhicu<strong>le</strong>. Si <strong>le</strong> produit n’est pas correctement installé, <strong>le</strong>conducteur sera en me<strong>sur</strong>e <strong>de</strong> regar<strong>de</strong>r <strong>la</strong> télévision/vidéo pendant<strong>la</strong> conduite du véhicu<strong>le</strong>, ce qui risque <strong>de</strong> <strong>le</strong> distraire et <strong>de</strong> causer unacci<strong>de</strong>nt. Le conducteur ainsi que d’autres personnes risquentd’être b<strong>le</strong>ssées.NE PAS REGARDER DE VIDEO PENDANT LA CONDUITE.Le visionnage d’un enregistrement vidéo peut distraire <strong>le</strong>conducteur <strong>de</strong> <strong>la</strong> conduite du véhicu<strong>le</strong> et causer un acci<strong>de</strong>nt.N’ACTIVER AUCUNE FONCTION SUSCEPTIBLE DEDETOURNER VOTRE ATTENTION DE LA CONDUITE DUVEHICULE.Les fonctions requérant une attention prolongée ne doivent êtreexploitées qu’à l’arrêt comp<strong>le</strong>t du véhicu<strong>le</strong>. T<strong>ou</strong>j<strong>ou</strong>rs arrêter <strong>le</strong>véhicu<strong>le</strong> à un endroit sûr avant d’activer ces fonctions. Il y a risque<strong>de</strong> provoquer un acci<strong>de</strong>nt.GARDER LE VOLUME A FAIBLE NIVEAU DE MANIERE APOUVOIR ENTENDRE LES BRUITS EXTERIEURS PENDANTLA CONDUITE.Il y a risque d’acci<strong>de</strong>nt.NE PAS DESASSEMBLER NI MODIFIER L’APPAREIL.Il y a risque d’acci<strong>de</strong>nt, d’incendie <strong>ou</strong> <strong>de</strong> choc é<strong>le</strong>ctrique.A UTILISER UNIQUEMENT SUR DES VOITURES A MASSENEGATIVE DE 12 VOLTS.(Vérifiez auprès <strong>de</strong> votre concessionnaire si v<strong>ou</strong>s n’en êtes pascertain.) Il y a risque d’incendie, etc.GARDER LES PETITS OBJETS COMME LES PILES HORS DEPORTEE DES ENFANTS.L’ingestion <strong>de</strong> tels objets peut entraîner <strong>de</strong> graves b<strong>le</strong>s<strong>sur</strong>es.En cas d’ingestion, consulter immédiatement un mé<strong>de</strong>cin.UTILISER DES FUSIBLES DE L’AMPERAGE APPROPRIE.Il y a risque d’incendie <strong>ou</strong> <strong>de</strong> décharge é<strong>le</strong>ctrique.NE PAS OBSTRUER LES SORTIES D’AIR NI LES PANNEAUXDU RADIATEUR.Une <strong>sur</strong>chauffe interne peut se produire et provoquer un incendie.UTILISER CET APPAREIL POUR DES APPLICATIONSMOBILES DE 12 V.T<strong>ou</strong>te utilisation autre que l'application désignée comporte unrisque d'incendie, <strong>de</strong> choc é<strong>le</strong>ctrique <strong>ou</strong> <strong>de</strong> b<strong>le</strong>s<strong>sur</strong>e.ATTENTIONCe symbo<strong>le</strong> désigne <strong>de</strong>s instructionsimportantes. Le non-respect <strong>de</strong> ces instructionspeut entraîner <strong>de</strong>s b<strong>le</strong>s<strong>sur</strong>es <strong>ou</strong> <strong>de</strong>s dommagesmatériels.INTERROMPRE TOUTE UTILISATION EN CAS DEPROBLEME.Le non-respect <strong>de</strong> cette précaution peut entraîner <strong>de</strong>s b<strong>le</strong>s<strong>sur</strong>es <strong>ou</strong>endommager l’appareil. Ret<strong>ou</strong>rner l’appareil auprès du distributeur<strong>Alpine</strong> agréé <strong>ou</strong> un centre <strong>de</strong> service après-vente <strong>Alpine</strong> en vue <strong>de</strong><strong>la</strong> réparation.MINIMISER L’AFFICHAGE EN COURS DE CONDUITE.La visualisation <strong>de</strong> l’affichage peut distraire <strong>le</strong> conducteur <strong>de</strong> <strong>la</strong>conduite du véhicu<strong>le</strong> et, partant, <strong>de</strong> provoquer un acci<strong>de</strong>nt.4-FR
PRÉCAUTIONSNettoyage <strong>de</strong> l’appareilNettoyez régulièrement <strong>le</strong> produit avec un chiffon d<strong>ou</strong>x et sec. Encas <strong>de</strong> taches tenaces, trempez <strong>le</strong> chiffon dans l’eau uniquement.T<strong>ou</strong>t autre produit risque <strong>de</strong> diss<strong>ou</strong>dre <strong>la</strong> peinture <strong>ou</strong>d’endommager <strong>le</strong> p<strong>la</strong>stique.TempératureAs<strong>sur</strong>ez-v<strong>ou</strong>s que <strong>la</strong> température intérieure du véhicu<strong>le</strong> estcomprise entre +45 °C (+113 °F) et 0 °C (+32 °F) avant <strong>de</strong> mettrel’appareil s<strong>ou</strong>s tension.Con<strong>de</strong>nsation d’humiditéSi <strong>le</strong> son est irrégulier pendant <strong>la</strong> <strong>le</strong>cture <strong>de</strong> disque, <strong>de</strong> l’humidités’est probab<strong>le</strong>ment con<strong>de</strong>nsée. Dans ce cas, en<strong>le</strong>ver <strong>le</strong> disque du<strong>le</strong>cteur et attendre environ une heure p<strong>ou</strong>r que l’humidité s’évapore.EntretienEn cas <strong>de</strong> problème, n’essayez pas <strong>de</strong> réparer l’appareil v<strong>ou</strong>smême.Rapportez l’appareil à votre reven<strong>de</strong>ur <strong>Alpine</strong>, <strong>ou</strong> à défaut,apportez-<strong>le</strong> dans un centre <strong>de</strong> réparation <strong>Alpine</strong>.Emp<strong>la</strong>cement <strong>de</strong> montageN’instal<strong>le</strong>z pas <strong>le</strong> VPA-B222R dans un endroit exposé :• directement au so<strong>le</strong>il <strong>ou</strong> à <strong>la</strong> cha<strong>le</strong>ur,• à l’humidité et à l’eau,• à <strong>la</strong> p<strong>ou</strong>ssière,• à <strong>de</strong>s vibrations excessives.Les produits <strong>Alpine</strong> équipés du bus Ai-NET, raccordés auVPA-B222R, peuvent être commandés <strong>de</strong>puis <strong>le</strong> VPA-B222R.T<strong>ou</strong>tefois, selon l’appareil raccordé, <strong>le</strong>s fonctions et <strong>le</strong>s affichagesvarieront. P<strong>ou</strong>r <strong>le</strong>s détails, adressez-v<strong>ou</strong>s à votre reven<strong>de</strong>ur <strong>Alpine</strong>.Le fonctionnement <strong>de</strong> certaines fonctions <strong>de</strong> cet appareil est trèscomp<strong>le</strong>xe. C’est <strong>la</strong> raison p<strong>ou</strong>r <strong>la</strong>quel<strong>le</strong> el<strong>le</strong>s se tr<strong>ou</strong>vent <strong>sur</strong> unécran spécial. Le conducteur ne peut donc <strong>le</strong>s utiliser que lorsque <strong>le</strong>véhicu<strong>le</strong> est à l’arrêt. De cette manière, il se concentre <strong>sur</strong> <strong>la</strong> r<strong>ou</strong>teet non <strong>sur</strong> <strong>le</strong> VPA-B222R. Cette fonction a été conçue p<strong>ou</strong>r <strong>la</strong>sécurité du conducteur et <strong>de</strong>s passagers.Les rég<strong>la</strong>ges du processeur audio sont impossib<strong>le</strong>s pendant <strong>la</strong>conduite du véhicu<strong>le</strong>. Le véhicu<strong>le</strong> doit être à l’arrêt et <strong>le</strong> frein àmain tiré p<strong>ou</strong>r que <strong>la</strong> procédure décrite dans <strong>le</strong> mo<strong>de</strong> d’emploi soitvali<strong>de</strong>. Le message « CAN’T OPERATE WHILE DRIVING »s’affiche si v<strong>ou</strong>s essayez d’effectuer ces opérations en conduisant.• App<strong>le</strong>, <strong>le</strong> logo d’App<strong>le</strong> et l’iPod sont <strong>de</strong>s marques déposées <strong>de</strong>App<strong>le</strong> Computer Inc, enregistrées aux États-Unis et dansd’autres pays.5-FR
Mise en r<strong>ou</strong>teCommutateurrotatifComman<strong>de</strong>multidirectionnel<strong>le</strong>Mise en service <strong>de</strong> l’appareilAs<strong>sur</strong>ez-v<strong>ou</strong>s d’appuyer <strong>sur</strong> <strong>la</strong> t<strong>ou</strong>che RESET lorsque v<strong>ou</strong>s utilisez cetappareil p<strong>ou</strong>r <strong>la</strong> première fois, après avoir installé <strong>le</strong> changeur CD, aprèsavoir changé <strong>la</strong> batterie du véhicu<strong>le</strong>, etc.1 Mettez l’appareil hors tension.2 <strong>Appuyez</strong> <strong>sur</strong> RESET à l’ai<strong>de</strong> d’un stylo à bil<strong>le</strong> <strong>ou</strong>d’un objet pointu.RESETUtilisez l’appareil <strong>de</strong> comman<strong>de</strong> p<strong>ou</strong>r faire fonctionner cet appareil. Si<strong>le</strong> moniteur à panneau tacti<strong>le</strong> <strong>Alpine</strong> est raccordé à cet appareil, v<strong>ou</strong>sp<strong>ou</strong>vez utiliser <strong>le</strong>s t<strong>ou</strong>ches tacti<strong>le</strong>s qui apparaissent à l’écran.V<strong>ou</strong>s tr<strong>ou</strong>verez dans ce manuel <strong>de</strong>s explications concernant l’utilisation<strong>de</strong> l’appareil <strong>de</strong> comman<strong>de</strong>. P<strong>ou</strong>r <strong>de</strong> plus amp<strong>le</strong>s informationsconcernant <strong>le</strong> fonctionnement <strong>de</strong>s t<strong>ou</strong>ches tacti<strong>le</strong>s, reportez-v<strong>ou</strong>s à <strong>la</strong>section « Utilisation <strong>de</strong>s t<strong>ou</strong>ches tacti<strong>le</strong>s », page 40.• L’appareil <strong>de</strong> comman<strong>de</strong> vibre quand une opération est exécutée.Reportez-v<strong>ou</strong>s à <strong>la</strong> section « Activation <strong>ou</strong> désactivation <strong>de</strong> <strong>la</strong>vibration <strong>de</strong> l’appareil <strong>de</strong> comman<strong>de</strong> » (page 14).CaractéristiquesSi <strong>de</strong>s appareils <strong>Alpine</strong> compatib<strong>le</strong>s avec Ai-NET (<strong>le</strong>cteur DVD,changeur DVD/CD, adaptateur p<strong>ou</strong>r iPod, etc.) sont raccordés auVPA-B222R, ceux-ci peuvent être commandés à partir <strong>de</strong> l’appareil <strong>de</strong>comman<strong>de</strong> et affichés <strong>sur</strong> un moniteur externe. Si un système <strong>de</strong>navigation <strong>Alpine</strong> en option est raccordé au VPA-B222R, l’écran <strong>de</strong>navigation s’affiche <strong>sur</strong> <strong>le</strong> moniteur externe p<strong>ou</strong>r permettre l’utilisationdu système. P<strong>ou</strong>r <strong>de</strong> plus amp<strong>le</strong>s informations concernant <strong>le</strong>fonctionnement <strong>de</strong>s dispositifs raccordés, consultez <strong>le</strong> Mo<strong>de</strong> d’emploi.Liste <strong>de</strong>s accessoiresUnité principa<strong>le</strong> .........................................................................1Câb<strong>le</strong> d’alimentation..................................................................1Fil du frein à main......................................................................1Câb<strong>le</strong> du système usinier..........................................................1Câb<strong>le</strong> d’alimentation ISO ..........................................................1Connecteur à étrang<strong>le</strong>ment.......................................................6Support .....................................................................................2Vis hexagona<strong>le</strong> (M4 × 14) .........................................................4Vis (M4 × 8)...............................................................................4Ban<strong>de</strong> Velcro.............................................................................2Câb<strong>le</strong> RGB (3M)........................................................................1Câb<strong>le</strong> d’extension RCA (6M).....................................................1Câb<strong>le</strong> d’extension <strong>de</strong> l’antenne (5,5M)......................................1Appareil <strong>de</strong> comman<strong>de</strong> .............................................................1Soc<strong>le</strong> .........................................................................................1Câb<strong>le</strong> <strong>de</strong> connexion <strong>de</strong> l’appareil <strong>de</strong> comman<strong>de</strong> (5,5M) ...........1Ruban adhésif d<strong>ou</strong>b<strong>le</strong> face........................................................1Vis <strong>de</strong> renforcement ..................................................................3Collier p<strong>ou</strong>r câb<strong>le</strong> ......................................................................3Mise s<strong>ou</strong>s et hors tensionCertaines fonctions <strong>de</strong> cet appareil ne peuvent pas être exécutées quand<strong>le</strong> véhicu<strong>le</strong> est en m<strong>ou</strong>vement. Avant <strong>de</strong> <strong>le</strong>s solliciter, arrêtez <strong>le</strong> véhicu<strong>le</strong>en lieu sûr et serrez <strong>le</strong> frein à main.1 <strong>Appuyez</strong> <strong>sur</strong> SOURCE/POWER p<strong>ou</strong>r mettrel’appareil s<strong>ou</strong>s tension.• V<strong>ou</strong>s p<strong>ou</strong>vez éga<strong>le</strong>ment mettre l’appareil s<strong>ou</strong>s tension en appuyant<strong>sur</strong> n’importe quel<strong>le</strong> t<strong>ou</strong>che.2 <strong>Appuyez</strong> <strong>sur</strong> SOURCE/POWER pendant au moins 2secon<strong>de</strong>s p<strong>ou</strong>r éteindre l’appareil.Affichage <strong>de</strong> <strong>la</strong> s<strong>ou</strong>rce <strong>de</strong> l’appareil <strong>sur</strong> <strong>le</strong>moniteurSi v<strong>ou</strong>s sé<strong>le</strong>ctionnez <strong>la</strong> s<strong>ou</strong>rce <strong>de</strong> l’image <strong>sur</strong> l’appareil, cel<strong>le</strong>-ci peutêtre affichée <strong>sur</strong> un moniteur raccordé. Reportez-v<strong>ou</strong>s au mo<strong>de</strong>d’emploi du moniteur.Si un moniteur <strong>Alpine</strong> est raccordé (connexion RGB)1 Rappe<strong>le</strong>z <strong>le</strong> mo<strong>de</strong> <strong>de</strong> navigation en sé<strong>le</strong>ctionnant <strong>la</strong>s<strong>ou</strong>rce <strong>de</strong> l’image <strong>sur</strong> <strong>le</strong> moniteur.La s<strong>ou</strong>rce <strong>de</strong> l’appareil s’affiche.Changement <strong>de</strong> s<strong>ou</strong>rce1 <strong>Appuyez</strong> <strong>sur</strong> SOURCE/POWER.L’écran <strong>de</strong> sé<strong>le</strong>ction <strong>de</strong> <strong>la</strong> s<strong>ou</strong>rce s’affiche.Exemp<strong>le</strong> d’écranAffiche <strong>le</strong>s mo<strong>de</strong>s <strong>de</strong> s<strong>ou</strong>rce p<strong>ou</strong>vant être sé<strong>le</strong>ctionnés.(Le type <strong>de</strong>s mo<strong>de</strong>s <strong>de</strong> s<strong>ou</strong>rce affichés varie en fonctiondu raccor<strong>de</strong>ment et <strong>de</strong> <strong>la</strong> configuration)2 <strong>Appuyez</strong> <strong>sur</strong> <strong>le</strong> <strong>b<strong>ou</strong>ton</strong> supérieur <strong>ou</strong> inférieur <strong>de</strong> <strong>la</strong>comman<strong>de</strong> multidirectionnel<strong>le</strong> p<strong>ou</strong>r sé<strong>le</strong>ctionner <strong>la</strong>s<strong>ou</strong>rce <strong>de</strong> votre choix, puis appuyez <strong>sur</strong> / /ENTER.L’écran <strong>de</strong> <strong>la</strong> s<strong>ou</strong>rce principa<strong>le</strong> que v<strong>ou</strong>s avez sé<strong>le</strong>ctionnées’affiche.• En mo<strong>de</strong> d’écran <strong>de</strong> sé<strong>le</strong>ction <strong>de</strong> <strong>la</strong> s<strong>ou</strong>rce, appuyez <strong>sur</strong> TA/RTN/SETUP p<strong>ou</strong>r revenir à l’écran précé<strong>de</strong>nt.6-FR
Rég<strong>la</strong>ge du volumeT<strong>ou</strong>rnez <strong>le</strong> commutateur rotatif dans <strong>le</strong> sens <strong>de</strong>saiguil<strong>le</strong>s d’une montre <strong>ou</strong> dans <strong>le</strong> sens inverse <strong>de</strong>saiguil<strong>le</strong>s d’une montre p<strong>ou</strong>r rég<strong>le</strong>r <strong>le</strong> volume.RadioSens <strong>de</strong>s aiguil<strong>le</strong>s d’une montre : p<strong>ou</strong>r augmenter <strong>le</strong> volumeSens inverse <strong>de</strong>s aiguil<strong>le</strong>s dune montre : p<strong>ou</strong>r réduire <strong>le</strong> volumeVolume : 0 - 35Réduction instantanée du volumeComman<strong>de</strong>multidirectionnel<strong>le</strong>En activant cette fonction, v<strong>ou</strong>s réduisez instantanément <strong>le</strong> niveau <strong>de</strong>volume.• Cette opération peut être effectuée avec un moniteur compatib<strong>le</strong> avecpanneau tacti<strong>le</strong> <strong>ou</strong> avec <strong>la</strong> télécomman<strong>de</strong> (vendue séparément). P<strong>ou</strong>rl’utilisation <strong>de</strong> <strong>la</strong> télécomman<strong>de</strong> (vendue séparément), reportez-v<strong>ou</strong>sau mo<strong>de</strong> d’emploi <strong>de</strong> <strong>la</strong> télécomman<strong>de</strong>.<strong>Appuyez</strong> <strong>sur</strong> <strong>la</strong> t<strong>ou</strong>che [MUTE] <strong>de</strong> l’écran <strong>de</strong> <strong>la</strong> s<strong>ou</strong>rceprincipa<strong>le</strong> p<strong>ou</strong>r activer <strong>le</strong> mo<strong>de</strong> MUTE.Le niveau <strong>de</strong> volume diminue.Lors <strong>de</strong> <strong>la</strong> mise en s<strong>ou</strong>rdine, l’indicateur du niveau <strong>de</strong> volumeclignote.Exemp<strong>le</strong> d’écranAffichage <strong>de</strong> <strong>la</strong> gamme d’on<strong>de</strong>sAffichage du numéro prérégléAffichage <strong>de</strong> <strong>la</strong> fréquenceMUTESi v<strong>ou</strong>s appuyez à n<strong>ou</strong>veau <strong>sur</strong> [MUTE], <strong>le</strong> niveau sonore initia<strong>le</strong>st rétabli.Éc<strong>ou</strong>te <strong>de</strong> <strong>la</strong> radio1 <strong>Appuyez</strong> <strong>sur</strong> SOURCE/POWER.L’écran <strong>de</strong> sé<strong>le</strong>ction <strong>de</strong> <strong>la</strong> s<strong>ou</strong>rce s’affiche.2 <strong>Appuyez</strong> <strong>sur</strong> <strong>le</strong> <strong>b<strong>ou</strong>ton</strong> supérieur <strong>ou</strong> inférieur <strong>de</strong> <strong>la</strong>comman<strong>de</strong> multidirectionnel<strong>le</strong> p<strong>ou</strong>r sé<strong>le</strong>ctionner<strong>la</strong> RADIO, puis appuyez <strong>sur</strong> / /ENTER.3 <strong>Appuyez</strong> plusieurs fois <strong>sur</strong> pendant au moins2 secon<strong>de</strong>s jusqu’à ce que <strong>la</strong> gamme d’on<strong>de</strong>ss<strong>ou</strong>haitée s’affiche.FM-1 FM-2 FM-3 MW LW FM-14 <strong>Appuyez</strong> <strong>sur</strong> / /ENTER p<strong>ou</strong>r sé<strong>le</strong>ctionner <strong>le</strong>mo<strong>de</strong> <strong>de</strong> syntonisation.DX SEEK SEEK (OFF) DX SEEK• Le mo<strong>de</strong> Distance est <strong>le</strong> mo<strong>de</strong> par défaut.DX SEEK (Mo<strong>de</strong> Distance) :T<strong>ou</strong>tes <strong>le</strong>s stations à signal puissant <strong>ou</strong> faib<strong>le</strong> sont automatiquementsyntonisées (syntonisation par recherche automatique).SEEK (Mo<strong>de</strong> Local) :Seu<strong>le</strong>s <strong>le</strong>s stations à signal puissant sont automatiquementsyntonisées (syntonisation par recherche automatique).OFF (Mo<strong>de</strong> Manuel) :La fréquence est syntonisée manuel<strong>le</strong>ment par étapes(syntonisation manuel<strong>le</strong>).5 <strong>Appuyez</strong> <strong>sur</strong> <strong>ou</strong> p<strong>ou</strong>r syntoniser <strong>la</strong> station<strong>de</strong> votre choix.Si v<strong>ou</strong>s maintenez <strong>la</strong> t<strong>ou</strong>che <strong>ou</strong> enfoncée, <strong>la</strong>fréquence change continuel<strong>le</strong>ment.7-FR
Mémorisation manuel<strong>le</strong> <strong>de</strong>s stations1 Sé<strong>le</strong>ctionnez <strong>la</strong> gamme d’on<strong>de</strong>s, puis syntonisez <strong>la</strong>station radio que v<strong>ou</strong>s s<strong>ou</strong>haitez mémoriser.2 <strong>Appuyez</strong> <strong>sur</strong> /MENU/FUNC. pendant au moins2 secon<strong>de</strong>s.L’écran FUNCTION s’affiche.3 <strong>Appuyez</strong> <strong>sur</strong> <strong>le</strong> <strong>b<strong>ou</strong>ton</strong> supérieur <strong>ou</strong> inférieur <strong>de</strong> <strong>la</strong>comman<strong>de</strong> multidirectionnel<strong>le</strong> p<strong>ou</strong>rsé<strong>le</strong>ctionner PRESET MEMORY, puis appuyez <strong>sur</strong><strong>le</strong> <strong>b<strong>ou</strong>ton</strong> droit <strong>de</strong> <strong>la</strong> comman<strong>de</strong>multidirectionnel<strong>le</strong>.4 <strong>Appuyez</strong> <strong>sur</strong> <strong>le</strong> <strong>b<strong>ou</strong>ton</strong> supérieur <strong>ou</strong> inférieur <strong>de</strong> <strong>la</strong>comman<strong>de</strong> multidirectionnel<strong>le</strong> p<strong>ou</strong>rsé<strong>le</strong>ctionner un <strong>de</strong>s numéros préréglés, PRESET1 àPRESET6, puis appuyez <strong>sur</strong> / /ENTER.La station sé<strong>le</strong>ctionnée est mémorisée.La gamme d’on<strong>de</strong>s, <strong>le</strong> numéro préréglé, ainsi que <strong>la</strong>fréquence <strong>de</strong> <strong>la</strong> station mémorisée s’affichent à l’écran.• V<strong>ou</strong>s p<strong>ou</strong>vez mémoriser 30 stations au total (6 stations <strong>sur</strong> chaquegamme d’on<strong>de</strong>s : FM-1, FM-2, FM-3, MW et LW).• Si v<strong>ou</strong>s mémorisez une station <strong>sur</strong> un prérég<strong>la</strong>ge déjà utilisé par uneautre station, cette <strong>de</strong>rnière est effacée et remp<strong>la</strong>cée par <strong>la</strong> n<strong>ou</strong>vel<strong>le</strong>.Mémorisation automatique <strong>de</strong>s stations1 <strong>Appuyez</strong> plusieurs fois <strong>sur</strong> pendant au moins 2secon<strong>de</strong>s jusqu’à ce que <strong>la</strong> gamme d’on<strong>de</strong>ss<strong>ou</strong>haitée s’affiche.2 <strong>Appuyez</strong> <strong>sur</strong> / /ENTER pendant au moins 2secon<strong>de</strong>s.La fréquence affichée à l’écran change continuel<strong>le</strong>ment lors<strong>de</strong> <strong>la</strong> mémorisation automatique. Le tuner recherche etmémorise automatiquement 6 stations à signaux puissants<strong>sur</strong> <strong>la</strong> gamme d’on<strong>de</strong>s sé<strong>le</strong>ctionnée. Cel<strong>le</strong>s-ci sontmémorisées <strong>sur</strong> <strong>le</strong>s t<strong>ou</strong>ches PRESET1 à PRESET6 dansl’ordre <strong>de</strong> <strong>la</strong> puissance <strong>de</strong>s signaux.Une fois <strong>la</strong> mémorisation automatique terminée, <strong>le</strong> tunerrevient à <strong>la</strong> station mémorisée <strong>sur</strong> <strong>la</strong> t<strong>ou</strong>che nº 1.• Si aucune station n’est mémorisée, <strong>le</strong> tuner revient à <strong>la</strong> station quev<strong>ou</strong>s éc<strong>ou</strong>tiez avant que <strong>la</strong> mémorisation automatique commence.Syntonisation d’une station préréglée1 <strong>Appuyez</strong> plusieurs fois <strong>sur</strong> pendant au moins2 secon<strong>de</strong>s jusqu’à ce que <strong>la</strong> gamme d’on<strong>de</strong>ss<strong>ou</strong>haitée s’affiche.Changement <strong>de</strong> station à l’ai<strong>de</strong> <strong>de</strong> l’appareil <strong>de</strong>comman<strong>de</strong>2 <strong>Appuyez</strong> <strong>sur</strong> <strong>ou</strong> p<strong>ou</strong>r sé<strong>le</strong>ctionner un numéropréréglé (P01 à P06).La station sé<strong>le</strong>ctionnée est reçue.Rappel à l’ai<strong>de</strong> <strong>de</strong> l’écran FUNCTION2 <strong>Appuyez</strong> <strong>sur</strong> /MENU/FUNC. pendant au moins2 secon<strong>de</strong>s.L’écran FUNCTION s’affiche.3 <strong>Appuyez</strong> <strong>sur</strong> <strong>le</strong> <strong>b<strong>ou</strong>ton</strong> supérieur <strong>ou</strong> inférieur <strong>de</strong> <strong>la</strong>comman<strong>de</strong> multidirectionnel<strong>le</strong> p<strong>ou</strong>rsé<strong>le</strong>ctionner PRESET CALL, puis appuyez <strong>sur</strong> <strong>le</strong><strong>b<strong>ou</strong>ton</strong> droit <strong>de</strong> <strong>la</strong> comman<strong>de</strong>multidirectionnel<strong>le</strong>.4 <strong>Appuyez</strong> <strong>sur</strong> <strong>le</strong> <strong>b<strong>ou</strong>ton</strong> supérieur <strong>ou</strong> inférieur <strong>de</strong> <strong>la</strong>comman<strong>de</strong> multidirectionnel<strong>le</strong> p<strong>ou</strong>rsé<strong>le</strong>ctionner un <strong>de</strong>s numéros préréglés, PRESET1 àPRESET6, puis appuyez <strong>sur</strong> / /ENTER.La station préréglée est reçu.La gamme d’on<strong>de</strong>s, <strong>le</strong> numéro préréglé, ainsi que <strong>la</strong>fréquence <strong>de</strong> <strong>la</strong> station sé<strong>le</strong>ctionnée s’affichent à l’écran.8-FR
FonctionnementRDS• Reportez-v<strong>ou</strong>s à <strong>la</strong> section Configuration généra<strong>le</strong> (pages 13 et 15) :« Affichage <strong>de</strong> l’heure du RDS », « Rég<strong>la</strong>ge PI SEEK », « Réception<strong>de</strong> stations RDS régiona<strong>le</strong>s (loca<strong>le</strong>s) » et « Changement <strong>de</strong> <strong>la</strong> <strong>la</strong>ngued’affichage du PTY (type <strong>de</strong> programme) ».Réception d’informations r<strong>ou</strong>tières<strong>Appuyez</strong> <strong>sur</strong> TA/RTN/SETUP p<strong>ou</strong>r activer <strong>le</strong> mo<strong>de</strong>d’informations r<strong>ou</strong>tières.Quand <strong>la</strong> station diffusant <strong>de</strong>s informations r<strong>ou</strong>tières estaccordée, l’indicateur TA s’allume.Activation <strong>ou</strong> désactivation <strong>de</strong>sfréquences alternatives (AF)Comman<strong>de</strong>multidirectionnel<strong>le</strong>Le RDS (Radio Data System) est un système d’informations radio quiutilise <strong>la</strong> s<strong>ou</strong>s-porteuse <strong>de</strong> 57 kHz <strong>de</strong> <strong>la</strong> gamme FM ordinaire. Lesystème RDS permet <strong>de</strong> recevoir diverses informations, tel<strong>le</strong>s que <strong>de</strong>sinformations r<strong>ou</strong>tières et <strong>de</strong>s noms <strong>de</strong> station, voire même <strong>de</strong> réaccor<strong>de</strong>rautomatiquement <strong>le</strong> tuner <strong>sur</strong> un émetteur-récepteur plus puissant quidiffuse <strong>le</strong> même programme.1 <strong>Appuyez</strong> <strong>sur</strong> TA/RTN/SETUP pendant au moins2 secon<strong>de</strong>s.L’écran SETUP s’affiche.2 <strong>Appuyez</strong> <strong>sur</strong> <strong>le</strong> <strong>b<strong>ou</strong>ton</strong> supérieur <strong>ou</strong> inférieur <strong>de</strong> <strong>la</strong>comman<strong>de</strong> multidirectionnel<strong>le</strong> p<strong>ou</strong>rsé<strong>le</strong>ctionner RDS, puis appuyez <strong>sur</strong> <strong>le</strong> <strong>b<strong>ou</strong>ton</strong> droit<strong>de</strong> <strong>la</strong> comman<strong>de</strong> multidirectionnel<strong>le</strong>.L’écran <strong>de</strong> rég<strong>la</strong>ge RDS s’affiche.3 <strong>Appuyez</strong> <strong>sur</strong> /MENU/FUNC. pendant au moins2 secon<strong>de</strong>s.L’écran FUNCTION s’affiche.4 <strong>Appuyez</strong> <strong>sur</strong> <strong>le</strong> <strong>b<strong>ou</strong>ton</strong> supérieur <strong>ou</strong> inférieur <strong>de</strong> <strong>la</strong>comman<strong>de</strong> multidirectionnel<strong>le</strong> p<strong>ou</strong>rsé<strong>le</strong>ctionner <strong>la</strong> fréquence alternative (AF) <strong>de</strong> votrechoix, puis appuyez <strong>sur</strong> / /ENTER.• Si v<strong>ou</strong>s sé<strong>le</strong>ctionnez <strong>le</strong> mo<strong>de</strong> AF, l’appareil capte automatiquementune station à signal puissant dans <strong>la</strong> liste AF.• Sé<strong>le</strong>ctionnez à n<strong>ou</strong>veau AF, puis appuyez <strong>sur</strong> / /ENTER p<strong>ou</strong>rsé<strong>le</strong>ctionner <strong>le</strong> mo<strong>de</strong> OFF si v<strong>ou</strong>s n’avez pas besoin d’effectuer àn<strong>ou</strong>veau une syntonisation automatique.5 <strong>Appuyez</strong> <strong>sur</strong> TA/RTN/SETUP p<strong>ou</strong>r revenir à l’écranprécé<strong>de</strong>nt.Conseil• Quand l’appareil capte <strong>le</strong> signal PTY31 (Émission d’urgence), i<strong>la</strong>ffiche l’indication « ALARM ».• Les données numériques RDS incluent <strong>le</strong>s informations suivantes :PI I<strong>de</strong>ntification du programmePS Nom <strong>de</strong> <strong>la</strong> chaîne <strong>de</strong> programmesAF Liste <strong>de</strong>s fréquences alternativesTP Programme <strong>de</strong> traficTA Annonces r<strong>ou</strong>tièresPTY Type <strong>de</strong> programmeEON Autres réseaux améliorésLes informations r<strong>ou</strong>tières ne sont reproduites que lorsqu’el<strong>le</strong>ssont diffusées. En l’absence <strong>de</strong> diffusion d’informationsr<strong>ou</strong>tières, l’appareil reste en mo<strong>de</strong> <strong>de</strong> veil<strong>le</strong>.Dès qu’une station émet <strong>de</strong>s informations r<strong>ou</strong>tières, l’appareil <strong>le</strong>sreçoit automatiquement et affiche l’indication « T. INFO ».Quand <strong>la</strong> diffusion <strong>de</strong>s informations r<strong>ou</strong>tières est terminée,l’appareil revient automatiquement en mo<strong>de</strong> <strong>de</strong> veil<strong>le</strong>.• Si <strong>le</strong> signal <strong>de</strong> diffusion <strong>de</strong>s informations r<strong>ou</strong>tières <strong>de</strong>vient inférieur àun niveau déterminé, l’appareil <strong>de</strong>meure en mo<strong>de</strong> <strong>de</strong> réceptionpendant 1 minute. Si <strong>le</strong> signal <strong>de</strong>meure s<strong>ou</strong>s un certain niveaupendant plus <strong>de</strong> 70 secon<strong>de</strong>s, l’indicateur « TA » clignote à l’écran.• Si v<strong>ou</strong>s ne s<strong>ou</strong>haitez pas éc<strong>ou</strong>ter <strong>le</strong>s informations r<strong>ou</strong>tières en c<strong>ou</strong>rs<strong>de</strong> diffusion, appuyez brièvement <strong>sur</strong> TA/RTN/SETUP p<strong>ou</strong>r passerce message. Le mo<strong>de</strong> T. INFO <strong>de</strong>meure en position activée p<strong>ou</strong>rrecevoir <strong>le</strong> prochain message d’information r<strong>ou</strong>tières.• Si v<strong>ou</strong>s modifiez <strong>le</strong> niveau <strong>de</strong> volume pendant <strong>la</strong> réceptiond’informations r<strong>ou</strong>tières, <strong>le</strong> changement <strong>de</strong> niveau est mémorisé. Surréception <strong>de</strong>s informations r<strong>ou</strong>tières suivantes, <strong>le</strong> volume seraautomatiquement réglé <strong>sur</strong> <strong>le</strong> niveau mémorisé.Accord PTY (type <strong>de</strong> programme)1 <strong>Appuyez</strong> <strong>sur</strong> TA/RTN/SETUP pendant au moins2 secon<strong>de</strong>s.L’écran SETUP s’affiche.2 <strong>Appuyez</strong> <strong>sur</strong> <strong>le</strong> <strong>b<strong>ou</strong>ton</strong> supérieur <strong>ou</strong> inférieur <strong>de</strong> <strong>la</strong>comman<strong>de</strong> multidirectionnel<strong>le</strong> p<strong>ou</strong>rsé<strong>le</strong>ctionner RDS, puis appuyez <strong>sur</strong> <strong>le</strong> <strong>b<strong>ou</strong>ton</strong> droit<strong>de</strong> <strong>la</strong> comman<strong>de</strong> multidirectionnel<strong>le</strong>.L’écran <strong>de</strong> rég<strong>la</strong>ge RDS s’affiche.Changement <strong>de</strong> PTY à l’ai<strong>de</strong> <strong>de</strong> l’appareil <strong>de</strong> comman<strong>de</strong>3 <strong>Appuyez</strong> <strong>sur</strong> <strong>ou</strong> pendant au moins 2secon<strong>de</strong>s.Le PTY est modifié.Changement à partir <strong>de</strong> l'écran FUNCTION3 <strong>Appuyez</strong> <strong>sur</strong> /MENU/FUNC. pendant au moins2 secon<strong>de</strong>s.L’écran FUNCTION s’affiche.4 <strong>Appuyez</strong> <strong>sur</strong> <strong>le</strong> <strong>b<strong>ou</strong>ton</strong> supérieur <strong>ou</strong> inférieur <strong>de</strong> <strong>la</strong>comman<strong>de</strong> multidirectionnel<strong>le</strong> p<strong>ou</strong>rsé<strong>le</strong>ctionner PTY, puis appuyez <strong>sur</strong> <strong>le</strong> <strong>b<strong>ou</strong>ton</strong> droit<strong>de</strong> <strong>la</strong> comman<strong>de</strong> multidirectionnel<strong>le</strong>.5 <strong>Appuyez</strong> <strong>sur</strong> <strong>le</strong> <strong>b<strong>ou</strong>ton</strong> supérieur <strong>ou</strong> inférieur <strong>de</strong> <strong>la</strong>comman<strong>de</strong> multifonctionnel<strong>le</strong> p<strong>ou</strong>r sé<strong>le</strong>ctionner<strong>le</strong> type <strong>de</strong> programme s<strong>ou</strong>haité.6 <strong>Appuyez</strong> <strong>sur</strong> / /ENTER après avoir sé<strong>le</strong>ctionné<strong>le</strong> type <strong>de</strong> programme p<strong>ou</strong>r commencer à rechercherune station dans <strong>le</strong> type <strong>de</strong> programme sé<strong>le</strong>ctionné.Si aucune station n’est tr<strong>ou</strong>vée, l’indication « NO PTY » s’affiche.9-FR
Recherche <strong>de</strong> programmeUn programme possédant <strong>le</strong> même PTY (Type <strong>de</strong> programme) que <strong>le</strong>programme en c<strong>ou</strong>rs est recherché.1 <strong>Appuyez</strong> <strong>sur</strong> TA/RTN/SETUP pendant au moins2 secon<strong>de</strong>s.L’écran SETUP s’affiche.2 <strong>Appuyez</strong> <strong>sur</strong> <strong>le</strong> <strong>b<strong>ou</strong>ton</strong> supérieur <strong>ou</strong> inférieur <strong>de</strong> <strong>la</strong>comman<strong>de</strong> multidirectionnel<strong>le</strong> p<strong>ou</strong>rsé<strong>le</strong>ctionner RDS, puis appuyez <strong>sur</strong> <strong>le</strong> <strong>b<strong>ou</strong>ton</strong> droit<strong>de</strong> <strong>la</strong> comman<strong>de</strong> multidirectionnel<strong>le</strong>.L’écran <strong>de</strong> rég<strong>la</strong>ge RDS s’affiche.3 <strong>Appuyez</strong> <strong>sur</strong> <strong>ou</strong> p<strong>ou</strong>r rechercher unprogramme.Réception d’informations r<strong>ou</strong>tièrespendant <strong>la</strong> <strong>le</strong>cture d’un CD <strong>ou</strong> d’unprogramme radioL’exemp<strong>le</strong> expliqué ici montre comment recevoir <strong>de</strong>s bul<strong>le</strong>tinsd’informations r<strong>ou</strong>tières pendant <strong>la</strong> <strong>le</strong>cture d’un CD.1 En mo<strong>de</strong> CD, appuyez <strong>sur</strong> TA/RTN/SETUP p<strong>ou</strong>ractiver <strong>le</strong> mo<strong>de</strong> d’informations r<strong>ou</strong>tières.L’appareil se met automatiquement à <strong>la</strong> recherche <strong>de</strong>s bul<strong>le</strong>tinsd’informations r<strong>ou</strong>tières qu’il est susceptib<strong>le</strong> <strong>de</strong> capter.Dès que <strong>la</strong> recherche est terminée, <strong>le</strong> mo<strong>de</strong> CD <strong>la</strong>isse <strong>la</strong>p<strong>la</strong>ce au mo<strong>de</strong> Radio et l’appareil capte <strong>le</strong>s bul<strong>le</strong>tinsd’informations r<strong>ou</strong>tières.• Dès que <strong>de</strong>s informations r<strong>ou</strong>tières sont diffusées, l’appareilréduit automatiquement au si<strong>le</strong>nce <strong>le</strong> <strong>le</strong>cteur <strong>de</strong> CD.• Quand <strong>la</strong> diffusion <strong>de</strong>s informations r<strong>ou</strong>tières est terminée,I’appareil revient automatiquement à <strong>la</strong> s<strong>ou</strong>rce d’origine quev<strong>ou</strong>s éc<strong>ou</strong>tiez avant <strong>la</strong> diffusion <strong>de</strong>s informations r<strong>ou</strong>tières.• Le récepteur étant équipé <strong>de</strong> <strong>la</strong> fonction EON (autres réseauxaméliorés), quand <strong>la</strong> station accordée ne diffuse pas d’informationsr<strong>ou</strong>tières, il s’accor<strong>de</strong> automatiquement <strong>sur</strong> une stationcorrespondante qui émet <strong>de</strong>s informations r<strong>ou</strong>tières.2 Quand <strong>le</strong> bul<strong>le</strong>tin d’informations r<strong>ou</strong>tières estterminé, l’appareil revient au mo<strong>de</strong> CD.Mo<strong>de</strong> Priority News (Priorité auxinformations)Cette fonction v<strong>ou</strong>s permet d’effectuer <strong>de</strong>s prérég<strong>la</strong>ges permettant àl’appareil <strong>de</strong> choisir en priorité <strong>le</strong>s programmes d’informations. V<strong>ou</strong>s nemanquerez jamais <strong>le</strong>s informations, car el<strong>le</strong>s seront automatiquementsé<strong>le</strong>ctionnées en priorité dès <strong>de</strong> début <strong>de</strong> <strong>le</strong>ur diffusion, interrompant <strong>le</strong>programme que v<strong>ou</strong>s êtes en train d’éc<strong>ou</strong>ter. Cette fonction s’avère pratiquequand l’appareil est réglé <strong>sur</strong> un mo<strong>de</strong> autre que <strong>le</strong>s mo<strong>de</strong>s LW et MW.1 <strong>Appuyez</strong> <strong>sur</strong> TA/RTN/SETUP pendant au moins2 secon<strong>de</strong>s.L’écran SETUP s’affiche.2 <strong>Appuyez</strong> <strong>sur</strong> <strong>le</strong> <strong>b<strong>ou</strong>ton</strong> supérieur <strong>ou</strong> inférieur <strong>de</strong> <strong>la</strong>comman<strong>de</strong> multidirectionnel<strong>le</strong> p<strong>ou</strong>rsé<strong>le</strong>ctionner RDS, puis appuyez <strong>sur</strong> <strong>le</strong> <strong>b<strong>ou</strong>ton</strong> droit<strong>de</strong> <strong>la</strong> comman<strong>de</strong> multidirectionnel<strong>le</strong>.L’écran <strong>de</strong> rég<strong>la</strong>ge RDS s’affiche.3 <strong>Appuyez</strong> <strong>sur</strong> /MENU/FUNC. pendant au moins2 secon<strong>de</strong>s.L’écran FUNCTION s’affiche.4 <strong>Appuyez</strong> <strong>sur</strong> <strong>le</strong> <strong>b<strong>ou</strong>ton</strong> supérieur <strong>ou</strong> inférieur <strong>de</strong> <strong>la</strong>comman<strong>de</strong> multidirectionnel<strong>le</strong> p<strong>ou</strong>r sé<strong>le</strong>ctionner<strong>le</strong> mo<strong>de</strong> NEWS, puis appuyez <strong>sur</strong> / /ENTER.L’indicateur « NEWS » s’affiche à l’écran.• Lorsque <strong>la</strong> fonction PRIORITY NEWS est activée, contrairement à <strong>la</strong>fonction TA, <strong>le</strong> volume n’augmente pas automatiquement.5 <strong>Appuyez</strong> <strong>sur</strong> TA/RTN/SETUP p<strong>ou</strong>r revenir à l’écranprécé<strong>de</strong>nt.Affichage du radio texteV<strong>ou</strong>s p<strong>ou</strong>vez afficher <strong>le</strong>s messages <strong>de</strong> texte d’une station radio.1 <strong>Appuyez</strong> <strong>sur</strong> <strong>la</strong> t<strong>ou</strong>che /MENU/FUNC. pendant aumoins 2 secon<strong>de</strong>s en mo<strong>de</strong> radio FM.L’écran FUNCTION s’affiche.2 <strong>Appuyez</strong> <strong>sur</strong> <strong>le</strong> <strong>b<strong>ou</strong>ton</strong> supérieur <strong>ou</strong> inférieur <strong>de</strong> <strong>la</strong>comman<strong>de</strong> multidirectionnel<strong>le</strong> p<strong>ou</strong>rsé<strong>le</strong>ctionner INFO., puis appuyez <strong>sur</strong> / /ENTER.L’indication « WAIT » s’affiche pendant quelques secon<strong>de</strong>s.3 P<strong>ou</strong>r désactiver <strong>le</strong> mo<strong>de</strong> radio texte, répétez <strong>le</strong>sétapes 1 et 2.• Si aucun message <strong>de</strong> texte n’est diffusé <strong>ou</strong> si l’appareil ne peut pas <strong>le</strong>recevoir correctement, l’indication « NO TEXT » s’affiche.10-FR
Autres fonctionspratiquesRég<strong>la</strong>ge <strong>de</strong> <strong>la</strong> ba<strong>la</strong>ncePermet <strong>de</strong> rég<strong>le</strong>r <strong>le</strong> volume sonore <strong>de</strong>s enceintes gauche et droite.Désignation du rég<strong>la</strong>ge : BALANCEVa<strong>le</strong>urs <strong>de</strong> rég<strong>la</strong>ge : L15 à R15Rég<strong>la</strong>ge du Fa<strong>de</strong>rPermet <strong>de</strong> rég<strong>le</strong>r <strong>le</strong> volume <strong>de</strong>s enceintes avant et arrière.Désignation du rég<strong>la</strong>ge : FADERVa<strong>le</strong>urs <strong>de</strong> rég<strong>la</strong>ge : F15 à R15Rég<strong>la</strong>ge du sonLes étapes 1 à 5 suivantes sont communes à t<strong>ou</strong>s <strong>le</strong>s rég<strong>la</strong>ges audio.Consultez chaque section p<strong>ou</strong>r plus d’informations.1 <strong>Appuyez</strong> <strong>sur</strong> TA/RTN/SETUP pendant au moins2 secon<strong>de</strong>s.L’écran SETUP s’affiche.2 <strong>Appuyez</strong> <strong>sur</strong> <strong>le</strong> <strong>b<strong>ou</strong>ton</strong> supérieur <strong>ou</strong> inférieur <strong>de</strong> <strong>la</strong>comman<strong>de</strong> multidirectionnel<strong>le</strong> p<strong>ou</strong>r sé<strong>le</strong>ctionnerAUDIO MODE, puis appuyez <strong>sur</strong> <strong>le</strong> <strong>b<strong>ou</strong>ton</strong> droit <strong>de</strong><strong>la</strong> comman<strong>de</strong> multidirectionnel<strong>le</strong>.L’écran AUDIO MODE s’affiche.Exemp<strong>le</strong> d’affichage <strong>de</strong> l’écran AUDIO MODEComman<strong>de</strong>multidirectionnel<strong>le</strong>Rég<strong>la</strong>ge <strong>de</strong> <strong>la</strong> comman<strong>de</strong> <strong>de</strong>s aigusV<strong>ou</strong>s p<strong>ou</strong>vez modifier <strong>le</strong>s rég<strong>la</strong>ges <strong>de</strong> <strong>la</strong> fréquence <strong>de</strong>s aigus afin <strong>de</strong>créer <strong>la</strong> tonalité <strong>de</strong> votre choix.1 Sé<strong>le</strong>ctionnez TREBLE <strong>sur</strong> l’écran AUDIO MODE,puis appuyez <strong>sur</strong> <strong>le</strong> <strong>b<strong>ou</strong>ton</strong> droit <strong>de</strong> <strong>la</strong> comman<strong>de</strong>multidirectionnel<strong>le</strong>.2 <strong>Appuyez</strong> <strong>sur</strong> <strong>le</strong> <strong>b<strong>ou</strong>ton</strong> supérieur <strong>ou</strong> inférieur <strong>de</strong> <strong>la</strong>comman<strong>de</strong> multidirectionnel<strong>le</strong> p<strong>ou</strong>rsé<strong>le</strong>ctionner <strong>la</strong> désignation du rég<strong>la</strong>ge <strong>de</strong> votrechoix, puis appuyez <strong>sur</strong> <strong>le</strong> <strong>b<strong>ou</strong>ton</strong> gauche <strong>ou</strong> droit<strong>de</strong> <strong>la</strong> comman<strong>de</strong> multidirectionnel<strong>le</strong> p<strong>ou</strong>reffectuer <strong>le</strong>s rég<strong>la</strong>ges <strong>de</strong> votre choix et p<strong>ou</strong>r <strong>le</strong>svali<strong>de</strong>r.Rég<strong>la</strong>ge du niveau <strong>de</strong>s aigusV<strong>ou</strong>s p<strong>ou</strong>vez amplifier <strong>ou</strong> réduire <strong>la</strong> fréquence <strong>de</strong>s aigus.(Le niveau <strong>de</strong> <strong>la</strong> s<strong>ou</strong>rce audio peut être réglé.)Désignation du rég<strong>la</strong>ge : LEVELVa<strong>le</strong>urs du rég<strong>la</strong>ge : -7 à +7Rég<strong>la</strong>ge <strong>de</strong> <strong>la</strong> fréquence centra<strong>le</strong> <strong>de</strong>s aigusLa fréquence <strong>de</strong>s aigus affichée est amplifiée.(Commune à chaque s<strong>ou</strong>rce audio.)Désignation du rég<strong>la</strong>ge : FREQUENCYVa<strong>le</strong>urs du rég<strong>la</strong>ge : 7,5 kHz 10 kHz12,5 kHz 15 kHz• Ce rég<strong>la</strong>ge ne peut pas être effectué si un processeur audio externeest raccordé et si DEFEAT est réglé <strong>sur</strong> ON.3 <strong>Appuyez</strong> <strong>sur</strong> <strong>le</strong> <strong>b<strong>ou</strong>ton</strong> supérieur <strong>ou</strong> inférieur <strong>de</strong> <strong>la</strong>comman<strong>de</strong> multidirectionnel<strong>le</strong> p<strong>ou</strong>r sé<strong>le</strong>ctionner<strong>la</strong> désignation du rég<strong>la</strong>ge <strong>de</strong> votre choix.Désignationdu rég<strong>la</strong>ge :BALANCE / FADER / TREBLE / BASS /SUBW LEVEL / LOUDNESS / DEFEAT /GUIDE MIX LV ** Ce rég<strong>la</strong>ge ne peut être effectué que si un processeur audio externeest raccordé.4 <strong>Appuyez</strong> <strong>sur</strong> <strong>le</strong> <strong>b<strong>ou</strong>ton</strong> gauche <strong>ou</strong> droit <strong>de</strong> <strong>la</strong>comman<strong>de</strong> multidirectionnel<strong>le</strong> p<strong>ou</strong>r effectuer<strong>le</strong>s rég<strong>la</strong>ges <strong>de</strong> votre choix et p<strong>ou</strong>r <strong>le</strong>s vali<strong>de</strong>r.5 <strong>Appuyez</strong> <strong>sur</strong> TA/RTN/SETUP p<strong>ou</strong>r revenir à l’écranprécé<strong>de</strong>nt. <strong>Appuyez</strong> plusieurs fois <strong>sur</strong> TA/RTN/SETUP p<strong>ou</strong>r revenir à l’écran <strong>de</strong> <strong>la</strong> s<strong>ou</strong>rceprincipa<strong>le</strong> affiché avant <strong>la</strong> configuration.Rég<strong>la</strong>ge <strong>de</strong> <strong>la</strong> comman<strong>de</strong> <strong>de</strong>s gravesV<strong>ou</strong>s p<strong>ou</strong>vez modifier <strong>le</strong>s rég<strong>la</strong>ges <strong>de</strong> <strong>la</strong> fréquence <strong>de</strong>s graves afin <strong>de</strong>créer <strong>la</strong> tonalité <strong>de</strong> votre choix.1 Sé<strong>le</strong>ctionnez BASS <strong>sur</strong> l’écran AUDIO MODE, puisappuyez <strong>sur</strong> <strong>le</strong> <strong>b<strong>ou</strong>ton</strong> droit <strong>de</strong> <strong>la</strong> comman<strong>de</strong>multidirectionnel<strong>le</strong>.2 <strong>Appuyez</strong> <strong>sur</strong> <strong>le</strong> <strong>b<strong>ou</strong>ton</strong> supérieur <strong>ou</strong> inférieur <strong>de</strong> <strong>la</strong>comman<strong>de</strong> multidirectionnel<strong>le</strong> p<strong>ou</strong>rsé<strong>le</strong>ctionner <strong>la</strong> désignation du rég<strong>la</strong>ge <strong>de</strong> votrechoix, puis appuyez <strong>sur</strong> <strong>le</strong> <strong>b<strong>ou</strong>ton</strong> gauche <strong>ou</strong> droit<strong>de</strong> <strong>la</strong> comman<strong>de</strong> multidirectionnel<strong>le</strong> p<strong>ou</strong>reffectuer <strong>le</strong>s rég<strong>la</strong>ges <strong>de</strong> votre choix et p<strong>ou</strong>r <strong>le</strong>svali<strong>de</strong>r.11-FR
Rég<strong>la</strong>ge du niveau <strong>de</strong>s gravesV<strong>ou</strong>s p<strong>ou</strong>vez amplifier <strong>ou</strong> réduire <strong>la</strong> fréquence <strong>de</strong>s graves.(Le niveau <strong>de</strong> <strong>la</strong> s<strong>ou</strong>rce audio peut être réglé.)Désignation du rég<strong>la</strong>ge : LEVELVa<strong>le</strong>urs du rég<strong>la</strong>ge : -7 à +10Rég<strong>la</strong>ge <strong>de</strong> <strong>la</strong> penteSé<strong>le</strong>ctionnez dans <strong>la</strong> p<strong>la</strong>ge disponib<strong>le</strong> <strong>la</strong> fréquence que v<strong>ou</strong>s s<strong>ou</strong>haitezrég<strong>le</strong>r.(Commune à chaque s<strong>ou</strong>rce audio.)Désignation du rég<strong>la</strong>ge : SLOPEVa<strong>le</strong>urs du rég<strong>la</strong>ge : 0,50 0,75 1,00 1,25Rég<strong>la</strong>ge <strong>de</strong> <strong>la</strong> fréquence centra<strong>le</strong> <strong>de</strong>s gravesLa fréquence <strong>de</strong>s graves affichée est amplifiée.(Commune à chaque s<strong>ou</strong>rce audio.)Désignation du rég<strong>la</strong>ge : FREQUENCYVa<strong>le</strong>urs du rég<strong>la</strong>ge : 60 Hz 80 Hz 100 Hz 120 Hz• Ce rég<strong>la</strong>ge ne peut pas être effectué si un processeur audio externeest raccordé et si DEFEAT est réglé <strong>sur</strong> ON.Rég<strong>la</strong>ge du subwooferFonction moniteur arrièreLa Fonction moniteur arrière achemine différentes s<strong>ou</strong>rces <strong>de</strong> manièreindépendante vers l’avant et l’arrière à l’intérieur d’un véhicu<strong>le</strong>. Parexemp<strong>le</strong>, pendant <strong>la</strong> diffusion d’un programme radio <strong>ou</strong> d’autre s<strong>ou</strong>rceaudio à l’avant, il est possib<strong>le</strong> <strong>de</strong> regar<strong>de</strong>r un DVD à l’arrière à l’ai<strong>de</strong>d’un casque et d’un moniteur arrière en option.P<strong>ou</strong>r raccor<strong>de</strong>r <strong>le</strong> moniteur arrière, v<strong>ou</strong>s <strong>de</strong>vez instal<strong>le</strong>r <strong>le</strong> boîtierd’expansion en option (VPE-S431).1 <strong>Appuyez</strong> <strong>sur</strong> TA/RTN/SETUP pendant au moins2 secon<strong>de</strong>s.L’écran SETUP s’affiche.2 <strong>Appuyez</strong> <strong>sur</strong> <strong>le</strong> <strong>b<strong>ou</strong>ton</strong> supérieur <strong>ou</strong> inférieur <strong>de</strong> <strong>la</strong>comman<strong>de</strong> multidirectionnel<strong>le</strong> p<strong>ou</strong>rsé<strong>le</strong>ctionner REAR SELECT, puis appuyez <strong>sur</strong> <strong>le</strong><strong>b<strong>ou</strong>ton</strong> droit <strong>de</strong> <strong>la</strong> comman<strong>de</strong>multidirectionnel<strong>le</strong>.L’écran REAR SELECT s’affiche.Exemp<strong>le</strong> d’affichage <strong>de</strong> l’écran REAR SELECTPermet <strong>de</strong> rég<strong>le</strong>r <strong>le</strong> niveau <strong>de</strong> sortie du subwoofer.Désignation du rég<strong>la</strong>ge : SUBW LEVELVa<strong>le</strong>urs du rég<strong>la</strong>ge : 0 à 15• Le rég<strong>la</strong>ge du niveau est disponib<strong>le</strong> si v<strong>ou</strong>s sé<strong>le</strong>ctionnez ON à <strong>la</strong>section « Mise en et hors service du subwoofer » (page 19).Activation et désactivation du cont<strong>ou</strong>rLe rég<strong>la</strong>ge du cont<strong>ou</strong>r permet <strong>de</strong> re<strong>le</strong>ver <strong>le</strong> niveau <strong>de</strong>s fréquences graveset aiguës lorsque <strong>le</strong> niveau du volume sonore est faib<strong>le</strong>. Ce rég<strong>la</strong>gepermet donc <strong>de</strong> compenser <strong>la</strong> perte <strong>de</strong> sensibilité <strong>de</strong> l’oreil<strong>le</strong> à cesfréquences.Désignation du rég<strong>la</strong>ge : LOUDNESSVa<strong>le</strong>urs du rég<strong>la</strong>ge : ON / OFF• Ce rég<strong>la</strong>ge ne peut pas être effectué si un processeur audio externeest raccordé et si DEFEAT est réglé <strong>sur</strong> ON.Activation <strong>ou</strong> désactivation <strong>de</strong> <strong>la</strong> fonctionDefeat (suppression)Si v<strong>ou</strong>s activez <strong>la</strong> fonction Defeat (ON), <strong>le</strong> rég<strong>la</strong>ge <strong>de</strong>s graves (BASS) et<strong>de</strong>s aigus (TREBLE) effectué précé<strong>de</strong>mment revient aux va<strong>le</strong>urs pardéfaut.Désignation du rég<strong>la</strong>ge : DEFEATVa<strong>le</strong>urs du rég<strong>la</strong>ge : ON / OFFRég<strong>la</strong>ge du volume du guidage vocalLe niveau sonore <strong>de</strong> <strong>la</strong> voix d’entrée <strong>de</strong>s enceintes et <strong>la</strong> sortie voca<strong>le</strong>d’interruption <strong>de</strong> <strong>la</strong> navigation provenant du processeur audio externesont réglés.• Cette fonction ne peut pas être utilisée si <strong>la</strong> fonctionMONITOR -1 <strong>ou</strong> 2 est réglée <strong>sur</strong> OFF au chapitreCONFIGURATION SYSTÈME (SYSTEM SETUP).3 <strong>Appuyez</strong> <strong>sur</strong> <strong>le</strong> <strong>b<strong>ou</strong>ton</strong> supérieur <strong>ou</strong> inférieur <strong>de</strong> <strong>la</strong>comman<strong>de</strong> multidirectionnel<strong>le</strong> p<strong>ou</strong>rsé<strong>le</strong>ctionner <strong>le</strong> moniteur externe <strong>de</strong> votre choix.REAR-1 :REAR-2 :V<strong>ou</strong>s p<strong>ou</strong>vez raccor<strong>de</strong>r un moniteur externe à <strong>la</strong>sortie AUX OUT 1 du boîtier d’expansion en option(VPE-S431).V<strong>ou</strong>s p<strong>ou</strong>vez raccor<strong>de</strong>r un moniteur externe à <strong>la</strong>sortie AUX OUT 2 du boîtier d’expansion en option(VPE-S431)4 <strong>Appuyez</strong> <strong>sur</strong> <strong>le</strong> <strong>b<strong>ou</strong>ton</strong> gauche <strong>ou</strong> droit <strong>de</strong> <strong>la</strong>comman<strong>de</strong> multidirectionnel<strong>le</strong> p<strong>ou</strong>r rég<strong>le</strong>r <strong>la</strong>s<strong>ou</strong>rce vidéo <strong>de</strong> votre choix (entrée externe).5 <strong>Appuyez</strong> <strong>sur</strong> TA/RTN/SETUP p<strong>ou</strong>r revenir à l’écranprécé<strong>de</strong>nt. <strong>Appuyez</strong> plusieurs fois <strong>sur</strong> TA/RTN/SETUP p<strong>ou</strong>r revenir à l’écran <strong>de</strong> <strong>la</strong> s<strong>ou</strong>rceprincipa<strong>le</strong> affiché avant <strong>la</strong> configuration.• P<strong>ou</strong>r annu<strong>le</strong>r <strong>la</strong> fonction moniteur arrière, sé<strong>le</strong>ctionnez OFF.• Si <strong>la</strong> fonction « Rég<strong>la</strong>ge du mo<strong>de</strong> AUX » (page 18) est réglée <strong>sur</strong>OFF, <strong>la</strong> s<strong>ou</strong>rce auxiliaire n’est pas affichée.• VISUALIZER (VISUAL.) n’est pas affiché si <strong>le</strong> « Rég<strong>la</strong>ge <strong>de</strong>l’affichage du mo<strong>de</strong> VISUALIZER » (page 18) est désactivé.Désignation du rég<strong>la</strong>ge : GUIDE MIX LV* Va<strong>le</strong>urs du rég<strong>la</strong>ge : 0 à 15* Veil<strong>le</strong>z à sé<strong>le</strong>ctionner <strong>la</strong> va<strong>le</strong>ur 15, car cette opération risque <strong>de</strong> nepas être correctement effectuée.• Rég<strong>le</strong>z <strong>le</strong> niveau d’interruption <strong>de</strong> <strong>la</strong> voix d’entrée <strong>de</strong>s enceintes auxsections « Rég<strong>la</strong>ge du niveau d’interruption <strong>de</strong> <strong>la</strong> voix d’entrée <strong>de</strong>senceintes » (page 17) et « Rég<strong>la</strong>ge du volume <strong>de</strong> l’interruption duson <strong>de</strong> <strong>la</strong> navigation » (page 18).12-FR
Changement <strong>de</strong> <strong>la</strong> fonction du capteur <strong>de</strong>télécomman<strong>de</strong>V<strong>ou</strong>s p<strong>ou</strong>vez activer <strong>ou</strong> désactiver <strong>le</strong> capteur <strong>de</strong> télécomman<strong>de</strong> <strong>de</strong>l’unité externe (moniteur, etc.) p<strong>ou</strong>r p<strong>ou</strong>voir comman<strong>de</strong>r <strong>ou</strong> non cel<strong>le</strong>-cià l’ai<strong>de</strong> <strong>de</strong> <strong>la</strong> télécomman<strong>de</strong>.Commutation du capteur <strong>de</strong> <strong>la</strong> télécomman<strong>de</strong>1 Lorsque l’écran <strong>de</strong> configuration est affiché,appuyez <strong>sur</strong> <strong>le</strong> <strong>b<strong>ou</strong>ton</strong> supérieur <strong>ou</strong> inférieur <strong>de</strong> <strong>la</strong>comman<strong>de</strong> multidirectionnel<strong>le</strong> p<strong>ou</strong>rsé<strong>le</strong>ctionner SYSTEM SETUP, puis appuyez <strong>sur</strong> <strong>le</strong><strong>b<strong>ou</strong>ton</strong> droit <strong>de</strong> <strong>la</strong> comman<strong>de</strong>multidirectionnel<strong>le</strong>.L’écran SYSTEM SETUP s’affiche.2 <strong>Appuyez</strong> <strong>sur</strong> <strong>le</strong> <strong>b<strong>ou</strong>ton</strong> supérieur <strong>ou</strong> inférieur <strong>de</strong> <strong>la</strong>comman<strong>de</strong> multidirectionnel<strong>le</strong> p<strong>ou</strong>rsé<strong>le</strong>ctionner REMOTE SEL.3 <strong>Appuyez</strong> <strong>sur</strong> <strong>le</strong> <strong>b<strong>ou</strong>ton</strong> gauche <strong>ou</strong> droit <strong>de</strong> <strong>la</strong>comman<strong>de</strong> multidirectionnel<strong>le</strong> p<strong>ou</strong>rsé<strong>le</strong>ctionner <strong>le</strong> moniteur que v<strong>ou</strong>s s<strong>ou</strong>haitezcomman<strong>de</strong>r à l’ai<strong>de</strong> <strong>de</strong> <strong>la</strong> télécomman<strong>de</strong>.FRONT :REAR-1 :REAR-2 :La télécomman<strong>de</strong> peut être utilisée quand <strong>le</strong>moniteur <strong>Alpine</strong> est raccordé à l’ai<strong>de</strong> d’uncâb<strong>le</strong> RGB ainsi qu’en cas <strong>de</strong> raccor<strong>de</strong>mentd’un moniteur (d’une autre marque) connectéau capteur <strong>de</strong> télécomman<strong>de</strong>.Le capteur <strong>de</strong> télécomman<strong>de</strong> du moniteurexterne raccordé à <strong>la</strong> prise AUX OUT1 dusyntoniseur <strong>de</strong> cet appareil <strong>ou</strong> <strong>le</strong> boîtierd’expansion en option (VPE-S431) est activé et<strong>la</strong> télécomman<strong>de</strong> ne peut comman<strong>de</strong>r que <strong>la</strong>s<strong>ou</strong>rce sé<strong>le</strong>ctionnée p<strong>ou</strong>r l’écran REARSELECT.Le capteur <strong>de</strong> télécomman<strong>de</strong> du moniteurexterne raccordé à <strong>la</strong> prise AUX OUT2 duboîtier d’expansion en option (VPE-S431) estactivé et <strong>la</strong> télécomman<strong>de</strong> ne peut comman<strong>de</strong>rque <strong>la</strong> s<strong>ou</strong>rce sé<strong>le</strong>ctionnée p<strong>ou</strong>r l’écran REARSELECT.ConfigurationConfiguration généra<strong>le</strong>Comman<strong>de</strong>multidirectionnel<strong>le</strong>Opération <strong>de</strong> configuration généra<strong>le</strong>Le frein à main doit être serré p<strong>ou</strong>r p<strong>ou</strong>voir accé<strong>de</strong>r à l’écrandu mo<strong>de</strong> SETUP. Si v<strong>ou</strong>s tentez d’accé<strong>de</strong>r à cet écranpendant <strong>la</strong> conduite, l’avertissement -CAN’T OPERATEWHILE DRIVING s’affiche.Les étapes 1 à 5 ci-<strong>de</strong>ss<strong>ou</strong>s sont communes à chaque« Désignation du rég<strong>la</strong>ge » <strong>de</strong> <strong>la</strong> configuration GÉNÉRALE.Consultez chaque section p<strong>ou</strong>r plus d’informations.1 <strong>Appuyez</strong> <strong>sur</strong> TA/RTN/SETUP pendant au moins2 secon<strong>de</strong>s.L’écran SETUP s’affiche.4 <strong>Appuyez</strong> <strong>sur</strong> TA/RTN/SETUP p<strong>ou</strong>r revenir à l’écranprécé<strong>de</strong>nt. <strong>Appuyez</strong> plusieurs fois <strong>sur</strong> TA/RTN/SETUP p<strong>ou</strong>r revenir à l’écran <strong>de</strong> <strong>la</strong> s<strong>ou</strong>rceprincipa<strong>le</strong> affiché avant <strong>la</strong> configuration.• Sé<strong>le</strong>ctionnez SETUP <strong>sur</strong> l’écran FUNCTION p<strong>ou</strong>r rappe<strong>le</strong>r l’écran<strong>de</strong> configuration après avoir appuyé <strong>sur</strong> /MENU/FUNC. pendantau moins 2 secon<strong>de</strong>s.• Le capteur du moniteur arrière à panneau tacti<strong>le</strong> est prioritaire parrapport au capteur <strong>de</strong> <strong>la</strong> télécomman<strong>de</strong> si v<strong>ou</strong>s appuyez <strong>sur</strong> <strong>le</strong>moniteur arrière (raccordé au moniteur arrière à panneau tacti<strong>le</strong><strong>Alpine</strong> via <strong>le</strong> câb<strong>le</strong> <strong>de</strong> comman<strong>de</strong> du moniteur), quel que soit <strong>le</strong>rég<strong>la</strong>ge du commutateur du capteur <strong>de</strong> télécomman<strong>de</strong>. Notezcependant que <strong>le</strong> capteur <strong>de</strong> <strong>la</strong> télécomman<strong>de</strong> réglé est prioritaires’il s’est éc<strong>ou</strong>lé 5 secon<strong>de</strong>s <strong>de</strong>puis <strong>la</strong> <strong>de</strong>rnière pression <strong>sur</strong> <strong>le</strong>panneau.13-FR
2 <strong>Appuyez</strong> <strong>sur</strong> <strong>le</strong> <strong>b<strong>ou</strong>ton</strong> supérieur <strong>ou</strong> inférieur <strong>de</strong> <strong>la</strong>comman<strong>de</strong> multidirectionnel<strong>le</strong> p<strong>ou</strong>rsé<strong>le</strong>ctionner GENERAL SETUP, puis appuyez <strong>sur</strong><strong>le</strong> <strong>b<strong>ou</strong>ton</strong> droit <strong>de</strong> <strong>la</strong> comman<strong>de</strong>multidirectionnel<strong>le</strong>.L’écran GENERAL SETUP s’affiche.Exemp<strong>le</strong> d’affichage <strong>de</strong> l’écran <strong>de</strong> <strong>la</strong> configuration généra<strong>le</strong>Rég<strong>la</strong>ge <strong>de</strong> l’heureDésignation du rég<strong>la</strong>ge : CLOCK ADJAutres désignations <strong>de</strong> rég<strong>la</strong>ge : HOUR / MINUTEVa<strong>le</strong>urs du rég<strong>la</strong>ge : 1-12 (0-23)* / 0-59HOUR : Règ<strong>le</strong> <strong>le</strong>s heures.MINUTE : Règ<strong>le</strong> <strong>le</strong>s minutes.* Les va<strong>le</strong>urs <strong>de</strong> rég<strong>la</strong>ge varient en fonction <strong>de</strong> l’option sé<strong>le</strong>ctionnée à<strong>la</strong> section « Rég<strong>la</strong>ge <strong>de</strong> l’affichage <strong>de</strong> l’heure » (page 14).• Si v<strong>ou</strong>s appuyez <strong>sur</strong> <strong>le</strong> <strong>b<strong>ou</strong>ton</strong> gauche <strong>ou</strong> droit <strong>de</strong> <strong>la</strong> comman<strong>de</strong>multidirectionnel<strong>le</strong> et <strong>le</strong> maintenez enfoncé, <strong>la</strong> va<strong>le</strong>ur <strong>de</strong> rég<strong>la</strong>gechange continuel<strong>le</strong>ment.Rég<strong>la</strong>ge <strong>de</strong> l’heure d’été3 <strong>Appuyez</strong> <strong>sur</strong> <strong>le</strong> <strong>b<strong>ou</strong>ton</strong> supérieur <strong>ou</strong> inférieur <strong>de</strong> <strong>la</strong>comman<strong>de</strong> multidirectionnel<strong>le</strong> p<strong>ou</strong>r sé<strong>le</strong>ctionner<strong>la</strong> désignation du rég<strong>la</strong>ge <strong>de</strong> votre choix.Désignation du rég<strong>la</strong>ge :DEMO / CLOCK TYPE / CLOCK ADJ / DAYLIGHT TIME / BEEP /REACTOR / SCROLL AUTO / RDS CLK DISP / FM LEVEL /PI SEEK / RDS REGIONAL / PTY LANGUAGE / LANGUAGE SEL4 <strong>Appuyez</strong> <strong>sur</strong> <strong>le</strong> <strong>b<strong>ou</strong>ton</strong> supérieur <strong>ou</strong> inférieur <strong>de</strong> <strong>la</strong>comman<strong>de</strong> multidirectionnel<strong>le</strong> p<strong>ou</strong>r effectuer<strong>le</strong>s rég<strong>la</strong>ges <strong>de</strong> votre choix et p<strong>ou</strong>r <strong>le</strong>s vali<strong>de</strong>r.5 <strong>Appuyez</strong> <strong>sur</strong> TA/RTN/SETUP p<strong>ou</strong>r revenir à l’écranprécé<strong>de</strong>nt. <strong>Appuyez</strong> plusieurs fois <strong>sur</strong> TA/RTN/SETUP p<strong>ou</strong>r revenir à l’écran <strong>de</strong> <strong>la</strong> s<strong>ou</strong>rceprincipa<strong>le</strong> affiché avant <strong>la</strong> configuration.• Sé<strong>le</strong>ctionnez SETUP <strong>sur</strong> l’écran FUNCTION p<strong>ou</strong>r rappe<strong>le</strong>r l’écran<strong>de</strong> configuration après avoir appuyé <strong>sur</strong> /MENU/FUNC. pendantau moins 2 secon<strong>de</strong>s.• Ne t<strong>ou</strong>rnez pas <strong>la</strong> clé <strong>de</strong> contact (démarreur) <strong>sur</strong> <strong>la</strong> position OFFimmédiatement après avoir modifié <strong>le</strong>s rég<strong>la</strong>ges du mo<strong>de</strong> général(pendant que <strong>le</strong> système entre <strong>le</strong>s données automatiquement).Sinon, <strong>le</strong>s rég<strong>la</strong>ges ne seront pas modifiés.Fonction <strong>de</strong> démonstrationCet appareil possè<strong>de</strong> une fonction <strong>de</strong> démonstration permettant <strong>de</strong>présenter <strong>le</strong>s opérations <strong>de</strong> base <strong>de</strong>s différentes s<strong>ou</strong>rces <strong>sur</strong> l’affichagedu moniteur.Désignation du rég<strong>la</strong>ge : DEMOVa<strong>le</strong>urs du rég<strong>la</strong>ge : OFF / ONON : Active <strong>le</strong> mo<strong>de</strong> <strong>de</strong> démonstration p<strong>ou</strong>r montrer <strong>le</strong>sopérations <strong>de</strong> base.OFF : Désactive <strong>le</strong> mo<strong>de</strong> <strong>de</strong> démonstration.• L’opération <strong>de</strong> démonstration est automatiquement répétée jusqu’àce que <strong>la</strong> fonction soit désactivée.Rég<strong>la</strong>ge <strong>de</strong> l’affichage <strong>de</strong> l’heureDésignation du rég<strong>la</strong>ge : DAYLIGHT TIMEVa<strong>le</strong>urs du rég<strong>la</strong>ge : OFF / ONON : Active <strong>le</strong> mo<strong>de</strong> heure d’été. L’heure avance d’une heure.OFF : Rétablit l’heure ordinaire.Fonction <strong>de</strong> guidage sonoreDésignation du rég<strong>la</strong>ge : BEEPVa<strong>le</strong>urs du rég<strong>la</strong>ge : OFF / ONON : Active <strong>le</strong> mo<strong>de</strong> <strong>de</strong> guidage sonore.OFF : Désactive <strong>le</strong> mo<strong>de</strong> <strong>de</strong> guidage sonore. Le signal sonore<strong>de</strong> guidage ne retentit pas lorsque v<strong>ou</strong>s appuyez <strong>sur</strong> une<strong>de</strong>s t<strong>ou</strong>ches <strong>de</strong> l’appareil <strong>de</strong> comman<strong>de</strong>.Activation <strong>ou</strong> désactivation <strong>de</strong> <strong>la</strong> vibration<strong>de</strong> l’appareil <strong>de</strong> comman<strong>de</strong>V<strong>ou</strong>s p<strong>ou</strong>vez activer <strong>ou</strong> désactiver <strong>la</strong> vibration <strong>de</strong> l’appareil <strong>de</strong>comman<strong>de</strong> lors du fonctionnement.Désignation du rég<strong>la</strong>ge : REACTORVa<strong>le</strong>urs du rég<strong>la</strong>ge : OFF / ONOFF : Désactive <strong>le</strong>s vibrations en c<strong>ou</strong>rs <strong>de</strong> fonctionnement.ON : Active <strong>le</strong>s vibrations en c<strong>ou</strong>rs <strong>de</strong> fonctionnement.Rég<strong>la</strong>ge du défi<strong>le</strong>mentL’affichage en défi<strong>le</strong>ment est disponib<strong>le</strong> si v<strong>ou</strong>s saisissez <strong>le</strong> texte du CD,<strong>le</strong> nom <strong>de</strong> dossier, <strong>le</strong> nom <strong>de</strong> fichier <strong>ou</strong> <strong>le</strong>s informations tag.Désignation du rég<strong>la</strong>ge : SCROLL AUTOVa<strong>le</strong>urs du rég<strong>la</strong>ge : OFF / ONON : Active <strong>le</strong> mo<strong>de</strong> <strong>de</strong> défi<strong>le</strong>ment AUTO. L’affichage endéfi<strong>le</strong>ment est répété tant que <strong>le</strong> mo<strong>de</strong> est activé.OFF : Désactive <strong>le</strong> mo<strong>de</strong> <strong>de</strong> défi<strong>le</strong>ment AUTO.L’affichage en défi<strong>le</strong>ment est exécuté dès que <strong>la</strong> pistechange.• L’affichage en défi<strong>le</strong>ment <strong>de</strong>s chansons, <strong>de</strong> l’artiste et <strong>de</strong> l’album estactivé lorsque l’iPod est connecté.V<strong>ou</strong>s p<strong>ou</strong>vez sé<strong>le</strong>ctionner <strong>le</strong> type d’affichage <strong>de</strong> l’heure.Désignation du rég<strong>la</strong>ge : CLOCK TYPEVa<strong>le</strong>urs du rég<strong>la</strong>ge : OFF / 12H / 24H12H : L’heure est affichée au format 12 heures.24H : L’heure est affichée au format 24 heures.OFF : L’affichage <strong>de</strong> l’heure est désactivé.14-FR
Affichage <strong>de</strong> l’heure du RDSQuand v<strong>ou</strong>s sé<strong>le</strong>ctionnez ON, l’horloge est automatiquement réglée enfonction <strong>de</strong>s données d’heure transmises par <strong>la</strong> diffusion RDS.Désignation du rég<strong>la</strong>ge : RDS CLK DISPVa<strong>le</strong>urs du rég<strong>la</strong>ge : OFF / ONON :Règ<strong>le</strong> l’horloge automatiquement <strong>sur</strong> base <strong>de</strong>s donnéesd’heure. Quand ce rég<strong>la</strong>ge est sé<strong>le</strong>ctionné, il estimpossib<strong>le</strong> <strong>de</strong> rég<strong>le</strong>r l’horloge manuel<strong>le</strong>ment.P<strong>ou</strong>r <strong>la</strong> rég<strong>le</strong>r manuel<strong>le</strong>ment, sé<strong>le</strong>ctionnez OFF.Rég<strong>la</strong>ge <strong>de</strong>s niveaux <strong>de</strong> signal <strong>de</strong> <strong>la</strong> s<strong>ou</strong>rceSi <strong>la</strong> différence <strong>de</strong> volume entre <strong>le</strong> CD et <strong>la</strong> radio FM est tropimportante, rég<strong>le</strong>z <strong>le</strong> niveau du signal FM comme suit.Désignation du rég<strong>la</strong>ge : FM LEVELVa<strong>le</strong>urs du rég<strong>la</strong>ge : LOW / HIGHRég<strong>la</strong>ge PI SEEKDésignation du rég<strong>la</strong>ge : PI SEEKVa<strong>le</strong>urs du rég<strong>la</strong>ge : OFF / AUTOConfiguration systèmeOpération <strong>de</strong> configuration du systèmeLe frein à main doit être serré p<strong>ou</strong>r p<strong>ou</strong>voir accé<strong>de</strong>r à l’écrandu mo<strong>de</strong> SETUP. Si v<strong>ou</strong>s tentez d’accé<strong>de</strong>r à cet écranpendant <strong>la</strong> conduite, l’avertissement -CAN’T OPERATEWHILE DRIVING s’affiche.Les étapes 1 à 5 ci-<strong>de</strong>ss<strong>ou</strong>s sont communes à chaque« Désignation du rég<strong>la</strong>ge » <strong>de</strong> <strong>la</strong> configuration du système.Consultez chaque section p<strong>ou</strong>r plus d’informations.1 <strong>Appuyez</strong> <strong>sur</strong> TA/RTN/SETUP pendant au moins2 secon<strong>de</strong>s.L’écran SETUP s’affiche.Réception <strong>de</strong> stations RDS régiona<strong>le</strong>s(loca<strong>le</strong>s)Si v<strong>ou</strong>s sé<strong>le</strong>ctionnez ON, l’appareil continue <strong>de</strong> recevoirautomatiquement <strong>la</strong> station RDS loca<strong>le</strong> concernée.Désignation du rég<strong>la</strong>ge : RDS REGIONALVa<strong>le</strong>urs du rég<strong>la</strong>ge : OFF / ONChangement <strong>de</strong> <strong>la</strong> <strong>la</strong>ngue d’affichage duPTY (type <strong>de</strong> programme)V<strong>ou</strong>s p<strong>ou</strong>vez sé<strong>le</strong>ctionner un modè<strong>le</strong> <strong>de</strong> <strong>la</strong>ngue d’affichage.Désignation du rég<strong>la</strong>ge : PTY LANGUAGEVa<strong>le</strong>urs du rég<strong>la</strong>ge : GB / NL / F / D / I / E2 <strong>Appuyez</strong> <strong>sur</strong> <strong>le</strong> <strong>b<strong>ou</strong>ton</strong> supérieur <strong>ou</strong> inférieur <strong>de</strong> <strong>la</strong>comman<strong>de</strong> multidirectionnel<strong>le</strong> p<strong>ou</strong>rsé<strong>le</strong>ctionner SYSTEM SETUP, puis appuyez <strong>sur</strong> <strong>le</strong><strong>b<strong>ou</strong>ton</strong> droit <strong>de</strong> <strong>la</strong> comman<strong>de</strong>multidirectionnel<strong>le</strong>.L’écran SYSTEM SETUP s’affiche.Exemp<strong>le</strong> d’écran SYSTEM SETUPP<strong>ou</strong>r passer aux polices <strong>de</strong> caractèresrussesV<strong>ou</strong>s p<strong>ou</strong>vez sé<strong>le</strong>ctionner <strong>de</strong>ux types <strong>de</strong> polices <strong>de</strong> caractères.Désignation du rég<strong>la</strong>ge : LANGUAGE SELVa<strong>le</strong>urs du rég<strong>la</strong>ge : MODE1 / MODE2MODE1 : Affichage avec police <strong>de</strong> caractères norma<strong>le</strong>(ISO8859-1)MODE2 : Affichage avec police <strong>de</strong> caractères russe(WINDOWS-1251)V<strong>ou</strong>s ne p<strong>ou</strong>vez pas utiliser cette police <strong>de</strong>caractères p<strong>ou</strong>r l’affichage en mo<strong>de</strong> RDS et Tuner.15-FR
3 <strong>Appuyez</strong> <strong>sur</strong> <strong>le</strong> <strong>b<strong>ou</strong>ton</strong> supérieur <strong>ou</strong> inférieur <strong>de</strong> <strong>la</strong>comman<strong>de</strong> multidirectionnel<strong>le</strong> p<strong>ou</strong>rsé<strong>le</strong>ctionner <strong>la</strong> désignation du rég<strong>la</strong>ge <strong>de</strong> votrechoix.Désignation du rég<strong>la</strong>ge :IN-INT MUTE / NAV. / GUIDE MIX / NAV. MIX LV / FACT SYS SET /FACT SYS LV / FACT SYS DET / FACT SYS MIX / F.SYS MIX TYP /F.SYS INT CH. / REMOTE SEL.* 1 / AUX IN-1(2,3) / AUX IN-1(2,3)NAME / AUX IN-1(2,3) LEVEL / MONITOR-1 / MONITOR-2 /VISUALIZER / ILLUM COLOR / CMNDR LIGHT. / DIMMER /SCREEN ADJ / SUBW* 2* 1 Reportez-v<strong>ou</strong>s à <strong>la</strong> section « Fonction moniteur arrière », page 12.* 2 Si un processeur audio externe est raccordé, l’élément SUBW n’estpas affiché.4 <strong>Appuyez</strong> <strong>sur</strong> <strong>le</strong> <strong>b<strong>ou</strong>ton</strong> supérieur <strong>ou</strong> inférieur <strong>de</strong> <strong>la</strong>comman<strong>de</strong> multidirectionnel<strong>le</strong> p<strong>ou</strong>r effectuer<strong>le</strong>s rég<strong>la</strong>ges <strong>de</strong> votre choix et p<strong>ou</strong>r <strong>le</strong>s vali<strong>de</strong>r.5 <strong>Appuyez</strong> <strong>sur</strong> TA/RTN/SETUP p<strong>ou</strong>r revenir à l’écranprécé<strong>de</strong>nt. <strong>Appuyez</strong> plusieurs fois <strong>sur</strong> TA/RTN/SETUP p<strong>ou</strong>r revenir à l’écran <strong>de</strong> <strong>la</strong> s<strong>ou</strong>rceprincipa<strong>le</strong> affiché avant <strong>la</strong> configuration.• Sé<strong>le</strong>ctionnez SETUP <strong>sur</strong> l’écran FUNCTION p<strong>ou</strong>r rappe<strong>le</strong>r l’écran<strong>de</strong> configuration après avoir appuyé <strong>sur</strong> /MENU/FUNC. pendantau moins 2 secon<strong>de</strong>s.• Ne t<strong>ou</strong>rnez pas <strong>la</strong> clé <strong>de</strong> contact (démarreur) <strong>sur</strong> <strong>la</strong> position OFFimmédiatement après avoir modifié <strong>le</strong>s rég<strong>la</strong>ges du mo<strong>de</strong> système(pendant que <strong>le</strong> système entre <strong>le</strong>s données automatiquement).Sinon, <strong>le</strong>s rég<strong>la</strong>ges ne seront pas modifiés.Utilisation <strong>de</strong> l’entrée <strong>de</strong>s enceintesCet appareil peut interrompre <strong>le</strong> système (navigation <strong>ou</strong> téléphone) <strong>de</strong>votre véhicu<strong>le</strong>. Le son peut éga<strong>le</strong>ment être reproduit <strong>sur</strong> cet appareil si<strong>le</strong> système audio du véhicu<strong>le</strong> (CD, etc.) est sé<strong>le</strong>ctionné comme s<strong>ou</strong>rce.L’appareil interrompt <strong>le</strong> son en fonction du niveau d’interruption sonoredu système audio du véhicu<strong>le</strong>. Si aucun <strong>de</strong>s rég<strong>la</strong>ges suivants n’esteffectué, il est possib<strong>le</strong> que <strong>le</strong> son ne soit pas interrompu <strong>ou</strong> qu’un sonpuissant soit subitement interrompu.Rég<strong>la</strong>ge du mo<strong>de</strong> d’entrée <strong>de</strong>s enceintesCette section v<strong>ou</strong>s explique comment instal<strong>le</strong>r <strong>le</strong> système (système <strong>de</strong>navigation <strong>ou</strong> téléphone) dans votre véhicu<strong>le</strong>. Lorsque v<strong>ou</strong>s éc<strong>ou</strong>tez <strong>la</strong>radio, v<strong>ou</strong>s p<strong>ou</strong>vez interrompre automatiquement <strong>le</strong> guidage vocal dusystème <strong>de</strong> navigation <strong>ou</strong> un appel téléphonique entrant. V<strong>ou</strong>s p<strong>ou</strong>vezéga<strong>le</strong>ment sé<strong>le</strong>ctionner <strong>le</strong> mo<strong>de</strong> d’entrée <strong>de</strong>s enceintes (FACTRY SYS)<strong>sur</strong> l’écran <strong>de</strong> sé<strong>le</strong>ction <strong>de</strong> <strong>la</strong> s<strong>ou</strong>rce.Désignation du rég<strong>la</strong>ge : FACT SYS SETVa<strong>le</strong>urs du rég<strong>la</strong>ge : OFF / SOURCE / INT / BOTHSOURCE : Le système audio du véhicu<strong>le</strong> (CD, etc.) peut êtresé<strong>le</strong>ctionné comme s<strong>ou</strong>rce.Le système <strong>de</strong> navigation <strong>ou</strong> <strong>le</strong> téléphone duvéhicu<strong>le</strong> n’est pas interrompu.INT : Interrompt seu<strong>le</strong>ment <strong>le</strong> système <strong>de</strong> navigation <strong>ou</strong> <strong>le</strong>téléphone du véhicu<strong>le</strong>.BOTH : Le système audio du véhicu<strong>le</strong> (CD, etc.) peut êtresé<strong>le</strong>ctionné comme s<strong>ou</strong>rce.Le système <strong>de</strong> nagivation <strong>ou</strong> <strong>le</strong> téléphone duvéhicu<strong>le</strong> est interrompu.OFF : L’opération et <strong>le</strong> rég<strong>la</strong>ge du mo<strong>de</strong> d’entrée <strong>de</strong>senceintes ne sont pas effectués.• Si <strong>le</strong> système audio du véhicu<strong>le</strong> (CD, etc.) est réglé <strong>sur</strong> SOURCE etutilisé dans un véhicu<strong>le</strong> muni d’enceintes multi-canaux, il estpossib<strong>le</strong> que <strong>le</strong> son (aigus, etc.) ne soit pas reproduit correctement.• Selon <strong>le</strong>s conditions d’utilisation, n<strong>ou</strong>s v<strong>ou</strong>s recommandons <strong>de</strong>sé<strong>le</strong>ctionner <strong>le</strong> rég<strong>la</strong>ge INT <strong>ou</strong> SOURCE.• Si v<strong>ou</strong>s sé<strong>le</strong>ctionnez INT, ne reproduisez pas <strong>le</strong> CD audio à partir dusystème audio du véhicu<strong>le</strong>.• Si v<strong>ou</strong>s sé<strong>le</strong>ctionnez <strong>le</strong>s <strong>de</strong>ux (BOTH) rég<strong>la</strong>ges et si <strong>la</strong> s<strong>ou</strong>rce estréglée <strong>sur</strong> une autre va<strong>le</strong>ur que FACTORY SYS, ne reproduisez pas <strong>le</strong>CD audio, etc., à partir du système audio du véhicu<strong>le</strong>.• Si v<strong>ou</strong>s sé<strong>le</strong>ctionnez <strong>la</strong> va<strong>le</strong>ur <strong>de</strong> rég<strong>la</strong>ge « OFF », <strong>le</strong>s rég<strong>la</strong>ges dumo<strong>de</strong> d’entrée <strong>de</strong>s enceintes ne peuvent pas être effectués.Affichage du niveau sonore d’entrée <strong>de</strong>senceintesLe niveau sonore <strong>de</strong> l’entrée <strong>de</strong>s enceintes s’affiche numériquement. Cerég<strong>la</strong>ge ne peut être effectué que <strong>sur</strong> <strong>le</strong> système audio <strong>de</strong> votre véhicu<strong>le</strong>(système audio standard) et ne peut pas être effectué par cet appareil.Désignation du rég<strong>la</strong>ge : FACT SYS LVVa<strong>le</strong>urs du rég<strong>la</strong>ge : 0 à 2 L / 3 à 15 : OK / 16 à 18 HL : Le niveau sonore est FAIBLEOK : Le niveau sonore est correctement régléH : Le niveau sonore est ÉLEVÉRég<strong>le</strong>z <strong>le</strong> volume p<strong>ou</strong>r atteindre un niveau optimal.• Rég<strong>le</strong>z <strong>le</strong> volume à un niveau é<strong>le</strong>vé, mais sans atteindre <strong>la</strong> distorsion(Le niveau du volume ne doit pas dépasser 15). Même si OK estaffiché, si une distorsion est apparente, baissez <strong>le</strong> volume sonore <strong>de</strong>votre véhicu<strong>le</strong>.• Désactivez <strong>le</strong>s rég<strong>la</strong>ges <strong>de</strong>s aigus (TREBLE) et <strong>de</strong>s graves (BASS) dusystème audio <strong>de</strong> votre véhicu<strong>le</strong>.• Le niveau sonore ne peut pas être affiché si v<strong>ou</strong>s sé<strong>le</strong>ctionnez <strong>la</strong>va<strong>le</strong>ur OFF à <strong>la</strong> section « Rég<strong>la</strong>ge du mo<strong>de</strong> d’entrée <strong>de</strong>s enceintes »(page 16).16-FR
Rég<strong>la</strong>ge <strong>de</strong> l’interruption <strong>de</strong> <strong>la</strong> navigation/<strong>de</strong> <strong>la</strong> voix d’entrée <strong>de</strong>s enceintesSi un système <strong>de</strong> navigation <strong>Alpine</strong> est raccordé au VPA-B222R, <strong>le</strong>guidage vocal du système <strong>de</strong> navigation est combiné aux sons <strong>de</strong> <strong>la</strong>radio. De plus, v<strong>ou</strong>s p<strong>ou</strong>vez rég<strong>le</strong>r l’interruption <strong>de</strong> <strong>la</strong> voix d’entrée <strong>de</strong>senceintes.Désignation du rég<strong>la</strong>ge : GUIDE MIXVa<strong>le</strong>urs du rég<strong>la</strong>ge : OFF / ONOFF : Le mo<strong>de</strong> d’interruption <strong>de</strong> <strong>la</strong> navigation/<strong>de</strong> <strong>la</strong> voixd’entrée <strong>de</strong>s enceintes est désactivé.ON : Le mo<strong>de</strong> d’interruption <strong>de</strong> <strong>la</strong> navigation/<strong>de</strong> <strong>la</strong> voixd’entrée <strong>de</strong>s enceintes est activé.Rég<strong>la</strong>ge du niveau <strong>de</strong> détection <strong>de</strong>l’interruption <strong>de</strong> l’entrée <strong>de</strong>s enceintesV<strong>ou</strong>s p<strong>ou</strong>vez rég<strong>le</strong>r <strong>le</strong> niveau sonore p<strong>ou</strong>r l’interruption du guidagevocal.Désignation du rég<strong>la</strong>ge : FACT SYS DETVa<strong>le</strong>urs du rég<strong>la</strong>ge : 1 à 15Si v<strong>ou</strong>s effectuez ce rég<strong>la</strong>ge <strong>sur</strong> un niveau faib<strong>le</strong>, <strong>le</strong> guidagevocal est interrompu, même si <strong>le</strong> niveau sonore du système estfaib<strong>le</strong>.• Le rég<strong>la</strong>ge peut être effectué si v<strong>ou</strong>s sé<strong>le</strong>ctionnez <strong>le</strong>s va<strong>le</strong>urs INT etBOTH à <strong>la</strong> section « Rég<strong>la</strong>ge du mo<strong>de</strong> d’entrée <strong>de</strong>s enceintes »(page 16).• Selon <strong>le</strong> véhicu<strong>le</strong>, <strong>le</strong>s enceintes peuvent aussi reproduire <strong>de</strong>s signauxd’avertissement, notamment ceux <strong>de</strong>s ceintures <strong>de</strong> sécurité. As<strong>sur</strong>ezv<strong>ou</strong>sque l’interruption <strong>de</strong> <strong>la</strong> voix fonctionne correctement dans untel véhicu<strong>le</strong>.• N<strong>ou</strong>s v<strong>ou</strong>s recommandons <strong>de</strong> rég<strong>le</strong>r initia<strong>le</strong>ment <strong>le</strong> niveau <strong>sur</strong> 8.Rég<strong>le</strong>z <strong>le</strong> niveau d’interruption <strong>de</strong> <strong>la</strong> voix <strong>sur</strong> un niveau supérieur à 8si l’interruption est trop fréquente, <strong>ou</strong> <strong>sur</strong> un niveau inférieur à 8 siel<strong>le</strong> ne l’est pas assez.Rég<strong>la</strong>ge du niveau d’interruption <strong>de</strong> <strong>la</strong> voixd’entrée <strong>de</strong>s enceintesV<strong>ou</strong>s p<strong>ou</strong>vez rég<strong>le</strong>r <strong>le</strong> niveau <strong>de</strong> sortie <strong>de</strong> l’interruption <strong>de</strong> l’entrée <strong>de</strong>senceintes.Désignation du rég<strong>la</strong>ge : FACT SYS MIXVa<strong>le</strong>urs du rég<strong>la</strong>ge : 0 à 15• Ce rég<strong>la</strong>ge peut être effectué si v<strong>ou</strong>s avez sé<strong>le</strong>ctionné INT <strong>ou</strong> BOTH à<strong>la</strong> section « Rég<strong>la</strong>ge du mo<strong>de</strong> d’entrée <strong>de</strong>s enceintes » (page 16).• Si un processeur audio externe est raccordé, effectuez ce rég<strong>la</strong>geaprès avoir réglé GUIDE MIX <strong>sur</strong> ON et GUIDE MIX LV <strong>sur</strong> 15.P<strong>ou</strong>r plus <strong>de</strong> détails, reportez-v<strong>ou</strong>s à <strong>la</strong> section « Rég<strong>la</strong>ge <strong>de</strong>l’interruption <strong>de</strong> <strong>la</strong> navigation/<strong>de</strong> <strong>la</strong> voix d’entrée <strong>de</strong>s enceintes »(page 17) et « Rég<strong>la</strong>ge du volume du guidage vocal » (page 12).Rég<strong>la</strong>ge du type d’interruption <strong>de</strong> <strong>la</strong> voixd’entrée <strong>de</strong>s enceintesCette section v<strong>ou</strong>s explique comment rég<strong>le</strong>r <strong>le</strong> type d’interruption <strong>de</strong> <strong>la</strong>voix d’entrée <strong>de</strong>s enceintes. Si v<strong>ou</strong>s avez réglé <strong>le</strong> guidage vocal <strong>de</strong> façonà ce qu’il soit interrompu, sé<strong>le</strong>ctionnez <strong>la</strong> va<strong>le</strong>ur DEMAND. Si v<strong>ou</strong>savez éga<strong>le</strong>ment réglé <strong>la</strong> voix du téléphone <strong>de</strong> façon à ce qu’el<strong>le</strong> soitinterrompue, sé<strong>le</strong>ctionnez <strong>la</strong> va<strong>le</strong>ur MUTE. Ces va<strong>le</strong>urs sont <strong>le</strong>s va<strong>le</strong>ursrecommandées.Désignation du rég<strong>la</strong>ge : F.SYS MIX TYPVa<strong>le</strong>urs du rég<strong>la</strong>ge : FULL / DEMAND / MUTEFULL : Quel que soit <strong>le</strong> niveau <strong>de</strong> détection <strong>de</strong> l’interruption<strong>de</strong>s enceintes, l’interruption voca<strong>le</strong> et <strong>le</strong> son <strong>de</strong> <strong>la</strong>s<strong>ou</strong>rce sont t<strong>ou</strong>s <strong>de</strong>ux actifs. Si v<strong>ou</strong>s n’enten<strong>de</strong>z pasbien l’interruption voca<strong>le</strong>, rég<strong>le</strong>z <strong>le</strong> volume <strong>de</strong> <strong>la</strong>s<strong>ou</strong>rce <strong>sur</strong> l’appareil <strong>de</strong> comman<strong>de</strong>.DEMAND : Lors <strong>de</strong> l’interruption <strong>de</strong> l’entrée <strong>de</strong>s enceintes, il estpossib<strong>le</strong> que l’interruption voca<strong>le</strong> soit trop é<strong>le</strong>vée <strong>ou</strong>trop faib<strong>le</strong> ; rég<strong>le</strong>z <strong>le</strong> volume <strong>de</strong> <strong>la</strong> s<strong>ou</strong>rce afin quev<strong>ou</strong>s puissiez entendre l’interruption voca<strong>le</strong>. Sil’interruption <strong>de</strong> l’entrée <strong>de</strong>s enceintes ne se produitpas dans <strong>le</strong>s 5 secon<strong>de</strong>s, <strong>le</strong> volume <strong>de</strong> <strong>la</strong> s<strong>ou</strong>rceréglé initia<strong>le</strong>ment est rétabli. Lorsque l’interruption <strong>de</strong>l’entrée <strong>de</strong>s enceintes se produit à n<strong>ou</strong>veau, <strong>le</strong>volume <strong>de</strong> <strong>la</strong> s<strong>ou</strong>rce est automatiquement rétabli auniveau réglé précé<strong>de</strong>mment.MUTE : P<strong>ou</strong>r éviter que l’interruption <strong>de</strong> <strong>la</strong> voix ne soit pasc<strong>la</strong>irement entendue, ce rég<strong>la</strong>ge c<strong>ou</strong>pe <strong>le</strong> son <strong>de</strong> <strong>la</strong>s<strong>ou</strong>rce actuel<strong>le</strong> à chaque interruption <strong>de</strong> l’entrée <strong>de</strong>senceintes. Ce rég<strong>la</strong>ge v<strong>ou</strong>s permet <strong>de</strong> rég<strong>le</strong>r <strong>le</strong>volume à l’ai<strong>de</strong> <strong>de</strong> l’appareil <strong>de</strong> comman<strong>de</strong>, même siv<strong>ou</strong>s n’enten<strong>de</strong>z pas c<strong>la</strong>irement l’interruption voca<strong>le</strong>.Lorsque l’interruption <strong>de</strong> l’entrée <strong>de</strong>s enceintes seproduit, <strong>le</strong>s t<strong>ou</strong>ches <strong>de</strong> l’appareil <strong>de</strong> comman<strong>de</strong>clignotent. <strong>Appuyez</strong> <strong>sur</strong> SOURCE/POWER p<strong>ou</strong>rannu<strong>le</strong>r l’interruption voca<strong>le</strong>.• Le rég<strong>la</strong>ge peut être effectué si v<strong>ou</strong>s sé<strong>le</strong>ctionnez <strong>le</strong>s va<strong>le</strong>urs INT etBOTH à <strong>la</strong> section « Rég<strong>la</strong>ge du mo<strong>de</strong> d’entrée <strong>de</strong>s enceintes »(page 16).Rég<strong>la</strong>ge du canal <strong>de</strong> <strong>la</strong> détection <strong>de</strong>l’interruption <strong>de</strong>s enceintesCe rég<strong>la</strong>ge doit être effectué en fonction <strong>de</strong> <strong>la</strong> sortie <strong>de</strong>s enceintes dusystème du véhicu<strong>le</strong> (navigation/téléphone).Désignation du rég<strong>la</strong>ge : F.SYS INT CH.Va<strong>le</strong>urs du rég<strong>la</strong>ge : L / R / BOTHL : Reproduit <strong>le</strong> son via l’enceinte gauche du système duvéhicu<strong>le</strong>.R : Reproduit <strong>le</strong> son via l’enceinte droite du système duvéhicu<strong>le</strong>.BOTH : Reproduit <strong>le</strong> son via <strong>le</strong>s <strong>de</strong>ux enceintes du système duvéhicu<strong>le</strong>.• Norma<strong>le</strong>ment réglé <strong>sur</strong> BOTH.• Le rég<strong>la</strong>ge peut être effectué si v<strong>ou</strong>s sé<strong>le</strong>ctionnez <strong>le</strong>s va<strong>le</strong>urs INT etBOTH à <strong>la</strong> section « Rég<strong>la</strong>ge du mo<strong>de</strong> d’entrée <strong>de</strong>s enceintes »(page 16).• La voix d’interruption d’entrée <strong>de</strong>s enceintes est reproduite par <strong>le</strong>senceintes droite et gauche, quel que soit <strong>le</strong> rég<strong>la</strong>ge.17-FR
Raccor<strong>de</strong>ment du système <strong>de</strong> navigationSi un système <strong>de</strong> navigation <strong>Alpine</strong> est raccordé, effectuez <strong>le</strong>s rég<strong>la</strong>gesrequis, décrits à <strong>la</strong> section « Rég<strong>la</strong>ge <strong>de</strong> l’interruption <strong>de</strong> <strong>la</strong> navigation/<strong>de</strong> <strong>la</strong> voix d’entrée <strong>de</strong>s enceintes » (page 17). Procé<strong>de</strong>z éga<strong>le</strong>ment auxrég<strong>la</strong>ges ci-<strong>de</strong>ss<strong>ou</strong>s.Rég<strong>la</strong>ge du mo<strong>de</strong> <strong>de</strong> navigationQuand un équipement <strong>de</strong> navigation en option est connecté, rég<strong>le</strong>z cemo<strong>de</strong> <strong>sur</strong> ON.Désignation du rég<strong>la</strong>ge : NAV.Va<strong>le</strong>urs du rég<strong>la</strong>ge : OFF / ONON : La s<strong>ou</strong>rce Navigation est affichée.OFF : La s<strong>ou</strong>rce Navigation n’est pas affichée. Les rég<strong>la</strong>gesre<strong>la</strong>tifs à <strong>la</strong> navigation ne peuvent pas être modifiés àpartir <strong>de</strong> cet équipement.Rég<strong>la</strong>ge du volume <strong>de</strong> l’interruption duson <strong>de</strong> <strong>la</strong> navigationSi un système <strong>de</strong> navigation <strong>Alpine</strong> est raccordé au VPA-B222R, <strong>le</strong> guidagevocal du système <strong>de</strong> navigation est combiné aux sons du DVD <strong>ou</strong> du CD.V<strong>ou</strong>s p<strong>ou</strong>vez rég<strong>le</strong>r <strong>le</strong> niveau sonore du guidage vocal.Désignation du rég<strong>la</strong>ge : NAV. MIX LVVa<strong>le</strong>urs du rég<strong>la</strong>ge : 0 à 15• V<strong>ou</strong>s p<strong>ou</strong>vez effectuer ce rég<strong>la</strong>ge si NAV. est activé. Reportez-v<strong>ou</strong>s à<strong>la</strong> section « Rég<strong>la</strong>ge du mo<strong>de</strong> <strong>de</strong> navigation » (page 18).Raccor<strong>de</strong>ment d’un dispositif d’entréeexterne (AUX)Si un dispositif d’entrée externe est raccordé, effectuez <strong>le</strong>s rég<strong>la</strong>ges suivants.Rég<strong>la</strong>ge du mo<strong>de</strong> AUXDésignation du rég<strong>la</strong>ge : AUX IN-1, 2, 3Va<strong>le</strong>urs du rég<strong>la</strong>ge : OFF / ONOFF : La s<strong>ou</strong>rce AUX n’est pas affichée.ON : La s<strong>ou</strong>rce AUX s’affiche.• Quand OFF est sé<strong>le</strong>ctionné, <strong>le</strong>s rég<strong>la</strong>ges re<strong>la</strong>tifs à <strong>la</strong> s<strong>ou</strong>rce AUX nepeuvent pas être modifiés à partir <strong>de</strong> cet équipement.• AUX IN -3 peut être réglé lorsque <strong>le</strong> boîtier d’expansion externe(VPE-S431) est raccordé.• OFF n’est pas affiché si un <strong>le</strong>cteur <strong>ou</strong> un changeur DVD est raccordéavec l’Ai-NET en option.• Si un <strong>le</strong>cteur <strong>ou</strong> un changeur DVD est connecté à AUX IN 1,l'indication DVD s'affiche à l'écran. Si <strong>le</strong>s <strong>de</strong>ux appareils sontconnectés, l'indication DVD s'affiche p<strong>ou</strong>r AUX IN 1 et DVDCHANGER p<strong>ou</strong>r AUX IN 2.Désignation <strong>de</strong>s appareils externesLorsque plusieurs appareils externes sont connectés, v<strong>ou</strong>s p<strong>ou</strong>vezaffecter un nom à chacun d’eux (3 maximum).Désignation <strong>de</strong>s rég<strong>la</strong>ges : NAMEVa<strong>le</strong>urs du rég<strong>la</strong>ge : AUX / VCR / GAME-1,2 / TV / EXTDVD * / DVB-T• Le rég<strong>la</strong>ge peut être effectué si v<strong>ou</strong>s sé<strong>le</strong>ctionnez <strong>la</strong> va<strong>le</strong>ur ON à <strong>la</strong>section « Rég<strong>la</strong>ge du mo<strong>de</strong> AUX » (page 18).• Le nom <strong>de</strong> <strong>la</strong> s<strong>ou</strong>rce sé<strong>le</strong>ctionnée s’affiche au lieu <strong>de</strong> <strong>la</strong> s<strong>ou</strong>rce AUX.Si v<strong>ou</strong>s sé<strong>le</strong>ctionnez TV/EXT.DVD/DVB-T comme s<strong>ou</strong>rce, l’écran <strong>de</strong>sfonctions <strong>de</strong> <strong>la</strong> s<strong>ou</strong>rce correspondante s’affiche.• Seu<strong>le</strong>ment si un tuner TV <strong>de</strong> marque <strong>Alpine</strong> est connecté, v<strong>ou</strong>s p<strong>ou</strong>vezcomman<strong>de</strong>r <strong>le</strong> gui<strong>de</strong> <strong>de</strong>s fonctions affiché à partir <strong>de</strong> cet appareil.• Si un <strong>le</strong>cteur DVD <strong>ou</strong> un changeur DVD compatib<strong>le</strong> avec Ai-NET estraccordé, <strong>le</strong>s noms sont automatiquement réglés ; v<strong>ou</strong>s ne p<strong>ou</strong>vezcependant pas <strong>le</strong>s modifier.* « EXT.DVD » s'affiche <strong>sur</strong> l'écran <strong>de</strong> sé<strong>le</strong>ction <strong>de</strong> <strong>la</strong> s<strong>ou</strong>rce lorsqueun <strong>le</strong>cteur DVD est connecté; « DVD-1-3 » s'affiche <strong>sur</strong> l'écran <strong>de</strong>sé<strong>le</strong>ction <strong>de</strong> <strong>la</strong> s<strong>ou</strong>rce lorsque <strong>le</strong> rég<strong>la</strong>ge NAME est défini s<strong>ou</strong>s« EXTDVD » dans plus d'un AUX (y compris lorsqu'un <strong>le</strong>cteur DVDcompatib<strong>le</strong> Ai-NET est connecté).Rég<strong>la</strong>ge du niveau sonore <strong>de</strong> l’entréeexterneDésignation du rég<strong>la</strong>ge : LEVELVa<strong>le</strong>urs du rég<strong>la</strong>ge : LOW / HIGHLOW : Réduit <strong>le</strong> niveau sonore <strong>de</strong> l’entrée externe.HIGH : Augmente <strong>le</strong> niveau sonore <strong>de</strong> l’entrée externe.• Ce rég<strong>la</strong>ge est disponib<strong>le</strong> si v<strong>ou</strong>s sé<strong>le</strong>ctionnez <strong>la</strong> va<strong>le</strong>ur ON à <strong>la</strong>section « Rég<strong>la</strong>ge du mo<strong>de</strong> AUX » (page 18).Raccor<strong>de</strong>ment du moniteur arrièreSi <strong>le</strong> moniteur arrière est raccordé, effectuez chacun <strong>de</strong>s rég<strong>la</strong>ges suivants.Rég<strong>la</strong>ge <strong>de</strong> <strong>la</strong> sortie du moniteur externeRég<strong>le</strong>z cette sortie <strong>sur</strong> ON lorsque v<strong>ou</strong>s utilisez <strong>la</strong> fonction moniteurarrière (page 12).Désignation du rég<strong>la</strong>ge : MONITOR OUT-1, 2Va<strong>le</strong>urs du rég<strong>la</strong>ge : OFF / ONON : Quand v<strong>ou</strong>s rég<strong>le</strong>z <strong>le</strong> moniteur externe connecté àl’appareil <strong>sur</strong> ON, v<strong>ou</strong>s p<strong>ou</strong>vez <strong>le</strong> comman<strong>de</strong>r à l’ai<strong>de</strong> <strong>de</strong><strong>la</strong> télécomman<strong>de</strong>.OFF : Si MONITOR-1 <strong>ou</strong> 2 est réglé <strong>sur</strong> OFF, un seul moniteurpeut être réglé par <strong>la</strong> fonction moniteur arrière. SiMONITOR-1 et 2 sont réglés <strong>sur</strong> OFF, <strong>la</strong> fonction moniteurarrière ne peut pas être utilisée.• Ce rég<strong>la</strong>ge peut être effectué si un boîtier d’expansion en option(VPE-S431) est raccordé.Rég<strong>la</strong>ge <strong>de</strong> l’affichage du mo<strong>de</strong>VISUALIZERNotez que ce rég<strong>la</strong>ge est uniquement activé lorsque <strong>le</strong> boîtierd’expansion en option (VPE-S431) est raccordé.Désignation du rég<strong>la</strong>ge : VISUALIZERVa<strong>le</strong>urs du rég<strong>la</strong>ge : MODE-1-MODE-6 / SCAN / OFFMODE-1 àMODE-6 / OFF : Rappel<strong>le</strong> <strong>le</strong> mo<strong>de</strong> <strong>de</strong> rég<strong>la</strong>ge d’origine <strong>sur</strong> <strong>le</strong>boîtier d’expansion (VPE-S431).SCAN : Affiche <strong>la</strong> combinaison <strong>de</strong> MODE-1 à MODE-6<strong>de</strong> façon répétée.• VISUALIZER peut être affiché <strong>sur</strong> <strong>le</strong> moniteur arrière quand ce mo<strong>de</strong>n’est pas réglé <strong>sur</strong> OFF. Rég<strong>le</strong>z <strong>la</strong> s<strong>ou</strong>rce du moniteur arrière <strong>sur</strong>VISUAL. p<strong>ou</strong>r afficher VISUALIZER dans <strong>le</strong> moniteur arrière. P<strong>ou</strong>rplus d’informations <strong>sur</strong> <strong>le</strong> rég<strong>la</strong>ge du moniteur arrière, reportez-v<strong>ou</strong>sà <strong>la</strong> section « Fonction moniteur arrière » (page 12).18-FR
Raccor<strong>de</strong>ment d’un subwooferSi un subwoofer est raccordé, sé<strong>le</strong>ctionnez ON.Mise en et hors service du subwooferDésignation du rég<strong>la</strong>ge : SUBWVa<strong>le</strong>urs du rég<strong>la</strong>ge : ON / OFFON : Active <strong>la</strong> sortie du subwoofer.OFF : Désactive <strong>la</strong> sortie du subwoofer• Si un processeur audio externe est raccordé, reportez-v<strong>ou</strong>s à <strong>la</strong>section « Rég<strong>la</strong>ge <strong>de</strong>s enceintes » (page 32).Rég<strong>la</strong>ge <strong>de</strong> l’appareil <strong>de</strong> comman<strong>de</strong>V<strong>ou</strong>s p<strong>ou</strong>vez rég<strong>le</strong>r <strong>la</strong> c<strong>ou</strong><strong>le</strong>ur, <strong>la</strong> luminosité, etc., <strong>de</strong>s t<strong>ou</strong>ches <strong>de</strong>l’appareil <strong>de</strong> comman<strong>de</strong> f<strong>ou</strong>rni avec cet appareil.Rég<strong>la</strong>ge <strong>de</strong> <strong>la</strong> c<strong>ou</strong><strong>le</strong>ur d’illumination <strong>de</strong>st<strong>ou</strong>ches <strong>de</strong> l’appareil <strong>de</strong> comman<strong>de</strong>V<strong>ou</strong>s p<strong>ou</strong>vez rég<strong>le</strong>r <strong>la</strong> c<strong>ou</strong><strong>le</strong>ur d’illumination <strong>de</strong>s t<strong>ou</strong>ches <strong>de</strong> l’appareil<strong>de</strong> comman<strong>de</strong>.Désignation du rég<strong>la</strong>ge : ILLUM COLORVa<strong>le</strong>urs du rég<strong>la</strong>ge : BLUE / REDBLUE : Lorsqu’une s<strong>ou</strong>rce autre que <strong>le</strong> système <strong>de</strong> navigationest activée, l’illumination est b<strong>le</strong>ue. Lorsque <strong>le</strong> système<strong>de</strong> navigation est activé, l’illumination est r<strong>ou</strong>ge.RED : Lorsqu’une s<strong>ou</strong>rce autre que <strong>le</strong> système <strong>de</strong> navigationest activée, l’illumination est r<strong>ou</strong>ge. Lorsque <strong>le</strong> système<strong>de</strong> navigation est activé, l’illumination est b<strong>le</strong>ue.Activation et désactivation <strong>de</strong> l’illumination<strong>de</strong>s t<strong>ou</strong>ches <strong>de</strong> l’appareil <strong>de</strong> comman<strong>de</strong>V<strong>ou</strong>s p<strong>ou</strong>vez rég<strong>le</strong>r <strong>le</strong>s t<strong>ou</strong>ches <strong>de</strong> l’appareil <strong>de</strong> comman<strong>de</strong> <strong>de</strong> façon à cequ’el<strong>le</strong>s restent allumées <strong>ou</strong> qu’el<strong>le</strong>s clignotent lorsque aucuneopération n’est effectuée dans <strong>le</strong>s 5 minutes.Désignation du rég<strong>la</strong>ge : CMNDR LIGHT.Va<strong>le</strong>urs du rég<strong>la</strong>ge : ON / OFFON : Les t<strong>ou</strong>ches <strong>de</strong> l’appareil <strong>de</strong> comman<strong>de</strong> clignotent.OFF : Les t<strong>ou</strong>ches <strong>de</strong> l’appareil <strong>de</strong> comman<strong>de</strong> <strong>de</strong>meurentallumées (ne clignotent pas).Rég<strong>la</strong>ge <strong>de</strong> <strong>la</strong> luminosité <strong>de</strong>s t<strong>ou</strong>ches <strong>de</strong>l’appareil <strong>de</strong> comman<strong>de</strong>Si v<strong>ou</strong>s sé<strong>le</strong>ctionnez <strong>la</strong> va<strong>le</strong>ur AUTO, l’illumination <strong>de</strong>s t<strong>ou</strong>ches <strong>de</strong>l’appareil <strong>de</strong> comman<strong>de</strong> s’atténue lorsque <strong>le</strong>s phares sont allumés. N<strong>ou</strong>sv<strong>ou</strong>s recommandons <strong>de</strong> sé<strong>le</strong>ctionner cette va<strong>le</strong>ur <strong>de</strong> rég<strong>la</strong>ge <strong>la</strong> nuit sil’illumination <strong>de</strong>s t<strong>ou</strong>ches <strong>de</strong> l’appareil <strong>de</strong> comman<strong>de</strong> est trop vive.Désignation du rég<strong>la</strong>ge : DIMMERVa<strong>le</strong>urs du rég<strong>la</strong>ge : OFF / ON / AUTOOFF : La luminosité <strong>de</strong> l’illumination <strong>de</strong>s t<strong>ou</strong>ches <strong>de</strong> l’appareil<strong>de</strong> comman<strong>de</strong> est au maximum.ON : Permet <strong>de</strong> réduire <strong>la</strong> luminosité <strong>de</strong> l’illumination <strong>de</strong>st<strong>ou</strong>ches <strong>de</strong> l’appareil <strong>de</strong> comman<strong>de</strong>.AUTO : L’illumination <strong>de</strong>s t<strong>ou</strong>ches <strong>de</strong> l’appareil <strong>de</strong> comman<strong>de</strong>s’atténue lorsque <strong>le</strong>s phares sont allumés.Autres rég<strong>la</strong>gesRég<strong>la</strong>ge du mo<strong>de</strong> d’interruption <strong>de</strong>l’appareil externeSi une borne <strong>de</strong> liaison universel<strong>le</strong> (Versati<strong>le</strong> Link Terminal) d’<strong>Alpine</strong>(KCA-410C) est raccordée au VPA-B222R, une s<strong>ou</strong>rce auxiliaire peutinterrompre <strong>la</strong> s<strong>ou</strong>rce audio en c<strong>ou</strong>rs. V<strong>ou</strong>s p<strong>ou</strong>vez par exemp<strong>le</strong>brancher un <strong>le</strong>cteur MP3 <strong>sur</strong> <strong>le</strong> système audio <strong>de</strong> votre véhicu<strong>le</strong>, mêmesi un changeur CD est raccordé et fonctionne. Le changeur CD s’arrêteautomatiquement lorsqu’il est commuté à l’entrée AUX. P<strong>ou</strong>r <strong>de</strong> plusamp<strong>le</strong>s informations concernant l’utilisation du KCA-410C d’<strong>Alpine</strong>,contactez votre reven<strong>de</strong>ur <strong>Alpine</strong> agréé.Désignation du rég<strong>la</strong>ge : IN-INT MUTEVa<strong>le</strong>urs du rég<strong>la</strong>ge : OFF / ONOFF : Le son est reproduit en mo<strong>de</strong> d’interruption.ON : Le son n’est pas reproduit en mo<strong>de</strong> d’interruption.• P<strong>ou</strong>r que cette fonction soit automatique, l’appareil auxiliaireconnecté doit avoir un fil d’interruption équipé d’un déc<strong>le</strong>ncheurnégatif. Sinon, un interrupteur séparé doit être installé p<strong>ou</strong>r activer/désactiver manuel<strong>le</strong>ment cette fonction.Rég<strong>la</strong>ge <strong>de</strong> <strong>la</strong> position <strong>de</strong> l’affichageSelon <strong>le</strong> moniteur raccordé, il est possib<strong>le</strong> <strong>de</strong> changer <strong>la</strong> position <strong>de</strong>l’affichage. Lorsque v<strong>ou</strong>s utilisez <strong>le</strong> panneau tacti<strong>le</strong>, si l’affichage <strong>de</strong>l’écran à cristaux liqui<strong>de</strong> et l’affichage du panneau tacti<strong>le</strong> necorrespon<strong>de</strong>nt pas, rég<strong>le</strong>z <strong>la</strong> position <strong>de</strong> l’affichage.Désignation du rég<strong>la</strong>ge : SCREEN ADJVa<strong>le</strong>urs du rég<strong>la</strong>ge :Rég<strong>la</strong>ge en cas <strong>de</strong> raccor<strong>de</strong>ment d’un moniteur à panneau tacti<strong>le</strong>non compatib<strong>le</strong>.V<strong>ou</strong>s p<strong>ou</strong>vez rég<strong>le</strong>r <strong>la</strong> position <strong>de</strong> l’écran <strong>sur</strong> <strong>le</strong> moniteur. La positionest réglée à l’ai<strong>de</strong> <strong>de</strong> l’appareil <strong>de</strong> comman<strong>de</strong>.1 En mo<strong>de</strong> SCREEN ADJ, appuyez <strong>sur</strong> <strong>le</strong> <strong>b<strong>ou</strong>ton</strong> droit <strong>de</strong> <strong>la</strong>comman<strong>de</strong> multidirectionnel<strong>le</strong>.L’écran <strong>de</strong> rég<strong>la</strong>ge s’affiche.2 <strong>Appuyez</strong> <strong>sur</strong> <strong>le</strong> <strong>b<strong>ou</strong>ton</strong> supérieur, inférieur, gauche <strong>ou</strong>droit <strong>de</strong> <strong>la</strong> comman<strong>de</strong> multidirectionnel<strong>le</strong> p<strong>ou</strong>r rég<strong>le</strong>r <strong>la</strong>position d’affichage.3 <strong>Appuyez</strong> <strong>sur</strong> / /ENTER.Le rég<strong>la</strong>ge est terminé et l’affichage revient à l’écran <strong>de</strong><strong>la</strong> s<strong>ou</strong>rce principa<strong>le</strong>.Rég<strong>la</strong>ge en cas <strong>de</strong> raccor<strong>de</strong>ment d’un moniteur à panneau tacti<strong>le</strong>compatib<strong>le</strong>.V<strong>ou</strong>s p<strong>ou</strong>vez rég<strong>le</strong>r <strong>la</strong> position <strong>de</strong> l’écran et <strong>de</strong>s t<strong>ou</strong>ches tacti<strong>le</strong>s <strong>sur</strong><strong>le</strong> moniteur. La position est réglée à l’ai<strong>de</strong> <strong>de</strong>s t<strong>ou</strong>ches tacti<strong>le</strong>s.1 <strong>Appuyez</strong> <strong>sur</strong> [ ] s<strong>ou</strong>s SCREEN ADJ.2 <strong>Appuyez</strong> <strong>sur</strong> [ ], [ ], [ ] <strong>ou</strong> [ ] p<strong>ou</strong>r rég<strong>le</strong>r <strong>la</strong> positiond’affichage, puis appuyez <strong>sur</strong> [ENT].L’écran TOUCH LOCATE s’affiche.3 <strong>Appuyez</strong> <strong>sur</strong> <strong>le</strong> centre du symbo<strong>le</strong> affiché en bas àgauche <strong>de</strong> l’écran.L’écran bascu<strong>le</strong> <strong>sur</strong> l’écran <strong>de</strong> rég<strong>la</strong>ge.4 <strong>Appuyez</strong> <strong>sur</strong> <strong>le</strong> centre du symbo<strong>le</strong> affiché en haut àdroite <strong>de</strong> l’écran, puis appuyez <strong>sur</strong> [ENT].Le rég<strong>la</strong>ge est terminé et l’affichage revient à l’écran <strong>de</strong><strong>la</strong> s<strong>ou</strong>rce principa<strong>le</strong>.19-FR
Utilisation duCD/MP3/WMA(en option)Exemp<strong>le</strong> d’affichage <strong>de</strong> l’écran principal MP3/WMAComman<strong>de</strong>multidirectionnel<strong>le</strong>Recherche rapi<strong>de</strong> vers l’arrière :<strong>Appuyez</strong> <strong>sur</strong> <strong>la</strong> t<strong>ou</strong>che et maintenez-<strong>la</strong> enfoncée.Avance jusqu’au début <strong>de</strong> <strong>la</strong> piste suivante :<strong>Appuyez</strong> <strong>sur</strong> .Recherche rapi<strong>de</strong> vers l’avant :<strong>Appuyez</strong> <strong>sur</strong> <strong>la</strong> t<strong>ou</strong>che et maintenez-<strong>la</strong> enfoncée.6 P<strong>ou</strong>r interrompre <strong>la</strong> <strong>le</strong>cture (mo<strong>de</strong> pause), appuyez<strong>sur</strong> / /ENTER.<strong>Appuyez</strong> à n<strong>ou</strong>veau <strong>sur</strong> / /ENTER p<strong>ou</strong>r reprendre <strong>la</strong><strong>le</strong>cture.• Les informations <strong>sur</strong> <strong>la</strong> <strong>le</strong>cture du CD (nº <strong>de</strong> piste, texte, etc.)s’affichent <strong>sur</strong> <strong>le</strong> moniteur lors <strong>de</strong> <strong>la</strong> <strong>le</strong>cture.• Les informations <strong>sur</strong> <strong>la</strong> <strong>le</strong>cture du MP3/WMA (nº <strong>de</strong> dossier, nº <strong>de</strong>fichier, informations tag, etc.) s’affichent <strong>sur</strong> <strong>le</strong> moniteur lors <strong>de</strong> <strong>la</strong><strong>le</strong>cture.• « NO SUPPORT » s’affiche si <strong>le</strong>s informations <strong>de</strong> texte ne sont pascompatib<strong>le</strong>s avec <strong>le</strong> VPA-B222R.• V<strong>ou</strong>s p<strong>ou</strong>vez comman<strong>de</strong>r <strong>le</strong> changeur DVD (en option), t<strong>ou</strong>t comme<strong>le</strong> changeur CD.Sé<strong>le</strong>ction du multi-changeurGrâce au KCA-410C (borne <strong>de</strong> liaison universel<strong>le</strong>), v<strong>ou</strong>s p<strong>ou</strong>vezraccor<strong>de</strong>r <strong>de</strong>ux changeurs.1 <strong>Appuyez</strong> <strong>sur</strong> /MENU/FUNC. pendant au moins2 secon<strong>de</strong>s.L’écran FUNCTION s’affiche.2 <strong>Appuyez</strong> <strong>sur</strong> <strong>le</strong> <strong>b<strong>ou</strong>ton</strong> supérieur <strong>ou</strong> inférieur <strong>de</strong> <strong>la</strong>comman<strong>de</strong> multifonctionnel<strong>le</strong> p<strong>ou</strong>r sé<strong>le</strong>ctionnerCHG SEL. <strong>Appuyez</strong> ensuite <strong>sur</strong> / /ENTER p<strong>ou</strong>rsé<strong>le</strong>ctionner <strong>le</strong> changeur suivant (changeurs CDconnectés uniquement).Affichage du numéro <strong>de</strong> disqueAffichage du numéro <strong>de</strong> dossierAffichage du numéro <strong>de</strong> fichierLecture du CD/MP3/WMA1 <strong>Appuyez</strong> <strong>sur</strong> SOURCE/POWER.L’écran <strong>de</strong> sé<strong>le</strong>ction <strong>de</strong> <strong>la</strong> s<strong>ou</strong>rce s’affiche.2 <strong>Appuyez</strong> <strong>sur</strong> <strong>le</strong> <strong>b<strong>ou</strong>ton</strong> supérieur <strong>ou</strong> inférieur <strong>de</strong> <strong>la</strong>comman<strong>de</strong> multidirectionnel<strong>le</strong> p<strong>ou</strong>rsé<strong>le</strong>ctionner <strong>le</strong> mo<strong>de</strong> CD/MP3/WMA (CD CHANGER,etc.), puis appuyez <strong>sur</strong> / /ENTER.3 <strong>Appuyez</strong> <strong>sur</strong> <strong>ou</strong> pendant au moins 2 secon<strong>de</strong>sp<strong>ou</strong>r sé<strong>le</strong>ctionner un disque (si un changeur estraccordé).4 Lors <strong>de</strong> <strong>le</strong>cture <strong>de</strong> fichiers MP3/WMA. <strong>Appuyez</strong> <strong>sur</strong><strong>ou</strong> p<strong>ou</strong>r sé<strong>le</strong>ctionner <strong>le</strong> dossier <strong>de</strong> votre choix.5 <strong>Appuyez</strong> <strong>sur</strong> <strong>ou</strong> p<strong>ou</strong>r sé<strong>le</strong>ctionner <strong>la</strong> piste<strong>de</strong> votre choix.Ret<strong>ou</strong>r au début <strong>de</strong> <strong>la</strong> piste en c<strong>ou</strong>rs :<strong>Appuyez</strong> <strong>sur</strong> .Recherche <strong>de</strong> dossier <strong>ou</strong> <strong>de</strong> fichierV<strong>ou</strong>s p<strong>ou</strong>vez afficher <strong>le</strong>s noms <strong>de</strong> dossiers <strong>ou</strong> <strong>de</strong> fichiers et rechercherun dossier <strong>ou</strong> un fichier à lire.1 <strong>Appuyez</strong> <strong>sur</strong> /MENU/FUNC. pendant <strong>la</strong> <strong>le</strong>cture.La liste <strong>de</strong>s noms <strong>de</strong> dossiers s’affiche.2 <strong>Appuyez</strong> <strong>sur</strong> <strong>le</strong> <strong>b<strong>ou</strong>ton</strong> supérieur <strong>ou</strong> inférieur <strong>de</strong> <strong>la</strong>comman<strong>de</strong> multidirectionnel<strong>le</strong> p<strong>ou</strong>rsé<strong>le</strong>ctionner <strong>le</strong> dossier <strong>de</strong> votre choix.3 <strong>Appuyez</strong> <strong>sur</strong> / /ENTER p<strong>ou</strong>r lire <strong>le</strong> premierfichier du dossier sé<strong>le</strong>ctionné.P<strong>ou</strong>r rechercher un fichier dans <strong>le</strong> dossier sé<strong>le</strong>ctionné1 Après avoir sé<strong>le</strong>ctionné <strong>le</strong> dossier à l’étape 2, appuyez<strong>sur</strong> <strong>le</strong> <strong>b<strong>ou</strong>ton</strong> droit <strong>de</strong> <strong>la</strong> comman<strong>de</strong> multidirectionnel<strong>le</strong>p<strong>ou</strong>r modifier <strong>le</strong> mo<strong>de</strong> <strong>de</strong> recherche <strong>de</strong> fichiers dudossier sé<strong>le</strong>ctionné.• S’il existe une liste <strong>de</strong>s noms <strong>de</strong> fichiers dans <strong>le</strong> dossier, s’affiche.2 <strong>Appuyez</strong> <strong>sur</strong> <strong>le</strong> <strong>b<strong>ou</strong>ton</strong> supérieur <strong>ou</strong> inférieur <strong>de</strong> <strong>la</strong>comman<strong>de</strong> multidirectionnel<strong>le</strong> p<strong>ou</strong>r sé<strong>le</strong>ctionner unfichier, puis appuyez <strong>sur</strong> / /ENTER.Le fichier sé<strong>le</strong>ctionné est lu.• <strong>Appuyez</strong> <strong>sur</strong> TA/RTN/SETUP p<strong>ou</strong>r revenir à l’écran précé<strong>de</strong>nt.• La recherche par nom <strong>de</strong> dossier <strong>ou</strong> par nom <strong>de</strong> fichier est impossib<strong>le</strong>lors <strong>de</strong> <strong>la</strong> <strong>le</strong>cture aléatoire (mo<strong>de</strong> M.I.X.).• « ROOT » s’affiche si <strong>le</strong> dossier racine ne possè<strong>de</strong> aucun nom <strong>de</strong>dossier.20-FR
M.I.X. (<strong>le</strong>cture aléatoire)1 <strong>Appuyez</strong> <strong>sur</strong> /MENU/FUNC. pendant au moins2 secon<strong>de</strong>s.L’écran FUNCTION s’affiche.2 <strong>Appuyez</strong> <strong>sur</strong> <strong>le</strong> <strong>b<strong>ou</strong>ton</strong> supérieur <strong>ou</strong> inférieur <strong>de</strong> <strong>la</strong>comman<strong>de</strong> multidirectionnel<strong>le</strong> p<strong>ou</strong>rsé<strong>le</strong>ctionner M.I.X..Lecture répétitive1 <strong>Appuyez</strong> <strong>sur</strong> /MENU/FUNC. pendant au moins2 secon<strong>de</strong>s.L’écran FUNCTION s’affiche.2 <strong>Appuyez</strong> <strong>sur</strong> <strong>le</strong> <strong>b<strong>ou</strong>ton</strong> supérieur <strong>ou</strong> inférieur <strong>de</strong> <strong>la</strong>comman<strong>de</strong> multidirectionnel<strong>le</strong> p<strong>ou</strong>rsé<strong>le</strong>ctionner REPEAT.Lorsque M.I.X.est affiché (changeur connecté)3 <strong>Appuyez</strong> <strong>sur</strong> <strong>le</strong> <strong>b<strong>ou</strong>ton</strong> droit <strong>de</strong> <strong>la</strong> comman<strong>de</strong>multifonctionnel<strong>le</strong>.4 <strong>Appuyez</strong> <strong>sur</strong> <strong>le</strong> <strong>b<strong>ou</strong>ton</strong> supérieur <strong>ou</strong> inférieur <strong>de</strong> <strong>la</strong>comman<strong>de</strong> multifonctionnel<strong>le</strong> p<strong>ou</strong>r sé<strong>le</strong>ctionner<strong>le</strong> mo<strong>de</strong> M.I.X., puis appuyez <strong>sur</strong> / /ENTER.Lorsque REPEATest affiché (changeur connecté)Mo<strong>de</strong> CD :M.I.X. : Les pistes sont lues dans un ordre aléatoire.M.I.X. ALL : Les pistes <strong>de</strong> t<strong>ou</strong>s <strong>le</strong>s CD contenus dans <strong>le</strong>magasin sont prises en compte p<strong>ou</strong>r <strong>la</strong> <strong>le</strong>cturealéatoire.OFF : Mo<strong>de</strong> M.I.X. désactivé.* Si un changeur CD muni <strong>de</strong> <strong>la</strong> fonction All M.I.X. est raccordé.Mo<strong>de</strong> MP3/WMA :M.I.X. FLD : Seuls <strong>le</strong>s fichiers d’un dossier sont lus dans unordre aléatoire.M.I.X. : T<strong>ou</strong>s <strong>le</strong>s fichiers d’un disque sont lus dans un ordrealéatoire, puis <strong>la</strong> <strong>le</strong>cture passe au disque suivant.OFF : Mo<strong>de</strong> M.I.X. désactivé.Lorsque M.I.X. est affiché3 <strong>Appuyez</strong> <strong>sur</strong> / /ENTER.Le mo<strong>de</strong> M.I.X. est modifié.Mo<strong>de</strong> CD :M.I.X. OFF M.I.X.Mo<strong>de</strong> MP3/WMA :M.I.X. FLD M.I.X. OFF M.I.X. FLD3 <strong>Appuyez</strong> <strong>sur</strong> <strong>le</strong> <strong>b<strong>ou</strong>ton</strong> droit <strong>de</strong> <strong>la</strong> comman<strong>de</strong>multifonctionnel<strong>le</strong>.4 <strong>Appuyez</strong> <strong>sur</strong> <strong>le</strong> <strong>b<strong>ou</strong>ton</strong> supérieur <strong>ou</strong> inférieur <strong>de</strong> <strong>la</strong>comman<strong>de</strong> multifonctionnel<strong>le</strong> p<strong>ou</strong>r sé<strong>le</strong>ctionner<strong>le</strong> mo<strong>de</strong> REPEAT, puis appuyez <strong>sur</strong> / /ENTER.Mo<strong>de</strong> CD :RPT : Seu<strong>le</strong> une piste est lue à plusieurs reprises.RPT DISC : Un disque est lu à plusieurs reprises.OFF : Mo<strong>de</strong> <strong>de</strong> <strong>le</strong>cture répétitive désactivé.Mo<strong>de</strong> MP3/WMA :RPT :RPT FLD :Seul un fichier est lu à plusieurs reprises.Seuls <strong>le</strong>s fichiers d’un dossier sont lus à plusieursreprises.RPT DISC : Un disque est lu à plusieurs reprises.OFF : Mo<strong>de</strong> <strong>de</strong> <strong>le</strong>cture répétitive désactivé.Lorsque REPEAT est affiché3 <strong>Appuyez</strong> <strong>sur</strong> / /ENTER.Le mo<strong>de</strong> <strong>de</strong> <strong>le</strong>cture répétitive est modifié.Mo<strong>de</strong> CD :RPT OFF RPTMo<strong>de</strong> MP3/WMA :RPT RPT FLD OFF RPT21-FR
Utilisation d’unDVD/CD vidéo(en option)Comman<strong>de</strong>multidirectionnel<strong>le</strong>Exemp<strong>le</strong> d’affichage <strong>de</strong> l’écran principal <strong>de</strong>s fonctions du DVDP<strong>ou</strong>r afficher l’écran du mo<strong>de</strong> DVD• Si v<strong>ou</strong>s essayez d’activer l’appareil auxiliaire pendant que v<strong>ou</strong>sconduisez, l’avertissement -PICTURE OFF FOR YOUR SAFETYs’affiche.Attention• T<strong>ou</strong>tes <strong>le</strong>s fonctions ne sont pas accessib<strong>le</strong>s avecchaque DVD. P<strong>ou</strong>r plus d’informations <strong>sur</strong> <strong>le</strong>sfonctions prises en charge, consultez <strong>le</strong>sinstructions <strong>de</strong> chaque DVD.• Si v<strong>ou</strong>s tentez d’exécuter une opération non vali<strong>de</strong>(selon <strong>le</strong> type <strong>de</strong> disque lu), <strong>le</strong> symbo<strong>le</strong> suivantapparaît <strong>sur</strong> l’écran du moniteur :1 <strong>Appuyez</strong> <strong>sur</strong> SOURCE/POWER.L’écran <strong>de</strong> sé<strong>le</strong>ction <strong>de</strong> <strong>la</strong> s<strong>ou</strong>rce s’affiche.2 <strong>Appuyez</strong> <strong>sur</strong> <strong>le</strong> <strong>b<strong>ou</strong>ton</strong> supérieur <strong>ou</strong> inférieur <strong>de</strong> <strong>la</strong>comman<strong>de</strong> multifonctionnel<strong>le</strong> p<strong>ou</strong>r sé<strong>le</strong>ctionner<strong>le</strong> mo<strong>de</strong> DVD (EXT.DVD, DVD CHANGER, etc.), puisappuyez <strong>sur</strong> / /ENTER.La <strong>le</strong>cture commence.Si un écran <strong>de</strong> menu s’afficheDes écrans <strong>de</strong> menu peuvent s’afficher automatiquement avec <strong>de</strong>s DVDet <strong>de</strong>s CD vidéo qui possè<strong>de</strong>nt une comman<strong>de</strong> <strong>de</strong> <strong>le</strong>cture (PBC). V<strong>ou</strong>sp<strong>ou</strong>vez comman<strong>de</strong>r <strong>le</strong> menu du DVD à l’ai<strong>de</strong> <strong>de</strong> l’appareil <strong>de</strong>comman<strong>de</strong> f<strong>ou</strong>rni avec cet appareil. Dans ce cas, exécutez <strong>la</strong> procédureci-<strong>de</strong>ss<strong>ou</strong>s p<strong>ou</strong>r commencer <strong>la</strong> <strong>le</strong>cture.Lecture <strong>de</strong> DVD/CD vidéoL’appareil <strong>de</strong> comman<strong>de</strong> f<strong>ou</strong>rni avec cet appareil v<strong>ou</strong>s permet <strong>de</strong>comman<strong>de</strong>r un <strong>le</strong>cteur/changeur DVD <strong>Alpine</strong>. Reportez-v<strong>ou</strong>s au Mo<strong>de</strong>d’emploi du <strong>le</strong>cteur <strong>ou</strong> du changeur DVD raccordé.Il est possib<strong>le</strong> que certaines fonctions <strong>de</strong> l’appareil <strong>de</strong> comman<strong>de</strong> nesoient pas reconnues par <strong>le</strong> <strong>le</strong>cteur/changeur DVD <strong>Alpine</strong>. Ce<strong>la</strong> dépenddu disque. Si l’appareil <strong>de</strong> comman<strong>de</strong> f<strong>ou</strong>rni avec <strong>le</strong> VPA-B222R necomman<strong>de</strong> pas une fonction particulière du DVD en c<strong>ou</strong>rs <strong>de</strong> <strong>le</strong>cture,utilisez <strong>la</strong> télécomman<strong>de</strong> f<strong>ou</strong>rnie avec <strong>le</strong> <strong>le</strong>cteur DVD.AVERTISSEMENTRegar<strong>de</strong>r <strong>le</strong> téléviseur, <strong>la</strong> vidéo <strong>ou</strong> <strong>le</strong> DVD pendant <strong>la</strong>conduite d’un véhicu<strong>le</strong> s’avère dangereux p<strong>ou</strong>r <strong>le</strong>conducteur. Le conducteur qui n’est plus concentré<strong>sur</strong> <strong>la</strong> r<strong>ou</strong>te peut provoquer un acci<strong>de</strong>nt.<strong>Appuyez</strong> <strong>sur</strong> <strong>le</strong> <strong>b<strong>ou</strong>ton</strong> supérieur, inférieur, gauche <strong>ou</strong>droit <strong>de</strong> <strong>la</strong> comman<strong>de</strong> multidirectionnel<strong>le</strong> p<strong>ou</strong>rsé<strong>le</strong>ctionner un élément, puis appuyez <strong>sur</strong> / /ENTERpendant au moins 2 secon<strong>de</strong>s.• <strong>Appuyez</strong> <strong>sur</strong> TA/RTN/SETUP p<strong>ou</strong>r revenir à l’écran précé<strong>de</strong>nt.• V<strong>ou</strong>s ne p<strong>ou</strong>vez comman<strong>de</strong>r l’écran du menu CD Vidéo à l’ai<strong>de</strong> <strong>de</strong>l’appareil <strong>de</strong> comman<strong>de</strong> f<strong>ou</strong>rni avec cet appareil.• Selon <strong>le</strong> disque, il est possib<strong>le</strong> que l’écran FUNCTION rappel<strong>le</strong>l’écran du menu. Sé<strong>le</strong>ctionnez MENU <strong>sur</strong> l’écran FUNCTION, puisappuyez <strong>sur</strong> / /ENTER p<strong>ou</strong>r rappe<strong>le</strong>r <strong>le</strong> menu après avoirappuyé <strong>sur</strong> /MENU/FUNC. pendant au moins 2 secon<strong>de</strong>s.Lecture d’arrêts <strong>sur</strong> image (pauses)1 Pendant <strong>la</strong> <strong>le</strong>cture, appuyez <strong>sur</strong> / /ENTER.2 <strong>Appuyez</strong> à n<strong>ou</strong>veau <strong>sur</strong> / /ENTER p<strong>ou</strong>rreprendre <strong>la</strong> <strong>le</strong>cture.Instal<strong>le</strong>z correctement <strong>le</strong> VPA-B222R <strong>de</strong> façon à ceque <strong>le</strong> conducteur ne puisse pas regar<strong>de</strong>r <strong>le</strong> DVD, <strong>le</strong>téléviseur <strong>ou</strong> <strong>la</strong> vidéo tant que <strong>le</strong> véhicu<strong>le</strong> n’est pas àl’arrêt et que <strong>le</strong> frein à main n’est pas actionné.Si <strong>le</strong> VPA-B222R n’est pas correctement installé, <strong>le</strong>conducteur sera tenté <strong>de</strong> regar<strong>de</strong>r <strong>le</strong> DVD, <strong>le</strong>téléviseur <strong>ou</strong> <strong>la</strong> vidéo lors <strong>de</strong> <strong>la</strong> conduite et s’il n’estpas concentré <strong>sur</strong> <strong>la</strong> r<strong>ou</strong>te, il peut provoquer unacci<strong>de</strong>nt. Le conducteur ainsi que d’autres personnesrisquent d’être b<strong>le</strong>ssés.22-FR
Recherche du début d’un chapitre <strong>ou</strong>d’une pistePendant <strong>la</strong> <strong>le</strong>cture, appuyez <strong>sur</strong> <strong>ou</strong> .Le chapitre <strong>ou</strong> <strong>la</strong> piste change chaque fois que v<strong>ou</strong>s appuyez<strong>sur</strong> cette t<strong>ou</strong>che et <strong>la</strong> <strong>le</strong>cture <strong>de</strong> <strong>la</strong> piste <strong>ou</strong> du chapitresé<strong>le</strong>ctionné commence.: <strong>Appuyez</strong> <strong>sur</strong> cette t<strong>ou</strong>che p<strong>ou</strong>r commencer <strong>la</strong> <strong>le</strong>ctureau début du chapitre <strong>ou</strong> <strong>la</strong> piste suivante.: <strong>Appuyez</strong> <strong>sur</strong> cette t<strong>ou</strong>che p<strong>ou</strong>r commencer <strong>la</strong> <strong>le</strong>ctureau début du chapitre <strong>ou</strong> <strong>la</strong> piste en c<strong>ou</strong>rs.• Certains DVD ne possè<strong>de</strong>nt pas <strong>de</strong> chapitres.Informations complémentairesLes « Chapitres » désignent <strong>de</strong>s parties <strong>de</strong> films <strong>ou</strong> <strong>de</strong>ssé<strong>le</strong>ctions musica<strong>le</strong>s <strong>sur</strong> <strong>de</strong>s DVD.Les « Pistes » désignent <strong>de</strong>s parties <strong>de</strong> films <strong>ou</strong> <strong>de</strong>ssé<strong>le</strong>ctions musica<strong>le</strong>s <strong>sur</strong> <strong>de</strong>s CD vidéo et audio.Recherche rapi<strong>de</strong> vers l’avant <strong>ou</strong> versl’arrière1 Pendant <strong>la</strong> <strong>le</strong>cture, appuyez <strong>sur</strong> (rechercherapi<strong>de</strong> vers l’avant) <strong>ou</strong> <strong>sur</strong> (recherche rapi<strong>de</strong>vers l’arrière).2 Relâchez <strong>la</strong> t<strong>ou</strong>che <strong>ou</strong> p<strong>ou</strong>r revenir aumo<strong>de</strong> <strong>de</strong> <strong>le</strong>cture norma<strong>le</strong>.Affichage <strong>de</strong> l’écran du menu principal(DVD seu<strong>le</strong>ment)Si un DVD contient <strong>de</strong>ux titres <strong>ou</strong> plus, l’écran <strong>de</strong> menu principals’affiche.<strong>Appuyez</strong> <strong>sur</strong> /MENU/FUNC. <strong>sur</strong> l’écran principal dumo<strong>de</strong> DVD.L’écran <strong>de</strong> menu s’affiche.• P<strong>ou</strong>r effectuer <strong>le</strong>s opérations nécessaires, reportez-v<strong>ou</strong>s à <strong>la</strong> section« Si un écran <strong>de</strong> menu s’affiche » à <strong>la</strong> page 22.Changement <strong>de</strong> disques (seu<strong>le</strong>ment siun changeur DVD est raccordé)<strong>Appuyez</strong> <strong>sur</strong> <strong>ou</strong> pendant au moins 2 secon<strong>de</strong>s.Le disque sé<strong>le</strong>ctionné est lu.• Sé<strong>le</strong>ctionnez DISC SELECT <strong>sur</strong> l’écran FUNCTION, puis appuyez<strong>sur</strong> / /ENTER p<strong>ou</strong>r changer <strong>de</strong> disque après avoir appuyé <strong>sur</strong>/MENU/FUNC. pendant au moins 2 secon<strong>de</strong>s.Arrêt <strong>de</strong> <strong>la</strong> <strong>le</strong>cture (PRE STOP)Sé<strong>le</strong>ctionnez PRE STOP en c<strong>ou</strong>rs <strong>de</strong> <strong>le</strong>cture p<strong>ou</strong>r arrêter cel<strong>le</strong>-ci. Cetteposition est mémorisée.1 Pendant <strong>la</strong> <strong>le</strong>cture, appuyez <strong>sur</strong> /MENU/FUNC.pendant au moins 2 secon<strong>de</strong>s.L’écran FUNCTION s’affiche.2 <strong>Appuyez</strong> <strong>sur</strong> <strong>le</strong> <strong>b<strong>ou</strong>ton</strong> supérieur <strong>ou</strong> inférieur <strong>de</strong> <strong>la</strong>comman<strong>de</strong> multidirectionnel<strong>le</strong> p<strong>ou</strong>rsé<strong>le</strong>ctionner STOP/PRE STOP, puis appuyez <strong>sur</strong>/ /ENTER.L’indication « PRE STOP » s’affiche.3 En mo<strong>de</strong> PRE STOP, appuyez <strong>sur</strong> / /ENTER.La <strong>le</strong>cture reprend à partir <strong>de</strong> l’endroit où el<strong>le</strong> a été arrêtée.• Sur certains disques, <strong>la</strong> position à <strong>la</strong>quel<strong>le</strong> <strong>la</strong> <strong>le</strong>cture a été arrêtéepeut ne pas être précise.• Lorsqu’un <strong>le</strong>cteur DVD <strong>ou</strong> un changeur DVD Ai-NET est raccordé àl’ai<strong>de</strong> d’Ai-NET, STOP/PRE STOP n’est pas affiché <strong>sur</strong> l’écranFUNCTION en mo<strong>de</strong> CD vidéo.Arrêt <strong>de</strong> <strong>la</strong> <strong>le</strong>cture1 En mo<strong>de</strong> PRE STOP, appuyez <strong>sur</strong> /MENU/FUNC.pendant au moins 2 secon<strong>de</strong>s.L’écran FUNCTION s’affiche.2 <strong>Appuyez</strong> <strong>sur</strong> <strong>le</strong> <strong>b<strong>ou</strong>ton</strong> supérieur <strong>ou</strong> inférieur <strong>de</strong> <strong>la</strong>comman<strong>de</strong> multidirectionnel<strong>le</strong> p<strong>ou</strong>rsé<strong>le</strong>ctionner STOP/PRE STOP, puis appuyez <strong>sur</strong>/ /ENTER.L’indication « STOP » s’affiche et <strong>la</strong> <strong>le</strong>cture s’arrête.• La <strong>le</strong>cture démarre <strong>de</strong>puis <strong>le</strong> début si v<strong>ou</strong>s appuyez <strong>sur</strong> / /ENTER lorsque <strong>la</strong> <strong>le</strong>cture est arrêtée.• Lorsqu’un <strong>le</strong>cteur DVD <strong>ou</strong> un changeur DVD Ai-NET est raccordé àl’ai<strong>de</strong> d’Ai-NET, STOP/PRE STOP n’est pas affiché <strong>sur</strong> l’écranFUNCTION en mo<strong>de</strong> CD vidéo.Lecture répétitive du chapitre, <strong>de</strong> <strong>la</strong>piste <strong>ou</strong> du titreCette fonction permet <strong>de</strong> lire à plusieurs reprises <strong>de</strong>s titres, chapitres <strong>ou</strong>pistes <strong>de</strong> disque.1 <strong>Appuyez</strong> <strong>sur</strong> /MENU/FUNC. pendant au moins2 secon<strong>de</strong>s.L’écran FUNCTION s’affiche.2 <strong>Appuyez</strong> <strong>sur</strong> <strong>le</strong> <strong>b<strong>ou</strong>ton</strong> supérieur <strong>ou</strong> inférieur <strong>de</strong> <strong>la</strong>comman<strong>de</strong> multidirectionnel<strong>le</strong> p<strong>ou</strong>r sé<strong>le</strong>ctionnerREPEAT, puis appuyez <strong>sur</strong> / /ENTER.L’affichage passe à l’écran du mo<strong>de</strong> REPEAT (voir ci-<strong>de</strong>ss<strong>ou</strong>s).DVDLe chapitre est lu à plusieurs reprises.Le titre est lu à plusieurs reprises.La <strong>le</strong>cture revient au mo<strong>de</strong> normal.23-FR
CD vidéoLa piste est lue à plusieurs reprises.Changement <strong>de</strong> s<strong>ou</strong>s-titre (<strong>la</strong>ngue <strong>de</strong>s<strong>ou</strong>s-titrage) (DVD seu<strong>le</strong>ment)• L’affichage peut varier selon <strong>le</strong>s appareils raccordés.• Les mo<strong>de</strong>s <strong>de</strong> répétition <strong>de</strong> piste/disque ne sont pas accessib<strong>le</strong>s <strong>sur</strong><strong>le</strong>s CD vidéo équipés <strong>de</strong> <strong>la</strong> fonction PBC. Ces mo<strong>de</strong>s peuvent êtreexécutés une fois que v<strong>ou</strong>s avez désactivé <strong>la</strong> fonction PBC.• Certains disques ne permettent pas <strong>de</strong> changer <strong>de</strong> mo<strong>de</strong> <strong>de</strong>répétition.• Selon l'appareil raccordé, il est possib<strong>le</strong> que <strong>le</strong> mo<strong>de</strong> <strong>de</strong> <strong>le</strong>cturerépétitive ne puisse pas être commuté.Changement <strong>de</strong> piste audioLe disque est lu à plusieurs reprises.La <strong>le</strong>cture ne se répète pas.Les DVD peuvent comporter jusqu’à huit pistes audio différentes. V<strong>ou</strong>sp<strong>ou</strong>vez changer <strong>de</strong> piste en c<strong>ou</strong>rs <strong>de</strong> <strong>le</strong>cture.1 <strong>Appuyez</strong> <strong>sur</strong> /MENU/FUNC. pendant au moins2 secon<strong>de</strong>s.L’écran FUNCTION s’affiche.2 <strong>Appuyez</strong> <strong>sur</strong> <strong>le</strong> <strong>b<strong>ou</strong>ton</strong> supérieur <strong>ou</strong> inférieur <strong>de</strong> <strong>la</strong>comman<strong>de</strong> multidirectionnel<strong>le</strong> p<strong>ou</strong>r sé<strong>le</strong>ctionnerAUDIO, puis appuyez <strong>sur</strong> / /ENTER.Le son change selon <strong>le</strong>s pistes audio enregistrées <strong>sur</strong> <strong>le</strong>disque.• La n<strong>ou</strong>vel<strong>le</strong> piste sé<strong>le</strong>ctionnée est utilisée comme rég<strong>la</strong>ge par défautà chaque mise s<strong>ou</strong>s tension <strong>ou</strong> à chaque changement <strong>de</strong> disque. Si <strong>le</strong>disque ne possè<strong>de</strong> pas cette piste, <strong>la</strong> <strong>la</strong>ngue par défaut du disque estsé<strong>le</strong>ctionnée.• T<strong>ou</strong>s <strong>le</strong>s disques ne permettent pas <strong>de</strong> changer <strong>de</strong> piste audio pendant<strong>la</strong> <strong>le</strong>cture. Dans ce cas, sé<strong>le</strong>ctionnez <strong>le</strong>s pistes audio à partir du menuDVD.• Un dé<strong>la</strong>i peut s’éc<strong>ou</strong><strong>le</strong>r avant que <strong>la</strong> <strong>le</strong>cture <strong>de</strong> <strong>la</strong> n<strong>ou</strong>vel<strong>le</strong> pistesé<strong>le</strong>ctionnée commence.CD vidéo avec audio multip<strong>le</strong>x1 <strong>Appuyez</strong> <strong>sur</strong> /MENU/FUNC. pendant au moins2 secon<strong>de</strong>s.L’écran FUNCTION s’affiche.2 <strong>Appuyez</strong> <strong>sur</strong> <strong>le</strong> <strong>b<strong>ou</strong>ton</strong> supérieur <strong>ou</strong> inférieur <strong>de</strong> <strong>la</strong>comman<strong>de</strong> multidirectionnel<strong>le</strong> p<strong>ou</strong>r sé<strong>le</strong>ctionnerAUDIO, puis appuyez <strong>sur</strong> / /ENTER.Les canaux droit et gauche sont reproduits comme indiquédans <strong>le</strong> schéma ci-<strong>de</strong>ss<strong>ou</strong>s.AUDIO L/R AUDIO L/L AUDIO R/R AUDIO L/R• Si un <strong>le</strong>cteur DVD <strong>ou</strong> un changeur DVD équipé <strong>de</strong> Ai-NET estraccordé, AUDIO n’est pas affiché <strong>sur</strong> l’écran <strong>de</strong>s fonctions du CDvidéo.Les DVD <strong>sur</strong> <strong>le</strong>squels plusieurs <strong>la</strong>ngues <strong>de</strong> s<strong>ou</strong>s-titrage sont enregistréespermettent <strong>de</strong> changer <strong>la</strong> <strong>la</strong>ngue <strong>de</strong>s s<strong>ou</strong>s-titres en c<strong>ou</strong>rs <strong>de</strong> <strong>le</strong>cture, voiremême <strong>de</strong> masquer <strong>de</strong>s s<strong>ou</strong>s-titres.1 <strong>Appuyez</strong> <strong>sur</strong> /MENU/FUNC. pendant au moins2 secon<strong>de</strong>s.L’écran FUNCTION s’affiche.2 <strong>Appuyez</strong> <strong>sur</strong> <strong>le</strong> <strong>b<strong>ou</strong>ton</strong> supérieur <strong>ou</strong> inférieur <strong>de</strong> <strong>la</strong>comman<strong>de</strong> multidirectionnel<strong>le</strong> p<strong>ou</strong>r sé<strong>le</strong>ctionnerSUB TITLE, puis appuyez <strong>sur</strong> / /ENTER.La <strong>la</strong>ngue <strong>de</strong>s s<strong>ou</strong>s-titres enregistrée <strong>sur</strong> <strong>le</strong> disque estmodifiée, puis se désactive.• Un dé<strong>la</strong>i peut s’éc<strong>ou</strong><strong>le</strong>r avant que <strong>le</strong> s<strong>ou</strong>s-titre sé<strong>le</strong>ctionné s’affiche.• T<strong>ou</strong>s <strong>le</strong>s disques ne permettent pas <strong>de</strong> changer <strong>le</strong>s s<strong>ou</strong>s-titres pendant<strong>la</strong> <strong>le</strong>cture. Dans ce cas, sé<strong>le</strong>ctionnez <strong>le</strong>s s<strong>ou</strong>s-titres à partir du menuDVD.• La <strong>la</strong>ngue <strong>de</strong>s s<strong>ou</strong>s-titres sé<strong>le</strong>ctionnée est utilisée comme rég<strong>la</strong>ge pardéfaut à chaque mise s<strong>ou</strong>s tension <strong>ou</strong> à chaque changement <strong>de</strong>disque. Si <strong>le</strong> disque ne possè<strong>de</strong> pas cette <strong>la</strong>ngue, <strong>la</strong> <strong>la</strong>ngue par défautdu disque est sé<strong>le</strong>ctionnée. La <strong>la</strong>ngue <strong>de</strong>s s<strong>ou</strong>s-titres peut t<strong>ou</strong>tefoisvarier selon <strong>le</strong> disque.• Certains disques affichent <strong>le</strong>s s<strong>ou</strong>s-titres même lorsque cette fonctionest désactivée. La <strong>la</strong>ngue <strong>de</strong>s s<strong>ou</strong>s-titres peut t<strong>ou</strong>tefois varier selon <strong>le</strong>disque.Changement d’ang<strong>le</strong> (DVD seu<strong>le</strong>ment)Sur <strong>le</strong>s DVD qui contiennent <strong>de</strong>s scènes filmées s<strong>ou</strong>s plusieurs ang<strong>le</strong>s,v<strong>ou</strong>s p<strong>ou</strong>vez changer d’ang<strong>le</strong> en c<strong>ou</strong>rs <strong>de</strong> <strong>le</strong>cture.1 <strong>Appuyez</strong> <strong>sur</strong> /MENU/FUNC. pendant au moins2 secon<strong>de</strong>s.L’écran FUNCTION s’affiche.2 <strong>Appuyez</strong> <strong>sur</strong> <strong>le</strong> <strong>b<strong>ou</strong>ton</strong> supérieur <strong>ou</strong> inférieur <strong>de</strong> <strong>la</strong>comman<strong>de</strong> multidirectionnel<strong>le</strong> p<strong>ou</strong>r sé<strong>le</strong>ctionnerANGLE, puis appuyez <strong>sur</strong> / /ENTER.L’ang<strong>le</strong> change selon <strong>le</strong>s ang<strong>le</strong>s enregistrés <strong>sur</strong> <strong>le</strong> disque.• Le changement d’ang<strong>le</strong> peut nécessiter un certain temps.• Selon <strong>le</strong> disque, l’ang<strong>le</strong> peut changer <strong>de</strong> l’une <strong>ou</strong> l’autre façonsuivante.- Mo<strong>de</strong> transparent : L’ang<strong>le</strong> change en d<strong>ou</strong>ceur.- Mo<strong>de</strong> non transparent : Au changement d’ang<strong>le</strong>, un arrêt <strong>sur</strong>image s’affiche avant l’ang<strong>le</strong> suivant.Changement à partir du menu du disqueCertains disques permettent <strong>de</strong> changer <strong>la</strong> <strong>la</strong>ngue audio, l’ang<strong>le</strong> et <strong>le</strong>ss<strong>ou</strong>s-titres à partir du menu du disque.1 <strong>Appuyez</strong> <strong>sur</strong> /MENU/FUNC. pendant au moins2 secon<strong>de</strong>s.L’écran FUNCTION s'affiche.2 <strong>Appuyez</strong> <strong>sur</strong> <strong>le</strong> <strong>b<strong>ou</strong>ton</strong> supérieur <strong>ou</strong> inférieur <strong>de</strong> <strong>la</strong>comman<strong>de</strong> multifonctionnel<strong>le</strong> p<strong>ou</strong>r sé<strong>le</strong>ctionnerMENU, puis appuyez <strong>sur</strong> / /ENTER.3 Sé<strong>le</strong>ctionnez une option p<strong>ou</strong>r <strong>la</strong> vali<strong>de</strong>r.Reportez-v<strong>ou</strong>s à <strong>la</strong> section « Si un écran <strong>de</strong> menus’affiche », page 22.24-FR
iPod ® (en option)Le VPA-B222R peut comman<strong>de</strong>r un iPod ® lorsque celui-ci estraccordé à un adaptateur d’interface <strong>Alpine</strong> p<strong>ou</strong>r iPod(KCA-420i). Une fois que l’iPod est raccordé au VPA-B222R, iln’est plus possib<strong>le</strong> d’utiliser <strong>le</strong>s fonctions <strong>de</strong> l’iPod.• P<strong>ou</strong>r plus d’informations, reportez-v<strong>ou</strong>s au mo<strong>de</strong> d’emploi <strong>de</strong>l’adaptateur connecté (KCA-420i).• P<strong>ou</strong>r l’utilisation <strong>de</strong>s fonctions, consultez <strong>la</strong> documentation <strong>de</strong> l’iPod.À propos <strong>de</strong>s iPod p<strong>ou</strong>vant être utilisés avec cet appareil• V<strong>ou</strong>s p<strong>ou</strong>vez utiliser <strong>le</strong>s iPod <strong>de</strong> troisième génération <strong>sur</strong> cetappareil : iPod photo, iPod mini <strong>ou</strong> iPod nano. V<strong>ou</strong>s nep<strong>ou</strong>vez cependant pas utiliser l’iPod Shuff<strong>le</strong>.• Les iPod T<strong>ou</strong>ch wheel <strong>ou</strong> Scroll wheel non équipés du câb<strong>le</strong><strong>de</strong> données (câb<strong>le</strong> Dock connector) ne peuvent pas êtreraccordés à cet appareil.• Cet appareil prend en charge <strong>le</strong>s versions suivantes <strong>de</strong> l’iPod:N<strong>ou</strong>s ne p<strong>ou</strong>vons garantir <strong>le</strong> bon fonctionnement <strong>de</strong> cetappareil avec <strong>de</strong>s versions antérieures.iPod <strong>de</strong> troisième génération : version 2.3iPod <strong>de</strong> quatrième génération : version 3.0.2iPod photo : version 1.1iPod mini : version 1.3iPod nano : version 1.0• Cet appareil ne prend pas en charge <strong>le</strong>s versions <strong>de</strong> logicie<strong>la</strong>ntérieures au 22-02-2005. P<strong>ou</strong>r <strong>de</strong> plus amp<strong>le</strong>s informationsconcernant <strong>la</strong> « mise à j<strong>ou</strong>r du logiciel <strong>de</strong> l’iPod », reportezv<strong>ou</strong>sau Gui<strong>de</strong> <strong>de</strong> l’utilisateur <strong>de</strong> l’iPod.Lecture1 <strong>Appuyez</strong> <strong>sur</strong> SOURCE/POWER.L’écran <strong>de</strong> sé<strong>le</strong>ction <strong>de</strong> <strong>la</strong> s<strong>ou</strong>rce s’affiche.2 <strong>Appuyez</strong> <strong>sur</strong> <strong>le</strong> <strong>b<strong>ou</strong>ton</strong> supérieur <strong>ou</strong> inférieur <strong>de</strong> <strong>la</strong>comman<strong>de</strong> multidirectionnel<strong>le</strong> p<strong>ou</strong>rsé<strong>le</strong>ctionner iPod, puis appuyez <strong>sur</strong> / /ENTER.3 <strong>Appuyez</strong> <strong>sur</strong> <strong>ou</strong> p<strong>ou</strong>r sé<strong>le</strong>ctionner <strong>le</strong>morceau <strong>de</strong> votre choix.Ret<strong>ou</strong>r au début <strong>de</strong> <strong>la</strong> chanson en c<strong>ou</strong>rs :<strong>Appuyez</strong> <strong>sur</strong> .Recherche rapi<strong>de</strong> vers l’arrière :<strong>Appuyez</strong> <strong>sur</strong> <strong>la</strong> t<strong>ou</strong>che et maintenez-<strong>la</strong> enfoncée.Permet d’avancer au début <strong>de</strong> <strong>la</strong> prochaine chanson :<strong>Appuyez</strong> <strong>sur</strong> .Recherche rapi<strong>de</strong> vers l’avant :<strong>Appuyez</strong> <strong>sur</strong> <strong>la</strong> t<strong>ou</strong>che et maintenez-<strong>la</strong> enfoncée.Comman<strong>de</strong>multidirectionnel<strong>le</strong>4 P<strong>ou</strong>r interrompre <strong>la</strong> <strong>le</strong>cture (mo<strong>de</strong> pause), appuyez<strong>sur</strong> / /ENTER. <strong>Appuyez</strong> à n<strong>ou</strong>veau <strong>sur</strong> / /ENTER p<strong>ou</strong>r reprendre <strong>la</strong> <strong>le</strong>cture.• Si un morceau est lu dans l’iPod lors du raccor<strong>de</strong>ment auVPA-B222R, <strong>la</strong> <strong>le</strong>cture continue après <strong>la</strong> connexion.• Si v<strong>ou</strong>s utilisez l’iPod avec un changeur, v<strong>ou</strong>s <strong>de</strong>vez utiliser <strong>le</strong>Versati<strong>le</strong> Link Terminal (KCA-410C). Dans ce cas, sé<strong>le</strong>ctionnez« CHG SEL » et appuyez <strong>sur</strong> / /ENTER dans l’écranFUNCTION <strong>ou</strong> appuyez <strong>sur</strong> pendant au moins 2 secon<strong>de</strong>s p<strong>ou</strong>rsé<strong>le</strong>ctionner <strong>le</strong> mo<strong>de</strong> du changeur applicab<strong>le</strong> à l’iPod.• Si <strong>le</strong> nom <strong>de</strong> l’artiste, <strong>de</strong> l’album <strong>ou</strong> <strong>de</strong> <strong>la</strong> chanson (défini dansiTunes) comporte trop <strong>de</strong> caractères, il est possib<strong>le</strong> que <strong>le</strong>s chansonsne soient pas lues lorsque l’adaptateur est connecté. Par conséquent,il est recommandé d’utiliser un maximum <strong>de</strong> 250 caractères. Lenombre maximal <strong>de</strong> caractères <strong>de</strong> cet appareil est <strong>de</strong> 64 (64 bits).• Il est possib<strong>le</strong> que certains caractères ne s’affichent pascorrectement.• « NO SUPPORT » s’affiche lorsque <strong>le</strong>s informations <strong>de</strong> texte ne sontpas compatib<strong>le</strong>s avec <strong>le</strong> VPA-B222R.Recherche <strong>de</strong> <strong>la</strong> chanson que v<strong>ou</strong>ss<strong>ou</strong>haitez éc<strong>ou</strong>terUn iPod peut contenir <strong>de</strong>s centaines, voire <strong>de</strong>s milliers <strong>de</strong> chansons. LeVPA-B222R facilite <strong>la</strong> recherche <strong>de</strong> chansons car il <strong>le</strong>s met en mémoiredans <strong>de</strong>s listes d’éc<strong>ou</strong>te plus réduites.• V<strong>ou</strong>s p<strong>ou</strong>vez rechercher un maximum <strong>de</strong> 511 listes d’éc<strong>ou</strong>te, artistes<strong>ou</strong> albums. Le nombre maximal <strong>de</strong> recherches p<strong>ou</strong>r une chanson est255.Recherche par liste d’éc<strong>ou</strong>te1 <strong>Appuyez</strong> <strong>sur</strong> /MENU/FUNC..Le mo<strong>de</strong> <strong>de</strong> recherche est activé et l’écran contenant <strong>la</strong>liste <strong>de</strong> recherche apparaît.2 <strong>Appuyez</strong> <strong>sur</strong> <strong>le</strong> <strong>b<strong>ou</strong>ton</strong> supérieur <strong>ou</strong> inférieur <strong>de</strong> <strong>la</strong>comman<strong>de</strong> multidirectionnel<strong>le</strong> p<strong>ou</strong>rsé<strong>le</strong>ctionner PLAYLIST SEARCH, puis appuyez<strong>sur</strong> <strong>le</strong> <strong>b<strong>ou</strong>ton</strong> droit <strong>de</strong> <strong>la</strong> comman<strong>de</strong>multidirectionnel<strong>le</strong>.3 <strong>Appuyez</strong> <strong>sur</strong> <strong>le</strong> <strong>b<strong>ou</strong>ton</strong> supérieur <strong>ou</strong> inférieur <strong>de</strong> <strong>la</strong>comman<strong>de</strong> multidirectionnel<strong>le</strong> p<strong>ou</strong>rsé<strong>le</strong>ctionner <strong>la</strong> liste d’éc<strong>ou</strong>te.P<strong>ou</strong>r lire directement <strong>la</strong> liste d’éc<strong>ou</strong>te1 <strong>Appuyez</strong> <strong>sur</strong> / /ENTER.La liste d’éc<strong>ou</strong>te sé<strong>le</strong>ctionnée est lue <strong>de</strong> manièrerépétée.Chercher une chanson dans <strong>la</strong> liste d’éc<strong>ou</strong>te1 <strong>Appuyez</strong> <strong>sur</strong> <strong>le</strong> <strong>b<strong>ou</strong>ton</strong> droit <strong>de</strong> <strong>la</strong> comman<strong>de</strong>multidirectionnel<strong>le</strong> p<strong>ou</strong>r passer au mo<strong>de</strong> <strong>de</strong> recherchepar chanson <strong>de</strong> <strong>la</strong> liste d’éc<strong>ou</strong>te sé<strong>le</strong>ctionnée.2 <strong>Appuyez</strong> <strong>sur</strong> <strong>le</strong> <strong>b<strong>ou</strong>ton</strong> supérieur <strong>ou</strong> inférieur <strong>de</strong> <strong>la</strong>comman<strong>de</strong> multidirectionnel<strong>le</strong> p<strong>ou</strong>r sé<strong>le</strong>ctionner unechanson, puis appuyez <strong>sur</strong> / /ENTER.La chanson sé<strong>le</strong>ctionnée est lue.25-FR
Recherche par nom d’artiste1 <strong>Appuyez</strong> <strong>sur</strong> /MENU/FUNC..Le mo<strong>de</strong> <strong>de</strong> recherche est activé et l’écran contenant <strong>la</strong>liste <strong>de</strong> recherche apparaît.2 <strong>Appuyez</strong> <strong>sur</strong> <strong>le</strong> <strong>b<strong>ou</strong>ton</strong> supérieur <strong>ou</strong> inférieur <strong>de</strong> <strong>la</strong>comman<strong>de</strong> multidirectionnel<strong>le</strong> p<strong>ou</strong>rsé<strong>le</strong>ctionner ARTIST SEARCH, puis appuyez <strong>sur</strong> <strong>le</strong><strong>b<strong>ou</strong>ton</strong> droit <strong>de</strong> <strong>la</strong> comman<strong>de</strong>multidirectionnel<strong>le</strong>.3 <strong>Appuyez</strong> <strong>sur</strong> <strong>le</strong> <strong>b<strong>ou</strong>ton</strong> supérieur <strong>ou</strong> inférieur <strong>de</strong> <strong>la</strong>comman<strong>de</strong> multidirectionnel<strong>le</strong> p<strong>ou</strong>rsé<strong>le</strong>ctionner l’artiste que v<strong>ou</strong>s s<strong>ou</strong>haitez éc<strong>ou</strong>ter.P<strong>ou</strong>r lire directement l’artiste1 <strong>Appuyez</strong> <strong>sur</strong> / /ENTER.Les chansons <strong>de</strong> l’artiste sé<strong>le</strong>ctionné sont lues.• Si v<strong>ou</strong>s sé<strong>le</strong>ctionnez ALL et appuyez <strong>sur</strong> / /ENTER, v<strong>ou</strong>s passezà l'écran <strong>de</strong> mo<strong>de</strong> <strong>de</strong> l'iPod.• P<strong>ou</strong>r afficher l’écran <strong>de</strong> recherche <strong>de</strong> l’ALBUM, sé<strong>le</strong>ctionnez ALL,puis appuyez <strong>sur</strong> <strong>le</strong> <strong>b<strong>ou</strong>ton</strong> droit <strong>de</strong> <strong>la</strong> comman<strong>de</strong>multidirectionnel<strong>le</strong>.Rechercher l’album d’un artiste1 <strong>Appuyez</strong> <strong>sur</strong> <strong>le</strong> <strong>b<strong>ou</strong>ton</strong> droit <strong>de</strong> <strong>la</strong> comman<strong>de</strong>multidirectionnel<strong>le</strong> p<strong>ou</strong>r passer au mo<strong>de</strong> <strong>de</strong> recherchepar album <strong>de</strong> l’artiste sé<strong>le</strong>ctionné.2* 1 <strong>Appuyez</strong> <strong>sur</strong> <strong>le</strong> <strong>b<strong>ou</strong>ton</strong> supérieur <strong>ou</strong> inférieur <strong>de</strong> <strong>la</strong>comman<strong>de</strong> multidirectionnel<strong>le</strong> p<strong>ou</strong>r sé<strong>le</strong>ctionner l’albumque v<strong>ou</strong>s s<strong>ou</strong>haitez éc<strong>ou</strong>ter.3 <strong>Appuyez</strong> <strong>sur</strong> / /ENTER p<strong>ou</strong>r éc<strong>ou</strong>ter t<strong>ou</strong>tes <strong>le</strong>schansons <strong>de</strong> l’album sé<strong>le</strong>ctionné.Les chansons <strong>de</strong> l’album sé<strong>le</strong>ctionné sont lues.Recherche par nom d’album1 <strong>Appuyez</strong> <strong>sur</strong> /MENU/FUNC..Le mo<strong>de</strong> <strong>de</strong> recherche est activé et l’écran contenant <strong>la</strong>liste <strong>de</strong> recherche apparaît.2 <strong>Appuyez</strong> <strong>sur</strong> <strong>le</strong> <strong>b<strong>ou</strong>ton</strong> supérieur <strong>ou</strong> inférieur <strong>de</strong> <strong>la</strong>comman<strong>de</strong> multidirectionnel<strong>le</strong> p<strong>ou</strong>rsé<strong>le</strong>ctionner ALBUM SEARCH, puis appuyez <strong>sur</strong> <strong>le</strong><strong>b<strong>ou</strong>ton</strong> droit <strong>de</strong> <strong>la</strong> comman<strong>de</strong>multidirectionnel<strong>le</strong>.3 <strong>Appuyez</strong> <strong>sur</strong> <strong>le</strong> <strong>b<strong>ou</strong>ton</strong> supérieur <strong>ou</strong> inférieur <strong>de</strong> <strong>la</strong>comman<strong>de</strong> multidirectionnel<strong>le</strong> p<strong>ou</strong>rsé<strong>le</strong>ctionner l’album que v<strong>ou</strong>s s<strong>ou</strong>haitez éc<strong>ou</strong>ter.P<strong>ou</strong>r lire directement l’album1 <strong>Appuyez</strong> <strong>sur</strong> / /ENTER.Les chansons <strong>de</strong> l’album sé<strong>le</strong>ctionné sont lues.• Si v<strong>ou</strong>s sé<strong>le</strong>ctionnez ALL et appuyez <strong>sur</strong> / /ENTER, v<strong>ou</strong>s passezà l'écran <strong>de</strong> mo<strong>de</strong> <strong>de</strong> l'iPod.• P<strong>ou</strong>r afficher l’écran <strong>de</strong> recherche <strong>de</strong> <strong>la</strong> CHANSON, sé<strong>le</strong>ctionnezALL, puis appuyez <strong>sur</strong> <strong>le</strong> <strong>b<strong>ou</strong>ton</strong> droit <strong>de</strong> <strong>la</strong> comman<strong>de</strong>multidirectionnel<strong>le</strong>.Rechercher une chanson dans l’album1 <strong>Appuyez</strong> <strong>sur</strong> <strong>le</strong> <strong>b<strong>ou</strong>ton</strong> droit <strong>de</strong> <strong>la</strong> comman<strong>de</strong>multidirectionnel<strong>le</strong> p<strong>ou</strong>r passer au mo<strong>de</strong> <strong>de</strong> recherchepar chanson <strong>de</strong> l’album sé<strong>le</strong>ctionné.2 <strong>Appuyez</strong> <strong>sur</strong> <strong>le</strong> <strong>b<strong>ou</strong>ton</strong> supérieur <strong>ou</strong> inférieur <strong>de</strong> <strong>la</strong>comman<strong>de</strong> multidirectionnel<strong>le</strong> p<strong>ou</strong>r sé<strong>le</strong>ctionner unechanson, puis appuyez <strong>sur</strong> / /ENTER.La chanson sé<strong>le</strong>ctionnée est lue.• P<strong>ou</strong>r éc<strong>ou</strong>ter <strong>la</strong> première chanson <strong>de</strong> l’artiste sé<strong>le</strong>ctionné,sé<strong>le</strong>ctionnez ALL, puis appuyez <strong>sur</strong> / /ENTER.• P<strong>ou</strong>r passer à l’écran <strong>de</strong> recherche <strong>de</strong> <strong>la</strong> CHANSON <strong>de</strong> l’artistesé<strong>le</strong>ctionné, sé<strong>le</strong>ctionnez ALL, puis appuyez <strong>sur</strong> <strong>le</strong> <strong>b<strong>ou</strong>ton</strong> droit <strong>de</strong> <strong>la</strong>comman<strong>de</strong> multidirectionnel<strong>le</strong>.Rechercher une chanson dans l’album d’un artiste1 Après avoir sé<strong>le</strong>ctionné l’album à l’étape 2* 1 , appuyez<strong>sur</strong> <strong>le</strong> <strong>b<strong>ou</strong>ton</strong> droit <strong>de</strong> <strong>la</strong> comman<strong>de</strong> multidirectionnel<strong>le</strong>p<strong>ou</strong>r passer au mo<strong>de</strong> <strong>de</strong> recherche par chanson <strong>de</strong>l’album sé<strong>le</strong>ctionné.2 <strong>Appuyez</strong> <strong>sur</strong> <strong>le</strong> <strong>b<strong>ou</strong>ton</strong> supérieur <strong>ou</strong> inférieur <strong>de</strong> <strong>la</strong>comman<strong>de</strong> multidirectionnel<strong>le</strong> p<strong>ou</strong>r sé<strong>le</strong>ctionner unechanson, puis appuyez <strong>sur</strong> / /ENTER.La chanson sé<strong>le</strong>ctionnée est lue.26-FR
Lecture aléatoire Shuff<strong>le</strong> (M.I.X.)La fonction <strong>de</strong> <strong>le</strong>cture aléatoire <strong>de</strong> l’iPod s’affiche comme M.I.X <strong>sur</strong> <strong>le</strong>VPA-B222R.1 <strong>Appuyez</strong> <strong>sur</strong> /MENU/FUNC. pendant au moins2 secon<strong>de</strong>s.L’écran FUNCTION s’affiche.2 <strong>Appuyez</strong> <strong>sur</strong> <strong>le</strong> <strong>b<strong>ou</strong>ton</strong> supérieur <strong>ou</strong> inférieur <strong>de</strong> <strong>la</strong>comman<strong>de</strong> multidirectionnel<strong>le</strong> p<strong>ou</strong>rsé<strong>le</strong>ctionner M.I.X., puis appuyez <strong>sur</strong> <strong>le</strong> <strong>b<strong>ou</strong>ton</strong>droit <strong>de</strong> <strong>la</strong> comman<strong>de</strong> multidirectionnel<strong>le</strong>.3 <strong>Appuyez</strong> <strong>sur</strong> <strong>le</strong> <strong>b<strong>ou</strong>ton</strong> supérieur <strong>ou</strong> inférieur <strong>de</strong> <strong>la</strong>comman<strong>de</strong> multidirectionnel<strong>le</strong> p<strong>ou</strong>rsé<strong>le</strong>ctionner <strong>le</strong> mo<strong>de</strong> M.I.X., puis appuyez <strong>sur</strong> //ENTER.M.I.X. ALBUM :Cette fonction permet d’éc<strong>ou</strong>ter t<strong>ou</strong>tes <strong>le</strong>s chansons dans l’ordre ;l’album suivant est ensuite sé<strong>le</strong>ctionné dans un ordre aléatoire. V<strong>ou</strong>séc<strong>ou</strong>tez t<strong>ou</strong>tes <strong>le</strong>s chansons <strong>de</strong> l’album suivant dans l’ordre, et ainsi <strong>de</strong>suite. T<strong>ou</strong>s <strong>le</strong>s albums sé<strong>le</strong>ctionnés ne sont lus qu’une seu<strong>le</strong> fois.M.I.X. SONGS :Cette fonction v<strong>ou</strong>s permet d’éc<strong>ou</strong>ter certaines chansons uniquement(choix aléatoire). V<strong>ou</strong>s ne p<strong>ou</strong>vez éc<strong>ou</strong>ter <strong>le</strong>s chansons sé<strong>le</strong>ctionnéesqu’une seu<strong>le</strong> fois.OFF : Mo<strong>de</strong> M.I.X. désactivé4 P<strong>ou</strong>r désactiver <strong>la</strong> <strong>le</strong>cture M.I.X., sé<strong>le</strong>ctionnez OFF,puis appuyez <strong>sur</strong> / /ENTER.• P<strong>ou</strong>r <strong>de</strong> plus amp<strong>le</strong>s informations concernant <strong>le</strong> mo<strong>de</strong> <strong>de</strong> recherche,reportez-v<strong>ou</strong>s à <strong>la</strong> section « Recherche <strong>de</strong> <strong>la</strong> chanson que v<strong>ou</strong>ss<strong>ou</strong>haitez éc<strong>ou</strong>ter » (page 25).• Si v<strong>ou</strong>s sé<strong>le</strong>ctionnez une chanson à l’ai<strong>de</strong> du mo<strong>de</strong> <strong>de</strong> recherched’album avant <strong>de</strong> sé<strong>le</strong>ctionner <strong>le</strong> mo<strong>de</strong> <strong>de</strong> <strong>le</strong>cture aléatoire (M.I.X.),<strong>le</strong>s chansons ne seront pas lues <strong>de</strong> manière aléatoire, même si <strong>la</strong>fonction Lecture aléatoire d’album est définie.• Le mo<strong>de</strong> M.I.X est désactivé lorsque v<strong>ou</strong>s débranchez l’iPod <strong>ou</strong>lorsque v<strong>ou</strong>s t<strong>ou</strong>rnez <strong>la</strong> clé <strong>de</strong> contact <strong>sur</strong> <strong>la</strong> position OFF.Lecture répétitiveSeu<strong>le</strong> l’option <strong>de</strong> répétition unique est disponib<strong>le</strong> <strong>sur</strong> l’iPod.Répétition unique : seu<strong>le</strong> une chanson est lue <strong>de</strong> manière répétée.1 <strong>Appuyez</strong> <strong>sur</strong> /MENU/FUNC. pendant au moins2 secon<strong>de</strong>s.L’écran FUNCTION s’affiche.2 <strong>Appuyez</strong> <strong>sur</strong> <strong>le</strong> <strong>b<strong>ou</strong>ton</strong> supérieur <strong>ou</strong> inférieur <strong>de</strong> <strong>la</strong>comman<strong>de</strong> multidirectionnel<strong>le</strong> p<strong>ou</strong>rsé<strong>le</strong>ctionner REPEAT, puis appuyez <strong>sur</strong> <strong>le</strong> <strong>b<strong>ou</strong>ton</strong>droit <strong>de</strong> <strong>la</strong> comman<strong>de</strong> multidirectionnel<strong>le</strong>.3 <strong>Appuyez</strong> <strong>sur</strong> <strong>le</strong> <strong>b<strong>ou</strong>ton</strong> supérieur <strong>ou</strong> inférieur <strong>de</strong> <strong>la</strong>comman<strong>de</strong> multifonctionnel<strong>le</strong> p<strong>ou</strong>r sé<strong>le</strong>ctionnerRPT, puis appuyez <strong>sur</strong> / /ENTER.La piste est lue à plusieurs reprises.4 P<strong>ou</strong>r désactiver <strong>la</strong> <strong>le</strong>cture répétitive, sé<strong>le</strong>ctionnezOFF à l’étape 3, puis appuyez <strong>sur</strong> / /ENTER.• Pendant <strong>la</strong> <strong>le</strong>cture répétitive, si v<strong>ou</strong>s appuyez <strong>sur</strong> <strong>ou</strong> ,aucune autre chanson ne peut être sé<strong>le</strong>ctionnée.• La <strong>le</strong>cture répétitive est désactivée lorsque v<strong>ou</strong>s débranchez l’iPod<strong>ou</strong> lorsque v<strong>ou</strong>s t<strong>ou</strong>rnez <strong>la</strong> clé <strong>de</strong> contact <strong>sur</strong> <strong>la</strong> position OFF.Système <strong>de</strong>navigation(en option)Comman<strong>de</strong>multidirectionnel<strong>le</strong>V<strong>ou</strong>s p<strong>ou</strong>vez comman<strong>de</strong>r <strong>le</strong> système <strong>de</strong> navigation d’<strong>Alpine</strong> à l’ai<strong>de</strong> <strong>de</strong>l’appareil <strong>de</strong> comman<strong>de</strong> f<strong>ou</strong>rni avec cet appareil. Reportez-v<strong>ou</strong>s auMo<strong>de</strong> d’emploi du système <strong>de</strong> navigation.• En cas <strong>de</strong> raccor<strong>de</strong>ment d’un système <strong>de</strong> navigation qui n’est pascommandé par l’appareil <strong>de</strong> comman<strong>de</strong>, mais seu<strong>le</strong>ment par <strong>le</strong>panneau tacti<strong>le</strong>, ce système ne peut pas être commandé à l’ai<strong>de</strong> <strong>de</strong>l’appareil <strong>de</strong> comman<strong>de</strong>.Affichage <strong>de</strong> l’écran <strong>de</strong> navigationSi un système <strong>de</strong> navigation <strong>Alpine</strong> est raccordé, l’écran <strong>de</strong> <strong>la</strong>navigation peut être faci<strong>le</strong>ment affiché.1 <strong>Appuyez</strong> <strong>sur</strong> DISP..L’écran <strong>de</strong> navigation s’affiche.2 P<strong>ou</strong>r désactiver cet écran, appuyez à n<strong>ou</strong>veau <strong>sur</strong>DISP..Activation et désactivation du mo<strong>de</strong> <strong>de</strong>navigationSi un système <strong>de</strong> navigation <strong>Alpine</strong> est raccordé, l’écran <strong>de</strong> <strong>la</strong> navigationpeut être faci<strong>le</strong>ment affiché et certaines opérations peuvent être effectuées.1 <strong>Appuyez</strong> <strong>sur</strong> NAV./POS..L’écran <strong>de</strong> navigation s’affiche et <strong>le</strong> mo<strong>de</strong> <strong>de</strong> navigation estactivé.2 <strong>Appuyez</strong> <strong>sur</strong> DISP. p<strong>ou</strong>r annu<strong>le</strong>r <strong>le</strong> mo<strong>de</strong>opérations, puis revenez à l’écran <strong>de</strong> <strong>la</strong> s<strong>ou</strong>rceprincipa<strong>le</strong> avant d’effectuer cette opération.Si v<strong>ou</strong>s appuyez <strong>sur</strong> DISP pendant au moins 2 secon<strong>de</strong>s, <strong>le</strong>mo<strong>de</strong> opérations est annulé, l’écran <strong>de</strong> <strong>la</strong> navigation resteaffiché et <strong>le</strong> son revient à <strong>la</strong> s<strong>ou</strong>rce initia<strong>le</strong>.• Si v<strong>ou</strong>s sé<strong>le</strong>ctionnez <strong>le</strong> mo<strong>de</strong> <strong>de</strong> navigation dans l’écran <strong>de</strong> sé<strong>le</strong>ction<strong>de</strong> <strong>la</strong> s<strong>ou</strong>rce, <strong>le</strong> mo<strong>de</strong> <strong>de</strong> navigation n’est pas désactivé, même si v<strong>ou</strong>sappuyez <strong>sur</strong> DISP..• La c<strong>ou</strong><strong>le</strong>ur <strong>de</strong>s t<strong>ou</strong>ches <strong>de</strong> l’appareil <strong>de</strong> comman<strong>de</strong> changent enmo<strong>de</strong> <strong>de</strong> navigation. Reportez-v<strong>ou</strong>s à <strong>la</strong> section « Rég<strong>la</strong>ge <strong>de</strong> <strong>la</strong>c<strong>ou</strong><strong>le</strong>ur d’illumination <strong>de</strong>s t<strong>ou</strong>ches <strong>de</strong> l’appareil <strong>de</strong> comman<strong>de</strong> »(page 19).27-FR
Écran <strong>de</strong> <strong>la</strong> carteAffichage <strong>de</strong> <strong>la</strong> position actuel<strong>le</strong>1 <strong>Appuyez</strong> <strong>sur</strong> NAV./POS. pendant l’affichage <strong>de</strong>l’écran <strong>de</strong> <strong>la</strong> carte.L’écran <strong>de</strong> <strong>la</strong> position actuel<strong>le</strong> s’affiche.Utilisation dutéléviseur(en option)Défi<strong>le</strong>ment <strong>de</strong> <strong>la</strong> carte1 <strong>Appuyez</strong> <strong>sur</strong> <strong>la</strong> comman<strong>de</strong> multidirectionnel<strong>le</strong>.La direction <strong>de</strong> défi<strong>le</strong>ment <strong>de</strong> <strong>la</strong> carte dépend du <strong>b<strong>ou</strong>ton</strong> <strong>de</strong><strong>la</strong> comman<strong>de</strong> multidirectionnel<strong>le</strong> <strong>sur</strong> <strong>le</strong>quel v<strong>ou</strong>s appuyez.Modification <strong>de</strong> l’échel<strong>le</strong> <strong>de</strong> <strong>la</strong> carteComman<strong>de</strong>multidirectionnel<strong>le</strong>1 <strong>Appuyez</strong> <strong>sur</strong> <strong>ou</strong> .L’échel<strong>le</strong> change chaque fois que v<strong>ou</strong>s appuyez <strong>sur</strong> l’une<strong>de</strong> ces t<strong>ou</strong>ches. Si v<strong>ou</strong>s appuyez <strong>sur</strong> l’une <strong>de</strong>s ces t<strong>ou</strong>cheset <strong>la</strong> maintenez enfoncée, l’échel<strong>le</strong> change continuel<strong>le</strong>ment.Écran <strong>de</strong> menus1 <strong>Appuyez</strong> <strong>sur</strong> /MENU/FUNC. en mo<strong>de</strong> <strong>de</strong>navigation.L’écran du menu du système <strong>de</strong> navigation s’affiche.2 <strong>Appuyez</strong> <strong>sur</strong> <strong>le</strong> <strong>b<strong>ou</strong>ton</strong> supérieur <strong>ou</strong> inférieur <strong>de</strong> <strong>la</strong>comman<strong>de</strong> multidirectionnel<strong>le</strong> p<strong>ou</strong>rsé<strong>le</strong>ctionner l’élément <strong>de</strong> votre choix.3 <strong>Appuyez</strong> <strong>sur</strong> / /ENTER.• <strong>Appuyez</strong> <strong>sur</strong> TA/RTN/SETUP p<strong>ou</strong>r revenir à l’écran précé<strong>de</strong>nt.Une fois effectué <strong>le</strong> raccor<strong>de</strong>ment à un téléviseur <strong>Alpine</strong> (venduséparément), v<strong>ou</strong>s p<strong>ou</strong>vez comman<strong>de</strong>r <strong>le</strong> téléviseur à l’ai<strong>de</strong> <strong>de</strong> l’appareil<strong>de</strong> comman<strong>de</strong> f<strong>ou</strong>rni avec <strong>le</strong> VPA-B222R. Rég<strong>le</strong>r AUX NAME <strong>sur</strong> TV.Reportez-v<strong>ou</strong>s à <strong>la</strong> section « Désignation <strong>de</strong>s appareils externes »,page 18.• Si <strong>le</strong> boîtier d’expansion en option (VPE-S431) est raccordé,raccor<strong>de</strong>z <strong>le</strong> téléviseur à <strong>la</strong> borne AUX IN-2, 3.• As<strong>sur</strong>ez-v<strong>ou</strong>s <strong>de</strong> raccor<strong>de</strong>r cet appareil <strong>ou</strong> <strong>le</strong> fil <strong>de</strong> sortie <strong>de</strong> <strong>la</strong>télécomman<strong>de</strong> du VPE-S431 au fil d’entrée <strong>de</strong> <strong>la</strong> télécomman<strong>de</strong> dutéléviseur.• P<strong>ou</strong>r plus d’informations, reportez-v<strong>ou</strong>s au mo<strong>de</strong> d’emploi dutéléviseur numérique.Fonctionnement du téléviseurAVERTISSEMENTRegar<strong>de</strong>r <strong>le</strong> téléviseur pendant <strong>la</strong> conduite d’unvéhicu<strong>le</strong> s’avère dangereux p<strong>ou</strong>r <strong>le</strong> conducteur. Leconducteur qui n’est plus concentré <strong>sur</strong> <strong>la</strong> r<strong>ou</strong>te peutprovoquer un acci<strong>de</strong>nt.Instal<strong>le</strong>z correctement <strong>le</strong> VPA-B222R <strong>de</strong> façon à ceque <strong>le</strong> conducteur ne puisse pas regar<strong>de</strong>r <strong>le</strong>téléviseur tant que <strong>le</strong> véhicu<strong>le</strong> n’est pas à l’arrêt etque <strong>le</strong> frein à main n’est pas actionné.Si <strong>le</strong> VPA-B222R n’est pas correctement installé, <strong>le</strong>conducteur sera tenté <strong>de</strong> regar<strong>de</strong>r <strong>le</strong> téléviseur lors<strong>de</strong> <strong>la</strong> conduite et s’il n’est pas concentré <strong>sur</strong> <strong>la</strong> r<strong>ou</strong>te,il peut provoquer un acci<strong>de</strong>nt. Le conducteur ainsique d’autres personnes risquent d’être b<strong>le</strong>ssés.• Si v<strong>ou</strong>s essayez d’activer <strong>le</strong> téléviseur pendant que v<strong>ou</strong>s conduisez,l’avertissement « PICTURE OFF FOR YOUR SAFETY » s’affiche.28-FR
1 <strong>Appuyez</strong> <strong>sur</strong> SOURCE/POWER.L’écran <strong>de</strong> sé<strong>le</strong>ction <strong>de</strong> <strong>la</strong> s<strong>ou</strong>rce s’affiche.2 <strong>Appuyez</strong> <strong>sur</strong> <strong>le</strong> <strong>b<strong>ou</strong>ton</strong> supérieur <strong>ou</strong> inférieur <strong>de</strong> <strong>la</strong>comman<strong>de</strong> multidirectionnel<strong>le</strong> p<strong>ou</strong>rsé<strong>le</strong>ctionner TV, puis appuyez <strong>sur</strong> / /ENTER.3 <strong>Appuyez</strong> <strong>sur</strong> pendant au moins 2 secon<strong>de</strong>s p<strong>ou</strong>rsé<strong>le</strong>ctionner BAND.4 <strong>Appuyez</strong> <strong>sur</strong> / /ENTER p<strong>ou</strong>r changer <strong>le</strong> mo<strong>de</strong> <strong>de</strong>syntonisation.Syntonisation manuel<strong>le</strong> Syntonisation automatique5 <strong>Appuyez</strong> <strong>sur</strong> <strong>ou</strong> p<strong>ou</strong>r rechercher <strong>le</strong>schaînes précé<strong>de</strong>ntes <strong>ou</strong> suivantes, respectivement.Mémorisation automatique <strong>de</strong>s chaînesUtilisation dutéléviseur numérique(en option)Comman<strong>de</strong>multidirectionnel<strong>le</strong>1 <strong>Appuyez</strong> <strong>sur</strong> / /ENTER pendant au moins2 secon<strong>de</strong>s.La mémorisation automatique commence.Une fois terminée, <strong>la</strong> liste <strong>de</strong>s numéros <strong>de</strong> chaînesmémorisés s’affiche et <strong>la</strong> première chaîne mémorisée estautomatiquement reçue.2 P<strong>ou</strong>r recevoir une chaîne mémorisée, appuyez <strong>sur</strong><strong>ou</strong> .Changement <strong>de</strong> <strong>la</strong> s<strong>ou</strong>rce audio1 <strong>Appuyez</strong> <strong>sur</strong> /MENU/FUNC. pendant au moins2 secon<strong>de</strong>s.L’écran FUNCTION s’affiche.2 <strong>Appuyez</strong> <strong>sur</strong> <strong>le</strong> <strong>b<strong>ou</strong>ton</strong> supérieur <strong>ou</strong> inférieur <strong>de</strong> <strong>la</strong>comman<strong>de</strong> multidirectionnel<strong>le</strong> p<strong>ou</strong>r sé<strong>le</strong>ctionnerAUDIO, puis appuyez <strong>sur</strong> / /ENTER.Le mo<strong>de</strong> audio est modifié.Une fois effectué <strong>le</strong> raccor<strong>de</strong>ment à un téléviseur numérique <strong>Alpine</strong>(vendu séparément), v<strong>ou</strong>s p<strong>ou</strong>vez comman<strong>de</strong>r <strong>le</strong> téléviseur numérique àl’ai<strong>de</strong> <strong>de</strong> l’appareil <strong>de</strong> comman<strong>de</strong> f<strong>ou</strong>rni avec <strong>le</strong> VPA-B222R. Rég<strong>le</strong>zAUX NAME <strong>sur</strong> DVB-T. Reportez-v<strong>ou</strong>s à <strong>la</strong> section « Désignation <strong>de</strong>sappareils externes », page 18.• As<strong>sur</strong>ez-v<strong>ou</strong>s <strong>de</strong> raccor<strong>de</strong>r cet appareil <strong>ou</strong> <strong>le</strong> fil <strong>de</strong> sortie <strong>de</strong> <strong>la</strong>télécomman<strong>de</strong> du VPE-S431 au fil d’entrée <strong>de</strong> <strong>la</strong> télécomman<strong>de</strong> dutéléviseur numérique.• P<strong>ou</strong>r plus d’informations, reportez-v<strong>ou</strong>s au mo<strong>de</strong> d’emploi dutéléviseur numérique.Fonctionnement du téléviseurnumériqueAVERTISSEMENTRegar<strong>de</strong>r <strong>le</strong> téléviseur pendant <strong>la</strong> conduite d’unvéhicu<strong>le</strong> s’avère dangereux p<strong>ou</strong>r <strong>le</strong> conducteur. Leconducteur qui n’est plus concentré <strong>sur</strong> <strong>la</strong> r<strong>ou</strong>te peutprovoquer un acci<strong>de</strong>nt.Instal<strong>le</strong>z correctement <strong>le</strong> VPA-B222R <strong>de</strong> façon à ceque <strong>le</strong> conducteur ne puisse pas regar<strong>de</strong>r <strong>le</strong>téléviseur tant que <strong>le</strong> véhicu<strong>le</strong> n’est pas à l’arrêt etque <strong>le</strong> frein à main n’est pas actionné.Si <strong>le</strong> VPA-B222R n’est pas correctement installé, <strong>le</strong>conducteur sera tenté <strong>de</strong> regar<strong>de</strong>r <strong>le</strong> téléviseur lors<strong>de</strong> <strong>la</strong> conduite et s’il n’est pas concentré <strong>sur</strong> <strong>la</strong> r<strong>ou</strong>te,il peut provoquer un acci<strong>de</strong>nt. Le conducteur ainsique d’autres personnes risquent d’être b<strong>le</strong>ssés.• Si v<strong>ou</strong>s essayez d’activer <strong>le</strong> téléviseur numérique pendant que v<strong>ou</strong>sconduisez, l’avertissement « PICTURE OFF FOR YOUR SAFETY »s’affiche.29-FR
1 <strong>Appuyez</strong> <strong>sur</strong> SOURCE/POWER.L’écran <strong>de</strong> sé<strong>le</strong>ction <strong>de</strong> <strong>la</strong> s<strong>ou</strong>rce s’affiche.2 <strong>Appuyez</strong> <strong>sur</strong> <strong>le</strong> <strong>b<strong>ou</strong>ton</strong> supérieur <strong>ou</strong> inférieur <strong>de</strong> <strong>la</strong>comman<strong>de</strong> multidirectionnel<strong>le</strong> p<strong>ou</strong>r sé<strong>le</strong>ctionnerDVB-T, puis appuyez <strong>sur</strong> / /ENTER.3 <strong>Appuyez</strong> <strong>sur</strong> / /ENTER p<strong>ou</strong>r changer <strong>le</strong> mo<strong>de</strong> <strong>de</strong>canal.Canal suivant/précé<strong>de</strong>ntCanal préféré suivant/précé<strong>de</strong>nt4 <strong>Appuyez</strong> <strong>sur</strong> <strong>ou</strong> p<strong>ou</strong>r rechercher <strong>le</strong>schaînes précé<strong>de</strong>ntes <strong>ou</strong> suivantes, respectivement.5 <strong>Appuyez</strong> <strong>sur</strong> pendant au moins 2 secon<strong>de</strong>s p<strong>ou</strong>rchanger <strong>la</strong> s<strong>ou</strong>rce du téléviseur numérique.Utilisation <strong>de</strong> l’écran du gui<strong>de</strong>é<strong>le</strong>ctronique <strong>de</strong>s programmes (EPG)1 <strong>Appuyez</strong> <strong>sur</strong> /MENU/FUNC..L’écran du gui<strong>de</strong> é<strong>le</strong>ctronique <strong>de</strong>s programmes (EPG)s’affiche.2 <strong>Appuyez</strong> <strong>sur</strong> <strong>le</strong> <strong>b<strong>ou</strong>ton</strong> supérieur <strong>ou</strong> inférieur <strong>de</strong> <strong>la</strong>comman<strong>de</strong> multidirectionnel<strong>le</strong> p<strong>ou</strong>rsé<strong>le</strong>ctionner <strong>la</strong> désignation du rég<strong>la</strong>ge <strong>de</strong> votrechoix.3 <strong>Appuyez</strong> <strong>sur</strong> <strong>le</strong> <strong>b<strong>ou</strong>ton</strong> gauche <strong>ou</strong> droit <strong>de</strong> <strong>la</strong>comman<strong>de</strong> multidirectionnel<strong>le</strong> p<strong>ou</strong>r rég<strong>le</strong>rl’élément sé<strong>le</strong>ctionné, puis appuyez <strong>sur</strong> / /ENTER pendant au moins 2 secon<strong>de</strong>s.Mémorisation automatique <strong>de</strong>s chaînes1 <strong>Appuyez</strong> <strong>sur</strong> /MENU/FUNC. pendant au moins2 secon<strong>de</strong>s.L’écran FUNCTION s’affiche.2 <strong>Appuyez</strong> <strong>sur</strong> <strong>le</strong> <strong>b<strong>ou</strong>ton</strong> supérieur <strong>ou</strong> inférieur <strong>de</strong> <strong>la</strong>comman<strong>de</strong> multidirectionnel<strong>le</strong> p<strong>ou</strong>r sé<strong>le</strong>ctionnerA. MEMO, puis appuyez <strong>sur</strong> / /ENTER.La mémorisation automatique commence.Affichage <strong>de</strong> l’écran <strong>de</strong> menuL’écran <strong>de</strong> menu du téléviseur numérique s’affiche.1 <strong>Appuyez</strong> <strong>sur</strong> /MENU/FUNC. pendant au moins2 secon<strong>de</strong>s.L’écran FUNCTION s’affiche.2 <strong>Appuyez</strong> <strong>sur</strong> <strong>le</strong> <strong>b<strong>ou</strong>ton</strong> supérieur <strong>ou</strong> inférieur <strong>de</strong> <strong>la</strong>comman<strong>de</strong> multidirectionnel<strong>le</strong> p<strong>ou</strong>r sé<strong>le</strong>ctionnerMENU, puis appuyez <strong>sur</strong> / /ENTER pendant aumoins 2 secon<strong>de</strong>s.Appareil auxiliaire(en option)Fonctionnement <strong>de</strong>s appareilsauxiliaires (en option)P<strong>ou</strong>r comman<strong>de</strong>r vos appareils raccordés aux bornes AUX duVPA-B222R, procé<strong>de</strong>z comme décrit ci-<strong>de</strong>ss<strong>ou</strong>s.AVERTISSEMENTRegar<strong>de</strong>r <strong>la</strong> TV/vidéo pendant <strong>la</strong> conduite d’unvéhicu<strong>le</strong> s’avère dangereux p<strong>ou</strong>r <strong>le</strong> conducteur. Leconducteur qui n’est plus concentré <strong>sur</strong> <strong>la</strong> r<strong>ou</strong>te peutprovoquer un acci<strong>de</strong>nt.Instal<strong>le</strong>z correctement <strong>le</strong> VPA-B222R <strong>de</strong> façon à ceque <strong>le</strong> conducteur ne puisse pas regar<strong>de</strong>r <strong>le</strong>téléviseur <strong>ou</strong> <strong>la</strong> vidéo tant que <strong>le</strong> véhicu<strong>le</strong> n’est pas àl’arrêt et que <strong>le</strong> frein à main n’est pas actionné.Si <strong>le</strong> VPA-B222R n’est pas correctement installé, <strong>le</strong>conducteur sera tenté <strong>de</strong> regar<strong>de</strong>r <strong>le</strong> téléviseur <strong>ou</strong> <strong>la</strong>vidéo lors <strong>de</strong> <strong>la</strong> conduite et s’il n’est pas concentré<strong>sur</strong> <strong>la</strong> r<strong>ou</strong>te, il peut provoquer un acci<strong>de</strong>nt. Leconducteur ainsi que d’autres personnes risquentd’être b<strong>le</strong>ssés.• Si v<strong>ou</strong>s essayez d’activer l’appareil auxiliaire pendant que v<strong>ou</strong>sconduisez, l’avertissement -PICTURE OFF FOR YOUR SAFETYs’affiche.1 <strong>Appuyez</strong> <strong>sur</strong> SOURCE/POWER.L’écran <strong>de</strong> sé<strong>le</strong>ction <strong>de</strong> <strong>la</strong> s<strong>ou</strong>rce s’affiche.2 <strong>Appuyez</strong> <strong>sur</strong> <strong>le</strong> <strong>b<strong>ou</strong>ton</strong> supérieur <strong>ou</strong> inférieur <strong>de</strong> <strong>la</strong>comman<strong>de</strong> multidirectionnel<strong>le</strong> p<strong>ou</strong>r sé<strong>le</strong>ctionner<strong>le</strong> mo<strong>de</strong> AUX, puis appuyez <strong>sur</strong> / /ENTER.L’écran <strong>de</strong> l’entrée externe s’affiche.• AUX-1 à AUX s’affichent si AUX IN est réglé <strong>sur</strong> ON à <strong>la</strong> section« Rég<strong>la</strong>ge du mo<strong>de</strong> AUX » (page 18) <strong>ou</strong> <strong>le</strong> nom donné comme nom <strong>de</strong>s<strong>ou</strong>rce à <strong>la</strong> section « Désignation <strong>de</strong>s appareils externes » à <strong>la</strong>page 18.• AUX-3 s’affiche si <strong>le</strong> boîtier d’expansion en option (VPE-S431) estraccordé.• Si <strong>la</strong> borne <strong>de</strong> liaison universel<strong>le</strong> (Versati<strong>le</strong> Link Terminal)(KCA-410C) est raccordée, l’entrée externe du KCA-410C n’est pasdisponib<strong>le</strong>. Cependant, si IN-INT MUTE est réglé <strong>sur</strong> OFF, <strong>le</strong> sond’un appareil raccordé à l’entrée externe du KCA-410C peut êtreinterrompu. (Reportez-v<strong>ou</strong>s à <strong>la</strong> section « Rég<strong>la</strong>ge du mo<strong>de</strong>d’interruption <strong>de</strong> l’appareil externe », page 19.)30-FR
Système usinierFonctionnement du système usinier(mo<strong>de</strong> d’entrée <strong>de</strong>s enceintes)Le système audio du véhicu<strong>le</strong> (<strong>le</strong>cteur CD standard) peut êtresé<strong>le</strong>ctionné comme s<strong>ou</strong>rce.1 <strong>Appuyez</strong> <strong>sur</strong> SOURCE/POWER.L’écran <strong>de</strong> sé<strong>le</strong>ction <strong>de</strong> <strong>la</strong> s<strong>ou</strong>rce s’affiche.2 <strong>Appuyez</strong> <strong>sur</strong> <strong>le</strong> <strong>b<strong>ou</strong>ton</strong> supérieur <strong>ou</strong> inférieur <strong>de</strong> <strong>la</strong>comman<strong>de</strong> multidirectionnel<strong>le</strong> p<strong>ou</strong>rsé<strong>le</strong>ctionner <strong>le</strong> mo<strong>de</strong> FACTORY SYS, puis appuyez<strong>sur</strong> / /ENTER.L’écran <strong>de</strong> l’entrée <strong>de</strong>s enceintes s’affiche.• Le mo<strong>de</strong> FACTORY SYS s’affiche v<strong>ou</strong>s sé<strong>le</strong>ctionnez SOURCE etBOTH à <strong>la</strong> section « Rég<strong>la</strong>ge du mo<strong>de</strong> d’entrée <strong>de</strong>s enceintes »(page 16).• Effectuez chacun <strong>de</strong>s rég<strong>la</strong>ges correctement à <strong>la</strong> section « Utilisation<strong>de</strong> l’entrée <strong>de</strong>s enceintes » (page 16) avant d’utiliser cette fonction.Processeur audioexterne(en option)Comman<strong>de</strong>multidirectionnel<strong>le</strong>Quand un processeur audio externe est connecté à l’appareil, v<strong>ou</strong>sp<strong>ou</strong>vez <strong>le</strong> comman<strong>de</strong>r à partir <strong>de</strong> celui-ci. Ce<strong>la</strong> n’est t<strong>ou</strong>tefois pas <strong>le</strong> casp<strong>ou</strong>r t<strong>ou</strong>s <strong>le</strong>s processeurs audio. Les instructions d’exemp<strong>le</strong> ci-<strong>de</strong>ss<strong>ou</strong>ssont applicab<strong>le</strong>s quand un processeur PXA-H700 <strong>ou</strong> PXA-H701 estconnecté à l’appareil.Consultez aussi <strong>le</strong>s instructions d’utilisation du processeur audioraccordé.• Les ajustements <strong>ou</strong> rég<strong>la</strong>ges effectués <strong>sur</strong> <strong>le</strong> processeur audioconnecté à l’appareil ne peuvent pas être commandés correctement àpartir <strong>de</strong> celui-ci.• Les rég<strong>la</strong>ges suivants ne sont pas disponib<strong>le</strong>s si <strong>le</strong> MRD-D550 estraccordé : « Rég<strong>la</strong>ge <strong>de</strong>s enceintes », « Rég<strong>la</strong>ge <strong>de</strong> <strong>la</strong> comman<strong>de</strong> <strong>de</strong>sbasses » et « Rég<strong>la</strong>ges <strong>de</strong> l’égaliseur graphique ». En <strong>ou</strong>tre, si <strong>le</strong>MRD-F350 est raccordé, <strong>le</strong> « Rég<strong>la</strong>ge du mo<strong>de</strong> MX » n’est pasdisponib<strong>le</strong>. De plus, <strong>le</strong>s va<strong>le</strong>urs du rég<strong>la</strong>ge entre <strong>le</strong> PXA-H700 et <strong>le</strong>PXA-H701 diffèrent.31-FR
Procédure <strong>de</strong> rég<strong>la</strong>ge du son DolbySurr<strong>ou</strong>ndEffectuez <strong>le</strong>s rég<strong>la</strong>ges décrits ci-<strong>de</strong>ss<strong>ou</strong>s p<strong>ou</strong>r reproduire <strong>le</strong>s sons DolbyDigital et DTS avec davantage <strong>de</strong> précision.Procédure <strong>de</strong> rég<strong>la</strong>ge12345Configuration <strong>de</strong>s enceintes (page 36)(Activation/désactivation <strong>de</strong>s enceintes et rég<strong>la</strong>ge <strong>de</strong><strong>le</strong>ur réponse)Rég<strong>la</strong>ge <strong>de</strong>s niveaux <strong>de</strong>s enceintes (page 38)(Rég<strong>la</strong>ge du niveau <strong>de</strong> sortie du signal vers <strong>le</strong>sdifférentes enceintes)Mixage <strong>de</strong>s sons graves vers <strong>le</strong> canal arrière(page 37)(Régu<strong>la</strong>risation du son au niveau du siège arrière parmixage <strong>de</strong>s signaux audio avant avec <strong>le</strong>s signaux<strong>de</strong>s enceintes arrière)Rég<strong>la</strong>ge <strong>de</strong> l’image ac<strong>ou</strong>stique (page 37)(Rég<strong>la</strong>ge <strong>de</strong> l’image ac<strong>ou</strong>stique en vue d’obtenir unson simi<strong>la</strong>ire à celui produit quand l’enceinte centra<strong>le</strong>se tr<strong>ou</strong>ve directement <strong>de</strong>vant l’auditeur)Rég<strong>la</strong>ge <strong>de</strong> <strong>la</strong> puissance du son à un volumeé<strong>le</strong>vé (page 38)(Rég<strong>la</strong>ge du son énergique avec davantage <strong>de</strong>puissance en vue d’obtenir un son simi<strong>la</strong>ire à celuid’une sal<strong>le</strong> <strong>de</strong> cinéma)Rég<strong>la</strong>ge <strong>de</strong>s enceintes1 As<strong>sur</strong>ez-v<strong>ou</strong>s que <strong>le</strong> mo<strong>de</strong> Defeat est désactivé(page 12).2 <strong>Appuyez</strong> <strong>sur</strong> TA/RTN/SETUP pendant au moins2 secon<strong>de</strong>s.L’écran SETUP s’affiche.3 <strong>Appuyez</strong> <strong>sur</strong> <strong>le</strong> <strong>b<strong>ou</strong>ton</strong> supérieur <strong>ou</strong> inférieur <strong>de</strong> <strong>la</strong>comman<strong>de</strong> multidirectionnel<strong>le</strong> p<strong>ou</strong>rsé<strong>le</strong>ctionner AP SETUP, puis appuyez <strong>sur</strong> <strong>le</strong> <strong>b<strong>ou</strong>ton</strong>droit <strong>de</strong> <strong>la</strong> comman<strong>de</strong> multidirectionnel<strong>le</strong>.L’écran AP SETUP s’affiche.4 <strong>Appuyez</strong> <strong>sur</strong> <strong>le</strong> <strong>b<strong>ou</strong>ton</strong> supérieur <strong>ou</strong> inférieur <strong>de</strong> <strong>la</strong>comman<strong>de</strong> multidirectionnel<strong>le</strong> p<strong>ou</strong>r sé<strong>le</strong>ctionnerSPEAKER SEL, puis appuyez <strong>sur</strong> <strong>le</strong> <strong>b<strong>ou</strong>ton</strong> droit <strong>de</strong><strong>la</strong> comman<strong>de</strong> multidirectionnel<strong>le</strong>.5 <strong>Appuyez</strong> <strong>sur</strong> <strong>le</strong> <strong>b<strong>ou</strong>ton</strong> droit <strong>ou</strong> gauche <strong>de</strong> <strong>la</strong>comman<strong>de</strong> multidirectionnel<strong>le</strong> p<strong>ou</strong>r rég<strong>le</strong>rl’enceinte raccordée.FRONT1 : OFF/FULL (p<strong>la</strong>ge complète)/TW (tweeter)FRONT2 : OFF/ONREAR : OFF/ONCENTER : OFF/ONSUBWOOFER : OFF/MONO/STEREO6 Répétez <strong>le</strong>s étapes 4 et 5 p<strong>ou</strong>r rég<strong>le</strong>r t<strong>ou</strong>tes <strong>le</strong>sautres enceintes.7 <strong>Appuyez</strong> <strong>sur</strong> TA/RTN/SETUP p<strong>ou</strong>r revenir à l’écranprécé<strong>de</strong>nt.• Rég<strong>le</strong>z <strong>le</strong>s enceintes qui ne sont pas connectées <strong>sur</strong> OFF.• Les rég<strong>la</strong>ges ci-<strong>de</strong>ssus peuvent être effectués même si l’enceinte estréglée <strong>sur</strong> OFF à <strong>la</strong> section « Configuration <strong>de</strong>s enceintes »(page 36).• P<strong>ou</strong>r utiliser <strong>le</strong> subwoofer en mo<strong>de</strong> MONO alors que <strong>le</strong> PXA-H700<strong>ou</strong> PXA-H701 est raccordé, raccor<strong>de</strong>z <strong>le</strong> subwoofer à <strong>la</strong> borne <strong>de</strong>sortie subwoofer du PXA-H700 <strong>ou</strong> PXA-H701.6Rég<strong>la</strong>ge du niveau du DVD (page 38)(Rég<strong>la</strong>ge du volume (niveau du signal) dans <strong>le</strong>smo<strong>de</strong>s Dolby Digital, Pro Logic II, DTS et PCM)7Mémorisation <strong>de</strong>s rég<strong>la</strong>ges (page 38)(Mémorisation <strong>de</strong> t<strong>ou</strong>s <strong>le</strong>s rég<strong>la</strong>ges effectués <strong>sur</strong> <strong>le</strong>VPA-B222R (et pas uniquement ceux mentionnésci-<strong>de</strong>ssus))En cas <strong>de</strong> combinaison <strong>de</strong>s rég<strong>la</strong>ges automatiques, etc.N<strong>ou</strong>s v<strong>ou</strong>s recommandons d’effectuer <strong>le</strong>s rég<strong>la</strong>ges automatiques avantd’ajuster <strong>le</strong> son Dolby Surr<strong>ou</strong>nd.32-FR
Rég<strong>la</strong>ge du mo<strong>de</strong> MX du processeuraudio externeAvant d’exécuter <strong>le</strong>s opérations ci-<strong>de</strong>ss<strong>ou</strong>s, rég<strong>le</strong>z <strong>le</strong> mo<strong>de</strong> MX (MediaXpan<strong>de</strong>r) du PXA-H700 <strong>sur</strong> « AUTO » lorsque celui-ci est raccordé.1 As<strong>sur</strong>ez-v<strong>ou</strong>s que <strong>le</strong> mo<strong>de</strong> Defeat est désactivé(page 12).2 <strong>Appuyez</strong> <strong>sur</strong> TA/RTN/SETUP pendant au moins2 secon<strong>de</strong>s.L’écran SETUP s’affiche.3 <strong>Appuyez</strong> <strong>sur</strong> <strong>le</strong> <strong>b<strong>ou</strong>ton</strong> supérieur <strong>ou</strong> inférieur <strong>de</strong> <strong>la</strong>comman<strong>de</strong> multidirectionnel<strong>le</strong> p<strong>ou</strong>rsé<strong>le</strong>ctionner AP SETUP, puis appuyez <strong>sur</strong> <strong>le</strong> <strong>b<strong>ou</strong>ton</strong>droit <strong>de</strong> <strong>la</strong> comman<strong>de</strong> multidirectionnel<strong>le</strong>.L’écran AP SETUP s’affiche.4 <strong>Appuyez</strong> <strong>sur</strong> <strong>le</strong> <strong>b<strong>ou</strong>ton</strong> supérieur <strong>ou</strong> inférieur <strong>de</strong> <strong>la</strong>comman<strong>de</strong> multidirectionnel<strong>le</strong> p<strong>ou</strong>rsé<strong>le</strong>ctionner MX, puis appuyez <strong>sur</strong> <strong>le</strong> <strong>b<strong>ou</strong>ton</strong> droit<strong>ou</strong> gauche <strong>de</strong> <strong>la</strong> comman<strong>de</strong> multidirectionnel<strong>le</strong>p<strong>ou</strong>r sé<strong>le</strong>ctionner ON.5 <strong>Appuyez</strong> <strong>sur</strong> <strong>le</strong> <strong>b<strong>ou</strong>ton</strong> supérieur <strong>ou</strong> inférieur <strong>de</strong> <strong>la</strong>comman<strong>de</strong> multidirectionnel<strong>le</strong> p<strong>ou</strong>r sé<strong>le</strong>ctionnerMX SETUP, puis appuyez <strong>sur</strong> <strong>le</strong> <strong>b<strong>ou</strong>ton</strong> droit <strong>de</strong> <strong>la</strong>comman<strong>de</strong> multidirectionnel<strong>le</strong>.6 <strong>Appuyez</strong> <strong>sur</strong> <strong>le</strong> <strong>b<strong>ou</strong>ton</strong> supérieur <strong>ou</strong> inférieur <strong>de</strong> <strong>la</strong>comman<strong>de</strong> multifonctionnel<strong>le</strong> p<strong>ou</strong>r sé<strong>le</strong>ctionner<strong>le</strong> support qui est en c<strong>ou</strong>rs <strong>de</strong> <strong>le</strong>cture. <strong>Appuyez</strong>ensuite <strong>sur</strong> <strong>le</strong> <strong>b<strong>ou</strong>ton</strong> gauche <strong>ou</strong> droit <strong>de</strong> <strong>la</strong>comman<strong>de</strong> multifonctionnel<strong>le</strong> p<strong>ou</strong>r rég<strong>le</strong>r <strong>le</strong>mo<strong>de</strong> MX s<strong>ou</strong>haité.MX CD (OFF, CD 1 à 3)Le mo<strong>de</strong> CD traite <strong>de</strong> gran<strong>de</strong>s quantités <strong>de</strong> données. Cesdonnées servent à reproduire c<strong>la</strong>irement <strong>le</strong> son <strong>sur</strong> base <strong>de</strong> <strong>la</strong>quantité <strong>de</strong> données.MX COMPM (OFF, CMPM 1 à 3)Ce rég<strong>la</strong>ge corrige <strong>le</strong>s informations omises lors <strong>de</strong> <strong>la</strong>compression. Ce<strong>la</strong> permet <strong>de</strong> reproduire un son parfaitementéquilibré, proche <strong>de</strong> l’original.MX FM (OFF, FM 1 à 3)Ce rég<strong>la</strong>ge produit <strong>de</strong>s sons <strong>de</strong> fréquences moyennes à hautesavec plus <strong>de</strong> c<strong>la</strong>rté et produit <strong>de</strong>s sons bien équilibrés <strong>sur</strong>t<strong>ou</strong>tes <strong>le</strong>s gammes d’on<strong>de</strong>s.MX DVD (OFF, MOVIE 1 à 2)Ce rég<strong>la</strong>ge reproduit plus c<strong>la</strong>irement <strong>la</strong> partie <strong>de</strong>s dialogues dufilm.(MUSIC)Ce disque contient une gran<strong>de</strong> quantité <strong>de</strong> données, tel<strong>le</strong>squ’une vidéo musica<strong>le</strong>. MX utilise ces données p<strong>ou</strong>r reproduire<strong>le</strong> son <strong>de</strong> façon précise.MX AUX 1 à 3 (OFF, CMPM, MOVIE, MUSIC)Sé<strong>le</strong>ctionnez <strong>le</strong> mo<strong>de</strong> MX (CMPM, MUSIC <strong>ou</strong> MOVIE) quicorrespond au support connecté.7 <strong>Appuyez</strong> <strong>sur</strong> TA/RTN/SETUP p<strong>ou</strong>r revenir à l’écranprécé<strong>de</strong>nt.• Le contenu du mo<strong>de</strong> MX réglé ici est reflété vers <strong>le</strong> PXA-H700 <strong>ou</strong>PXA-H701.• La sé<strong>le</strong>ction du rég<strong>la</strong>ge OFF désactive l’effet MX <strong>de</strong> chaque mo<strong>de</strong> MX.• Chaque s<strong>ou</strong>rce <strong>de</strong> musique, notamment <strong>la</strong> radio, <strong>le</strong> CD et <strong>le</strong> MP3,peut possé<strong>de</strong>r son propre rég<strong>la</strong>ge MX.• Le mo<strong>de</strong> MX ne fonctionne pas lorsque MX est réglé <strong>sur</strong> ON p<strong>ou</strong>r <strong>la</strong>radio MW, LW.• MX COMPM s’applique p<strong>ou</strong>r MP3/WMA, MMD et iPod.• Le mo<strong>de</strong> MX ne peut être réglé que p<strong>ou</strong>r <strong>le</strong> support en c<strong>ou</strong>rs <strong>de</strong> <strong>le</strong>cture.• AUX3 ne peut être réglé que si <strong>le</strong> boîtier d’expansion VPE-S431 enoption est raccordé.Rég<strong>la</strong>ge du mo<strong>de</strong> X-OVER1 As<strong>sur</strong>ez-v<strong>ou</strong>s que <strong>le</strong> mo<strong>de</strong> Defeat est désactivé(page 12).2 <strong>Appuyez</strong> <strong>sur</strong> TA/RTN/SETUP pendant au moins2 secon<strong>de</strong>s.L’écran SETUP s’affiche.3 <strong>Appuyez</strong> <strong>sur</strong> <strong>le</strong> <strong>b<strong>ou</strong>ton</strong> supérieur <strong>ou</strong> inférieur <strong>de</strong> <strong>la</strong>comman<strong>de</strong> multidirectionnel<strong>le</strong> p<strong>ou</strong>rsé<strong>le</strong>ctionner AP SETUP, puis appuyez <strong>sur</strong> <strong>le</strong> <strong>b<strong>ou</strong>ton</strong>droit <strong>de</strong> <strong>la</strong> comman<strong>de</strong> multidirectionnel<strong>le</strong>.L’écran AP SETUP s’affiche.4 <strong>Appuyez</strong> <strong>sur</strong> <strong>le</strong> <strong>b<strong>ou</strong>ton</strong> supérieur <strong>ou</strong> inférieur <strong>de</strong> <strong>la</strong>comman<strong>de</strong> multidirectionnel<strong>le</strong> p<strong>ou</strong>rsé<strong>le</strong>ctionner X-OVER.5 <strong>Appuyez</strong> <strong>sur</strong> <strong>le</strong> <strong>b<strong>ou</strong>ton</strong> gauche <strong>ou</strong> droit <strong>de</strong> <strong>la</strong>comman<strong>de</strong> multidirectionnel<strong>le</strong> p<strong>ou</strong>rsé<strong>le</strong>ctionner L/R <strong>ou</strong> L+R.6 <strong>Appuyez</strong> <strong>sur</strong> <strong>le</strong> <strong>b<strong>ou</strong>ton</strong> supérieur <strong>ou</strong> inférieur <strong>de</strong> <strong>la</strong>comman<strong>de</strong> multidirectionnel<strong>le</strong> p<strong>ou</strong>rsé<strong>le</strong>ctionner X-OVER SETUP, puis appuyez <strong>sur</strong> <strong>le</strong><strong>b<strong>ou</strong>ton</strong> droit <strong>de</strong> <strong>la</strong> comman<strong>de</strong>multidirectionnel<strong>le</strong>.7 <strong>Appuyez</strong> <strong>sur</strong> <strong>le</strong> <strong>b<strong>ou</strong>ton</strong> supérieur <strong>ou</strong> inférieur <strong>de</strong> <strong>la</strong>comman<strong>de</strong> multidirectionnel<strong>le</strong> p<strong>ou</strong>rsé<strong>le</strong>ctionner l’enceinte <strong>de</strong> votre choix, puis appuyez<strong>sur</strong> <strong>le</strong> <strong>b<strong>ou</strong>ton</strong> droit <strong>de</strong> <strong>la</strong> comman<strong>de</strong>multidirectionnel<strong>le</strong>.8 <strong>Appuyez</strong> <strong>sur</strong> <strong>le</strong> <strong>b<strong>ou</strong>ton</strong> supérieur <strong>ou</strong> inférieur <strong>de</strong> <strong>la</strong>comman<strong>de</strong> multidirectionnel<strong>le</strong> p<strong>ou</strong>rsé<strong>le</strong>ctionner l’élément <strong>de</strong> votre choix, puis appuyez<strong>sur</strong> <strong>le</strong> <strong>b<strong>ou</strong>ton</strong> droit <strong>ou</strong> gauche <strong>de</strong> <strong>la</strong> comman<strong>de</strong>multidirectionnel<strong>le</strong> p<strong>ou</strong>r rég<strong>le</strong>r <strong>le</strong> répartiteur.FREQUENCY : permet <strong>de</strong> rég<strong>le</strong>r <strong>la</strong> fréquence <strong>de</strong> référence dufiltre passe-haut et du filtre passe-bas.Les gammes d’on<strong>de</strong>s p<strong>ou</strong>vant être régléesvarient en fonction du canal (enceinte).LEVEL : permet <strong>de</strong> rég<strong>le</strong>r <strong>le</strong> niveau du filtre passe-haut<strong>ou</strong> du filtre passe-bas.Niveau rég<strong>la</strong>b<strong>le</strong> : -13 à 0SLOPE : permet <strong>de</strong> rég<strong>le</strong>r <strong>la</strong> pente du filtre passe-haut<strong>ou</strong> du filtre passe-bas.Pente rég<strong>la</strong>b<strong>le</strong> : OFF/-6/-12/-18/-24/-30P<strong>ou</strong>r rég<strong>le</strong>r d’autres canaux, répétez <strong>le</strong>s étapes 7 et 8.9 <strong>Appuyez</strong> <strong>sur</strong> TA/RTN/SETUP p<strong>ou</strong>r revenir à l’écranprécé<strong>de</strong>nt.• Lorsque l’enceinte est réglée <strong>sur</strong> <strong>le</strong> mo<strong>de</strong> « OFF », il v<strong>ou</strong>s seraimpossib<strong>le</strong> <strong>de</strong> configurer <strong>le</strong> X-OVER p<strong>ou</strong>r cette enceinte. Reportezv<strong>ou</strong>sà <strong>la</strong> section « Rég<strong>la</strong>ge <strong>de</strong>s enceintes » (page 32).• Contrô<strong>le</strong>z <strong>le</strong>s fréquences <strong>de</strong> <strong>le</strong>cture <strong>de</strong>s enceintes connectées avant<strong>de</strong> procé<strong>de</strong>r au rég<strong>la</strong>ge.• P<strong>ou</strong>r protéger <strong>le</strong>s enceintes, il n’est pas possib<strong>le</strong> <strong>de</strong> désactiver (OFF)<strong>le</strong> filtre passe-bas du subwoofer (<strong>la</strong> pente <strong>de</strong>meure inchangée).• Le filtre H.P.F ne peut pas être désactivé (pente OFF) si v<strong>ou</strong>ssé<strong>le</strong>ctionnez TW (tweeter) p<strong>ou</strong>r FRONT1.33-FR
Rég<strong>la</strong>ge <strong>de</strong> <strong>la</strong> correction manuel<strong>le</strong> dutemps (TCR)En raison <strong>de</strong>s conditions particulières <strong>de</strong> l’habitac<strong>le</strong> du véhicu<strong>le</strong>, il peuty avoir d’importantes différences <strong>de</strong> distances entre <strong>le</strong>s diversesenceintes et <strong>la</strong> position d’éc<strong>ou</strong>te. Cette fonction v<strong>ou</strong>s permet néanmoins<strong>de</strong> calcu<strong>le</strong>r v<strong>ou</strong>s-même <strong>le</strong>s va<strong>le</strong>urs <strong>de</strong> correction optima<strong>le</strong>s et <strong>de</strong>supprimer <strong>le</strong>s erreurs <strong>de</strong> temps au niveau <strong>de</strong> <strong>la</strong> position d’éc<strong>ou</strong>te.1 As<strong>sur</strong>ez-v<strong>ou</strong>s que <strong>le</strong> mo<strong>de</strong> Defeat est désactivé(page 12).2 Asseyez-v<strong>ou</strong>s à <strong>la</strong> position d’éc<strong>ou</strong>te (siège duconducteur, par exemp<strong>le</strong>) et me<strong>sur</strong>ez <strong>la</strong> distance(en mètres) entre votre tête et chaque enceinte.3 Calcu<strong>le</strong>z <strong>la</strong> différence <strong>de</strong> distance entre l’enceinte <strong>la</strong>plus éloignée et <strong>le</strong>s autres enceintes.L =(distance <strong>de</strong> l’enceinte <strong>la</strong> plus éloignée)– (distance <strong>de</strong>s autres enceintes)4 Divisez <strong>le</strong>s distances calculées p<strong>ou</strong>r <strong>le</strong>s différentesenceintes par <strong>la</strong> vitesse du son (343 m/s à unetempérature <strong>de</strong> 20 °C).Cette va<strong>le</strong>ur est cel<strong>le</strong> <strong>de</strong> <strong>la</strong> correction du temps <strong>de</strong>sdifférentes enceintes.Exemp<strong>le</strong>s concretsIci, n<strong>ou</strong>s calculons <strong>la</strong> va<strong>le</strong>ur <strong>de</strong> correction du temps p<strong>ou</strong>rl’enceinte avant gauche dans <strong>le</strong> schéma ci-<strong>de</strong>ssus.Conditions :Distance entre l’enceinte <strong>la</strong> plus éloignée et <strong>la</strong> position d’éc<strong>ou</strong>te :2,25 m (88-3/4")Distance entre l’enceinte avant gauche et <strong>la</strong> position d’éc<strong>ou</strong>te :0,5 m (20")Calcul :L = 2,25 m (88-3/4") – 0,5 m (20") = 1,75 m (68-3/4")Correction du temps = 1,75 ÷ 343 x 1000 = 5,1 (ms)Autrement dit, en rég<strong>la</strong>nt <strong>la</strong> va<strong>le</strong>ur <strong>de</strong> correction du temps p<strong>ou</strong>rl’enceinte avant gauche <strong>sur</strong> 5,1 (ms), v<strong>ou</strong>s définissez unedistance virtuel<strong>le</strong> i<strong>de</strong>ntique à cel<strong>le</strong> <strong>de</strong> l’enceinte <strong>la</strong> plus éloignée.5 <strong>Appuyez</strong> <strong>sur</strong> TA/RTN/SETUP pendant au moins2 secon<strong>de</strong>s.L’écran SETUP s’affiche.6 <strong>Appuyez</strong> <strong>sur</strong> <strong>le</strong> <strong>b<strong>ou</strong>ton</strong> supérieur <strong>ou</strong> inférieur <strong>de</strong> <strong>la</strong>comman<strong>de</strong> multidirectionnel<strong>le</strong> p<strong>ou</strong>rsé<strong>le</strong>ctionner AP SETUP, puis appuyez <strong>sur</strong> <strong>le</strong> <strong>b<strong>ou</strong>ton</strong>droit <strong>de</strong> <strong>la</strong> comman<strong>de</strong> multidirectionnel<strong>le</strong>.L’écran AP SETUP s’affiche.7 <strong>Appuyez</strong> <strong>sur</strong> <strong>le</strong> <strong>b<strong>ou</strong>ton</strong> supérieur <strong>ou</strong> inférieur <strong>de</strong> <strong>la</strong>comman<strong>de</strong> multidirectionnel<strong>le</strong> p<strong>ou</strong>r sé<strong>le</strong>ctionner TCR.8 <strong>Appuyez</strong> <strong>sur</strong> <strong>le</strong> <strong>b<strong>ou</strong>ton</strong> gauche <strong>ou</strong> droit <strong>de</strong> <strong>la</strong> comman<strong>de</strong>multidirectionnel<strong>le</strong> p<strong>ou</strong>r sé<strong>le</strong>ctionner L/R <strong>ou</strong> L+R.L/R :Différentes va<strong>le</strong>urs <strong>de</strong> rég<strong>la</strong>ge peuvent être définies p<strong>ou</strong>r<strong>le</strong>s canaux gauche et droit.L+R : Définit <strong>de</strong>s va<strong>le</strong>urs <strong>de</strong> rég<strong>la</strong>ge i<strong>de</strong>ntiques p<strong>ou</strong>r <strong>le</strong>scanaux gauche et droit.9 <strong>Appuyez</strong> <strong>sur</strong> <strong>le</strong> <strong>b<strong>ou</strong>ton</strong> supérieur <strong>ou</strong> inférieur <strong>de</strong> <strong>la</strong>comman<strong>de</strong> multidirectionnel<strong>le</strong> p<strong>ou</strong>r sé<strong>le</strong>ctionnerTCR SETUP, puis appuyez <strong>sur</strong> <strong>le</strong> <strong>b<strong>ou</strong>ton</strong> droit <strong>de</strong> <strong>la</strong>comman<strong>de</strong> multidirectionnel<strong>le</strong>.10 <strong>Appuyez</strong> <strong>sur</strong> <strong>le</strong> <strong>b<strong>ou</strong>ton</strong> supérieur <strong>ou</strong> inférieur <strong>de</strong> <strong>la</strong>comman<strong>de</strong> multidirectionnel<strong>le</strong> p<strong>ou</strong>rsé<strong>le</strong>ctionner l’enceinte <strong>de</strong> votre choix.11 <strong>Appuyez</strong> <strong>sur</strong> <strong>le</strong> <strong>b<strong>ou</strong>ton</strong> gauche <strong>ou</strong> droit <strong>de</strong> <strong>la</strong> comman<strong>de</strong>multidirectionnel<strong>le</strong> p<strong>ou</strong>r rég<strong>le</strong>r <strong>la</strong> va<strong>le</strong>ur <strong>de</strong> correctiondu temps (0,00 à 20,00 ms). (1 pas = 0,05 ms)La va<strong>le</strong>ur <strong>de</strong> correction du temps change continuel<strong>le</strong>ment siv<strong>ou</strong>s appuyez <strong>sur</strong> <strong>la</strong> comman<strong>de</strong> multidirectionnel<strong>le</strong> et <strong>la</strong>maintenez enfoncée.12 <strong>Appuyez</strong> <strong>sur</strong> TA/RTN/SETUP p<strong>ou</strong>r revenir à l’écranprécé<strong>de</strong>nt.• Lorsque l’enceinte est réglée <strong>sur</strong> <strong>le</strong> mo<strong>de</strong> « OFF », <strong>le</strong> TCR ne peutpas être réglé p<strong>ou</strong>r cette enceinte. Reportez-v<strong>ou</strong>s à <strong>la</strong> section« Rég<strong>la</strong>ge <strong>de</strong>s enceintes » (page 32).• La va<strong>le</strong>ur <strong>de</strong> rég<strong>la</strong>ge <strong>de</strong> FRONT2 (enceintes) définie en mo<strong>de</strong> <strong>de</strong>correction du temps est éga<strong>le</strong>ment appliquée aux enceintes avant à <strong>la</strong>section « Rég<strong>la</strong>ge <strong>de</strong> l’accentuation <strong>de</strong>s graves » (page 36).• Le rég<strong>la</strong>ge (AUTO TCR) ne peut pas être réglé automatiquement <strong>sur</strong>cet appareil.Changement <strong>de</strong> phase0,5 m34-FR2,25 mLe son n’est pas équilibré,car <strong>la</strong> distance entre <strong>la</strong>position d’éc<strong>ou</strong>te et <strong>le</strong>sdifférentes enceintes varie.La différence <strong>de</strong> distanceentre l’enceinte avant gaucheet l’enceinte arrière droite est<strong>de</strong> 1,75 m (68-3/4").5,1 msLa correction du temps élimine<strong>le</strong>s différences <strong>de</strong> tempsrequises p<strong>ou</strong>r que <strong>le</strong> sonatteigne <strong>la</strong> position d’éc<strong>ou</strong>te<strong>de</strong>puis <strong>le</strong>s différentes enceintes.Le rég<strong>la</strong>ge <strong>de</strong> <strong>la</strong> correction dutemps <strong>de</strong> l’enceinte avantgauche <strong>sur</strong> 5,1 ms permet <strong>de</strong>coordonner <strong>la</strong> distance entre <strong>la</strong>position d’éc<strong>ou</strong>te et l’enceinte.1 As<strong>sur</strong>ez-v<strong>ou</strong>s que <strong>le</strong> mo<strong>de</strong> Defeat est désactivé (page 12).2 <strong>Appuyez</strong> <strong>sur</strong> TA/RTN/SETUP pendant au moins2 secon<strong>de</strong>s.L’écran SETUP s’affiche.3 <strong>Appuyez</strong> <strong>sur</strong> <strong>le</strong> <strong>b<strong>ou</strong>ton</strong> supérieur <strong>ou</strong> inférieur <strong>de</strong> <strong>la</strong>comman<strong>de</strong> multidirectionnel<strong>le</strong> p<strong>ou</strong>rsé<strong>le</strong>ctionner AP SETUP, puis appuyez <strong>sur</strong> <strong>le</strong> <strong>b<strong>ou</strong>ton</strong>droit <strong>de</strong> <strong>la</strong> comman<strong>de</strong> multidirectionnel<strong>le</strong>.L’écran AP SETUP s’affiche.4 <strong>Appuyez</strong> <strong>sur</strong> <strong>le</strong> <strong>b<strong>ou</strong>ton</strong> supérieur <strong>ou</strong> inférieur <strong>de</strong> <strong>la</strong>comman<strong>de</strong> multidirectionnel<strong>le</strong> p<strong>ou</strong>r sé<strong>le</strong>ctionnerPHASE SETUP, puis appuyez <strong>sur</strong> <strong>le</strong> <strong>b<strong>ou</strong>ton</strong> droit <strong>de</strong><strong>la</strong> comman<strong>de</strong> multidirectionnel<strong>le</strong>.5 <strong>Appuyez</strong> <strong>sur</strong> <strong>le</strong> <strong>b<strong>ou</strong>ton</strong> supérieur <strong>ou</strong> inférieur <strong>de</strong> <strong>la</strong>comman<strong>de</strong> multidirectionnel<strong>le</strong> p<strong>ou</strong>rsé<strong>le</strong>ctionner l’enceinte <strong>de</strong> votre choix.6 <strong>Appuyez</strong> <strong>sur</strong> <strong>le</strong> <strong>b<strong>ou</strong>ton</strong> droit <strong>ou</strong> gauche <strong>de</strong> <strong>la</strong> comman<strong>de</strong>multidirectionnel<strong>le</strong> p<strong>ou</strong>r modifier <strong>la</strong> phase (0° <strong>ou</strong> 180°).7 <strong>Appuyez</strong> <strong>sur</strong> TA/RTN/SETUP p<strong>ou</strong>r revenir à l’écranprécé<strong>de</strong>nt.
Rég<strong>la</strong>ges <strong>de</strong> l’égaliseur graphiqueL’égaliseur graphique permet <strong>de</strong> modifier <strong>le</strong> son à l’ai<strong>de</strong> <strong>de</strong> 31 ban<strong>de</strong>sp<strong>ou</strong>r chaque enceinte avant (gauche et droite), arrière (gauche et droite)et centra<strong>le</strong>. 10 autres ban<strong>de</strong>s sont disponib<strong>le</strong>s p<strong>ou</strong>r <strong>le</strong> subwoofer. Ce<strong>la</strong>v<strong>ou</strong>s permet <strong>de</strong> personnaliser <strong>le</strong> son en fonction <strong>de</strong> vos préférences.1 As<strong>sur</strong>ez-v<strong>ou</strong>s que <strong>le</strong> mo<strong>de</strong> Defeat est désactivé(page 12).2 <strong>Appuyez</strong> <strong>sur</strong> TA/RTN/SETUP pendant au moins2 secon<strong>de</strong>s.L’écran SETUP s’affiche.3 <strong>Appuyez</strong> <strong>sur</strong> <strong>le</strong> <strong>b<strong>ou</strong>ton</strong> supérieur <strong>ou</strong> inférieur <strong>de</strong> <strong>la</strong>comman<strong>de</strong> multidirectionnel<strong>le</strong> p<strong>ou</strong>rsé<strong>le</strong>ctionner AP SETUP, puis appuyez <strong>sur</strong> <strong>le</strong> <strong>b<strong>ou</strong>ton</strong>droit <strong>de</strong> <strong>la</strong> comman<strong>de</strong> multidirectionnel<strong>le</strong>.L’écran AP SETUP s’affiche.4 <strong>Appuyez</strong> <strong>sur</strong> <strong>le</strong> <strong>b<strong>ou</strong>ton</strong> supérieur <strong>ou</strong> inférieur <strong>de</strong> <strong>la</strong>comman<strong>de</strong> multidirectionnel<strong>le</strong> p<strong>ou</strong>r sé<strong>le</strong>ctionner G-EQ.5 <strong>Appuyez</strong> <strong>sur</strong> <strong>le</strong> <strong>b<strong>ou</strong>ton</strong> gauche <strong>ou</strong> droit <strong>de</strong> <strong>la</strong> comman<strong>de</strong>multidirectionnel<strong>le</strong> p<strong>ou</strong>r sé<strong>le</strong>ctionner L/R <strong>ou</strong> L+R.L/R : Différentes va<strong>le</strong>urs <strong>de</strong> rég<strong>la</strong>ge peuvent être définies p<strong>ou</strong>r<strong>le</strong>s canaux gauche et droit.L+R : Définit <strong>de</strong>s va<strong>le</strong>urs <strong>de</strong> rég<strong>la</strong>ge i<strong>de</strong>ntiques p<strong>ou</strong>r <strong>le</strong>scanaux gauche et droit.Ce rég<strong>la</strong>ge est désactivé si v<strong>ou</strong>s rég<strong>le</strong>z l’égaliseur paramétrique.6 <strong>Appuyez</strong> <strong>sur</strong> <strong>le</strong> <strong>b<strong>ou</strong>ton</strong> droit <strong>ou</strong> gauche <strong>de</strong> <strong>la</strong>comman<strong>de</strong> multidirectionnel<strong>le</strong> p<strong>ou</strong>r sé<strong>le</strong>ctionnerG-EQ SETUP, puis appuyez <strong>sur</strong> <strong>le</strong> <strong>b<strong>ou</strong>ton</strong> droit <strong>de</strong> <strong>la</strong>comman<strong>de</strong> multidirectionnel<strong>le</strong>.7 <strong>Appuyez</strong> <strong>sur</strong> <strong>le</strong> <strong>b<strong>ou</strong>ton</strong> supérieur <strong>ou</strong> inférieur <strong>de</strong> <strong>la</strong>comman<strong>de</strong> multidirectionnel<strong>le</strong> p<strong>ou</strong>r sé<strong>le</strong>ctionner<strong>le</strong> canal <strong>de</strong> votre choix, puis appuyez <strong>sur</strong> <strong>le</strong> <strong>b<strong>ou</strong>ton</strong>droit <strong>de</strong> <strong>la</strong> comman<strong>de</strong> multidirectionnel<strong>le</strong>.8 <strong>Appuyez</strong> <strong>sur</strong> <strong>le</strong> <strong>b<strong>ou</strong>ton</strong> supérieur <strong>ou</strong> inférieur <strong>de</strong> <strong>la</strong>comman<strong>de</strong> multidirectionnel<strong>le</strong> p<strong>ou</strong>r sé<strong>le</strong>ctionner<strong>la</strong> fréquence <strong>de</strong> votre choix.9 <strong>Appuyez</strong> <strong>sur</strong> <strong>le</strong> <strong>b<strong>ou</strong>ton</strong> gauche <strong>ou</strong> droit <strong>de</strong> <strong>la</strong>comman<strong>de</strong> multidirectionnel<strong>le</strong> p<strong>ou</strong>r rég<strong>le</strong>r <strong>le</strong>niveau <strong>de</strong> <strong>la</strong> fréquence <strong>de</strong> votre choix.Niveau rég<strong>la</strong>b<strong>le</strong> : -9 à +9P<strong>ou</strong>r rég<strong>le</strong>r une autre fréquence, répétez <strong>le</strong>s étapes 8 et 9.P<strong>ou</strong>r rég<strong>le</strong>r d’autres canaux, répétez <strong>le</strong>s étapes 7 et 9.10 <strong>Appuyez</strong> <strong>sur</strong> TA/RTN/SETUP p<strong>ou</strong>r revenir à l’écranprécé<strong>de</strong>nt.• Lorsque l’enceinte est réglée <strong>sur</strong> <strong>le</strong> mo<strong>de</strong> « OFF », l’égaliseurgraphique ne peut pas être réglé p<strong>ou</strong>r cette enceinte. Reportez-v<strong>ou</strong>s à<strong>la</strong> section « Rég<strong>la</strong>ge <strong>de</strong>s enceintes » (page 32).• Contrô<strong>le</strong>z <strong>le</strong>s p<strong>la</strong>ges <strong>de</strong> fréquences <strong>de</strong> <strong>le</strong>cture <strong>de</strong>s enceintes connectéesavant <strong>de</strong> rég<strong>le</strong>r l’égaliseur graphique. Si <strong>la</strong> gamme <strong>de</strong> fréquences <strong>de</strong><strong>le</strong>cture <strong>de</strong> l’enceinte est comprise entre 55 Hz et 30 kHz, par exemp<strong>le</strong>,<strong>le</strong> rég<strong>la</strong>ge <strong>de</strong> <strong>la</strong> ban<strong>de</strong> <strong>de</strong> 40 Hz <strong>ou</strong> 20 Hz est sans effet. En <strong>ou</strong>tre, v<strong>ou</strong>srisquez <strong>de</strong> <strong>sur</strong>charger <strong>le</strong>s enceintes et <strong>de</strong> <strong>le</strong>s endommager.• Quand v<strong>ou</strong>s rég<strong>le</strong>z l’égaliseur graphique, <strong>le</strong>s rég<strong>la</strong>ges <strong>de</strong> l’égaliseurparamétrique ne sont pas effectifs.Rég<strong>la</strong>ges <strong>de</strong> l’égaliseur paramétriqueLes ban<strong>de</strong>s <strong>de</strong> fréquences <strong>de</strong> l’égaliseur graphique sont fixes. Il s’avèredonc extrêmement diffici<strong>le</strong> <strong>de</strong> corriger <strong>le</strong>s pointes et <strong>le</strong>s chutes indésirab<strong>le</strong>sà <strong>de</strong>s fréquences spécifiques. La fréquence centra<strong>le</strong> <strong>de</strong> l’égaliseurparamétrique peut être réglée <strong>sur</strong> ces fréquences spécifiques. V<strong>ou</strong>s p<strong>ou</strong>vezensuite rég<strong>le</strong>r avec précision <strong>la</strong> <strong>la</strong>rgeur <strong>de</strong> ban<strong>de</strong> (Q) et <strong>le</strong> niveau, <strong>de</strong> manièreindépendante, p<strong>ou</strong>r réaliser <strong>le</strong>s corrections nécessaires. L’égaliseurparamétrique est une fonction évoluée <strong>de</strong>stinée aux audiophi<strong>le</strong>s passionnés.1 As<strong>sur</strong>ez-v<strong>ou</strong>s que <strong>le</strong> mo<strong>de</strong> Defeat est désactivé(page 12).2 <strong>Appuyez</strong> <strong>sur</strong> TA/RTN/SETUP pendant au moins2 secon<strong>de</strong>s.L’écran SETUP s’affiche.3 <strong>Appuyez</strong> <strong>sur</strong> <strong>le</strong> <strong>b<strong>ou</strong>ton</strong> supérieur <strong>ou</strong> inférieur <strong>de</strong> <strong>la</strong>comman<strong>de</strong> multidirectionnel<strong>le</strong> p<strong>ou</strong>rsé<strong>le</strong>ctionner AP SETUP, puis appuyez <strong>sur</strong> <strong>le</strong> <strong>b<strong>ou</strong>ton</strong>droit <strong>de</strong> <strong>la</strong> comman<strong>de</strong> multidirectionnel<strong>le</strong>.L’écran AP SETUP s’affiche.4 <strong>Appuyez</strong> <strong>sur</strong> <strong>le</strong> <strong>b<strong>ou</strong>ton</strong> supérieur <strong>ou</strong> inférieur <strong>de</strong> <strong>la</strong>comman<strong>de</strong> multidirectionnel<strong>le</strong> p<strong>ou</strong>r sé<strong>le</strong>ctionner P-EQ.5 <strong>Appuyez</strong> <strong>sur</strong> <strong>le</strong> <strong>b<strong>ou</strong>ton</strong> gauche <strong>ou</strong> droit <strong>de</strong> <strong>la</strong> comman<strong>de</strong>multidirectionnel<strong>le</strong> p<strong>ou</strong>r sé<strong>le</strong>ctionner L/R <strong>ou</strong> L+R.L/R : Différentes va<strong>le</strong>urs <strong>de</strong> rég<strong>la</strong>ge peuvent être définies p<strong>ou</strong>r<strong>le</strong>s canaux gauche et droit.L+R : Définit <strong>de</strong>s va<strong>le</strong>urs <strong>de</strong> rég<strong>la</strong>ge i<strong>de</strong>ntiques p<strong>ou</strong>r <strong>le</strong>scanaux gauche et droit.Ce rég<strong>la</strong>ge est désactivé si v<strong>ou</strong>s rég<strong>le</strong>z l’égaliseurgraphique.6 <strong>Appuyez</strong> <strong>sur</strong> <strong>le</strong> <strong>b<strong>ou</strong>ton</strong> supérieur <strong>ou</strong> inférieur <strong>de</strong> <strong>la</strong>comman<strong>de</strong> multidirectionnel<strong>le</strong> p<strong>ou</strong>r sé<strong>le</strong>ctionnerP-EQ SETUP, puis appuyez <strong>sur</strong> <strong>le</strong> <strong>b<strong>ou</strong>ton</strong> droit <strong>de</strong> <strong>la</strong>comman<strong>de</strong> multidirectionnel<strong>le</strong>.7 <strong>Appuyez</strong> <strong>sur</strong> <strong>le</strong> <strong>b<strong>ou</strong>ton</strong> supérieur <strong>ou</strong> inférieur <strong>de</strong> <strong>la</strong>comman<strong>de</strong> multidirectionnel<strong>le</strong> p<strong>ou</strong>r sé<strong>le</strong>ctionner<strong>le</strong> canal <strong>de</strong> votre choix, puis appuyez <strong>sur</strong> <strong>le</strong> <strong>b<strong>ou</strong>ton</strong>droit <strong>de</strong> <strong>la</strong> comman<strong>de</strong> multidirectionnel<strong>le</strong>.8 <strong>Appuyez</strong> <strong>sur</strong> <strong>le</strong> <strong>b<strong>ou</strong>ton</strong> supérieur <strong>ou</strong> inférieur <strong>de</strong> <strong>la</strong>comman<strong>de</strong> multidirectionnel<strong>le</strong> p<strong>ou</strong>r sé<strong>le</strong>ctionner<strong>la</strong> ban<strong>de</strong> <strong>de</strong> votre choix, puis appuyez <strong>sur</strong> <strong>le</strong> <strong>b<strong>ou</strong>ton</strong>droit <strong>de</strong> <strong>la</strong> comman<strong>de</strong> multidirectionnel<strong>le</strong>.9 <strong>Appuyez</strong> <strong>sur</strong> <strong>le</strong> <strong>b<strong>ou</strong>ton</strong> supérieur <strong>ou</strong> inférieur <strong>de</strong> <strong>la</strong>comman<strong>de</strong> multidirectionnel<strong>le</strong> p<strong>ou</strong>r sé<strong>le</strong>ctionnerl’élément <strong>de</strong> votre choix, puis appuyez <strong>sur</strong> <strong>le</strong> <strong>b<strong>ou</strong>ton</strong>gauche <strong>ou</strong> droite <strong>de</strong> <strong>la</strong> comman<strong>de</strong>multidirectionnel<strong>le</strong> p<strong>ou</strong>r rég<strong>le</strong>r <strong>le</strong> mo<strong>de</strong> <strong>de</strong> votre choix.P<strong>ou</strong>r rég<strong>le</strong>r d’autres ban<strong>de</strong>s, répétez <strong>le</strong>s étapes 8 et 9.P<strong>ou</strong>r rég<strong>le</strong>r d’autres canaux, répétez <strong>le</strong>s étapes 7 et 9.FREQUENCY : permet <strong>de</strong> sé<strong>le</strong>ctionner <strong>la</strong> fréquence.LEVEL : permet <strong>de</strong> rég<strong>le</strong>r <strong>le</strong> niveau.Niveau rég<strong>la</strong>b<strong>le</strong> : -9 à +9Q :permet <strong>de</strong> rég<strong>le</strong>r <strong>la</strong> <strong>la</strong>rgeur <strong>de</strong> ban<strong>de</strong>.Largeur <strong>de</strong> ban<strong>de</strong> rég<strong>la</strong>b<strong>le</strong> : 0,5/1/2/3/4/510 <strong>Appuyez</strong> <strong>sur</strong> TA/RTN/SETUP p<strong>ou</strong>r revenir à l’écranprécé<strong>de</strong>nt.• Lorsque l’enceinte est réglée <strong>sur</strong> <strong>le</strong> mo<strong>de</strong> « OFF », l’égaliseurparamétrique ne peut pas être configuré p<strong>ou</strong>r cette enceinte.Reportez-v<strong>ou</strong>s à <strong>la</strong> section « Rég<strong>la</strong>ge <strong>de</strong>s enceintes » (page 32).• Il n’est pas possib<strong>le</strong> <strong>de</strong> rég<strong>le</strong>r <strong>le</strong>s fréquences <strong>de</strong>s ban<strong>de</strong>s adjacentes àmoins <strong>de</strong> 7 pas.• Contrô<strong>le</strong>z <strong>le</strong>s p<strong>la</strong>ges <strong>de</strong> fréquences <strong>de</strong> <strong>le</strong>cture <strong>de</strong>s enceintes connectéesavant <strong>de</strong> rég<strong>le</strong>r l’égaliseur graphique. Si <strong>la</strong> gamme <strong>de</strong> fréquences <strong>de</strong><strong>le</strong>cture <strong>de</strong> l’enceinte est comprise entre 55 Hz et 30 kHz, par exemp<strong>le</strong>,<strong>le</strong> rég<strong>la</strong>ge <strong>de</strong> <strong>la</strong> ban<strong>de</strong> <strong>de</strong> 40 Hz <strong>ou</strong> 20 Hz est sans effet. En <strong>ou</strong>tre, v<strong>ou</strong>srisquez <strong>de</strong> <strong>sur</strong>charger <strong>le</strong>s enceintes et <strong>de</strong> <strong>le</strong>s endommager.• Quand v<strong>ou</strong>s rég<strong>le</strong>z l’égaliseur paramétrique, <strong>le</strong>s rég<strong>la</strong>ges <strong>de</strong>l’égaliseur graphique ne sont pas effectifs.35-FR
Rég<strong>la</strong>ge <strong>de</strong> <strong>la</strong> comman<strong>de</strong> <strong>de</strong>s basses1 As<strong>sur</strong>ez-v<strong>ou</strong>s que <strong>le</strong> mo<strong>de</strong> Defeat est désactivé (page 12).2 <strong>Appuyez</strong> <strong>sur</strong> TA/RTN/SETUP pendant au moins2 secon<strong>de</strong>s.L’écran SETUP s’affiche.3 <strong>Appuyez</strong> <strong>sur</strong> <strong>le</strong> <strong>b<strong>ou</strong>ton</strong> supérieur <strong>ou</strong> inférieur <strong>de</strong> <strong>la</strong>comman<strong>de</strong> multidirectionnel<strong>le</strong> p<strong>ou</strong>rsé<strong>le</strong>ctionner AP SETUP, puis appuyez <strong>sur</strong> <strong>le</strong> <strong>b<strong>ou</strong>ton</strong>droit <strong>de</strong> <strong>la</strong> comman<strong>de</strong> multidirectionnel<strong>le</strong>.L’écran AP SETUP s’affiche.4 <strong>Appuyez</strong> <strong>sur</strong> <strong>le</strong> <strong>b<strong>ou</strong>ton</strong> supérieur <strong>ou</strong> inférieur <strong>de</strong> <strong>la</strong>comman<strong>de</strong> multidirectionnel<strong>le</strong> p<strong>ou</strong>r sé<strong>le</strong>ctionnerB.SOUND CNTL, puis appuyez <strong>sur</strong> <strong>le</strong> <strong>b<strong>ou</strong>ton</strong> droit<strong>de</strong> <strong>la</strong> comman<strong>de</strong> multidirectionnel<strong>le</strong>.Rég<strong>la</strong>ge BASS COMP.V<strong>ou</strong>s p<strong>ou</strong>vez rég<strong>le</strong>r <strong>le</strong> son <strong>de</strong>s fréquences basses à votre convenance.5 <strong>Appuyez</strong> <strong>sur</strong> <strong>le</strong> <strong>b<strong>ou</strong>ton</strong> supérieur <strong>ou</strong> inférieur <strong>de</strong> <strong>la</strong>comman<strong>de</strong> multidirectionnel<strong>le</strong> p<strong>ou</strong>rsé<strong>le</strong>ctionner BASS COMP.6 <strong>Appuyez</strong> <strong>sur</strong> <strong>le</strong> <strong>b<strong>ou</strong>ton</strong> droit <strong>ou</strong> gauche <strong>de</strong> <strong>la</strong>comman<strong>de</strong> multidirectionnel<strong>le</strong> p<strong>ou</strong>rsé<strong>le</strong>ctionner <strong>le</strong> mo<strong>de</strong> <strong>de</strong> votre choix.Comme <strong>le</strong> niveau <strong>de</strong>s graves augmente dans l’ordreMODE1 2 3, v<strong>ou</strong>s p<strong>ou</strong>vez bénéficier <strong>de</strong>s meil<strong>le</strong>uresbasses fréquences.Sé<strong>le</strong>ctionnez OFF lorsque <strong>le</strong> rég<strong>la</strong>ge est inuti<strong>le</strong>.<strong>Appuyez</strong> <strong>sur</strong> TA/RTN/SETUP p<strong>ou</strong>r revenir à l’écranprécé<strong>de</strong>nt.Rég<strong>la</strong>ge <strong>de</strong> l’accentuation <strong>de</strong>s gravesL’utilisation du nombre <strong>de</strong> pas spécifié précé<strong>de</strong>mment (différence <strong>de</strong>temps) v<strong>ou</strong>s permet <strong>de</strong> rég<strong>le</strong>r une différence <strong>de</strong> temps entre <strong>le</strong>s enceintesavant-arrière/gauche-droite. Ce<strong>la</strong> permet d’effectuer une correction dutemps à votre convenance. Une correction <strong>de</strong> temps audib<strong>le</strong> peut êtreobtenue avec un retard initial <strong>de</strong> 0,05 ms p<strong>ou</strong>r chaque pas <strong>de</strong> 0 à 400.5 <strong>Appuyez</strong> <strong>sur</strong> <strong>le</strong> <strong>b<strong>ou</strong>ton</strong> supérieur <strong>ou</strong> inférieur <strong>de</strong> <strong>la</strong>comman<strong>de</strong> multidirectionnel<strong>le</strong> p<strong>ou</strong>rsé<strong>le</strong>ctionner l’enceinte <strong>de</strong> votre choix.6 <strong>Appuyez</strong> <strong>sur</strong> <strong>le</strong> <strong>b<strong>ou</strong>ton</strong> gauche <strong>ou</strong> droite <strong>de</strong> <strong>la</strong>comman<strong>de</strong> multidirectionnel<strong>le</strong> p<strong>ou</strong>r rég<strong>le</strong>r <strong>le</strong>senceintes avant, arrière, gauche et droite.7 Répétez <strong>le</strong>s étapes 5 et 6 p<strong>ou</strong>r rég<strong>le</strong>r t<strong>ou</strong>tes <strong>le</strong>sautres enceintes.• T<strong>ou</strong>s <strong>le</strong>s rég<strong>la</strong>ges <strong>de</strong> l’accentuation <strong>de</strong>s graves s’appliquent à <strong>la</strong>correction du temps.• <strong>Appuyez</strong> <strong>sur</strong> TA/RTN/SETUP p<strong>ou</strong>r revenir à l’écran précé<strong>de</strong>nt.Configuration <strong>de</strong>s enceintesLe PXA-H700 <strong>ou</strong> PXA-H701 peut être réglé en fonction <strong>de</strong> <strong>la</strong> gamme<strong>de</strong> fréquences <strong>de</strong> <strong>le</strong>cture <strong>de</strong> vos enceintes.Contrô<strong>le</strong>z <strong>la</strong> gamme <strong>de</strong> fréquences <strong>de</strong> <strong>le</strong>cture <strong>de</strong>s enceintes (subwooferexclu) avant d’exécuter cette opération p<strong>ou</strong>r vérifier si <strong>le</strong>s enceintespeuvent reproduire <strong>de</strong>s basses fréquences (d’environ 80 Hz <strong>ou</strong> moins).• Pendant que v<strong>ou</strong>s effectuez ce rég<strong>la</strong>ge, évitez d’arrêter, d’interrompre<strong>ou</strong> <strong>de</strong> changer <strong>de</strong> disque, d’avancer, <strong>de</strong> revenir en arrière <strong>ou</strong> <strong>de</strong>changer <strong>le</strong> canal audio <strong>de</strong> l’appareil. Ce rég<strong>la</strong>ge est annulé si v<strong>ou</strong>smodifiez l’état du mo<strong>de</strong> <strong>de</strong> décodage.1 As<strong>sur</strong>ez-v<strong>ou</strong>s que <strong>le</strong> mo<strong>de</strong> Defeat est désactivé(page 12).2 <strong>Appuyez</strong> <strong>sur</strong> TA/RTN/SETUP pendant au moins2 secon<strong>de</strong>s.L’écran SETUP s’affiche.3 <strong>Appuyez</strong> <strong>sur</strong> <strong>le</strong> <strong>b<strong>ou</strong>ton</strong> supérieur <strong>ou</strong> inférieur <strong>de</strong> <strong>la</strong>comman<strong>de</strong> multidirectionnel<strong>le</strong> p<strong>ou</strong>rsé<strong>le</strong>ctionner AP SETUP, puis appuyez <strong>sur</strong> <strong>le</strong> <strong>b<strong>ou</strong>ton</strong>droit <strong>de</strong> <strong>la</strong> comman<strong>de</strong> multidirectionnel<strong>le</strong>.L’écran AP SETUP s’affiche.4 <strong>Appuyez</strong> <strong>sur</strong> <strong>le</strong> <strong>b<strong>ou</strong>ton</strong> supérieur <strong>ou</strong> inférieur <strong>de</strong> <strong>la</strong>comman<strong>de</strong> multidirectionnel<strong>le</strong> p<strong>ou</strong>rsé<strong>le</strong>ctionner SPEAKER SETUP, puis appuyez <strong>sur</strong><strong>le</strong> <strong>b<strong>ou</strong>ton</strong> droit <strong>de</strong> <strong>la</strong> comman<strong>de</strong>multidirectionnel<strong>le</strong>.5 <strong>Appuyez</strong> <strong>sur</strong> <strong>le</strong> <strong>b<strong>ou</strong>ton</strong> supérieur <strong>ou</strong> inférieur <strong>de</strong> <strong>la</strong>comman<strong>de</strong> multidirectionnel<strong>le</strong> p<strong>ou</strong>rsé<strong>le</strong>ctionner l’enceinte <strong>de</strong> votre choix.6 <strong>Appuyez</strong> <strong>sur</strong> <strong>le</strong> <strong>b<strong>ou</strong>ton</strong> droit <strong>ou</strong> gauche <strong>de</strong> <strong>la</strong>comman<strong>de</strong> multidirectionnel<strong>le</strong> p<strong>ou</strong>rsé<strong>le</strong>ctionner <strong>le</strong>s caractéristiques <strong>de</strong> l’enceinte.OFF* 1 :SMALL :Lorsqu’aucune enceinte n’est connectée.Quand une enceinte qui ne peut pas reproduire <strong>de</strong>sbasses fréquences (80 Hz <strong>ou</strong> moins) est connectée.LARGE* 2 : Quand une enceinte capab<strong>le</strong> <strong>de</strong> reproduire <strong>de</strong>sbasses fréquences (80 Hz <strong>ou</strong> moins) est connectée.* 1 Il n’est pas possib<strong>le</strong> <strong>de</strong> rég<strong>le</strong>r <strong>le</strong>s enceintes avant <strong>sur</strong>«OFF».* 2 Si l’enceinte avant est réglée <strong>sur</strong> « SMALL », <strong>le</strong>senceintes arrière et centra<strong>le</strong> ne peuvent pas êtreréglées <strong>sur</strong> « LARGE ».36-FR
7 Répétez <strong>le</strong>s étapes 5 et 6 p<strong>ou</strong>r rég<strong>le</strong>r chaqueenceinte.• Si l’enceinte centra<strong>le</strong> est réglée <strong>sur</strong> « OFF », ses signaux audio sontaj<strong>ou</strong>tés à <strong>la</strong> sortie <strong>de</strong>s signaux audio <strong>de</strong>s enceintes avant.• Si v<strong>ou</strong>s rég<strong>le</strong>z <strong>la</strong> réponse <strong>de</strong> l’enceinte <strong>sur</strong> « OFF », rég<strong>le</strong>z aussil’enceinte proprement dite <strong>sur</strong> « OFF » (page 32).• Effectuez ce rég<strong>la</strong>ge p<strong>ou</strong>r t<strong>ou</strong>tes <strong>le</strong>s enceintes (« avant »,« centra<strong>le</strong> »,« arrière » et « Subwoofer »). Sinon, <strong>le</strong> son risque <strong>de</strong> nepas être équilibré.• Quand l’enceinte centra<strong>le</strong> est réglée <strong>sur</strong> « OFF », <strong>le</strong> rég<strong>la</strong>ge n’estpas effectif, même si l’enceinte centra<strong>le</strong> est configurée avec cettefonction.• En changeant <strong>le</strong>s rég<strong>la</strong>ges <strong>de</strong> chaque enceinte, il risque <strong>de</strong> seproduire un changement <strong>de</strong> sortie <strong>de</strong>s autres enceintes en raison <strong>de</strong>sexigences <strong>de</strong> rég<strong>la</strong>ge.• Si l’enceinte arrière est réglée <strong>sur</strong> « LARGE » quand v<strong>ou</strong>s utilisezPRO LOGIC II, <strong>le</strong> subwoofer ne reproduit aucun son.Rég<strong>la</strong>ge du Dolby Digital1 As<strong>sur</strong>ez-v<strong>ou</strong>s que <strong>le</strong> mo<strong>de</strong> Defeat est désactivé(page 12).2 <strong>Appuyez</strong> <strong>sur</strong> TA/RTN/SETUP pendant au moins2 secon<strong>de</strong>s.L’écran SETUP s’affiche.3 <strong>Appuyez</strong> <strong>sur</strong> <strong>le</strong> <strong>b<strong>ou</strong>ton</strong> supérieur <strong>ou</strong> inférieur <strong>de</strong> <strong>la</strong>comman<strong>de</strong> multidirectionnel<strong>le</strong> p<strong>ou</strong>rsé<strong>le</strong>ctionner AP SETUP, puis appuyez <strong>sur</strong> <strong>le</strong> <strong>b<strong>ou</strong>ton</strong>droit <strong>de</strong> <strong>la</strong> comman<strong>de</strong> multidirectionnel<strong>le</strong>.L’écran AP SETUP s’affiche.4 <strong>Appuyez</strong> <strong>sur</strong> <strong>le</strong> <strong>b<strong>ou</strong>ton</strong> supérieur <strong>ou</strong> inférieur <strong>de</strong> <strong>la</strong>comman<strong>de</strong> multidirectionnel<strong>le</strong> p<strong>ou</strong>rsé<strong>le</strong>ctionner MULTI CH SET, puis appuyez <strong>sur</strong> <strong>le</strong><strong>b<strong>ou</strong>ton</strong> droit <strong>de</strong> <strong>la</strong> comman<strong>de</strong>multidirectionnel<strong>le</strong>.L’écran MULTI CH SET s’affiche.5 <strong>Appuyez</strong> <strong>sur</strong> <strong>le</strong> <strong>b<strong>ou</strong>ton</strong> supérieur <strong>ou</strong> inférieur <strong>de</strong> <strong>la</strong>comman<strong>de</strong> multidirectionnel<strong>le</strong> p<strong>ou</strong>rsé<strong>le</strong>ctionner <strong>la</strong> désignation du rég<strong>la</strong>ge <strong>de</strong> votrechoix.Effectuez <strong>le</strong>s rég<strong>la</strong>ges ci-<strong>de</strong>ss<strong>ou</strong>s comme s<strong>ou</strong>haité.Rég<strong>la</strong>ge <strong>de</strong> l’image ac<strong>ou</strong>stiqueDans <strong>la</strong> plupart <strong>de</strong>s instal<strong>la</strong>tions, l’enceinte centra<strong>le</strong> doit êtrepositionnée directement entre <strong>le</strong> conducteur et <strong>le</strong> passager avant. Cettefonction distribue <strong>le</strong>s informations du canal central aux enceintesgauche et droite et crée ainsi une image ac<strong>ou</strong>stique donnantl’impression qu’une enceinte centra<strong>le</strong> se tr<strong>ou</strong>ve directement <strong>de</strong>vantchaque auditeur. Ce<strong>la</strong> crée une image ac<strong>ou</strong>stique qui simu<strong>le</strong> uneenceinte centra<strong>le</strong> directement en face <strong>de</strong> chaque auditeur. Néanmoins, siv<strong>ou</strong>s rég<strong>le</strong>z <strong>la</strong> <strong>la</strong>rgeur <strong>de</strong> ban<strong>de</strong> <strong>de</strong> l’enceinte centra<strong>le</strong> <strong>sur</strong> PL II MUSIC(reportez-v<strong>ou</strong>s à <strong>la</strong> section « Utilisation du mo<strong>de</strong> Pro Logic II »,page 39), cette fonction est sans effet.• Pendant que v<strong>ou</strong>s effectuez ce rég<strong>la</strong>ge, évitez d’arrêter, d’interrompre<strong>ou</strong> <strong>de</strong> changer <strong>de</strong> disque, d’avancer, <strong>de</strong> revenir en arrière <strong>ou</strong> <strong>de</strong>changer <strong>le</strong> canal audio <strong>de</strong> l’appareil. Ce rég<strong>la</strong>ge est annulé si v<strong>ou</strong>smodifiez l’état du mo<strong>de</strong> <strong>de</strong> décodage.1 <strong>Appuyez</strong> <strong>sur</strong> <strong>le</strong> <strong>b<strong>ou</strong>ton</strong> gauche <strong>ou</strong> droit <strong>de</strong> <strong>la</strong> comman<strong>de</strong>multidirectionnel<strong>le</strong> p<strong>ou</strong>r sé<strong>le</strong>ctionner ON s<strong>ou</strong>sBI-PHANTOM.2 <strong>Appuyez</strong> <strong>sur</strong> <strong>le</strong> <strong>b<strong>ou</strong>ton</strong> inférieur <strong>de</strong> <strong>la</strong> comman<strong>de</strong>multidirectionnel<strong>le</strong> p<strong>ou</strong>r sé<strong>le</strong>ctionner BI-PHANTOM LV.3 <strong>Appuyez</strong> <strong>sur</strong> <strong>le</strong> <strong>b<strong>ou</strong>ton</strong> droit <strong>ou</strong> gauche <strong>de</strong> <strong>la</strong> comman<strong>de</strong>multidirectionnel<strong>le</strong> p<strong>ou</strong>r rég<strong>le</strong>r <strong>le</strong> niveau.V<strong>ou</strong>s p<strong>ou</strong>vez rég<strong>le</strong>r <strong>le</strong> niveau entre -5 et +5. Plus <strong>le</strong> niveau esté<strong>le</strong>vé, plus <strong>la</strong> position <strong>de</strong> l’enceinte centra<strong>le</strong> est décalée <strong>sur</strong> <strong>le</strong>scôtés.La fonction BI-PHANTOM est désactivée si v<strong>ou</strong>ssé<strong>le</strong>ctionnez OFF.• Ce rég<strong>la</strong>ge est effectif si l’enceinte centra<strong>le</strong> est réglée <strong>sur</strong> SMALL <strong>ou</strong>LARGE dans <strong>la</strong> configuration <strong>de</strong>s enceintes.• Ce rég<strong>la</strong>ge est sans effet si l’enceinte est réglée <strong>sur</strong> CENTER OFF à<strong>la</strong> section « Rég<strong>la</strong>ge <strong>de</strong>s enceintes » (page 32).Mixage <strong>de</strong>s sons graves vers <strong>le</strong> canal arrièreCette fonction mixe <strong>le</strong>s signaux audio du canal avant à <strong>la</strong> sortie <strong>de</strong>ssignaux audio <strong>de</strong>s enceintes arrière p<strong>ou</strong>r améliorer <strong>le</strong> son au niveau dusiège arrière du véhicu<strong>le</strong>.• Pendant que v<strong>ou</strong>s effectuez ce rég<strong>la</strong>ge, évitez d’arrêter, d’interrompre<strong>ou</strong> <strong>de</strong> changer <strong>de</strong> disque, d’avancer, <strong>de</strong> revenir en arrière <strong>ou</strong> <strong>de</strong>changer <strong>le</strong> canal audio <strong>de</strong> l’appareil. Ce rég<strong>la</strong>ge est annulé si v<strong>ou</strong>smodifiez l’état du mo<strong>de</strong> <strong>de</strong> décodage.1 <strong>Appuyez</strong> <strong>sur</strong> <strong>le</strong> <strong>b<strong>ou</strong>ton</strong> gauche <strong>ou</strong> droit <strong>de</strong> <strong>la</strong> comman<strong>de</strong>multidirectionnel<strong>le</strong> p<strong>ou</strong>r sé<strong>le</strong>ctionner ON s<strong>ou</strong>s REAR MIX.2 <strong>Appuyez</strong> <strong>sur</strong> <strong>le</strong> <strong>b<strong>ou</strong>ton</strong> inférieur <strong>de</strong> <strong>la</strong> comman<strong>de</strong>multidirectionnel<strong>le</strong> p<strong>ou</strong>r sé<strong>le</strong>ctionner MIX LEVEL.3 <strong>Appuyez</strong> <strong>sur</strong> <strong>le</strong> <strong>b<strong>ou</strong>ton</strong> droit <strong>ou</strong> gauche <strong>de</strong> <strong>la</strong> comman<strong>de</strong>multidirectionnel<strong>le</strong> p<strong>ou</strong>r rég<strong>le</strong>r <strong>le</strong> niveau.Le niveau peut être réglé <strong>sur</strong> 5 pas : –6, –3, 0, +3 et +6. Plus <strong>le</strong>niveau est é<strong>le</strong>vé, plus <strong>la</strong> quantité <strong>de</strong> graves reproduite à partir<strong>de</strong>s enceintes arrière est importante (L’effet varie néanmoins enfonction du logiciel (DVD, etc.)).La fonction REAR MIX est désactivée si v<strong>ou</strong>ssé<strong>le</strong>ctionnez OFF.• Ce rég<strong>la</strong>ge n’est pas effectif quand <strong>le</strong>s enceintes arrière sont réglées<strong>sur</strong> « OFF » dans <strong>la</strong> configuration <strong>de</strong>s enceintes.• P<strong>ou</strong>r <strong>le</strong>s signaux PCM linéaires, <strong>la</strong> voix est reproduite à partir <strong>de</strong>l’enceinte arrière, quel que soit <strong>le</strong> rég<strong>la</strong>ge <strong>de</strong> REAR FILL et REARMIX.37-FR
Rég<strong>la</strong>ge <strong>de</strong> <strong>la</strong> puissance du son à unvolume é<strong>le</strong>véLe mo<strong>de</strong> Dolby Digital comprime <strong>la</strong> gamme dynamique p<strong>ou</strong>r obtenir unson puissant à <strong>de</strong>s niveaux <strong>de</strong> volume ordinaires. Cette compressionpeut être annulée p<strong>ou</strong>r obtenir un son énergique avec davantage <strong>de</strong>puissance, simi<strong>la</strong>ire à celui d’une sal<strong>le</strong> <strong>de</strong> cinéma.Cette fonction n’est disponib<strong>le</strong> qu’avec <strong>le</strong> mo<strong>de</strong> Dolby Digital.<strong>Appuyez</strong> <strong>sur</strong> <strong>le</strong> <strong>b<strong>ou</strong>ton</strong> gauche <strong>ou</strong> droit <strong>de</strong> <strong>la</strong> comman<strong>de</strong>multifonctionnel<strong>le</strong> p<strong>ou</strong>r sé<strong>le</strong>ctionner STD <strong>ou</strong> MAX. <strong>de</strong>LISTENING.STD : P<strong>ou</strong>r un son puissant à <strong>de</strong>s niveaux <strong>de</strong> volume ordinairesMAX. :P<strong>ou</strong>r un son puissant à <strong>de</strong>s niveaux <strong>de</strong> volume é<strong>le</strong>vés• Maintenez <strong>le</strong> volume à un niveau qui ne c<strong>ou</strong>vre pas <strong>le</strong>s sons àl’extérieur du véhicu<strong>le</strong>.Rég<strong>la</strong>ge <strong>de</strong>s niveaux <strong>de</strong>s enceintesLes tonalités <strong>de</strong> test facilitent <strong>le</strong>s rég<strong>la</strong>ges du volume <strong>de</strong>s différentesenceintes. Quand <strong>le</strong>s niveaux sont égaux, une forte sensation <strong>de</strong>présence peut être perçue à partir <strong>de</strong>s différentes enceintes à <strong>la</strong> positiond’éc<strong>ou</strong>te.• Pendant que v<strong>ou</strong>s effectuez ce rég<strong>la</strong>ge, évitez d’arrêter, d’interrompre<strong>ou</strong> <strong>de</strong> changer <strong>de</strong> disque, d’avancer, <strong>de</strong> revenir en arrière <strong>ou</strong> <strong>de</strong>changer <strong>le</strong> canal audio <strong>de</strong> l’appareil. Ce rég<strong>la</strong>ge est annulé si v<strong>ou</strong>smodifiez l’état du mo<strong>de</strong> <strong>de</strong> décodage.1 <strong>Appuyez</strong> <strong>sur</strong> <strong>le</strong> <strong>b<strong>ou</strong>ton</strong> gauche <strong>ou</strong> droit <strong>de</strong> <strong>la</strong> comman<strong>de</strong>multifonctionnel<strong>le</strong> p<strong>ou</strong>r sé<strong>le</strong>ctionner ON <strong>de</strong> OUTPUT.La sortie <strong>de</strong> <strong>la</strong> tonalité <strong>de</strong> test est répétée p<strong>ou</strong>r chaquecanal <strong>de</strong>s différentes enceintes. Cette répétitions’effectue dans l’ordre illustré ci-<strong>de</strong>ss<strong>ou</strong>s.Si v<strong>ou</strong>s n’effectuez aucune opération pendant2 secon<strong>de</strong>s, <strong>le</strong> canal passe au suivant.Gauche Centre Droit Surr<strong>ou</strong>nd droitSurr<strong>ou</strong>nd gauche Gauche2 <strong>Appuyez</strong> <strong>sur</strong> <strong>le</strong> <strong>b<strong>ou</strong>ton</strong> inférieur <strong>de</strong> <strong>la</strong> comman<strong>de</strong>multidirectionnel<strong>le</strong> p<strong>ou</strong>r sé<strong>le</strong>ctionner OUTPUT LEVEL.3 <strong>Appuyez</strong> <strong>sur</strong> <strong>le</strong> <strong>b<strong>ou</strong>ton</strong> gauche <strong>ou</strong> droit <strong>de</strong> <strong>la</strong> comman<strong>de</strong>multidirectionnel<strong>le</strong> p<strong>ou</strong>r équilibrer <strong>la</strong> sortie <strong>de</strong> t<strong>ou</strong>tes <strong>le</strong>senceintes.• La p<strong>la</strong>ge <strong>de</strong> rég<strong>la</strong>ge <strong>de</strong>s différentes enceintes est <strong>de</strong>–10 dB - +10 dB.• Basez <strong>le</strong>s rég<strong>la</strong>ges <strong>sur</strong> <strong>le</strong>s enceintes avant.• Si une enceinte est réglée <strong>sur</strong> OFF, v<strong>ou</strong>s ne p<strong>ou</strong>vez pas rég<strong>le</strong>r sonniveau. Reportez-v<strong>ou</strong>s à <strong>la</strong> section « Configuration <strong>de</strong>s enceintes »(page 36).Rég<strong>la</strong>ge du niveau DVDV<strong>ou</strong>s p<strong>ou</strong>vez rég<strong>le</strong>r <strong>le</strong> volume (niveau du signal) <strong>de</strong>s mo<strong>de</strong>s DolbyDigital, Dolby PL II, DTS et PCM.• Pendant que v<strong>ou</strong>s effectuez ce rég<strong>la</strong>ge, évitez d’arrêter, d’interrompre<strong>ou</strong> <strong>de</strong> changer <strong>de</strong> disque, d’avancer, <strong>de</strong> revenir en arrière <strong>ou</strong> <strong>de</strong>changer <strong>le</strong> canal audio <strong>de</strong> l’appareil. Ce rég<strong>la</strong>ge est annulé si v<strong>ou</strong>smodifiez l’état du mo<strong>de</strong> <strong>de</strong> décodage.1 As<strong>sur</strong>ez-v<strong>ou</strong>s que <strong>le</strong> mo<strong>de</strong> Defeat est désactivé(page 12).2 <strong>Appuyez</strong> <strong>sur</strong> TA/RTN/SETUP pendant au moins2 secon<strong>de</strong>s.L’écran SETUP s’affiche.3 <strong>Appuyez</strong> <strong>sur</strong> <strong>le</strong> <strong>b<strong>ou</strong>ton</strong> supérieur <strong>ou</strong> inférieur <strong>de</strong> <strong>la</strong>comman<strong>de</strong> multidirectionnel<strong>le</strong> p<strong>ou</strong>rsé<strong>le</strong>ctionner AP SETUP, puis appuyez <strong>sur</strong> <strong>le</strong> <strong>b<strong>ou</strong>ton</strong>droit <strong>de</strong> <strong>la</strong> comman<strong>de</strong> multidirectionnel<strong>le</strong>.L’écran AP SETUP s’affiche.4 <strong>Appuyez</strong> <strong>sur</strong> <strong>le</strong> <strong>b<strong>ou</strong>ton</strong> supérieur <strong>ou</strong> inférieur <strong>de</strong> <strong>la</strong>comman<strong>de</strong> multidirectionnel<strong>le</strong> p<strong>ou</strong>r sé<strong>le</strong>ctionnerDVD LEVEL, puis appuyez <strong>sur</strong> <strong>le</strong> <strong>b<strong>ou</strong>ton</strong> droit <strong>de</strong> <strong>la</strong>comman<strong>de</strong> multidirectionnel<strong>le</strong>.L’écran DVD LEVEL s’affiche.5 <strong>Appuyez</strong> <strong>sur</strong> <strong>le</strong> <strong>b<strong>ou</strong>ton</strong> supérieur <strong>ou</strong> inférieur <strong>de</strong> <strong>la</strong>comman<strong>de</strong> multidirectionnel<strong>le</strong> p<strong>ou</strong>rsé<strong>le</strong>ctionner <strong>le</strong> mo<strong>de</strong> <strong>de</strong> votre choix.6 <strong>Appuyez</strong> <strong>sur</strong> <strong>le</strong> <strong>b<strong>ou</strong>ton</strong> droit <strong>ou</strong> gauche <strong>de</strong> <strong>la</strong>comman<strong>de</strong> multidirectionnel<strong>le</strong> p<strong>ou</strong>r rég<strong>le</strong>r <strong>le</strong>niveau.Le niveau peut être réglé <strong>sur</strong> une p<strong>la</strong>ge <strong>de</strong> –5 à +5.7 Répétez <strong>le</strong>s étapes 5 et 6 p<strong>ou</strong>r rég<strong>le</strong>r chaque niveau.Mémorisation <strong>de</strong>s rég<strong>la</strong>gesV<strong>ou</strong>s p<strong>ou</strong>vez mémoriser <strong>le</strong>s ajustements <strong>ou</strong> <strong>le</strong>s rég<strong>la</strong>ges.Le contenu susceptib<strong>le</strong> d’être mémorisé varie en fonction du processeuraudio utilisé.1 As<strong>sur</strong>ez-v<strong>ou</strong>s que <strong>le</strong> mo<strong>de</strong> Defeat est désactivé(page 12).2 <strong>Appuyez</strong> <strong>sur</strong> TA/RTN/SETUP pendant au moins2 secon<strong>de</strong>s.L’écran SETUP s’affiche.3 <strong>Appuyez</strong> <strong>sur</strong> <strong>le</strong> <strong>b<strong>ou</strong>ton</strong> supérieur <strong>ou</strong> inférieur <strong>de</strong> <strong>la</strong>comman<strong>de</strong> multidirectionnel<strong>le</strong> p<strong>ou</strong>rsé<strong>le</strong>ctionner AP SETUP, puis appuyez <strong>sur</strong> <strong>le</strong> <strong>b<strong>ou</strong>ton</strong>droit <strong>de</strong> <strong>la</strong> comman<strong>de</strong> multidirectionnel<strong>le</strong>.L’écran AP SETUP s’affiche.4 <strong>Appuyez</strong> <strong>sur</strong> <strong>le</strong> <strong>b<strong>ou</strong>ton</strong> supérieur <strong>ou</strong> inférieur <strong>de</strong> <strong>la</strong>comman<strong>de</strong> multidirectionnel<strong>le</strong> p<strong>ou</strong>r sé<strong>le</strong>ctionnerPRESET MEMORY, puis appuyez <strong>sur</strong> <strong>le</strong> <strong>b<strong>ou</strong>ton</strong>droit <strong>de</strong> <strong>la</strong> comman<strong>de</strong> multidirectionnel<strong>le</strong>.5 <strong>Appuyez</strong> <strong>sur</strong> <strong>le</strong> <strong>b<strong>ou</strong>ton</strong> supérieur <strong>ou</strong> inférieur <strong>de</strong> <strong>la</strong>comman<strong>de</strong> multidirectionnel<strong>le</strong> p<strong>ou</strong>rsé<strong>le</strong>ctionner un <strong>de</strong>s numéros préréglés (1 à 6), puisappuyez <strong>sur</strong> / /ENTER.Le contenu du rég<strong>la</strong>ge est mémorisé.• Le contenu mémorisé n’est pas effacé lorsque <strong>le</strong> cordond’alimentation <strong>de</strong> <strong>la</strong> batterie est débranché.38-FR
Rappel d’un prérég<strong>la</strong>ge1 As<strong>sur</strong>ez-v<strong>ou</strong>s que <strong>le</strong> mo<strong>de</strong> Defeat est désactivé(page 12).2 <strong>Appuyez</strong> <strong>sur</strong> TA/RTN/SETUP pendant au moins2 secon<strong>de</strong>s.L’écran SETUP s’affiche.3 <strong>Appuyez</strong> <strong>sur</strong> <strong>le</strong> <strong>b<strong>ou</strong>ton</strong> supérieur <strong>ou</strong> inférieur <strong>de</strong> <strong>la</strong>comman<strong>de</strong> multidirectionnel<strong>le</strong> p<strong>ou</strong>rsé<strong>le</strong>ctionner AP SETUP, puis appuyez <strong>sur</strong> <strong>le</strong> <strong>b<strong>ou</strong>ton</strong>droit <strong>de</strong> <strong>la</strong> comman<strong>de</strong> multidirectionnel<strong>le</strong>.L’écran AP SETUP s’affiche.4 <strong>Appuyez</strong> <strong>sur</strong> <strong>le</strong> <strong>b<strong>ou</strong>ton</strong> supérieur <strong>ou</strong> inférieur <strong>de</strong> <strong>la</strong>comman<strong>de</strong> multidirectionnel<strong>le</strong> p<strong>ou</strong>r sé<strong>le</strong>ctionnerPRESET CALL, puis appuyez <strong>sur</strong> <strong>le</strong> <strong>b<strong>ou</strong>ton</strong> droit <strong>de</strong><strong>la</strong> comman<strong>de</strong> multidirectionnel<strong>le</strong>.5 <strong>Appuyez</strong> <strong>sur</strong> <strong>le</strong> <strong>b<strong>ou</strong>ton</strong> supérieur <strong>ou</strong> inférieur <strong>de</strong> <strong>la</strong>comman<strong>de</strong> multidirectionnel<strong>le</strong> p<strong>ou</strong>rsé<strong>le</strong>ctionner un <strong>de</strong>s numéros préréglés (1 à 6), puisappuyez <strong>sur</strong> / /ENTER.• Le rappel du prérég<strong>la</strong>ge peut prendre quelques instants.Utilisation du mo<strong>de</strong> Pro Logic IILe traitement Pro Logic peut être appliqué aux signaux <strong>de</strong> musiqueenregistrés <strong>sur</strong> <strong>de</strong>ux canaux p<strong>ou</strong>r obtenir un son <strong>sur</strong>r<strong>ou</strong>nd Dolby ProLogic II. P<strong>ou</strong>r <strong>le</strong>s signaux Dolby Digital et DTS à <strong>de</strong>ux canaux, unefonction « REAR FILL » est aussi disponib<strong>le</strong> p<strong>ou</strong>r reproduire <strong>le</strong>ssignaux du canal avant vers <strong>le</strong> canal arrière.1 As<strong>sur</strong>ez-v<strong>ou</strong>s que <strong>le</strong> mo<strong>de</strong> Defeat est désactivé(page 12).2 <strong>Appuyez</strong> <strong>sur</strong> TA/RTN/SETUP pendant au moins2 secon<strong>de</strong>s.L’écran SETUP s’affiche.3 <strong>Appuyez</strong> <strong>sur</strong> <strong>le</strong> <strong>b<strong>ou</strong>ton</strong> supérieur <strong>ou</strong> inférieur <strong>de</strong> <strong>la</strong>comman<strong>de</strong> multidirectionnel<strong>le</strong> p<strong>ou</strong>rsé<strong>le</strong>ctionner AP SETUP, puis appuyez <strong>sur</strong> <strong>le</strong> <strong>b<strong>ou</strong>ton</strong>droit <strong>de</strong> <strong>la</strong> comman<strong>de</strong> multidirectionnel<strong>le</strong>.L’écran AP SETUP s’affiche.4 <strong>Appuyez</strong> <strong>sur</strong> <strong>le</strong> <strong>b<strong>ou</strong>ton</strong> supérieur <strong>ou</strong> inférieur <strong>de</strong> <strong>la</strong>comman<strong>de</strong> multidirectionnel<strong>le</strong> p<strong>ou</strong>r sé<strong>le</strong>ctionnerD PLII/REAR, puis appuyez <strong>sur</strong> <strong>le</strong> <strong>b<strong>ou</strong>ton</strong> droit <strong>de</strong> <strong>la</strong>comman<strong>de</strong> multidirectionnel<strong>le</strong>.5 <strong>Appuyez</strong> <strong>sur</strong> <strong>le</strong> <strong>b<strong>ou</strong>ton</strong> droit <strong>ou</strong> gauche <strong>de</strong> <strong>la</strong>comman<strong>de</strong> multidirectionnel<strong>le</strong> p<strong>ou</strong>rsé<strong>le</strong>ctionner <strong>le</strong> mo<strong>de</strong> D PLII/REAR <strong>de</strong> votre choix.MOVIE :MUSIC :R.FILL :OFF :Convient p<strong>ou</strong>r <strong>le</strong>s émissions TV stéréo et t<strong>ou</strong>s <strong>le</strong>sprogrammes encodés en Dolby Surr<strong>ou</strong>nd. Ce rég<strong>la</strong>geaméliore <strong>la</strong> directivité du champ sonore jusqu’à cequ’el<strong>le</strong> soit proche <strong>de</strong> cel<strong>le</strong> du son discret 5.1 canaux.Peut être utilisé avec t<strong>ou</strong>s <strong>le</strong>s enregistrements <strong>de</strong>musique en stéréo et f<strong>ou</strong>rnit un champ sonore <strong>la</strong>rge etprofond.Selon <strong>le</strong>s signaux d’entrée, il se peut que <strong>le</strong> son nepuisse être reproduit qu’à partir <strong>de</strong>s enceintes avant.Dans ce cas, utilisez <strong>la</strong> fonction « REAR FILL » p<strong>ou</strong>rreproduire aussi <strong>le</strong>s signaux à partir <strong>de</strong>s enceintesarrière.Désactive <strong>la</strong> fonction D PLII/REAR FILL.Si MUSIC est sé<strong>le</strong>ctionné, v<strong>ou</strong>s p<strong>ou</strong>vez rég<strong>le</strong>r <strong>la</strong> <strong>la</strong>rgeur <strong>de</strong>l’enceinte centra<strong>le</strong> en procédant comme suit.Cette fonction offre une position voca<strong>le</strong> optima<strong>le</strong> en rég<strong>la</strong>nt <strong>la</strong>position du canal central entre l’enceinte centra<strong>le</strong> et <strong>le</strong>senceintes G/D (Les rég<strong>la</strong>ges effectués à <strong>la</strong> section « Rég<strong>la</strong>ge<strong>de</strong> l’image ac<strong>ou</strong>stique » (page 37) sont sans effet si cettefonction est activée).1 <strong>Appuyez</strong> <strong>sur</strong> <strong>le</strong> <strong>b<strong>ou</strong>ton</strong> inférieur <strong>de</strong> <strong>la</strong> comman<strong>de</strong>multidirectionnel<strong>le</strong> p<strong>ou</strong>r sé<strong>le</strong>ctionner CENTER WIDTH,puis appuyez <strong>sur</strong> <strong>le</strong> <strong>b<strong>ou</strong>ton</strong> droit <strong>ou</strong> gauche <strong>de</strong> <strong>la</strong>comman<strong>de</strong> multidirectionnel<strong>le</strong> p<strong>ou</strong>r sé<strong>le</strong>ctionner ON.2 <strong>Appuyez</strong> <strong>sur</strong> <strong>le</strong> <strong>b<strong>ou</strong>ton</strong> droit <strong>ou</strong> gauche <strong>de</strong> <strong>la</strong> comman<strong>de</strong>multidirectionnel<strong>le</strong> p<strong>ou</strong>r rég<strong>le</strong>r <strong>le</strong> niveau.Le niveau peut être réglé entre 0 et 7. Lorsque <strong>le</strong> niveauaugmente, <strong>la</strong> position du canal central se dép<strong>la</strong>ce <strong>de</strong> <strong>la</strong>position <strong>de</strong> l’enceinte centra<strong>le</strong> vers <strong>le</strong>s <strong>de</strong>ux côtés.La comman<strong>de</strong> <strong>de</strong> <strong>la</strong> <strong>la</strong>rgeur <strong>de</strong> l’enceinte centra<strong>le</strong> estdésactivée si v<strong>ou</strong>s sé<strong>le</strong>ctionnez OFF.• Ce rég<strong>la</strong>ge est effectif si l’enceinte centra<strong>le</strong> est réglée <strong>sur</strong> SMALL <strong>ou</strong>LARGE dans <strong>la</strong> configuration <strong>de</strong>s enceintes.• Pendant que v<strong>ou</strong>s effectuez ce rég<strong>la</strong>ge, évitez d’arrêter, d’interrompre<strong>ou</strong> <strong>de</strong> changer <strong>de</strong> disque, d’avancer, <strong>de</strong> revenir en arrière <strong>ou</strong> <strong>de</strong>changer <strong>le</strong> canal audio <strong>de</strong> l’appareil. Ce rég<strong>la</strong>ge est annulé si v<strong>ou</strong>smodifiez l’état du mo<strong>de</strong> <strong>de</strong> décodage.• Ce rég<strong>la</strong>ge est sans effet si l’enceinte est réglée <strong>sur</strong> CENTER OFF à<strong>la</strong> section « Rég<strong>la</strong>ge <strong>de</strong>s enceintes » (page 32).• Cette fonction n’est disponib<strong>le</strong> qu’avec <strong>de</strong>s signaux à <strong>de</strong>ux canaux.El<strong>le</strong> n’est pas effective quand <strong>le</strong>s signaux entrés sont <strong>de</strong>s signauxDTS 5.1 canaux <strong>ou</strong> Dolby Digital.• Si v<strong>ou</strong>s rég<strong>le</strong>z REAR FILL quand REAR MIX est réglé <strong>sur</strong> ON, <strong>le</strong> sondu rég<strong>la</strong>ge Rear Fill ne change pas, car REAR MIX a <strong>la</strong> prioritéquand <strong>le</strong> déco<strong>de</strong>ur à <strong>de</strong>ux canaux utilisé n’est pas <strong>de</strong> type PCMlinéaire.• P<strong>ou</strong>r <strong>le</strong>s signaux PCM linéaires, <strong>la</strong> voix est reproduite à partir <strong>de</strong>l’enceinte arrière, quel que soit <strong>le</strong> rég<strong>la</strong>ge <strong>de</strong> REAR FILL et REARMIX.• <strong>Appuyez</strong> <strong>sur</strong> TA/RTN/SETUP p<strong>ou</strong>r revenir à l’écran précé<strong>de</strong>nt.Rég<strong>la</strong>ge PCM linéairePendant <strong>la</strong> <strong>le</strong>cture <strong>de</strong> disques enregistrés en mo<strong>de</strong> PCM linéaire, v<strong>ou</strong>sp<strong>ou</strong>vez rég<strong>le</strong>r <strong>la</strong> sortie <strong>sur</strong> 2 <strong>ou</strong> 3 canaux.1 As<strong>sur</strong>ez-v<strong>ou</strong>s que <strong>le</strong> mo<strong>de</strong> Defeat est désactivé(page 12).2 <strong>Appuyez</strong> <strong>sur</strong> TA/RTN/SETUP pendant au moins2 secon<strong>de</strong>s.L’écran SETUP s’affiche.3 <strong>Appuyez</strong> <strong>sur</strong> <strong>le</strong> <strong>b<strong>ou</strong>ton</strong> supérieur <strong>ou</strong> inférieur <strong>de</strong> <strong>la</strong>comman<strong>de</strong> multidirectionnel<strong>le</strong> p<strong>ou</strong>rsé<strong>le</strong>ctionner AP SETUP, puis appuyez <strong>sur</strong> <strong>le</strong> <strong>b<strong>ou</strong>ton</strong>droit <strong>de</strong> <strong>la</strong> comman<strong>de</strong> multidirectionnel<strong>le</strong>.L’écran AP SETUP s’affiche.4 <strong>Appuyez</strong> <strong>sur</strong> <strong>le</strong> <strong>b<strong>ou</strong>ton</strong> supérieur <strong>ou</strong> inférieur <strong>de</strong> <strong>la</strong>comman<strong>de</strong> multidirectionnel<strong>le</strong> p<strong>ou</strong>rsé<strong>le</strong>ctionner PCM MODE.5 <strong>Appuyez</strong> <strong>sur</strong> <strong>le</strong> <strong>b<strong>ou</strong>ton</strong> gauche <strong>ou</strong> droit <strong>de</strong> <strong>la</strong>comman<strong>de</strong> multidirectionnel<strong>le</strong> p<strong>ou</strong>rsé<strong>le</strong>ctionner 2CH <strong>ou</strong> 3CH.2CH : Sortie à <strong>de</strong>ux canaux (G/D)3CH : Sortie à trois canaux (G/D/CENTRE)• Ce rég<strong>la</strong>ge est sans effet si l’enceinte est réglée <strong>sur</strong> CENTER OFF à<strong>la</strong> section « Rég<strong>la</strong>ge <strong>de</strong>s enceintes » (page 32).39-FR
Utilisation <strong>de</strong>st<strong>ou</strong>ches tacti<strong>le</strong>sSi v<strong>ou</strong>s raccor<strong>de</strong>z un moniteur à panneau tacti<strong>le</strong> <strong>Alpine</strong> à cet appareil,v<strong>ou</strong>s p<strong>ou</strong>vez utiliser <strong>le</strong>s t<strong>ou</strong>ches tacti<strong>le</strong>s en appuyant directement <strong>sur</strong>l’écran. Consultez chaque section p<strong>ou</strong>r plus d’informations.• Il est possib<strong>le</strong> que l’utilisation ne soit pas <strong>la</strong> même selon l’appareilraccordé. Reportez-v<strong>ou</strong>s au mo<strong>de</strong> d’emploi <strong>de</strong> l’appareil raccordé.Fonctions principa<strong>le</strong>sL’exemp<strong>le</strong> suivant <strong>sur</strong> l’écran radio et l’écran <strong>de</strong> sé<strong>le</strong>ction <strong>de</strong> <strong>la</strong> s<strong>ou</strong>rceexplique quel<strong>le</strong>s sont <strong>le</strong>s fonctions principa<strong>le</strong>s.S’il existe une liste hiérarchique, s’affiche et si v<strong>ou</strong>sappuyez <strong>sur</strong> cette t<strong>ou</strong>che, l’écran <strong>de</strong> <strong>la</strong> liste change.RTNCette t<strong>ou</strong>che permet <strong>de</strong> revenir à l’écran précé<strong>de</strong>nt.Fonctions <strong>de</strong> <strong>la</strong> radioExemp<strong>le</strong> d’affichage <strong>de</strong> l’écran principal <strong>de</strong> <strong>la</strong> radioCette t<strong>ou</strong>che permet <strong>de</strong> revenir à l’écran <strong>de</strong> <strong>la</strong> s<strong>ou</strong>rceprincipa<strong>le</strong>./Ces t<strong>ou</strong>ches permettent <strong>de</strong> faire défi<strong>le</strong>r <strong>la</strong> liste.Cette t<strong>ou</strong>che permet <strong>de</strong> sé<strong>le</strong>ctionner un élément.SOURCE (page 6)L’écran <strong>de</strong> sé<strong>le</strong>ction <strong>de</strong> <strong>la</strong> s<strong>ou</strong>rce s’affiche.NAV. (page 27)L’écran <strong>de</strong> navigation s’affiche.CONTROLCette t<strong>ou</strong>che permet d’afficher l’écran <strong>de</strong>s fonctions <strong>sur</strong> <strong>le</strong>panneau tacti<strong>le</strong> raccordé.VOL. / (page 7)Cette t<strong>ou</strong>che permet <strong>de</strong> rég<strong>le</strong>r <strong>le</strong> volume.MUTE (page 7)Cette t<strong>ou</strong>che permet d’activer et <strong>de</strong> désactiver <strong>le</strong> mo<strong>de</strong>MUTE.FUNC.Affiche l’écran FUNCTION <strong>de</strong> chaque s<strong>ou</strong>rce.(page 7)Recherche et capte automatiquement un canal (mo<strong>de</strong>distance <strong>ou</strong> mo<strong>de</strong> local).(page 7)Parc<strong>ou</strong>rt <strong>le</strong>s canaux un à un (mo<strong>de</strong> manuel).(page 9)Recherche PTY (mo<strong>de</strong> RDS).TUNE (page 7)Cette t<strong>ou</strong>che permet <strong>de</strong> modifier <strong>le</strong> mo<strong>de</strong> <strong>de</strong> syntonisation.DX SEEK ( , ) SEEK ( , )OFF ( , ) PTY SEEK ( , ) DX SEEK(page 7)Recherche et capte automatiquement un canal (mo<strong>de</strong>distance <strong>ou</strong> mo<strong>de</strong> local).(page 7)Parc<strong>ou</strong>rt <strong>le</strong>s canaux un à un (mo<strong>de</strong> manuel).(page 9)Recherche PTY (mo<strong>de</strong> RDS).A.MEMO (page 8)Cette t<strong>ou</strong>che permet une mise en mémoire automatique.BAND (page 7)Cette t<strong>ou</strong>che permet <strong>de</strong> changer <strong>de</strong> gamme d’on<strong>de</strong>s.TA (page 9)Affiché en cas <strong>de</strong> réception d’une station FM. <strong>Appuyez</strong> p<strong>ou</strong>rpasser au mo<strong>de</strong> <strong>de</strong> réception <strong>de</strong>s informations r<strong>ou</strong>tières.40-FR
Exemp<strong>le</strong> d’affichage <strong>de</strong> l’écran <strong>de</strong>s fonctions(NEWS) (page 10)Cette t<strong>ou</strong>che permet <strong>de</strong> modifier <strong>le</strong> mo<strong>de</strong> NEWS.(AF) (page 9)Permet d’activer <strong>ou</strong> <strong>de</strong> désactiver <strong>le</strong>s fréquencesalternatives (AF).Exemp<strong>le</strong> d’affichage <strong>de</strong> l’écran <strong>de</strong> fonction(page 8)Si v<strong>ou</strong>s enregistrez <strong>ou</strong> rappe<strong>le</strong>z un numéro préréglé,l’affichage passe à l’écran du numéro préréglé.(INFO) (page 10)Affiche <strong>le</strong> radio texte.Fonctions <strong>de</strong> <strong>la</strong> configuration(page 8)Cette t<strong>ou</strong>che permet <strong>de</strong> sé<strong>le</strong>ctionner <strong>le</strong> numéro préréglé.Fonctionnement RDSLe « Rég<strong>la</strong>ge du son » (page 11), « Fonction moniteur arrière »(page 12) et « Processeur audio externe (en option) » (page 31)fonctionnent <strong>de</strong> <strong>la</strong> même manière.Exemp<strong>le</strong> d’affichage <strong>de</strong> l’écran <strong>de</strong>s fonctionsExemp<strong>le</strong> d’affichage <strong>de</strong> l’écran RDS(SETUP)Affiche l’écran SETUP.Exemp<strong>le</strong> d’affichage <strong>de</strong> l’écran <strong>de</strong> configuration(pages 9, 10)Un programme possédant <strong>le</strong> PTY (Type <strong>de</strong> programme) enc<strong>ou</strong>rs.<strong>Appuyez</strong> <strong>sur</strong> <strong>la</strong> t<strong>ou</strong>che et maintenez-<strong>la</strong> enfoncée p<strong>ou</strong>rchanger <strong>de</strong> PTY.(pages 9, 10)Un programme possédant <strong>le</strong> PTY (Type <strong>de</strong> programme) enc<strong>ou</strong>rs.<strong>Appuyez</strong> <strong>sur</strong> <strong>la</strong> t<strong>ou</strong>che et maintenez-<strong>la</strong> enfoncée p<strong>ou</strong>rchanger <strong>de</strong> PTY.Exemp<strong>le</strong> d’affichage <strong>de</strong> l’écran <strong>de</strong> <strong>la</strong> fonction RDSS’il existe une liste hiérarchique, s’affiche et si v<strong>ou</strong>sappuyez <strong>sur</strong> cette t<strong>ou</strong>che, l’écran <strong>de</strong> <strong>la</strong> liste change.(PTY) (page 9)Affiche l’écran <strong>de</strong> sé<strong>le</strong>ction du PTY. <strong>Appuyez</strong> <strong>sur</strong> p<strong>ou</strong>rconfirmer <strong>le</strong> type <strong>de</strong> programme dans l’écran <strong>de</strong> sé<strong>le</strong>ction./Ces t<strong>ou</strong>ches permettent d’effectuer <strong>de</strong>s rég<strong>la</strong>ges enappuyant <strong>sur</strong> l’écran.41-FR
Utilisation du CD/MP3/WMAExemp<strong>le</strong> d’affichage <strong>de</strong> l’écran <strong>de</strong>s fonctionsExemp<strong>le</strong> d’affichage <strong>de</strong> l’écran principal MP3/WMA(REPEAT), (M.I.X.) (page 21)Chaque fois que v<strong>ou</strong>s appuyez <strong>sur</strong> cette t<strong>ou</strong>che, v<strong>ou</strong>scommutez <strong>le</strong>s mo<strong>de</strong>s Repeat et M.I.X.Exemp<strong>le</strong> d’affichage lorsque v<strong>ou</strong>s raccor<strong>de</strong>z un changeur CD(page 20)Recherche <strong>le</strong> début <strong>de</strong> <strong>la</strong> piste en c<strong>ou</strong>rs. <strong>Appuyez</strong> <strong>sur</strong> <strong>la</strong>t<strong>ou</strong>che et maintenez-<strong>la</strong> enfoncée p<strong>ou</strong>r un recu<strong>le</strong>rrapi<strong>de</strong>ment./ (page 20)Cette t<strong>ou</strong>che permet <strong>de</strong> démarrer et d’interrompre (Pause)<strong>la</strong> <strong>le</strong>cture.(page 20)Recherche <strong>le</strong> début <strong>de</strong> <strong>la</strong> piste suivante. <strong>Appuyez</strong> <strong>sur</strong> <strong>la</strong>t<strong>ou</strong>che et maintenez-<strong>la</strong> enfoncée p<strong>ou</strong>r un avancerrapi<strong>de</strong>ment.F. (page 20)Sé<strong>le</strong>ctionne <strong>le</strong> dossier antérieur.F. (page 20)Sé<strong>le</strong>ctionne <strong>le</strong> dossier suivant.(page 20)Permet d’accé<strong>de</strong>r au mo<strong>de</strong> <strong>de</strong> recherche par dossier <strong>ou</strong>par fichier.• « F. », « F. » et « » ne sont pas affichés lors <strong>de</strong> <strong>la</strong> <strong>le</strong>cture duCD.Exemp<strong>le</strong> d’affichage <strong>de</strong> l’écran <strong>de</strong> recherche(REPEAT) , (M.I.X.) (page 21)Cette t<strong>ou</strong>che permet <strong>de</strong> changer l’écran <strong>de</strong> sé<strong>le</strong>ction dumo<strong>de</strong> M.I.X. <strong>ou</strong> Repeat.<strong>Appuyez</strong> <strong>sur</strong> p<strong>ou</strong>r confirmer <strong>le</strong> mo<strong>de</strong> dans l’écran <strong>de</strong> sé<strong>le</strong>ction.(DISC SELECT) (page 20)Affiche l’écran <strong>de</strong> sé<strong>le</strong>ction du disque.<strong>Appuyez</strong> <strong>sur</strong> p<strong>ou</strong>r confirmer <strong>le</strong> disque dans l’écran <strong>de</strong> sé<strong>le</strong>ction.(CHG SEL) (page 20)S’affiche lorsque <strong>de</strong>ux changeurs sont raccordés.<strong>Appuyez</strong> <strong>sur</strong> cette t<strong>ou</strong>che p<strong>ou</strong>r changer <strong>de</strong> changeur.(page 20)Cette t<strong>ou</strong>che permet d’accé<strong>de</strong>r au dossier <strong>ou</strong> au fichiersé<strong>le</strong>ctionné.(page 20)Si <strong>le</strong> dossier contient <strong>de</strong>s fichiers, <strong>le</strong>s dossiers s’affichent ;si v<strong>ou</strong>s appuyez <strong>sur</strong> cette t<strong>ou</strong>che, l’affichage passe àl’écran <strong>de</strong> <strong>la</strong> liste <strong>de</strong>s fichiers.42-FR
Utilisation <strong>de</strong> DVD/CD vidéoExemp<strong>le</strong> d’affichage <strong>de</strong> l’écran <strong>de</strong>s fonctions• L’élément affiché varie selon <strong>le</strong> disque et l’appareil raccordé.• Il est possib<strong>le</strong> que certaines t<strong>ou</strong>ches tacti<strong>le</strong>s ne fonctionnent pas correctement.Exemp<strong>le</strong> d’affichage <strong>de</strong> l’écran principal <strong>de</strong>s fonctions du DVD(page 23)Cette t<strong>ou</strong>che permet <strong>de</strong> rechercher <strong>le</strong> début d’une piste <strong>ou</strong>d’un chapitre. <strong>Appuyez</strong> <strong>sur</strong> <strong>la</strong> t<strong>ou</strong>che et maintenez-<strong>la</strong> enfoncéep<strong>ou</strong>r un recu<strong>le</strong>r rapi<strong>de</strong>ment./ (page 22)Cette t<strong>ou</strong>che permet <strong>de</strong> démarrer et d’interrompre (Pause) <strong>la</strong> <strong>le</strong>cture.(page 23)Cette t<strong>ou</strong>che permet <strong>de</strong> rechercher <strong>le</strong> début d’une piste <strong>ou</strong>d’un chapitre. <strong>Appuyez</strong> <strong>sur</strong> <strong>la</strong> t<strong>ou</strong>che et maintenez-<strong>la</strong>enfoncée p<strong>ou</strong>r un avancer rapi<strong>de</strong>ment.KEY (page 22)L’écran du menu <strong>de</strong>s fonctions du DVD s’affiche.TOP MENU (page 23)L’écran du menu supérieur <strong>de</strong>s fonctions du DVD s’affiche.Exemp<strong>le</strong> d’affichage <strong>de</strong> l’écran du menu <strong>de</strong>s fonctions du DVD(MENU) (page 24)Affiche l’écran <strong>de</strong> menus.(AUDIO) (page 24)Change <strong>la</strong> <strong>la</strong>ngue audio.(SUB TITLE) (page 24)Change <strong>la</strong> <strong>la</strong>ngue <strong>de</strong> s<strong>ou</strong>s-titrage.(ANGLE) (page 24)Change l’ang<strong>le</strong>.(STOP/PRE STOP) (page 23)Arrête/met en pause <strong>la</strong> <strong>le</strong>cture.(REPEAT) (pages 23, 24)Change <strong>le</strong> mo<strong>de</strong> <strong>de</strong> répétition.Cette t<strong>ou</strong>che permet <strong>de</strong> dép<strong>la</strong>cer un élément affiché à l’écran.ENTCette t<strong>ou</strong>che permet <strong>de</strong> vali<strong>de</strong>r un élément sé<strong>le</strong>ctionné.RTNCette t<strong>ou</strong>che permet <strong>de</strong> revenir à l’écran précé<strong>de</strong>nt.CONTROLAffiche l’écran principal <strong>de</strong>s opérations.43-FR
Utilisation <strong>de</strong> l’iPod ®Exemp<strong>le</strong> d’affichage <strong>de</strong> l’écran principal <strong>de</strong> l’iPodFonctions du téléviseurExemp<strong>le</strong> d’affichage <strong>de</strong> l’écran principal du téléviseur(page 25)Cette t<strong>ou</strong>che permet <strong>de</strong> rechercher <strong>le</strong> début d’une chanson.<strong>Appuyez</strong> <strong>sur</strong> <strong>la</strong> t<strong>ou</strong>che et maintenez-<strong>la</strong> enfoncée p<strong>ou</strong>r unrecu<strong>le</strong>r rapi<strong>de</strong>ment./ (page 25)Cette t<strong>ou</strong>che permet <strong>de</strong> démarrer et d’interrompre (Pause)<strong>la</strong> <strong>le</strong>cture.(page 25)Cette t<strong>ou</strong>che permet <strong>de</strong> rechercher <strong>le</strong> début d’une chanson.<strong>Appuyez</strong> <strong>sur</strong> <strong>la</strong> t<strong>ou</strong>che et maintenez-<strong>la</strong> enfoncée p<strong>ou</strong>r faireavancer rapi<strong>de</strong>ment un morceau.(page 25)L’écran du mo<strong>de</strong> <strong>de</strong> recherche s’affiche.Exemp<strong>le</strong> d’affichage <strong>de</strong> l’écran <strong>de</strong> recherche(page 25)Entre <strong>la</strong> liste d’éc<strong>ou</strong>te/artiste/album/morceau.(page 25)S’il existe une hiérarchie dans <strong>la</strong> liste d’éc<strong>ou</strong>te, l’artiste <strong>ou</strong>l’album, <strong>le</strong>s listes s’affichent ; appuyez <strong>sur</strong> cette t<strong>ou</strong>che àl’écran p<strong>ou</strong>r changer l’écran <strong>de</strong> <strong>la</strong> liste.Exemp<strong>le</strong> d’affichage <strong>de</strong> l’écran <strong>de</strong>s fonctions(page 29)Cette t<strong>ou</strong>che permet <strong>de</strong> rechercher <strong>de</strong>s canaux versl’arrière un par un (mo<strong>de</strong> manuel).(page 29)Recherche et reçoit un canal automatiquement (mo<strong>de</strong> <strong>de</strong>recherche automatique).P.SET (page 29)Cette t<strong>ou</strong>che permet <strong>de</strong> rechercher <strong>de</strong>s numéros préréglésvers l’arrière un par un.TUNE (page 29)Change <strong>le</strong> mo<strong>de</strong> <strong>de</strong> syntonisation (mo<strong>de</strong> manuel, mo<strong>de</strong> <strong>de</strong>recherche automatique et numéro préréglé).(page 29)Cette t<strong>ou</strong>che permet <strong>de</strong> rechercher <strong>de</strong>s canaux vers l’avantun par un.(page 29)Recherche et reçoit un canal automatiquement (mo<strong>de</strong> <strong>de</strong>recherche automatique).P.SET (page 29)Cette t<strong>ou</strong>che permet <strong>de</strong> rechercher <strong>de</strong>s numéros préréglésvers l’avant un par un.A.MEMO (page 29)Cette t<strong>ou</strong>che permet une mise en mémoire automatique.BAND (page 29)Cette t<strong>ou</strong>che permet <strong>de</strong> changer <strong>de</strong> gamme d’on<strong>de</strong>s.Exemp<strong>le</strong> d’affichage <strong>de</strong> l’écran <strong>de</strong>s fonctions(AUDIO) (page 29)Permet <strong>de</strong> changer <strong>le</strong> son.(REPEAT) , (M.I.X.) (page 27)Cette t<strong>ou</strong>che permet <strong>de</strong> changer l’écran <strong>de</strong> sé<strong>le</strong>ction dumo<strong>de</strong> M.I.X. <strong>ou</strong> Repeat.<strong>Appuyez</strong> <strong>sur</strong> p<strong>ou</strong>r confirmer <strong>le</strong> mo<strong>de</strong> dans l’écran <strong>de</strong>sé<strong>le</strong>ction.44-FR
Utilisation du téléviseur numériqueExemp<strong>le</strong> d’affichage <strong>de</strong> l’écran <strong>de</strong>s fonctionsExemp<strong>le</strong> d’affichage <strong>de</strong> l’écran principal du téléviseur numériqueMENU (page 30)Affiche l’écran <strong>de</strong> menus.A.MEMO (page 30)Cette t<strong>ou</strong>che permet une mise en mémoire automatique.CH (page 30)Cette t<strong>ou</strong>che permet <strong>de</strong> rechercher <strong>de</strong>s canaux versl’arrière un par un. Si v<strong>ou</strong>s appuyez <strong>sur</strong> cette t<strong>ou</strong>che et<strong>la</strong> maintenez enfoncée, <strong>le</strong>s canaux changentcontinuel<strong>le</strong>ment.FAV (page 30)Cette t<strong>ou</strong>che permet <strong>de</strong> rechercher <strong>le</strong>s canaux préférésvers l’arrière un par un.TUNE (page 30)Cette t<strong>ou</strong>che permet <strong>de</strong> changer <strong>la</strong> métho<strong>de</strong> <strong>de</strong>syntonisation (par canal <strong>ou</strong> par canal préféré).CH (page 30)Cette t<strong>ou</strong>che permet <strong>de</strong> rechercher <strong>de</strong>s canaux versl’avant un par un. Si v<strong>ou</strong>s appuyez <strong>sur</strong> cette t<strong>ou</strong>che et <strong>la</strong>maintenez enfoncée, <strong>le</strong>s canaux changentcontinuel<strong>le</strong>ment.FAV (page 30)Cette t<strong>ou</strong>che permet <strong>de</strong> rechercher <strong>le</strong>s canaux préférésvers l’avant un par un.KEY (page 30)Affiche <strong>le</strong>s t<strong>ou</strong>ches tacti<strong>le</strong>s p<strong>ou</strong>r utiliser l’écran du gui<strong>de</strong>é<strong>le</strong>ctronique <strong>de</strong>s programmes (EPG).BAND (page 30)Change <strong>la</strong> s<strong>ou</strong>rce du téléviseur numérique.EPG (page 30)Affiche l’écran du gui<strong>de</strong> é<strong>le</strong>ctronique <strong>de</strong>s programmes(EPG).Exemp<strong>le</strong> d’affichage <strong>de</strong> l’écran du gui<strong>de</strong> é<strong>le</strong>ctronique <strong>de</strong>sprogrammes (EPG)(page 30)Cette t<strong>ou</strong>che permet <strong>de</strong> dép<strong>la</strong>cer un élément affiché à l’écran.ENT (page 30)Cette t<strong>ou</strong>che permet <strong>de</strong> vali<strong>de</strong>r un élément sé<strong>le</strong>ctionné.RTNCette t<strong>ou</strong>che permet <strong>de</strong> revenir à l’écran précé<strong>de</strong>nt.CONTROLAffiche l’écran principal <strong>de</strong>s opérations.45-FR
InformationsEn cas <strong>de</strong> problèmeEn cas <strong>de</strong> problème, mettez l’appareil hors tension, puis à n<strong>ou</strong>veaus<strong>ou</strong>s tension. Si l’appareil ne fonctionne t<strong>ou</strong>j<strong>ou</strong>rs pas norma<strong>le</strong>ment,vérifiez <strong>le</strong>s éléments <strong>de</strong> <strong>la</strong> liste ci-<strong>de</strong>ss<strong>ou</strong>s. Ce gui<strong>de</strong> peut v<strong>ou</strong>s ai<strong>de</strong>rà i<strong>de</strong>ntifier un problème quand l’appareil présente une anomalie. Si<strong>le</strong> problème persiste, as<strong>sur</strong>ez-v<strong>ou</strong>s que <strong>le</strong> reste du système estcorrectement raccordé, puis consultez votre reven<strong>de</strong>ur <strong>Alpine</strong> agréé.GénéralitésAbsence <strong>de</strong> fonctionnement <strong>ou</strong> d’affichage.• Le contact du véhicu<strong>le</strong> n’est pas mis.- Lorsque l’appareil est raccordé conformément auxinstructions, il ne fonctionne pas quand <strong>le</strong> contact du véhicu<strong>le</strong>n’est pas mis.• Mauvaise connexion du fil d’alimentation.- Vérifiez <strong>le</strong>s connexions du fil d’alimentation.• Fusib<strong>le</strong> grillé.- Vérifiez <strong>le</strong> fusib<strong>le</strong> du fil <strong>de</strong> <strong>la</strong> batterie <strong>de</strong> l’appareil et sinécessaire, remp<strong>la</strong>cez-<strong>le</strong> par un fusib<strong>le</strong> d’ampérage approprié.• Mauvais fonctionnement du micro-ordinateur interne dû à <strong>de</strong>sbruits d’interférence, etc.- <strong>Appuyez</strong> <strong>sur</strong> <strong>le</strong> commutateur RESET à l’ai<strong>de</strong> d’un stylo à bil<strong>le</strong><strong>ou</strong> autre objet pointu.Son absent <strong>ou</strong> anormal.• Rég<strong>la</strong>ge non correct <strong>de</strong>s comman<strong>de</strong>s du volume/<strong>de</strong> <strong>la</strong> ba<strong>la</strong>nce/dufa<strong>de</strong>r.- Réajustez <strong>le</strong>s comman<strong>de</strong>s.• Les connexions ne sont pas établies correctement <strong>ou</strong> en t<strong>ou</strong>tesécurité.- Vérifiez <strong>le</strong>s connexions et raccor<strong>de</strong>z-<strong>le</strong>s fermement.L’écran ne s’affiche pas.• Les connexions au DVD, <strong>le</strong>cteur CD <strong>ou</strong> système <strong>de</strong> navigationne sont pas établies en t<strong>ou</strong>te sécurité.- Vérifiez <strong>le</strong>s connexions et raccor<strong>de</strong>z-<strong>le</strong>s fermement.Absence <strong>de</strong> fonctionnement du système <strong>de</strong> navigation.• Le système <strong>de</strong> navigation n’est pas correctement raccordé.- Vérifiez <strong>le</strong>s connexions au système <strong>de</strong> navigation et raccor<strong>de</strong>z<strong>le</strong>s câb<strong>le</strong>s correctement et fermement.La télécomman<strong>de</strong> ne fonctionne pas.• Le rég<strong>la</strong>ge du capteur <strong>de</strong> <strong>la</strong> télécomman<strong>de</strong>, décrit à <strong>la</strong> section« Fonction moniteur arrière », n’est pas défini <strong>sur</strong> cet appareil.- Rég<strong>le</strong>z-<strong>le</strong> p<strong>ou</strong>r cet appareil.RadioRéception <strong>de</strong>s stations impossib<strong>le</strong>.• Absence d’antenne <strong>ou</strong> connexion <strong>ou</strong>verte du câb<strong>le</strong> d’antenne.- As<strong>sur</strong>ez-v<strong>ou</strong>s que l’antenne est correctement raccordée ;remp<strong>la</strong>cez l’antenne <strong>ou</strong> <strong>le</strong> câb<strong>le</strong> si nécessaire.Impossib<strong>le</strong> d’accor<strong>de</strong>r <strong>de</strong>s stations en mo<strong>de</strong> <strong>de</strong>recherche.• V<strong>ou</strong>s v<strong>ou</strong>s tr<strong>ou</strong>vez dans une zone <strong>de</strong> signal faib<strong>le</strong>.- As<strong>sur</strong>ez-v<strong>ou</strong>s que <strong>le</strong> tuner est en mo<strong>de</strong> DX.• Si v<strong>ou</strong>s v<strong>ou</strong>s tr<strong>ou</strong>vez dans une zone <strong>de</strong> signal fort, il se peut quel’antenne ne soit pas mise à <strong>la</strong> masse <strong>ou</strong> qu’el<strong>le</strong> ne soit pascorrectement raccordée.- Vérifiez <strong>le</strong>s connexions <strong>de</strong> l’antenne ; as<strong>sur</strong>ez-v<strong>ou</strong>s qu’el<strong>le</strong> estcorrectement mise à <strong>la</strong> masse et que sa position <strong>de</strong> montage estcorrecte.• La longueur <strong>de</strong> l’antenne n’est peut-être pas adéquate.- As<strong>sur</strong>ez-v<strong>ou</strong>s que l’antenne est complètement déployée ; si el<strong>le</strong>est brisée, remp<strong>la</strong>cez-<strong>la</strong> par une neuve.La diffusion est parasitée.• La longueur <strong>de</strong> l’antenne n’est pas adéquate.- Déployez complètement l’antenne et si el<strong>le</strong> est brisée,remp<strong>la</strong>cez-<strong>la</strong>.• L’antenne n’est pas correctement mise à <strong>la</strong> masse.- As<strong>sur</strong>ez-v<strong>ou</strong>s que l’antenne est correctement mise à <strong>la</strong> masse etque sa position <strong>de</strong> montage est correcte.• Le signal <strong>de</strong> <strong>la</strong> station est faib<strong>le</strong> et parasité.- Si <strong>le</strong>s solutions ci-<strong>de</strong>ssus sont inefficaces, captez une autrestation.Indication p<strong>ou</strong>r changeur CD• Le circuit <strong>de</strong> protection est activé, car <strong>la</strong> température est é<strong>le</strong>vée.- L’indication disparaît quand <strong>la</strong> température atteint à n<strong>ou</strong>veausa p<strong>la</strong>ge <strong>de</strong> fonctionnement.• Mauvais fonctionnement du changeur CD.- Consultez votre reven<strong>de</strong>ur <strong>Alpine</strong>. <strong>Appuyez</strong> <strong>sur</strong> <strong>la</strong> t<strong>ou</strong>ched’éjection du magasin et sortez <strong>le</strong> magasin.Contrô<strong>le</strong>z l’indication. Insérez à n<strong>ou</strong>veau <strong>le</strong> magasin.S’il s’avère impossib<strong>le</strong> d’extraire <strong>le</strong> magasin, consultez votrereven<strong>de</strong>ur <strong>Alpine</strong>.• Impossib<strong>le</strong> d’éjecter <strong>le</strong> magasin.- <strong>Appuyez</strong> <strong>sur</strong> <strong>la</strong> t<strong>ou</strong>che d’éjection du magasin. S’il estimpossib<strong>le</strong> d’éjecter <strong>le</strong> magasin, consultez votre reven<strong>de</strong>ur<strong>Alpine</strong>.• Un disque <strong>de</strong>meure dans <strong>le</strong> changeur CD.- <strong>Appuyez</strong> <strong>sur</strong> <strong>la</strong> t<strong>ou</strong>che d’éjection p<strong>ou</strong>r éjecter <strong>le</strong> disque. Quand<strong>le</strong> changeur CD a terminé l’éjection, insérez un magasin CDvi<strong>de</strong> dans <strong>le</strong> changeur p<strong>ou</strong>r récupérer <strong>le</strong> disque qui est <strong>de</strong>meuréà l’intérieur <strong>de</strong> l’appareil.• Il n’y a pas <strong>de</strong> magasin dans <strong>le</strong> changeur CD.- Insérez un magasin.• Pas <strong>de</strong> disque indiqué.- Choisissez un autre disque.46-FR
Indications p<strong>ou</strong>r <strong>le</strong> mo<strong>de</strong> iPodCaractéristiques techniques• L’iPod n’est pas connecté.- As<strong>sur</strong>ez-v<strong>ou</strong>s que l’iPod est correctement connecté.As<strong>sur</strong>ez-v<strong>ou</strong>s que <strong>le</strong> câb<strong>le</strong> n’est pas trop plié.• La batterie <strong>de</strong> l’iPod reste faib<strong>le</strong>.- Consultez <strong>la</strong> documentation <strong>de</strong> l’iPod et chargez <strong>la</strong> batterie.• L’iPod ne comporte aucune chanson.- Téléchargez <strong>de</strong>s chansons <strong>sur</strong> l’iPod, puis raccor<strong>de</strong>z-<strong>le</strong> auVPA-B222R.• Erreur <strong>de</strong> communication- T<strong>ou</strong>rnez <strong>la</strong> clé <strong>de</strong> contact <strong>sur</strong> <strong>la</strong> position OFF, puis rég<strong>le</strong>z àn<strong>ou</strong>veau <strong>sur</strong> ACC <strong>ou</strong> ON.- Contrô<strong>le</strong>z l’écran en connectant à n<strong>ou</strong>veau l’iPod etl’adaptateur à l’ai<strong>de</strong> du câb<strong>le</strong> <strong>de</strong> l’iPod.SECTION DU TUNER FMP<strong>la</strong>ge d’accordSensibilité utilisab<strong>le</strong> enmo<strong>de</strong> monoSensibilité du si<strong>le</strong>ncieuxà 50 dBSé<strong>le</strong>ctivité du canal <strong>de</strong>remp<strong>la</strong>cementRapport signal/bruitSéparation stéréoRapport <strong>de</strong> captageSECTION DU TUNER MWP<strong>la</strong>ge d’accordSensibilité (norme IEC)SECTION DU TUNER LWP<strong>la</strong>ge d’accordSensibilité (norme IEC)GÉNÉRALITÉS87,5 – 108,0 MHz9,3 dBf (0,8 µV/75 ohms)13,5 dBf (1,3 µV/75 ohms)80 dB65 dB35 dB2,0 dB531 – 1 602 kHz25,1 µV/28 dB153 – 281 kHz31,6 µV/30 dB• La version du logiciel <strong>de</strong> l’iPod n’est pas compatib<strong>le</strong> avec cetappareil.- Effectuez <strong>la</strong> mise à j<strong>ou</strong>r <strong>de</strong> <strong>la</strong> version du logiciel <strong>de</strong> l’iPod afinque cel<strong>le</strong>-ci soit compatib<strong>le</strong> avec cet appareil.Puissance requise14,4 V CC(11–16 V autorisé)Température <strong>de</strong>0 °C à + 45 °CfonctionnementPuissance <strong>de</strong> sortie maximum 50 W × 4Tension <strong>de</strong> sortie2 000 mV/10k ohmsGraves+20/–14 dB à 100 HzAigus±14 dB à 10 kHzPoids1,2 kgNiveau <strong>de</strong> sortie audioPrésortie (avant, arrière) :2V/10k ohms (max.)Présortie (subwoofer) : 2V/10k ohms (max.)Sortie auxiliaire : 1,2V/10k ohmsAi-NET :850 mVTAILLE DU CHÂSSISLargeurHauteurProfon<strong>de</strong>ur275 mm40 mm170 mmAppareil <strong>de</strong> comman<strong>de</strong>LargeurHauteurProfon<strong>de</strong>urPoids53 mm29 mm87 mm50 g (sans <strong>le</strong> soc<strong>le</strong>)47-FR
Instal<strong>la</strong>tion et Raccor<strong>de</strong>mentsAvant d’instal<strong>le</strong>r <strong>ou</strong> <strong>de</strong> raccor<strong>de</strong>r votre appareil, lisezattentivement <strong>le</strong>s pages suivantes ainsi que <strong>le</strong>s pages 4à 5 <strong>de</strong> ce manuel p<strong>ou</strong>r une meil<strong>le</strong>ure utilisation.AvertissementEFFECTUER CORRECTEMENT LES CONNEXIONS.Il y a risque <strong>de</strong> b<strong>le</strong>s<strong>sur</strong>es <strong>ou</strong> <strong>de</strong> dommages à l’appareil.A UTILISER UNIQUEMENT SUR DES VOITURES A MASSENEGATIVE DE 12 VOLTS.(Vérifiez auprès <strong>de</strong> votre concessionnaire si v<strong>ou</strong>s n’en êtes pascertain.) Il y a risque d’incendie, etc.AVANT TOUTE CONNEXION, DEBRANCHER LE CABLE DE LABORNE NEGATIVE DE LA BATTERIE.Il y a risque <strong>de</strong> choc é<strong>le</strong>ctrique <strong>ou</strong> <strong>de</strong> b<strong>le</strong>s<strong>sur</strong>e par c<strong>ou</strong>rts-circuits.NE PAS COINCER LES CABLES AVEC DES OBJETS VOISINS.Positionner <strong>le</strong>s câb<strong>le</strong>s conformément au manuel <strong>de</strong> manière à évitert<strong>ou</strong>te obstruction en c<strong>ou</strong>rs <strong>de</strong> conduite. Les câb<strong>le</strong>s qui obstruent <strong>ou</strong>dépassent à <strong>de</strong>s endroits tels que <strong>le</strong> vo<strong>la</strong>nt, <strong>le</strong> <strong>le</strong>vier <strong>de</strong> changement<strong>de</strong> vitesses, <strong>la</strong> péda<strong>le</strong> <strong>de</strong> frein, etc., peuvent s’avérer extrêmementdangereux.NE PAS DENUDER LES CABLES ELECTRIQUES.Ne jamais en<strong>le</strong>ver <strong>la</strong> gaine iso<strong>la</strong>nte p<strong>ou</strong>r alimenter un autreappareil. Il y a risque <strong>de</strong> dépassement <strong>de</strong> <strong>la</strong> capacité <strong>de</strong> c<strong>ou</strong>rant et,partant, d’incendie <strong>ou</strong> <strong>de</strong> choc é<strong>le</strong>ctrique.NE PAS ENDOMMAGER DE CONDUITES NI DE CABLESLORS DU FORAGE DES TROUS.Lors du forage <strong>de</strong> tr<strong>ou</strong>s dans <strong>le</strong> châssis en vue <strong>de</strong> l’instal<strong>la</strong>tion,veil<strong>le</strong>r à ne pas entrer en contact, endommager ni obstruer <strong>de</strong>conduites, <strong>de</strong> tuyaux à carburant <strong>ou</strong> <strong>de</strong> fils é<strong>le</strong>ctriques. Lenon-respect <strong>de</strong> cette précaution peut entraîner un incendie.NE PAS UTILISER DES ECROUS NI DES BOULONS DUCIRCUIT DE FREINAGE OU DE DIRECTION POUR LESCONNEXIONS DE MASSE.Les b<strong>ou</strong>lons et <strong>le</strong>s écr<strong>ou</strong>s utilisés p<strong>ou</strong>r <strong>le</strong>s circuits <strong>de</strong> freinage et <strong>de</strong>direction (<strong>ou</strong> <strong>de</strong> t<strong>ou</strong>t autre système <strong>de</strong> sécurité) <strong>ou</strong> <strong>le</strong>s réservoirs nepeuvent JAMAIS être utilisés p<strong>ou</strong>r l’instal<strong>la</strong>tion <strong>ou</strong> <strong>la</strong> liaison à <strong>la</strong>masse. L’utilisation <strong>de</strong> ces organes peut désactiver <strong>le</strong> système <strong>de</strong>contrô<strong>le</strong> du véhicu<strong>le</strong> et causer un incendie, etc.GARDER LES PETITS OBJETS COMME LES BOULONS OULES VIS HORS DE LA PORTEE DES ENFANTS.L’ingestion <strong>de</strong> tels objets peut entraîner <strong>de</strong> graves b<strong>le</strong>s<strong>sur</strong>es. En casd’ingestion, consulter immédiatement un mé<strong>de</strong>cin.NE PAS INSTALLER A DES ENDROITS SUSCEPTIBLESD’ENTRAVER LA CONDUITE DU VEHICULE, COMME LEVOLANT OU LE LEVIER DE VITESSES.La vue vers l’avant p<strong>ou</strong>rrait être obstruée <strong>ou</strong> <strong>le</strong>s m<strong>ou</strong>vements gênés,etc., et provoquer un acci<strong>de</strong>nt grave.AttentionFAIRE INSTALLER LE CABLAGE ET L’APPAREIL PAR DESEXPERTS.Le câb<strong>la</strong>ge et l’instal<strong>la</strong>tion <strong>de</strong> cet appareil requiert <strong>de</strong>s compétencestechniques et <strong>de</strong> l’expérience. P<strong>ou</strong>r garantir <strong>la</strong> sécurité, faire procé<strong>de</strong>rà l’instal<strong>la</strong>tion <strong>de</strong> cet appareil par <strong>le</strong> distributeur qui v<strong>ou</strong>s l’a vendu.UTILISER LES ACCESSOIRES SPECIFIES ET LES INSTALLERCORRECTEMENT.Utiliser uniquement <strong>le</strong>s accessoires spécifiés. L’utilisation d’autrescomposants que <strong>le</strong>s composants spécifiés peut causer <strong>de</strong>s dommagesinternes à cet appareil <strong>ou</strong> son instal<strong>la</strong>tion risque <strong>de</strong> ne pas êtreeffectuée correctement. Les pièces utilisées risquent <strong>de</strong> se <strong>de</strong>sserreret <strong>de</strong> provoquer <strong>de</strong>s dommages <strong>ou</strong> une défail<strong>la</strong>nce <strong>de</strong> l’appareil.FAIRE CHEMINER LE CABLAGE DE MANIERE A NE PAS LECOINCER CONTRE UNE ARETE METALLIQUE.Faire cheminer <strong>le</strong>s câb<strong>le</strong>s à l’écart <strong>de</strong>s pièces mobi<strong>le</strong>s (comme <strong>le</strong>srails d’un siège) et <strong>de</strong>s arêtes acérées <strong>ou</strong> pointues. Ce<strong>la</strong> évitera ainsi<strong>de</strong> coincer et d’endommager <strong>le</strong>s câb<strong>le</strong>s. Si un câb<strong>le</strong> passe dans unorifice métallique, utiliser un passe-cloison en ca<strong>ou</strong>tch<strong>ou</strong>c p<strong>ou</strong>réviter que <strong>la</strong> gaine iso<strong>la</strong>nte du câb<strong>le</strong> ne soit endommagée par <strong>le</strong>rebord métallique <strong>de</strong> l’orifice.NE PAS INSTALLER A DES ENDROITS TRES HUMIDES OUPOUSSIEREUX.Eviter d’instal<strong>le</strong>r l’appareil à <strong>de</strong>s endroits s<strong>ou</strong>mis à une forte humidité<strong>ou</strong> à <strong>de</strong> <strong>la</strong> p<strong>ou</strong>ssière en excès. La pénétration d’humidité <strong>ou</strong> <strong>de</strong> p<strong>ou</strong>ssièreà l’intérieur <strong>de</strong> cet appareil risque <strong>de</strong> provoquer une défail<strong>la</strong>nce.Précautions• Veil<strong>le</strong>z à débrancher <strong>le</strong> câb<strong>le</strong> <strong>de</strong> <strong>la</strong> borne négative (–) <strong>de</strong> <strong>la</strong>batterie avant d’instal<strong>le</strong>r <strong>le</strong> VPA-B222R. Les risques <strong>de</strong>dommages causés par un c<strong>ou</strong>rt-circuit seront réduits.• Veil<strong>le</strong>z à raccor<strong>de</strong>r <strong>le</strong>s fils co<strong>de</strong>s c<strong>ou</strong><strong>le</strong>ur selon <strong>le</strong> schéma <strong>de</strong>connexion. De mauvaises connexions peuvent causer un mauvaisfonctionnement <strong>ou</strong> endommager <strong>le</strong> système é<strong>le</strong>ctrique du véhicu<strong>le</strong>.• Quand v<strong>ou</strong>s raccor<strong>de</strong>z <strong>le</strong>s fils au système é<strong>le</strong>ctrique <strong>de</strong> <strong>la</strong> voiture,faites attention aux composants installés en usine (par ex.microprocesseur). Ne pas essayer d’alimenter l’appareil en <strong>le</strong>raccordant aux fils <strong>de</strong> ces appareils. Lorsque v<strong>ou</strong>s raccor<strong>de</strong>z <strong>le</strong>VPA-B222R au boîtier à fusib<strong>le</strong>s, as<strong>sur</strong>ez-v<strong>ou</strong>s que <strong>le</strong> fusib<strong>le</strong>p<strong>ou</strong>r <strong>le</strong> circuit <strong>de</strong>stiné au VPA-B222R possè<strong>de</strong> l’ampérage requis,sinon l’appareil et/<strong>ou</strong> <strong>le</strong> véhicu<strong>le</strong> risquent d’être endommagés. Encas <strong>de</strong> d<strong>ou</strong>te, consultez votre reven<strong>de</strong>ur <strong>Alpine</strong>.• Le VPA-B222R utilise <strong>de</strong>s prises femel<strong>le</strong>s <strong>de</strong> type RCA p<strong>ou</strong>r <strong>le</strong>raccor<strong>de</strong>ment à d’autres appareils (par ex. amplificateur) munis <strong>de</strong>connecteurs RCA. V<strong>ou</strong>s aurez éventuel<strong>le</strong>ment besoin d’unadaptateur p<strong>ou</strong>r <strong>le</strong> relier à d’autres appareils. Le cas échéant,contactez votre reven<strong>de</strong>ur <strong>Alpine</strong> qui v<strong>ou</strong>s conseil<strong>le</strong>ra à ce sujet.• Veil<strong>le</strong>z à connecter <strong>le</strong> cordon <strong>de</strong> l’enceinte (–) à <strong>la</strong> borne <strong>de</strong>l’enceinte (–). Ne connectez jamais <strong>le</strong>s câb<strong>le</strong>s d’enceintes <strong>de</strong>svoies gauche et droite ensemb<strong>le</strong> <strong>ou</strong> au corps du véhicu<strong>le</strong>.IMPORTANTNotez <strong>le</strong> numéro <strong>de</strong> série <strong>de</strong> l’appareil dans l’espace prévu ci-<strong>de</strong>ss<strong>ou</strong>set conservez-<strong>le</strong> en permanence. La p<strong>la</strong>que <strong>de</strong> numéro <strong>de</strong> série est situéeau fond <strong>de</strong> l’appareil.NUMÉRO DE SÉRIE :DATE D’INSTALLATION :INSTALLATEUR :LIEU D’ACHAT :48-FR
Instal<strong>la</strong>tionInstal<strong>la</strong>tion <strong>de</strong> l’appareilAttention• N’obstruez pas <strong>le</strong> venti<strong>la</strong>teur <strong>ou</strong> <strong>le</strong> dissipateur thermique <strong>de</strong>l’appareil, car ce<strong>la</strong> empêcherait l’air <strong>de</strong> circu<strong>le</strong>r. En casd’obstruction, <strong>de</strong> <strong>la</strong> cha<strong>le</strong>ur s’accumu<strong>le</strong> à l’intérieur <strong>de</strong>l’appareil et peut provoquer un incendie.• Ne t<strong>ou</strong>chez pas <strong>le</strong> dissipateur thermique car v<strong>ou</strong>s p<strong>ou</strong>rriez v<strong>ou</strong>sbrû<strong>le</strong>r.Fixation à l’ai<strong>de</strong> <strong>de</strong> visQuand v<strong>ou</strong>s fixez <strong>le</strong> tuner à l’ai<strong>de</strong> <strong>de</strong> vis, choisissez un endroit p<strong>la</strong>t.Quand v<strong>ou</strong>s percez <strong>de</strong>s tr<strong>ou</strong>s, veil<strong>le</strong>z à ne pas rayer <strong>de</strong>s tuyaux <strong>ou</strong> <strong>de</strong>scâb<strong>le</strong>s.1 Fixez <strong>le</strong> support aux <strong>de</strong>ux f<strong>la</strong>ncs du tuner à l’ai<strong>de</strong><strong>de</strong>s vis f<strong>ou</strong>rnies (M4 × 8).VPA-B222ROrifice <strong>de</strong> venti<strong>la</strong>tion d’airSupport (f<strong>ou</strong>rnies)Fixation à l’ai<strong>de</strong> <strong>de</strong> retenues VelcroQuand v<strong>ou</strong>s fixez l’appareil à l’ai<strong>de</strong> <strong>de</strong> retenues Velcro, choisissez une<strong>sur</strong>face p<strong>la</strong>ne.Ne suspen<strong>de</strong>z pas l’appareil au bas du tab<strong>le</strong>au <strong>de</strong> bord <strong>ou</strong> <strong>sur</strong> <strong>la</strong> p<strong>la</strong>gearrière avec <strong>de</strong>s retenues Velcro.1 Détachez <strong>le</strong> papier <strong>de</strong> protection et fixez <strong>de</strong>uxmorceaux <strong>de</strong> Velcro <strong>sur</strong> <strong>le</strong> <strong>de</strong>ss<strong>ou</strong>s du tuner.Vis (M4 × 8) (f<strong>ou</strong>rnies)2 Instal<strong>le</strong>z <strong>le</strong> tuner <strong>sur</strong> <strong>le</strong> p<strong>la</strong>ncher à l’ai<strong>de</strong> <strong>de</strong>s vishexagona<strong>le</strong>s à tête f<strong>la</strong>sque (M4 × 14).Vis hexagona<strong>le</strong>s à têtef<strong>la</strong>sque (M4 × 14) (f<strong>ou</strong>rnies)VPA-B222RVPA-B222RPapier <strong>de</strong>protectionPapier <strong>de</strong> protectionRetenue Velcro(f<strong>ou</strong>rnies)2 Vérifiez <strong>la</strong> position, puis fixez <strong>le</strong> tuner à <strong>la</strong> moquettedu p<strong>la</strong>ncher.49-FR
Fixation <strong>de</strong> l’appareil <strong>de</strong> comman<strong>de</strong>P<strong>ou</strong>r une utilisation en t<strong>ou</strong>te sécurité, respectez <strong>le</strong>s consignesci-<strong>de</strong>ss<strong>ou</strong>s :• Instal<strong>le</strong>z l’appareil <strong>de</strong> comman<strong>de</strong> <strong>sur</strong> un endroit stab<strong>le</strong> et résistant.• Le maniement <strong>de</strong> l’appareil ne doit pas gêner <strong>le</strong> conducteur pendant<strong>la</strong> conduite.• Instal<strong>le</strong>z l’appareil <strong>de</strong> comman<strong>de</strong> <strong>de</strong> façon à ne pas gêner <strong>la</strong> conduite(conso<strong>le</strong> centra<strong>le</strong>, etc.).Veil<strong>le</strong>z à maintenir votre position <strong>de</strong> conduite lors <strong>de</strong> l’utilisation <strong>de</strong>l’appareil et restez concentré <strong>sur</strong> <strong>la</strong> r<strong>ou</strong>te.1 Choisissez bien l’emp<strong>la</strong>cement et l’orientation dusoc<strong>le</strong>.V<strong>ou</strong>s p<strong>ou</strong>vez rég<strong>le</strong>r l’ang<strong>le</strong> <strong>de</strong> l’appareil <strong>de</strong> comman<strong>de</strong> enfonction <strong>de</strong> l’orientation du soc<strong>le</strong>.Illustration 1Illustration 23 Fixez <strong>le</strong> soc<strong>le</strong>• Si v<strong>ou</strong>s ne p<strong>ou</strong>vez pas fixer <strong>le</strong> soc<strong>le</strong> avec un ruban adhésif d<strong>ou</strong>b<strong>le</strong>face, utilisez <strong>de</strong>s vis.Papier <strong>de</strong>protectionVis <strong>de</strong> renforcementConso<strong>le</strong>, etc.Appareil <strong>de</strong>comman<strong>de</strong>Soc<strong>le</strong>Rubanadhésifd<strong>ou</strong>b<strong>le</strong> face**Avant <strong>de</strong> fixer <strong>le</strong> ruban adhésif, veil<strong>le</strong>z à bien nettoyer et dép<strong>ou</strong>ssiérerl’emp<strong>la</strong>cement d’instal<strong>la</strong>tion.4 Raccor<strong>de</strong>z <strong>le</strong> câb<strong>le</strong> <strong>de</strong> l’appareil <strong>de</strong> comman<strong>de</strong> àl’appareil <strong>de</strong> comman<strong>de</strong>.5 T<strong>ou</strong>t en tenant <strong>le</strong> soc<strong>le</strong>, tirez <strong>sur</strong> <strong>la</strong> câb<strong>le</strong> p<strong>ou</strong>r qu’ilsoit bien tendu.6 Fixez l’appareil <strong>de</strong> comman<strong>de</strong> <strong>sur</strong> <strong>le</strong> soc<strong>le</strong>.Insérez <strong>le</strong>s 2 mentonnets situés s<strong>ou</strong>s l’appareil <strong>de</strong>comman<strong>de</strong> dans <strong>le</strong>s fentes du soc<strong>le</strong>, t<strong>ou</strong>rnez l’appareil <strong>de</strong>comman<strong>de</strong> dans <strong>le</strong> sens <strong>de</strong>s aiguil<strong>le</strong>s d’une montre jusqu’àce qu’il s’enc<strong>le</strong>nche.Mentonnets2 P<strong>la</strong>cez <strong>le</strong> câb<strong>le</strong> <strong>de</strong> connexion <strong>de</strong> l’appareil <strong>de</strong>comman<strong>de</strong> dans <strong>le</strong> soc<strong>le</strong>.Illustration 1Faites passer <strong>le</strong> câb<strong>le</strong> dansl’orifice <strong>la</strong>téral du soc<strong>le</strong>.Illustration 2• P<strong>ou</strong>r retirer l’appareil <strong>de</strong> comman<strong>de</strong> du soc<strong>le</strong>, t<strong>ou</strong>rnez-<strong>le</strong> dans <strong>le</strong>sens inverse <strong>de</strong>s aiguil<strong>le</strong>s d’une montre en appuyant <strong>sur</strong> <strong>le</strong> <strong>b<strong>ou</strong>ton</strong>situé <strong>sur</strong> <strong>le</strong> soc<strong>le</strong>, puis retirez l’appareil <strong>de</strong> comman<strong>de</strong>.AVERTISSEMENTFaites passer <strong>le</strong> câb<strong>le</strong> dansl’orifice situé s<strong>ou</strong>s <strong>le</strong> soc<strong>le</strong>.N’INSTALLEZ PAS L’APPAREIL DE COMMANDE PRÈSDE L’AIRBAG DU PASSAGER.Si l’appareil n’est pas installé correctement, il est possib<strong>le</strong> quel’airbag ne fonctionne pas correctement ; <strong>de</strong> plus, si l’airbag sedéc<strong>le</strong>nche, l’appareil risque <strong>de</strong> se détacher brusquement etv<strong>ou</strong>s p<strong>ou</strong>rriez v<strong>ou</strong>s b<strong>le</strong>sser <strong>ou</strong> provoquer un acci<strong>de</strong>nt.7 Fixez <strong>le</strong> câb<strong>le</strong> <strong>de</strong> connexion à l’ai<strong>de</strong> du collier p<strong>ou</strong>rcâb<strong>le</strong>.50-FR
Raccor<strong>de</strong>ment du fil du frein à mainSi nécessaire, utilisez un connecteur à étrang<strong>le</strong>ment p<strong>ou</strong>r raccor<strong>de</strong>r <strong>le</strong> fil du frein au pied, <strong>le</strong> fil du frein à main, etc.1 2Câb<strong>le</strong> du véhicu<strong>le</strong>Connecteur àétrang<strong>le</strong>mentPinceCâb<strong>le</strong> dumoniteurButéeSchéma <strong>de</strong> raccor<strong>de</strong>ment <strong>de</strong> l’interrupteur SPST (vendu séparément)(Si l’alimentation ACC n’est pas disponib<strong>le</strong>)ALLUMAGESPST SW (en option)FUSIBLE (5A)(en option)(R<strong>ou</strong>ge)BATTERIEVPA-B222R(Jaune)FUSIBLE (20A)(en option)Batterie• Si votre véhicu<strong>le</strong> est dép<strong>ou</strong>rvu d’alimentation ACC, instal<strong>le</strong>z un interrupteur SPST (Sing<strong>le</strong>-Po<strong>le</strong>, Sing<strong>le</strong>-Throw) (vendu séparément) et un fusib<strong>le</strong>(vendu séparément).• Le schéma et l’ampérage <strong>de</strong>s fusib<strong>le</strong>s indiqués ci-<strong>de</strong>ssus s’appliquent lorsque <strong>le</strong> VPA-B222R est utilisé seul.• Si <strong>le</strong> fil <strong>de</strong> l’alimentation commutée (allumage) du VPA-B222R est directement raccordé à <strong>la</strong> borne positive (+) <strong>de</strong> <strong>la</strong> batterie du véhicu<strong>le</strong>, <strong>le</strong>VPA-B222R véhicu<strong>le</strong> un certain c<strong>ou</strong>rant (plusieurs centaines <strong>de</strong> milliampères), même lorsqu’il est hors tension et ce<strong>la</strong> risque <strong>de</strong> décharger <strong>la</strong>batterie.Connexion du fil d’entrée <strong>de</strong>s enceintes1 C<strong>ou</strong>pez <strong>le</strong>s fils <strong>de</strong>s enceintes du système audio duvéhicu<strong>le</strong>.2 Connectez <strong>le</strong>s fils.Raccor<strong>de</strong>z <strong>le</strong> connecteur à étrang<strong>le</strong>ment f<strong>ou</strong>rni.P<strong>ou</strong>r éviter que <strong>de</strong>s bruits externes pénètrent dans l’instal<strong>la</strong>tion audio.• Positionnez l’appareil et acheminez <strong>le</strong>s fils en <strong>le</strong>s éloignant <strong>de</strong> 10 cm au moins du faisceau du véhicu<strong>le</strong>.• Eloignez <strong>le</strong>s fils d’alimentation <strong>de</strong> <strong>la</strong> batterie <strong>le</strong> plus possib<strong>le</strong> <strong>de</strong>s autres fils.• Raccor<strong>de</strong>z fermement <strong>le</strong> fil <strong>de</strong> terre à un élément métallique nu (si nécessaire, en<strong>le</strong>vez <strong>la</strong> peinture, <strong>le</strong>s sa<strong>le</strong>tés <strong>ou</strong> <strong>la</strong> graisse) duchâssis du véhicu<strong>le</strong>.• Si v<strong>ou</strong>s aj<strong>ou</strong>tez un atténuateur <strong>de</strong> bruit en option, raccor<strong>de</strong>z-<strong>le</strong> <strong>le</strong> plus loin possib<strong>le</strong> <strong>de</strong> l’appareil. Votre reven<strong>de</strong>ur <strong>Alpine</strong> peutv<strong>ou</strong>s proposer différents modè<strong>le</strong>s d’atténuateur <strong>de</strong> bruit. P<strong>ou</strong>r plus d’informations, contactez-<strong>le</strong>.• Votre reven<strong>de</strong>ur <strong>Alpine</strong> connaît parfaitement bien <strong>le</strong>s me<strong>sur</strong>es à prendre p<strong>ou</strong>r éviter <strong>le</strong>s bruits. N’hésitez donc pas à <strong>le</strong>consulter.51-FR
Raccor<strong>de</strong>ments (schéma <strong>de</strong> câb<strong>la</strong>ge du VPA-B222R)AntenneVPA-B222RENTRÉE ENCEINTE (Gris)AVANTDROITEAVANTGAUCHESORTIE TÉLÉCOMMANDE(AUX1)(B<strong>la</strong>nc/Brun)SORTIE TÉLÉCOMMANDE(AUX2)(Orange)(Gris/R<strong>ou</strong>ge)ENTRÉE ENCEINTE(B<strong>la</strong>nc)(B<strong>la</strong>nc/R<strong>ou</strong>ge)(B<strong>la</strong>nc/Brun)COMMANDE GUIDE(B<strong>la</strong>nc/Vert)ILLUMINACIÓN ILLUMINACIÓN(Orange)Vers <strong>le</strong> fil <strong>de</strong> sortie <strong>de</strong>l’enceinte du véhicu<strong>le</strong>Vers <strong>le</strong> fil <strong>de</strong> sortie <strong>de</strong>l’enceinte du véhicu<strong>le</strong>Vers <strong>le</strong> fil <strong>de</strong> sortie <strong>de</strong>l’enceinte du véhicu<strong>le</strong>Vers <strong>le</strong> fil <strong>de</strong> sortie <strong>de</strong>l’enceinte du véhicu<strong>le</strong>Vers <strong>le</strong> fil d’entrée <strong>de</strong> <strong>la</strong>télécomman<strong>de</strong>Vers <strong>le</strong> fil d’entrée <strong>de</strong> <strong>la</strong>télécomman<strong>de</strong>Vers <strong>le</strong> fil <strong>de</strong> <strong>la</strong> comman<strong>de</strong>du gui<strong>de</strong> du processeuraudio externeVers <strong>le</strong> fild’illumination duconglomératd’instrumentsMISE SOUS TENSION ÀDISTANCE(B<strong>le</strong>u/B<strong>la</strong>nc)ANTÉLECTRIQUE(B<strong>le</strong>u)ENTRÉE INTERRUPTIONAUDIOP.ANT(B<strong>le</strong>u)(Rose/Noir)FREIN ÁMAIN(Jaune/B<strong>le</strong>u)ACC(R<strong>ou</strong>ge)BATTERIE(Jaune)ACC(R<strong>ou</strong>ge)BATTERIE(Jaune)GND(Noir)ENCEINTEAVANTGAUCHE(B<strong>la</strong>nc) (B<strong>la</strong>nc/Noir)ENCEINTEARRIÈREGAUCHE(Vert/Noir)(Vert)ENCEINTEARRIÈREDROITE(Vio<strong>le</strong>t)(Vio<strong>le</strong>t/Noir)ENCEINTEAVANTDROITE(Gris/Noir)(Gris)Remarque :Veil<strong>le</strong>z à raccor<strong>de</strong>rcorrectement <strong>le</strong>s fils aprèsavoir i<strong>de</strong>ntifié <strong>le</strong>s bornes duconnecteur ISO <strong>de</strong> <strong>la</strong> batterieet <strong>de</strong> l’allumage (ACC).F-Lch R-Lch R-Rch F-Rch• Rég<strong>le</strong>z l’interrupteur du système <strong>sur</strong> <strong>la</strong> position « NORM » lorsqu’un changeur seu<strong>le</strong>ment est raccordé à l’appareil (quand l’égaliseur compatib<strong>le</strong> Ai-NET n’est pas utilisé).52-FR
Fiche d’antenne ISOFiche du convertisseur d’antenne ISO (vendue séparément)Câb<strong>le</strong> d’extension <strong>de</strong> l’antenne (f<strong>ou</strong>rni)Fil d’entrée <strong>de</strong> l’enceinte avant droite (+) (gris)Fil d’entrée <strong>de</strong> l’enceinte avant droite (–) (gris/r<strong>ou</strong>ge)Fil d’entrée <strong>de</strong> l’enceinte avant gauche (+) (b<strong>la</strong>nc)Fil d’entrée <strong>de</strong> l’enceinte avant gauche (–) (b<strong>la</strong>nc/r<strong>ou</strong>ge)Fil <strong>de</strong> sortie <strong>de</strong> <strong>la</strong> télécomman<strong>de</strong> (b<strong>la</strong>nc/brun)Raccor<strong>de</strong>z-<strong>le</strong> au fil d’entrée <strong>de</strong> <strong>la</strong> télécomman<strong>de</strong>. Ce filproduit <strong>le</strong>s signaux <strong>de</strong> comman<strong>de</strong> <strong>de</strong> <strong>la</strong> télécomman<strong>de</strong>.Fil <strong>de</strong> sortie <strong>de</strong> <strong>la</strong> télécomman<strong>de</strong> (b<strong>la</strong>nc/brun)Raccor<strong>de</strong>z-<strong>le</strong> au fil d’entrée <strong>de</strong> <strong>la</strong> télécomman<strong>de</strong>. Ce filproduit <strong>le</strong>s signaux <strong>de</strong> comman<strong>de</strong> <strong>de</strong> <strong>la</strong> télécomman<strong>de</strong>.Fil <strong>de</strong> comman<strong>de</strong> du gui<strong>de</strong> (b<strong>la</strong>nc/vert)Si un processeur audio externe est raccordé, raccor<strong>de</strong>z cefil au fil <strong>de</strong> comman<strong>de</strong> du gui<strong>de</strong>.Fil <strong>de</strong> l’illumination (orange)V<strong>ou</strong>s <strong>de</strong>vez raccor<strong>de</strong>r ce fil au fil <strong>de</strong> l’illumination du combiné.Ainsi, <strong>le</strong> rétroéc<strong>la</strong>irage <strong>de</strong> l’appareil <strong>de</strong> comman<strong>de</strong> s’estompechaque fois que <strong>le</strong>s phares du véhicu<strong>le</strong>s sont allumés.Connecteur d’alimentationConnecteur d’interface <strong>de</strong> <strong>la</strong> télécomman<strong>de</strong> auvo<strong>la</strong>ntVers <strong>le</strong> boîtier d’interface <strong>de</strong> <strong>la</strong> télécomman<strong>de</strong> au vo<strong>la</strong>nt.Prise optique <strong>de</strong> <strong>la</strong> télécomman<strong>de</strong>Raccor<strong>de</strong>z-<strong>la</strong> au capteur <strong>de</strong> <strong>la</strong> télécomman<strong>de</strong>.Borne d’entrée du système usinierBorne d’entrée <strong>de</strong> navigation (entrée RGB)Raccor<strong>de</strong>z-<strong>la</strong> à <strong>la</strong> borne <strong>de</strong> sortie RGB du système <strong>de</strong>navigation.Borne <strong>de</strong> sortie <strong>de</strong> l’affichage (sortie RGB)Raccor<strong>de</strong>z un moniteur muni d’une borne 13P RGB à l’ai<strong>de</strong>du câb<strong>le</strong> RGB f<strong>ou</strong>rni avec cet appareil.Borne <strong>de</strong> sortie vidéoRaccor<strong>de</strong>z-<strong>la</strong> au moniteur avant externe à l’ai<strong>de</strong> du câb<strong>le</strong>d’extension RCA f<strong>ou</strong>rni avec cet appareil.Borne <strong>de</strong> sortie du subwooferRaccor<strong>de</strong>z-lui <strong>le</strong> fil d’entrée d’un amplificateur p<strong>ou</strong>r <strong>le</strong>subwoofer.Borne <strong>de</strong> sortie arrièreUtilisez-<strong>la</strong> p<strong>ou</strong>r raccor<strong>de</strong>r un amplificateur <strong>ou</strong> un égaliseur.Borne <strong>de</strong> sortie avantUtilisez-<strong>la</strong> p<strong>ou</strong>r raccor<strong>de</strong>r un amplificateur <strong>ou</strong> un égaliseur.Connecteur Ai-NETRaccor<strong>de</strong>z-<strong>le</strong> au connecteur d’entrée <strong>ou</strong> <strong>de</strong> sortie d’unautre appareil (changeur CD, égaliseur, adaptateur iPod*,etc.) équipé <strong>de</strong> <strong>la</strong> fonction Ai-NET.* P<strong>ou</strong>r v<strong>ou</strong>s connecter à l’iPod, v<strong>ou</strong>s avez besoin <strong>de</strong> l’adaptateuroptionnel (KCA-420i). P<strong>ou</strong>r plus d’informations <strong>sur</strong> <strong>la</strong> connexion,reportez-v<strong>ou</strong>s au mo<strong>de</strong> d’emploi du KCA-420i.Borne <strong>de</strong> sortie du gui<strong>de</strong>Si un processeur audio externe est raccordé, v<strong>ou</strong>s p<strong>ou</strong>vezreproduire <strong>le</strong> signal vocal d’interruption <strong>de</strong> <strong>la</strong> navigation quientre du système <strong>de</strong> navigation <strong>ou</strong> <strong>de</strong> <strong>la</strong> borne d’entrée <strong>de</strong>senceintes.Borne <strong>de</strong> l’appareil <strong>de</strong> comman<strong>de</strong>Connecteur du sé<strong>le</strong>cteur AVLorsque ce connecteur est raccordé au boîtier d’expansion,en option (VPE-S431), raccor<strong>de</strong>z celui-ci à <strong>la</strong> borne HEADUNIT du VPE-S431.Bornes d’entrée AUXSi ces bornes sont raccordées au boîtier d’expansion enoption (VPE-S431), <strong>le</strong>s bornes d’entrée AUX ne sont pasutilisées <strong>sur</strong> cet appareil. Raccor<strong>de</strong>z <strong>le</strong>s bornes AUX IN 1, 2et 3, ainsi que <strong>le</strong>s bornes AUX OUT 1 et 2 du boîtierd’expansion (VPE-S431) aux appareils externes.Boîtier <strong>de</strong> l’antenneConnecteur ISO (f<strong>ou</strong>rni)Fil <strong>de</strong> terre (noir)Raccor<strong>de</strong>z ce fil à une masse correcte du châssis duvéhicu<strong>le</strong>. Veil<strong>le</strong>z à effectuer <strong>la</strong> connexion <strong>sur</strong> du métal nu etfixez-<strong>la</strong> fermement à l’ai<strong>de</strong> <strong>de</strong> <strong>la</strong> vis à tô<strong>le</strong> f<strong>ou</strong>rnie d’origine.Fil <strong>de</strong> mise s<strong>ou</strong>s tension à distance (b<strong>le</strong>u/b<strong>la</strong>nc)Raccor<strong>de</strong>z ce fil au fil <strong>de</strong> mise s<strong>ou</strong>s tension à distance <strong>de</strong>l’amplificateur <strong>ou</strong> du processeur <strong>de</strong> signal.Vers amplificateur <strong>ou</strong> égaliseurFil d’antenne à comman<strong>de</strong> é<strong>le</strong>ctrique (b<strong>le</strong>u)Raccor<strong>de</strong>z ce fil à <strong>la</strong> borne +B <strong>de</strong> votre antenne àcomman<strong>de</strong> é<strong>le</strong>ctrique, <strong>le</strong> cas échéant.Fil d’entrée d’interruption audio (rose/noir)Vers téléphone du véhicu<strong>le</strong>Fil du frein à main (jaune/b<strong>le</strong>u)Raccor<strong>de</strong>z ce fil au côté <strong>de</strong> l’alimentation <strong>de</strong> l’interrupteurdu frein à main p<strong>ou</strong>r transmettre <strong>le</strong>s signaux d’état du frein àmain au VPA-B222R.Raccor<strong>de</strong>z ce fil au fil du frein à main qui estalimenté quand <strong>le</strong> frein est serré.Fil d’alimentation commutée (allumage) (r<strong>ou</strong>ge)Raccor<strong>de</strong>z ce fil à une borne <strong>ou</strong>verte du boîtier <strong>de</strong> fusib<strong>le</strong>sdu véhicu<strong>le</strong> <strong>ou</strong> à une autre s<strong>ou</strong>rce d’alimentation inutiliséequi f<strong>ou</strong>rnit une tension (+) 12V uniquement lorsquel’allumage est s<strong>ou</strong>s tension <strong>ou</strong> <strong>sur</strong> <strong>la</strong> position accessoire.Fil <strong>de</strong> <strong>la</strong> batterie (jaune)Raccor<strong>de</strong>z ce fil à <strong>la</strong> borne positive (+) <strong>de</strong> <strong>la</strong> batterie duvéhicu<strong>le</strong>.Porte-fusib<strong>le</strong>s (10 A)Fil <strong>de</strong> sortie <strong>de</strong> l’enceinte avant droite (+) (gris)Fil <strong>de</strong> sortie <strong>de</strong> l’enceinte avant droite (–) (gris/noir)Fil <strong>de</strong> sortie <strong>de</strong> l’enceinte arrière droite (–) (vio<strong>le</strong>t/noir)Fil <strong>de</strong> sortie <strong>de</strong> l’enceinte arrière droite (+) (vio<strong>le</strong>t)Fil <strong>de</strong> sortie <strong>de</strong> l’enceinte arrière gauche (+) (vert)Fil <strong>de</strong> sortie <strong>de</strong> l’enceinte arrière gauche (–) (vert/noir)Fil <strong>de</strong> sortie <strong>de</strong> l’enceinte avant gauche (–) (b<strong>la</strong>nc/noir)Fil <strong>de</strong> sortie <strong>de</strong> l’enceinte avant gauche (+) (b<strong>la</strong>nc)Sé<strong>le</strong>cteur <strong>de</strong> systèmeQuand v<strong>ou</strong>s raccor<strong>de</strong>z un égaliseur <strong>ou</strong> un répartiteuréquipé <strong>de</strong> <strong>la</strong> fonction Ai-NET, p<strong>la</strong>cez ce sé<strong>le</strong>cteur <strong>sur</strong> <strong>la</strong>position EQ/DIV. Si aucun appareil n’est connecté, <strong>la</strong>issez <strong>le</strong>sé<strong>le</strong>cteur <strong>sur</strong> <strong>la</strong> position NORM.• N’<strong>ou</strong>bliez pas <strong>de</strong> mettre l’appareil hors tension avant <strong>de</strong>modifier <strong>la</strong> position du sé<strong>le</strong>cteur.Interrupteur ALPINE/OTHERRég<strong>le</strong>z-<strong>le</strong> <strong>sur</strong> « ALPINE » p<strong>ou</strong>r une utilisation norma<strong>le</strong>.Rég<strong>le</strong>z-<strong>le</strong> <strong>sur</strong> « OTHER » lorsque v<strong>ou</strong>s raccor<strong>de</strong>z un boîtierd’interface d’affichage en option.Interrupteur NTSC/PALChangez si nécessaire. Actif uniquement lorsquel’interrupteur ALPINE/OTHER est réglé <strong>sur</strong> OTHER.Appareil <strong>de</strong> comman<strong>de</strong> (f<strong>ou</strong>rni)53-FR
Exemp<strong>le</strong> <strong>de</strong> systèmeRaccor<strong>de</strong>z <strong>le</strong> moniteur ALPINEMoniteur(vendu séparément)Câb<strong>le</strong> RGB(f<strong>ou</strong>rni)Borne d’entrée RGBBoîtier moniteur(vendu séparément)Borne <strong>de</strong> sortie <strong>de</strong> l’affichage (sortie RGB)Raccor<strong>de</strong>z un moniteur muni d’une borne 13P RGB à l’ai<strong>de</strong> du câb<strong>le</strong> RGB f<strong>ou</strong>rni avec cet appareil.Câb<strong>le</strong> RGB (f<strong>ou</strong>rni)Raccor<strong>de</strong>z un moniteur d’une autre marqueMoniteur(vendu séparément)Borne d’entrée vidéoBoîtier moniteur(vendu séparément)Câb<strong>le</strong> d’extension RCA (f<strong>ou</strong>rni)• Le capteur <strong>de</strong> <strong>la</strong> télécomman<strong>de</strong> est nécessaire.Borne <strong>de</strong> sortie vidéoRaccor<strong>de</strong>z-<strong>la</strong> au moniteur avant externe à l’ai<strong>de</strong> du câb<strong>le</strong> d’extension RCA f<strong>ou</strong>rni avec cet appareil.Câb<strong>le</strong> d’extension RCA (f<strong>ou</strong>rni)54-FR
En cas <strong>de</strong> raccor<strong>de</strong>ment du processeur audio compatib<strong>le</strong> Ai-NET, du système <strong>de</strong> navigation, du <strong>le</strong>cteur et du changeurDVDNVE-N099PSystème <strong>de</strong> navigation(vendu séparément)Fil <strong>de</strong> comman<strong>de</strong> du gui<strong>de</strong> *VPA-B222R(B<strong>la</strong>nc/Vert)Fil <strong>de</strong> comman<strong>de</strong>du gui<strong>de</strong>(B<strong>la</strong>nc/Vert)Processeur audio (Ai-NET) (compatib<strong>le</strong> avec<strong>le</strong>s fibres numériques)(vendu séparément)Câb<strong>le</strong>d’extensionRCABorned’entrée enfibresnumériques(p<strong>ou</strong>r <strong>le</strong>cteurDVD)Câb<strong>le</strong>Ai-NETCâb<strong>le</strong> Ai-NETCâb<strong>le</strong> en fibre optique(Jaune)(B<strong>la</strong>nc/Brun) (B<strong>la</strong>nc/Brun)Lecteur DVD vidéo(Ai-NET)Câb<strong>le</strong> Ai-NET(DVA-5210, etc.)(vendu séparément)SORTIETÉLÉCOMMANDEENTRÉETÉLÉCOMMANDEChangeur CD(Ai-NET)(vendu séparément)* Le fil <strong>de</strong> comman<strong>de</strong> du gui<strong>de</strong> n’est pas raccordé lorsque <strong>le</strong> PXA-H700/PXA-H701 est connecté à l’appareil.• Si v<strong>ou</strong>s connectez <strong>le</strong> système <strong>de</strong> navigation NVA-N751AS, utilisez <strong>le</strong> câb<strong>le</strong> <strong>de</strong> conversion RGB KWE-503N (vendu séparément).Câb<strong>le</strong> RGB (f<strong>ou</strong>rni avec <strong>le</strong> NVE-N099P)Borne d’entrée du système usinierBorne d’entrée du système <strong>de</strong> navigation (entréeRGB)Raccor<strong>de</strong>z-<strong>la</strong> à <strong>la</strong> borne <strong>de</strong> sortie RGB du système <strong>de</strong>navigation.Sé<strong>le</strong>cteur <strong>de</strong> systèmeQuand v<strong>ou</strong>s raccor<strong>de</strong>z un égaliseur <strong>ou</strong> un répartiteuréquipé <strong>de</strong> <strong>la</strong> fonction Ai-NET, p<strong>la</strong>cez ce sé<strong>le</strong>cteur <strong>sur</strong> <strong>la</strong>position EQ/DIV. Si aucun appareil n’est connecté, <strong>la</strong>issez <strong>le</strong>sé<strong>le</strong>cteur <strong>sur</strong> <strong>la</strong> position NORM.• N’<strong>ou</strong>bliez pas <strong>de</strong> mettre l’appareil hors tension avant <strong>de</strong>modifier <strong>la</strong> position du sé<strong>le</strong>cteur.Fil <strong>de</strong> comman<strong>de</strong> du gui<strong>de</strong> (b<strong>la</strong>nc/vert)Connecteur Ai-NETRaccor<strong>de</strong>z-<strong>le</strong> au connecteur d’entrée <strong>ou</strong> <strong>de</strong> sortie d’unautre appareil équipé <strong>de</strong> <strong>la</strong> fonction Ai-NET.Borne <strong>de</strong> sortie du gui<strong>de</strong>Si un processeur audio externe est raccordé, v<strong>ou</strong>s p<strong>ou</strong>vezreproduire <strong>le</strong> signal vocal d’interruption <strong>de</strong> <strong>la</strong> navigation quientre du système <strong>de</strong> navigation <strong>ou</strong> <strong>de</strong> <strong>la</strong> borne d’entrée <strong>de</strong>senceintes.Câb<strong>le</strong> d’extension RCA (vendu séparément)Câb<strong>le</strong> Ai-NET (f<strong>ou</strong>rni avec <strong>le</strong> <strong>le</strong>cteur DVD vidéo)Câb<strong>le</strong> Ai-NET (f<strong>ou</strong>rni avec <strong>le</strong> processeur audio)Câb<strong>le</strong> Ai-NET (f<strong>ou</strong>rni avec <strong>le</strong> changeur CD)Fil <strong>de</strong> sortie <strong>de</strong> <strong>la</strong> télécomman<strong>de</strong> (b<strong>la</strong>nc/brun)Raccor<strong>de</strong>z-<strong>le</strong> au fil d’entrée <strong>de</strong> <strong>la</strong> télécomman<strong>de</strong>. Ce filproduit <strong>le</strong>s signaux <strong>de</strong> comman<strong>de</strong> <strong>de</strong> <strong>la</strong> télécomman<strong>de</strong>.Vers <strong>le</strong> connecteur Ai-NET (gris)Vers <strong>le</strong> connecteur Ai-NET (noir)Prise d’entrée audio du système <strong>de</strong> navigation(entrée RCA)Câb<strong>le</strong> en fibre optique (vendu séparément)Borne d'entrée vidéo AUX (AUX1)Raccor<strong>de</strong>z-lui <strong>le</strong> fil <strong>de</strong> sortie vidéo d'un <strong>le</strong>cteur DVD vidéo<strong>ou</strong> d'un changeur DVD.Câb<strong>le</strong> d'extension RCA (inclus avec <strong>le</strong> <strong>le</strong>cteur DVDvidéo)55-FR
En cas <strong>de</strong> raccor<strong>de</strong>ment d’un appareil externeVPA-B222RVers borne <strong>de</strong> sortie vidéoTuner TV, magnétoscope <strong>ou</strong><strong>le</strong>cteur DVD (DVE-5207) noncompatib<strong>le</strong> avec Ai-NET (venduséparément)Vers borne <strong>de</strong> sortie audio(B<strong>la</strong>nc/Brun)SORTIETÉLÉCOMMANDEENTRÉETÉLÉCOMMANDE(B<strong>la</strong>nc/Brun)Sé<strong>le</strong>cteur <strong>de</strong> systèmeQuand v<strong>ou</strong>s raccor<strong>de</strong>z un égaliseur <strong>ou</strong> un répartiteuréquipé <strong>de</strong> <strong>la</strong> fonction Ai-NET, p<strong>la</strong>cez ce sé<strong>le</strong>cteur <strong>sur</strong> <strong>la</strong>position EQ/DIV. Si aucun appareil n’est connecté, <strong>la</strong>issez <strong>le</strong>sé<strong>le</strong>cteur <strong>sur</strong> <strong>la</strong> position NORM.• N’<strong>ou</strong>bliez pas <strong>de</strong> mettre l’appareil hors tension avant <strong>de</strong>modifier <strong>la</strong> position du sé<strong>le</strong>cteur.Borne d’entrée du système usinierBorne d’entrée vidéo/audio AUXCâb<strong>le</strong> d’extension RCA (vendu séparément)Fil <strong>de</strong> sortie <strong>de</strong> <strong>la</strong> télécomman<strong>de</strong> (b<strong>la</strong>nc/brun)Raccor<strong>de</strong>z-<strong>le</strong> au fil d’entrée <strong>de</strong> <strong>la</strong> télécomman<strong>de</strong>. Ce filproduit <strong>le</strong>s signaux <strong>de</strong> comman<strong>de</strong> <strong>de</strong> <strong>la</strong> télécomman<strong>de</strong>.56-FR
Raccor<strong>de</strong>ment d’un boîtier d’expansion (VPE-S431), d’un <strong>le</strong>cteur DVD, d’un changeur DVD <strong>ou</strong> d’un moniteur à panneau tacti<strong>le</strong>.Moniteur à panneau tacti<strong>le</strong>.VPA-B222RVers bornes entrées AUX(AUX IN 1)LECTEUR DVD(DVA-5210, etc.)(vendu séparément)Vers borned’entrée vidéoVers borned’entrée audioVers bornes <strong>de</strong>sortie AUXCOMMANDE DUMONITEUR(B<strong>la</strong>nc/Rose)COMMANDEDU MONITEUR(B<strong>la</strong>nc/Rose)BOÎTIERD’EXPANSION(VPE-S431)(venduséparément)ENTRÉETÉLÉCOMMANDE(B<strong>la</strong>nc/Brun)SORTIETÉLÉCOMMANDE(B<strong>la</strong>nc/Brun)MONITEUR ARRIÈRECOMPATIBLE AVECPANNEAU TACTILE(vendu séparément)Vers bornes entrées AUX(AUX IN 2)CHANGEUR DVD(vendu séparément)SORTIETÉLÉCOMMANDE(AUX1)(B<strong>la</strong>nc/Brun)(B<strong>la</strong>nc/Brun)SORTIETÉLÉCOMMANDE(AUX2)ENTRÉETÉLÉCOMMANDE(AUX1)(B<strong>la</strong>nc/Brun)ENTRÉETÉLÉCOMMANDE (AUX2)(B<strong>la</strong>nc/Brun)• Si <strong>le</strong> boîtier d’expansion (VPE-S431) est raccordé à un <strong>le</strong>cteur DVD vidéo <strong>ou</strong> un changeur DVD, raccor<strong>de</strong>z ce câb<strong>le</strong> à <strong>la</strong> borne AUXIN 1. Si celui-ci est raccordé à <strong>la</strong> borne AUX IN 2, il est impossib<strong>le</strong> d’utiliser <strong>la</strong> télécomman<strong>de</strong>. Si v<strong>ou</strong>s <strong>de</strong>vez raccor<strong>de</strong>r <strong>le</strong>s <strong>de</strong>uxappareils, raccor<strong>de</strong>z <strong>le</strong> <strong>le</strong>cteur DVD vidéo à <strong>la</strong> borne AUX IN 1 et <strong>le</strong> changeur DVD à <strong>la</strong> borne AUX IN 2.Sé<strong>le</strong>cteur <strong>de</strong> systèmeQuand v<strong>ou</strong>s raccor<strong>de</strong>z un égaliseur <strong>ou</strong> un répartiteuréquipé <strong>de</strong> <strong>la</strong> fonction Ai-NET, p<strong>la</strong>cez ce sé<strong>le</strong>cteur <strong>sur</strong> <strong>la</strong>position EQ/DIV. Si aucun appareil n’est connecté, <strong>la</strong>issez <strong>le</strong>sé<strong>le</strong>cteur <strong>sur</strong> <strong>la</strong> position NORM.• N’<strong>ou</strong>bliez pas <strong>de</strong> mettre l’appareil hors tension avant <strong>de</strong>modifier <strong>la</strong> position du sé<strong>le</strong>cteur.Vers <strong>la</strong> borne du sé<strong>le</strong>cteur AVCâb<strong>le</strong> du sé<strong>le</strong>cteur AV (f<strong>ou</strong>rni avec <strong>le</strong> VPE-S431)Câb<strong>le</strong> d’extension RCA (vendu séparément)Câb<strong>le</strong> <strong>de</strong> comman<strong>de</strong> du moniteur (b<strong>la</strong>nc/rose)Raccor<strong>de</strong>z-<strong>le</strong> au câb<strong>le</strong> <strong>de</strong> comman<strong>de</strong> du moniteur arrièrecompatib<strong>le</strong> avec panneau tacti<strong>le</strong>.Fil <strong>de</strong> sortie <strong>de</strong> <strong>la</strong> télécomman<strong>de</strong> (b<strong>la</strong>nc/brun)Raccor<strong>de</strong>z-<strong>le</strong> au fil d’entrée <strong>de</strong> <strong>la</strong> télécomman<strong>de</strong>. Ce filproduit <strong>le</strong>s signaux <strong>de</strong> comman<strong>de</strong> <strong>de</strong> <strong>la</strong> télécomman<strong>de</strong>.Câb<strong>le</strong> Ai-NET (f<strong>ou</strong>rni avec <strong>le</strong> <strong>le</strong>cteur DVD vidéo)Câb<strong>le</strong> Ai-NET (f<strong>ou</strong>rni avec <strong>le</strong> changeur DVD)Vers <strong>le</strong> connecteur Ai-NET (noir)Vers <strong>le</strong> connecteur Ai-NET (gris)57-FR
Raccor<strong>de</strong>z <strong>le</strong> système audio du véhicu<strong>le</strong> (système audio standard, etc.).ENTRÉE ENCEINTEAVANTGAUCHEAVANTDROITE(B<strong>la</strong>nc)(B<strong>la</strong>nc/R<strong>ou</strong>ge)(Gris)SORTIE ENCEINTEAVANTGAUCHEAVANTDROITESystème audiostandard du véhicu<strong>le</strong>(Gris/R<strong>ou</strong>ge)ENCEINTE(Gris)(Gris/Noir)ENCEINTE (AVANT DROITE)(B<strong>la</strong>nc)(B<strong>la</strong>nc/Noir)ENCEINTE (AVANT GAUCHE)(Vert)(Vert/Noir)ENCEINTE (ARRIÈRE GAUCHE)(Vio<strong>le</strong>t)(Vio<strong>le</strong>t/Noir)ENCEINTE (ARRIÈRE DROITE)Connecteur d’alimentationBorne d’entrée du système usinierFil d’entrée <strong>de</strong> l’enceinte avant gauche (+) (b<strong>la</strong>nc)Fil d’entrée <strong>de</strong> l’enceinte avant gauche (–) (b<strong>la</strong>nc/r<strong>ou</strong>ge)Fil d’entrée <strong>de</strong> l’enceinte avant droite (+) (gris)Fil d’entrée <strong>de</strong> l’enceinte avant droite (–) (gris/r<strong>ou</strong>ge)Fil <strong>de</strong> sortie <strong>de</strong> l’enceinte avant droite (+) (gris)Fil <strong>de</strong> sortie <strong>de</strong> l’enceinte avant droite (–) (gris/noir)Fil <strong>de</strong> sortie <strong>de</strong> l’enceinte avant gauche (+) (b<strong>la</strong>nc)Fil <strong>de</strong> sortie <strong>de</strong> l’enceinte avant gauche (–) (b<strong>la</strong>nc/noir)Fil <strong>de</strong> sortie <strong>de</strong> l’enceinte arrière gauche (+) (vert)Fil <strong>de</strong> sortie <strong>de</strong> l’enceinte arrière gauche (–) (vert/noir)Fil <strong>de</strong> sortie <strong>de</strong> l’enceinte arrière droite (+) (vio<strong>le</strong>t)Fil <strong>de</strong> sortie <strong>de</strong> l’enceinte arrière droite (–) (vio<strong>le</strong>t/noir)• Veil<strong>le</strong>z à raccor<strong>de</strong>r l’entrée <strong>de</strong>s enceintes au fil <strong>de</strong> sortie <strong>de</strong>s enceintes avant. Le fil <strong>de</strong> sortie <strong>de</strong>s enceintes arrière ne peut pas être connecté.• Veil<strong>le</strong>z à débrancher t<strong>ou</strong>s <strong>le</strong>s fils <strong>de</strong> sortie <strong>de</strong>s enceintes du système et <strong>de</strong>s enceintes standard.• Si v<strong>ou</strong>s raccor<strong>de</strong>z un système à plusieurs enceintes, connectez l’entrée <strong>de</strong>s enceintes à l’enceinte <strong>de</strong>s médiums (avant). Le son n’est pascorrectement reproduit en cas <strong>de</strong> raccor<strong>de</strong>ment d’un tweeter <strong>ou</strong> d’un woofer.• Rég<strong>le</strong>z chaque élément <strong>de</strong> <strong>la</strong> manière décrite à <strong>la</strong> section « Utilisation <strong>de</strong> l’entrée <strong>de</strong>s enceintes » (page 16)• Reportez-v<strong>ou</strong>s à <strong>la</strong> section « Connexion du fil d’entrée <strong>de</strong>s enceintes » (page 51).• Veil<strong>le</strong>z à connecter correctement t<strong>ou</strong>s <strong>le</strong>s câb<strong>le</strong> afin <strong>de</strong> ne pas endommager <strong>le</strong> système audio <strong>de</strong> votre véhicu<strong>le</strong>.58-FR
To customers/Hinweis an Kun<strong>de</strong>n/A l’attention<strong>de</strong> l’utilisateur/Información para los clientes/Informazioni per i clienti/Till kun<strong>de</strong>rP<strong>le</strong>ase note following additional information of the Owner’s Manual./Bitte beachten Sie folgen<strong>de</strong> zusätzlicheInformationen zur Bedienungsan<strong>le</strong>itung./ Veuil<strong>le</strong>z noter <strong>le</strong>s aj<strong>ou</strong>ts suivants au mo<strong>de</strong> d’emploi./Tenga encuenta <strong>la</strong> información adicional contenida en el Manual <strong>de</strong> operación./ Tenere presente <strong>le</strong> seguentiinformazioni supp<strong>le</strong>mentari d’ istruzioni per l’uso./ Se följan<strong>de</strong> tillägg till användarhand<strong>le</strong>dning.EnglishAb<strong>ou</strong>t connecting other productsL Connect the Ai-NET compatib<strong>le</strong> audio processor, Navigation system, DVD p<strong>la</strong>yer andchanger (page 55).• If PXA-H701/PXA-H700 and DVD p<strong>la</strong>yer/changer are connected via fiber digital, interruption audio may not be <strong>ou</strong>tput when adisc is changed, during pause, etc. In this case, connect an external speaker with built-in amplifier to the GUIDE OUT terminal to<strong>ou</strong>tput interruption audio.The Owner's Manual has errors as shown here.• When the NVA-N751AS is connected for the Navigation System, use the RGB conversion cab<strong>le</strong> KWE-503N (Sold separately).• When the NVE-N055PS is connected for the Navigation System, use the RGB conversion cab<strong>le</strong> KCE-030N (Sold separately).L Connect the Digital theater amplifier, Navigation system, DVD changer and CDchanger.RGBcab<strong>le</strong>FactorySystem Inputterminal(White/Brown)REMOTE OUTNVE-N099P(Yellow)(White/Brown)Navigation System(Sold Separately)VPA-B222RREMOTE INRCA Extension cab<strong>le</strong>(Inclu<strong>de</strong>d with DVD changer)To Ai-NET connector(Grey)DVD Changer(Ai-NET) (DHA-S680P)(Sold Separately)External Speaker withbuilt-in amplifier (SoldSeparately)RCA Extensioncab<strong>le</strong> (SoldSeparately)Ai-NET cab<strong>le</strong>(Inclu<strong>de</strong>d withDVD changer)Fiber DigitalInput terminal(for DVD P<strong>la</strong>yer)Ai-NET cab<strong>le</strong>(Inclu<strong>de</strong>d with amplifier)To Ai-NET connector (B<strong>la</strong>ck)Digital Theateramplifier(MRA-D550)Ai-NETcab<strong>le</strong>(Inclu<strong>de</strong>dwith CDChanger)CD Changer (Ai-NET)(Sold Separately)• If a DVD p<strong>la</strong>yer such as DVA-5210 or DVE-5207 is connected, a digital theater amplifier cannot be connected via fiber digital tothe DVD p<strong>la</strong>yer.RDeutschAnmerkungen zum Anschluss an<strong>de</strong>rer ProdukteL Anschluss eines Ai-NET-kompatib<strong>le</strong>n K<strong>la</strong>ngprozessors, Navigationssystems, DVD-P<strong>la</strong>yers und -Wechs<strong>le</strong>rs (Seite 55).• Wenn <strong>de</strong>r PXA-H701/PXA-H700 bzw. DVD-P<strong>la</strong>yer/Wechs<strong>le</strong>r über ein optisches Digitalkabel angeschlossen ist, kann beim Wechseln <strong>de</strong>r Disc,im Pausenzustand u. dgl. unter Umstän<strong>de</strong>n <strong>de</strong>r Ton eines unterbrechen<strong>de</strong>n Signals (Ansage) nicht ausgegeben wer<strong>de</strong>n. In diesem Fall schafftein externer Aktiv<strong>la</strong>utsprecher Abhilfe, <strong>de</strong>r für die Wie<strong>de</strong>rgabe unterbrechen<strong>de</strong>r Tonsigna<strong>le</strong> an die GUIDE OUT-Buchse angeschlossen wird.Bitte beachten Sie folgen<strong>de</strong> Korrekturen an <strong>de</strong>r Bedienungsan<strong>le</strong>itung.• Wenn das NVA-N751AS als Navigationssystem angeschlossen wird, verwen<strong>de</strong>n Sie das RGB-Konversionskabel KWE-503N (separat erhältlich).• Wenn das NVE-N055PS als Navigationssystem angeschlossen wird, verwen<strong>de</strong>n Sie das RGB-Konversionskabel KCE-030N (separat erhältlich).L Anschluss eines Digital-Theater-Verstärkers, Navigationssystems, DVD-P<strong>la</strong>yers undCD-Wechs<strong>le</strong>rs.RGB-KabelFactory-System-Eingang(Weiß/Braun)FERNBEDIENUNGS-AUSGANG(Weiß/Braun)• Wenn ein DVD-P<strong>la</strong>yer wie <strong>de</strong>r DVA-5210 o<strong>de</strong>r DVE-5207 angeschlossen ist, kann ein Digital-Theater-Verstärker nicht über einoptisches Digitalkabel an <strong>de</strong>n DVD-P<strong>la</strong>yer angeschlossen wer<strong>de</strong>n.1 Navigationseingang (RGB)Wird mit <strong>de</strong>m RGB-Ausgang amNavigationssystem verbun<strong>de</strong>n.NVE-N099PNavigationssystem(separat erhältlich)VPA-B222RFERNBE-DIENUNGS-EINGANGCinch-Anschlusskabel(im Lieferumfang <strong>de</strong>s DVD-Wechs<strong>le</strong>rs)(Gelb)2 System-SchalterWenn ein Equalizer o<strong>de</strong>r eine Frequenzweiche mitAi-NET-Funktion angeschlossen wird, stel<strong>le</strong>n Siediesen Schalter auf EQ/DIV.• Vor Än<strong>de</strong>rn <strong>de</strong>r Schalterstellung unbedingt dasGerät ausschalten!3 Ai-NET-AnschlussWird mit <strong>de</strong>m Aus- bzw. Eingangsanschluss <strong>de</strong>san<strong>de</strong>ren Ai-NET-Geräts verbun<strong>de</strong>n.An Ai-NET-Anschluss(Grau)DVD-Wechs<strong>le</strong>r(Ai-NET) (DHA-S680P)(separat erhältlich)ExternerAktiv<strong>la</strong>utsprecher(separat erhältlich)Cinch-Anschlusskabel(separaterhältlich)Ai-NET-Kabel(im Lieferumfang<strong>de</strong>s DVD-Wechs<strong>le</strong>rs)OptischerDigita<strong>le</strong>ingang(für DVD-P<strong>la</strong>yer)Ai-NET-Kabel(im Lieferumfang <strong>de</strong>s Versärkers)An Ai-NET-Anschluss (Schwarz)Digital-Theater-Verstärker(MRA-D550)Ai-NET-Kabel (imLieferumfang<strong>de</strong>s CD-Wechs<strong>le</strong>rs)CD-Wechs<strong>le</strong>r (Ai-NET)(separat erhältlich)4 Führungs-AusgangWenn ein externer K<strong>la</strong>ngprozessor angeschlossenwird, kann hier das vom Navigationssystem bzw.<strong>de</strong>n Lautsprechereingang eingegebeneUnterbrechungs-Sprachsignal abgegriffen wer<strong>de</strong>n.5 Fernbedienungs-Ausgangskabel (Weiß/Braun)Wird mit <strong>de</strong>m Fernbedienungs-Eingangskabelverbun<strong>de</strong>n. Über dieses Kabel wer<strong>de</strong>n dieSteuersigna<strong>le</strong> <strong>de</strong>r Fernbedienung ausgegeben.6 AUX-Vi<strong>de</strong>oeingang (AUX1)Hier wird das Vi<strong>de</strong>o-Ausgangskabel eines DVD-P<strong>la</strong>yers o<strong>de</strong>r DVD-Wechs<strong>le</strong>rs angeschlossen.1 Navigation Input (RGB Input) TerminalConnect this to the RGB <strong>ou</strong>tput terminal of theNavigation System.2 System SwitchWhen connecting an equalizer or divi<strong>de</strong>r usingAi-NET feature, p<strong>la</strong>ce this switch in the EQ/DIVposition.• Be <strong>sur</strong>e to turn the power off on the unit beforechanging the switch position.3 Ai-NET ConnectorConnect this to the <strong>ou</strong>tput or input connector ofother products equipped with Ai-NET.4 Gui<strong>de</strong> Output TerminalIf an external audio processor is connected,<strong>ou</strong>tputs the navigation interrupt voice signal that isinput from the <strong>Alpine</strong> navigation system, or thespeaker input terminal.5 Remote Control Output Lead (White/Brown)Connect this <strong>le</strong>ad to the remote control input <strong>le</strong>ad.This <strong>le</strong>ad <strong>ou</strong>tputs the controlling signals from theremote control.6 AUX Vi<strong>de</strong>o Input (AUX1) TerminalConnect the vi<strong>de</strong>o <strong>ou</strong>tput <strong>le</strong>ad of a DVD vi<strong>de</strong>op<strong>la</strong>yer or DVD changer to this terminal.FrançaisÀ propos du raccor<strong>de</strong>ment d'autres appareilsL Raccor<strong>de</strong>z <strong>le</strong> processeur audio compatib<strong>le</strong> Ai-NET, <strong>le</strong> système <strong>de</strong> navigation, <strong>le</strong><strong>le</strong>cteur DVD et <strong>le</strong> changeur DVD (page 55).• Si <strong>le</strong> PXA-H701/PXA-H700 et <strong>le</strong> <strong>le</strong>cteur <strong>ou</strong> <strong>le</strong> changeur DVD sont raccordés via <strong>la</strong> borne d’entrée en fibres numériques, il est possib<strong>le</strong>que l’interruption audio ne soit pas reproduite lorsque v<strong>ou</strong>s changez <strong>de</strong> disque, lorsque v<strong>ou</strong>s passez en mo<strong>de</strong> pause, etc. Dans ce cas,raccor<strong>de</strong>z une enceinte externe munie d’un amplificateur intégré à <strong>la</strong> borne GUIDE OUT p<strong>ou</strong>r reproduire l’interruption audio.Le mo<strong>de</strong> d'emploi contient <strong>le</strong>s erreurs indiquées ici.• Si v<strong>ou</strong>s connectez <strong>le</strong> système <strong>de</strong> navigation NVA-N751AS, utilisez <strong>le</strong> câb<strong>le</strong> <strong>de</strong> conversion RGB KWE-503N (vendu séparément).• Si v<strong>ou</strong>s connectez <strong>le</strong> système <strong>de</strong> navigation NVE-N055PS, utilisez <strong>le</strong> câb<strong>le</strong> <strong>de</strong> conversion RGB KCE-030N (vendu séparément).L Raccor<strong>de</strong>z l’amplificateur numérique <strong>de</strong> home cinéma, <strong>le</strong> système <strong>de</strong> navigation, <strong>le</strong>changeur DVD et <strong>le</strong> changeur CD.NVE-N099PCâb<strong>le</strong>RGBSystème <strong>de</strong> navigation(vendu séparément)VPA-B222REnceinte externe avecamplificateur intégré(vendu séparément)Amplificateurnumérique <strong>de</strong> homecinéma (MRA-D550)Borned’entrée dusystèmeusinierCâb<strong>le</strong> d'extension RCA(inclus avec <strong>le</strong> changeur DVD)Câb<strong>le</strong>d’extensionRCA (venduséparément)Câb<strong>le</strong> Ai-NET(inclus avec<strong>le</strong> changeurDVD)Borne d’entréeen fibresnumériques(p<strong>ou</strong>r <strong>le</strong>cteurDVD)Câb<strong>le</strong> Ai-NET(f<strong>ou</strong>rni avec<strong>le</strong> changeurCD)Vers <strong>le</strong> connecteur Ai-NET(gris)(Jaune)Câb<strong>le</strong> Ai-NET(inclus avec <strong>le</strong> amplificateur)(B<strong>la</strong>nc/Brun)SORTIETÉLÉCOMMANDE(B<strong>la</strong>nc/Brun)ENTRÉETÉLÉCOMMANDEChangeur DVD(Ai-NET) (DHA-S680P)(vendu séparément)Vers <strong>le</strong> connecteur Ai-NET (noir)Changeur CD(Ai-NET)(vendu séparément)VPA-B222R• Si un <strong>le</strong>cteur DVD, tel que <strong>le</strong> DVA-5210 <strong>ou</strong> <strong>le</strong> DVE-5207 est raccordé, un amplificateur numérique <strong>de</strong> home cinéma ne peut pasêtre raccordé via <strong>la</strong> borne en fibres numériques au <strong>le</strong>cteur DVD.1 Borne d’entrée du système <strong>de</strong> navigation(entrée RGB)Raccor<strong>de</strong>z-<strong>la</strong> à <strong>la</strong> borne <strong>de</strong> sortie RGB dusystème <strong>de</strong> navigation.2 Sé<strong>le</strong>cteur <strong>de</strong> systèmeQuand v<strong>ou</strong>s raccor<strong>de</strong>z un égaliseur <strong>ou</strong> unrépartiteur équipé <strong>de</strong> <strong>la</strong> fonction Ai-NET, p<strong>la</strong>cezce sé<strong>le</strong>cteur <strong>sur</strong> <strong>la</strong> position EQ/DIV.• N’<strong>ou</strong>bliez pas <strong>de</strong> mettre l’appareil hors tensionavant <strong>de</strong> modifier <strong>la</strong> position du sé<strong>le</strong>cteur.3 Connecteur Ai-NETRaccor<strong>de</strong>z-<strong>le</strong> au connecteur d’entrée <strong>ou</strong> <strong>de</strong> sortied’un autre appareil équipé <strong>de</strong> <strong>la</strong> fonction Ai-NET.4 Borne <strong>de</strong> sortie du gui<strong>de</strong>Si un processeur audio externe est raccordé, v<strong>ou</strong>sp<strong>ou</strong>vez reproduire <strong>le</strong> signal vocal d’interruption <strong>de</strong><strong>la</strong> navigation qui entre du système <strong>de</strong> navigation<strong>ou</strong> <strong>de</strong> <strong>la</strong> borne d’entrée <strong>de</strong>s enceintes.5 Fil <strong>de</strong> sortie <strong>de</strong> <strong>la</strong> télécomman<strong>de</strong> (b<strong>la</strong>nc/brun)Raccor<strong>de</strong>z-<strong>le</strong> au fil d’entrée <strong>de</strong> <strong>la</strong> télécomman<strong>de</strong>.Ce fil produit <strong>le</strong>s signaux <strong>de</strong> comman<strong>de</strong> <strong>de</strong> <strong>la</strong>télécomman<strong>de</strong>.6 Borne d'entrée vidéo AUX (AUX1)Raccor<strong>de</strong>z-lui <strong>le</strong> fil <strong>de</strong> sortie vidéo d'un <strong>le</strong>cteurDVD vidéo <strong>ou</strong> d'un changeur DVD.68-06194Z30-A (Y)
To customers/Hinweis an Kun<strong>de</strong>n/A l’attention <strong>de</strong> l’utilisateur/Información paralos clientes/Informazioni per i clienti/Till kun<strong>de</strong>rREnglishL Add to “In Case of Difficulty” in the Owner’s Manual (page 46) the following settings and operations for FACTORYSYSTEM (Speaker Input).Speaker input s<strong>ou</strong>nd is distorted.• The Factory system has already been adjusted.- If the following settings of the car's Factory System: BASS, TREBLE, LOUDNESS, etc., are performed whi<strong>le</strong> in speaker inputmo<strong>de</strong>, the Factory System s<strong>ou</strong>nd is easily distorted. Therefore reset the above settings.• The volume is not appropriately adjusted.- Set the speaker input volume <strong>le</strong>vel (FACT SYS LV) to <strong>le</strong>ss than 15. Then, lower the car's Factory System volume, so that s<strong>ou</strong>nd isnot distorted. Refer to “Disp<strong>la</strong>ying the Speaker Input Volume Level” (page 16).ENMalfunction.• A malfunction occurs caused by speaker input cab<strong>le</strong> noise.- Bund<strong>le</strong> and r<strong>ou</strong>te the e and d speaker input cab<strong>le</strong>s. R<strong>ou</strong>ting the speaker input cab<strong>le</strong>s separately may cause noise.The volume of the car audio system is too high/low.• The volume is not appropriately adjusted.- Se<strong>le</strong>ct FACTORY SYS on the s<strong>ou</strong>rce se<strong>le</strong>ction screen, and adjust the volume using the comman<strong>de</strong>r.Interruption does not function correctly.• The speaker input is not correctly set to <strong>de</strong>tect the Factory System.- Make <strong>sur</strong>e that the speaker cab<strong>le</strong> of the car's Factory System properly connected. Confirm that the input is correctly se<strong>le</strong>ctedaccording to the <strong>de</strong>tection channel setting (F.SYS INT CH.). Refer to “Setting the Channel of the Speaker Interruption Detection”(page 17).• Interruption volume of the car's Factory System is too low.- 1) When an external audio processor is connected, set the GUIDE voice to 15. Refer to “Adjusting Volume of GUIDE Voice”(page 12).- 2) Whi<strong>le</strong> the navigation voice guidance or the te<strong>le</strong>phone audio of the car's Factory System is ON, set the speaker input volume <strong>le</strong>vel(FACT SYS LV). The s<strong>ou</strong>nd sh<strong>ou</strong>ld be c<strong>le</strong>arly audib<strong>le</strong>, but the <strong>le</strong>vel sh<strong>ou</strong>ld not exceed 15. Adjust the volume of the car's FactorySystem if necessary. Refer to “Disp<strong>la</strong>ying the Speaker Input Volume Level” (page 16).If the speaker input volume <strong>le</strong>vel is lower than the <strong>de</strong>tection <strong>le</strong>vel (FACT SYS DET), interruption will not occur. Refer to“Adjusting the Speaker Input’s Interruption Detection Level” (page 17).• Interruption occurs too frequently because the <strong>de</strong>tection <strong>le</strong>vel is set too low.- Raise the interruption <strong>de</strong>tection <strong>le</strong>vel (FACT SYS DET). Refer to “Adjusting the Speaker Input’s Interruption Detection Level”(page 17).• Interruption does not occur frequently en<strong>ou</strong>gh if the <strong>de</strong>tection <strong>le</strong>vel is set too high.-Lower the interruption <strong>de</strong>tection <strong>le</strong>vel (FACT SYS DET). Refer to “Adjusting the Speaker Input’s Interruption Detection Level”(page 17).• The s<strong>ou</strong>rce is set to FACTORY SYS.- Change to another s<strong>ou</strong>rce. If the s<strong>ou</strong>rce is set to FACTORY SYS whi<strong>le</strong> listening to the Factory audio system, s<strong>ou</strong>nd is <strong>ou</strong>tput to allspeakers with<strong>ou</strong>t interrupting the front speaker for the navigation voice guidance or te<strong>le</strong>phone voice.• Depending on the type of te<strong>le</strong>phone ring tone, interruption may not be recognized.-Lower the interruption <strong>de</strong>tection <strong>le</strong>vel (FACT SYS DET), or change the te<strong>le</strong>phone ring tone. Refer to “Adjusting the Speaker Input’sInterruption Detection Level” (page 17).• Depending on the car, the te<strong>le</strong>phone volume is automatically lowered. Therefore, interruption is not recognized.-Lower the interruption <strong>de</strong>tection <strong>le</strong>vel (FACT SYS DET) based on the car's Factory System <strong>le</strong>vel. Refer to “Adjusting the SpeakerInput’s Interruption Detection Level” (page 17).Interruption volume of the car navigation system is too high/low.• The volume is not appropriately adjusted.- Set the interruption volume (FACT SYS MIX) appropriately. Refer to “Adjusting the Speaker Input Voice Interruption Level”(page 17).
The volume of the s<strong>ou</strong>rce is too high/low during the navigation interruption of the car system.• The volume is not appropriately adjusted.- During navigation voice interruption, adjust the volume of the current listening s<strong>ou</strong>rce using the comman<strong>de</strong>r. The next time thenavigation voice interrupts, the volume will match the adjusted s<strong>ou</strong>rce.When the navigation voice of the car system interrupts, the volume of the s<strong>ou</strong>rce changes.• The volume of the s<strong>ou</strong>rce was adjusted during a navigation voice interruption.- During a navigation voice interruption, adjust the <strong>de</strong>sired volume using the comman<strong>de</strong>r.If the volume of the s<strong>ou</strong>rce is adjusted during a navigation voice interruption, its volume is stored, and the volume of the s<strong>ou</strong>rce isadjusted at the next time navigation voice interruption.Navigation interruption of the car system is not cancel<strong>le</strong>d.• Navigation voice is <strong>ou</strong>tput.-Navigation interruption cannot be cancel<strong>le</strong>d on the unit. 5 seconds after y<strong>ou</strong> have operated the navigation and finished the guidance,interruption is cancel<strong>le</strong>d, and the volume of the s<strong>ou</strong>rce returns to its previ<strong>ou</strong>sly adjusted <strong>le</strong>vel.The volume of the te<strong>le</strong>phone interruption of the car system is too high/low.• The volume is not appropriately adjusted.- During the te<strong>le</strong>phone interruption, adjust the volume appropriately using the comman<strong>de</strong>r. At the next te<strong>le</strong>phone interruption, thevolume will be adjusted automatically to that <strong>le</strong>vel. (Concerning the volume disp<strong>la</strong>y, th<strong>ou</strong>gh the volume of the s<strong>ou</strong>rce is disp<strong>la</strong>yed,the volume of the te<strong>le</strong>phone interruption is not disp<strong>la</strong>yed.)Te<strong>le</strong>phone interruption of the car system is not cancel<strong>le</strong>d.• Te<strong>le</strong>phone voice is <strong>ou</strong>tput.- If the volume of the te<strong>le</strong>phone is higher than the interruption <strong>de</strong>tection <strong>le</strong>vel (FACT SYS DET), the te<strong>le</strong>phone voice interrupts againeven when interruption is cancel<strong>le</strong>d. Press SOURCE/POWER after hanging up, and cancel the te<strong>le</strong>phone interruption.Alth<strong>ou</strong>gh the s<strong>ou</strong>rce screen is disp<strong>la</strong>yed, s<strong>ou</strong>nd is not <strong>ou</strong>tput.• The te<strong>le</strong>phone is interrupting.- 1) Make <strong>sur</strong>e that the comman<strong>de</strong>r blinks quickly, and hang up.- 2) Press SOURCE/POWER, and cancel the te<strong>le</strong>phone interruption.Operation cannot be performed on the unit.• The te<strong>le</strong>phone is interrupting.- When the speaker input mo<strong>de</strong> (FACT SYS SET) is set to INT or BOTH, or the voice interruption type (F.SYS MIX TYP) is set toMUTE, the te<strong>le</strong>phone will interrupt if the audio of the car system is turned on in a s<strong>ou</strong>rce other than FACTORY SYS.Press SOURCE/POWER after the audio of the car system is turned off, and cancel the te<strong>le</strong>phone interruption. Refer to “Setting theSpeaker Input Mo<strong>de</strong>” (page 16) and “Setting the Interrupt Type of the Speaker Input Voice” (page 17).
DeutschL Ergänzung zu „Im Prob<strong>le</strong>mfall“ in <strong>de</strong>r Bedienungsan<strong>le</strong>itung (Seite 46): Einstellungen und Bedienung fürFACTORY SYSTEM (Lautsprechereingang).Der K<strong>la</strong>ng <strong>de</strong>s Lautsprechers ist verzerrt.• Das Werksystem wur<strong>de</strong> bereits eingestellt.-Wenn die Werksystem-Einstellfunktionen BASS, TREBLE, LOUDNESS usw. im Lautsprechereingangsmodus geän<strong>de</strong>rt wer<strong>de</strong>n,verzerrt <strong>de</strong>r K<strong>la</strong>ng <strong>de</strong>s Werksystems <strong>le</strong>icht. Setzen Sie die obigen Einstellungen daher wie<strong>de</strong>r zurück.• Die Lautstärke ist nicht gut eingestellt.- Stel<strong>le</strong>n Sie <strong>de</strong>n Lautstärkepegel <strong>de</strong>s Lautsprechereingangs (FACT SYS LV) auf einen k<strong>le</strong>ineren Wert als 15 ein. Vermin<strong>de</strong>rn Siedanach die Werksystem-Lautstärke <strong>de</strong>s Fahrzeugs, so dass <strong>de</strong>r K<strong>la</strong>ng nicht mehr verzerrt ist. Siehe „Anzeigen <strong>de</strong>sLautsprechereingangspegels“ (Seite 16).Störung.• Lautsprechereingangskabelrauschen kann eine Störung verursachen.-Ver<strong>le</strong>gen Sie die Lautsprechereingangskabel e und d gebün<strong>de</strong>lt. Ein separates Ver<strong>le</strong>gen <strong>de</strong>r Lautsprechereingangskabel kannRauschen verursachen.Die Lautstärke <strong>de</strong>r Autostereoan<strong>la</strong>ge ist zu hoch/niedrig.• Die Lautstärke ist nicht gut eingestellt.-Wäh<strong>le</strong>n Sie FACTORY SYS auf <strong>de</strong>r Quel<strong>le</strong>nauswah<strong>la</strong>nzeige, und stel<strong>le</strong>n Sie die Lautstärke mit <strong>de</strong>m Comman<strong>de</strong>r passend ein.DEUnterbrechung arbeitet nicht einwandfrei.• Der Lautsprechereingang wur<strong>de</strong> nicht richtig auf die Erkennung <strong>de</strong>s Werksystems eingestellt.-Vergewissern Sie sich, dass das Lautsprecherkabel <strong>de</strong>s Werksystems im Fahrzeug korrekt angeschlossen ist. Prüfen Sie, ob <strong>de</strong>r zurEinstellung <strong>de</strong>s Erkennungskanals (F.SYS INT CH.) passen<strong>de</strong> Eingang gewählt wur<strong>de</strong>. Siehe „Einstel<strong>le</strong>n <strong>de</strong>s Kanals für dasSprachsignal-Unterbrechungssignal“ (Seite 17).• Die Unterbrechungs<strong>la</strong>utstärke <strong>de</strong>s Werksystems im Fahrzeug ist zu niedrig.- 1) Wenn ein externer K<strong>la</strong>ngprozessor angeschlossen ist, stel<strong>le</strong>n Sie das GUIDE-Sprachsigal auf 15 ein. Siehe „Einstel<strong>le</strong>n <strong>de</strong>rLautstärke <strong>de</strong>s GUIDE-Sprachsignals“ (Seite 12).- 2) Stel<strong>le</strong>n Sie, während das Werksystem eine Navigationsansage o<strong>de</strong>r Te<strong>le</strong>fonsignal wie<strong>de</strong>rgibt, <strong>de</strong>n Lautstärkepegel <strong>de</strong>sLautsprechereingangs (FACT SYS LV) ein. Der Ton sollte gut vernehmbar sein, aber <strong>de</strong>r Pegel darf 15 nicht überschreiten.Stel<strong>le</strong>n Sie ggf. die Lautstärke <strong>de</strong>s Fahrzeug-Werksystems ein. Siehe „Anzeigen <strong>de</strong>s Lautsprechereingangspegels“ (Seite 16).Wenn <strong>de</strong>r Lautstärkepegel <strong>de</strong>s Lautsprechereingangs niedriger ist als <strong>de</strong>r Erkennungspegel (FACT SYS DET), erfolgt keineUnterbrechung. Siehe „Einstel<strong>le</strong>n <strong>de</strong>s Unterbrechungspegels für das Sprachsignal am Lautsprechereingang“ (Seite 17).• Zu häufige Unterbrechung wegen eines zu niedrig eingestellten Erkennungspegels.- Stel<strong>le</strong>n Sie für <strong>de</strong>n Erkennungspegel (FACT SYS DET) einen höheren Wert ein. Siehe „Einstel<strong>le</strong>n <strong>de</strong>s Unterbrechungspegels für dasSprachsignal am Lautsprechereingang“ (Seite 17).• Unterbrechung erfolgt wegen eines zu hoch eingestellten Erkennungspegels nicht je<strong>de</strong>s Mal.- Stel<strong>le</strong>n Sie für <strong>de</strong>n Erkennungspegel (FACT SYS DET) einen niedrigeren Wert ein. Siehe „Einstel<strong>le</strong>n <strong>de</strong>s Unterbrechungspegels fürdas Sprachsignal am Lautsprechereingang“ (Seite 17).• Die Quel<strong>le</strong> ist auf FACTORY SYS eingestellt.-Wechseln Sie die Quel<strong>le</strong>. Wenn beim Hören über das Fahrzeug-Werksystem die Quel<strong>le</strong> auf FACTORY SYS eingestellt ist, wird <strong>de</strong>rTon über al<strong>le</strong> Lautsprecher wie<strong>de</strong>rgegeben, ohne dass eine Unterbrechung <strong>de</strong>r Front<strong>la</strong>utsprecher-Tonwie<strong>de</strong>rgabe durch Navigationso<strong>de</strong>rTe<strong>le</strong>fon-Sprachsigna<strong>le</strong> erfolgt.• Das Unterbrechungssignal wird wegen <strong>de</strong>s Te<strong>le</strong>fon-Klingeltons unter Umstän<strong>de</strong>n nicht erkannt.- Stel<strong>le</strong>n Sie für <strong>de</strong>n Erkennungspegel (FACT SYS DET) einen niedrigeren Wert ein, o<strong>de</strong>r än<strong>de</strong>rn Sie <strong>de</strong>n Te<strong>le</strong>fon-Klingelton. Siehe„Einstel<strong>le</strong>n <strong>de</strong>s Unterbrechungspegels für das Sprachsignal am Lautsprechereingang“ (Seite 17).• Bei gewissen Fahrzeugen wird die Te<strong>le</strong>fon<strong>la</strong>utstärke automatisch gesenkt, in welchem Fall die Unterbrechung nicht erkannt wird.- Stel<strong>le</strong>n Sie für <strong>de</strong>n Erkennungspegel (FACT SYS DET) einen niedrigeren Wert ein, <strong>de</strong>r zum Signalpegel <strong>de</strong>s Fahrzeug-Werksystemspasst. Siehe „Einstel<strong>le</strong>n <strong>de</strong>s Unterbrechungspegels für das Sprachsignal am Lautsprechereingang“ (Seite 17).Die Unterbrechungs<strong>la</strong>utstärke <strong>de</strong>s Fahrzeugnavigationssystems ist zu hoch/niedrig.• Die Lautstärke ist nicht gut eingestellt.- Stel<strong>le</strong>n Sie die Unterbrechungs<strong>la</strong>utstärke (FACT SYS MIX) passend ein. Siehe „Einstel<strong>le</strong>n <strong>de</strong>s Unterbrechungspegels für dasSprachsignal am Lautsprechereingang“ (Seite 17).
Die Lautstärke <strong>de</strong>r Quel<strong>le</strong> ist bei Navigationsunterbrechung <strong>de</strong>s Fahrzeugsystems zu hoch/niedrig.• Die Lautstärke ist nicht gut eingestellt.- Stel<strong>le</strong>n Sie bei einer Unterbrechung durch das Navigationssystem die Lautstärke <strong>de</strong>r gegenwärtig gehörten Quel<strong>le</strong> mit <strong>de</strong>mComman<strong>de</strong>r ein. Bei <strong>de</strong>r nächsten Unterbrechung durch die Sprachführung <strong>de</strong>s Navigationssystems passt die Lautstärke dann zu <strong>de</strong>rfür die Quel<strong>le</strong> eingestellten.Bei Unterbrechung durch die Sprachführung <strong>de</strong>s Navigationssystems än<strong>de</strong>rt sich die Lautstärke <strong>de</strong>r Quel<strong>le</strong>.• Die Lautstärke wur<strong>de</strong> während einer Navigationsansage an <strong>de</strong>r Quel<strong>le</strong> geän<strong>de</strong>rt.- Stel<strong>le</strong>n Sie bei einer Unterbrechung durch das Navigationssystem die Lautstärke mit <strong>de</strong>m Comman<strong>de</strong>r ein.Wenn die Lautstärke bei einer Unterbrechung durch die Sprachführung am Quel<strong>le</strong>ngerät eingestellt wird, b<strong>le</strong>ibt die Einstellunggespeichert und wird bei <strong>de</strong>r nächsten Unterbrechung wie<strong>de</strong>r abgerufen.Navigationsunterbrechung <strong>de</strong>s Fahrzeugsystems wird nicht aufgehoben.• Navigationsansage wird wie<strong>de</strong>rgegeben.- Die Navigationsunterbrechung kann nicht am Gerät aufgehoben wer<strong>de</strong>n. Wenn die Ansage <strong>de</strong>r Sprachführung nach einer Bedienung<strong>de</strong>s Navigationssystems been<strong>de</strong>t ist, wird die Unterbrechung 5 Sekun<strong>de</strong>n später aufgehoben, wonach die frühere Tonquel<strong>le</strong> wie<strong>de</strong>rmit <strong>de</strong>r eingestellten Lautstärke wie<strong>de</strong>rgegeben wird.Die Lautstärke <strong>de</strong>s Fahrzeugsystems ist bei Unterbrechung durch ein Te<strong>le</strong>fongespräch zu hoch/niedrig.• Die Lautstärke ist nicht gut eingestellt.- Stel<strong>le</strong>n Sie während einer Unterbrechung durch ein Te<strong>le</strong>fongespräch die Lautstärke mit <strong>de</strong>m Comman<strong>de</strong>r passend ein. Bei <strong>de</strong>rnächsten Unterbrechung durch ein Te<strong>le</strong>fongespräch wird die Lautstärke automatisch auf diesen Pegel eingestellt. (Auf <strong>de</strong>rLautstärkeanzeige ist <strong>le</strong>diglich die Lautstärke <strong>de</strong>r Quel<strong>le</strong> zu sehen, aber nicht die Lautstärke <strong>de</strong>r Te<strong>le</strong>fonunterbrechung.)Te<strong>le</strong>fonunterbrechung <strong>de</strong>s Fahrzeugsystems wird nicht aufgehoben.• Te<strong>le</strong>fonsignal wird ausgegeben.- Wenn die Lautstärke <strong>de</strong>s Te<strong>le</strong>fons höher ist als <strong>de</strong>r Erkennungspegel (FACT SYS DET), unterbricht das Te<strong>le</strong>fonsignal nach Aufheben<strong>de</strong>r Unterbrechung erneut. Drücken Sie nach <strong>de</strong>m Auf<strong>le</strong>gen SOURCE/POWER, um die Te<strong>le</strong>fonunterbrechung aufzuheben.Es wird kein Ton wie<strong>de</strong>rgegeben, obwohl <strong>de</strong>r Quel<strong>le</strong>nbildschirm angezeigt wird.• Unterbrechung durch das Te<strong>le</strong>fon.- 1) Prüfen Sie, ob <strong>de</strong>r Comman<strong>de</strong>r schnell blinkt, und <strong>le</strong>gen Sie auf.- 2) Drücken Sie SOURCE/POWER, um die Te<strong>le</strong>fonunterbrechung aufzuheben.Gerät lässt sich nicht bedienen.• Unterbrechung durch das Te<strong>le</strong>fon.-Wenn als Lautsprechereingangsmodus (FACT SYS SET) INT o<strong>de</strong>r BOTH eingestellt o<strong>de</strong>r die Sprachsignal-Unterbrechungsart(F.SYS MIX TYP) auf MUTE eingestellt ist, unterbricht das Te<strong>le</strong>fon, wenn das Fahrzeugsystem bei einer an<strong>de</strong>ren Quel<strong>le</strong> alsFACTORY SYS eingeschaltet wird.Drücken Sie nach Ausschalten <strong>de</strong>s Fahrzeugsystems SOURCE/POWER, um die Te<strong>le</strong>fonunterbrechung aufzuheben. Siehe„Einstel<strong>le</strong>n <strong>de</strong>s Lautsprechereingangsmodus“ (Seite 16) und „Einstel<strong>le</strong>n <strong>de</strong>r Unterbrechungsart für Lautsprechereingang-Sprachsigna<strong>le</strong>“ (Seite 17).
Français DeutschL Aj<strong>ou</strong>ter à <strong>la</strong> section « En cas <strong>de</strong> problème » du Mo<strong>de</strong> d’emploi (page 46) <strong>le</strong>s rég<strong>la</strong>ges et opérations suivants p<strong>ou</strong>rFACTORY SYSTEM (entrée <strong>de</strong>s enceintes).Le son d’entrée <strong>de</strong>s enceintes est déformé.• Le système d’usine est déjà configuré.- Si v<strong>ou</strong>s spécifiez <strong>le</strong>s rég<strong>la</strong>ges BASS, TREBLE, LOUDNESS, etc. du système d’usine du véhicu<strong>le</strong> en mo<strong>de</strong> d’entrée <strong>de</strong>s enceintes, <strong>le</strong>son du système d’usine risque d’être déformé. Par conséquent, réinitialisez <strong>le</strong>s rég<strong>la</strong>ges ci-<strong>de</strong>ssus.• Le volume n’est pas correctement réglé.-Rég<strong>le</strong>z <strong>le</strong> niveau <strong>de</strong> volume <strong>de</strong> l’entrée <strong>de</strong>s enceintes (FACT SYS LV) <strong>sur</strong> une va<strong>le</strong>ur inférieure à 15. Ensuite, réduisez <strong>le</strong> volume dusystème d’usine du véhicu<strong>le</strong> afin que <strong>le</strong> son ne soit pas déformé. Consultez <strong>la</strong> section « Affichage du niveau sonore d’entrée <strong>de</strong>senceintes » (page 16).Dysfonctionnement.• Un dysfonctionnement peut se produire en raison <strong>de</strong> bruits au niveau <strong>de</strong>s câb<strong>le</strong>s d’entrée <strong>de</strong>s enceintes.-Regr<strong>ou</strong>pez et acheminez <strong>le</strong>s câb<strong>le</strong>s d’entrée <strong>de</strong>s enceintes e et d. Si v<strong>ou</strong>s acheminez <strong>le</strong>s câb<strong>le</strong>s d’entrée <strong>de</strong>s enceintes séparément,v<strong>ou</strong>s risquez <strong>de</strong> provoquer du bruit.Le volume du système audio du véhicu<strong>le</strong> est trop é<strong>le</strong>vé/faib<strong>le</strong>.• Le volume n’est pas correctement réglé.- Sé<strong>le</strong>ctionnez FACTORY SYS <strong>sur</strong> l’écran <strong>de</strong> sé<strong>le</strong>ction <strong>de</strong> <strong>la</strong> s<strong>ou</strong>rce, puis rég<strong>le</strong>z <strong>le</strong> volume à l’ai<strong>de</strong> <strong>de</strong> l’appareil <strong>de</strong> comman<strong>de</strong>.L’interruption ne fonctionne pas correctement.• L’entrée <strong>de</strong>s enceintes n’est pas correctement configurée p<strong>ou</strong>r détecter <strong>le</strong> système d’usine.-Vérifiez que <strong>le</strong> câb<strong>le</strong> <strong>de</strong>s enceintes du système d’usine du véhicu<strong>le</strong> est correctement raccordé. As<strong>sur</strong>ez-v<strong>ou</strong>s que l’entrée estcorrectement sé<strong>le</strong>ctionnée en fonction du rég<strong>la</strong>ge du canal <strong>de</strong> détection (F.SYS INT CH.). Consultez <strong>la</strong> section « Rég<strong>la</strong>ge du canal<strong>de</strong> <strong>la</strong> détection <strong>de</strong> l’interruption <strong>de</strong>s enceintes » (page 17).• Le volume <strong>de</strong> l’interruption du système d’usine du véhicu<strong>le</strong> est trop faib<strong>le</strong>.-1)Si un processeur audio externe est raccordé, rég<strong>le</strong>z <strong>le</strong> volume du guidage vocal <strong>sur</strong> 15. Consultez <strong>la</strong> section « Rég<strong>la</strong>ge du volumedu guidage vocal » (page 12).-2)Lorsque <strong>le</strong> guidage vocal du système <strong>de</strong> navigation <strong>ou</strong> <strong>le</strong> son du téléphone du système d’usine du véhicu<strong>le</strong> sont activés, rég<strong>le</strong>z <strong>le</strong>niveau sonore <strong>de</strong> l’entrée <strong>de</strong>s enceintes (FACT SYS LV). Le son doit être c<strong>la</strong>irement audib<strong>le</strong>, mais <strong>le</strong> niveau ne doit pas dépasser15. Le cas échéant, rég<strong>le</strong>z <strong>le</strong> volume du système d’usine du véhicu<strong>le</strong>. Consultez <strong>la</strong> section « Affichage du niveau sonore d’entrée<strong>de</strong>s enceintes » (page 16).Si <strong>le</strong> niveau sonore <strong>de</strong> l’entrée <strong>de</strong>s enceintes est inférieur au niveau <strong>de</strong> détection (FACT SYS DET), l’interruption n’a pas lieu.Consultez <strong>la</strong> section « Rég<strong>la</strong>ge du niveau <strong>de</strong> détection <strong>de</strong> l’interruption <strong>de</strong> l’entrée <strong>de</strong>s enceintes » (page 17).• L’interruption se produit trop fréquemment, car <strong>le</strong> niveau <strong>de</strong> détection est trop faib<strong>le</strong>.- Augmentez <strong>le</strong> niveau <strong>de</strong> détection <strong>de</strong> l’interruption (FACT SYS DET). Consultez <strong>la</strong> section « Rég<strong>la</strong>ge du niveau <strong>de</strong> détection <strong>de</strong>l’interruption <strong>de</strong> l’entrée <strong>de</strong>s enceintes » (page 17).• L’interruption ne se produit pas assez s<strong>ou</strong>vent, car <strong>le</strong> niveau <strong>de</strong> détection est trop é<strong>le</strong>vé.- Réduisez <strong>le</strong> niveau <strong>de</strong> détection <strong>de</strong> l’interruption (FACT SYS DET). Consultez <strong>la</strong> section « Rég<strong>la</strong>ge du niveau <strong>de</strong> détection <strong>de</strong>l’interruption <strong>de</strong> l’entrée <strong>de</strong>s enceintes » (page 17).• La s<strong>ou</strong>rce est réglée <strong>sur</strong> FACTORY SYS.- Sé<strong>le</strong>ctionnez une autre s<strong>ou</strong>rce. Si <strong>la</strong> s<strong>ou</strong>rce est réglée <strong>sur</strong> FACTORY SYS lorsque v<strong>ou</strong>s éc<strong>ou</strong>tez <strong>le</strong> système audio d’usine, <strong>le</strong> son estreproduit par t<strong>ou</strong>tes <strong>le</strong>s enceintes, sans interruption <strong>de</strong> l’enceinte avant p<strong>ou</strong>r <strong>le</strong> guidage vocal du système <strong>de</strong> navigation <strong>ou</strong>l’utilisation du téléphone.• Selon <strong>le</strong> type <strong>de</strong> sonnerie du téléphone, il se peut que l’interruption ne soit pas reconnue.- Réduisez <strong>le</strong> niveau <strong>de</strong> détection <strong>de</strong> l’interruption (FACT SYS DET) <strong>ou</strong> modifiez <strong>la</strong> sonnerie du téléphone. Consultez <strong>la</strong> section«Rég<strong>la</strong>ge du niveau <strong>de</strong> détection <strong>de</strong> l’interruption <strong>de</strong> l’entrée <strong>de</strong>s enceintes » (page 17).• Selon <strong>le</strong> véhicu<strong>le</strong>, <strong>le</strong> volume du téléphone est automatiquement réduit. Par conséquent, l’interruption n’est pas reconnue.- Réduisez <strong>le</strong> niveau <strong>de</strong> détection <strong>de</strong> l’interruption (FACT SYS DET) en fonction du niveau du système d’usine du véhicu<strong>le</strong>.Consultez <strong>la</strong> section « Rég<strong>la</strong>ge du niveau <strong>de</strong> détection <strong>de</strong> l’interruption <strong>de</strong> l’entrée <strong>de</strong>s enceintes » (page 17).FRLe volume <strong>de</strong> l’interruption du système <strong>de</strong> navigation du véhicu<strong>le</strong> est trop é<strong>le</strong>vé/faib<strong>le</strong>.• Le volume n’est pas correctement réglé.-Rég<strong>le</strong>z correctement <strong>le</strong> volume <strong>de</strong> l’interruption (FACT SYS MIX). Consultez <strong>la</strong> section « Rég<strong>la</strong>ge du niveau d’interruption <strong>de</strong> <strong>la</strong>voix d’entrée <strong>de</strong>s enceintes » (page 17).
Le volume <strong>de</strong> <strong>la</strong> s<strong>ou</strong>rce est trop é<strong>le</strong>vé/faib<strong>le</strong> pendant l’interruption du système <strong>de</strong> navigation du véhicu<strong>le</strong>.• Le volume n’est pas correctement réglé.- Pendant l’interruption du guidage vocal du système <strong>de</strong> navigation, rég<strong>le</strong>z <strong>le</strong> volume <strong>de</strong> <strong>la</strong> s<strong>ou</strong>rce d’éc<strong>ou</strong>te actuel<strong>le</strong> à l’ai<strong>de</strong> <strong>de</strong>l’appareil <strong>de</strong> comman<strong>de</strong>. Lors <strong>de</strong> <strong>la</strong> prochaine interruption du guidage vocal du système <strong>de</strong> navigation, <strong>le</strong> volume s’ajuste à <strong>la</strong> s<strong>ou</strong>rceréglée.Lorsque <strong>le</strong> guidage vocal du système <strong>de</strong> navigation du véhicu<strong>le</strong> s’interrompt, <strong>le</strong> volume <strong>de</strong> <strong>la</strong> s<strong>ou</strong>rce change.• Le volume <strong>de</strong> <strong>la</strong> s<strong>ou</strong>rce a été réglé pendant une interruption du guidage vocal du système <strong>de</strong> navigation.- Pendant une interruption du guidage vocal du système <strong>de</strong> navigation, rég<strong>le</strong>z <strong>le</strong> volume au niveau s<strong>ou</strong>haité à l’ai<strong>de</strong> <strong>de</strong> l’appareil <strong>de</strong>comman<strong>de</strong>.Si v<strong>ou</strong>s rég<strong>le</strong>z <strong>le</strong> volume <strong>de</strong> <strong>la</strong> s<strong>ou</strong>rce pendant une interruption du guidage vocal du système <strong>de</strong> navigation, ce volume est enregistréet sera ajusté lors <strong>de</strong> sa prochaine interruption par <strong>la</strong> voix du système <strong>de</strong> navigation.L’interruption du système <strong>de</strong> navigation du véhicu<strong>le</strong> n’est pas annulée.• Le guidage vocal du système <strong>de</strong> navigation est diffusé.- Il est impossib<strong>le</strong> d’annu<strong>le</strong>r l’interruption <strong>de</strong> <strong>la</strong> navigation <strong>sur</strong> l’appareil. 5 secon<strong>de</strong>s après l’utilisation du système <strong>de</strong> navigation et <strong>la</strong>fin du guidage vocal, l’interruption est annulée et <strong>le</strong> volume <strong>de</strong> <strong>la</strong> s<strong>ou</strong>rce revient à son niveau réglé précé<strong>de</strong>mment.Le volume <strong>de</strong> l’interruption du téléphone du système du véhicu<strong>le</strong> est trop é<strong>le</strong>vé/faib<strong>le</strong>.• Le volume n’est pas correctement réglé.- Pendant une interruption par <strong>le</strong> téléphone, rég<strong>le</strong>z correctement <strong>le</strong> volume à l’ai<strong>de</strong> <strong>de</strong> l’appareil <strong>de</strong> comman<strong>de</strong>. Lors <strong>de</strong> <strong>la</strong> prochaineinterruption par <strong>le</strong> téléphone, <strong>le</strong> volume sera automatiquement réglé à ce niveau. (En ce qui concerne l’affichage du volume : <strong>le</strong>volume <strong>de</strong> <strong>la</strong> s<strong>ou</strong>rce est indiqué, et non <strong>le</strong> volume <strong>de</strong> l’interruption du téléphone.)L’interruption du téléphone du système du véhicu<strong>le</strong> n’est pas annulée.• L’appel téléphonique est diffusé.- Si <strong>le</strong> volume du téléphone est supérieur au niveau <strong>de</strong> détection <strong>de</strong> l’interruption (FACT SYS DET), l’appel téléphonique s’interromptà n<strong>ou</strong>veau, même si l’interruption est annulée. Raccrochez, puis appuyez <strong>sur</strong> SOURCE/POWER et annu<strong>le</strong>z l’interruption dutéléphone.Même si l’écran <strong>de</strong> <strong>la</strong> s<strong>ou</strong>rce s’affiche, aucun son n’est reproduit.• Le téléphone interrompt l’éc<strong>ou</strong>te <strong>de</strong> <strong>la</strong> s<strong>ou</strong>rce.- 1)Vérifiez que l’appareil <strong>de</strong> comman<strong>de</strong> clignote rapi<strong>de</strong>ment et raccrochez.- 2) <strong>Appuyez</strong> <strong>sur</strong> SOURCE/POWER et annu<strong>le</strong>z l’interruption du téléphone.Cette opération ne peut pas être réalisée <strong>sur</strong> l’appareil.• Le téléphone interrompt l’éc<strong>ou</strong>te <strong>de</strong> <strong>la</strong> s<strong>ou</strong>rce.- Lorsque <strong>le</strong> mo<strong>de</strong> d’entrée <strong>de</strong>s enceintes (FACT SYS SET) est réglé <strong>sur</strong> INT <strong>ou</strong> BOTH, <strong>ou</strong> lorsque <strong>le</strong> type d’interruption voca<strong>le</strong>(F.SYS MIX TYP) est réglé <strong>sur</strong> MUTE, <strong>le</strong> téléphone interrompt <strong>le</strong> son du système du véhicu<strong>le</strong> si celui-ci est activé dans une s<strong>ou</strong>rceautre que FACTORY SYS.Désactivez <strong>le</strong> son du système du véhicu<strong>le</strong>, puis appuyez <strong>sur</strong> SOURCE/POWER et annu<strong>le</strong>z l’interruption du téléphone. Consultez <strong>le</strong>ssections « Rég<strong>la</strong>ge du mo<strong>de</strong> d’entrée <strong>de</strong>s enceintes » (page 16) et « Rég<strong>la</strong>ge du type d’interruption <strong>de</strong> <strong>la</strong> voix d’entrée <strong>de</strong>senceintes » (page 17).
Français EspañolL Incluya los ajustes y operaciones siguientes <strong>de</strong>l SISTEMA DE FÁBRICA (Entrada <strong>de</strong> altavoces) en <strong>la</strong> sección “Encaso <strong>de</strong> dificultad” <strong>de</strong>l Manual <strong>de</strong> operación (página 46).El sonido <strong>de</strong> <strong>la</strong> entrada <strong>de</strong> los altavoces suena distorsionado.• El Sistema <strong>de</strong> fábrica ya se ha ajustado.- Si los siguientes ajustes <strong>de</strong> Sistema <strong>de</strong> fábrica: BASS, TREBLE, LOUDNESS, etc., se l<strong>le</strong>van a cabo en el modo <strong>de</strong> entrada <strong>de</strong> losaltavoces, el sonido <strong>de</strong>l Sistema <strong>de</strong> fábrica se distorsionará con facilidad. Por lo tanto, restab<strong>le</strong>zca los ajustes mostrados arriba.• El volumen no se ajusta correctamente.- Ajuste el nivel <strong>de</strong> volumen <strong>de</strong> <strong>la</strong> entrada <strong>de</strong> los altavoces (FACT SYS LV) en un valor por <strong>de</strong>bajo <strong>de</strong> 15. A continuación, reduzca elvolumen <strong>de</strong>l Sistema <strong>de</strong> fábrica <strong>de</strong>l vehículo <strong>de</strong> modo que <strong>de</strong>je <strong>de</strong> sonar con distorsión. Consulte <strong>la</strong> sección “Visualización <strong>de</strong>l nivel<strong>de</strong>l volumen <strong>de</strong> entrada <strong>de</strong> los altavoces” (página 16).Mal funcionamiento.• Se produce un mal funcionamiento provocado por ruidos en el cab<strong>le</strong> <strong>de</strong> entrada <strong>de</strong> los altavoces.- Agrupe y guíe los cab<strong>le</strong>s <strong>de</strong> entrada e y d <strong>de</strong> los altavoces. Al guiar los cab<strong>le</strong>s <strong>de</strong> entrada <strong>de</strong> los altavoces por separado pue<strong>de</strong>naparecer ruidos.El volumen <strong>de</strong>l sistema <strong>de</strong> audio <strong>de</strong>l vehículo está <strong>de</strong>masiado alto o bajo.• El volumen no se ajusta correctamente.- Se<strong>le</strong>ccione FACTORY SYS en <strong>la</strong> pantal<strong>la</strong> <strong>de</strong> se<strong>le</strong>cción <strong>de</strong> <strong>la</strong> fuente y ajuste el volumen <strong>de</strong>s<strong>de</strong> el panel <strong>de</strong> mandos.La interrupción no funciona correctamente.• La entrada <strong>de</strong> los altavoces no está ajustada correctamente para <strong>de</strong>tectar el Sistema <strong>de</strong> fábrica.-Verifique que el cab<strong>le</strong> <strong>de</strong> los altavoces <strong>de</strong>l Sistema <strong>de</strong> fábrica <strong>de</strong>l vehículo está correctamente conectado. Confirme que <strong>la</strong> entradaestá correctamente se<strong>le</strong>ccionada según los ajustes <strong>de</strong>l canal <strong>de</strong> <strong>de</strong>tección (F.SYS INT CH.). Consulte <strong>la</strong> sección “Configuración <strong>de</strong>lcanal <strong>de</strong> <strong>de</strong>tección <strong>de</strong> interrupción <strong>de</strong> los altavoces” (página 17).• El volumen <strong>de</strong> interrupción <strong>de</strong>l Sistema <strong>de</strong> fábrica <strong>de</strong>l vehículo está <strong>de</strong>masiado bajo.- 1) Si se conecta un procesador <strong>de</strong> audio externo, ajuste <strong>la</strong> voz <strong>de</strong> <strong>la</strong> guía en el valor 15. Consulte <strong>la</strong> sección “Ajuste <strong>de</strong>l volumen <strong>de</strong><strong>la</strong> voz <strong>de</strong> <strong>la</strong> guía” (página 12).- 2) Con el control por voz <strong>de</strong> navegación o el audio <strong>de</strong>l teléfono <strong>de</strong>l Sistema <strong>de</strong> fábrica <strong>de</strong>l vehículo activado, ajuste el nivel <strong>de</strong>lvolumen <strong>de</strong> entrada <strong>de</strong> los altavoces (FACT SYS LV). El sonido <strong>de</strong>bería oírse perfectamente, pero el nivel <strong>de</strong>l sonido no <strong>de</strong>besuperar el valor 15. Ajuste el volumen <strong>de</strong>l Sistema <strong>de</strong> fábrica <strong>de</strong>l vehículo si es necesario. Consulte <strong>la</strong> sección “Visualización <strong>de</strong>lnivel <strong>de</strong>l volumen <strong>de</strong> entrada <strong>de</strong> los altavoces” (página 16).Si el nivel <strong>de</strong>l volumen <strong>de</strong> <strong>la</strong> entrada <strong>de</strong> los altavoces está por <strong>de</strong>bajo <strong>de</strong>l nivel <strong>de</strong> <strong>de</strong>tección (FACT SYS DET), no se producirá<strong>la</strong> interrupción. Consulte <strong>la</strong> sección “Configuración <strong>de</strong>l nivel <strong>de</strong> <strong>de</strong>tección <strong>de</strong> interrupción <strong>de</strong> entrada <strong>de</strong> los altavoces” (página17).• La interrupción se produce con <strong>de</strong>masiada frecuencia porque el nivel <strong>de</strong> <strong>de</strong>tección está ajustado en un valor muy bajo.- Aumente el nivel <strong>de</strong> <strong>de</strong>tección <strong>de</strong> interrupción (FACT SYS DET). Consulte <strong>la</strong> sección “Configuración <strong>de</strong>l nivel <strong>de</strong> <strong>de</strong>tección <strong>de</strong>interrupción <strong>de</strong> entrada <strong>de</strong> los altavoces” (página 17).• La interrupción no se produce con <strong>la</strong> frecuencia <strong>de</strong>seada si el nivel <strong>de</strong> <strong>de</strong>tección está ajustado en un valor <strong>de</strong>masiado alto.- Reduzca el nivel <strong>de</strong> <strong>de</strong>tección <strong>de</strong> interrupción (FACT SYS DET). Consulte <strong>la</strong> sección “Configuración <strong>de</strong>l nivel <strong>de</strong> <strong>de</strong>tección <strong>de</strong>interrupción <strong>de</strong> entrada <strong>de</strong> los altavoces” (página 17).• La fuente está ajustada en FACTORY SYS.- Cambie a otra fuente. Si <strong>la</strong> fuente se ajusta en FACTORY SYS mientras se escucha el sistema <strong>de</strong> audio <strong>de</strong> fábrica, el sonido seemitirá por todos los altavoces sin interrumpir el altavoz <strong>de</strong><strong>la</strong>ntero para el control por voz <strong>de</strong> navegación ni para <strong>la</strong> voz <strong>de</strong>l teléfono.• En función <strong>de</strong>l tipo <strong>de</strong> tono <strong>de</strong> l<strong>la</strong>mada <strong>de</strong>l teléfono, es posib<strong>le</strong> que no se reconozca <strong>la</strong> interrupción.- Reduzca el nivel <strong>de</strong> <strong>de</strong>tección <strong>de</strong> interrupción (FACT SYS DET) o cambie el tono <strong>de</strong> l<strong>la</strong>mada <strong>de</strong>l teléfono. Consulte <strong>la</strong> sección“Configuración <strong>de</strong>l nivel <strong>de</strong> <strong>de</strong>tección <strong>de</strong> interrupción <strong>de</strong> entrada <strong>de</strong> los altavoces” (página 17).• En función <strong>de</strong>l vehículo, el volumen <strong>de</strong>l teléfono disminuye automáticamente. Por lo tanto, no se reconoce <strong>la</strong> interrupción.- Reduzca el nivel <strong>de</strong> <strong>de</strong>tección <strong>de</strong> interrupción (FACT SYS DET) según el nivel <strong>de</strong>l Sistema <strong>de</strong> fábrica <strong>de</strong>l vehículo. Consulte <strong>la</strong>sección “Configuración <strong>de</strong>l nivel <strong>de</strong> <strong>de</strong>tección <strong>de</strong> interrupción <strong>de</strong> entrada <strong>de</strong> los altavoces” (página 17).El volumen <strong>de</strong> interrupción <strong>de</strong>l sistema <strong>de</strong> navegación <strong>de</strong>l vehículo está <strong>de</strong>masiado alto o bajo.• El volumen no se ajusta correctamente.- Ajuste el volumen <strong>de</strong> interrupción (FACT SYS MIX) correctamente. Consulte <strong>la</strong> sección “Configuración <strong>de</strong>l nivel <strong>de</strong> interrupción <strong>de</strong>voz <strong>de</strong> entrada <strong>de</strong> los altavoces” (página 17).ES
El volumen <strong>de</strong> <strong>la</strong> fuente es <strong>de</strong>masiado alto o bajo durante <strong>la</strong> interrupción <strong>de</strong> navegación <strong>de</strong>l sistema <strong>de</strong>l vehículo.• El volumen no se ajusta correctamente.- Durante <strong>la</strong> interrupción <strong>de</strong> voz <strong>de</strong> navegación, ajuste el volumen <strong>de</strong> <strong>la</strong> fuente que escuche en ese momento con ayuda <strong>de</strong>l panel <strong>de</strong>mandos. La próxima vez que se produzca una interrupción <strong>de</strong> voz <strong>de</strong> navegación, el volumen se ajustará a <strong>la</strong> fuente configurada.Cuando se interrumpa <strong>la</strong> voz <strong>de</strong> navegación <strong>de</strong>l sistema <strong>de</strong>l vehículo, el volumen <strong>de</strong> <strong>la</strong> fuente cambiará.• El volumen <strong>de</strong> <strong>la</strong> fuente se ajustó durante una interrupción <strong>de</strong> voz <strong>de</strong> navegación.- Durante una interrupción <strong>de</strong> voz <strong>de</strong> navegación, ajuste el volumen que <strong>de</strong>see con ayuda <strong>de</strong>l panel <strong>de</strong> mandos.Si el volumen <strong>de</strong> <strong>la</strong> fuente se ajusta durante una interrupción <strong>de</strong> voz <strong>de</strong> navegación, se guardará el valor <strong>de</strong>l volumen y se ajustará elvolumen <strong>de</strong> <strong>la</strong> fuente en <strong>la</strong> próxima interrupción <strong>de</strong> voz <strong>de</strong> navegación.La interrupción <strong>de</strong> navegación <strong>de</strong>l sistema <strong>de</strong>l vehículo no se cance<strong>la</strong>.• Se escucha <strong>la</strong> voz <strong>de</strong> navegación.- No es posib<strong>le</strong> cance<strong>la</strong>r <strong>la</strong> interrupción <strong>de</strong> navegación en <strong>la</strong> unidad. 5 segundos <strong>de</strong> haber utilizado <strong>la</strong> navegación y cerrado <strong>la</strong> guía, secance<strong>la</strong> <strong>la</strong> interrupción y el volumen <strong>de</strong> <strong>la</strong> fuente vuelve al nivel ajustado anteriormente.El volumen <strong>de</strong> <strong>la</strong> interrupción <strong>de</strong>l teléfono <strong>de</strong>l sistema <strong>de</strong>l vehículo está <strong>de</strong>masiado alto o bajo.• El volumen no se ajusta correctamente.- Durante <strong>la</strong> interrupción <strong>de</strong>l teléfono, ajuste el volumen correctamente con ayuda <strong>de</strong>l panel <strong>de</strong> mandos. Cuando se produzca <strong>la</strong>siguiente interrupción <strong>de</strong>l teléfono, el volumen se ajustará automáticamente en dicho nivel. (En re<strong>la</strong>ción con <strong>la</strong> pantal<strong>la</strong> <strong>de</strong>l volumen,aunque sí se muestra el volumen <strong>de</strong> <strong>la</strong> fuente, no ocurre lo mismo con el volumen <strong>de</strong> <strong>la</strong> interrupción <strong>de</strong>l teléfono.)La interrupción <strong>de</strong>l teléfono <strong>de</strong>l sistema <strong>de</strong>l vehículo no se cance<strong>la</strong>.• Se escucha <strong>la</strong> voz <strong>de</strong>l teléfono.- Si el volumen <strong>de</strong>l teléfono es más alto que el nivel <strong>de</strong> <strong>de</strong>tección <strong>de</strong> interrupción (FACT SYS DET), <strong>la</strong> voz <strong>de</strong>l teléfono seinterrumpirá <strong>de</strong> nuevo aunque se cance<strong>le</strong> <strong>la</strong> interrupción. Pulse SOURCE/POWER <strong>de</strong>spués <strong>de</strong> colgar y cance<strong>le</strong> <strong>la</strong> interrupción <strong>de</strong>lteléfono.Aunque aparece <strong>la</strong> pantal<strong>la</strong> <strong>de</strong> fuente, no se escucha sonido.• El teléfono está interrumpiendo.-1)Verifique que el panel <strong>de</strong> mandos parpa<strong>de</strong>a con insistencia y cuelgue.-2)Pulse SOURCE/POWER y cance<strong>le</strong> <strong>la</strong> interrupción <strong>de</strong>l teléfono.No se pue<strong>de</strong> realizar <strong>la</strong> operación en <strong>la</strong> unidad.• El teléfono está interrumpiendo.- Si el modo <strong>de</strong> entrada <strong>de</strong> los altavoces (FACT SYS SET) está ajustado en INT o BOTH, o bien si el tipo <strong>de</strong> interrupción <strong>de</strong> voz(F.SYS MIX TYP) está ajustado en MUTE, el teléfono interrumpirá si el audio <strong>de</strong>l sistema <strong>de</strong>l vehículo se activa con una fuente queno sea FACTORY SYS.Pulse SOURCE/POWER tras <strong>de</strong>sactivar el audio <strong>de</strong>l sistema <strong>de</strong>l vehículo y cance<strong>le</strong> <strong>la</strong> interrupción <strong>de</strong>l teléfono. Consulte <strong>la</strong>ssecciones “Configuración <strong>de</strong>l modo <strong>de</strong> entrada <strong>de</strong> los altavoces” (página 16) y “Configuración <strong>de</strong>l tipo <strong>de</strong> interrupción <strong>de</strong> <strong>la</strong> voz <strong>de</strong>entrada <strong>de</strong> los altavoces” (página 17).
LItalianoAggiungere a “In caso di difficoltà” nel<strong>le</strong> Istruzioni per l’uso (pagina 46) <strong>le</strong> seguenti impostazioni e operazioniper IMPIANTO DI FABBRICA (Ingresso altopar<strong>la</strong>nti)L’audio in ingresso negli altopar<strong>la</strong>nti è distorto.• L’impianto è già stato rego<strong>la</strong>to in fabbrica.- Se <strong>le</strong> impostazioni BASS, TREBLE, LOUDNESS per l’impianto di fabbrica <strong>de</strong>l<strong>la</strong> vettura vengono utilizzate nel<strong>la</strong> modalità diingresso altopar<strong>la</strong>nti, l’audio <strong>de</strong>ll’impianto di fabbrica potrebbe risultare distorto. Ripristinare <strong>le</strong> impostazioni indicate.• Il volume non è rego<strong>la</strong>to correttamente.- Impostare il livello <strong>de</strong>l volume di ingresso altopar<strong>la</strong>nti (FACT SYS LV) su un valore inferiore a 15. Ridurre quindi il volume <strong>de</strong>lsistema di fabbrica <strong>de</strong>l<strong>la</strong> vettura in modo da evitare <strong>la</strong> distorsione <strong>de</strong>l suono. Consultare “Visualizzazione <strong>de</strong>l livello di volume<strong>de</strong>ll’ingresso altopar<strong>la</strong>nti” (pagina 16).Malfunzionamenti.• Un disturbo nel cavo di ingresso altopar<strong>la</strong>nti potrebbe provocare un malfunzionamento.-Legare e far scorrere insieme i cavi di ingresso altopar<strong>la</strong>nti e e d. Se i cavi di ingresso altopar<strong>la</strong>nti vengono separati si potrebberoverificare <strong>de</strong>i disturbi.Il volume <strong>de</strong>ll’impianto audio <strong>de</strong>l<strong>la</strong> vettura è troppo alto o troppo basso.• Il volume non è rego<strong>la</strong>to correttamente.- Se<strong>le</strong>zionare FACTORY SYS nel<strong>la</strong> schermata di se<strong>le</strong>zione <strong>de</strong>l<strong>la</strong> sorgente, quindi rego<strong>la</strong>re il volume utilizzando <strong>la</strong> manopo<strong>la</strong> dicomando.La modalità interruzione non funziona correttamente.• L’ingresso altopar<strong>la</strong>nti non è impostato in modo corretto per il ri<strong>le</strong>vamento <strong>de</strong>ll’impianto di fabbrica.-Verificare che il cavo altopar<strong>la</strong>nti <strong>de</strong>ll’impianto di fabbrica <strong>de</strong>l<strong>la</strong> vettura sia col<strong>le</strong>gato correttamente. Verificare <strong>la</strong> corretta se<strong>le</strong>zione<strong>de</strong>ll’ingresso secondo l’impostazione <strong>de</strong>l cana<strong>le</strong> di ri<strong>le</strong>vamento (F.SYS INT CH.). Consultare “Impostazione <strong>de</strong>l cana<strong>le</strong> diri<strong>le</strong>vamento <strong>de</strong>ll’interruzione altopar<strong>la</strong>nti” (pagina 17).• Il volume di interruzione <strong>de</strong>ll’impianto di fabbrica <strong>de</strong>l<strong>la</strong> vettura è troppo basso.- 1) Se è col<strong>le</strong>gato un processore audio esterno, impostare <strong>la</strong> guida voca<strong>le</strong> su 15. Consultare “Rego<strong>la</strong>zione <strong>de</strong>l volume <strong>de</strong>l<strong>la</strong> voceGUIDE” (pagina 12).- 2) Se <strong>la</strong> guida voca<strong>le</strong> <strong>de</strong>l sistema di navigazione o l’audio <strong>de</strong>l te<strong>le</strong>fono <strong>de</strong>ll’impianto di fabbrica <strong>de</strong>l<strong>la</strong> vettura sono attivi, impostareil livello di volume <strong>de</strong>ll’ingresso altopar<strong>la</strong>nti (FACT SYS LV). L’audio dovrebbe essere udibi<strong>le</strong> in modo chiaro, ma il livello non<strong>de</strong>ve superare 15. Rego<strong>la</strong>re il volume <strong>de</strong>ll’impianto di fabbrica <strong>de</strong>l<strong>la</strong> vettura, se necessario. Consultare “Visualizzazione <strong>de</strong>llivello di volume <strong>de</strong>ll’ingresso altopar<strong>la</strong>nti” (pagina 16).Se il livello di volume <strong>de</strong>ll’ingresso altopar<strong>la</strong>nti è inferiore al livello di ri<strong>le</strong>vamento (FACT SYS DET), l’interruzione non saràeffettuata. Consultare “Rego<strong>la</strong>zione <strong>de</strong>l livello di ri<strong>le</strong>vamento interruzioni nell’ingresso altopar<strong>la</strong>nti” (pagina 17).• L’interruzione si verifica troppo spesso perché il livello di ri<strong>le</strong>vamento è troppo basso.- Aumentare il livello di ri<strong>le</strong>vamento interruzioni (FACT SYS DET). Consultare “Rego<strong>la</strong>zione <strong>de</strong>l livello di ri<strong>le</strong>vamento interruzioninell’ingresso altopar<strong>la</strong>nti” (pagina 17).• L’interruzione non si verifica con <strong>la</strong> frequenza dovuta se il livello di ri<strong>le</strong>vamento è troppo basso.- Ridurre il livello di ri<strong>le</strong>vamento interruzioni (FACT SYS DET). Consultare “Rego<strong>la</strong>zione <strong>de</strong>l livello di ri<strong>le</strong>vamento interruzioninell’ingresso altopar<strong>la</strong>nti” (pagina 17).• La sorgente è impostata su FACTORY SYS.-Passare a un’altra sorgente. Se <strong>la</strong> sorgente è impostata su FACTORY SYS durante l’ascolto dall’impianto audio di fabbrica, l’audioviene inviato su tutti gli altopar<strong>la</strong>nti senza interrompere l’altopar<strong>la</strong>nte anteriore per <strong>la</strong> guida voca<strong>le</strong> <strong>de</strong>l sistema di navigazione o <strong>le</strong>te<strong>le</strong>fonate.• Secondo il tipo di suoneria <strong>de</strong>l te<strong>le</strong>fono, l’interruzione potrebbe non essere riconosciuta.- Ridurre il livello di ri<strong>le</strong>vamento interruzioni (FACT SYS DET) o cambiare <strong>la</strong> suoneria <strong>de</strong>l te<strong>le</strong>fono. Consultare “Rego<strong>la</strong>zione <strong>de</strong>llivello di ri<strong>le</strong>vamento interruzioni nell’ingresso altopar<strong>la</strong>nti” (pagina 17).• Secondo <strong>la</strong> vettura in uso, il volume <strong>de</strong>l te<strong>le</strong>fono viene abbassato automaticamente. In questo caso, l’interruzione non vienericonosciuta.- Ridurre il livello di ri<strong>le</strong>vamento interruzioni (FACT SYS DET) in base al livello <strong>de</strong>ll’impianto di fabbrica <strong>de</strong>l<strong>la</strong> vettura. Consultare“Rego<strong>la</strong>zione <strong>de</strong>l livello di ri<strong>le</strong>vamento interruzioni nell’ingresso altopar<strong>la</strong>nti” (pagina 17).ITIl volume di interruzione <strong>de</strong>l sistema di navigazione <strong>de</strong>l<strong>la</strong> vettura è troppo alto o troppo basso.• Il volume non è rego<strong>la</strong>to correttamente.- Impostare a<strong>de</strong>guatamente il volume <strong>de</strong>ll’interruzione (FACT SYS MIX). Consultare “Rego<strong>la</strong>zione <strong>de</strong>l livello di interruzionenell’ingresso altopar<strong>la</strong>nti” (pagina 17).
Il volume <strong>de</strong>l<strong>la</strong> sorgente è troppo alto o troppo basso durante l’interruzione per <strong>la</strong> navigazione <strong>de</strong>ll’impianto <strong>de</strong>l<strong>la</strong>vettura.• Il volume non è rego<strong>la</strong>to correttamente.- Durante l’interruzione <strong>de</strong>l<strong>la</strong> voce di navigazione, rego<strong>la</strong>re il volume <strong>de</strong>l<strong>la</strong> sorgente d’ascolto corrente utilizzando <strong>la</strong> manopo<strong>la</strong> dicomando. Al<strong>la</strong> successiva interruzione da parte <strong>de</strong>l<strong>la</strong> voce di navigazione, il volume corrispon<strong>de</strong>rà a quello <strong>de</strong>l<strong>la</strong> sorgente rego<strong>la</strong>ta.Durante un’interruzione <strong>de</strong>l<strong>la</strong> voce di navigazione <strong>de</strong>ll’impianto <strong>de</strong>ll’audio, il volume <strong>de</strong>l<strong>la</strong> sorgente cambia.• Il volume <strong>de</strong>l<strong>la</strong> sorgente è stato rego<strong>la</strong>to durante un’interruzione <strong>de</strong>l<strong>la</strong> voce di navigazione.- Durante un’interruzione <strong>de</strong>l<strong>la</strong> voce di navigazione, rego<strong>la</strong>re il volume <strong>de</strong>si<strong>de</strong>rato utilizzando <strong>la</strong> manopo<strong>la</strong> di comando.Se il volume <strong>de</strong>l<strong>la</strong> sorgente viene rego<strong>la</strong>to durante un’interruzione <strong>de</strong>l<strong>la</strong> voce di navigazione, ta<strong>le</strong> volume viene memorizzato e ilvolume <strong>de</strong>l<strong>la</strong> sorgente viene rego<strong>la</strong>to al<strong>la</strong> successiva interruzione <strong>de</strong>l<strong>la</strong> voce di navigazione.L’interruzione <strong>de</strong>l<strong>la</strong> navigazione sull’impianto <strong>de</strong>l<strong>la</strong> vettura non viene annul<strong>la</strong>ta.• Viene emessa <strong>la</strong> voce di navigazione.-L’interruzione <strong>de</strong>l<strong>la</strong> navigazione non può essere annul<strong>la</strong>ta sull’unità. 5 secondi dopo l’uso <strong>de</strong>l<strong>la</strong> navigazione e <strong>la</strong> conclusione <strong>de</strong>l<strong>la</strong>guida voca<strong>le</strong>, l’interruzione viene annul<strong>la</strong>ta e il volume <strong>de</strong>l<strong>la</strong> sorgente ritorna al livello prece<strong>de</strong>ntemente rego<strong>la</strong>to.Il volume di interruzione <strong>de</strong>l te<strong>le</strong>fono <strong>de</strong>l<strong>la</strong> vettura è troppo alto o troppo basso.• Il volume non è rego<strong>la</strong>to correttamente.- Durante l’interruzione <strong>de</strong>l te<strong>le</strong>fono, rego<strong>la</strong>re il volume in modo a<strong>de</strong>guato utilizzando <strong>la</strong> manopo<strong>la</strong> di comando. Al<strong>la</strong> successivainterruzione <strong>de</strong>l te<strong>le</strong>fono, il volume verrà rego<strong>la</strong>to automaticamente su ta<strong>le</strong> livello (per quanto riguarda <strong>la</strong> visualizzazione <strong>de</strong>lvolume, viene visualizzato il volume <strong>de</strong>l<strong>la</strong> sorgente e non quello di interruzione <strong>de</strong>l te<strong>le</strong>fono).L’interruzione <strong>de</strong>l te<strong>le</strong>fono sull’impianto <strong>de</strong>l<strong>la</strong> vettura non viene annul<strong>la</strong>ta.• Viene emessa <strong>la</strong> voce <strong>de</strong>l te<strong>le</strong>fono.- Se il volume <strong>de</strong>l te<strong>le</strong>fono è superiore al livello di ri<strong>le</strong>vamento interruzioni (FACT SYS DET), <strong>la</strong> voce <strong>de</strong>l te<strong>le</strong>fono interrompe <strong>la</strong>riproduzione anche se l’interruzione è stata annul<strong>la</strong>ta. Premere SOURCE/POWER dopo aver riagganciato e annul<strong>la</strong>re l’interruzione<strong>de</strong>l te<strong>le</strong>fono.L’audio non viene emesso nonostante sia visualizzata <strong>la</strong> schermata <strong>de</strong>l<strong>la</strong> sorgente.• Il te<strong>le</strong>fono interrompe <strong>la</strong> riproduzione.- 1) Verificare che <strong>la</strong> manopo<strong>la</strong> di comando <strong>la</strong>mpeggi rapidamente e riagganciare.-2)Premere SOURCE/POWER e annul<strong>la</strong>re l’interruzione <strong>de</strong>l te<strong>le</strong>fono.Non è possibi<strong>le</strong> eseguire operazioni sull’unità.• Il te<strong>le</strong>fono interrompe <strong>la</strong> riproduzione.- Se <strong>la</strong> modalità di ingresso altopar<strong>la</strong>nti (FACT SYS SET) è impostata su INT o BOTH, o se il tipo di interruzione voca<strong>le</strong> (F.SYS MIXTYP) è impostato su MUTE, il te<strong>le</strong>fono interrompe <strong>la</strong> riproduzione se l’audio <strong>de</strong>ll’impianto <strong>de</strong>l<strong>la</strong> vettura è acceso su una sorgentediversa da FACTORY SYS.Premere SOURCE/POWER dopo aver disattivato l’audio <strong>de</strong>ll’impianto <strong>de</strong>l<strong>la</strong> vettura e annul<strong>la</strong>re l’interruzione <strong>de</strong>l te<strong>le</strong>fono.Consultare “Impostazione <strong>de</strong>l modo di ingresso <strong>de</strong>gli altopar<strong>la</strong>nti” (pagina 16) e “Impostazione <strong>de</strong>l tipo di interruzione <strong>de</strong>l<strong>la</strong> voce diingresso altopar<strong>la</strong>nti” (pagina 17).
SvenskaL Lägg till följan<strong>de</strong> inställningar och funktioner un<strong>de</strong>r ”Felsökning” i användarhand<strong>le</strong>dning (sidan 46) förFABRIKSSYSTEM (högta<strong>la</strong>ringång).Högta<strong>la</strong>ringångens ljud är förvrängt.• Fabrikssystemet har redan justerats.- Om inställningar av bi<strong>le</strong>ns fabrikssystem, BASS, TREBLE, LOUDNESS etc., utförs i högta<strong>la</strong>ringångens läge, är <strong>de</strong>t lätt attfabrikssystemets ljud förvrängs. Återställ därför ovan nämnda inställningar.• Volymen justeras inte korrekt.- Ställ in högta<strong>la</strong>ringångens volym (FACT SYS LV) på lägre än 15. Sänk därefter bi<strong>le</strong>ns fabrikssystems volym så att lju<strong>de</strong>t inteförvrängs. Se ”Visa högta<strong>la</strong>ringångens volymnivå” (sidan 16).Funktionsstörning.• En funktionsstörning orsakad av bruset i högta<strong>la</strong>ringångens kabel uppstår.- Linda upp och dra högta<strong>la</strong>ringångens e och d -kab<strong>la</strong>r. Det kan orsaka brus om högta<strong>la</strong>ringångens kab<strong>la</strong>r dras separat.Volymen i bi<strong>le</strong>ns ljudsystem är för hög/låg.• Volymen justeras inte korrekt.-Välj FACTORY SYS på skärmen för val av käl<strong>la</strong> och justera volymen med hjälp av fjärrkontrol<strong>le</strong>n.Avbrott fungerar inte som <strong>de</strong>t ska.• Högta<strong>la</strong>ringången är inte korrekt inställd för att upptäcka fabrikssystemet.-Kontrol<strong>le</strong>ra att högta<strong>la</strong>rkabeln för bi<strong>le</strong>ns fabrikssystem är or<strong>de</strong>ntligt ansluten. Bekräfta att ingången valts korrekt i enlighet med<strong>de</strong>tekteringskana<strong>le</strong>ns inställning (F.SYS INT CH.). Se “Ställ in kanal för högta<strong>la</strong>ravbrott” (sidan 17).• Avbrottsvolym för bi<strong>le</strong>ns fabrikssystem är för låg.-1)När en extern ljudprocessor är ansluten ska GUIDE-rösten stäl<strong>la</strong>s in på 15. Se “Justering av volym för GUIDE-röst” (sidan 12).-2)Ställ in högta<strong>la</strong>ringångens volym (FACT SYS LV) när navigationens röstväg<strong>le</strong>dning el<strong>le</strong>r te<strong>le</strong>fonens ljud i bi<strong>le</strong>ns fabrikssystem ärON. Lju<strong>de</strong>t ska höras tydligt men nivån bör inte överstiga 15. Justera volymen för bi<strong>le</strong>ns fabrikssystem vid behov. Se ”Visahögta<strong>la</strong>ringångens volymnivå” (sidan 16).Om nivån på högta<strong>la</strong>ringångens volym är lägre än <strong>de</strong>tekteringsnivån (FACT SYS DET) sker inget avbrott. Se ”Justering avhögta<strong>la</strong>ringångens avbrottsnivå” (sidan 17).• Avbrott sker för ofta eftersom <strong>de</strong>tekteringsnivån är för lågt inställd.- Höj <strong>de</strong>tekteringsnivån för avbrott (FACT SYS DET). Se ”Justering av högta<strong>la</strong>ringångens avbrottsnivå” (sidan 17).• Avbrott sker inte ofta nog om <strong>de</strong>tekteringsnivån är för högt inställd.- Sänk <strong>de</strong>tekteringsnivån för avbrott (FACT SYS DET). Se ”Justering av högta<strong>la</strong>ringångens avbrottsnivå” (sidan 17).• Käl<strong>la</strong>n ställs in på FACTORY SYS.- Byt till annan käl<strong>la</strong>. Om käl<strong>la</strong>n är inställd på FACTORY SYS medan man lyssnar på fabriksljudsystemet, matas lju<strong>de</strong>t ut till al<strong>la</strong>högta<strong>la</strong>rna utan att avbryta främre högta<strong>la</strong>ren för navigationens röstväg<strong>le</strong>dning el<strong>le</strong>r te<strong>le</strong>fonröst.• Beroen<strong>de</strong> på vilken typ av ringsignal te<strong>le</strong>fonen har kan <strong>de</strong>t hända att avbrottet inte godkänns.- Sänk <strong>de</strong>tekteringsnivån för avbrott (FACT SYS DET) el<strong>le</strong>r byt te<strong>le</strong>fonens ringsignal. Se ”Justering av högta<strong>la</strong>ringångensavbrottsnivå” (sidan 17).• Te<strong>le</strong>fonens volym sänks beroen<strong>de</strong> på vilken typ av bil du har. Därför godkänns inte avbrottet.- Sänk <strong>de</strong>tekteringsnivån för avbrott (FACT SYS DET) baserat på nivån för bi<strong>le</strong>ns fabrikssystem. Se ”Justering av högta<strong>la</strong>ringångensavbrottsnivå” (sidan 17).Avbrottsvolymen för bi<strong>le</strong>ns navigationssystem är för hög/låg.• Volymen är inte korrekt justerad.- Ställ in avbrottsvolymen (FACT SYS MIX) ungefärligt. Se ”Justering av högta<strong>la</strong>ringångens nivå för röstavbrott” (sidan 17).SE
Käl<strong>la</strong>ns volym är för hög/låg un<strong>de</strong>r bilsystemets navigationsavbrott.• Volymen är inte korrekt justerad.-Vid avbrott av navigationsrösten justeras volymen för aktuell ljudkäl<strong>la</strong> med hjälp av fjärrkontrol<strong>le</strong>n. Nästa gång navigationsröstenavbryts motsvarar volymen <strong>de</strong>n justera<strong>de</strong> käl<strong>la</strong>ns.När bilsystemets navigationsröst avbryter ändras käl<strong>la</strong>ns volym.• Käl<strong>la</strong>ns volym justera<strong>de</strong>s un<strong>de</strong>r navigationsröstens avbrott.-Vid ett avbrott av navigationsrösten justeras <strong>de</strong>n önska<strong>de</strong> volymen med hjälp av fjärrkontrol<strong>le</strong>n.Om käl<strong>la</strong>ns volym justeras un<strong>de</strong>r ett avbrott av navigationsrösten <strong>la</strong>gras <strong>de</strong>ss volym och käl<strong>la</strong>ns volym justeras nästa gångnavigationsrösten avbryts.Bilsystemets navigationsavbrott avbryts inte.• Navigationsrösten matas ut.-Navigationsavbrott kan inte avbrytas på enheten. Fem sekun<strong>de</strong>r efter att du använt navigationen och avslutat väg<strong>le</strong>dningen avslutasavbrottet och käl<strong>la</strong>ns volym återgår till föregåen<strong>de</strong> nivå.Volymen för bilsystemets te<strong>le</strong>fonavbrott är för hög/låg.• Volymen är inte korrekt justerad.- ustera volymen med fjärrkontrol<strong>le</strong>n un<strong>de</strong>r te<strong>le</strong>fonavbrottet. Vid nästa te<strong>le</strong>fonavbrott kommer volymen automatiskt att justeras till <strong>de</strong>nnivån (när <strong>de</strong>t gäl<strong>le</strong>r visningen av volymen så visas inte te<strong>le</strong>fonavbrottets volym, trots att käl<strong>la</strong>ns volym visas).Bilsystemets te<strong>le</strong>fonavbrott avbryts inte.• Te<strong>le</strong>fonrösten matas ut.- Om te<strong>le</strong>fonens volym är högre än avbrottets <strong>de</strong>tekteringsnivå (FACT SYS DET), avbryter te<strong>le</strong>fonrösten igen även då avbrottetavslutats. Tryck på SOURCE/POWER efter att du <strong>la</strong>gt på och avsluta te<strong>le</strong>fonens avbrott.Även om skärmbil<strong>de</strong>n för käl<strong>la</strong>n visas matas inget ljud ut.• Te<strong>le</strong>fonen avbryter.-1) Se till att fjärrkontrol<strong>le</strong>n blinkar snabbt och lägg på luren.-2) Tryck på SOURCE/POWER och avsluta te<strong>le</strong>fonens avbrott.Funktionen kan inte utföras på enheten.• Te<strong>le</strong>fonen avbryter.- När högta<strong>la</strong>ringångens läge (FACT SYS SET) är inställt på INT el<strong>le</strong>r BOTH, el<strong>le</strong>r om typen av röstavbrott (F.SYS MIX TYP) ärinställd på MUTE, kommer te<strong>le</strong>fonen att avbryta om bilsystemets ljud sätts på i en annan käl<strong>la</strong> än FACTORY SYS.Tryck på SOURCE/POWER efter att bilsystemets ljud stängts av, och avsluta te<strong>le</strong>fonens avbrott. Se “Inställning av högta<strong>la</strong>ringång”(sidan 16) och “Inställning av avbrottstyp för högta<strong>la</strong>rens inmatningsröst” (sidan 17).VPA-B222R68-06194Z40-A (Y)
EspañolAcerca <strong>de</strong> <strong>la</strong> conexión <strong>de</strong> otros productosL Conectar el procesador <strong>de</strong> audio compatib<strong>le</strong> Ai-NET, el sistema <strong>de</strong> navegación, elreproductor <strong>de</strong> DVD y el cambiador <strong>de</strong> discos (página 55).• Si el PXA-H701/PXA-H700 y el cambiador/reproductor <strong>de</strong> DVD están conectados mediante fibra digital, es posib<strong>le</strong> que no seobtenga el audio <strong>de</strong> interrupción al cambiar un disco, durante <strong>la</strong> pausa, etc. En este caso, conecte un altavoz externo conamplificador incorporado en el terminal GUIDE OUT para obtener el audio <strong>de</strong> interrupción.El manual <strong>de</strong> operación contiene los errores mostrados aquí.• Cuando el NVA-N751AS esté conectado al sistema <strong>de</strong> navegación, utilice el cab<strong>le</strong> <strong>de</strong> conversión KWE-503N (se ven<strong>de</strong> por separado).• Cuando el NVE-N055PS esté conectado al sistema <strong>de</strong> navegación, utilice el cab<strong>le</strong> <strong>de</strong> conversión RGB KCE-030N (se ven<strong>de</strong> por separado).L Conectar el amplificador digital <strong>de</strong> home cinema, el sistema <strong>de</strong> navegación, elcambiador <strong>de</strong> DVD y el cambiador <strong>de</strong> CD.ItalianoCab<strong>le</strong>RGBTerminal <strong>de</strong>entrada <strong>de</strong>lsistema <strong>de</strong>fábrica(b<strong>la</strong>nco/marrón)SALIDAREMOTANVE-N099PSistema <strong>de</strong> navegación(Se ven<strong>de</strong> por separado)VPA-B222R(amarillo)(b<strong>la</strong>nco/marrón)ENTRADAREMOTAProlongador eléctrico RCA(incluido con el cambiador <strong>de</strong> DVD)Cambiador <strong>de</strong> DVD(Ai-NET) (DHA-S680P)(Se ven<strong>de</strong> por separado)• Si se conecta un reproductor <strong>de</strong> DVD como el DVA-5210 o el DVE-5207, no podrá conectar un amplificador digital <strong>de</strong> homecinema mediante fibra digital al reproductor <strong>de</strong> DVD.1 Terminal <strong>de</strong> entrada <strong>de</strong> navegación (entrada RGB)Conéctelo al terminal <strong>de</strong> salida RGB <strong>de</strong>l sistema<strong>de</strong> navegación.2 Interruptor <strong>de</strong>l sistemaSi conecta un ecualizador o un separadorutilizando un e<strong>le</strong>mento Ai-NET, sitúe esteinterruptor en <strong>la</strong> posición EQ/DIV.• Asegúrese <strong>de</strong> <strong>de</strong>sactivar <strong>la</strong> alimentación <strong>de</strong> <strong>la</strong>unidad antes <strong>de</strong> cambiar <strong>la</strong> posición <strong>de</strong>l interruptor.3 Conector Ai-NETConéctelo al conector <strong>de</strong> salida o entrada <strong>de</strong> otroproducto equipado con Ai-NET.Col<strong>le</strong>gamento di altri prodottiAl conector Ai-NET(gris)Altavoz externo conamplificadorincorporado (Seven<strong>de</strong> por separado)Prolongadoreléctrico RCA(Se ven<strong>de</strong> porseparado)Cab<strong>le</strong> Ai-NET(incluido con elcambiador <strong>de</strong> DVD)Terminal <strong>de</strong>entrada <strong>de</strong>fibra digital(para elreproductor<strong>de</strong> DVD)Cab<strong>le</strong> Ai-NET(incluido con el amplificador)Al conector Ai-NET (negro)Amplificador digital<strong>de</strong> home cinema(MRA-D550)Cab<strong>le</strong> Ai-NET(Incluido conel cambiador<strong>de</strong> CD)Cambiador <strong>de</strong> CD(Ai-NET) (Se ven<strong>de</strong>por separado)4 Terminal <strong>de</strong> salida <strong>de</strong> <strong>la</strong> guíaSi hay un procesador <strong>de</strong> audio externo conectado,obtenga <strong>la</strong> señal <strong>de</strong> voz <strong>de</strong> interrupción <strong>de</strong>navegación que entra al sistema <strong>de</strong> navegación <strong>de</strong><strong>Alpine</strong> o al terminal <strong>de</strong> entrada <strong>de</strong> los altavoces.5 Cab<strong>le</strong> <strong>de</strong> salida <strong>de</strong>l control remoto (b<strong>la</strong>nco/marrón)Conecte este cab<strong>le</strong> al cab<strong>le</strong> <strong>de</strong> entrada <strong>de</strong>lcontrol remoto. Este cab<strong>le</strong> permite <strong>la</strong> salida <strong>de</strong>seña<strong>le</strong>s <strong>de</strong> control <strong>de</strong>l mando a distancia.6 Terminal <strong>de</strong> entrada <strong>de</strong> ví<strong>de</strong>o AUX (AUX1)Conecte el cab<strong>le</strong> <strong>de</strong> salida <strong>de</strong> ví<strong>de</strong>o <strong>de</strong> unreproductor <strong>de</strong> ví<strong>de</strong>o DVD o un cambiador <strong>de</strong>DVD a este terminal.L Col<strong>le</strong>gare il processore audio compatibi<strong>le</strong> con Ai-NET, il sistema di navigazione, il<strong>le</strong>ttore DVD e il caricatore (pagina 55).• Se il PXA-H701/PXA-H700 e il <strong>le</strong>ttore/cambia DVD sono col<strong>le</strong>gati mediante dispositivi digitali in fibra, il segna<strong>le</strong> acustico diinterruzione non viene emesso quando si cambia un disco, durante <strong>la</strong> pausa, ecc. In tal caso, col<strong>le</strong>gare un altopar<strong>la</strong>nte esternocon amplificatore incorporato al termina<strong>le</strong> GUIDE OUT per l’emissione <strong>de</strong>l segna<strong>le</strong> acustico di interruzione.Le istruzioni per l'uso contengono gli errori indicati di seguito.• Quando è col<strong>le</strong>gata un’unità NVA-N751AS per il sistema di navigazione, utilizzare il cavo di conversione RGB KWE-503N (venduto separatamente).• Quando vi è un unità NVE-N055PS col<strong>le</strong>gata per il sistema di navigazione, utilizzare il cavo KCE-030N di conversione RGB (venduto separatamente).L Col<strong>le</strong>gare l'amplificatore Digital Theater, il sistema di navigazione, il cambia DVD e ilcambia CD.SvenskaOm att ansluta andra produkterL Anslut <strong>de</strong>n Ai-NET-kompatib<strong>la</strong> ljudprocessorn, navigationssystem, DVD-spe<strong>la</strong>reoch -väx<strong>la</strong>re (sidan 55).• Om PXA-H701/PXA-H700 och DVD-spe<strong>la</strong>re/-väx<strong>la</strong>re är anslutna med digital fiberoptik, kan <strong>de</strong>t hända att avbrottssigna<strong>le</strong>n intematas ut när en skiva byts, vid paus etc. I <strong>de</strong>tta fall ska en extern högta<strong>la</strong>re med inbyggd förstärkare anslutas till GUIDE OUTkontaktenför utmatning av avbrottssigna<strong>le</strong>n.Tyvärr har <strong>de</strong>t smugit in ett fel i användarhand<strong>le</strong>dningen. Följan<strong>de</strong> behöver rättas till.• Använd RGB-omvandlingskabel KWE-503N (säljs separat) när NVA-N751AS är ansluten som navigationssystem.• Använd en RGB-omvandlingskabel KCE-030N (säljs separat) när NVE-N055PS är ansluten som navigationssystem.L Anslut <strong>de</strong>n digita<strong>la</strong> bioförstärkaren, navigationssystem, DVD-väx<strong>la</strong>re och CD-väx<strong>la</strong>re.RGB-kabelFabrikssystemingång(Vit/Brun)FJÄRRSTYRN-INGSUTGÅNG(Vit/Brun)1 Kontakt för navigationsinmatning (RGBingång)Anslut <strong>de</strong>nna till navigationssystemets RGButgång.FJÄRRSTYRN-INGSINGÅNGNVE-N099PNavigationssystem(säljs separat)VPA-B222RRCA-förlängningskabel(medföljer DVD-väx<strong>la</strong>re)(Gul)• Om en DVD-spe<strong>la</strong>re som t ex DVA-5210 el<strong>le</strong>r DVE-5207 är ansluten, kan inte en digital bioförstärkare anslutas till DVD-spe<strong>la</strong>renmed digital fiberoptik.2 Systemomkopp<strong>la</strong>reStäll <strong>de</strong>nna omkopp<strong>la</strong>re i läget EQ/DIV när enAi-NET-kompatibel equalizer el<strong>le</strong>r <strong>de</strong>lningsfilterska anslutas.• Glöm inte att du måste slå av strömmen til<strong>le</strong>nheten innan du ändrar läget på omkopp<strong>la</strong>ren.3 Ai-NET-kontaktAnslut <strong>de</strong>nna koppling till motsvaran<strong>de</strong> kopplingpå en annan produkt kompatibel med Ai-NET.Till Ai-NET-kontakt(Grå)DVD-väx<strong>la</strong>re(Ai-NET) (DHA-S680P)(säljs separat)Extern högta<strong>la</strong>re medinbyggd förstärkare(säljs separat)RCAförlängningskabel(säljs separat)Ai-NETi-kabel(medföljerDVD-väx<strong>la</strong>re)Fiberoptiskdigital ingång(för DVD-spe<strong>la</strong>re)Ai-NETi-kabel(medföljer förstärkare)Till Ai-NET-kontakt (Svart)Digitalbioförstärkare(MRA-D550)Ai-NET-kabel(medföljerCD-väx<strong>la</strong>ren)CD-väx<strong>la</strong>re(Ai-NET) (säljs separat)4 Gui<strong>de</strong>utgångOm en extern ljudprocessor är ansluten skanavigatorns avbrottssignal som matas in från<strong>Alpine</strong>s navigationssystem el<strong>le</strong>r högta<strong>la</strong>rensingång matas ut.5 Kontrollkabel för bildskärm (Vit/Brun)Anslut <strong>de</strong>nna <strong>le</strong>dning till ingångs<strong>le</strong>dningen förfjärrstyrning.Genom <strong>de</strong>n här kabeln sänds kontrollsigna<strong>le</strong>r utfrån fjärrkontrol<strong>le</strong>n.6 AUX-vi<strong>de</strong>oingång (AUX1)Anslut vi<strong>de</strong><strong>ou</strong>tgångskabeln från en DVD-spe<strong>la</strong>reel<strong>le</strong>r DVD-väx<strong>la</strong>re till <strong>de</strong>n här anslutningen.NVE-N099PCavoRGBSistema di navigazione(venduto separatamente)VPA-B222RAltopar<strong>la</strong>nte esternocon amplificatoreincorporato (vendutoseparatamente)Amplificatore DigitalTheater (MRA-D550)Termina<strong>le</strong> diingressosistemaindustria<strong>le</strong>Prolunga RCA (inclusacon il caricatore DVD)Prolunga RCA(vendutaseparatamente)Cavo Ai-NET(inclusa conil caricatoreDVD)Termina<strong>le</strong> diingresso digita<strong>le</strong>in fibra (per il<strong>le</strong>ttore DVD)Cavo Ai-NET(incluso conil caricatoreCD)AI connettore Ai-NET(grigio)(giallo)(bianco/marrone)USCITA DELTELECOMANDO(bianco/marrone)INGRESSO DELTELECOMANDOCaricatore DVD(Ai-NET) (DHA-S680P)(vendutoseparatamente)Cavo Ai-NET(inclusa con amplificatore)AI connettore Ai-NET (nero)Caricatore CD(Ai-NET) (vendutoseparatamente)• Se è col<strong>le</strong>gato un <strong>le</strong>ttore DVD come il DVA-5210 o il DVE-5207, non è possibi<strong>le</strong> col<strong>le</strong>gare un amplificatore Digital Theater al<strong>le</strong>ttore DVD mediante dispositivi digitali in fibra.1 Termina<strong>le</strong> di ingresso navigazione(ingresso RGB)Col<strong>le</strong>gare al termina<strong>le</strong> di uscita RGB <strong>de</strong>l sistemadi navigazione.2 Interruttore sistemaQuando si col<strong>le</strong>ga un equalizzatore o un divisoreusando <strong>la</strong> funzione Ai-NET, portare l’interruttoresul<strong>la</strong> posizione EQ/DIV.• Assicurarsi di spegnere l’unità prima dicambiare <strong>la</strong> posizione <strong>de</strong>ll’interruttore.3 Connettore Ai-NETCol<strong>le</strong>garlo al connettore di uscita o ingresso dialtri prodotti dotati di Ai-NET.4 Termina<strong>le</strong> di uscita guidaSe è col<strong>le</strong>gato un processore audio esterno, emetteil segna<strong>le</strong> voca<strong>le</strong> di interruzione <strong>de</strong>l<strong>la</strong> navigazionein ingresso dal sistema di navigazione <strong>Alpine</strong> o daltermina<strong>le</strong> di ingresso <strong>de</strong>gli altopar<strong>la</strong>nti.5 Cavo di uscita <strong>de</strong>l te<strong>le</strong>comando (bianco/marrone)Col<strong>le</strong>gare questo cavo al cavo di ingresso <strong>de</strong>lte<strong>le</strong>comando.Questo cavo emette i segnali di controllo dalte<strong>le</strong>comando.6 Termina<strong>le</strong> (AUX1) di ingresso vi<strong>de</strong>o AUXCol<strong>le</strong>gare a questo termina<strong>le</strong> il cavo di uscitavi<strong>de</strong>o di un <strong>le</strong>ttore o caricatore DVD.
CHA-S634• CD changer for VPA-B222R.• CD-Wechs<strong>le</strong>r für VPA-B222R.• Changeur CD p<strong>ou</strong>r VPA-B222R.• Cambiador <strong>de</strong> CD para VPA-B222R.• Cambia CD per VPA-B222R.• CD-väx<strong>la</strong>re för VPA-B222R.CHA-1214• CD changer for VPA-B222R.• CD-Wechs<strong>le</strong>r für VPA-B222R.• Changeur CD p<strong>ou</strong>r VPA-B222R.• Cambiador <strong>de</strong> CD para VPA-B222R.• Cambia CD per VPA-B222R.• CD-väx<strong>la</strong>re för VPA-B222R.CHM-S630<strong>Alpine</strong> CD Changers Give Y<strong>ou</strong> More!More musical se<strong>le</strong>ctions, more versatility, more convenience.The CHA-S634 is a high-performance 6-disc changer with a new M DAC, CD-R/RW PLAY BACK, MP3 PLAY BACK and CD TEXT.The CHA-1214 Ai-NET mo<strong>de</strong>l holds 12 discs, and the CHM-S630 M-Bus mo<strong>de</strong>l is a super-compact 6-disc changer with a CD-R/RWPLAY BACK.Von <strong>Alpine</strong> CD-Wechs<strong>le</strong>rn haben Sie mehr!Mehr Musikauswahl, mehr Vielseitigkeit, mehr Komfort.Der CHA-S634 ist ein Hoch<strong>le</strong>istungs-Wechs<strong>le</strong>r für 6 CDs mit <strong>de</strong>m neuen M-DAC, mit CD-R/RW- und MP3-Wie<strong>de</strong>rgabefunktion und mitCD-TEXT. Der CHA-1214 ist ein Ai-NET-Mo<strong>de</strong>ll für 12 CDs. Der M-Bus-kompatib<strong>le</strong> CHM-S630 ist ein superkompakter Wechs<strong>le</strong>r für 6CDs mit CD-R/RW-Wie<strong>de</strong>rgabefunktion.Changeurs <strong>de</strong> CD <strong>Alpine</strong> : v<strong>ou</strong>s avez <strong>le</strong> choix!Plus <strong>de</strong> sé<strong>le</strong>ctions musica<strong>le</strong>s, plus <strong>de</strong> s<strong>ou</strong>p<strong>le</strong>sse, plus <strong>de</strong> confort.Le modè<strong>le</strong> CHA-S634 est un changeur 6 disques ultra performant équipé <strong>de</strong>s n<strong>ou</strong>vel<strong>le</strong>s fonctions M DAC, CD-R/RW PLAY BACK, MP3PLAY BACK et CD TEXT. Le modè<strong>le</strong> CHA-1214 Ai-NET contient 12 disques. Le modè<strong>le</strong> CHM-S630 M-Bus est un changeur 6 disquessuper compact doté <strong>de</strong> <strong>la</strong> fonction CD-R/RW PLAY BACK.¡Los cambiadores <strong>Alpine</strong> <strong>de</strong> CD <strong>le</strong> ofrecen más!Más se<strong>le</strong>cciones musica<strong>le</strong>s, más versatilidad y más ventajas.CHA-S634 es un cambiador <strong>de</strong> seis discos <strong>de</strong> alto rendimiento con nuevo M DAC, CD-R/RW PLAY BACK, MP3 PLAY BACK y CDTEXT. El mo<strong>de</strong>lo CHA-1214 Ai-NET alberga 12 discos y el mo<strong>de</strong>lo CHM-S630 M-Bus es un cambiador <strong>de</strong> seis discos <strong>de</strong> tamañoreducido con un CD-R/RW PLAY BACK.I caricatori CD <strong>Alpine</strong> danno di più!Più scelta, più versatilità, più comodità.Il mo<strong>de</strong>llo CHA-S634 è un caricatore a 6 dischi ad e<strong>le</strong>vate prestazioni dotato di un nuovo M DAC, CD-R/RW PLAY BACK, MP3 PLAYBACK e CD TEXT. Il mo<strong>de</strong>llo CHA-1214 Ai-NET è in grado di contenere 12 dischi, il mo<strong>de</strong>llo CHM-S630 M-Bus è un caricatore a 6dischi ultra compatto dotato di un CD-R/RW PLAY BACK.<strong>Alpine</strong>s CD-väx<strong>la</strong>re ger mer!F<strong>le</strong>r musikval, mer variation, större bekvämlighet.CHA-S634 är en väx<strong>la</strong>re för 6 skivor med mycket höga prestanda och en ny M D/A-omvand<strong>la</strong>re samt uppspelning av CD-R/RW, MP3 ochCD TEXT. CHA-1214 Ai-NET rymmer 12 skivor. CHM-S630 M-Bus är en mycket kompakt väx<strong>la</strong>re med kapaciteten 6 skivor meduppspelning av CD-R/RW PLAY BACK.