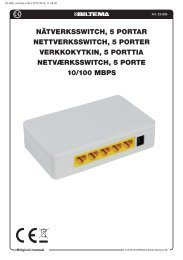
BILSTEREO AUTOSTEREO - Biltema
BILSTEREO AUTOSTEREO - Biltema
BILSTEREO AUTOSTEREO - Biltema

Create successful ePaper yourself
Turn your PDF publications into a flip-book with our unique Google optimized e-Paper software.
Factory Radio<br />
Mounting Bracket<br />
Art. 24-666<br />
Bakmontering (metode B)<br />
Screw<br />
Dersom bilen din er en Nissan eller en Toyota,<br />
må du bakmontere enheten. Bruk skruehullene<br />
merket med T (for Toyota) eller N (for Nissan),<br />
som befinner seg på sidene av enheten, for å<br />
feste den til bilens fabrikkmonterte fester.<br />
INSTALLATION<br />
asten the unit to the factory radio mounting<br />
brackets supplied with your vehicle.<br />
Factory Bilens Radio fester<br />
Mounting Bracket<br />
Screw Skrue<br />
Se til at skruehullene på enheten og på bilens<br />
fester er i linje med hverandre, og skru deretter<br />
i skruene (5x5 mm) på begge sider. Legg merke<br />
til at enhetens pyntekant, deksel og metallbånd<br />
ikke REMOVING brukes ved THE bakmontering. FRONT PANEL<br />
1. Press the release button ( ) on the<br />
front panel and pull off the front panel.<br />
Side View showing<br />
Enhetens side med skruehull<br />
Screw Holes marked<br />
merket T og N<br />
T, N<br />
Screw Skrue<br />
Dashboard Dashbord eller or Console konsoll<br />
USING THE DETACHABLE FRONT PANEL 2. Keep front panel into the case.<br />
REMOVING THE FRONT PANEL<br />
1. Press the release button ( ) on the<br />
Precautions when handling<br />
REMOVING THE FRONT PANEL<br />
front panel and pull off the front<br />
1. Press the release button ( ) on the<br />
Precautions panel.<br />
1. Do not drop the front panel.<br />
when handling<br />
2. Do not put pressure on the display or<br />
front panel and pull off the front panel.<br />
1. Do not drop the front panel.<br />
control buttons when removing or<br />
2. Do not put pressure on the display or<br />
installing the front panel.<br />
2. BRUKE DET AVTAKBARE<br />
Montere control buttons det when avtakbare removing frontpanelet<br />
or<br />
3. Do not touch the contacts on the front<br />
FRONTPANELET<br />
Sett installing panelet the i front dekselet, panel.<br />
SING THE DETACHABLE FRONT PANEL<br />
og se til at det kneppes<br />
panel or on the main unit body. It may<br />
Demontere det avtakbare frontpanelet 3. ordentlig Do not touch på plass. the contacts Legg merke on the front til at dersom<br />
result in poor electrical contact.<br />
1. Trykk på release-knappen. Frontpanelet vil ikke panel INSTALLING frontpanelet or the main kneppes unit body. fast It ordentlig, may kan<br />
EMOVING THE nå kunne FRONT slås PANEL<br />
4. If any<br />
THE<br />
dirt<br />
FRONT<br />
or foreign<br />
PANEL<br />
substances<br />
ned.<br />
dette result forårsake poor electrical problemer contact. med kommunikasjonsporten<br />
If any dirt or på foreign baksiden. substances Dette kan vise seg<br />
. Press the release button ( ) on the<br />
Precautions Frontpanel when To handling install the adhered front panel, on the contacts, insert the they panel can be<br />
4.<br />
front panel and pull off the front panel.<br />
1. Do not drop the into front the panel. housing removed and with make a clean sure and the dry panel cloth. is<br />
ved adhered at segmenter on the contacts, faller bort they fra can LCD-displayet.<br />
be<br />
2. Do not put pressure properly on the 5. installed. display Do not or expose Otherwise, front abnormality panel to high<br />
Dersom removed dette with a er clean tilfellet, and trykk dry cloth. på release-knappen,<br />
Do occurs not ta frontpanelet expose the temperatures<br />
control buttons when removing or<br />
5. the display front av, panel og or or some direct<br />
sett to high det keys sunlight<br />
på igjen. will in not<br />
installing the front temperatures function<br />
panel.<br />
properly. anywhere.<br />
3. Do not touch the contacts 6. on Keep or the direct front away sunlight any volatile in agents (e.g.<br />
Release-<br />
anywhere.<br />
panel or on the main unit body. benzene, It maythinner, or insecticides) from<br />
knapp<br />
6. Keep away any volatile agents (e.g.<br />
mounting result poor brackets.<br />
electrical contact. touching the surface of the front panel<br />
benzene, thinner, or insecticides) from<br />
4. If any dirt or foreign substances<br />
2. Keep front panel into the case.<br />
7. Do not attempt to disassemble the front<br />
touching the surface of the front panel<br />
To 2. Oppbevar fasten frontpanelet the unit i medfølgende to the adhered<br />
futteral.<br />
factory on radio<br />
2. Keep front panel into the case.<br />
7. the Do contacts, not attempt they panel. can to disassemble be<br />
the front<br />
removed with a clean and dry cloth.<br />
panel.<br />
mounting brackets. Futteral 5. Do not expose the front panel to high<br />
Align the screw holes on the temperatures bracket or direct with<br />
sunlight in<br />
anywhere.<br />
the screw holes on the 6. Keep unit, away and any volatile thenagents (e.g.<br />
benzene, thinner, or insecticides) from<br />
tighten the screws (5x5mm) on each side.<br />
INSTALLING THE FRONT<br />
touching<br />
PANEL<br />
the surface of the front panel<br />
Frontpanel<br />
. Keep Note: front panel the outer trim ring, sleeve and the<br />
INSTALLING<br />
into the To case.<br />
7. Do not attempt to disassemble the front<br />
THE<br />
install<br />
FRONT<br />
the front<br />
PANEL<br />
panel, insert the panel<br />
panel.<br />
metal To install strap the<br />
into<br />
front are<br />
the<br />
panel,<br />
housing<br />
not insert used<br />
and<br />
the<br />
make<br />
panel for<br />
sure the<br />
method<br />
panel is<br />
B<br />
into the housing<br />
properly<br />
and make<br />
installed.<br />
sure<br />
Otherwise,<br />
the panel is<br />
abnormality<br />
occurs on the display or some keys will not<br />
installation.<br />
USING THE DETACHABLE FRONT PANEL<br />
USING THE DETACHABLE FRONT PA<br />
Preca<br />
co<br />
in<br />
pa<br />
re<br />
ad<br />
re<br />
te<br />
an<br />
be<br />
to<br />
pa<br />
1. D<br />
2. D<br />
3. D<br />
4. If<br />
5. D<br />
6. K<br />
7. D<br />
Dashboard or Con<br />
To fasten the unit to the facto<br />
Align the screw holes on the brac<br />
the screw holes on the unit, a<br />
tighten the screws (5x5mm) on eac<br />
Note: the outer trim ring, sleeve<br />
17<br />
© 2013-02-15 <strong>Biltema</strong> Nordic Services AB<br />
6<br />
metal strap are not used for m