
Create successful ePaper yourself
Turn your PDF publications into a flip-book with our unique Google optimized e-Paper software.
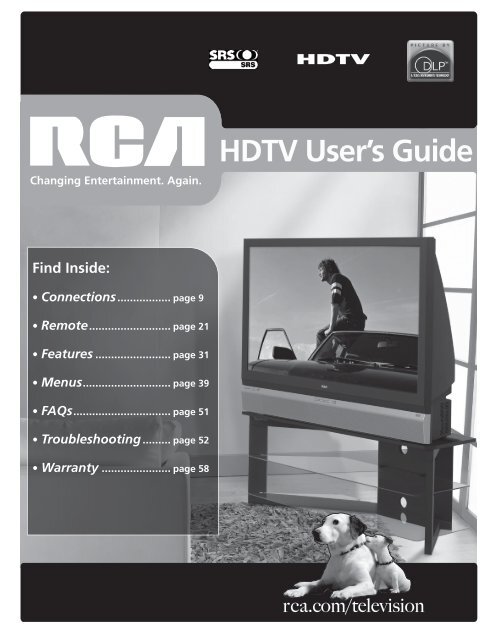
Changing Entertainment. Again.<br />
HDTV User’s Guide<br />
Find Inside:<br />
• Connections.................. page 9<br />
• Remote.......................... page 21<br />
• Features......................... page 31<br />
• Menus............................ page 39<br />
• FAQs............................... page 51<br />
• Troubleshooting.......... page 52<br />
• Warranty....................... page 58<br />
rca.com/television
Important Information<br />
Warning<br />
To reduce the risk of fire<br />
or electric shock, do not<br />
expose this product to rain or<br />
moisture. The apparatus shall<br />
not be exposed to dripping or<br />
splashing and no objects filled<br />
with liquids, such as vases, shall<br />
be placed on the apparatus.<br />
CAUTION<br />
RISK OF ELECTRIC SHOCK<br />
DO NOT OPEN<br />
This symbol indicates<br />
"dangerous voltage" inside<br />
the product that presents<br />
a risk of electric shock or<br />
personal injury.<br />
Caution: To reduce the risk of electric shock, do<br />
not remove cover (or back). With the exception of<br />
the lamp, no user serviceable parts inside. Refer<br />
servicing to qualified service personnel.<br />
This symbol indicates<br />
important instructions<br />
accompanying the product.<br />
This symbol indicates that the lamp in the HDTV contains mercury.<br />
Special disposal of the lamp for environmental reasons may be<br />
required under the laws applicable to your jurisdiction. For disposal<br />
or recycling information, please contact your local authorities or the<br />
Electronic Industries Alliance: www.eiae.org, or call 1-800-338-0376<br />
for more details.<br />
Refer to the identification/rating label located on the back panel of your product for its proper operating voltage.<br />
FCC Regulations state that unauthorized changes or modifications to this equipment may void the user’s authority<br />
to operate it.<br />
Cable TV Installer: This reminder is provided to call your attention to Article 820-40 of the National Electrical<br />
Code (Section 54 of the Canadian Electrical Code, Part 1) which provides guidelines for proper grounding and, in<br />
particular, specifies that the cable ground shall be connected to the grounding system of the building as close to<br />
the point of cable entry as practical.<br />
Important: This television is a table model and is designed to sit on a firm, flat, surface. Don't place the TV on<br />
soft carpeting or similar surface because the ventilation slots on the bottom of the unit will be blocked resulting in<br />
reduced lifetime from overheating. To assure adequate ventilation for this product, maintain a spacing of 4 inches<br />
from the top and sides of the TV receiver and 2 inches from the rear of the TV receiver and other surfaces.<br />
Also, make sure the stand, cabinet, or base you use is of adequate size and strength to prevent the TV from being<br />
accidentally tipped over, pushed off, or pulled off. This could cause personal injury and/or damage the TV. Refer to<br />
the Important Safety Instructions packed separately.<br />
Product Registration<br />
Please fill out the product registration card (packed separately) and return it immediately. For U.S. customers: Your<br />
RCA Consumer Electronics product may also be registered at www.rca.com/television. Returning the card allows us<br />
to contact you if needed.<br />
Product Information<br />
Keep your sales receipt to obtain warranty parts and service and for proof of purchase. Attach it here and record<br />
the serial and model numbers in case you need them. These numbers are located on the product.<br />
Model No. ______________________________________________________________________________________________<br />
Serial No ._______________________________________________________________________________________________<br />
Purchase Date: __________________________________________________________________________________________<br />
Dealer/Address/Phone: ___________________________________________________________________________________
Thank You for Choosing RCA<br />
Congratulations on purchasing this RCA High Definition Television (HDTV) featuring Texas<br />
Instruments Digital Light Processing® technology–a true viewing experience. Your purchase<br />
decision represents an investment in a new generation of technology–DLP® and HDTV. Even<br />
though this is a technologically advanced HDTV, it is the most user-friendly of its kind–with<br />
comprehensive on-screen instructions that guide you through all of the TV’s features. There are<br />
three main things about HDTV that bring you a superior viewing experience: (1) resolution, (2)<br />
aspect ratio, and (3) digital signal and sound.<br />
Introduction<br />
Resolution<br />
The crisp, lifelike picture that people rave about when experiencing true HDTV is due to the<br />
resolution this technology provides. HDTV is capable of resolution that is up to almost 10 times<br />
the resolution of the picture on a regular, analog TV!<br />
4 x 3 Aspect Ratio<br />
Aspect Ratio<br />
Aspect ratio is simply the width and height of the picture. Regular TVs use a 4<br />
x 3 aspect ratio, which means the picture is a little wider than it is tall (a screen<br />
that is 20 inches wide is about 15 inches tall).<br />
As TVs dropped in price and people prospered in the 1950s, the movie industry<br />
created the 16 x 9 aspect ratio (also called widescreen format) to get people<br />
back to seeing movies. When the standards for HDTV were being developed by<br />
the ATSC (Advanced Television Standards Committee), the 16 x 9 aspect ratio<br />
was chosen as the format for HDTV.<br />
This widescreen format is much closer to the way we see and the pictures are<br />
crisper and cleaner with more detail in the close-up and panoramic views.<br />
16 x 9 Aspect Ratio<br />
Digital Signal and Sound<br />
The analog television broadcast system that has been used in the United<br />
States for the past 50 years transmits signals as electronic waves. These waves<br />
can suffer degradation as the signal travels to your home. Digital signals, in<br />
contrast to analog signals, can be reproduced precisely because the images<br />
are transmitted and received using the computer language of 1s and 0s. Such<br />
precision yields a signal that is capable of displaying studio-quality picture and<br />
Dolby Digital 5.1 channel sound.<br />
Digital Light Processing, DLP, the DLP logo, and the DLP medallion are trademarks of Texas Instruments.
Introduction<br />
Other Key Features of Owning an RCA HDTV<br />
RCA HDTV has been designed with features that will enhance your TV viewing experience, and<br />
features that provide flexibility to build on the digital revolution that is taking place. A summary<br />
of your TV’s most unique features follows. Go to Chapter 3 for more details on these and<br />
additional features.<br />
0<br />
1<br />
2<br />
3<br />
4<br />
5<br />
Go Back<br />
Picture Preset Mode<br />
Picture Settings<br />
Screen Format<br />
Advanced Picture<br />
Screen Adjust<br />
Main Menu4Picture Menu<br />
Vibrant (Day)<br />
Contrast 65%<br />
Natural<br />
Color 70%<br />
Tint 55%<br />
Cinematic (Night)<br />
Brightness 60%<br />
Sports<br />
Sharpness 55%<br />
Personal<br />
Auto Flesh Tone<br />
On<br />
Color Temperature<br />
Cool<br />
Video Noise Filter Frame Comb<br />
Green Enhance<br />
On<br />
Detail Enhance<br />
On<br />
Contrast Enhance<br />
On<br />
A change in this screen is applied to Input 3.<br />
Press 5 or 6 to point to an option, then press OK to select it.<br />
Press 3 to return to the menu.<br />
Help text<br />
Integrated HDTV Tuner with QAM<br />
RCA was the first to offer an integrated tuner with its HDTVs, which means there<br />
is no need for another box to receive digital programming. Your TV is equipped<br />
with a QAM (Quadrature Amplitude Modulation) tuner that enables reception of<br />
unscrambled digital cable content. If you have regular cable, your TV will receive<br />
some digital channels that are available through a cable connection.<br />
User-friendly Features Help You Personalize Your TV<br />
• You can customize your TV to fit your viewing taste and match the lighting<br />
where you watch TV by using Personal Presets and/or the picture preset<br />
settings: Vibrant (Day), Natural, Cinematic (Night), and Sports. You can<br />
adjust each input to a different setting and the TV will automatically adjust<br />
the picture settings when you change inputs.<br />
• Help Text: The on-screen help text describes your TV’s features and explains<br />
how to use them.<br />
Service Model Number Numéro de Modéle-Service<br />
M50WHXXXXX<br />
000000000 X<br />
SERIAL SERIE<br />
LAMP<br />
EXAMPLE: Service Model Number<br />
sticker with lamp type listed.<br />
Model No._________________________<br />
Lamp Type________________________<br />
Date______________________________<br />
Lamp Replacement<br />
DLP technology uses a special lamp. Eventually, you’ll need to replace this lamp,<br />
which you can do yourself by following the instructions that come packed with<br />
the new lamp. To order the correct lamp, you’ll need to know your TV’s model<br />
number, serial number, and lamp type–this information is listed on the Service<br />
Model Number sticker (example of the sticker is shown on the left). To find this<br />
sticker, face the back of the TV. The sticker is located on the left side of the TV.<br />
For future reference, write down the information in the space provided at the<br />
left.
Table of Contents<br />
Introduction<br />
Thank You For Owning an RCA HDTV.............................................................................4<br />
Other Key Features of Owning an RCA HDTV...........................................................4<br />
Lamp Replacement......................................................................................................4<br />
Chapter 1: Connections & Setup<br />
Things to Consider Before You Connect .........................................................................7<br />
Protect Against Power Surges....................................................................................7<br />
Protect Components from Overheating....................................................................7<br />
Position Cables Properly to Avoid Audio Interference.............................................7<br />
Use Indirect Light........................................................................................................7<br />
FCC Statement ............................................................................................................7<br />
Get the Picture...................................................................................................................8<br />
Getting Cable Channels..............................................................................................8<br />
Getting Off Air Channels............................................................................................8<br />
Choose Your Connection...................................................................................................9<br />
Y Pb Pr (Component Video) Connection..................................................................10<br />
Audio/Video Connection...........................................................................................11<br />
HDMI Connection......................................................................................................12<br />
Advanced Audio Connection Information..............................................................14<br />
Setting Up Your TV..........................................................................................................15<br />
Remote Control Buttons Used for the Assisted Setup..................................................15<br />
Complete the Assisted Setup....................................................................................15<br />
Set the Menu Language...........................................................................................16<br />
Complete the Channel Search..................................................................................16<br />
Choose Setup Options...............................................................................................16<br />
What To Expect..........................................................................................................17<br />
Watching TV..............................................................................................................17<br />
Next Steps........................................................................................................................17<br />
Explanation of Jacks........................................................................................................18<br />
The Front/Side of Your TV...............................................................................................20<br />
Side Input Jacks.........................................................................................................20<br />
Front Panel................................................................................................................20<br />
Chapter 2: Using the Remote Control<br />
The Buttons on the Remote Control..............................................................................21<br />
Programming the Remote to Operate Other Devices...................................................23<br />
Find Out If You Need to Program the Remote .......................................................23<br />
Programming the Remote........................................................................................23<br />
How to Use the Remote After You’ve Programmed It.................................................24<br />
Modes of Operation..................................................................................................24<br />
Volume Punchthrough Feature.......................................................................................25<br />
Deleting ALL Volume Punchthrough Commands....................................................25<br />
Using the INPUT Button..................................................................................................26<br />
Remote Code List.............................................................................................................26
Table of Contents<br />
Chapter 3: Using the TV’s Features<br />
About the Channel Banner.............................................................................................31<br />
Digital or Analog TV Channels.......................................................................................32<br />
Direct Tuning to a Channel.......................................................................................32<br />
Getting a Program Description................................................................................32<br />
Parental Controls.............................................................................................................33<br />
Lock/Unlock TV..........................................................................................................33<br />
How V-Chip Works for the USA and Canada...........................................................33<br />
USA V-Chip TV Ratings..............................................................................................34<br />
Channel Lists....................................................................................................................37<br />
Auto Tuning Feature .......................................................................................................38<br />
Future Downloadable Ratings........................................................................................38<br />
Chapter 4: Using the TV’s Menu System<br />
Menus, On-screen Help, and Control Panels.................................................................39<br />
Navigating the Menu System...................................................................................39<br />
On-Screen Help..........................................................................................................39<br />
Controls......................................................................................................................39<br />
Picture Menu....................................................................................................................41<br />
Picture Preset Mode..................................................................................................41<br />
Picture Settings..........................................................................................................41<br />
Screen Format............................................................................................................42<br />
Advanced Picture Menu............................................................................................42<br />
Screen Adjust Menu..................................................................................................43<br />
Audio Menu.....................................................................................................................44<br />
Sound Preset Mode...................................................................................................44<br />
Sound Logic...............................................................................................................44<br />
Balance.......................................................................................................................44<br />
Advanced Audio........................................................................................................44<br />
Channel Setup Menu.......................................................................................................46<br />
Channel Search..........................................................................................................46<br />
Advanced Settings.....................................................................................................47<br />
Setup Options Menu.......................................................................................................47<br />
Closed Captioning.....................................................................................................47<br />
Time Menu.................................................................................................................49<br />
Quick Startup.............................................................................................................49<br />
Assisted Setup............................................................................................................49<br />
Menu Preferences.....................................................................................................49<br />
Advanced Options.....................................................................................................50<br />
Chapter 5: Other Information<br />
Frequently Asked Questions (FAQs)...............................................................................51<br />
Troubleshooting...............................................................................................................52<br />
Lamp Replacement Information.....................................................................................56<br />
Replacing the Lamp Unit..........................................................................................56<br />
HDTV Specifications........................................................................................................57<br />
Limited Warranty.............................................................................................................58<br />
Care and Cleaning...........................................................................................................60<br />
FCC Information...............................................................................................................60
Chapter 1: Connections & Setup<br />
Things to Consider Before You Connect<br />
Protect Against Power Surges<br />
• Connect all components before you plug any of their power cords into the wall outlet or<br />
power strip. NEVER plug your TV into an outlet that is controlled by a wall switch.<br />
• Turn off the TV and/or device(s) before you connect or disconnect any cables.<br />
• Make sure all antennas and cables are properly grounded. Refer to the Important Safety<br />
Instructions sheet packed with your TV.<br />
Protect Components from Overheating<br />
• Don’t block ventilation holes on any of the components. Arrange the components so that air<br />
can circulate freely.<br />
• Don’t stack components.<br />
• If you place components in a stand, make sure you allow adequate ventilation.<br />
• If you connect an audio receiver or amplifier, place it on the top shelf so the heated air from<br />
it won’t flow around other components.<br />
Position Cables Properly to Avoid Audio Interference<br />
Insert each cable firmly into the designated jack.<br />
Use Indirect Light<br />
Don’t place the TV where sunlight or room lighting will be directed toward the screen. Use soft<br />
or indirect lighting.<br />
FCC Statement<br />
This digital television is capable of receiving analog basic, digital basic and digital premium cable<br />
television programming by direct connection to a cable system providing such programming.<br />
Certain advanced and interactive digital cable services such as video-on-demand, a cable<br />
operator’s enhanced program guide and data-enhanced television services may require the use of<br />
a set-top box. For more information, call your local cable operator.<br />
Graphics contained within this publication are for representation only.
PB<br />
PR<br />
PB<br />
PR<br />
FIXED/VARIABLE<br />
AUDIO OUTPUT<br />
L<br />
R<br />
DIGITAL<br />
AUDIO<br />
OUTPUT<br />
use only<br />
Connections & Setup<br />
Get the Picture<br />
The first part of connecting your TV is to get the picture, also known as a signal. The back panel<br />
of your TV allows you to receive analog and digital channels by using the ANTENNA/CABLE<br />
INPUT. See graphic below for the location of the jack.<br />
ANTENNA/CABLE INPUT<br />
INPUT 1<br />
INPUT 2<br />
INPUT 3<br />
INPUT 4<br />
COMPONENT/COMPOSITE COMPOSITE COMPONENT/COMPOSITE COMPOSITE<br />
Y/VIDEO<br />
L VIDEO Y/VIDEO<br />
L VIDEO<br />
ANTENNA/CABLE<br />
INPUT<br />
Note: This back panel graphic is<br />
for representation only. Your back<br />
panel might be different.<br />
R<br />
L<br />
R<br />
L<br />
HDMI 1 INPUT HDMI 2 INPUT For Factory<br />
S-VIDEO<br />
R<br />
S-VIDEO<br />
R<br />
What You Need To Know<br />
Your TV is equipped with a QAM (Quadrature Amplitude Modulation) tuner that enables reception<br />
of unscrambled digital cable content. If you have regular cable, your TV will receive some digital<br />
channels that are available through a cable connection. Your TV can also receive analog and digital<br />
off-air cable signals from an indoor or outdoor antenna.<br />
Coaxial cable<br />
Getting Cable Channels<br />
Connect a coaxial cable from the cable TV wall outlet to the ANTENNA/CABLE INPUT on the back of<br />
the TV to receive cable channels.<br />
What You Need<br />
Coaxial cable<br />
What You Need To Know<br />
• When you’re ready to watch digital channels, make sure you are tuned to a digital channel. Digital<br />
stations typically have a dash in the channel number and a number following the dash which is a<br />
subchannel. Go to page 17 for more information.<br />
• When you’re ready to watch an analog channel, make sure you are tuned to an analog channel.<br />
Analog stations contain no more then three digits. Go to page 17 for more information.<br />
Getting Off Air Channels<br />
Connect a coaxial cable from an off-air antenna to the ANTENNA/CABLE INPUT to receive free local<br />
off-air digital and analog channels.<br />
Outdoor antenna<br />
Indoor antenna<br />
What You Need<br />
Indoor or outdoor antenna<br />
What you Need to Know<br />
• Visit www.antennaweb.org to get help deciding what type of antenna to use to receive the local<br />
digital channels available to you. By entering where you live, this mapping program tells you<br />
what local analog and digital stations are available using a certain antenna. Once you determine<br />
what type of antenna you need, go to rca.com.<br />
• Depending on your antenna capability, it may be necessary to rotate your antenna and repeat the<br />
channel search to find all off-air channels in your area. To speed this process, uncheck the box<br />
Detect antenna or cable signal. Also to avoid erasing channels already found, uncheck the box<br />
Search channels already in my channel list.<br />
Chapter 1
Choose Your Connection<br />
Connections & Setup<br />
There are several ways to connect your HDTV, depending on the components you want to connect and the quality of the<br />
signal you want to achieve. The HDMI and component jacks are considered excellent; S-Video is very good; composite jacks<br />
are good, while connecting components to the Antenna or Cable input is fair.<br />
Please use the following chart to determine which connection is best for you. Proceed to the appropriate page and connect<br />
your TV.<br />
INPUT 1<br />
COMPONENT/COMPOSITE<br />
Jacks Used Cables Needed Go to...<br />
Y Pb Pr<br />
Component video page 10<br />
Y/VIDEO<br />
L<br />
Audio R and L<br />
PB<br />
R<br />
Audio<br />
PR<br />
INPUT 2<br />
COMPOSITE<br />
Video<br />
Audio/Video<br />
page 11<br />
VIDEO<br />
Audio R and L<br />
L<br />
S-Video<br />
S-VIDEO<br />
R<br />
HDMI 1 INPUT<br />
HDMI 2 INPUT<br />
HDMI<br />
HDMI<br />
pages 12-13<br />
OR<br />
HDMI<br />
HDMI/DVI<br />
adapter<br />
Audio<br />
HDMI, the HDMI logo, and High-Definition Multimedia Interface are trademarks or registered trademarks of HDMI Licensing LLC.<br />
Chapter 1
PB<br />
Connections & Setup<br />
Y Pb Pr (Component Video) Connection<br />
INPUT 2<br />
INPUT 3<br />
INPUT 4<br />
COMPONENT/COMPOSITE COMPOSITE<br />
ANTENNA/CABLE<br />
INPUT<br />
Y/VIDEO<br />
L<br />
R<br />
S-VIDEO<br />
VIDEO<br />
L<br />
R<br />
FIXED/VARIABLE<br />
AUDIO OUTPUT<br />
L<br />
R<br />
DIGITAL<br />
AUDIO<br />
OUTPUT<br />
HDMI 1 INPUT HDMI 2 INPUT For Factory<br />
use only<br />
Note: This back panel graphic is<br />
for representation only. Your back<br />
panel might be different.<br />
INPUT 1<br />
COMPONENT/COMPOSITE<br />
Y/VIDEO<br />
L<br />
PB<br />
R<br />
PR<br />
• If you are done<br />
connecting devices to<br />
your TV, go to page 15<br />
to complete the Assisted<br />
Setup.<br />
• To continue connecting<br />
devices, go to the next<br />
page.<br />
INPUT<br />
OUTPUT<br />
VIDEO<br />
L<br />
AUDIO<br />
R<br />
S-VIDEO<br />
IN<br />
COMPONENT VIDEO<br />
Y Pb Pr<br />
L<br />
AUDIO<br />
R<br />
VIDEO<br />
L<br />
AUDIO<br />
R<br />
S-VIDEO<br />
OUT<br />
Component Video<br />
cables (Y Pb Pr) are<br />
color coded- Green,<br />
Blue and Red<br />
Green<br />
Blue<br />
Red<br />
Red<br />
White<br />
Audio cables are color<br />
coded- Red= right audio;<br />
white= left audio<br />
Connecting the Device<br />
This connection allows you to connect a device that has Y Pb Pr jacks, for example, a DVD<br />
player. If the device you are connecting also has S-Video or composite video, we recommend<br />
you use the component video input for better quality.<br />
Using the example of a DVD player:<br />
1. If necessary, connect your cable and/or off-air antenna as described on page 8.<br />
2. Connect your Y Pb Pr component video cables.<br />
Connect three video cables or component video cables to the INPUT 1 Y/VIDEO P B<br />
P R<br />
jacks on the back of the TV and to the Y P B<br />
P R<br />
outputs on the DVD player.<br />
3. Connect your audio cables.<br />
Connect the audio (white and red) cables to the INPUT 1 R and L Audio jacks on the back<br />
of the TV and to the Audio Output jacks on the DVD player.<br />
Viewing the Picture from the Connected Device<br />
The device in this connection is connected to the TV’s INPUT 1 jacks. To view this device:<br />
1. Turn on the TV and the device you want to view, for example a DVD player.<br />
2. Press the TV button on the remote control to put the remote in TV mode.<br />
3. Press the INPUT button on the remote control to scroll through the Video Input Channels<br />
until you see Input 1 (Component) displayed in the channel banner.<br />
Note: You can set up the TV to automatically tune to the correct device you want to<br />
view. This is called Auto Tuning. See Chapter 3 for more information on Auto Tuning.<br />
10 Chapter 1
PB<br />
PR<br />
Connections & Setup<br />
Audio/Video Connection<br />
INPUT 1<br />
COMPONENT/COMPOSITE<br />
Y/VIDEO<br />
L<br />
INPUT 3<br />
INPUT 4<br />
COMPONENT/COMPOSITE COMPOSITE<br />
Y/VIDEO<br />
L VIDEO<br />
FIXED/VARIABLE<br />
AUDIO OUTPUT<br />
ANTENNA/CABLE<br />
INPUT<br />
Note: This back panel<br />
graphic is for representation<br />
only. Your back panel might<br />
be different.<br />
R<br />
R<br />
L<br />
L<br />
DIGITAL<br />
AUDIO<br />
OUTPUT<br />
HDMI 1 INPUT HDMI 2 INPUT For Factory<br />
use only<br />
S-VIDEO<br />
R<br />
R<br />
INPUT 2<br />
COMPOSITE<br />
VIDEO<br />
L<br />
S-VIDEO<br />
R<br />
• If you are done<br />
connecting devices to<br />
your TV, go to page 15<br />
to complete the Assisted<br />
Setup.<br />
OUTPUT<br />
COMPONENT VIDEO<br />
Y Pb Pr<br />
L<br />
AUDIO<br />
R<br />
INPUT<br />
VIDEO<br />
L<br />
AUDIO<br />
R<br />
S-VIDEO<br />
IN<br />
• To continue connecting<br />
devices, go to the next<br />
page.<br />
VIDEO<br />
L<br />
AUDIO<br />
R<br />
S-VIDEO<br />
OUT<br />
Red<br />
Yellow<br />
White<br />
Composite cables are color coded-<br />
Yellow= video; Red= right audio; white=<br />
left audio<br />
Connecting the Device<br />
This connection allows you to connect a device such as a VCR that has audio/video<br />
outputs.<br />
Using the example of a VCR:<br />
1. Connect your cable and/or off-air antenna as described on page 8.<br />
2. Connect your composite audio/video cables to the TV’s input.<br />
Connect composite audio/video cables to the TV’s INPUT 2 jacks (R and L-<br />
Audio, and Video) and to the VCR’s audio/video outputs.<br />
Notes: Press the INPUT button on the remote control to scroll through the<br />
Video Input Channels until you see Input 2 displayed in the channel banner.<br />
You can set up the TV to automatically tune to the correct device you want<br />
to view. This is called Auto Tuning. See Chapter 3 for more information on<br />
Auto Tuning.<br />
Chapter 1 11
PB<br />
PR<br />
PB<br />
PR<br />
Connections & Setup<br />
HDMI Connection<br />
INPUT 1<br />
INPUT 2<br />
COMPONENT/COMPOSITE COMPOSITE<br />
INPUT 3<br />
COMPONENT/COMPOSITE C<br />
COMPOSITE<br />
ANTENNA/CABLE<br />
INPUT<br />
Y/VIDEO<br />
L<br />
VIDEO<br />
Y/VIDEO<br />
L<br />
FIXED/VARIABLE<br />
R<br />
L<br />
R<br />
L<br />
DIGITAL<br />
AUDIO<br />
OUTPUT<br />
HDMI 1 INPUT HDMI 2 INPUT For Factory<br />
use only<br />
S-VIDEO<br />
R<br />
S-VIDEO<br />
R<br />
INPUT 4<br />
COMPOSITEC<br />
VIDEO<br />
Note: This back panel graphic is<br />
for representation only. Your back<br />
panel might be different.<br />
L<br />
C<br />
R<br />
A<br />
B<br />
Device with DVI<br />
Device with HDMI<br />
L<br />
Audio Out<br />
R<br />
DVI Out<br />
OR<br />
Y<br />
Video Out<br />
Pb<br />
Pr<br />
R<br />
Audio Out<br />
L<br />
HDMI Out<br />
12 Chapter 1
Connections & Setup<br />
HDMI cable<br />
HDMI/DVI adapter<br />
Red<br />
Audio cables are color<br />
coded- Red= right audio;<br />
white= left audio<br />
HDMI cable<br />
White<br />
Connecting the Device<br />
High-Definition Multimedia Interface (HDMI) is an uncompressed digital interface<br />
that carries both video and audio data by way of an integrated mini-plug cable. Since<br />
HDMI is based on Digital Visual Interface (DVI), the jack on the back of your TV is also<br />
compatible with devices that have a DVI jack.<br />
Using the example of a set-top box:<br />
• If your set-top box has a DVI jack, connect an HDMI cable and an HDMI/DVI<br />
adapter.<br />
A. Connect an HDMI cable to the HDMI INPUT jack on the back of the TV.<br />
B. Attach an HDMI/DVI adapter to the end of the HDMI cable, then connect the<br />
adapter to the DVI Out jack on the back of the device.<br />
C. Since you’re using an HDMI/DVI adapter, you need to connect Audio left and<br />
right cables to the R and L jacks on the back of the device and to R and L Audio<br />
jacks that aren’t in use on the back of the TV.<br />
After you’ve completed the on-screen Assisted Setup (page 15), go to the DVI Audio<br />
Input option in the Advanced Audio menu to select which Audio Input jack you’re<br />
using. In the example on the opposite page you would choose INPUT 4.<br />
Note: If the device you’re connecting has a digital audio output jack, connect a<br />
digital audio cable from the device to an audio receiver for digital audio.<br />
OR<br />
• If your set-top box has an HDMI jack, connect an HDMI cable.<br />
Connect an HDMI cable to the HDMI 1 INPUT (or HDMI 2 INPUT if your TV has<br />
this jack and it’s more convenient) jack on the back of the TV and to the HDMI Out<br />
jack on the back of the device.<br />
Notes: Press the INPUT button on the remote control to scroll through the Video<br />
Input Channels until you see HDMI 1 or HDMI 2 displayed in the channel<br />
banner.<br />
You can set up the TV to automatically tune to the correct device you want to<br />
view. This is called Auto Tuning. See Chapter 3 for more information on Auto<br />
Tuning.<br />
• If you are done connecting<br />
devices to your TV, go to<br />
page 15 to complete the<br />
Assisted Setup.<br />
• To find out more about<br />
connecting audio/video<br />
receivers, go to the next<br />
page.<br />
Chapter 1 13
Connections & Setup<br />
Advanced Audio Connection Information<br />
With the audio versatility of your HDTV, you can choose various connection options depending<br />
on the type and quality of sound that you want. From good to best sound, choose one of the<br />
options or refer to the user’s manual of each device that you are connecting to get the best<br />
results.<br />
• Use your TV’s internal speakers (good sound).<br />
• Connect an audio receiver (speakers connected to receiver) to your TV (better sound).<br />
• Connect an audio receiver (speakers connected to receiver) to your TV using the DIGITAL<br />
AUDIO OUTPUT (OPTICAL) jack (best sound)<br />
INPUT 1<br />
INPUT 2<br />
COMPONENT/COMPOSITE COMPOSITE<br />
INPUT 3<br />
INPUT 4<br />
COMPONENT/COMPOSITE COMPOSITE<br />
ANTENNA/CABLE<br />
INPUT<br />
Y/VIDEO<br />
L<br />
VIDEO<br />
Y/VIDEO<br />
L<br />
VIDEO<br />
FIXED/VARIABLE<br />
AUDIO OUTPUT<br />
PB<br />
R<br />
L<br />
PB<br />
R<br />
L<br />
DIGITAL<br />
AUDIO<br />
OUTPUT<br />
HDMI 1 INPUT HDMI 2 INPUT For Factory<br />
use only<br />
PR<br />
S-VIDEO<br />
R<br />
PR<br />
S-VIDEO<br />
R<br />
FIXED/VARIABLE<br />
AUDIO OUTPUT<br />
DIGITAL<br />
AUDIO<br />
OUTPUT<br />
L<br />
(OPTICAL)<br />
R<br />
Red<br />
White<br />
Audio cables are color<br />
coded- Red= right<br />
audio; white= left<br />
audio<br />
Connecting Your TV to an Audio/Video Receiver<br />
For better sound quality than the TV’s internal speakers, connect to an audio receiver using audio<br />
cables to the TV’s AUDIO OUTPUT jacks.<br />
• Use the FIXED/VARIABLE AUDIO OUTPUT for a more advanced connection. Connect the FIXED/<br />
variable AUDIO OUTPUTS from the TV to an A/V receiver using audio cables.<br />
Be sure to go to the Fixed/Variable Out screen in the Advanced Audio menu and select whether<br />
you want the FIXED/VARIABLE AUDIO OUTPUT jacks to send fixed or variable volume audio.<br />
• Variable Output provides variable-level audio output. Volume levels are controlled by the<br />
OUTPUT<br />
INPUT<br />
TV’s volume.<br />
COMPONENT VIDEO<br />
VIDEO L AUDIO<br />
R<br />
S-VIDEO<br />
Y Pb Pr L AUDIO<br />
R<br />
IN<br />
• Fixed Output provides fixed-level audio output from the TV. This audio output is ideal for<br />
VIDEO L AUDIO<br />
R S-VIDEO<br />
connecting to OUT an A/V receiver that has its own volume control.<br />
Digital Optical<br />
cable<br />
Connecting Your TV to a Receiver with Dolby® Digital<br />
If you own a receiver with *Dolby® Digital decoding or PCM (Pulse-Code Modulation) that uses an<br />
optical cable-type input, connect an optical cable for excellent audio quality.<br />
• Connect one end of the optical cable to the DIGITAL AUDIO OUTPUT (OPTICAL) jack on your<br />
TV and to the Digital Optical Input jack on your receiver/amplifier receiver.<br />
• If your receiver can decode Dolby Digital and PCM, go to the Audio menu, select Advanced<br />
Audio menu, then Digital Audio Output. Select AutoSelect (recommended) or PCM.<br />
• If your receiver can decode only PCM, select PCM.<br />
*Dolby is a registered trademark of Dolby Laboratories.<br />
14 Chapter 1
Setting Up Your TV<br />
• Plug in the TV.<br />
Note: When you first plug your TV into an outlet, the Power indicator on the front panel<br />
will light and blink for approximately 30 seconds and then go off during the initialization<br />
of the TV. This happens only when the TV is unplugged and plugged back in. The TV can<br />
only be turned on after the Power indicator goes off.<br />
• Put batteries in the remote.<br />
• Turn on the TV.<br />
Connections & Setup<br />
MENU<br />
TV<br />
Remote Control Buttons Used for the<br />
Assisted Setup<br />
To use the TV’s menus, first press the TV button on the remote control to put<br />
the remote in TV mode. When the Assisted Setup screen appears, use the arrow<br />
buttons to highlight one of the items listed in the menu. Use the up or down<br />
arrow button to move up or down. Use the right or left arrow button to move<br />
right or left.<br />
To select the item that you’ve highlighted, press OK.<br />
Note: Highlighted means that the menu item stands out from other<br />
menu items on the list (appears darker, brighter, or a different color).<br />
Tip<br />
CLEAR<br />
Use these buttons during the Assisted Setup<br />
To access the initial setup menus at a later time, press<br />
MENU, choose Setup Options, then Assisted Setup.<br />
Complete the Assisted Setup<br />
Your TV’s menu system allows you to customize your TV’s features. On-screen<br />
information helps you choose settings to match your setup. The first time you<br />
turn on your TV, the Assisted Setup screen appears automatically. Press OK to<br />
begin the setup.<br />
Chapter 1 15
Connections & Setup<br />
0<br />
1<br />
2<br />
Go Back<br />
Continue Setup<br />
Cancel Setup<br />
Main Menu4Setup Options4Assisted Setup 4Menu Language<br />
English<br />
Highlight with the 5and 6 arrows. Select with the OK button.<br />
Español<br />
Resalte con las flechas 5 y 6. Seleccione con el botón OK.<br />
Français<br />
Mise en surbrillance avec 5 et 6. Sélection avec OK.<br />
Set the Menu Language<br />
Press the right arrow button, then press OK to select English and continue to<br />
the next step. Press the down arrow button to choose another language, then<br />
press OK to continue.<br />
Press 5or 6to point to an option, then press OK to<br />
select it. Press 4 to return to the menu.<br />
Tip<br />
0<br />
1<br />
2<br />
Go Back<br />
Continue Setup<br />
Cancel Setup<br />
Main Menu4 Channel Setup<br />
Select channels to search:<br />
Digital channels<br />
Analog channels<br />
Select other search options:<br />
Detect antenna or cable signal<br />
Check fewer boxes to make the search faster (but less<br />
complete) and vice versa. A complete search takes about<br />
50 minutes.<br />
To add a channel that Channel Search didn't find, clear all<br />
menus and tune to the channel with the number keys.<br />
Start Search<br />
Cable Input<br />
Antenna Input<br />
Search channels already in my channel list(s)<br />
Remove scrambled digital cable channels<br />
Select input to search:<br />
Two lines of help text will appear in this area to explain the<br />
feature and instruct the user on how to use it.<br />
The first Channel Search can take up to 20 minutes if<br />
the TV is searching for analog and digital channels,<br />
and cable and antenna inputs are being searched.<br />
You may want to leave and come back later.<br />
Complete the Channel Search<br />
Even though this initial channel search can take several minutes, you must<br />
complete it in order for your TV to display channels and programming<br />
information. Make sure you’ve connected your TV to cable or an off-air<br />
antenna before you begin the channel search.<br />
All the options are selected for you to ensure a full channel search is<br />
completed. Press the right arrow button. An alert screen appears to allow<br />
you to start a channel search or customize the options.<br />
Press OK to start a channel search or if you want to change some of the<br />
options, use the arrow buttons to highlight those options. Press OK to check<br />
or uncheck an option. Then highlight Start Search and press OK to start the<br />
channel search.<br />
When the channel search is complete a message screen appears. Press OK to<br />
continue.<br />
Notes: If you skip Channel Search now, you can access it later<br />
through the Channel Setup menu. For more detailed instructions, refer<br />
to Chapter 4 of the User’s Guide.<br />
Choose Setup Options<br />
Quick Startup is a power saving feature. Select to enable or disable Quick Startup. Decide<br />
which option is best for you. Enabling Quick Startup allows you to turn on the TV faster than if<br />
disabled.<br />
Several more screens appear that give you basic tips about using your TV. Read through the<br />
information and continue to press OK until the screens disappear.<br />
Note: When you disable Quick Startup it adds approximately 30 seconds to the TV’s turn<br />
on time.<br />
16 Chapter 1
What To Expect<br />
Watching TV<br />
Connections & Setup<br />
If you have both analog and digital cable channels these will be put into the same channel list. To<br />
tell the difference between these channels, press the INFO button and look in the channel banner<br />
for these things: a subchannel, the format, an A or D (analog or digital) icon and resolution the TV<br />
is receiving.<br />
• Analog channels only display one channel number. Digital channels received through cable or<br />
an off-air antenna might have a primary channel and a subchannel. In the example below, 6<br />
is the primary channel; 1 is the subchannel.<br />
• Analog channels are sent in a 4 x 3 format. Digital channels can be sent in a format of 4 x 3,<br />
but usually 16 x 9.<br />
• Analog channels are sent in a resolution up to 480i. Digital channels are sent in a resolution of<br />
480i, 480p, 720p, or 1080i.<br />
Changing Channels<br />
Channel number<br />
Program Title/Acquiring Channel<br />
Channel format and resolution<br />
12:30 AM 00:30<br />
12:39 PM<br />
D Ch 6-1 DNLJ Cable Input<br />
Listening to English in SRS<br />
16x9 Normal 1080i HDTV<br />
MPAA - Not Rated<br />
12:00 PM - 1:00 PM<br />
Depending upon the type of signals you have connected to your HDTV, you might notice that<br />
the channels change slower than you’re used to. This is perfectly normal. Digital cable channels<br />
sometimes take longer to tune.<br />
Some channels might be found during the channel search that aren’t available. Some channels are<br />
enabled by the cable company that don’t carry programming, such as video-on-demand. When<br />
channels are unavailable, your TV’s screen displays Weak or No Signal. You probably want to<br />
remove these so they no longer appear in your channel list. Remove these in the Channel Setup<br />
menu. Go to page 37 for more information.<br />
Next Steps<br />
Now that you’ve finished the Assisted Setup, you’re ready to watch TV. This might be a good time<br />
to program your remote control. The remote control that came with this TV can be programmed<br />
to operate other devices. Go to the next chapter to find out how to program your remote.<br />
Continue to the next few pages to learn more about the back panel and front of your TV.<br />
• Chapter 2: Using the Remote Control<br />
• Chapter 3: Using the TV’s Features<br />
• Chapter 4: Using the TV’s Menu System<br />
• Chapter 5: Other Information<br />
Chapter 1 17
Connections & Setup<br />
Explanation of Jacks<br />
The diagrams below illustrate jacks found on the back of the TV. When connecting cables, be<br />
sure to connect corresponding outputs and inputs (video input into video output, right audio<br />
input into right audio output, etc.).<br />
INPUT 1<br />
INPUT 2<br />
COMPONENT/COMPOSITE COMPOSITE<br />
INPUT 3<br />
INPUT 4<br />
COMPONENT/COMPOSITE COMPOSITE<br />
ANTENNA/<br />
CABLE<br />
Y/VIDEO<br />
L<br />
VIDEO<br />
Y/VIDEO<br />
L<br />
VIDEO<br />
FIXED/VARIABLE<br />
AUDIO OUTPUT<br />
PB<br />
R<br />
L<br />
PB<br />
R<br />
L<br />
L<br />
HDMI 1 INPUT<br />
HDMI 2 INPUT<br />
DIGITAL<br />
AUDIO<br />
OUTPUT<br />
For Factory<br />
use only<br />
PR<br />
S-VIDEO<br />
R<br />
PR<br />
S-VIDEO<br />
R<br />
R<br />
(OPTICAL)<br />
Tip<br />
INPUT 1<br />
COMPONENT/COMPOSITE<br />
Y/VIDEO<br />
PB<br />
PR<br />
Inputs 1 and 3 can be used as either component<br />
video (Y PB PR ) inputs or composite video<br />
(Y/Video) inputs.<br />
S-VIDEO<br />
L<br />
R<br />
INPUT 2<br />
COMPOSITE<br />
VIDEO<br />
L<br />
R<br />
INPUT 1 and 3 COMPONENT/COMPOSITE INPUTS Provides connection to an<br />
(analog) video device with either composite or component outputs such as a VCR<br />
or DVD player.<br />
• R Audio provides right audio connection and connector is usually red.<br />
• L Audio provides left audio connection and connector is usually white.<br />
• Y/Video P B<br />
P R<br />
Unlike a single video input, component (Y P B<br />
P R<br />
) video<br />
maintains the video signal as three separate parts through these three jacks.<br />
To ensure maximum picture quality, use three video cables or component<br />
video cables for the Y P B<br />
P R<br />
connections. Accepts 480i, 480p, 720p, and 1080i<br />
signals. If you’re connecting to a device with a Video jack instead, you can<br />
still use the Y/Video jack.<br />
Note: Also, remember to connect the left and right audio cables because the<br />
Y, Pb, Pr cables carry only the picture signal, not the sound.<br />
INPUT 3 COMPONENT/COMPOSITE INPUT Provides connection to an<br />
additional optional video device, such as a DVD player or satellite receiver. The<br />
jacks are the same as described above for INPUT 1.<br />
INPUT 2 and 4 COMPOSITE INPUTS Connect an NTSC (analog) device. These<br />
jacks are used for most audio/video connections between devices. The audio/<br />
video jacks are often color coded (yellow for video, red for right audio, and white<br />
for left audio).<br />
• R Audio provides right audio connection and connector is usually red.<br />
• L Audio provides left audio connection and connector is usually white.<br />
• V (Video) provides composite video connection and connector is usually<br />
yellow.<br />
• S-VIDEO Lets you connect an S-Video cable for better picture quality to a<br />
device with S-Video capability, such as a VCR or DVD player. The S-Video<br />
jack provides better picture quality than the composite video jacks because<br />
the color part of the signal is separated from the black and white part of the<br />
picture.<br />
When using S-Video, make sure to connect the two audio cables as well as<br />
the S-Video connector.<br />
INPUT 4 COMPOSITE INPUT Provides connection to an additional optional<br />
video device, such as a DVD player or satellite receiver. The jacks are the same as<br />
described above for INPUT 2.<br />
18 Chapter 1
Connections & Setup<br />
FIXED/VARIABLE<br />
AUDIO OUTPUT<br />
L<br />
FIXED/VARIABLE AUDIO OUTPUTS<br />
• L and R Provides fixed/variable sound for use with an audio amplifier.<br />
R<br />
HDMI 1 INPUT<br />
DIGITAL<br />
AUDIO<br />
OUTPUT<br />
(OPTICAL)<br />
HDMI 2 INPUT<br />
ANTENNA/CABLE<br />
INPUT<br />
HDMI 1 and 2 INPUTS High-Definition Multimedia Interface/Digital Visual<br />
Interface Provides an uncompressed digital interface that carries both video<br />
and audio data by way of an integrated mini-plug cable. Since HDMI is based<br />
on Digital Visual Interface (DVI), the jack on the back of your TV is also compatible<br />
with DVI devices.<br />
Note: If you connect a device with a DVI jack to one of the HDMI inputs,<br />
you’ll need an HDMI to DVI adapter. Also, connect audio cables to an<br />
input that is not in use. An example is shown on page 12. Then go to the<br />
Advanced Audio menu and select DVI Audio Input to choose the input<br />
you’re using to receive audio.<br />
DIGITAL AUDIO OUTPUT (OPTICAL) Use a digital optical cable (or SPDIF<br />
cable) to connect your TV to a compatible Dolby Digital or PCM receiver or<br />
decoder. Dolby Digital Technology offers theatre-quality sound (six audio<br />
channels). If you own a receiver that uses an optical cable input, you can use<br />
an optical cable to connect the TV to that receiver for the best sound quality.<br />
Go to the Digital Audio Out screen in the Audio menu to select Auto Select or<br />
PCM as the output for this jack.<br />
Note: This TV’s optical digital audio output jack fully complies with<br />
the international standard governing this type of jack (IEC958), and<br />
is designed for connection to a Dolby Digital (AC-3 ® or PCM) receiver<br />
or decoder. Older equipment, some of which is not fully compliant with<br />
IEC958, may not be compatible with the Dolby Digital bitstream. Such<br />
a connection using anything other than a Dolby Digital (AC-3 or PCM)<br />
receiver or decoder could create a high noise level, causing damage to<br />
headphones or speakers.<br />
ANTENNA/CABLE INPUT Used to connect a coaxial cable to receive the<br />
signal from cable, a cable box or an off-air antenna.<br />
ANTENNA INPUT<br />
Chapter 1 19
MENU CH CH VOL — VOL + POWER<br />
Connections & Setup<br />
The Front/Side of Your TV<br />
Side Input Jacks<br />
The TV has side input jacks for convenience in connecting a camcorder, digital camera, or video<br />
game system. Please note the illustration below is just an example of how these jacks might<br />
appear.<br />
Notes: When you plug in headphones, the TV’s internal speakers are muted. Use the VOL<br />
up or down button to control the volume.<br />
When connecting a device that uses a mono cable, such as some camcorders, use the<br />
L/MONO input jack to get sound from both speakers.<br />
Power Indicator Light Status<br />
AUDIO IN VIDEO S-VIDEO<br />
L/MONO R IN<br />
On<br />
Off<br />
TV is on<br />
TV is off (standby mode)<br />
HEADPHONE<br />
Blinks<br />
Light blinks 5 times, pauses, and blinks again 5 times:<br />
Lamp is trying to turn on. If the TV doesn’t turn on<br />
after 5 minutes and then the light blinks steadily for<br />
one minute, one of the following options is possible:<br />
Power button<br />
and indicator<br />
Lamp door may be open. Face the back of the TV.<br />
Locate the door at the bottom of the TV and close it.<br />
Turn off the TV and turn back on. The lamp should<br />
turn on.<br />
MENU /OK<br />
CH CH VOL VOL<br />
Lamp may be dead. You can replace the lamp<br />
yourself. Go to page 56 for lamp replacement<br />
information.<br />
Front Panel<br />
Notes: The front panel illustration shows a typical front panel layout. The<br />
exact look may be different from your TV.<br />
If you use the Front Button Block feature, the front panel no longer provides<br />
access to the menus. The Front Button Block feature disables all front panel<br />
buttons but not the jacks. For more information, see Chapter 3.<br />
If you cannot locate your remote, you can use the front panel of your TV to operate many of the TV’s features.<br />
MENU/OK Brings up the Main menu. When the menu system is displayed, pressing MENU/OK selects highlighted items.<br />
CH6 Scans down through the channel list. In the menu system, it moves the highlight down and adjusts menu controls.<br />
CH5 Scans up through the channel list. In the menu system, it moves the highlight up and adjusts menu controls.<br />
VOL3 Decreases the volume. In the menu system, it moves the highlight left to items and adjusts menu controls.<br />
VOL4 Increases the volume. In the menu system, it moves the highlight right to items and adjusts menu controls.<br />
(Power button and indicator) Turns the TV on and off. The indicator lights when TV is on. Your HDTV’s lamp has a<br />
cool-down period when the TV is turned off, and a warm up period when the TV is turned on. If you try to turn the TV on<br />
during a cool-down, you will hear audio and then the picture will be displayed after a few moments. This could take up to<br />
one minute. For different light status of the indicator, see above.<br />
20 Chapter 1
Chapter 2: Using the Remote Control<br />
The Buttons on the Remote Control<br />
ON•OFF<br />
Arrows (up, down, left, right) Use to move through the on-screen menus.<br />
TV<br />
SAT-AUX DVD<br />
GO BACK<br />
FAV<br />
§<br />
(0-9) Number Buttons Enter channel numbers and time settings. Also used in the TV menu<br />
to make selections.<br />
VOL<br />
CH<br />
MUTE<br />
INFO<br />
ZZZ<br />
MENU<br />
SLEEP<br />
ZOOM - ZOOM +<br />
CLEAR<br />
GUIDE<br />
PRESETS<br />
?!+- DEF<br />
ABC<br />
GHI<br />
MNO<br />
JKL<br />
PQRS<br />
WXYZ<br />
TUV<br />
INPUT<br />
SUB CH<br />
_,.:=$<br />
To enter a digital channel with a sub-channel, enter the main channel, then to enter the subchannel,<br />
press the SUB CH button and press OK.<br />
CH + or CH – Scrolls up or down through the channel or input list. Press once to change<br />
the channel up or down; press and hold to continue changing channels. In DVD mode, if<br />
programmed, advances or reverses the chapters with some DVD players.<br />
CLEAR Removes on-screen menus and displays. Cancels the commercial skip timer if it is set.<br />
DVD Places the remote in DVD mode. If Auto Tuning is enabled, pressing the DVD button<br />
turns on the TV and tunes to the correct Video Input Channel for RCA devices. This button<br />
lights when you press a valid button in DVD mode (see Modes of Operation on page 24 for<br />
more details).<br />
FAV (Favorites) When the FAV key is pressed, the TV will display the “Channel List” menu<br />
within the Channel Setup menu. From there, the user can edit the “Favorite Channels List.<br />
GO BACK Returns you to the previous channel or previous screen in the menu system.<br />
GUIDE Displays the Channel Guide List which allows you to see programming information.<br />
Tip<br />
Remote model<br />
R301G1<br />
To turn off most RCA devices<br />
that are connected to the TV,<br />
press ON•OFF twice within two<br />
seconds and hold remote steady<br />
until the mode indicator turns<br />
off.<br />
INFO Displays the Channel Banner with channel and viewing information. Press again to<br />
remove the banner.<br />
INPUT Toggles through the TV’s available input sources (INPUT 1, INPUT 2, INPUT 3, INPUT<br />
4, Front Input, HDMI1, HDMI2, and last-active channel.<br />
MENU Makes Main Menu appear and disappear.<br />
MUTE Reduces the TV’s volume to its minimum level. Press again to restore volume. The<br />
Audio Output menu must be set to Variable Level, Speakers On to control the TV’s volume.<br />
To program this button to work with an audio system, follow the instructions for Volume<br />
Punchthrough Feature on page 25.<br />
OK When a menu item is highlighted, press OK to select the item.<br />
ON•OFF Turns the TV on or off. Your HDTV is equipped with a special lamp system. In<br />
order to preserve the life of the lamp, the TV must warm up and cool down properly when you<br />
turn the TV on and off. When you turn the TV off, the screen turns blue and fades to black.<br />
While the screen is blue, you can still turn the TV back on. If the screen is black when you try<br />
to turn it on, the TV’s lamp may be in its cool-down cycle. The TV’s audio comes on, then the<br />
picture is displayed after a few moments.<br />
In other modes (SAT•AUX, DVD), and if programmed, turns the device on and off.<br />
PRESETS In TV mode, toggles through the Picture Presets for the input you’re currently<br />
tuned. In DVD mode, displays the different angles, if available, for the DVD you’re watching.<br />
REVERSE, PLAY, FORWARD, RECORD, STOP, PAUSE If programmed, provides transport<br />
control for some remote-controllable VCRs, DVD players, satellite receivers, etc. The RECORD<br />
button has a safety feature which means you must press the button two times to record.<br />
Graphics contained within this publication are for representation only. 21
Using the Remote Control<br />
SAT•AUX Places the remote in SAT/AUX box mode. If Auto Tuning is enabled, turns on the TV and tunes<br />
it to the satellite or auxiliary mode to operate a device (such as a cable box, satellite receiver, VCR, DVD, or<br />
audio receiver) that you’ve programmed for RCA devices. This button lights when you press a valid button in<br />
SAT•AUX mode (see Modes of Operation on page 24 for more details).<br />
SLEEP When the SLEEP key is pressed, the TV will display the Time Menu with the Sleep Timer screen open<br />
and the toggle box on the right side already highlighted. Press the right arrow button or OK button to advance<br />
the Sleep Timer setting to the next 15-minute increment.<br />
SUB CH (Subchannel) When entering a digital channel that has a subchannel, press this button to access<br />
the subchannel entry field. Once the channel is entered, press the button to tune to the channel.<br />
TV Places the remote in TV mode. Turns on the TV and tunes to the last-viewed TV channel or input. This<br />
button lights when you press a valid button in TV mode (see Modes of Operation on page 24 for more details).<br />
VOL – or VOL + Decreases or increases the TV’s volume. The TV Audio Output menu must be set to<br />
Variable Level, Speakers On to control the TV’s volume. To program this button to work with an audio system,<br />
follow the instructions for Volume Punchthrough Feature on page 25.<br />
ZOOM+/– When viewing a channel, press to change the screen formats: Normal, Stretch, Squeeze, and<br />
Zoom. Go to page 42 for more information on screen formats.<br />
22 Chapter 2
Using the Remote Control<br />
ON•OFF<br />
Programming the Remote to Operate Other<br />
Devices<br />
VOL<br />
TV<br />
SAT-AUX DVD<br />
GO BACK<br />
FAV<br />
§<br />
CH<br />
The universal remote can be programmed to operate many brands of remote-controllable VCRs,<br />
audio devices, DVD players, cable boxes, satellite receivers and other devices. In addition to being<br />
programmed to operate your television, it’s already programmed to operate some RCA devices.<br />
MUTE<br />
INFO<br />
A second and third RCA TV can be programmed to any device button, except the TV button.<br />
ZZZ<br />
MENU<br />
SLEEP<br />
ZOOM - ZOOM +<br />
CLEAR<br />
GUIDE<br />
PRESETS<br />
Notes: The TV button can’t be programmed on this remote to control any device; it<br />
controls only this TV.<br />
The remote may not be compatible with all models of all brands of devices. It also may not<br />
operate all functions of your device.<br />
?!+- DEF<br />
ABC<br />
GHI<br />
PQRS<br />
INPUT<br />
JKL<br />
TUV<br />
_,.:=$<br />
MNO<br />
WXYZ<br />
SUB CH<br />
Find Out If You Need to Program the Remote<br />
To determine whether the universal remote needs to be programmed to operate one of the<br />
devices connected to your TV, such as a VCR, do the following:<br />
1. Turn on the device (in this example, a VCR).<br />
2. Point the remote at the device.<br />
3. Press the corresponding device button (in this example, SAT•AUX).<br />
Remote model<br />
R301G1<br />
The darkened buttons<br />
are the device buttons<br />
that can be programmed.<br />
4. Press ON•OFF to see if the VCR responds. If the VCR doesn’t respond, you need to program<br />
the remote to operate it.<br />
TV<br />
SAT-AUX<br />
ON•OFF<br />
DVD<br />
FAV<br />
§<br />
Programming the Remote<br />
There are three ways to program the remote control to operate other devices: Direct Entry, <strong>Manual</strong><br />
Code Search, and Automatic Code Search. If you have recently purchased the device you want to<br />
control or if the device has many codes, you might want to try the manual code search first.<br />
GO BACK<br />
VOL<br />
MUTE<br />
INFO<br />
CH<br />
Using Direct Entry<br />
1. Turn on the device you want to control.<br />
ZZZ<br />
MENU<br />
SLEEP<br />
ZOOM - ZOOM +<br />
2. Look up the brand and code number(s) for the device in the code list at the end of this<br />
section.<br />
CLEAR<br />
PRESETS<br />
GUIDE<br />
3. On your remote control, simultaneously press and hold the ON•OFF and MUTE buttons<br />
(approximately 3 seconds) until a device button remains lit. Then release the buttons.<br />
?!+- DEF<br />
ABC<br />
GHI<br />
MNO<br />
JKL<br />
PQRS<br />
WXYZ<br />
TUV<br />
INPUT<br />
SUB CH<br />
_,.:=$<br />
4. Press and release the device button (SAT•AUX, DVD) you want to program.<br />
5. Enter a three digit code from the code list.<br />
6. To test the code you’ve programmed for that device button, point the remote at the device and<br />
then press ON•OFF to see if the device responds to the remote control.<br />
If the device turns off, you’ve entered the correct programming code for your device. Circle<br />
the code you entered for future reference.<br />
You’ll use these<br />
darkened buttons for<br />
Direct Entry.<br />
If the device doesn’t turn off, repeat these steps until you’ve tested all codes for your device’s<br />
brand or try to run a manual code search.<br />
Chapter 2 23
Using the Remote Control<br />
Using <strong>Manual</strong> Code Search<br />
Note: Before using manual code search, you must use Direct Entry first. This lets the remote know<br />
which type of device to begin searching codes. Then proceed with the following steps.<br />
1. Turn on the device you want to control.<br />
2. On your remote control, simultaneously press and hold the ON•OFF and MUTE buttons (approximately<br />
3 seconds) until a device button remains lit. Then release the buttons.<br />
3. Press and release the device button (SAT•AUX, DVD) you want to program.<br />
4. Repeatedly press and release the ON•OFF button, watching for the device to respond. If it does turn<br />
off, press and release the OK button within 3 seconds to save the code. If you accidentally passed the<br />
code before saving it, press the left arrow button to backtrack through the codes; then use the right<br />
arrow button to go forward through the codes again.<br />
When all codes have been searched, the device button flashes 3 times, then the remote exits manual code<br />
search and returns to normal operation.<br />
Using Automatic Code Search<br />
1. Turn on the device you want to control.<br />
2. On your remote control, simultaneously press and hold ON•OFF and MUTE (approximately 3 seconds)<br />
until a device button remains lit. Then release the buttons.<br />
3. Press and release the device button you want to program.<br />
4. Press and release the ON•OFF button once. There is a delay of approximately 6 seconds before the<br />
remote starts the code search.<br />
The device buttons blinks each time the remote control sends a code to test with your device. Keep<br />
pointing the remote at the device.<br />
5. Once the device turns off, quickly press the OK button to save the code. If you accidentally passed the<br />
code before saving it, press the left arrow button to backtrack through the codes; then use the right<br />
arrow button to go forward through the codes again.<br />
When all codes have been searched, the device button flashes 3 times, then the remote exits automatic code<br />
search and returns to normal operation.<br />
How to Use the Remote After You’ve Programmed It<br />
Once the remote has been programmed successfully, you are ready to use it to operate your devices.<br />
To Operate the Device:<br />
• Press the appropriate device button (SAT•AUX, DVD) to set the remote to control the device, for<br />
example, press DVD to control your DVD player.<br />
• Press ON•OFF to turn the device ON or OFF.<br />
• Use the remote buttons that apply to that device.<br />
Note: The remote control may not be compatible with all brands and models of devices.<br />
Modes of Operation<br />
The button corresponding to the mode the remote is in lights up when you press any button that works in<br />
that mode. For example, if you’re in TV mode and you press the VOL+ button, the TV button lights up. This<br />
tells you that the command to increase the volume is being sent to the TV (and not the satellite receiver, for<br />
example).<br />
24 Chapter 2
Volume Punchthrough Feature<br />
Using the Remote Control<br />
You may find this feature helpful if you’ve connected your devices to an audio system, and you<br />
want to use the TV’s remote control to operate the volume for a device that is connected to the<br />
audio system. An example follows:<br />
Let’s say you’ve connected your DVD player to your audio system. You’ve also programmed your<br />
TV remote control to operate your DVD player. Since the DVD player sends its volume through<br />
the audio system, you would have to bounce back and forth between two remote controls: the<br />
audio system’s remote to adjust the volume and the TV’s remote control to operate the DVD<br />
player.<br />
The Volume Punchthrough feature eliminates the need for you to use two remote controls and<br />
saves a button press when you’re using the TV remote to adjust the volume. In effect, you are<br />
telling the TV remote to retrieve and send volume commands from the audio system whenever<br />
the TV remote is in DVD mode.<br />
Therefore, after you’ve successfully set up the Volume Punchthrough feature, whenever the TV<br />
remote is in DVD mode (press the DVD button) and you want to adjust the volume, you only<br />
have to press the VOL +/- or MUTE buttons. Follow the instructions below to set up Volume<br />
Punchthrough.<br />
1. On your remote control, simultaneously press and hold the ON•OFF and MUTE buttons<br />
(approximately 3 seconds) until a device button remains lit. Then release the buttons.<br />
2. Press and hold the MUTE button until the device button blinks off, then release the MUTE<br />
button.<br />
3. Press and release the device button that you programmed to operate the audio system<br />
(receiver or amplifier).<br />
4. Press and release the MUTE button.<br />
5. Now, test it by turning on your audio system.<br />
6. Turn on the device that is connected to the audio system (satellite receiver, for example).<br />
7. Put the TV’s remote in SAT•AUX mode by pressing the SAT•AUX button.<br />
8. Press VOL+ or VOL-. The volume from the audio system should increase or decrease<br />
accordingly.<br />
Deleting ALL Volume Punchthrough Commands<br />
To delete all programmed Volume Punchthrough settings and return the remote control back to<br />
the factory default:<br />
1. Simultaneously press and hold the ON•OFF and MUTE buttons (approximately 3 seconds)<br />
until a device button remains lit. Then release the buttons.<br />
2. Press and hold the MUTE button until the device button blinks off, then release the MUTE<br />
button.<br />
3. Press and release the MUTE button.<br />
4. The remote returns to normal Volume/Mute control.<br />
Chapter 2 25
Using the Remote Control<br />
Using the INPUT Button<br />
1. Repeatedly press the INPUT button to scroll through the available input sources until you find the<br />
input associated with the device (such as VCR or DVD player) you want to view.<br />
2. Once you find the input source you want, stop pressing INPUT.<br />
• If you tune to INPUT 1 and your VCR is connected to that input, you will be able to view your<br />
VCR. To play, stop, or rewind the VCR tape using the remote that came with your TV, you<br />
must first press the SAT•AUX button (the button programmed to the VCR).<br />
There are other ways of selecting a Video Input Channel:<br />
• Program the device buttons (SAT•AUX, DVD) on the remote control to automatically tune to the<br />
correct Video Input Channel when pressed. For more details on Auto Tuning, see Chapter 3.<br />
• When viewing an input, press INPUT to go back to viewing channels or use the number buttons<br />
to enter the channel number.<br />
Remote Code List<br />
Note: The codes are programmable to any of the device buttons (SAT•AUX, DVD) on the remote.<br />
Audio Codes<br />
AIWA ....................................................... 839 842 851 860<br />
APEX ............................................................................ 436<br />
BOSE ............................................................................ 672<br />
CARVER ........................................................................ 825<br />
CITIZEN ....................................................................... 826<br />
CRITERION .................................................................. 448<br />
DENON .......................................................... 803 817 852<br />
DELPHI ......................................................................... 708<br />
FISHER .................................................................. 814 821<br />
GOLDSTAR ................................................................... 766<br />
HARMAN KARDON .............................................. 804 818<br />
JVC .................................................................. 790 813 819<br />
KENWOOD ............................... 683 808 816 828 832 869<br />
KOSS ............................................................................ 415<br />
MAGNAVOX ............................................ 796 814 915 756<br />
MARANTZ ............................................................. 688 824<br />
MITSUBISHI ................................................................. 877<br />
NAD ................................................................ 721 739 743<br />
NEO .............................................................................. 725<br />
NORCENT .................................................................... 907<br />
ONKYO ................................................... 805 811 812 892<br />
OPTIMUS .................... 667 747 748 749 751 752 754 793<br />
PANASONIC ................ 791 810 815 823 863 864 891 950<br />
PHILIPS ............................................ 755 814 823 824 825<br />
PIONEER .......................................... 837 866 867 878 893<br />
RADIO SHACK ..... 706 754 793 806 865 866 867 868 875<br />
878 879<br />
RCA ......... 717 726 772 781 795 827 845 866 867 870 871<br />
.................................................... 872 875 878 879 449 895<br />
REALISTIC .................................................................... 822<br />
SABA ............................................................................ 894<br />
SAMSUNG .................................................................... 454<br />
SANYO ......................................................................... 705<br />
SCOTT .......................................................................... 768<br />
SHARP ............................................................ 671 684 809<br />
SHERWOOD ........................................... 706 806 858 859<br />
SKYFI ........................................................................... 725<br />
SONY ......................................... 323 778 779 785 797 798<br />
............................................. 799 833 834 835 836 843 909<br />
TAO .............................................................................. 725<br />
TEAC ................................................ 710 807 855 856 857<br />
TECHNICS ................................. 791 810 815 823 863 864<br />
TEVION ........................................................................ 448<br />
VENTURER ................................................................... 745<br />
XM RADIO ............................................................ 708 725<br />
YAMAHA .............. 801 802 838 840 841 846 847 848 849<br />
ZENITH .. 676 730 749 759 765 766 784 814 787 850 405<br />
Cable<br />
ABC ....................................................461 464 465 466 463<br />
ADELPHIA ...............................................................512 511<br />
ALLEGRO ................................................................525 524<br />
AMERICAST ....................................................................527<br />
ANTRONIX ..............................................................468 469<br />
ARCHER ....................................................468 469 470 471<br />
AT&T ..............................................................................511<br />
BELL SOUTH .................................................................527<br />
CABLETENNA ................................................................468<br />
CABLEVIEW ...................................................................468<br />
CABLEVISION ................................................................506<br />
CENTURY .......................................................................471<br />
CITIZEN .........................................................................471<br />
COGECO ........................................................................511<br />
COLOR VOICE ........................................................472 473<br />
COMCAST ......................................................................511<br />
COMTRONICS .........................................................474 475<br />
CONTEC .........................................................................476<br />
DIGITAL MUSIC EXPRESS .............................................514<br />
EASTERN ........................................................................477<br />
EVERQUEST ...................................................................474<br />
GARRARD ......................................................................471<br />
GC ELECTRONICS .........................................................469<br />
GEMINI ...................................................................536 479<br />
GE ...................................................................................549<br />
GENERAL INSTRUMENT (GI) ....509 461 465 511 513 518<br />
.............................................................530 531 514 464 463<br />
HAMLIN ....................................................461 480 481 482<br />
HITACHI .........................................................................463<br />
ILLICO ............................................................................506<br />
JASCO .............................................................................471<br />
JERROLD .......................509 461 465 518 463 464 520 526<br />
MAGNAVOX ...................................................................485<br />
MEMOREX .....................................................................486<br />
MOTOROLA ....509 465 513 518 530 531 464 511 526 463<br />
MOVIE TIME ..................................................................487<br />
NSC .................................................................................487<br />
OAK .........................................................................476 489<br />
PACE ...............................................................................532<br />
PANASONIC ............................................................460 508<br />
PARAGON ...............................................................486 488<br />
PHILIPS .......................................471 479 485 490 491 492<br />
PHILIPS-MAGNAVOX .............................................505 534<br />
PIONEER ...................................................478 506 493 494<br />
PULSAR ..........................................................................486<br />
RADIO SHACK .................................................505 534 525<br />
RCA ...................................................................460 471 507<br />
REALISTIC .....................................................................469<br />
REGAL ...........................................................................482<br />
REGENCY ......................................................................477<br />
REMBRANDT ................................................................463<br />
ROGERS ........................................................................506<br />
RUNCO ..........................................................................486<br />
SAMSUNG ..............................................................474 494<br />
SCIENTIFIC ATLANTA ........498 497 506 535 512 466 496<br />
SHAW ............................................................................511<br />
SIGNAL ..........................................................................474<br />
SIGNATURE ..................................................................463<br />
SL MARX .......................................................................474<br />
SPRUCER .......................................................................460<br />
STANDARD ...................................................................499<br />
STARCOM ...............................................................461 518<br />
STARGATE .....................................................................474<br />
STAR SIGHT ..................................................................507<br />
STAR TRAK ...................................................................516<br />
TANDY ..........................................................................500<br />
TELEVIEW .....................................................................474<br />
TEXSCAN ......................................................................499<br />
TIME WARNER ..............................................................506<br />
TOCOM ....................................................464 513 520 501<br />
TOSHIBA .......................................................................486<br />
TV86 ..............................................................................487<br />
UNIKA .............................................................468 469 471<br />
UNITED CABLE ............................................................461<br />
UNIVERSAL ................................468 469 470 471 502 524<br />
VIDEOWAY ...................................................................504<br />
VIDEOTRON .................................................................506<br />
VIEWSTAR ................................................475 485 487 500<br />
VIDEO TECH ................................................................550<br />
ZENITH ...............................503 525 471 486 521 522 523<br />
ZENITH NETWORK ......................................................527<br />
26 Chapter 2
Using the Remote Control<br />
CD<br />
ADC ............................................................................... 660<br />
ADCOM .................................................................. 661 714<br />
AIWA ............................................................... 663 707 842<br />
AKAI ................................................................ 715 737 830<br />
AUDIO TECHNICA ....................................................... 665<br />
CALIFORNIA AUDIO LABS .......................................... 716<br />
CAPETRONIC ................................................................ 669<br />
CARVER .................................................... 666 667 668 825<br />
CASIO ............................................................................ 777<br />
CITIZEN ........................................................................ 826<br />
CURTIS MATHES .......................................................... 777<br />
DENON ......................................................................... 670<br />
EMERSON .............................................................. 661 673<br />
FISHER .............................................. 667 675 676 677 718<br />
GENEXXA ....................................................... 673 678 719<br />
GOLDSTAR .................................................................... 720<br />
HARMAN KARDON ............................................... 680 691<br />
HITACHI ........................................................................ 678<br />
INKEL ............................................................................ 681<br />
JC PENNEY ............................................................ 690 777<br />
JVC .......................................................................... 682 813<br />
KENWOOD ................................ 679 683 685 727 728 828<br />
KRELL ............................................................................ 666<br />
KYOCERA ..................................................................... 660<br />
LUXMAN .................................................. 686 687 729 738<br />
LXI ................................................................................. 777<br />
MAGNAVOX .................................................... 666 731 800<br />
MARANTZ ................................................ 666 688 689 732<br />
MCS ........................................................................ 690 777<br />
MGA .............................................................................. 691<br />
MISSION ........................................................................ 666<br />
MITSUBISHI ........................................................... 691 692<br />
NAD ........................................................................ 721 743<br />
NAKAMICHI .................................................... 693 694 831<br />
NEC ............................................................................... 690<br />
NIKKO ............................................................. 665 673 676<br />
NSM ............................................................................... 666<br />
ONKYO .................................................... 695 696 722 811<br />
OPTIMUS 667 668 678 679 697 698 699 700 744 747 751<br />
PANASONIC ...................................... 716 733 740 820 862<br />
PHILIPS ........................................................... 666 731 825<br />
PIONEER ............................. 678 701 702 719 750 837 876<br />
PROTON ....................................................................... 666<br />
QUASAR ........................................................................ 716<br />
RADIO SHACK ............. 668 699 706 750 786 868 874 876<br />
RCA ................. 661 667 703 723 750 795 844 873 874 876<br />
REALISTIC .................... 661 667 669 673 678 689 697 699<br />
ROTEL ........................................................................... 666<br />
SAE ................................................................................ 666<br />
SAMSUNG ..................................................................... 741<br />
SANSUI ..................................................... 666 704 723 734<br />
SANYO .............................................. 667 705 718 735 742<br />
SCOTT .................................................................... 661 673<br />
SEARS .............................................................. 679 689 777<br />
SHARP .................................................................... 679 689<br />
SHERWOOD ..................................... 681 689 698 706 859<br />
SHURE ........................................................................... 690<br />
SONY ........................................................ 707 792 794 800<br />
STS ................................................................................. 660<br />
SYLVANIA ...................................................................... 666<br />
SYMPHONIC ................................................................. 709<br />
TEAC ................................... 676 689 699 709 710 711 856<br />
TECHNICS ................................................ 716 733 820 862<br />
THETA DIGITAL ........................................................... 731<br />
TOSHIBA ....................................................................... 721<br />
VICTOR ......................................................................... 682<br />
YAMAHA ........................................... 665 712 713 724 846<br />
ZENITH ............................................. 676 730 759 784 850<br />
DVD<br />
ADVENT ........................................................................ 922<br />
AFREEY ......................................................................... 417<br />
AIWA ............................................................................. 414<br />
AKAI ....................................................................... 395 435<br />
AMES ............................................................................. 431<br />
AMW ....................................................................... 917 918<br />
ANABA .......................................................................... 961<br />
APEX 386 390 391 392 424 430 436 439 445 457 459 938<br />
949 913 401<br />
ASPIRE ........................................................................... 933<br />
A-TREND ....................................................................... 393<br />
AUDIOVOX .................................................................. 921<br />
AXION ........................................................................... 921<br />
B & K ............................................................................ 978<br />
BLAUPUNKT ................................................................. 430<br />
BODYSONIC ................................................................. 417<br />
BOSE ............................................................................. 672<br />
BROKSONIC ................................................... 394 932 967<br />
CENTRIOS ..................................................................... 951<br />
CHANGHONG .............................................................. 401<br />
CINEVISION .................................................................. 405<br />
CLASSIC .................................................................. 401 431<br />
COBY .................................. 926 946 947 916 445 928 894<br />
CONCEPT ...................................................................... 430<br />
CRITERION ................................................................... 448<br />
CURTIS INTERNATIONAL ..................................... 929 928<br />
CYBERHOME .................................................. 393 985 939<br />
CYTRON ................................................................. 446 388<br />
DAEWOO .......................................... 440 441 444 971 965<br />
DENON .................................................................. 400 421<br />
DENZEL ......................................................................... 428<br />
DESAY ........................................................................... 958<br />
DIAMOND VISION ......................................... 948 892 896<br />
DIGIX ............................................................................ 934<br />
DIGITREX ..................................................................... 445<br />
DISNEY ......................................................................... 458<br />
DUAL ................................................. 447 984 956 428 446<br />
DURABRAND ......................................................... 449 405<br />
DVD 2000 ...................................................................... 402<br />
ELTA ....................................................................... 434 435<br />
EMERSON ......................................... 405 456 458 940 899<br />
ESA ................................................................................ 956<br />
FARENHEIT ................................................................... 960<br />
FISHER .......................................................................... 416<br />
FUNAI ..................................................................... 456 458<br />
GE ........................................................................... 409 430<br />
GOLDSTAR .................................................................... 405<br />
GO-VIDEO ............ 407 426 455 431 937 971 454 902 901<br />
GPX ........................................................................ 936 944<br />
GRADIENTE .................................................................. 415<br />
GREENHILL ................................................................... 430<br />
HAAZ ...................................................................... 451 452<br />
HAIER ............................................................................ 935<br />
HARMAN KARDON ...................................................... 427<br />
HITACHI ................................................... 404 407 419 428<br />
HITEKER ....................................................................... 445<br />
HUMAX ......................................................................... 912<br />
ILO ................................................................................. 959<br />
INFINITY ....................................................................... 417<br />
INSIGNIA .......................................... 405 456 905 921 430<br />
INITIAL .......................................................................... 430<br />
INTEGRA ....................................................................... 422<br />
JBL ................................................................................. 427<br />
JVC ..................................................... 406 418 923 964 900<br />
JWIN ................................................................ 390 893 895<br />
KAWASAKI ............................................................. 945 449<br />
KENWOOD ............................................................ 400 429<br />
KISS ............................................................................... 428<br />
KLH ................................................................. 430 906 386<br />
KONKA ............................................. 410 411 412 413 905<br />
KOSS ...................................................................... 415 388<br />
KXD ............................................................................... 894<br />
LASONIC ................................................................ 451 948<br />
LENOXX ................................................................. 931 435<br />
LG .................................................................... 405 972 907<br />
LINN .............................................................................. 443<br />
LITEON ........................................................... 982 902 898<br />
MAGNAVOX .......... 398 408 979 981 980 456 915 914 969<br />
MARANTZ ......................................... 398 405 408 423 981<br />
MAXENT ........................................................................ 923<br />
MEDION ................................................... 911 446 903 896<br />
MEMOREX .................................................................... 446<br />
MICROSOFT .................................................................. 409<br />
MINTEK ......................................................................... 430<br />
MITSUBISHI .................................................................. 402<br />
MUSTEK ........................................................................ 431<br />
MYRON & DAVIS .......................................................... 962<br />
NAD ........................................................................ 405 433<br />
NAKAMICHI .................................................................. 432<br />
NESA ............................................................................. 430<br />
NEXXTECH .............................................. 952 954 955 956<br />
NORCENT ......................................... 926 982 927 925 928<br />
ONKYO .................................................................. 422 975<br />
OPTIMUS ...................................................................... 404<br />
ORION .......................................................................... 394<br />
ORITRON ...................................................................... 415<br />
PANASONIC ........................ 387 396 400 437 974 950 970<br />
PACIFIC ......................................................................... 446<br />
PHILIPS .......... 398 408 423 755 979 981 980 456 458 969<br />
PHILIPS-MAGNAVOX ....................... 398 408 423 979 980<br />
PIONEER .................................... 403 404 976 977 968 909<br />
POLAROID ...................................................... 385 949 957<br />
POLK AUDIO .................................................. 398 408 981<br />
PORTLAND ................................................................... 435<br />
PROLINE ....................................................................... 415<br />
PROSCAN ............................................................... 409 890<br />
PROSONIC .................................................................... 926<br />
RADIO SHACK ......................................... 449 453 919 920<br />
RCA ............................................. 409 430 449 453 920 890<br />
REGENT ........................................................................ 931<br />
REOC ............................................................................. 451<br />
ROSEN ........................................................................... 930<br />
ROTEL ........................................................................... 406<br />
SABA ............................................................................. 919<br />
SAMSUNG .................................. 407 454 455 942 963 891<br />
SAMPO .......................................................................... 417<br />
SANSUI .......................................................................... 394<br />
SANYO ................................................................... 416 904<br />
SEARS ..................................................................... 394 456<br />
SEG ................................................................................ 428<br />
SHARP .................................................................... 397 897<br />
SHERWOOD ................................................................. 425<br />
SHINCO ......................................................................... 430<br />
SHINSONIC ................................................................... 430<br />
SONIC BLUE ................................................................. 937<br />
SONY .......................................... 987 988 989 389 399 986<br />
SOUNDSTORM ...................................................... 910 911<br />
SUNGALE ...................................................................... 953<br />
SUPERSCAN .................................................................. 456<br />
SV2000 ........................................................................... 456<br />
SYLVANIA ............................................................... 456 458<br />
SYMPHONIC ................................................... 456 458 899<br />
TEAC ...................................................................... 404 449<br />
TECHNICS ..................................................................... 400<br />
TECHWOOD ................................................................. 433<br />
TERAPIN ....................................................................... 943<br />
TEVION ............................... 388 446 447 448 450 451 452<br />
THETA DIGITAL ........................................................... 404<br />
TIVO ....................................................................... 912 909<br />
TOSHIBA ........................................... 394 398 973 924 983<br />
TREDEX ......................................................................... 941<br />
UNITED ......................................................................... 449<br />
VENTURER .................................................................... 449<br />
WHARFEDALE ....................................................... 442 417<br />
WHITE WESTINGHOUSE ............................................ 458<br />
X-BOX ........................................................................... 409<br />
XENIUS .......................................................................... 388<br />
YAMAHA .................................................. 400 420 979 980<br />
YAMAKAWA ........................................................... 438 428<br />
ZENITH .................................................................. 405 907<br />
DVD/VCR Combo Codes<br />
Where the code is listed as [### ###] the first is for the<br />
DVD and the second is for the VCR. Otherwise just the<br />
one code operates both the DVD and the VCR.<br />
APEX ............................................................................. 949<br />
BROKSONIC .......................................................... 394 967<br />
CINEVISION ......................................................... [405 245]<br />
DAEWOO ...................................................................... 971<br />
DIAMOND VISION ....................................................... 896<br />
DURABRAND ....................................................... [405 245]<br />
EMERSON ..................................................... 456 [458 227]<br />
FISHER ................................................................. [416 267]<br />
FUNAI ............................................................ 456 [458 227]<br />
GO-VIDEO ............................................... 407 426 455 971<br />
HITACHI ............................................................... [419 227]<br />
INSIGNIA ............................................................. [405 245]<br />
JVC ................................................................................. 418<br />
LG .................................................................................. 907<br />
MAGNAVOX ...................................456 [914 286] [969 286]<br />
MEDION ........................................................................ 896<br />
PANASONIC .................................................................. 437<br />
PHILIPS ......................................................... 456 [969 286]<br />
POLAROID .................................................................... 949<br />
RCA ....................................................................... [409 255]<br />
SAMSUNG .............................................................. 455 963<br />
Chapter 2 27
Using the Remote Control<br />
SANSUI ...........................................................................394<br />
SANYO ..................................................................[416 267]<br />
SEARS .............................................................................394<br />
SONY ..............................................................................389<br />
SYLVANIA .......................................456 [458 227] [458 236]<br />
SYMPHONIC ..................................456 [458 227] [899 236]<br />
TOSHIBA ........................................................................924<br />
WHITE WESTINGHOUSE ....................................[458 227]<br />
ZENITH .................................................................[405 245]<br />
DVR/DVD Combos<br />
HUMAX ..........................................................................912<br />
PANASONIC ...................................................................387<br />
PIONEER .................................................................909 977<br />
TIVO ........................................................................912 909<br />
TOSHIBA .................................................................983 973<br />
DVR Codes<br />
Where codes are shown like this [###] each one can be<br />
used if you have 2 or more of the SAME device.<br />
AT&T ..............................................................................373<br />
HUGHES ........................................................................580<br />
HUMAX ..........................................................................912<br />
PANASONIC ...................................................................373<br />
PHILIPS ...................................................... [371] [344] [345]<br />
PIONEER .................................................................909 977<br />
RCA .................................................................................409<br />
REPLAYTV ......................................................................373<br />
SONIC BLUE ..................................................................373<br />
SONY .......................................................................372 657<br />
TiVo ...............................371 372 344 345 657 983 912 909<br />
TOSHIBA ........................................................................983<br />
DVR/Cable Combos<br />
CABLEVISION ................................................................506<br />
ILLICO ............................................................................506<br />
PIONEER ........................................................................506<br />
ROGERS .........................................................................506<br />
SCIENTIFIC ATLANTA ...................................................506<br />
TIME WARNER ...............................................................506<br />
VIDEOTRON ..................................................................506<br />
DVR/SAT Combos<br />
BELL EXPRESSVU ...................................................647 655<br />
DISH NETWORK ....................................................655 647<br />
DREAMBOX ...................................................................620<br />
ECHOSTAR ..............................................................655 647<br />
EXPRESSVU .............................................................647 655<br />
FORTEC STAR ..................................................569 555 556<br />
HUGHES NETWORK ..............................................621 580<br />
RCA .................................................................................653<br />
PHILIPS ..........................................................................621<br />
PROSCAN .......................................................................653<br />
SAMSUNG ......................................................................583<br />
SONY .......................................................................657 659<br />
ULTIMATE TV .........................................................653 659<br />
ZENITH ..........................................................................656<br />
Home Theatre in a Box<br />
Where the code is listed as [### ###] the first is for the<br />
DVD and the second is for the AUDIO. Otherwise just<br />
the one code operates both the DVD and the AUDIO.<br />
AIWA .....................................................................[414 839]<br />
AMW ...............................................................................918<br />
APEX ..............................................................................436<br />
BOSE ..............................................................................672<br />
CRITERION ....................................................................448<br />
DURABRAND ..........................................................449 405<br />
EMERSON ......................................................................940<br />
JVC ..................................................................................964<br />
KLH ................................................................................906<br />
KOSS ..............................................................................415<br />
LENOXX .........................................................................931<br />
LG ...................................................................................972<br />
MAGNAVOX ...................................915 [969 756] [408 756]<br />
MYRON & DAVIS ...........................................................962<br />
NORCENT ......................................................................928<br />
ONKYO ..........................................................................975<br />
PANASONIC ...................................................................974<br />
PHILIPS ......................................................... 755 [969 756]<br />
PIONEER ................................................................ 976 968<br />
RADIO SHACK ................................ 449 894 895 [453 879]<br />
RCA ......................................................... 449 920 [453 879]<br />
REGENT ........................................................................ 931<br />
SABA ............................................................................. 919<br />
SAMSUNG .............................................................. 454 942<br />
SONY ............................................................................. 986<br />
TEVION ......................................................................... 448<br />
ZENITH ................................................................ [405 787]<br />
Satellite/DTV Receivers<br />
Where codes are shown like this [###] each one can<br />
be used if you have 2 or more of the SAME device or<br />
brand.<br />
AMPLICA ....................................................................... 575<br />
BELL EXPRESSVU .................................... 654 647 655 628<br />
CHANNEL MASTER ........................................ 577 578 579<br />
CHAPPARAL ........................................................... 560 561<br />
CHEYENNE ................................................................... 561<br />
DRAKE ............................................................ 562 574 587<br />
DREAMBOX .................................................................. 620<br />
DIRECTV . 622 632 629 621 623 576 586 616 613 630 634<br />
636 638641 652 653 657 659 607 619 641<br />
DISH NETWORK .... [655] [647] 628 612 654 588 589 590<br />
DISHPRO ................................................. 588 589 590 654<br />
DX ANTENNA ........................................................ 568 582<br />
ECHOSPHERE ............................................................... 628<br />
ECHOSTAR ................[655] [647] 628 612 654 588 589 590<br />
EXPRESSVU .............................................. 654 647 655 628<br />
FORTEC STAR ............................ 569 555 556 557 558 559<br />
FUJITSU .................................................................. 591 592<br />
GE ................................. 636 649 637 622 653 650 651 652<br />
GEMINI ......................................................................... 595<br />
GENERAL INSTRUMENT (GI) ...[627] [642] [643] [644] 648<br />
640 645 564 565 566 593<br />
GO VIDEO .................................................................... 610<br />
HITACHI ..................................... 638 629 630 632 641 607<br />
HUGHES NETWORK ... 621 641 607 580 [632] [638] [629]<br />
[630]<br />
JVC ................................................................................. 628<br />
KENWOOD ................................................................... 598<br />
LUXOR .......................................................................... 599<br />
MAGNAVOX .................................................... 576 612 639<br />
MACOM ......................................................................... 600<br />
MITSUBISHI ............................... 641 632 638 629 630 607<br />
MOTOROLA ........................................................... 648 618<br />
NORSTAT ...................................................................... 601<br />
PACE ................................................................ 614 615 646<br />
PANSAT ......................................................................... 584<br />
PANASONIC .................................................... 626 586 596<br />
PRIMESTAR ............................................................ 627 640<br />
PHILIPS .......... 576 612 621 629 630 632 638 641 607 639<br />
PHILIPS-MAGNAVOX ..................................... 576 612 639<br />
PIONEER ....................................................................... 604<br />
PROSAT ......................................................................... 563<br />
PROSCAN ................................... 636 637 650 653 651 652<br />
RCA ............. [636] 649 [637] 622 658 653 650 651 652 098<br />
REALISTIC .............................................................. 567 603<br />
SAMSUNG ......................................... 594 583 613 616 619<br />
SHARP ........................................................................... 604<br />
SKY NETWORK .............................................. 614 615 646<br />
SIERRA I II III ............................................................... 561<br />
SONY ........................................................ 623 657 659 602<br />
STARCHOICE .................................................. 640 645 627<br />
STAR SIGHT .................................................................. 633<br />
STAR TRAK ................................................................... 608<br />
STS ................................................................... 568 570 571<br />
SUPER GUIDE ............................................................... 609<br />
SYLVANIA ...................................................................... 581<br />
TOSHIBA ........ 641 632 638 629 630 607 572 624 625 631<br />
ULTIMATE TV ........................................................ 653 659<br />
UNIDEN .......................................................... 633 573 611<br />
UNITED ......................................................................... 597<br />
VIDEO CIPHER II ......................................................... 574<br />
WEB TV .................................................................. 612 585<br />
ZENITH ................. 617 634 656 595 646 562 574 587 635<br />
VCR Codes<br />
Where codes are shown like this [###] each one can<br />
be used if you have 2 or more of the SAME device or<br />
brand.<br />
ACCELE ......................................................................... 354<br />
ADMIRAL ...................................................................... 226<br />
ADVENTURA ................................................................ 251<br />
AIKO ............................................................................. 252<br />
AIWA ........................................................ 245 227 269 251<br />
AKAI ............................. 227 229 228 230 231 254 303 337<br />
ALLEGRO ........................................................ 247 329 243<br />
AMERICAN HIGH ......................................................... 292<br />
APEX ............................................................................. 949<br />
ASHA ............................................................................. 354<br />
AT&T ............................................................................. 373<br />
AUDIO DYNAMICS ........................................ 376 377 234<br />
AUDIOVOX .................................................................. 245<br />
BELL & HOWELL .......................................................... 268<br />
BEAUMARK ................................................................... 354<br />
BROKSONIC ................ 256 250 257 310 394 967 237 289<br />
CALIX ............................................................................ 245<br />
CANDLE ..................................... 240 245 354 234 242 244<br />
CANNON ......................................................... 225 292 339<br />
CAPEHART .................................................................... 329<br />
CARVER ......................................................................... 287<br />
CCE ......................................................................... 252 356<br />
CINEVISION .................................................................. 245<br />
CITIZEN .............................. 240 245 252 354 234 242 244<br />
COLORTYME ................................................................ 234<br />
COLT ............................................................................. 356<br />
CRAIG ...................................................... 245 354 356 248<br />
CURTIS MATHES .. 225 287 227 334 354 358 234 249 292<br />
CYBERNEX .................................................................... 354<br />
DAEWOO .............. 279 240 250 252 334 242 244 251 971<br />
DBX ................................................................. 376 377 234<br />
DIAMOND VISION ....................................................... 896<br />
DIMENSIA ..................................................................... 225<br />
DURABRAND ................................................................ 245<br />
DYNATECH ............................................................ 227 251<br />
ELECTROHOME ..................................................... 245 254<br />
ELECTROPHONIC ........................................................ 245<br />
EMERSON 250 245 252 256 257 290 310 325 354 240 233<br />
227 265 266 268 269 456 458 231 237 249 251 254 259<br />
262 263 270 289 292 301 330 341<br />
FISHER ......................... 304 268 267 287 234 248 273 274<br />
FUJI ........................................................................ 229 292<br />
FUNAI ....................................................... 227 456 458 251<br />
GARRARD ..................................................................... 251<br />
GE ........................................ 225 311 335 342 354 278 292<br />
GOLDSTAR ................................. 227 245 338 329 346 234<br />
GRADIENTE .................................................................. 251<br />
GO-VIDEO .......................... 354 375 407 426 455 971 368<br />
HARLEY DAVIDSON .................................................... 251<br />
HARMAN KARDON ............................................... 234 254<br />
HARWOOD ................................................................... 356<br />
HEADQUARTER ........................................................... 268<br />
HITACHI ............................................ 369 227 347 303 332<br />
HI-Q .............................................................................. 248<br />
INFINITY ....................................................................... 288<br />
INSIGNIA ...................................................................... 245<br />
INSTANT REPLAY .................................................. 227 292<br />
INTEQ ........................................................................... 245<br />
JC PENNEY .... 225 245 268 354 369 376 377 292 303 332<br />
343 234<br />
JCL ................................................................................. 292<br />
JENSEN ................................................................... 369 303<br />
JVC ....................................... 376 377 268 247 418 234 303<br />
KENWOOD ....................................... 268 376 377 234 303<br />
KLH ............................................................................... 356<br />
KODAK .................................................................. 245 292<br />
LG ............................................................. 227 329 338 907<br />
LLOYD .................................................................... 227 251<br />
LOGIK ........................................................................... 356<br />
LXI .......................................................................... 227 245<br />
MAGNAVOX ... 287 288 329 226 225 456 286 235 227 914<br />
969 292<br />
MAGNIN ........................................................................ 354<br />
MARANTZ .................... 287 268 376 377 289 292 339 234<br />
MARTA .......................................................................... 245<br />
MATSUSHITA ................................................................ 292<br />
MEDION ........................................................................ 896<br />
MEI ................................................................................ 292<br />
MEMOREX ..... 287 245 268 304 310 329 354 226 227 337<br />
248 251 292<br />
28 Chapter 2
Using the Remote Control<br />
MGA .......................................................................290 254<br />
MGN TECHNOLOGY ...................................................354<br />
MIDLAND ......................................................................278<br />
MINOLTA ...............................................................369 332<br />
MITSUBISHI ........................290 298 369 376 377 254 295<br />
MONTGOMERY WARD .........................................226 300<br />
MOTOROLA ...........................................................226 292<br />
MTC .................................................................227 354 251<br />
MULTITECH ......................................227 354 251 278 356<br />
NEC .......................268 376 377 289 301 302 303 234 249<br />
NIKKO ...........................................................................245<br />
NOBLEX ........................................................................354<br />
OLYMPUS ......................................................................292<br />
OPTIMUS .....................239 354 363 245 361 374 381 226<br />
OPTONICA ............................................................354 300<br />
ORION ...................................................................256 310<br />
PANASONIC ........................363 381 374 373 225 437 292<br />
PENTAX ...........................................................369 234 332<br />
PHILCO ....................................................287 225 235 292<br />
PHILIPS ..........287 288 344 345 371 378 383 456 286 292<br />
PHILIPS-MAGNAVOX .....................................287 288 226<br />
PILOT ............................................................................245<br />
PIONEER ...........................................305 369 376 377 343<br />
PORTLAND ............................................................242 244<br />
PROSCAN ...............................................................225 308<br />
PROTEC ........................................................................356<br />
PULSAR .........................................................................329<br />
QUARTER ......................................................................268<br />
QUARTZ ........................................................................268<br />
QUASAR ............................................363 374 225 381 292<br />
RADIO SHACK .........................................225 226 227 239<br />
....245 268 342 354 361 363 248 251 254 274 292 300 337<br />
RADIX ...........................................................................245<br />
RANDEX ........................................................................245<br />
RCA ...... [225] 245 [308] 309 311 312 313 314 315 316 335<br />
342<br />
.....................................................354 369 228 278 292 332<br />
REALISTIC ......225 226 227 245 268 354 361 363 248 251<br />
............................................................254 274 292 300 337<br />
REPLAYTV .....................................................................373<br />
RICOH ...........................................................................353<br />
RUNCO ..........................................................................329<br />
SAMSUNG .............354 358 240 369 455 942 963 230 337<br />
SANKY ....................................................................226 329<br />
SANSUI .......................................310 376 377 394 256 303<br />
SANYO ..............................................304 267 268 354 248<br />
SCOTT .................................240 250 257 290 341 237 263<br />
SEARS ......363 245 268 287 369 394 456 248 273 274 292<br />
332 343<br />
SHARP ..........................360 361 226 227 266 242 254 300<br />
SHINTOM ..........................................229 353 369 356 357<br />
SHOGUN .......................................................................354<br />
SIGNATURE ..................................................................227<br />
SINGER ...................................................................292 356<br />
SONIC BLUE .................................................................373<br />
SONY .......379 324 229 323 353 389 372 364 365 366 380<br />
STS ...................................................................369 292 332<br />
SUPERSCAN ..................................................................456<br />
SYLVANIA ..............227 287 290 225 236 456 458 251 292<br />
SYMPHONIC ............................................227 236 456 251<br />
TANDY ...................................................................227 268<br />
TASHIKO .......................................................................245<br />
TATUNG ........................................................................303<br />
TEAC ...............................................................227 251 303<br />
TECHNICS .....................................................................292<br />
TEKNIKA ...........................................227 245 325 251 292<br />
TiVo ........................................................................371 372<br />
TMK .................................................................354 249 301<br />
TOSHIBA ........240 261 260 287 290 358 369 924 274 341<br />
TOTEVISION ..........................................................245 354<br />
UNITECH ......................................................................354<br />
VECTOR RESEARCH ................................240 376 377 234<br />
VICTOR ..................................................................376 377<br />
VIDEO CONCEPTS ...........................240 376 377 234 254<br />
VIDEOSONIC ................................................................354<br />
WARDS ....225 226 227 240 245 354 369 248 251 254 292<br />
300 326 332 341 356<br />
WHITE WESTINGHOUSE .....................................227 279<br />
XR-1000 ...........................................................251 292 356<br />
YAMAHA ..................................................376 377 234 303<br />
ZENITH ...329 247 252 266 288 226 227 338 347 353 358<br />
245 229 310 232 232 376 377 279 368 243<br />
Web TV<br />
JVC .................................................................................612<br />
SONY .............................................................................585<br />
Chapter 2 29
This page left intentionally blank.
Chapter 3: Using the TV’s Features<br />
Program Title/Acquiring Channel<br />
12:30 AM 00:30<br />
12:39 PM<br />
D 6-1 DNLJ<br />
English<br />
MPAA - Not Rated<br />
Cable Input<br />
16x9 Normal 1080i HDTV<br />
12:00 PM - 1:00 PM<br />
About the Channel Banner<br />
The Channel Banner appears when you press the INFO button on the remote. If an icon in the channel banner is grayed<br />
out (dim), the feature is not available. The following list describes the items on the Channel Banner screen (left to right and<br />
top to bottom). Other displays that are not described here are self-explanatory. When you change channels, the Channel<br />
Banner appears as a smaller version than what’s shown above.<br />
The icons change appearance to show the item’s status or availability.<br />
Program Title/Acquiring Channel Title of program (if available) or Acquiring Channel appears when tuning a channel.<br />
12:30 AM<br />
00:30<br />
The time when the TV shuts off if the Sleep Timer is activated in the Time menu.<br />
Displays the time remaining before the TV tunes back to the channel where<br />
Commercial Skip was activated.<br />
12:39 PM Current time if the Time feature is set in Time menu.<br />
D 6-1 DNLJ Current signal (D for digital; A for analog), channel, subchannel (for digital<br />
channels)<br />
and the TV station call letters, if available.<br />
Antenna/Cable Displays the type of input you’ve currently tuned.<br />
English For a digital channel, displays the currently playing Audio Language/ Mode. For<br />
an analog channel, displays when SAP is playing. SAP or Audio Language/ Mode<br />
changes with SOUND button.<br />
16x9 Normal 1080i HDTV Displays the aspect ratio; original resolution of the broadcast, not the resolution<br />
of the TV; and HDTV (High Definition Television), SDTV (Standard Definition<br />
Television) or EDTV (Enhanced Definition Television). For more information about<br />
aspect ratio and broadcast resolution, go to page 3.<br />
Displays when Closed Captioning is available on the current channel.<br />
The Audio language/mode icon appears when the current digital channel is<br />
broadcasting one or more alternate audio modes or languages.<br />
Parental Control icon is displayed red and locked when the TV is locked, green<br />
and unlocked when the TV is unlocked, and yellow and unlocked when the TV is<br />
temporarily unlocked.<br />
MPAA - Not Rated V-Chip program rating (not the TV’s rating set up in Parental Control menu).<br />
12:00 PM- 1:00 PM Displays the current TV program duration.<br />
Graphics contained within this publication are for representation only. 31
Using the TV’s Features<br />
Digital or Analog TV Channels<br />
A single off-air antenna can pick up both analog and digital channels. Digital channels can be<br />
made up of primary channels and subchannels.<br />
Note: Subchannels (sometimes called minor channels) are channels associated with the<br />
primary channel (sometimes called the major channel). A primary channel may have just<br />
one subchannel or multiple subchannels.<br />
Program Title/Acquiring Channel<br />
A “D” is displayed for digital;<br />
an “A” is displayed for analog<br />
Primary<br />
Channel<br />
Subchannel<br />
(if necessary)<br />
Tip:<br />
Program Title/Acquiring Channel<br />
D 6-1 DNLJ<br />
English<br />
MPAA - Not Rated<br />
Use the channel banner to determine whether<br />
a channel is digital or analog. A digital (ATSC<br />
or QAM) channel displays a “D” before the<br />
channel and may have a dash and second<br />
number after it (e.g., 21-1); an analog channel<br />
(NTSC) displays an “A” before the channel and<br />
only has one channel number (e.g., Ch 21).<br />
12:30 AM 00:30<br />
12:39 PM<br />
12:30 AM<br />
16x9 N<br />
D 6-1 DNLJ<br />
English<br />
MPAA - Not Rated<br />
Cable Input<br />
16x9 Normal 1080i HDTV<br />
12:00 PM - 1:00 PM<br />
Direct Tuning to a Channel<br />
1. Make sure the remote is in TV mode by pressing TV on the remote control.<br />
2. Enter the primary channel number. This number appears in the primary channel entry box.<br />
Press OK or wait a few seconds. If you don’t enter a subchannel, the TV tunes to the first<br />
available analog channel or lowest digital subchannel.<br />
3. If the primary channel number has fewer than six digits (for cable), or two digits (for<br />
antenna) and you want to enter subchannel numbers, press the SUB CH or SUBCHANNEL<br />
button to advance to the subchannel entry box.<br />
4. Enter the number of the subchannel. This number appears in the subchannel entry box.<br />
5. Press OK to tune to the channel or wait a few seconds and the TV tunes to the channel.<br />
Note: You can always use the channel up and down buttons on the remote control to<br />
change channels within the TV mode.<br />
Getting a Program Description<br />
1. Make sure the remote is in TV mode by pressing TV on the remote control.<br />
2. Press the INFO button on the remote twice. If the information is available from the<br />
broadcaster, a program description will appear.<br />
32 Chapter 3
0<br />
1<br />
2<br />
3<br />
4<br />
5<br />
6<br />
Go Back<br />
Lock TV<br />
Channel Search<br />
Channel List<br />
Video Input List<br />
Advanced Settings<br />
Parental Controls<br />
Main Menu 4Channel Setup<br />
The Parental Controls menu lets you adjust the TV’s<br />
blocking features, like V-Chip, which can block programs:<br />
•USA V-Chip<br />
•Canada V-Chip<br />
•V-Chip Unrated<br />
•Front Button Block<br />
Press OK or4to access the Parental Controls menu.<br />
Using the TV’s Features<br />
Parental Controls<br />
The Parental Controls menu allows you to program your TV so that<br />
children cannot see certain programs, channels, or use the buttons on<br />
the front of the TV. The Parental Controls menu controls the software<br />
inside your TV (referred to as V-Chip) which lets you program your TV<br />
so it won’t display certain programs and movies based on violence, sex,<br />
or other content you may believe children should not view. Once you<br />
block programs, you or other adults can unblock programs by entering<br />
a password to unlock video or enter the password to edit the features in<br />
the Parental Controls menu. By default, the software inside your TV is<br />
turned “off,” so if you don’t want to use this feature, you can just ignore it.<br />
The options in the Parental Controls menu are USA V-Chip, Canada<br />
V-Chip, V-Chip Unrated, and Front Button Block.<br />
Before V-Chip is explained, first you need to know how to lock and<br />
unlock your TV.<br />
Tip<br />
0<br />
1<br />
2<br />
3<br />
4<br />
5<br />
6<br />
Go Back<br />
Lock TV<br />
Channel Search<br />
Channel List<br />
Video Input List<br />
Advanced Settings<br />
Parental Controls<br />
Main Menu4Channel Setup<br />
The TV is currently unlocked.<br />
Locking the TV will enforce the rating limits (V-Chip),<br />
and blocking features that you have set up. Also, the<br />
Childrens’ Channel list of “safe channels” is used instead<br />
of the Favorite Channel List.<br />
In order to lock the TV, enter the four-digit password you<br />
would like to use.<br />
* * * *<br />
Confirm the password by entering it again.<br />
* * * *<br />
Locking the TV puts into effect the rating limits, the Locked<br />
List, and blocking features. Press OK to continue.<br />
You must lock the TV for the parental controls settings to be<br />
enforced.<br />
Lock/Unlock TV<br />
The Lock/Unlock TV option is found in the Channel Setup menu.<br />
Selecting this option lets you lock and unlock the parental controls<br />
and channel lists using a password. If the TV is locked when watching<br />
TV, you only see the channels that are marked as Viewable. Locking<br />
the TV also blocks channels in Channel Setup (go to page 45 for more<br />
information).<br />
Notes: When locking the TV, you’ll be asked to enter a password<br />
and then to re-enter the password a second time to re-confirm your<br />
password choice.<br />
If you do not lock the TV, none of the settings for V-Chip, channel<br />
block, and front panel block take effect.<br />
If you forget your password, simultaneously press and hold the MENU/<br />
OK button on the front panel and VOL- button on the remote for three<br />
seconds. This resets the password only and unlocks the TV; all other<br />
settings in Parental Controls are not changed.<br />
How V-Chip Works for the USA and Canada<br />
V-Chip reads the program’s age-based rating (TV-MA, TV-14, etc.) and content themes [(Violence<br />
(V), Adult Language (L), etc.)]. If you have blocked the rating and/or content themes that the<br />
program contains, you will receive the message telling you that the program is blocked from<br />
viewing.<br />
Broadcasters are not required to provide content themes, so programs received with no content<br />
themes will only be blocked if you block their age-based rating. You can also block out programs<br />
that have been given an Exempt rating, and programs that are considered unrated.<br />
Chapter 3 33
Using the TV’s Features<br />
0<br />
1<br />
2<br />
Go Back<br />
V-Chip TV Rating<br />
V-Chip Movie Rating<br />
Main Menu4Parental Controls 4USA V-Chip<br />
The V-Chip TV rating limits are set with this screen.<br />
The TV must be locked for the rating limits to be enforced.<br />
Rating Content<br />
Rating Status D L S V FV<br />
"TV-MA" Blocked B B B<br />
"TV-14" Blocked V V V V<br />
"TV-PG" Blocked V V V V<br />
"TV-G" Blocked<br />
"TV-Y7" Blocked<br />
B<br />
"TV-Y" Blocked<br />
Press OK to set the age-based TV rating limit and content<br />
theme limit.<br />
USA V-Chip TV Ratings<br />
The USA V-Chip TV Rating lets you decide which TV programs can and<br />
cannot be viewed. To set TV programming limits:<br />
1. Choose Channel Setup from the Main menu. If Channel Setup has<br />
previously been locked, you must enter your password.<br />
2. Then select Parental Controls.<br />
3. Highlight and select USA V-Chip.<br />
4. Highlight and select V-Chip TV Rating.<br />
5. Once you get to the V-Chip TV Rating screen, use the arrow buttons<br />
and OK on your remote to change the status of a TV program rating<br />
or content theme from Viewable to Blocked.<br />
Proceed to the next sections for more details about how to change the<br />
status of TV program limits.<br />
Hierarchy of Age-Based Ratings<br />
TV-MA<br />
TV-14<br />
TV-PG<br />
TV-G<br />
TV-Y7<br />
TV-Y<br />
Mature Audience Only<br />
Parents Strongly Cautioned<br />
Parental Guidance Suggested<br />
General Audience<br />
Directed to Children 7 years<br />
and older<br />
All Children<br />
Blocking Age-Based Ratings<br />
You can automatically block all program ratings above a specified agebased<br />
rating level. For example, if you only want your child to watch<br />
programs that have a TV-G rating and lower (in other words, you want<br />
the child to watch TV-G, TV-Y7, and TV-Y), then you need to block out<br />
higher ratings.<br />
To block programs with higher ratings:<br />
1. First, determine the lowest level rating you don’t want the child to<br />
watch (see chart of age-based ratings on previous page).<br />
2. Highlight the lowest rating you do not want the child to watch. In<br />
the example discussed above, you would highlight TV-PG, since the<br />
highest rating you want the child to watch is TV-G.<br />
3. Press the OK button to toggle between Viewable and Blocked.<br />
The status for the rating listed to the right and all higher ratings<br />
automatically change to Blocked (and B).<br />
4. Select Lock TV from the Parental Controls menu. Enter a password<br />
and re-enter password a second time to confirm the password.<br />
To view age-based ratings after you’ve blocked them, follow the same<br />
steps as above to make the rating Viewable (V).<br />
Notes: The content status fields corresponding to the unblocked<br />
rating become Viewable as well. They and the age-based rating<br />
status are the only fields that automatically change back to<br />
Viewable when you complete this process.<br />
You must remember to lock the TV as described above for rating<br />
limits to take effect.<br />
34 Chapter 3
Using the TV’s Features<br />
D<br />
L<br />
S<br />
V<br />
FV<br />
Content Themes<br />
Sexually explicit dialogue<br />
Adult language<br />
Sexual situations<br />
Violence<br />
Fantasy Violence<br />
Blocking Specific Content Themes<br />
You can block programs based on their content. When you block a<br />
content theme for a particular rating, you automatically block that<br />
content theme for higher rated programs as well.<br />
For example, if you do not want your child to watch programs that have<br />
adult language (L) rated TV-PG or higher, then you could block out all<br />
programming TV-PG and above containing adult language.<br />
To block program content:<br />
1. Determine the lowest level of content you don’t want the child to<br />
watch.<br />
2. Use the up and down arrow buttons on the remote to highlight the<br />
age-based ratings that correspond with the lowest content you do<br />
not want the child to watch. (In the example above, you would<br />
highlight TV-PG.)<br />
3. Press the OK button to change content status from (V) Viewable to<br />
(B) Blocked. All higher ratings’ content themes change to Blocked.<br />
Notes: Broadcasters are not required to provide content themes<br />
or age-based ratings.<br />
You must remember to lock the TV as described above for rating<br />
limits to take effect.<br />
To view content themes after you’ve blocked them, follow the same steps<br />
as above to make the content Viewable (V). Note that if you unblock the<br />
language corresponding to TV-PG, for example, the language for TV-MA<br />
doesn’t get unblocked. You have to unblock each content theme for each<br />
rating separately.<br />
0<br />
1<br />
2<br />
Go Back<br />
V-Chip TV Rating<br />
V-Chip Movie Rating<br />
Main Menu4Parental Controls 4USA V-Chip<br />
The V-Chip MPAA movie rating limits are set in this screen.<br />
The TV must be locked for the rating limits to be enforced.<br />
Rating Status Blocked B B B<br />
"X"<br />
"NC-17"<br />
"R"<br />
"PG-13"<br />
"PG"<br />
"G"<br />
Blocked<br />
Blocked<br />
Blocked<br />
Viewable<br />
Viewable<br />
Viewable<br />
Not Rated<br />
Movies<br />
Viewable<br />
Press OK to set the movie rating limits which are enforced<br />
when the TV is locked.<br />
V-Chip Movie Rating Limit<br />
You set movie (MPAA) rating limits by blocking movies rated above a<br />
specified rating. How to block and view movie ratings is explained in the<br />
next two sections.<br />
To access the V-Chip Movie Rating menu:<br />
1. Press MENU on the remote control (the Main Menu appears).<br />
2. Select Channel Setup. Enter your password if necessary.<br />
3. Select Parental Controls.<br />
4. Select USA V-Chip.<br />
5. Select V-Chip Movie Rating.<br />
Chapter 3 35
Using the TV’s Features<br />
Blocking Movie Ratings<br />
If you only want your child to watch movies that have a PG rating and lower (in other words,<br />
movies rated PG and G), then you could automatically block out all other movies with higher<br />
ratings.<br />
To block movies, follow the above steps used to describe blocking content themes.<br />
Note: Some movies may be given a Not Rated (NR) rating. After blocking movie ratings, you<br />
must set NR to Viewable separately to view NR movies.<br />
To view movie ratings after you’ve blocked them, follow the same steps as above to make the rating<br />
Viewable (V).<br />
0<br />
1<br />
2<br />
3<br />
4<br />
Go Back<br />
USA V-Chip<br />
Canada V-Chip<br />
V-Chip Unrated<br />
Front Button Block<br />
Channel Setup4Parental Controls<br />
The Canada V-Chip menu lets you set program rating<br />
limits for Canada’s English and French rating systems:<br />
English Ratings<br />
French Ratings<br />
You can set limits for shows rated with Canada’s French<br />
or English V-Chip ratings system. Press OK or4to continue.<br />
Canada V-Chip<br />
Canadian TV V-Chip supports two different Canadian rating systems:<br />
English and French. The English or French Canada V-Chip TV Rating lets<br />
you decide which TV programs can and cannot be viewed. To set TV<br />
programming limits:<br />
1. Choose Channel Setup from the Main menu.<br />
2. If Channel Setup has previously been locked, you must enter your<br />
password.<br />
3. Choose Parental Controls.<br />
4. Highlight Canada V-Chip and select either Canada’s English Ratings<br />
or French Ratings.<br />
5. Once you get to the English or French Ratings screen, use the arrow<br />
buttons and OK on your remote to change the status of a TV program<br />
rating or content theme from Viewable to Blocked.<br />
0<br />
1<br />
2<br />
3<br />
4<br />
Go Back<br />
USA V-Chip<br />
Canada V-Chip<br />
V-Chip Unrated<br />
Front Button Block<br />
Main Menu4 Channel Setup4Parental Controls<br />
Block Unrated and Exempt Programs<br />
View Unrated and Exempt Programs<br />
Note: “Unrated” and “Exempt” TV programs may include<br />
news, sports, political, religious, local and weather<br />
programs, emergency bulletins, public announcements,<br />
programs without ratings, the Movie rating “N/A”,<br />
the USA TV rating “None” and the Canadian rating of<br />
“Exempt” (E).<br />
The TV must be locked for the V-Chip Unrated feature to be<br />
enforced<br />
Two lines of help text will appear in this area to explain the<br />
feature and instruct the user on how to use it.<br />
V-Chip Unrated Program Block<br />
Selecting this option lets you decide if programs that the V-Chip recognizes<br />
as “Unrated” (USA) and “Exempt” (Canada) can be viewed. Note that<br />
“Unrated” and “Exempt” TV programs may include news, sports, political,<br />
religious, local and weather programs, emergency bulletins, public<br />
announcements, and programs without ratings, the movie rating<br />
“N/A,” and the TV rating “None” and the Canadian rating of “Exempt.”<br />
Block Unrated and Exempt Programs All unrated and exempt<br />
programs are available.<br />
View Unrated and Exempt Programs All unrated and exempt<br />
programs are not available.<br />
Note: You must remember to lock the TV for rating limits to take<br />
effect.<br />
36 Chapter 3
Using the TV’s Features<br />
0<br />
1<br />
2<br />
3<br />
4<br />
Go Back<br />
USA V-Chip<br />
Canada V-Chip<br />
V-Chip Unrated<br />
Front Button Block<br />
Main Menu4 Channel Setup4Parental Controls<br />
Front Buttons Blocked<br />
Front Buttons Unblocked<br />
When the buttons on the TV are blocked and the TV is<br />
locked, only the remote or keyboard will control the TV.<br />
Note: If power to the TV is lost for a prolonged time (for<br />
example, due to a power outage) the buttons become<br />
unblocked.<br />
Two lines of help text will appear in this area to explain the<br />
feature and instruct the user on how to use it.<br />
Front Button Block<br />
Selecting this option lets you block (disable) or unblock (enable) the TV’s<br />
front buttons. The remote still tunes to any channel. Front Panel Block can:<br />
• Keep children from watching TV when the parent is not present.<br />
• Keep young children from playing with the buttons on the TV.<br />
(When using this as a Parental Control method, you should remove<br />
access to any remote that is capable of operating the television.)<br />
Don’t forget to lock the TV after you select Blocked. If you do not, the<br />
front panel block will not take effect.<br />
Note: If power to the TV is lost for an extended period, the buttons<br />
become unblocked. Blocking the front buttons does not disable the<br />
front input jacks.<br />
0<br />
1<br />
2<br />
3<br />
4<br />
5<br />
6<br />
Go Back<br />
Lock TV<br />
Channel Search<br />
Channel List<br />
Video Input List<br />
Advanced Settings<br />
Parental Controls<br />
Main Menu4Channel Setup<br />
Analog/ Signal Favorite Children’s<br />
Digital Strength Ch. List Ch. List<br />
All Channels<br />
2 WXIN A N/A<br />
2-1 WTHR-HD D --<br />
4 WTEU A N/A<br />
5 WMGM A N/A<br />
6 WJAM A N/A<br />
8 WEMM A N/A<br />
10 WJMM A N/A<br />
99 WMMM-DT A N/A<br />
99-99 WMMM-DT D --<br />
Press OK to add (check in box) or delete (no check in box) all Cable<br />
Input channels in the Favorite Channel List.<br />
Channel Lists<br />
The channel lists contain the following information: major channel<br />
number, with sub-channel number only if it’s a digital channel; channel<br />
call letters, if available when channel is tuned; indicated as an analog or<br />
digital channel (if available), Signal Strength (if available), Favorite Ch.<br />
List; and Children’s Ch. List. The channels listed in Channel List are based<br />
on the Channel Search results. If a channel is not found by Channel<br />
Search, then it is not listed.<br />
Editing Channels in the Channel Lists<br />
Channels can be edited to appear in the Favorite Ch. List and Children’s<br />
Ch. List in the Channel List menu. Use the Favorite Ch. List to remove a<br />
channel if you no longer want it in your channel list because you don’t<br />
like a program, for example. Remove or “hide” a channel by removing the<br />
check mark in the box. In the example to the left, channel 4 is removed<br />
from the Channel List. If you decide later you want to view channel 4,<br />
access it using the number 4 button on the remote.<br />
Use the Children’s Ch. List to block a channel in your channel list if you<br />
don’t want children to view the channel. Remove or “hide” a channel by<br />
removing the check mark in the box. In the example to the left, channel<br />
8-2 is removed from the Children’s Ch. List. When the TV is locked,<br />
access the channel directly by using the number buttons on the remote<br />
control then enter your valid password to view the channel.<br />
To save time, you can also add ALL or delete ALL channels in a list by<br />
changing the box or choice field in the line that says All Video Inputs<br />
or All Channels but be very careful because you could erase all of your<br />
selections.<br />
Chapter 3 37
Using the TV’s Features<br />
0<br />
1<br />
2<br />
3<br />
Go Back<br />
Auto Tuning<br />
Startup Channel<br />
Diagnostic Info<br />
Channel Setup4Advanced Settings<br />
Select which input or channel should be automatically tuned<br />
when a button listed below is pressed on the remote control.<br />
VCR<br />
AUDIO (Audio Receiver/Amp)<br />
Front Input<br />
Not Connected<br />
VCR2<br />
RCA SAT2<br />
Not Connected<br />
Not Connected<br />
DVD<br />
Input 2<br />
SAT-CABLE (Satellite/Cable Box)<br />
HDMI<br />
Press OK to assign the channel that the TV tunes to when you<br />
press a device button, like DVD, on the remote control.<br />
Auto Tuning Feature<br />
The way you set up the Auto Tuning feature in the TV’s menu<br />
corresponds to the device buttons on the remote and the way you have<br />
each device connected to your TV. When you set auto tuning, you’re<br />
telling the TV what channel or input to tune to when you press the<br />
device buttons on the remote control. This is especially useful for going<br />
directly to an input like HDMI.<br />
1. Press MENU (the Main Menu appears).<br />
2. Highlight Channel Setup and press OK. Then highlight Advanced<br />
Settings and press OK.<br />
3. Highlight Auto Tuning and press OK.<br />
4. Highlight the device button field and continually press OK to scroll<br />
through the selection of inputs.<br />
The choices and a brief explanation follow:<br />
Not Connected Choose this if you don’t have this particular device connected to the TV, or if<br />
you don’t want the TV to automatically tune to the correct channel when you press one of the<br />
device buttons on the remote.<br />
Channel 2, 3 or 4 Device is connected to the ANTENNA/CABLE INPUT jack on the back of the<br />
TV, and you want the TV to tune to channel 2, 3, or 4 when you press the corresponding button<br />
on the remote. Reminder: make sure the device’s Channel 2/3 or 3/4 switch is set to match the<br />
channel you choose in Auto Tuning.<br />
Input 1, Input 3 Compatible video source, such as a DVD player or satellite receiver, is<br />
connected to the Input 1 or 3 COMPONENT/COMPOSITE INPUT jacks (Y/Video, Pb, Pr) on the<br />
back of the TV and you want the TV to tune to the composite/component video input when you<br />
press the corresponding button.<br />
Input 2, Input 4 Device is connected to the Input 2 Video (V) or S-VIDEO jack on the<br />
back of the TV and you want the TV to tune to the Video Input Channel when you press the<br />
corresponding button.<br />
Front Input Device is connected to the VIDEO IN jack on the front of the TV and you want the<br />
TV to tune to the front Video Input Channel when you press the corresponding button.<br />
HDMI 1, HDMI 2 Device is connected to an HDMI jack on the back of the TV and you want the<br />
TV to tune to this input when you press the corresponding button.<br />
Future Downloadable Ratings<br />
Your TV is equipped to support a downloadable rating system. It is similar to the current rating<br />
system your TV has, called V-Chip. If a new rating system becomes available, the TV downloads it<br />
automatically from the signal and there is nothing you need to do to receive the information. Once<br />
it’s downloaded, a new option appears in your Parental Control menu. This option and its name<br />
are dependent on the content acquired from the broadcaster.<br />
Note: These ratings are available only if the broadcaster is sending them.<br />
38 Chapter 3
Chapter 4: Using the TV’s Menu System<br />
Menus, On-screen Help, and Control Panels<br />
This section highlights your TV’s on-screen menu system. The menu system has several types of<br />
screens. An overview follows.<br />
Note: The Parental Controls menu items is discussed in the Features chapter, while<br />
Assisted Setup is discussed in the Connections and Setup chapter.<br />
Tips<br />
0<br />
Go Back<br />
1 Picture Menu<br />
2 Audio Menu<br />
3 Channel Setup<br />
4 Setup Options<br />
Main Menu<br />
The Audio menu has screens for setting the audio features<br />
and for tweaking the sound:<br />
•Sound Preset Mode<br />
•Sound Logic<br />
•Balance<br />
•Advanced Audio<br />
Press OK or4to access the Audio menu.<br />
A shortcut method to access a menu item is to press<br />
the number button on the remote that matches the<br />
number next to the on-screen menu. For example, in<br />
the Main Menu, press 2 to go straight to the Audio<br />
menu.<br />
Feel free to explore the menu system. If you’re ever<br />
unsure where you are in the menu system, look at<br />
the menu path at the top (for example, Main Menu,<br />
Picture Menu) or if you’re just tired of exploring,<br />
press CLEAR to remove the menus from the screen<br />
and start over again.<br />
Navigating the Menu System<br />
The first menu you see when you press the MENU button on the remote is<br />
called the Main Menu. To use the Main Menu:<br />
1. Press the MENU button (the Main Menu appears).<br />
2. Use the arrow buttons (left, right, up, down) to move through the menu and<br />
highlight different options.<br />
3. Press the OK button to select a highlighted item.<br />
Note: Press the number button on the remote that matches the number<br />
next to the on-screen menu to select the option.<br />
To exit the Main Menu:<br />
• Press CLEAR. The on-screen displays are cleared from the screen and you<br />
return to TV viewing.<br />
• Press MENU.<br />
• Press 0 (Go Back) or GO BACK on the remote.<br />
0<br />
1<br />
2<br />
3<br />
Go Back<br />
Auto Tuning<br />
Startup Channel<br />
Diagnostic Info<br />
Menu path<br />
Channel Setup4Advanced Settings<br />
Select which input or channel should be automatically tuned<br />
when a button listed below is pressed on the remote control.<br />
VCR<br />
AUDIO (Audio Receiver/Amp)<br />
Front Input<br />
Not Connected<br />
VCR2<br />
RCA SAT2<br />
Not Connected<br />
Not Connected<br />
DVD<br />
Input 2<br />
SAT-CABLE (Satellite/Cable Box)<br />
HDMI<br />
Press OK to assign the channel that the TV tunes to when you<br />
press a device button, like DVD, on the remote control.<br />
On-Screen Help<br />
Information appears on most screens to assist you in understanding your menu<br />
selection. To the right of the highlighted menu item is a display area that might<br />
provide text for the item selected along with any submenu items. In addition,<br />
a menu path appears at the top of the screen to let you know where you are<br />
in the menu system. At the bottom of the screen are two lines of help text that<br />
explain the currently highlighted item.<br />
Highlighted menu<br />
selection<br />
Help text<br />
Controls<br />
Controls let you adjust the default settings of your TV. You can choose a setting,<br />
enter a number, or adjust a level such as tint or brightness. There are four types<br />
of controls:<br />
• Sliders<br />
• Choice lists (check boxes, radio buttons)<br />
• Alpha/numeric entries<br />
• Menu (action, choice fields)<br />
Graphics contained within this publication are for representation only. 39
Using the TV’s Menu System<br />
6 Balance<br />
50% 50% 50%<br />
Check boxes<br />
Radio buttons<br />
Sliders<br />
Sliders are used to select a specific point of a control that has continuous levels.<br />
To make adjustments:<br />
1. Highlight the slider for the feature you want to adjust.<br />
2. Press the up or down arrow button to adjust the indicator on a vertical<br />
slider. Press the left or right arrow button to adjust the indicator on a<br />
horizontal slider.<br />
Choice Lists<br />
Check boxes and radio buttons are used to select options from a list. Check<br />
boxes let you select one or more options. A radio button lets you select only<br />
one option.<br />
1. Use the arrow buttons to move left/right/up/down.<br />
2. Press OK to select a radio button; press OK to select or de-select a check<br />
box.<br />
Turn TV On at: Turn TV Off at:<br />
+<br />
+<br />
- 12:00 pm - 1:15 pm<br />
Numeric Entries<br />
Numeric entry fields are used to enter numbers, passwords, and time values.<br />
The number buttons on the remote and the arrow, channel up/down, volume<br />
up/down, and MENU/OK buttons on the front panel can be used to enter the<br />
information.<br />
1. Use the left/right arrow button to highlight the field.<br />
2. To enter time values, such as the Wake-Up Timer, highlight the + or - field<br />
and press OK to change the time, or simply use the number buttons. To<br />
enter passwords, you must use the number buttons.<br />
0<br />
1<br />
2<br />
3<br />
Go Back<br />
Picture Preset Mode<br />
Picture Settings<br />
Screen Format<br />
On-screen Menu Items<br />
The on-screen menu items are used to access the information and/or change<br />
the settings of the specific item highlighted. Highlight the item with the up<br />
and down arrow buttons. Then press OK or right arrow button to access the<br />
item’s information. To make a selection in one step, press the number button<br />
corresponding to the item.<br />
Start<br />
Action Buttons<br />
An on-screen button that performs the action labelled on the button is an action<br />
button. Press the right arrow button to highlight and press OK to select.<br />
VCR<br />
Front Input<br />
VCR2<br />
Not Connected<br />
DVD<br />
Input 2<br />
Choice Fields<br />
A choice field cycles through at least two or more choices. Press OK to select<br />
the next entry within the choice field. Moving the highlight to a different choice<br />
field, pressing CLEAR, or exiting the menu saves the selection previously made.<br />
40 Chapter 4
Using the TV’s Menu System<br />
0<br />
2<br />
3<br />
4<br />
0<br />
1<br />
2<br />
3<br />
4<br />
5<br />
Go Back<br />
1 Picture Menu<br />
Audio Menu<br />
Channel Setup<br />
Setup Options<br />
Go Back<br />
Picture Preset Mode<br />
Picture Settings<br />
Screen Format<br />
Advanced Picture<br />
Screen Adjust<br />
Main Menu<br />
The Picture menu has screens for optimizing the picture for<br />
each of the TV’s input:<br />
•Picture Preset Mode<br />
•Picture Settings<br />
•Screen Format<br />
•Advanced Picture<br />
•Screen Adjust<br />
Press OK or4to access the Picture menu.<br />
Main Menu4Picture Menu<br />
Vibrant (Day)<br />
Contrast 65%<br />
Natural<br />
Color 70%<br />
Tint 55%<br />
Cinematic (Night)<br />
Brightness 60%<br />
Sports<br />
Sharpness 55%<br />
Personal<br />
Auto Flesh Tone<br />
On<br />
Color Temperature<br />
Cool<br />
Video Noise Filter Frame Comb<br />
Green Enhance<br />
On<br />
Detail Enhance<br />
On<br />
Contrast Enhance<br />
On<br />
A change in this screen is applied to Input 3.<br />
Press 5 or 6 to point to an option, then press OK to select it.<br />
Press 3 to return to the menu.<br />
Picture Menu<br />
The Picture Menu contains menus to configure video settings: Picture Preset<br />
Mode, Picture Settings, Screen Format, Advanced Picture, and Screen Adjust<br />
menu. Each one is described below.<br />
Note: When changing an item in the Picture Menu, the graphics become<br />
transparent so you can see how your adjustments affect the picture.<br />
To access the Picture Menu:<br />
1. Press MENU on the remote control (the Main Menu appears).<br />
2. Highlight Picture and press OK (the Picture options appear).<br />
Note: When making Picture changes, inputs are all adjusted independent<br />
of each other.<br />
Picture Preset Mode<br />
Picture Presets displays a choice list that lets you select one of these preset<br />
picture settings: Vibrant (Day), Natural, Cinematic (Night), Sports, and Personal.<br />
Choose your setting based on the degree of lighting in your room. After you<br />
select a preset, the settings listed to the right are adjusted automatically.<br />
If you choose Personal, you can customize each picture quality setting to your<br />
desired level, and a message appears asking if you want to save those settings.<br />
After you’ve saved your personal settings, you can go back into the menu and<br />
select a different picture preset. For example, if you normally use Personal but<br />
want to watch a show in Vibrant (Day) lighting, choose Vibrant (Day), watch<br />
the show, and then afterwards return to your customized settings by choosing<br />
Personal. The PRESETS button allows you to scroll through your Picture Presets<br />
quickly. Go to the Remote chapter for more information.<br />
Tip<br />
0<br />
1<br />
2<br />
3<br />
4<br />
5<br />
Go Back<br />
Picture Preset Mode<br />
Picture Settings<br />
Screen Format<br />
Advanced Picture<br />
Screen Adjust<br />
Main Menu4Picture Menu<br />
The Personal picture presets settings are:<br />
50% 50% 50% 50% 50%<br />
Contrast<br />
Color<br />
Tint<br />
Brightness<br />
Picture Settings lets you adjust aspects of the picture you<br />
are viewing. Press OK or4to adjust the picture settings.<br />
Sharpness<br />
To create a temporary personal setting, make your<br />
changes and when the message appears asking if<br />
you want to save the setting, select No. The preset is<br />
saved until you change the channel or input.<br />
Picture Settings<br />
The Picture Settings menu displays slider controls for adjusting the way the<br />
picture looks. Your options under the Picture Settings menu are:<br />
Contrast Difference between the light and dark areas of the picture.<br />
Color The richness of the color.<br />
Tint The balance between the red and green levels.<br />
Brightness The brightness of the picture.<br />
Sharpness The crispness of the edges in the picture.<br />
To create picture settings for the video inputs:<br />
1. Press the INPUT button while in the Picture Settings menu until the correct<br />
Video Input Channel appears in the upper right corner.<br />
2. Press the right and left arrow buttons on the remote control to select the<br />
slider.<br />
3. Press the up and down arrow buttons to operate the slider.<br />
Chapter 4 41
Using the TV’s Menu System<br />
Tip<br />
0<br />
Go Back<br />
1 Picture Preset Mode<br />
2 Picture Settings<br />
3 Screen Format<br />
4 Advanced Picture<br />
5<br />
Screen Adjust<br />
Main Menu4Picture Quality<br />
4x3<br />
4x3<br />
4x3<br />
4x3<br />
Normal<br />
Stretch<br />
Squeeze<br />
Zoom<br />
16x9<br />
16x9<br />
16x9<br />
16x9<br />
Use Automatic Format Switching (AFS)<br />
Use this screen or the FORMAT<br />
button on the remote to change<br />
how the picture is displayed for:<br />
Antenna Input - 4x3.<br />
Each input can have different<br />
Screen Format and AFS Settings.<br />
Screen format determines the format and size of the picture<br />
on the display screen. Press OK to continue.<br />
The aspect ratio is determined by the broadcaster. If<br />
you don’t like the way your picture is being formatted,<br />
press FORMAT until you see a screen format<br />
you like.<br />
Screen Format<br />
The Screen Format feature allows you to change how the image is displayed<br />
on screen. The options are Normal, Stretch, Squeeze, or Zoom. If you want to<br />
adjust your image, choose an option below:<br />
Normal The image of a 4 x 3 video signal is centered with bars on the<br />
right and left sides of the screen. The 16 x 9 image is kept to its 16 x 9<br />
format.<br />
Stretch The image of a 4 x 3 video signal is centered, expanding in the<br />
horizontal direction and cropping video at the sides. A 16 x 9 video signal<br />
expands horizontally.<br />
Squeeze A 4 x 3 image is compressed horizontally, adding bars to the<br />
sides. A 16 x 9 image is also compressed horizontally.<br />
Zoom The image of a 4 x 3 or 16 x 9 video signal expands horizontally<br />
and vertically, cropping all sides of the image.<br />
Turn on Automatic Format Switching so that as you change channels, the TV<br />
will change formats for you.<br />
Notes: The format of some video cannot be changed.<br />
The ZOOM +/- buttons on the remote let you change the format with a<br />
one-button press rather than navigating to the Screen Format menu.<br />
0<br />
1<br />
2<br />
3<br />
4<br />
5<br />
Go Back<br />
Picture Preset Mode<br />
Picture Settings<br />
Screen Format<br />
Advanced Picture<br />
Screen Adjust<br />
Main Menu4Picture Menu<br />
The Advanced Settings menu has screens that let you<br />
enhance picture performance:<br />
•Auto Flesh Tone<br />
•Color Temperature<br />
•Video Noise Filter<br />
•Green Enhance<br />
•Detail Enhance<br />
•Contrast Enhance<br />
•Film 3:2 Pulldown<br />
•Reset Picture<br />
Press OK or 4 to access the Advanced Settings menu.<br />
Advanced Picture Menu<br />
The Advanced Picture options let you enhance picture performance and adjust<br />
picture position. When you select Advanced Picture, a submenu appears with<br />
options:<br />
Auto Flesh Tone Minimizes the flesh tone variations of the TV picture.<br />
Choose On or Off, depending on your preference.<br />
Color Temperature Automatically adjusts the color temperature of the<br />
picture. The feature lets you set one of three automatic color adjustments:<br />
• Cool More blue.<br />
• Normal Standard picture color.<br />
• Warm More red.<br />
Video Noise Filter Displays a list that lets you set one of the three<br />
settings that allows you to reduce picture “static” or any type of<br />
interference. A different Noise Reduction setting can be stored for each<br />
input, but only applies to devices connected to the composite inputs. You<br />
can set the Noise Reduction to Frame Comb, Advanced Frame Comb, or Off.<br />
The settings are explained in the on-screen help text.<br />
Green Enhance Makes green “greener” and increases the saturation. For<br />
example, nature shows and sporting events are especially enhanced by this<br />
feature. The options are On and Off.<br />
Detail Enhance Makes the edges of the video steeper, sharper, and<br />
crisper. There are two options for the this menu: On or Off. If artifacts<br />
appear in the video, change the setting to Off.<br />
42 Chapter 4
Using the TV’s Menu System<br />
Contrast Enhance Makes the picture appear brighter by deepening the black parts of<br />
the picture. This also helps to maintain a more consistent black level from one scene to the<br />
next. The options are On and Off.<br />
Film 3:2 Pulldown Automatically detects video sources that were originally recorded on<br />
film and converted to a different format. Film 3:2 Pulldown modifies the converted signal<br />
so it looks as close as possible to the original, a process called reverse 3:2 pulldown. Film<br />
3:2 Pulldown is applied to all inputs. Options are:<br />
• Advanced The default and recommended setting. Turns Film 3:2 Pulldown on<br />
when needed.<br />
• On Used in circumstances when the TV is to be used solely with film-based sources.<br />
• Off Use this setting if you think the reverse 3:2 pulldown is causing distortions in<br />
your picture.<br />
Reset Picture Menu button resets all Picture Menu controls to their original factory<br />
settings (except Personal Picture Preset, Horizontal and Vertical Position, and Smoothing<br />
Adjust) for the currently tuned input (see on-screen text). To reset the settings, you must:<br />
1. Tune to the input you would like to reset.<br />
2. Press MENU to access the Main Menu.<br />
3. From the Advanced Settings menu, select Reset Controls, and then select Reset to reset<br />
the settings for the currently tuned input.<br />
0<br />
1<br />
2<br />
3<br />
4<br />
5<br />
Go Back<br />
Picture Preset Mode<br />
Picture Setting<br />
Screen Format<br />
Advanced Picture<br />
Screen Adjust<br />
Main Menu4Picture Menu<br />
The Screen Adjust Menu has features that let you position<br />
and adjust the picture on the screen:<br />
•Horizontal Position<br />
•Vertical Position<br />
•Smoothing Adjust<br />
•Auto Adjust<br />
Press OK or4to access the Screen Adjust menu.<br />
Screen Adjust Menu<br />
The Screen Adjust menu allows you to position and adjust the picture on-screen.<br />
The options are:<br />
Horizontal Position Allows you to adjust the picture left and right. Press<br />
the right arrow button to move the slider right and move the picture to<br />
the right. Press the left arrow button to move the slider left and move the<br />
picture to the left.<br />
Vertical Position Allows you to adjust the picture up and down. Press<br />
the right arrow button to move the slider right and move the picture up.<br />
Press the left arrow button to move the slider left and move the picture<br />
down.<br />
Smoothing Adjust Allows you to adjust the lines of the picture so they<br />
appear smooth. Press the left/right arrow buttons to adjust. Use the menu as<br />
your “test pattern” when adjusting smoothness.<br />
Auto Adjust If a device is connected to the HDMI inputs, the Auto Adjust<br />
menu option optimizes the on-screen position of the video. If your input<br />
has Auto Adjust, just choose Yes.<br />
Chapter 4 43
Using the TV’s Menu System<br />
0<br />
Go Back<br />
1 Picture Menu<br />
2 Audio Menu<br />
3 Channel Setup<br />
4 Setup Options<br />
Main Menu<br />
The Audio menu has screens for setting the audio features<br />
and for tweaking the sound:<br />
•Sound Preset Mode<br />
•Sound Logic<br />
•Balance<br />
•Advanced Audio<br />
Audio Menu<br />
The Audio menu lets you adjust audio output. To access the Audio menu, press<br />
MENU on the remote, and then select Audio from the main menu. The following<br />
audio items can be adjusted: Sound Preset Mode, Sound Logic, Balance, and<br />
Advanced Audio.<br />
Press OK or4to access the Audio menu.<br />
0<br />
1<br />
2<br />
3<br />
4<br />
Go Back<br />
Sound Preset Mode<br />
Sound Logic<br />
Balance<br />
Advanced Audio<br />
Main Menu4Audio Menu<br />
Standard<br />
Voice<br />
Music<br />
Video Camera<br />
Personal<br />
+12<br />
0 dB<br />
-12<br />
Standard Preset Settings<br />
7<br />
120<br />
Hz<br />
For each input select a different equalizer preset or create a<br />
Personal preset with the equalizer. Press OK to continue.<br />
5<br />
200<br />
Hz<br />
3<br />
500<br />
Hz<br />
0<br />
1.2<br />
kHz<br />
1<br />
3<br />
kHz<br />
2<br />
7.5<br />
kHz<br />
3<br />
12<br />
kHz<br />
Sound Preset Mode<br />
You can select one of the seven-band Sound Preset Modes or create your own<br />
personal preset. The seven-band graphic equalizer lets you adjust the audio<br />
frequency settings. The equalizer can only be changed if Fixed/Variable Out<br />
is set to Variable Level, Speakers On in the Advanced Audio menu. If Fixed/<br />
Variable Out is set to Fixed Level, you cannot make changes to the equalizer<br />
and the bands are set to 0dB. However, the graphic equalizer levels for Variable<br />
Level, Speakers On are stored in memory in case you switch from Fixed Level<br />
back to Variable Level, Speakers On.<br />
Note: Sound Preset Modes are stored for each input. All other audio<br />
feature settings are stored globally across all inputs and not per input.<br />
Sound Logic<br />
Acting like a dynamic range limiter, it compresses the dynamic range to limit<br />
sudden volume increases (for example, the sudden increase in volume you<br />
sometimes hear when a commercial starts). Choose On or Off, depending on<br />
your preference.<br />
Balance<br />
The Balance setting applies to the internal speakers and the headphone output.<br />
Balance is how much audio (loudness) gets sent to the left and right speakers.<br />
Note: Balance applies if Fixed/Variable Out is set to Variable Level,<br />
Speakers On. See the following page for more information.<br />
0<br />
1<br />
2<br />
3<br />
4<br />
Go Back<br />
Sound Preset Mode<br />
Sound Logic<br />
Balance<br />
Advanced Audio<br />
Main Menu4Audio Menu<br />
The Advanced Audio menu has screens for setting up how<br />
sound is treated and configuring audio inputs and outputs.<br />
•Sound Expansion<br />
•Audio Lang./Mode<br />
•SAP<br />
•Startup Volume<br />
•Maximum Volume<br />
•Fixed/Variable Out<br />
•Digital Audio Out<br />
•DVI Audio Input<br />
Press 5 or 6 to point to an option, then press OK to<br />
select it. Press 3to return to the menu.<br />
Advanced Audio<br />
The Advanced Audio menu has options that allow you to adjust audio input and<br />
output. The options are:<br />
Sound Expansion Displays a choice list of available audio modes, which<br />
control the way the sound comes through your speakers when the TV is<br />
set to using the Variable Output. The selected setting affects all inputs and<br />
tuners.<br />
To create the settings:<br />
1. Press the MENU button (the Main Menu appears).<br />
2. Select Advanced Audio, and then Sound Expansion. The following<br />
options appear:<br />
44 Chapter 4
Using the TV’s Menu System<br />
0<br />
1<br />
2<br />
Go Back<br />
Sound Expansion<br />
3 SAP<br />
4<br />
5<br />
6<br />
7<br />
8<br />
Audio Lang./Mode<br />
Startup Volume<br />
Maximum Volume<br />
Fixed/Variable Out<br />
Digital Audio Out<br />
DVI Audio Input<br />
Main Menu4 Audio4Advanced Audio<br />
Cable Input<br />
Select a default for analog sources and inputs:<br />
Mono<br />
Stereo<br />
Select a default for sound expansion:<br />
Off<br />
SRS<br />
SRS<br />
A change in this screen is applied to all inputs. FOCUS<br />
Two lines of help text will appear in this area to explain the<br />
feature and instruct the user on how to use it.<br />
Mono This should only be used when the stereo signal is weak.<br />
Stereo Splits the incoming stereo audio signal into left and right<br />
front channels.<br />
The following options are available only if Fixed/Variable Out is set to Variable Level, Speakers On:<br />
Off No SRS processing is applied to the audio.<br />
Track 1 of 10<br />
SRS Adds greater depth and stereo separation to stereo audio signals. Delivers a panoramic 3-D sound<br />
stage from stereo material. Use the SRS FOCUS adjustment on the right to adjust the clarity.<br />
Audio Lang./ Mode Lets you choose the default audio language/mode you want to hear for ATSC (digital TV)<br />
programs. If the Audio Lang./ Mode icon ( ) in the banner lights, it means there is more than one audio language/<br />
mode available. The system automatically sets the audio program to the default audio language/mode from the menu<br />
when the channel you are viewing is a digital channel and the specified language is available for that program.<br />
Some programs can have audio mode available that can be heard but that cannot be set as the default. To select and<br />
hear those audio modes, navigate to the “Change Audio” action button and select OK, or use the SOUND button on the<br />
remote.<br />
Note: You can change the Audio Lang./ Mode temporarily by pressing the SOUND button on the remote control.<br />
Changing channels reverts the Audio Lang./ Mode back to the default Audio Lang./ Mode originally selected in the<br />
menu.<br />
SAP (Second Audio Program) When turned on and available, Second Audio Program plays the analog program’s<br />
audio in a second language. SAP is also used to broadcast a program’s audio with descriptions of the video for the visually<br />
impaired. SAP might also contain audio which is totally unrelated to the video.<br />
Note: SAP is broadcast in mono and is only available for analog programs, not digital programs.<br />
0<br />
1<br />
2<br />
3<br />
4<br />
5<br />
6<br />
7<br />
8<br />
Go Back<br />
Sound Expansion<br />
Audio Lang./Mode<br />
SAP<br />
Startup Volume<br />
Maximum Volume<br />
Fixed/Variable Out<br />
Digital Audio Out<br />
DVI Audio Input<br />
Main Menu4Advanced Audio<br />
Off<br />
On<br />
SAP stands for "Second Audio Program". When SAP is<br />
available for a program, the SAP icon in the channel banner<br />
will light up.<br />
A change in this screen is applied to all inputs.<br />
Press 5 or 6 to point to an option, then press OK to<br />
select it. Press 3to return to the menu.<br />
Startup Volume Select the volume level that you want when the TV is<br />
turned on, then press the OK button to activate the option. To deactivate<br />
Startup Volume, access the menu and press OK.<br />
Maximum Volume This feature is intended to stop the volume from being<br />
turned up too loudly. Set the volume at the loudest level you would want<br />
to hear. To hear how loud you’re setting the volume, press and hold the OK<br />
button.<br />
Note: Startup and Maximum Volumes apply if Fixed/Variable Out is set<br />
to Variable Level, Speakers On.<br />
Fixed/Variable Out Displays a choice list that lets you turn the TV’s front<br />
internal speakers on or off and set the Fixed/Variable audio output to a fixed<br />
or variable volume output level. The choices are:<br />
SRS, SRS Focus, and ( ) symbol are trademarks of SRS Labs, Inc.<br />
SRS Focus Technology is incorporated under license from SRS Labs, Inc.<br />
Chapter 4 45
Using the TV’s Menu System<br />
0<br />
1<br />
2<br />
3<br />
4<br />
5<br />
6<br />
7<br />
8<br />
Go Back<br />
Sound Expansion<br />
Audio Lang./Mode<br />
SAP<br />
Startup Volume<br />
Maximum Volume<br />
Fixed/Variable Out<br />
Digital Audio Out<br />
DVI Audio Input<br />
Main Menu4Advanced Audio<br />
Select the default for the Fixed/Variable Output:<br />
Variable Output, Speakers On<br />
Variable Output, Speakers Off<br />
Fixed Output, Speakers Off<br />
Use Variable Output if volume will be controlled by the TV.<br />
Use Fixed Output when connecting to an audio receiver or<br />
amplifier with its own remote control for controlling volume.<br />
Press 5 or 6 to point to an option, then press OK to<br />
select it. Press 3to return to the menu.<br />
• Variable Level, Speakers On Turns the TV’s front speakers On<br />
and allows variable output from the TV’s FIXED/VARIABLE AUDIO<br />
OUTPUT jacks. Use this setting if the TV is not connected to an audio<br />
receiver or amplifier and the volume is controlled by the TV.<br />
• Variable Level, Speakers Off Turns the TV’s front speakers Off<br />
and allows variable output from the TV’s FIXED/VARIABLE AUDIO<br />
OUTPUT jacks. Use this setting if the TV is connected to an audio<br />
receiver or amplifier and the volume is controlled by the TV.<br />
• Fixed Level, Speakers Off Turns the TV’s front speakers Off<br />
and provides fixed output from the TV’s FIXED/VARIABLE AUDIO<br />
OUTPUT jack to a receiver or amplifier. With the Fixed Output, the<br />
TV’s volume control, graphic equalizer, and mute are disabled. This<br />
output is ideal when connecting to an audio receiver or amplifier that<br />
has its own remote control for controlling the volume.<br />
Digital Audio Out Allows you to output Dolby Digital surround sound, if<br />
available, and you’ve connected a six-channel receiver to the TV’s DIGITAL<br />
AUDIO OUTPUT jack with a digital optical cable. Choose Auto Select to<br />
have the TV choose between Dolby Digital and PCM. Choose PCM if your<br />
receiver is PCM only.<br />
DVI Audio Input Allows you to select the audio input you’re using if<br />
you’ve connected an HDMI/DVI cable adapter to the HDMI input. Select<br />
from the inputs listed. Go to page 12 for more information.<br />
0<br />
Go Back<br />
1 Picture Menu<br />
2 Audio Menu<br />
3<br />
4 Setup Options<br />
Channel Setup<br />
Main Menu<br />
The Channel Setup menu has screens that let you find, add,<br />
and delete channels, and set Parental Controls:<br />
•Lock TV/Unlock TV<br />
•Channel Search<br />
•Channel List<br />
•Video Input List<br />
•Advanced Settings<br />
•Parental Controls<br />
Channel Setup Menu<br />
The Channel Setup menu lets you find, add, and delete channels, and set<br />
Parental Controls. Items in the Channel Setup menu are: Lock TV/Unlock TV,<br />
Channel Search, Channel List, Video Input Setup, Advanced Settings, and<br />
Parental Controls.<br />
Press OK or4to access the Audio menu.<br />
Lock TV/Unlock TV, Channel List, Video Input Setup, and Parental Controls are<br />
explained in Chapter 3.<br />
0<br />
1<br />
2<br />
3<br />
4<br />
5<br />
6<br />
Tip<br />
Go Back<br />
Lock TV<br />
Channel Search<br />
Channel List<br />
Video Input List<br />
Advanced Settings<br />
Parental Controls<br />
Main Menu4 Channel Setup<br />
Select channels to search:<br />
Digital channels<br />
Analog channels<br />
Select other search options:<br />
Detect antenna or cable signal<br />
Check fewer boxes to make the search faster (but less<br />
complete) and vice versa. A complete search takes about<br />
50 minutes.<br />
To add a channel that Channel Search didn't find, clear all<br />
menus and tune to the channel with the number keys.<br />
Start Search<br />
Cable Input<br />
Antenna Input<br />
Search channels already in my channel list(s)<br />
Remove scrambled digital cable channels<br />
Select input to search:<br />
Two lines of help text will appear in this area to explain the<br />
feature and instruct the user on how to use it.<br />
You can still add a channel that was not found<br />
by Channel Search. Clear any on-screen menus,<br />
and tune to it by using the number buttons on<br />
the remote. If the channel can be tuned, it will be<br />
added to the channel list for that tuner.<br />
Channel Search<br />
Engaging in a channel search tells the TV to search for all the TV channels<br />
available through the Antenna/Cable input. When the TV finds an active<br />
channel, it places it in the channel list. Inactive channels (weak stations or<br />
channels with no signal at all) aren’t placed in the channel list.<br />
Notes: Channel Search with all options selected takes some time to<br />
complete because all possible analog and digital channels are being<br />
searched.<br />
46 Chapter 4
Using the TV’s Menu System<br />
0<br />
1<br />
2<br />
3<br />
4<br />
5<br />
6<br />
Go Back<br />
Lock TV<br />
Channel Search<br />
Channel List<br />
Video Input List<br />
Advanced Settings<br />
Parental Controls<br />
Main Menu4Channel Setup<br />
The Advanced Settings menu has screens that let you<br />
set up channel/input features and get more information:<br />
•Auto Tuning<br />
•Startup Channel<br />
•Diagnostic Info<br />
•CableCARD Tools<br />
•CableCARD Reset<br />
Press OK or4to access the Advanced Settings menu.<br />
Advanced Settings<br />
The Advanced Settings menu lets you set up channel and input features, and get<br />
more information about your TV. Items in the Advanced Settings menu are: Auto<br />
Tuning, Startup Channel, and Diagnostic Info.<br />
Auto Tuning Lets you specify the various devices you have connected to your<br />
TV. It lets you program a device button on the remote control (SAT•AUX or<br />
DVD) so that pressing the button automatically turns on the TV and turns the TV<br />
to the correct Video Input Channel (go to Chapter 3 for detailed information).<br />
Startup Channel You can select the tuner and channel or input that your TV<br />
tunes to each time the TV is turned on by plugging it back in.<br />
Diagnostic Info Displays channel and cable information for TV and cable<br />
service personnel.<br />
0<br />
1<br />
2<br />
3<br />
4<br />
5<br />
6<br />
Go Back<br />
Closed Captioning<br />
Time Menu<br />
Quick Startup<br />
Assisted Setup<br />
Menu Preferences<br />
Advanced Options<br />
Main Menu4 Setup Options<br />
The Closed Captioning menu has screens for setting closed<br />
captioning features to match your personal preferences:<br />
•Caption Display<br />
•Analog Captions<br />
•Digital Captions<br />
•Caption Style<br />
Two lines of help text will appear in this area to explain the<br />
feature and instruct the user on how to use it.<br />
Setup Options Menu<br />
The Setup Options menu lets you adjust items associated with setting up your<br />
TV. Items in the Setup Options menu are: Closed Captioning, Time Menu, Quick<br />
Startup, Assisted Setup, Menu Preferences, and Advanced Options.<br />
Closed Captioning<br />
You may set the type of captioning displayed. Choices within the Closed<br />
Captioning menu are: Caption Display, Analog Captions, Digital Captions and<br />
Caption Style.<br />
0<br />
1<br />
2<br />
3<br />
4<br />
Go Back<br />
Caption Display<br />
Analog Captions<br />
Digital Captions<br />
Caption Style<br />
Main Menu4Setup Options4Closed Captioning<br />
On<br />
Off<br />
On When Muted<br />
Note: Not all programs have closed captioning. Also, if you<br />
want to see captions that may be provided in a DVI, HDMI,<br />
or non-480i component video signal, turn on the captions<br />
in the device that is sending the signal to the TV.<br />
Caption Display lets you select whether closed captioning is<br />
displayed when it is available. Press OK to continue.<br />
Caption Display<br />
The Caption Display menu displays a choice list that lets you choose when<br />
closed captioning information is shown on the screen. HDMI inputs aren’t<br />
supported by Closed Captioning (CC); try the device’s menu system for CC<br />
options.<br />
On Captioning information is always shown when it’s available on a<br />
channel or input.<br />
Off<br />
No captioning information is displayed.<br />
On When Muted Captioning information is only shown when available<br />
and the TV’s sound is muted. (To mute the sound, press the MUTE button<br />
on the remote control and captioning information will appear on the screen,<br />
if available.)<br />
Notes: Use the CC button on the remote to toggle CC on and off. Go to<br />
the remote section for more information. Changing channels or inputs<br />
restores CC to the default setting.<br />
If you turned off the speakers in the Audio menu (Fixed Output,<br />
Speakers Off), Closed Captioning won’t appear when you press the MUTE<br />
button on the remote even when you choose On when Muted.<br />
Chapter 4 47
Using the TV’s Menu System<br />
0<br />
1<br />
2<br />
3<br />
4<br />
Go Back<br />
Caption Display<br />
Analog Captions<br />
Digital Captions<br />
Caption Style<br />
Main Menu4Setup Options4Closed Captioning<br />
CC1<br />
CC2<br />
CC3<br />
CC4<br />
Text 1<br />
Text 2<br />
Text 3<br />
Text 4<br />
If a digital-TV program has “analog<br />
captions” but no"digital captions,"<br />
then the analog caption mode you<br />
select is used.<br />
Note: CC1 and Text 1 are the<br />
primary caption and text services.<br />
Press 5 or 6 to point to an option, then press OK to<br />
select it. Press3to return to the menu.<br />
You can choose between eight closed caption modes:<br />
Analog Captions<br />
You can select a closed caption mode, which is the mode, or source, used for<br />
displaying captioning information for analog channels or digital channels, if<br />
available. The content of CC and Text are different; you can select which one<br />
you want to see on the screen.<br />
CC Displays information at any position on the screen. It overlays the text<br />
on top of the picture as it is received.<br />
Text Displays information at one particular position (such as the bottom<br />
third) of the screen. You cannot see the picture underneath the text.<br />
• CC1 and Text 1 are the primary caption and text services. The captioning or text is<br />
displayed in the same language as the program’s dialog.<br />
• CC3 and Text 3 serve as the preferred data channels. The captioning or text is often<br />
a secondary language translation, simplified English, or displayed at a slower rate.<br />
• CC2 and CC4 and Text 2 and Text 4 are rarely available and broadcasters use them<br />
only in special conditions, such as when CC1 and CC3 are not available, or Text 1<br />
and Text 3 are not available.<br />
Digital Captions<br />
You can select a closed caption, service mode (1-6) for digital channels.<br />
Service 1 and Service 2 are the primary and secondary languages, respectively.<br />
Service 3 and Service 4, 5, 6 are additional caption sources that may be available. Specific<br />
label names may be displayed (e.g., Spanish) instead of a generic label (e.g., Service 1), if<br />
available.<br />
Caption Style<br />
Customize closed captioning for the digital captions by choosing the settings for the following<br />
options:<br />
Note: Custom settings only apply to digital captions and when caption content allows it.<br />
Caption Size is the font size (Standard, Large, Small) of the text characters.<br />
Caption Font is a complete assortment of letters, numbers, punctuation marks, etc. of a<br />
given font design. You can choose from a variety of fonts (Ashley®, Floridian, etc.).<br />
Note: A preview graphic of the caption font appears on the right of the screen.<br />
Caption Color allows you to choose the font color: White, Black, Red, Green, Blue, Yellow,<br />
Magenta, and Cyan.<br />
Background Color allows you to choose the background color: White, Black, Red, Green,<br />
Blue, Yellow, Magenta, and Cyan.<br />
"Monotype" is a trademark of Monotype Imaging, Inc. Registered in the U.S. Patent and Trademark Office and may be registered in certain other<br />
jurisdictions.<br />
"iType" is a trademark of Monotype Imaging, Inc. and may be registered in certain jurisdictions.<br />
"Floridian", "Plate Gothic", and "Screen" are trademarks of The Monotype Corporation and may be registered in certain jurisdictions.<br />
"Ashley" is a trademark of The Monotype Corporation registered in the U.S. Patent and Trademark Office and may be registered in certain other<br />
jurisdictions.<br />
48 Chapter 4
Using the TV’s Menu System<br />
Background Opacity allows you to change the see-through background options: Solid,<br />
Transparent, Translucent, and Flashing.<br />
Caption Opacity allows you to change the see-through caption options: Solid, Transparent,<br />
Translucent, and Flashing.<br />
0<br />
1<br />
2<br />
3<br />
Go Back<br />
Sleep Timer<br />
Wake-Up Timer<br />
Time of Day<br />
Main Menu4Setup Options4Time Menu<br />
The current time is 3:58 PM.<br />
Daily Timer On<br />
Daily Timer Off<br />
Turn TV On at: Turn TV Off at: Durationut<br />
+<br />
-<br />
12:00<br />
+<br />
-<br />
46<br />
A timer can be set to turn on the TV everyday then turn it<br />
off after a period of time. Press OK to continue.<br />
+<br />
-<br />
1<br />
1 hour, 15 minutes<br />
When the timer is on, it will turn the TV on and tune to:<br />
Antenna Input<br />
Channel<br />
+<br />
pm - 1:15<br />
pm<br />
Sub-Channel<br />
Time Menu<br />
The Time menu lets you set up time-related features. Time menu consists of<br />
Sleep Timer, Wake-Up Timer, and Time of Day.<br />
Sleep Timer A one-time event that is used to set the TV to turn off at a<br />
specific time.<br />
Wake-Up Timer Used to turn the TV on and off at a specific time every<br />
day of the week and tune to a specific channel or video input.<br />
Time of Day Enables you to enter the correct time manually. If you don’t<br />
enter the time, it is acquired from the last tuned digital channel. Make sure<br />
you check the time acquired is correct.<br />
Note: If you enter the time manually, you must remember to set your<br />
TV’s time when the time changes to Daylight Saving Time. Sleep Timer<br />
and Wake-Up Timer will not function as you expect if you forget to<br />
change the TV’s time.<br />
Quick Startup<br />
The Quick Startup menu is a power-saving feature in your TV. If you choose<br />
Enable, it will allow you to turn on your TV faster than when disabled.<br />
Assisted Setup<br />
The Assisted Setup menus were covered in Chapter 1. Go to page 15 for more<br />
information.<br />
Menu Preferences<br />
Menu Language Change to one of three languages: English, Spanish or<br />
French. The menu language can also be selected when using the Assisted<br />
Setup menu.<br />
Color Menu Select from among four colors (Sky Blue, Forest Green, Raspberry,<br />
and Plum) to change the color of the menu system and banner.<br />
Translucency You can change the translucency (see-through) level of the<br />
menu screens. Adjust the slider by using the left and right arrow buttons.<br />
Continues on next page...<br />
Chapter 4 49
Using the TV’s Menu System<br />
Advanced Options<br />
Auto On If you lose power to your TV, turn this feature on to have the TV powered on<br />
for you.<br />
Multiple TV Setup This features allows you to control three different RCA TVs. This is<br />
helpful if you have two or three RCA TVs near each other, and they also have this menu<br />
option, but you want to control them independent of each other. Program a second RCA<br />
TV to one of the device buttons (SAT•AUX or DVD) using the TV2 code 162. Select the<br />
TV2 option in that TV’s Remote Setup menu. If you have a third RCA TV, program a device<br />
button using the TV3 code 163. Select the TV3 option in that TV’s Remote Setup menu. Go<br />
to Chapter 2 for more information on programming your remote.<br />
50 Chapter 4
Frequently Asked Questions (FAQs)<br />
Chapter 5: Other Information<br />
Why does my TV take so long to turn on?<br />
Quick Startup is a power-saving feature in your TV. Select either enable or disable, which ever option is best for you.<br />
Enabling Quick Startup allows you to turn on the TV faster than if disabled. Keep in mind, if you disable Quick Startup<br />
it adds approximately 30 seconds to your TV’s turn on time.<br />
What’s the quickest way to view High Definition (HD) video?<br />
Connect an off-air antenna to the ANTENNA/CABLE INPUT to view free local digital channels. You might need to<br />
purchase an antenna. Go to page 8 for more information.<br />
How do I tell an analog channel from a digital channel?<br />
There are several different ways to tell if your channel is digital or not. Press the INFO button to display the channel<br />
banner. Look at the left corner for a channel information. Channels displaying a D, primary channel, and a subchannel<br />
are digital channels (not all digital channels have subchannels). Channels displaying an A, are analog. Go to page 31 for<br />
more information.<br />
Why does channel search find a lot of channels, but when I try to tune to them there’s nothing there?<br />
Some channels are enabled by the cable company that don’t carry programming, such as video-on-demand. When<br />
channels are unavailable, your TV’s screen displays Weak or No Signal. You probably want to get rid of these so they<br />
no longer appear in your channel list. Remove these in the Channel Setup menu. Go to page 37 for more information.<br />
Why does the first channel search take a long time?<br />
If you’ve checked each box in the channel search menu, the TV is looking for all available channels in the channel list.<br />
If you do have digital channels, the TV is also searching for each subchannel of that digital channel.<br />
How do I control other devices I’ve connected to the TV?<br />
Because your TV came with a universal remote, you can program your remote to the button corresponding with the<br />
device you have connected to your TV. Go to page 23 for information on programming your remote.<br />
Why do I have sound, but no picture when I turn on my TV?<br />
There is a lamp inside the TV which needs approximately one minute to reach full brightness. You’ll hear audio during<br />
this time and the picture increasingly gets brighter as the lamp warms up.<br />
Why are there bars on my screen and can I get rid of them?<br />
Analog channels are sent in a 4 x 3 format, which cannot fill a 16 x 9 screen like your TV. Most digital channels are<br />
sent in a 16 x 9 format which do fill your screen, but sometimes are sent in 4 x 3. It depends on how the station or<br />
device connected to your TV is formatting the video. Press the ZOOM +/- button to see the different formats available<br />
that may eliminate the bars. Go to page 42 for more information on screen format.<br />
Graphics contained within this publication are for representation only. 51
Other Information<br />
Troubleshooting<br />
Most problems you encounter with your TV can be corrected by consulting the following troubleshooting list.<br />
TV Problems<br />
TV won’t turn on<br />
• Press the TV button or ON/OFF button while remote is in TV mode and there’s a source of power to the outlet or outlet strip.<br />
• Make sure the TV is plugged in.<br />
• You might have tried to turn on the TV during the lamp cool-down. Wait a few moments and the picture will appear.<br />
• Has the power light on the front of the TV been blinking for one minute? If so, the lamp may be dead. Refer to the Power indicator<br />
is blinking or flashing section below for more information.<br />
• When you first plug your TV into an outlet, the Power indicator on the front panel will light and blink for approximately 30 seconds<br />
and then go off during the initialization of the TV. This happens only when the TV is unplugged and plugged back in. The TV can<br />
only be turned on after the Power indicator goes off.<br />
• Check the wall receptacle (or extension cord) to make sure it is “live” by plugging in something else, such as a lamp.<br />
• Something might be wrong with your remote control. Press the POWER button on the front of the TV. If the TV turns on, check the<br />
remote control solutions on page 54.<br />
• Multiple TV Setup might be set to the wrong option. Press MENU/OK on the front panel. Select Setup Options, then Advanced<br />
Options, then Multiple TV Setup. Choose TV (default).<br />
Power indicator is blinking or flashing<br />
If the light blinks 5 times, pauses, and blinks again 5 times, the lamp is trying to turn on. If the TV doesn’t turn on after 5 minutes and<br />
then the light blinks steadily for one minute, one of the following options is possible:<br />
• Lamp door may be open. Face the back of the TV. Locate the door at the bottom of the TV and close it. Turn off the TV and turn<br />
back on. The lamp should turn on.<br />
• Lamp may be dead. Go to page 56 for lamp replacement information.<br />
Buttons don’t work<br />
• If you’re using the remote control, press the TV button first to make sure the remote is in TV mode.<br />
• The front panel controls may be locked (disabled). Use the remote control to unlock the front panel controls by selecting the Front<br />
Button Block in the Parental Controls menu and choosing Front Buttons Unblocked.<br />
• Unplug the TV for five minutes and then plug it back in. Turn the TV on and try again.<br />
TV turns off while playing<br />
• Sleep Timer or Wake-Up Timer may have been activated. Go to page 49 for instructions.<br />
• Electronic protection circuit may have been activated because of a power surge. Wait 30 seconds and then turn on again. If this<br />
happens frequently, the voltage in your house may be abnormally high or low.<br />
• Unplug. Wait five minutes. Plug in again.<br />
TV turns on unexpectedly<br />
• Wake-Up Timer may have been activated. Go to page 49 for instructions.<br />
Video and audio are out of sync<br />
• If you’ve connected a device, such as a DVD player, to your TV’s Video jack, and to an audio receiver using the audio jacks, you may<br />
experience a slight delay between the audio heard and the video seen. Connect the DVD player to the TV’s Audio jacks, then use the<br />
TV’s FIXED/VARIABLE AUDIO OUTPUT jacks to connect to an audio receiver.<br />
If your TV is connected to an audio/video (A/V) receiver or home theatre system via the DIGITAL AUDIO OUT jack, read the following<br />
information.<br />
Continues on next page...<br />
52 Chapter 5
Other Information<br />
• If you’ve connected a device to your A/V receiver, such as a DVD player or satellite receiver, you may experience a slight delay<br />
between the audio heard and the video seen. This occurs because the digital audio is sent directly to the speakers while the video<br />
must be processed inside the TV before it is displayed.<br />
• If the device has Component Video (Y, Pb, Pr) jacks, connect these jacks to the TV’s Y, Pb, Pr jacks to minimize the discrepancy. This<br />
works best if the device supports Progressive Scan technology.<br />
• If necessary, you can connect the device directly to the TV using L/R audio jacks and bypassing the A/V receiver or you can program<br />
an audio delay in the A/V receiver so the audio and video match up (not all audio equipment has the ability to program delays).<br />
Check the Audio/Video Receiver’s manual.<br />
Blank screen<br />
• Make sure you have connected the device to the TV correctly.<br />
• Make sure the device connected to the TV is turned on and tuned to the corresponding Video Input Channel.<br />
• Try another channel, or press the INPUT button.<br />
• When you first turn off your TV, the screen fades from blue to black. Once the screen goes black, the TV’s internal lamp starts its<br />
cool-down cycle. If you try to turn on the TV during the cool-down cycle, the TV turns back on and you’ll hear audio, but the picture<br />
will take a few moments to be displayed.<br />
Unusual sound quality<br />
• Check the Graphic Equalizer, Sound Expansion, SAP and Sound Logic settings.<br />
• Check if SAP is turned on.<br />
• Check that the Audio Lang./ Mode or SAP is set to your language.<br />
Humming or buzzing noise<br />
• The TV is in its lamp cool-down cycle. To prolong the life of the TV’s lamp system, the TV must warm up and cool down properly.<br />
You may notice additional noise during these cycles.<br />
• Maybe the speakers are turned off. Check the FIXED/VARIABLE OUT control panel in the Audio menu.<br />
No picture, sound okay<br />
• If the indicator on the front of the TV is blinking for one minute, the lamp inside of your TV may need to be changed. Refer to the<br />
Power indicator is blinking or flashing section on the previous page for more information.<br />
• You might have tried to turn on the TV during lamp cool-down. Wait a few moments and the picture will be displayed.<br />
No sound, picture okay<br />
• Maybe the sound is muted. Try pressing the volume up button to restore sound.<br />
• Maybe the speakers are turned off in the Audio menu. Check the FIXED/VARIABLE OUT control panel in the Advanced Audio menu.<br />
• If using an S-Video, component or composite video connection, remember to also connect the device’s L and R AUDIO OUT jacks to<br />
the TV’s L and R INPUT jacks.<br />
• Check the Maximum Volume and Startup Volume settings in the Advanced Audio menu.<br />
Channel search finds few channels<br />
• The cable connected to the CABLE/ANTENNA INPUT jack might be loose.<br />
• Your off-air antenna might be getting a weak signal. Move it higher or get a bigger antenna.<br />
• Select all the options in the Channel Search menu, and retry channel search.<br />
Can’t select certain channel<br />
• May be blocked or not approved in the Parental Controls menu.<br />
• If using a VCR, check to make sure the TV/VCR button on the VCR is in the correct mode (press the TV/VCR or INPUT button on<br />
your VCR).<br />
• You usually can’t change channels when a menu is on the screen (press the CLEAR button).<br />
Chapter 5 53
Other Information<br />
Noisy stereo reception<br />
• May be a weak station. Use Audio menu to choose Mono sound.<br />
No picture, no sound but TV is on<br />
• The channel might be blank — change channels.<br />
• If you’re watching your VCR and it’s connected with coaxial cable to the CABLE/ANTENNA jack, tune the TV to channel 3 or 4<br />
(whichever channel is selected on the 3/4 switch on the back of your VCR). Also check to make sure the TV/VCR button on the VCR<br />
is in the correct mode (press the TV/VCR button on your VCR).<br />
• If a channel doesn’t exist and you tune to scrambled QAM channel, Weak or No Signal appears.<br />
Sound okay, picture poor<br />
• Check antenna and video connections. Make sure all of the cables are firmly connected to the jacks and they’re not damaged.<br />
• Try adjusting sharpness function to improve weak signals. Go to page 41 for more instructions.<br />
• Press the ZOOM+/– buttons repeatedly to view the picture in different video formats. Analog channels may look better when you use<br />
the Normal video format (the video format appears on the right side of the channel banner).<br />
Black box appears on the screen<br />
• Closed-captioning might be on. Check the Caption Display control panel in the Setup Options and Closed Captioning menu. Go to<br />
page 47 for more instructions.<br />
Problems with HDMI Connection<br />
• Make sure the HDMI or DVI device is turned on and the cables are firmly connected. If problems still occur, turn off your device. Reconnect<br />
your device. Reset the power by unplugging the power cord and plugging it back in.<br />
• If you are tuned to an HDMI input and you’re receiving Weak or No Signal message on-screen, press the INFO button on the remote.<br />
If Acquiring Channel appears in the channel banner, the HDMI or DVI device isn’t responding. Contact the manufacturer of the<br />
HDMI or DVI device for further assistance.<br />
• If you tune to the HDMI input and you see snow, the video goes in and out, or the video takes a long time to appear, your HDMI or<br />
DVI device is having trouble sending video information to the TV. Re-connect your device. Reset the power by unplugging the power<br />
cord and plugging it back in. Contact the manufacturer of the HDMI or DVI device for further assistance.<br />
The Remote Control Doesn’t Work<br />
• Something might be between the remote and the remote sensor on the device. Make sure there is a clear path.<br />
• Maybe the remote isn’t aimed directly at the device that you’re trying to operate.<br />
• Maybe remote is not in TV Mode. Press the TV button so the remote operates the TV.<br />
• Maybe batteries in remote are weak, dead, or installed incorrectly. If batteries are weak, you will not be able to activate backlighting<br />
on the remote; instead, backlight will blink once when activated. Put new batteries in the remote. Note, if you remove the batteries,<br />
you may have to reprogram the remote to operate other devices.<br />
• Multiple TV Setup might be set to the wrong option. Press MENU/OK on the front panel. Select Setup Options, then Advanced<br />
Options, then Multiple TV Setup. Choose TV (default).<br />
Problems with V-Chip/Parental Controls<br />
The rating limits don’t work<br />
• You must lock the settings. Go to the Main Menu (press MENU on your remote), select Channel Setup then Parental Controls (press<br />
3 on your remote), and select Lock TV (press 1 on your remote).<br />
I don’t remember my password and I want to unlock the TV<br />
• If you forget your password, put the remote in TV mode. Simultaneously press and hold MENU/OK on the television and VOL down<br />
on the remote for 3 seconds. Nothing appears on the screen, Parental Controls simply unlock and you can re-enter a password via<br />
Lock TV.<br />
Continues on next page...<br />
54 Chapter 5
Other Information<br />
The V-Chip won’t let me watch a program even though it’s not rated as violent.<br />
• Maybe the movie was given an NR (Not Rated) status. After you block movie ratings, you must set V-Chip Unrated to View separately<br />
in order to view movies with an NR rating.<br />
What Else Can I Do?<br />
If you’ve been through the Troubleshooting section and nothing has fixed your problem, try rebooting your TV. Note that<br />
after a reboot you may need to run your TV through the setup process again. To do a reboot, unplug the power cord from<br />
the wall outlet, power strip, etc. Keep your TV unplugged for about 5 minutes. Then plug the TV back in, turn on the TV,<br />
and see if the problem is fixed. If the problem remains, then please visit www.rca.com/television for updated FAQs or<br />
contact RCA Customer Support at the support number provided in your Warranty under How To Get Service.<br />
Chapter 5 55
Other Information<br />
Lamp Replacement Information<br />
Replacing the Lamp Unit<br />
Your TV’s source of light comes from a lamp – similar to lamps used in film or front projectors. Although this lamp is longlasting,<br />
it may need to be replaced eventually.<br />
When to replace the lamp<br />
You probably need a new lamp if there’s no picture, but you still can hear the audio and the power light on the front of the<br />
TV does the following: blinks 5 times, pauses, blinks 5 times again. If the TV doesn’t turn on after 5 minutes and then the<br />
light blinks steadily for one minute, the lamp may be dead. If you have any concerns, please contact us at 1-866-723-6486<br />
or call an authorized servicer in your area.<br />
Note: The same symptoms occur if the lamp unit isn’t seated correctly or lamp access door is ajar. If you<br />
have recently accessed the lamp, make sure the lamp access door is completely closed and the lamp unit is<br />
seated correctly.<br />
What to do<br />
The lamp has been designed to make installation as easy as possible, but if you don’t follow the directions, there is a risk of<br />
injury.<br />
• You can easily replace the lamp yourself by following the instructions that come packed with the new lamp. If your TV<br />
is still covered by the warranty, call 1-866-723-6486 to receive troubleshooting assistance and a lamp replacement.<br />
• If your TV’s warranty has expired, call 1-800-338-0376 to purchase a lamp replacement. If you are not comfortable<br />
replacing the lamp yourself, call 1-866-723-6486 and we will refer you to a service person who will replace the lamp for<br />
you. There will be a service fee.<br />
This symbol indicates that the lamp in the HDTV contains mercury. Special disposal of the lamp for<br />
environmental reasons may be required under the laws applicable to your jurisdiction. For disposal or recycling<br />
information, please contact your local authorities or the Electronic Industries Alliance: www.eiae.org or call<br />
1-800-338-0376 for more details.<br />
Service Model Number Numéro de Modéle-Service<br />
M50WHXXXX<br />
000000000 X<br />
SERIAL SERIE<br />
LAMP<br />
EXAMPLE: Service<br />
Model Number<br />
sticker with lamp<br />
type listed.<br />
What you’ll need to get started:<br />
• To order the correct lamp, you’ll need to know your TV’s model number, serial number,<br />
and lamp type—this information is listed on the Service Model Number sticker (example<br />
of the sticker is shown at left). To locate the sticker, face the back of the TV. The sticker<br />
is located on the right side of the TV (see picture below for sticker location).<br />
• Follow the replacement instructions that come packed with the new lamp.<br />
Service Model Number<br />
Sticker location with<br />
Lamp Type<br />
56 Chapter 5
Other Information<br />
HDTV Specifications *<br />
Tuning Capability<br />
Video<br />
Sound<br />
Convenience<br />
Front Panel<br />
Back Panel<br />
Channel Tuning..........................................................................NTSC/ATSC/64 QAM/256 QAM<br />
Digital Cable Compatibility........................................................QAM, HDMI/DVI, Component<br />
3:2 Pull Down.............................................................................Yes<br />
16 x 9 / 4 x 3 Format Control (Screen).....................................Yes<br />
Adaptive Video Noise Reduction...............................................Yes<br />
Adjustable Color Temperature...................................................Yes<br />
Adjustable Picture Control.........................................................Yes<br />
Auto Color Control.....................................................................Yes<br />
Comb Filter ................................................................................Digital Frame Comb (3D Y/C)<br />
Optimum Contrast, High-Resolution Screen.............................Yes<br />
Green Enhance...........................................................................On, Off<br />
Hybrid Lens System....................................................................Yes<br />
Picture Presets............................................................................Yes<br />
Light Engine Type......................................................................DLP Light Engine<br />
Vertical Viewing Angle (Alpha V)..............................................20˚<br />
Horizontal Resolution (Picture Width)......................................1280<br />
Horizontal Viewing Angle (Alpha H)........................................80<br />
Audio Power (Watts) Front Speakers........................................10 Watts/Channel<br />
Sound Presets Mode...................................................................4 plus Personal<br />
Full Range Front Speakers.........................................................2<br />
Graphic Equalizer.......................................................................7 band<br />
Second Audio Program (SAP)....................................................Yes<br />
Sound Logic Audio Leveler........................................................Yes<br />
SRS ................................................................................Yes<br />
Auto Channel Search..................................................................Yes<br />
Multilingual On-screen Display.................................................English, French, Spanish<br />
Auto Tuning................................................................................Yes<br />
Closed Captioning......................................................................Analog & Digital<br />
Front Button Block.....................................................................Yes<br />
Commercial Skip ........................................................................Yes (available on certain models).<br />
Parental Control with USA & Canada V-Chip...........................Yes<br />
Picture Memory Presets for Video Inputs.................................Yes (Individual Memory)<br />
Clock (Time), Sleep and Wake-Up Timers...............................Yes<br />
Stereo Headphone Jack .............................................................3.5mm Stereo Mini-jack<br />
Side A/V Input............................................................................Composite and S-Video<br />
Composite and S-Video A/V Inputs..........................................2<br />
Component video Syncroscan with Autodetect........................2<br />
Antenna/Cable Inputs................................................................1 - RF<br />
HDMI/DVI Input (with Audio Input menu selection) .............2<br />
Digital Audio Output (Optical)..................................................1<br />
Fixed or Variable Audio Outputs...............................................1 set, menu switchable<br />
*Specifications are subject to change.<br />
Chapter 5 57
Other Information<br />
Limited Warranty<br />
What your warranty covers:<br />
• Defects in materials or workmanship to the first consumer purchaser.<br />
For how long after your purchase:<br />
• One year from date of purchase for labor charges excluding labor charges for replacement of the lamp unit. At our<br />
option we will either pay an Authorized RCA Service Center the labor to repair your television or replace your television<br />
with a new or refurbished unit.<br />
• One year from date of purchase for parts. At our option we will either supply new or refurbished parts to an Authorized<br />
RCA Service Center for them to repair your television or replace your television with a new or refurbished unit.<br />
• One year from date of purchase for the original lamp unit. At our option we will exchange a defective lamp unit with<br />
a new or refurbished lamp unit at no charge to you. Labor charges for the replacement of the lamp unit are your<br />
responsibility and are not covered under this warranty. The lamp unit is user-replaceable.<br />
The warranty period for rental begins with the first rental or 45 days from the date of shipment to the rental firm, whichever<br />
comes first.<br />
What your warranty does not cover:<br />
• Customer instruction. (Your Owner’s <strong>Manual</strong> describes how to install, adjust, and operate your unit.<br />
• Installation and related adjustments.<br />
• Damage resulting from non-approved installation methods.<br />
• Signal reception problems not caused by your unit.<br />
• Damage from misuse or neglect.<br />
• Batteries.<br />
• Labor to replace the light engine and lamp assembly after one year from the date of purchase.<br />
• A television that has been modified or incorporated into other products or is used for institutional or other commercial<br />
purposes.<br />
• A unit purchased or serviced outside the U.S.A.<br />
• Acts of nature, such as but not limited to lightning damage.<br />
• Special, incidental or consequential damages.<br />
How you get service:<br />
• Call 1-877-RCA-HDTV and have your unit’s date of purchase and model/serial number ready.<br />
• A representative will troubleshoot your problem over the phone.<br />
• If the representative determines that you should receive service, they will provide you with the name(s) of the<br />
Authorized Service Center in your area.<br />
• Contact the Service Center and arrange service. If your unit is located within the geographic territory covered by an<br />
Authorized Service Center, the Authorized Service Center will either arrange for service to be performed in your home<br />
or for pick-up and return service to enable the Authorized Service Center to perform service at the Authorized Service<br />
Center. If your unit is not located within the geographic territory covered by an Authorized Service Center, you must<br />
take your unit to the Service Center location at your own expense, or pay for the cost the Service Center may charge to<br />
transport your unit to and from your home.<br />
• Proof of purchase in the form of a bill of sale or receipted invoice which is evidence that the product is within the<br />
warranty period must be presented to obtain warranty service. For rental firms, proof of first rental is also required.<br />
Product Registration:<br />
• Please complete and mail the Product Registration Card packed with your TV or register on-line at<br />
www.rca.com/television. It will make it easier to contact you should it ever be necessary. The return of the card is not<br />
required for warranty coverage.<br />
58 Chapter 5
Other Information<br />
Limitation of Warranty:<br />
• THE WARRANTY STATED ABOVE IS THE ONLY WARRANTY APPLICABLE TO THIS PRODUCT. NO VERBAL OR<br />
WRITTEN INFORMATION GIVEN BY TTE TECHNOLOGY, INC., ITS AGENTS OR EMPLOYEES SHALL CREATE A<br />
GUARANTY OR IN ANY WAY INCREASE OR MODIFY THE SCOPE OF THIS WARRANTY.<br />
• REPAIR OR REPLACEMENT AS PROVIDED UNDER THIS WARRANTY IS THE EXCLUSIVE REMEDY OF THE<br />
CONSUMER. TTE TECHNOLOGY, INC. SHALL NOT BE LIABLE FOR SPECIAL, INCIDENTAL OR CONSEQUENTIAL<br />
DAMAGES RESULTING FROM THE USE OF THIS PRODUCT OR ARISING OUT OF ANY BREACH OF ANY EXPRESS<br />
OR IMPLIED WARRANTY ON THIS PRODUCT. THIS DISCLAIMER OF WARRANTIES AND LIMITED WARRANTY<br />
ARE GOVERNED BY THE LAWS OF THE STATE OF INDIANA. EXCEPT TO THE EXTENT PROHIBITED BY<br />
APPLICABLE LAW, ANY IMPLIED WARRANTY OF MERCHANTABILITY OR FITNESS FOR A PARTICULAR PURPOSE<br />
ON THIS PRODUCT IS LIMITED TO THE APPLICABLE WARRANTY AND WARRANTY PERIOD SET FORTH ABOVE.<br />
How State Law relates to warranty:<br />
• Some states do not allow the exclusion nor limitation of incidental or consequential damages, or limitations on how<br />
long an implied warranty lasts, so the above limitations or exclusions may not apply to you.<br />
• This warranty gives you specific legal rights, and you also may have other rights that vary from state to state.<br />
If you purchased your unit outside the United States or seek warranty coverage outside the United States:<br />
• This warranty does not apply. Contact your dealer for warranty information.<br />
Service calls which do not involve defective materials or workmanship are not covered by this warranty. Costs<br />
of such service calls are the sole responsibility of the purchaser.<br />
Chapter 5 59
Other Information<br />
Care and Cleaning<br />
CAUTION: Turn OFF your TV before cleaning.<br />
You can clean the TV as required, using a soft lint-free cloth. Be sure to occasionally dust the ventilation slots in the cabinet<br />
to help assure adequate ventilation.<br />
The TV’s screen may be cleaned with a soft, lint-free cloth as well. Take care not to scratch or mar the screen. If necessary,<br />
you may use a cloth dampened with warm water.<br />
Never use strong cleaning agents, such as ammonia-based cleaners, or abrasive powder. These types of cleaners will damage<br />
the TV.<br />
While cleaning do not spray liquid directly on the screen, or allow liquid to run down the screen and inside the TV. Also,<br />
avoid placing drinks or vases with water on top of the TV. This could increase the risk of fire or shock hazard or damage to<br />
the TV.<br />
FCC Information<br />
This equipment has been tested and found to comply with the limits for a Class B digital device, pursuant to Part 15 of<br />
the FCC Rules. These limits are designed to provide reasonable protection against harmful interference in a residential<br />
installation. This equipment generates, uses, and can radiate radio frequency energy and, if not installed and used in<br />
accordance with the instructions, may cause harmful interference to radio communications. However, there is no guarantee<br />
that interference will not occur in a particular installation. If this equipment does cause harmful interference to radio or<br />
television reception, which can be determined by turning the equipment off and on, the user is encouraged to try to correct<br />
the interference by one or more of the following measures:<br />
• Reorient or relocate the receiving antenna.<br />
• Increase the separation between the equipment and receiver.<br />
• Connect the equipment into an outlet on a circuit different from that to which the receiver is connected.<br />
• Consult the dealer or an experienced radio/TV technician for help.<br />
This Class B digital apparatus complies with Canadian ICES-003<br />
60 Chapter 5
This page left intentionally blank.
This page left intentionally blank.
This page left intentionally blank.
Manufactured under license from Dolby Laboratories.<br />
"Dolby" and the double-D symbol are registered trademarks of Dolby Laboratories.<br />
Visit the RCA website at www.rca.com/television<br />
Please do not send any products to the Indianapolis address listed in this manual or on the carton. This will only<br />
add delays in service for your product.<br />
TTE Technology, Inc.<br />
101 West 103rd Street<br />
Indianapolis, IN 46290<br />
©2007 TTE Technology, Inc.<br />
RCA and associated marks are trademarks of THOMSON S.A. used<br />
under license to TTE Corporation.<br />
Printed in USA<br />
Part Number 72-T199727-540