Interactive Program Guide - Cogeco
Interactive Program Guide - Cogeco
Interactive Program Guide - Cogeco
You also want an ePaper? Increase the reach of your titles
YUMPU automatically turns print PDFs into web optimized ePapers that Google loves.
DIGITAL VIDEO RECORDING<br />
28<br />
Slow Motion<br />
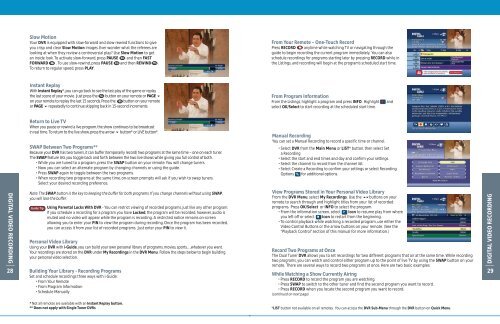
Your DVR is equipped with slow-forward and slow-rewind functions to give<br />
you crisp and clear Slow Motion images. Ever wonder what the referees are<br />
looking at when they review a controversial play? Use Slow Motion to get<br />
an inside look. To activate slow-forward, press PAUSE and then FAST<br />
FORWARD . To use slow-rewind, press PAUSE and then REWIND .<br />
To return to regular speed, press PLAY.<br />
Instant Replay<br />
With Instant Replay*, you can go back to see the last play of the game or replay<br />
the last scene of your movie. Just press the button on your remote or PAGE <br />
on your remote to replay the last 15 seconds. Press the button on your remote<br />
or PAGE repeatedly to continue skipping back in 15-second increments.<br />
Return to Live TV<br />
When you pause or rewind a live program, the show continues to be broadcast<br />
in real time. To return to the live show, press the arrow button* or LIVE button*.<br />
SWAP Between Two <strong>Program</strong>s**<br />
Because your DVR has two tuners, it can buffer (temporarily record) two programs at the same time – one on each tuner.<br />
The SWAP feature lets you toggle back and forth between the two live shows while giving you full control of both.<br />
While you are tuned to a program, press the SWAP button on your remote. You will change tuners.<br />
Now you can select an alternate program by changing channels or using the guide.<br />
Press SWAP again to toggle between the two programs.<br />
When recording two programs at the same time, on-screen prompts will ask if you wish to swap tuners.<br />
Select your desired recording preference.<br />
Note: The SWAP button is the key to keeping the buffer for both programs. If you change channels without using SWAP,<br />
you will lose the buffer.<br />
<strong>Guide</strong> Tip Using Parental Locks With DVR - You can restrict viewing of recorded programs, just like any other program.<br />
If you schedule a recording for a program you have Locked, the program will be recorded, however, audio is<br />
muted and no video will appear while the program is recording. A restricted notice remains on-screen<br />
allowing you to enter your PIN to view the program during recording. Once the program has been recorded,<br />
you can access it from your list of recorded programs. Just enter your PIN to view it.<br />
Personal Video Library<br />
Using your DVR with i-<strong>Guide</strong>, you can build your own personal library of programs, movies, sports…whatever you want.<br />
Your recordings are stored on the DVR under My Recordings in the DVR Menu. Follow the steps below to begin building<br />
your personal video selection.<br />
Building Your Library - Recording <strong>Program</strong>s<br />
Set and schedule recordings three ways with i-<strong>Guide</strong>:<br />
From Your Remote<br />
From <strong>Program</strong> Information<br />
Schedule Manually<br />
* Not all remotes are available with an Instant Replay button.<br />
** Does not apply with Single Tuner DVRs<br />
From Your Remote – One-Touch Record<br />
Press RECORD anytime while watching TV or navigating through the<br />
guide to begin recording the current program immediately. You can also<br />
schedule recordings for programs starting later by pressing RECORD while in<br />
the Listings, and recording will begin at the program’s scheduled start time.<br />
From <strong>Program</strong> Information<br />
From the Listings, highlight a program and press INFO. Highlight and<br />
select OK/Select to start recording at the scheduled start time.<br />
Manual Recording<br />
You can set a Manual Recording to record a specific time or channel.<br />
Select DVR from the Main Menu or LIST* button, then select Set<br />
a Recording<br />
Select the start and end times and day and confirm your settings.<br />
Select the channel to record from the channel list.<br />
Select Create a Recording to confirm your settings or select Recording<br />
Options for additional options.<br />
View <strong>Program</strong>s Stored in Your Personal Video Library<br />
From the DVR Menu, select My Recordings. Use the buttons on your<br />
remote to search through and highlight titles from your list of recorded<br />
programs. Press OK/Select or INFO to select the program.<br />
From the information screen, select Icon to resume play from where<br />
you left off or select Icon to restart from the beginning.<br />
To control playback while watching a recorded program, use either the<br />
Video Control Buttons or the arrow buttons on your remote. (See the<br />
“Playback Control” section of this manual for more information.)<br />
Record Two <strong>Program</strong>s at Once<br />
The Dual Tuner DVR allows you to set recordings for two different programs that air at the same time. While recording<br />
two programs, you can watch and control either program up to the point of live TV by using the SWAP button on your<br />
remote. There are several ways to record two programs at once. Here are two basic examples:<br />
While Watching a Show Currently Airing<br />
Press RECORD to record the program you are watching.<br />
Press SWAP to switch to the other tuner and find the second program you want to record.<br />
Press RECORD when you locate the second program you want to record.<br />
(continued on next page)<br />
*LIST button not available on all remotes. You can access the DVR Sub-Menu through the DVR button on Quick Menu.<br />
DIGITAL VIDEO RECORDING<br />
29


