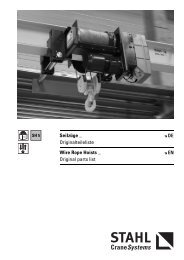
Wire Rope Hoists _ Operating and Maintenance ... - STAHL-POLSKA
Wire Rope Hoists _ Operating and Maintenance ... - STAHL-POLSKA
Wire Rope Hoists _ Operating and Maintenance ... - STAHL-POLSKA

Create successful ePaper yourself
Turn your PDF publications into a flip-book with our unique Google optimized e-Paper software.
6 Inspection <strong>and</strong> maintenance<br />
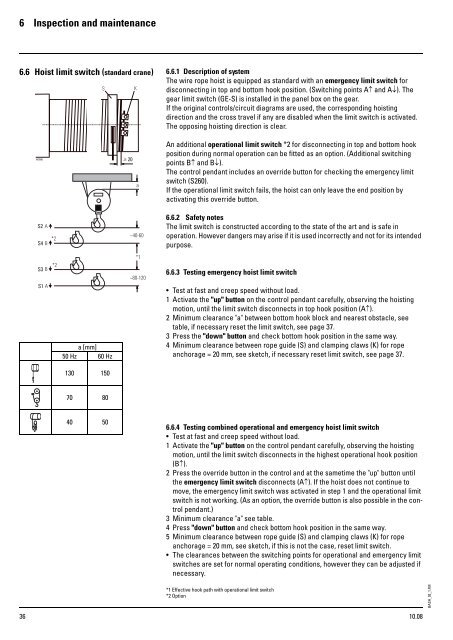
6.6 Hoist limit switch (st<strong>and</strong>ard crane)<br />
36<br />
a [mm]<br />
50 Hz 60 Hz<br />
130 150<br />
70 80<br />
40 50<br />
6.6.1 Description of system<br />
The wire rope hoist is equipped as st<strong>and</strong>ard with an emergency limit switch for<br />
disconnecting in top <strong>and</strong> bottom hook position. (Switching points A↑ <strong>and</strong> A↓). The<br />
gear limit switch (GE-S) is installed in the panel box on the gear.<br />
If the original controls/circuit diagrams are used, the corresponding hoisting<br />
direction <strong>and</strong> the cross travel if any are disabled when the limit switch is activated.<br />
The opposing hoisting direction is clear.<br />
An additional operational limit switch *2 for disconnecting in top <strong>and</strong> bottom hook<br />
position during normal operation can be fitted as an option. (Additional switching<br />
points B↑ <strong>and</strong> B↓).<br />
The control pendant includes an override button for checking the emergency limit<br />
switch (S260).<br />
If the operational limit switch fails, the hoist can only leave the end position by<br />
activating this override button.<br />
6.6.2 Safety notes<br />
The limit switch is constructed according to the state of the art <strong>and</strong> is safe in<br />
operation. However dangers may arise if it is used incorrectly <strong>and</strong> not for its intended<br />
purpose.<br />
6.6.3 Testing emergency hoist limit switch<br />
Test at fast <strong>and</strong> creep speed without load.<br />
1 Activate the "up" button on the control pendant carefully, observing the hoisting<br />
motion, until the limit switch disconnects in top hook position (A↑).<br />
2 Minimum clearance "a" between bottom hook block <strong>and</strong> nearest obstacle, see<br />
table, if necessary reset the limit switch, see page 37.<br />
3 Press the "down" button <strong>and</strong> check bottom hook position in the same way.<br />
4 Minimum clearance between rope guide (S) <strong>and</strong> clamping claws (K) for rope<br />
anchorage = 20 mm, see sketch, if necessary reset limit switch, see page 37.<br />
6.6.4 Testing combined operational <strong>and</strong> emergency hoist limit switch<br />
Test at fast <strong>and</strong> creep speed without load.<br />
1 Activate the "up" button on the control pendant carefully, observing the hoisting<br />
motion, until the limit switch disconnects in the highest operational hook position<br />
(B↑).<br />
2 Press the override button in the control <strong>and</strong> at the sametime the "up" button until<br />
the emergency limit switch disconnects (A↑). If the hoist does not continue to<br />
move, the emergency limit switch was activated in step 1 <strong>and</strong> the operational limit<br />
switch is not working. (As an option, the override button is also possible in the control<br />
pendant.)<br />
3 Minimum clearance "a" see table.<br />
4 Press "down" button <strong>and</strong> check bottom hook position in the same way.<br />
5 Minimum clearance between rope guide (S) <strong>and</strong> clamping claws (K) for rope<br />
anchorage = 20 mm, see sketch, if this is not the case, reset limit switch.<br />
The clearances between the switching points for operational <strong>and</strong> emergency limit<br />
switches are set for normal operating conditions, however they can be adjusted if<br />
necessary.<br />
*1 Effective hook path with operational limit switch<br />
*2 Option<br />
10.08<br />
BASH_02_1.FM