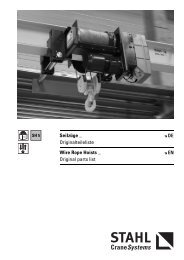
Wire Rope Hoists _ Operating and Maintenance ... - STAHL-POLSKA
Wire Rope Hoists _ Operating and Maintenance ... - STAHL-POLSKA
Wire Rope Hoists _ Operating and Maintenance ... - STAHL-POLSKA

You also want an ePaper? Increase the reach of your titles
YUMPU automatically turns print PDFs into web optimized ePapers that Google loves.
6 Inspection <strong>and</strong> maintenance<br />
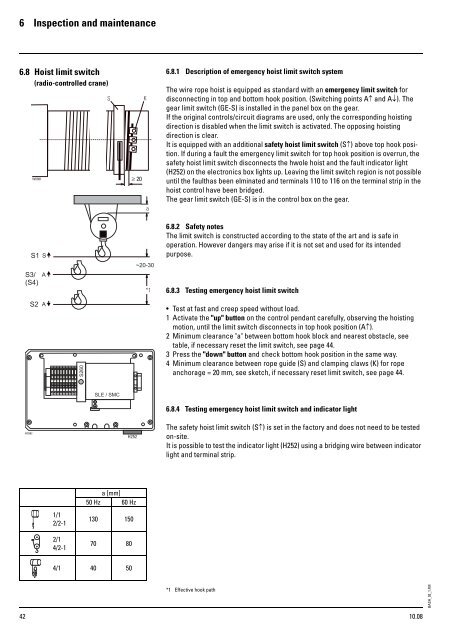
6.8 Hoist limit switch<br />
(radio-controlled crane)<br />
42<br />
1/1<br />
2/2-1<br />
2/1<br />
4/2-1<br />
a [mm]<br />
50 Hz 60 Hz<br />
130 150<br />
70 80<br />
4/1 40 50<br />
6.8.1 Description of emergency hoist limit switch system<br />
The wire rope hoist is equipped as st<strong>and</strong>ard with an emergency limit switch for<br />
disconnecting in top <strong>and</strong> bottom hook position. (Switching points A↑ <strong>and</strong> A↓). The<br />
gear limit switch (GE-S) is installed in the panel box on the gear.<br />
If the original controls/circuit diagrams are used, only the corresponding hoisting<br />
direction is disabled when the limit switch is activated. The opposing hoisting<br />
direction is clear.<br />
It is equipped with an additional safety hoist limit switch (S↑) above top hook position.<br />
If during a fault the emergency limit switch for top hook position is overrun, the<br />
safety hoist limit switch disconnects the hwole hoist <strong>and</strong> the fault indicator light<br />
(H252) on the electronics box lights up. Leaving the limit switch region is not possible<br />
until the faulthas been elminated <strong>and</strong> terminals 110 to 116 on the terminal strip in the<br />
hoist control have been bridged.<br />
The gear limit switch (GE-S) is in the control box on the gear.<br />
6.8.2 Safety notes<br />
The limit switch is constructed according to the state of the art <strong>and</strong> is safe in<br />
operation. However dangers may arise if it is not set <strong>and</strong> used for its intended<br />
purpose.<br />
6.8.3 Testing emergency hoist limit switch<br />
Test at fast <strong>and</strong> creep speed without load.<br />
1 Activate the "up" button on the control pendant carefully, observing the hoisting<br />
motion, until the limit switch disconnects in top hook position (A↑).<br />
2 Minimum clearance "a" between bottom hook block <strong>and</strong> nearest obstacle, see<br />
table, if necessary reset the limit switch, see page 44.<br />
3 Press the "down" button <strong>and</strong> check bottom hook position in the same way.<br />
4 Minimum clearance between rope guide (S) <strong>and</strong> clamping claws (K) for rope<br />
anchorage = 20 mm, see sketch, if necessary reset limit switch, see page 44.<br />
6.8.4 Testing emergency hoist limit switch <strong>and</strong> indicator light<br />
The safety hoist limit switch (S↑) is set in the factory <strong>and</strong> does not need to be tested<br />
on-site.<br />
It is possible to test the indicator light (H252) using a bridging wire between indicator<br />
light <strong>and</strong> terminal strip.<br />
*1 Effective hook path<br />
10.08<br />
BASH_02_1.FM