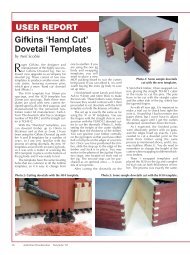
Instructions for web - Gifkins Dovetail Jig
Instructions for web - Gifkins Dovetail Jig
Instructions for web - Gifkins Dovetail Jig

Create successful ePaper yourself
Turn your PDF publications into a flip-book with our unique Google optimized e-Paper software.
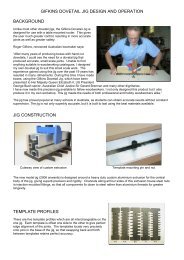
For vice or bench top use the table could be as small as 300mm x 500mm although larger (say 400mm x 600mm) is<br />
more useful. For a floor standing model a minimum size <strong>for</strong> stability is about 500mm x 700mm.<br />
Material <strong>for</strong> the table surface needs to be 4mm to 6mm thick, reasonable hard and not brittle. I have used two<br />
sheets of 3mm Lamipanel (made by Laminex Industries) glued together with contact cement <strong>for</strong> my tables and this<br />
works well.<br />
NOTE:<br />
Lamipanel is a sheet material (laminated phenolic resin) made <strong>for</strong> wet area wall paneling such as shower recesses.<br />
Similar products should be available in most countries.<br />
A single sheet of 3mm Lamipanel does not offer enough support <strong>for</strong> the router once screws have been countersunk<br />
into it. Other materials that would be suitable are Polycarbonate, Phenolic Resin, Aluminium and no doubt many<br />
other materials. Please let me know if you find a readily available material that works well so that I can update<br />
these instructions. Whatever the material is its thickness should be in the 4mm to 6mm range. The following plan<br />
assumes you are using Lamipanel.<br />
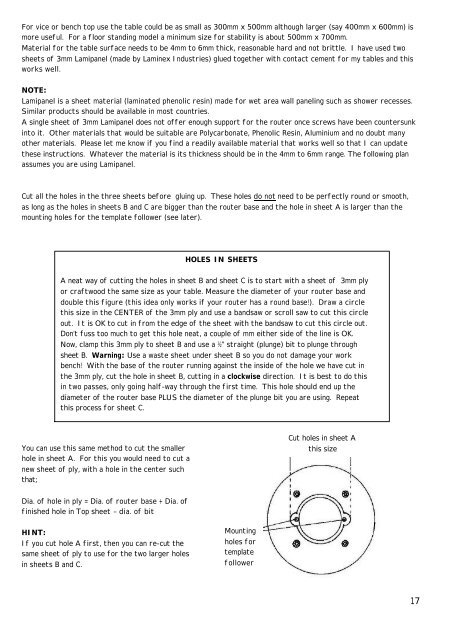
Cut all the holes in the three sheets be<strong>for</strong>e gluing up. These holes do not need to be perfectly round or smooth,<br />
as long as the holes in sheets B and C are bigger than the router base and the hole in sheet A is larger than the<br />
mounting holes <strong>for</strong> the template follower (see later).<br />
You can use this same method to cut the smaller<br />
hole in sheet A. For this you would need to cut a<br />
new sheet of ply, with a hole in the center such<br />
that;<br />
Dia. of hole in ply = Dia. of router base + Dia. of<br />
finished hole in Top sheet – dia. of bit<br />
HINT:<br />
If you cut hole A first, then you can re-cut the<br />
same sheet of ply to use <strong>for</strong> the two larger holes<br />
in sheets B and C.<br />
HOLES IN SHEETS<br />
A neat way of cutting the holes in sheet B and sheet C is to start with a sheet of 3mm ply<br />
or craftwood the same size as your table. Measure the diameter of your router base and<br />
double this figure (this idea only works if your router has a round base!). Draw a circle<br />
this size in the CENTER of the 3mm ply and use a bandsaw or scroll saw to cut this circle<br />
out. It is OK to cut in from the edge of the sheet with the bandsaw to cut this circle out.<br />
Don’t fuss too much to get this hole neat, a couple of mm either side of the line is OK.<br />
Now, clamp this 3mm ply to sheet B and use a ½” straight (plunge) bit to plunge through<br />
sheet B. Warning: Use a waste sheet under sheet B so you do not damage your work<br />
bench! With the base of the router running against the inside of the hole we have cut in<br />
the 3mm ply, cut the hole in sheet B, cutting in a clockwise direction. It is best to do this<br />
in two passes, only going half-way through the first time. This hole should end up the<br />
diameter of the router base PLUS the diameter of the plunge bit you are using. Repeat<br />
this process <strong>for</strong> sheet C.<br />
Mounting<br />
holes <strong>for</strong><br />
template<br />
follower<br />
Cut holes in sheet A<br />
this size<br />
17