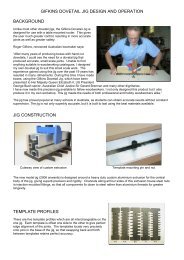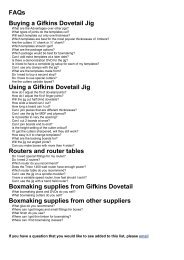
Instructions for web - Gifkins Dovetail Jig
Instructions for web - Gifkins Dovetail Jig
Instructions for web - Gifkins Dovetail Jig

Create successful ePaper yourself
Turn your PDF publications into a flip-book with our unique Google optimized e-Paper software.
Edge Misalignment<br />
There are a number of factors that impact on the edge alignment of the joints, and it can be quite difficult to<br />
determine which one is causing problems.<br />
1. Timber not square<br />
2. Stop not square<br />
3. Not clamping wood vertically on jig<br />
4. Turning wood inside out to cut the second end<br />
5. Turning end <strong>for</strong> end (with stop in the same position) with unequal width timber<br />
6. Not clamping wood tight against stop<br />
It is more than likely that errors are a combination of the points above, with small errors adding together to<br />
create the problem.<br />
# 1<br />
See instructions, note 23 on page 6. If you have difficulty preparing stock square, it can be achieved quickly and<br />
easily using a shooting board and a hand plane.<br />
#2<br />
<strong>Jig</strong>s sold after March 2003 should give perfect alignment. There were a few of the blue aluminium stops made<br />
be<strong>for</strong>e this that we subsequently found were inaccurately machined, and also the earlier timber stops could<br />
occasionally loose their accuracy if the timber moved.<br />
To check that the stop is square, use a square from either side of the jig and measure any gaps between the<br />
square and the stop with feeler gauges. Compare the results with CASES 1, 2 and 3 on page 22. This method is<br />
only approximate, as there is sometimes a slight curvature in the backing boards. This curvature does not have any<br />
effect on the function of the jig, but can make it very difficult to check the accuracy of the stop. If the stop is<br />
square, then it must be the timber preparation and /or the procedure that is causing the problem.<br />
#3<br />
Once you have clamped the timber to the jig, have a close look to make sure the timber is sitting flat against the<br />
template. See instructions, note 22 page 6.<br />
#4<br />
The OUTSIDE of the box or drawer must always be facing out from the jig. It is vital to keep this in mind when<br />
turning the board end <strong>for</strong> end. See instructions, note 18 page 5.<br />
#5<br />
You can only turn end <strong>for</strong> end (with the stop in the one position) if all the boards are exactly the same width AND<br />
the joint is roughly symmetrical across the board. See pages 14 and 15 in the instructions.<br />
#6<br />
As <strong>for</strong> #3 above, check that the workpiece is hard up against the stop after clamping it in place. Until you get in<br />
the habit of using the clamp with one hand, it can be difficult to hold the workpiece against the jig AND against<br />
the stop whilst clamping in place. This is probably the most common reason <strong>for</strong> misaligned joints. A careful visual<br />
inspection after clamping will eliminate most problems.<br />
21