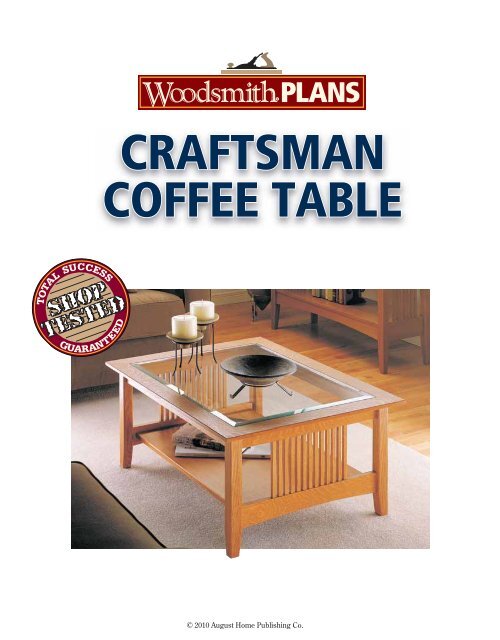
CRAFTSMAN COFFEE TABLE - Woodsmith Shop
CRAFTSMAN COFFEE TABLE - Woodsmith Shop
CRAFTSMAN COFFEE TABLE - Woodsmith Shop

Create successful ePaper yourself
Turn your PDF publications into a flip-book with our unique Google optimized e-Paper software.
<strong>CRAFTSMAN</strong><br />
<strong>COFFEE</strong> <strong>TABLE</strong><br />
© 2010 August Home Publishing Co.
FEATURE<br />
PROJECT<br />
<strong>COFFEE</strong> <strong>TABLE</strong><br />
Quartersawn oak, mortise and tenon joinery, and a beveled glass top<br />
make this coffee table a welcome addition to any home.<br />
Drilling a round hole to create<br />
a mortise for a square tenon<br />
has always struck me as a bit odd. But<br />
aside from investing in an expensive<br />
machine for making mortises, the<br />
only solution I could come up with<br />
in the past was to round the tenon or<br />
square up the mortise with a chisel.<br />
Now, if you’re only talking about a<br />
few mortises, that’s not a big deal. In<br />
fact, it’s kind of relaxing. But when it<br />
comes to the numerous spindles on<br />
the ends of this coffee table, it’s a bit<br />
of a different story.<br />
There are twenty-six spindles in the<br />
table, which means there’s a total of<br />
fifty-two mortises to drill and square<br />
up. Instead of a quiet hour or two, you<br />
could spend the better part of a day<br />
on this part of the project alone.<br />
Fortunately, I came up with a different<br />
procedure to make the mortises<br />
both quickly and accurately. (I’ll<br />
give you a hint — it doesn’t involve<br />
using a drill press or a chisel.)<br />
GLASS TOP. But the mortises aren’t<br />
the only feature of this table worth<br />
mentioning. The beveled glass top is<br />
also a little out of the ordinary.<br />
At first, I was worried that the beveled<br />
glass would look too “modern”<br />
for this style of table. But actually,<br />
it complements the style by giving<br />
you a clear view of the spindles from<br />
just about any angle.<br />
However, if the glass top doesn’t<br />
suit your home decor or taste and you<br />
would prefer the look of a solid wood<br />
top, I’ve included that as an option in<br />
the box on page 8. You’ll find that it<br />
isn’t too difficult to make the switch<br />
to a more traditional look.<br />
CHOOSING MATERIALS. One more<br />
thing. For the table pictured above,<br />
I decided to use quartersawn white<br />
oak. This balances the coffee table’s<br />
more contemporary glass top with its<br />
traditional Craftsman design.<br />
1 www.<strong>Woodsmith</strong>.com © 2010 August Home Publishing Co. All Rights Reserved.
Construction<br />
Details<br />
Overall Dimensions:<br />
30" x 38" x 17"<br />
For optional solid wood<br />
top, see box on page 8<br />
Inside faces<br />
of legs are<br />
tapered<br />
Spindles<br />
For details on<br />
making mortises<br />
for spindles,<br />
see page 9<br />
Mortise<br />
strips are<br />
glued into<br />
rails, see detail<br />
MATERIALS<br />
A Legs (4) 13 /4 x 13 /4 - 161 /4<br />
B Upper End Rails (2)<br />
3<br />
/4 x 2 - 241 /2<br />
C Lower End Rails (2)<br />
3<br />
/4 x 3 - 241 /2<br />
D Mortise Strips (4)<br />
1<br />
/2 x 3<br />
/8 - 241 /4<br />
E Spindles (26)<br />
1<br />
/2 x 1<br />
/2 - 81 /4<br />
F Cleats (2)<br />
3<br />
/4 x 11 /2 - 17<br />
G Stretchers (2)<br />
3<br />
/4 x 2 - 321 /2<br />
H Shelf (1)<br />
3<br />
/4 x 22 - 32<br />
I Frame Front/Back (2) 3<br />
/4 x 31 /2 - 38<br />
J Frame Sides (2)<br />
3<br />
/4 x 31 /2 - 30<br />
HARDWARE<br />
Beveled<br />
glass top<br />
sits in<br />
rabbeted<br />
frame<br />
(1) Beveled Glass 1 /4 - 24 x 32<br />
(6) #8 x 1 1 /4 Fh Woodscrews<br />
(18) #8 x 2 Fh Woodscrews<br />
Top frame is<br />
joined with<br />
splined miters<br />
Shelf is<br />
supported<br />
by cleats<br />
Notches<br />
cut in<br />
mortise<br />
strip create<br />
mortises for<br />
spindles<br />
CUTTING DIAGRAM<br />
Mortise<br />
Strip<br />
2 www.<strong>Woodsmith</strong>.com © 2010 August Home Publishing Co. All Rights Reserved.<br />
Top<br />
Frame<br />
a.<br />
Groove for<br />
mortise strip
End Frames<br />
Broken into its basic parts, the coffee<br />
table is nothing more than a couple<br />
of end frames joined by a top and a<br />
shelf. And each end frame contains<br />
a pair of legs, a pair of end rails, and<br />
a row of spindles. I started building<br />
these frames by making the legs.<br />
LEGS. The legs begin as four<br />
squared-up blanks cut from 1 3 ⁄4"-thick<br />
stock, as shown in the drawing at<br />
right. After cutting the leg blanks to<br />
length, I laid out the mortises for the<br />
rails on each leg (detail ‘a’).<br />
You can’t go wrong laying<br />
out the two mortises at the<br />
top of each leg — they’re<br />
on adjacent faces. But when<br />
laying out the single lower<br />
mortise on each leg, pay attention<br />
to the orientation of the legs.<br />
The right and left legs of each frame<br />
are mirror images of one another<br />
(drawing and detail ‘a’ at right).<br />
To make the mortises, I removed<br />
most of the waste by drilling a row<br />
of overlapping holes on a drill press.<br />
Then, using a chisel, I cleaned up the<br />
sides of the mortises.<br />
Once the mortises are complete,<br />
the legs are ready to be tapered and<br />
shaped. A table saw and a simple<br />
tapering jig make quick work of cutting<br />
the tapers on the inside faces<br />
of each leg, as shown in Figure 1.<br />
The tapering jig I used is nothing<br />
more than a piece of plywood with a<br />
hardwood cleat attached to one end,<br />
as you can see in the drawing in the<br />
margin at left.<br />
After cutting the tapers, rout a<br />
chamfer on the inside corner of each<br />
leg on a router table, as shown in<br />
Figure 2. But don’t try to chamfer<br />
the tapered edge. Instead, push the<br />
leg straight through the router table<br />
— the chamfer will narrow to a point<br />
at the bottom of the leg, as you see<br />
in detail ‘a’ above.<br />
When it came to the three outside<br />
corners of the leg, I wanted a softer<br />
look. So instead of a chamfer, I routed<br />
1 ⁄4" roundovers on the edges, again<br />
using the router table. You can see<br />
this in the drawing above.<br />
Finally, to prevent the legs from<br />
splintering in the event the table is<br />
dragged across the floor, I rounded<br />
1 2<br />
a. a.<br />
over the bottom edges of each leg<br />
slightly with sandpaper.<br />
At this point, I put the legs aside<br />
and began work on the other parts<br />
of the end frames. The next step is<br />
to make the end rails that connect<br />
the legs. Then later, spindles will be<br />
added between these rails.<br />
END RAILS. I cut the upper and lower<br />
end rails to size from 3 ⁄4"-thick stock<br />
first. All the rails are 24 1 ⁄2" long. The<br />
only difference is that the lower rails<br />
are an inch wider than the upper<br />
rails, as you can see in the drawing<br />
at the top of the following page.<br />
3 www.<strong>Woodsmith</strong>.com © 2010 August Home Publishing Co. All Rights Reserved.<br />
b.<br />
a.
MORTISE STRIPS. The next step is to<br />
make the mortises for the spindles.<br />
But instead of drilling a hole for each<br />
mortise and squaring it up with a<br />
chisel, I used a different approach.<br />
First, I cut a groove on one edge<br />
of each rail, as shown in Figure 3a.<br />
Then, I glued in a narrow strip of<br />
wood with a row of notches (Figures<br />
3 and 3b). Once these mortise strips<br />
are glued into the grooves, the notches<br />
become mortises.<br />
TENONS. After gluing the mortise<br />
strips into the rails and sanding them<br />
flush, tenons can be cut on the ends<br />
of the rails to fit the mortises in the<br />
legs (Figures 4, 4a, and 4b).<br />
Cut the tenons after gluing the<br />
mortise strips in place. The ends of<br />
the mortise strips will become part of<br />
the tenons of the rails (Figure 4b).<br />
ARCS. Now there are only a couple<br />
of steps left to finish up the rails.<br />
On the lower rails, I cut a gentle arc<br />
along the bottom edge (Figure 5).<br />
To lay out this arc, I used a pencil, a<br />
flexible straightedge, and a couple of<br />
blocks of wood (photo below).<br />
I cut the arcs on the lower rails<br />
with a band saw and then sanded<br />
them smooth with a sanding drum.<br />
But you could also use a jig saw and<br />
then sand them smooth by hand<br />
using a rounded sanding block.<br />
To complete the upper rails, I<br />
drilled a couple of counterbored<br />
shank holes in each rail (Figure 5).<br />
These are for the screws that will be<br />
used to fasten the top later. The shank<br />
holes are slightly oversized ( 3 ⁄16"-dia.)<br />
to allow room for wood movement<br />
(especially if you’re planning to build<br />
the solid wood top).<br />
{ Layout. To flex the straightedge<br />
and lay out the arcs, clamp pointed<br />
scraps to the ends of the rails.<br />
see page 9<br />
3<br />
4<br />
5<br />
4 www.<strong>Woodsmith</strong>.com © 2010 August Home Publishing Co. All Rights Reserved.<br />
a.<br />
a.<br />
b.<br />
b.
SPINDLES. The rails and legs are the<br />
main components of the end frames.<br />
But when the project is done, the<br />
spindles are what catch your eye.<br />
Making the twenty-six spindles for<br />
the table isn’t difficult — just a little<br />
repetitive. The spindles are first cut<br />
to size from 1 ⁄2"-thick stock, as shown<br />
in the drawing in the margin at left.<br />
Then the tenons on the ends of<br />
each spindle are cut with a table<br />
saw and dado blade, rotating each<br />
piece a quarter turn between passes<br />
(Figure 6). And to keep the shoulders<br />
even and the shoulder-to-shoulder<br />
distance the same on each spindle,<br />
I used a stop block clamped to my<br />
miter gauge fence (Figure 6a).<br />
With the spindles completed, you<br />
might think the next step is to glue up<br />
the end frames. Normally, this would<br />
be the case, but for this project, I did<br />
things a little differently.<br />
Because the spindles are so narrow<br />
and spaced so closely, I decided<br />
to stain them all before assembly. I<br />
also stained the end rails. This way, I<br />
didn’t have to worry about trying to<br />
work the stain in around the spindles<br />
after the table was assembled.<br />
ASSEMBLY. Don’t worry about trying<br />
to assemble all the spindles between<br />
the end rails before the glue sets up.<br />
The spindles aren’t glued in place —<br />
they’re captured between the rails.<br />
I used a two-step procedure to<br />
assemble the end frames. First, fit the<br />
spindles between the rails and hold<br />
them in place with band clamps.<br />
7<br />
a.<br />
6<br />
Then, glue and clamp the legs to<br />
the rails (Figure 7). Not having to<br />
worry about the spindles makes the<br />
gluing up process a lot easier.<br />
CLEATS. After assembling the end<br />
frames, there’s still one more piece<br />
to add to each frame — a cleat.<br />
A cleat is attached to the lower<br />
end rail of each frame to support a<br />
shelf (drawing above and Figure 8).<br />
5 www.<strong>Woodsmith</strong>.com © 2010 August Home Publishing Co. All Rights Reserved.<br />
8<br />
a.<br />
a.<br />
These cleats are nothing more than<br />
two narrow strips of 3 ⁄4"-thick stock.<br />
Before attaching the cleats to the<br />
end frames, I drilled three 3 ⁄16"-dia.<br />
countersunk shank holes in each<br />
cleat for the screws that will be used<br />
to attach the shelf (Figures 8 and 8b).<br />
Then, I simply glued and screwed the<br />
cleats to the inside of the lower rails<br />
(Figures 8 and 8a).<br />
b.
10<br />
a.<br />
Stretchers & Shelf<br />
With the end frames done, you’re<br />
more than halfway home. Now, you<br />
need to join the two end frames with<br />
a couple of stretchers and a shelf, and<br />
then add a top. I made the stretchers<br />
first so I could assemble the base of<br />
the table and take measurements for<br />
the shelf (drawing at right).<br />
STRETCHERS. Each stretcher is cut to<br />
size from a piece of 3 ⁄4"-thick stock.<br />
Then a tenon is cut on each end to<br />
match the mortises in the legs of the<br />
table (detail ‘a’ at right).<br />
Like the upper end rails, each<br />
stretcher is drilled and counterbored<br />
for three screws that will be used to<br />
attach the top (detail ‘a’).<br />
SHELF. Aside from providing a place<br />
for books or magazines, the shelf<br />
serves another purpose. It acts as<br />
a lower stretcher, helping to tie the<br />
base of the table together.<br />
I made the shelf from an oversized,<br />
glued-up panel of 3 ⁄4"-thick stock. If<br />
you’re planning on building a solid<br />
wood top for the table (box on page<br />
8) you may also want to glue up a<br />
panel for the top at this time.<br />
After gluing up the panel, rip the<br />
shelf to its finished width (22"), as<br />
shown in Figure 10. To determine the<br />
exact length, measure the distance<br />
between the upper end rails (32" in<br />
my case). Then, trim the ends of the<br />
shelf to match this measurement.<br />
Before attaching the shelf, take the<br />
time to break the sharp edges by routing<br />
a small ( 1 ⁄16") chamfer along the<br />
a.<br />
9<br />
front and back edges (both top and<br />
bottom), as in Figure 10a. (The ends<br />
of the shelf are not chamfered.)<br />
To attach the shelf, I placed it on<br />
the cleats and centered it from front<br />
6 www.<strong>Woodsmith</strong>.com © 2010 August Home Publishing Co. All Rights Reserved.<br />
11<br />
to back. Then, using a pair of clamps<br />
to pull the end frames tight against<br />
the ends of the shelf, I drove screws<br />
up through the cleats into the bottom<br />
of the shelf (Figures 11 and 11a).<br />
a.
Table Top<br />
The top of the coffee table is something<br />
like a picture in a frame — a<br />
really big frame. But the “picture” in<br />
this case is a piece of beveled glass.<br />
BEVELED GLASS. If you’ve never worked<br />
with beveled glass before, there are<br />
a couple of things you should know.<br />
First off, the piece of glass I used is<br />
fairly large ( 1 ⁄4"-thick and 24" x 32").<br />
So don’t expect to simply run down<br />
to your local hardware store and find<br />
it in stock. I had to special order the<br />
glass from a local glass shop, and it<br />
took a week to fill the order. I would<br />
suggest finding a glass shop in your<br />
area ahead of time.<br />
Another important thing to know<br />
about ordering glass is that the final<br />
measurements aren’t always exact.<br />
Because of the cutting and polishing<br />
process, the glass can vary as<br />
much as 1 ⁄8" from what you specify<br />
when you order it. But this isn’t a<br />
problem as long as you obtain the<br />
glass before you cut the top frame<br />
pieces to length.<br />
The frame front/back and frame<br />
sides are cut from 3 ⁄4"-thick stock.<br />
They can be ripped to finished width<br />
(3 1 ⁄2"), but don’t cut them to length<br />
just yet. They will be mitered to<br />
length a little later.<br />
Before mitering the frame pieces,<br />
I cut a rabbet on one edge of each<br />
piece, see Figures 12 and 12a. This<br />
rabbet creates a necessary ledge for<br />
the glass top to rest on. <strong>Shop</strong> Note:<br />
The rabbet should be deep enough<br />
so the beveled edge of the glass will<br />
sit flush with the top surface of the<br />
coffee table frame ( 1 ⁄8" in my case), as<br />
shown in detail ‘a’ above right.<br />
Then to keep the outside edges<br />
of the top from looking too thick<br />
and heavy, I beveled the underside<br />
of each frame piece, as shown in<br />
Figures 13 and 13a. I did this by running<br />
the pieces through the table<br />
saw on edge and then sanding off<br />
the saw marks.<br />
After rabbeting and beveling the<br />
frame pieces, they can be mitered to<br />
length to fit the beveled glass (Figure<br />
14). <strong>Shop</strong> Note: To avoid making the<br />
opening for the glass too tight, allow<br />
a little extra ( 1 ⁄16") when figuring the<br />
length of the frame pieces.<br />
a.<br />
12<br />
13<br />
14<br />
!/2" straight<br />
bit !/2<br />
7 www.<strong>Woodsmith</strong>.com © 2010 August Home Publishing Co. All Rights Reserved.<br />
a.<br />
a.<br />
!/8
SPLINES. To strengthen the miter<br />
joints, I added splines. But the splines<br />
serve another purpose, as well. They<br />
help to keep all the pieces even when<br />
gluing and clamping them together.<br />
To cut the slot for the splines, use<br />
a hand-held router and a slot-cutting<br />
bit (Figures 15 and 15b). Be sure to<br />
stop the slot short of the edges of the<br />
workpiece (Figure 15a).<br />
After routing the slots, I cut splines<br />
to fit. The thing to remember here<br />
is that for a strong joint, the grain<br />
should run across the joint line of the<br />
miters, as shown in Figure 15a.<br />
ASSEMBLING THE TOP. Before gluing<br />
up the top, dry assemble the pieces<br />
and clamp them together with band<br />
clamps to check the fit of the glass<br />
(Figure 16). To avoid breaking the<br />
glass, make a template out of hardboard<br />
the same size as the glass and<br />
use that to check the fit instead.<br />
When you’re satisfied with the fit<br />
of the miters and the size of the glass<br />
opening, glue up the frame pieces<br />
and clamp them together. Then, use<br />
the template to check the glass opening<br />
again with the clamps in place.<br />
CHAMFER. As a final detail, I relieved<br />
the sharp edges by routing a very<br />
small ( 1 ⁄16") chamfer all around the<br />
top edge (Figures 17 and 17a).<br />
To attach the top, I simply centered<br />
it front-to-back and side-to-side.<br />
Then, I drove screws up through the<br />
stretchers and upper end rails into<br />
the top (drawing at right).<br />
After staining and finishing the<br />
entire table, I added the glass top.<br />
15<br />
If you would prefer a more traditional look<br />
for the coffee table, you may want to substitute<br />
a solid wood top for the frame and glass<br />
top, as shown in the photo at right.<br />
16 17<br />
SOLID WOOD TOP<br />
8 www.<strong>Woodsmith</strong>.com © 2010 August Home Publishing Co. All Rights Reserved.<br />
a.<br />
To do this, start by gluing up an oversized<br />
panel of 3 ⁄4"-thick stock. After the glue<br />
is dry, the panel can be trimmed down to a<br />
finished size of 30" x 38" (the same size as<br />
the frame for the glass top).<br />
Once the panel is cut to finished size, the<br />
bottom edges can be beveled. But there’s a<br />
small problem here. Because of the large<br />
size of the top, I was a little nervous about<br />
standing the top on edge and running it<br />
through the table saw. So to provide a little<br />
extra support, I attached a tall auxiliary<br />
fence to my rip fence (drawing at left).<br />
b.<br />
a.
1 2<br />
3<br />
5<br />
Mortise Strips<br />
Instead of making individual mortises<br />
for the spindles in the coffee table, I<br />
used a different approach. First I cut<br />
a groove on one edge of each end rail.<br />
Then I glued in a “mortise strip.”<br />
GROOVES. There’s not much to making<br />
the grooves. I cut them in two<br />
passes, flipping each rail end for end<br />
between passes to center the grooves<br />
on the thickness of the workpiece<br />
(Figures 1 and 1a).<br />
MORTISE STRIPS. The mortise strips are<br />
just narrow strips with notches cut in<br />
them. When glued into the grooves,<br />
they create mortises.<br />
Instead of trying to cut the notches<br />
in narrow, individual strips, I started<br />
with a wide blank cut to the same<br />
length as the rails (24 1 /2"). Then after<br />
the notches are cut, the blank will get<br />
a.<br />
a.<br />
ripped into strips. (I made the thickness<br />
of the blank the same as the<br />
depth of the grooves in the rails.)<br />
NOTCHES. To cut the notches, I used a<br />
dado blade and a table saw. The trick<br />
is to keep the notches evenly spaced.<br />
So, I used a simple indexing jig.<br />
To make the jig, I clamped an auxiliary<br />
fence to the front of my miter<br />
gauge. Then I cut a dado through the<br />
center of my blank and through the<br />
auxiliary fence (Figure 2).<br />
To keep the notches evenly spaced,<br />
I glued an index key into the notch in<br />
the auxiliary fence (Figure 2a). Then<br />
I readjusted the fence so the key was<br />
5 /8" from the edge of the dado blade<br />
(Figures 3 and 3a).<br />
Next, I cut six more notches on<br />
one side of the center notch, as you<br />
a.<br />
9 www.<strong>Woodsmith</strong>.com © 2010 August Home Publishing Co. All Rights Reserved.<br />
4<br />
6<br />
can see in Figure 4. To do this, I simply<br />
placed each newly cut notch over<br />
the key to cut the next one.<br />
Then, after cutting the notches on<br />
one side, I turned the piece around<br />
and cut six more notches on the other<br />
side of the center notch — following<br />
the same procedure. Keep in mind<br />
that you should end up with a total<br />
of 13 notches.<br />
RIPPING. Before ripping the strips, I<br />
drew a reference line on one end of<br />
the blank (Figure 5). Later when the<br />
rails are glued between the legs, this<br />
line will help you orient the end rails<br />
so the mortises line up (Figure 6).<br />
<strong>Shop</strong> Note: When gluing the strips<br />
into the rails, use a sparing amount<br />
of adhesive to avoid getting any glue<br />
in the mortises.<br />
a.