HP CX4 & XFP Interface Cards User Guide - HP Business Support ...
HP CX4 & XFP Interface Cards User Guide - HP Business Support ...
HP CX4 & XFP Interface Cards User Guide - HP Business Support ...

Create successful ePaper yourself
Turn your PDF publications into a flip-book with our unique Google optimized e-Paper software.
Installing the interface card<br />
Installing the interface card to the switch<br />
NOTE:<br />
The procedure of installing the interface card to different models of<br />
<strong>HP</strong> switches is similar. This user guide takes the A5500-24G EI<br />
Switch with 2 <strong>Interface</strong> Slots (JD377A) as an example.<br />
Follow these steps to install the interface card to the switch:<br />
Step1 Wear an ESD-preventive wrist strap, and make sure that the<br />
ESD-preventive wrist strap makes good skin contact and is properly<br />
grounded.<br />
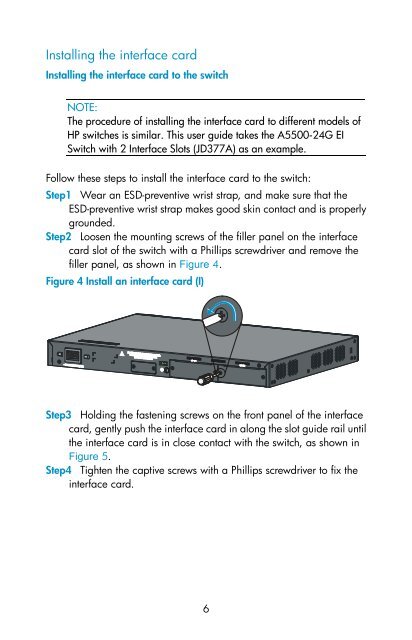
Step2 Loosen the mounting screws of the filler panel on the interface<br />
card slot of the switch with a Phillips screwdriver and remove the<br />
filler panel, as shown in Figure 4.<br />
Figure 4 Install an interface card (I)<br />
Step3 Holding the fastening screws on the front panel of the interface<br />
card, gently push the interface card in along the slot guide rail until<br />
the interface card is in close contact with the switch, as shown in<br />
Figure 5.<br />
Step4 Tighten the captive screws with a Phillips screwdriver to fix the<br />
interface card.<br />
6