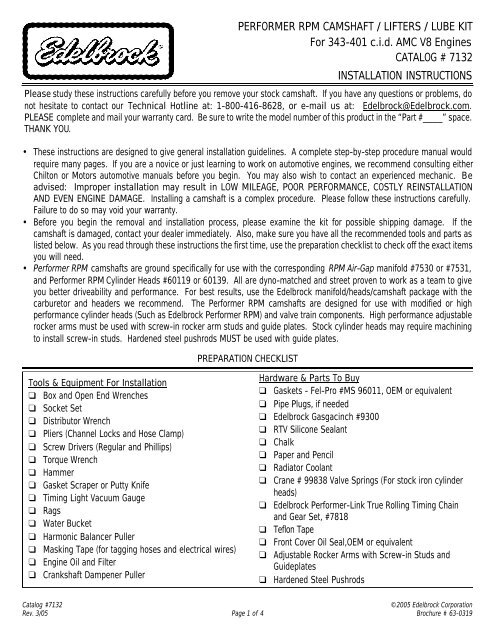
7132 - Performer RPM Camshaft for AMC V8 343-401.qxd - Edelbrock
7132 - Performer RPM Camshaft for AMC V8 343-401.qxd - Edelbrock
7132 - Performer RPM Camshaft for AMC V8 343-401.qxd - Edelbrock

You also want an ePaper? Increase the reach of your titles
YUMPU automatically turns print PDFs into web optimized ePapers that Google loves.
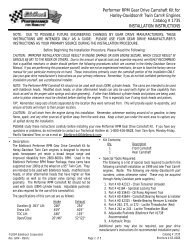
PERFORMER <strong>RPM</strong> CAMSHAFT / LIFTERS / LUBE KIT<br />
For <strong>343</strong>-401 c.i.d. <strong>AMC</strong> <strong>V8</strong> Engines<br />
CATALOG # <strong>7132</strong><br />
INSTALLATION INSTRUCTIONS<br />
Please study these instructions carefully be<strong>for</strong>e you remove your stock camshaft. If you have any questions or problems, do<br />
not hesitate to contact our Technical Hotline at: 1-800-416-8628, or e-mail us at: <strong>Edelbrock</strong>@<strong>Edelbrock</strong>.com.<br />
PLEASE complete and mail your warranty card. Be sure to write the model number of this product in the “Part #____” space.<br />
THANK YOU.<br />
• These instructions are designed to give general installation guidelines. A complete step-by-step procedure manual would<br />
require many pages. If you are a novice or just learning to work on automotive engines, we recommend consulting either<br />
Chilton or Motors automotive manuals be<strong>for</strong>e you begin. You may also wish to contact an experienced mechanic. Be<br />
advised: Improper installation may result in LOW MILEAGE, POOR PERFORMANCE, COSTLY REINSTALLATION<br />
AND EVEN ENGINE DAMAGE. Installing a camshaft is a complex procedure. Please follow these instructions carefully.<br />
Failure to do so may void your warranty.<br />
• Be<strong>for</strong>e you begin the removal and installation process, please examine the kit <strong>for</strong> possible shipping damage. If the<br />
camshaft is damaged, contact your dealer immediately. Also, make sure you have all the recommended tools and parts as<br />
listed below. As you read through these instructions the first time, use the preparation checklist to check off the exact items<br />
you will need.<br />
• <strong>Per<strong>for</strong>mer</strong> <strong>RPM</strong> camshafts are ground specifically <strong>for</strong> use with the corresponding <strong>RPM</strong> Air-Gap manifold #7530 or #7531,<br />
and <strong>Per<strong>for</strong>mer</strong> <strong>RPM</strong> Cylinder Heads #60119 or 60139. All are dyno-matched and street proven to work as a team to give<br />
you better driveability and per<strong>for</strong>mance. For best results, use the <strong>Edelbrock</strong> manifold/heads/camshaft package with the<br />
carburetor and headers we recommend. The <strong>Per<strong>for</strong>mer</strong> <strong>RPM</strong> camshafts are designed <strong>for</strong> use with modified or high<br />
per<strong>for</strong>mance cylinder heads (Such as <strong>Edelbrock</strong> <strong>Per<strong>for</strong>mer</strong> <strong>RPM</strong>) and valve train components. High per<strong>for</strong>mance adjustable<br />
rocker arms must be used with screw-in rocker arm studs and guide plates. Stock cylinder heads may require machining<br />
to install screw-in studs. Hardened steel pushrods MUST be used with guide plates.<br />
Tools & Equipment For Installation<br />
❑ Box and Open End Wrenches<br />
❑ Socket Set<br />
❑ Distributor Wrench<br />
❑ Pliers (Channel Locks and Hose Clamp)<br />
❑ Screw Drivers (Regular and Phillips)<br />
❑ Torque Wrench<br />
❑ Hammer<br />
❑ Gasket Scraper or Putty Knife<br />
❑ Timing Light Vacuum Gauge<br />
❑ Rags<br />
❑ Water Bucket<br />
❑ Harmonic Balancer Puller<br />
❑ Masking Tape (<strong>for</strong> tagging hoses and electrical wires)<br />
❑ Engine Oil and Filter<br />
❑ Crankshaft Dampener Puller<br />
PREPARATION CHECKLIST<br />
Hardware & Parts To Buy<br />
❑ Gaskets - Fel-Pro #MS 96011, OEM or equivalent<br />
❑ Pipe Plugs, if needed<br />
❑ <strong>Edelbrock</strong> Gasgacinch #9300<br />
❑ RTV Silicone Sealant<br />
❑ Chalk<br />
❑ Paper and Pencil<br />
❑ Radiator Coolant<br />
❑ Crane # 99838 Valve Springs (For stock iron cylinder<br />
heads)<br />
❑ <strong>Edelbrock</strong> <strong>Per<strong>for</strong>mer</strong>-Link True Rolling Timing Chain<br />
and Gear Set, #7818<br />
❑ Teflon Tape<br />
❑ Front Cover Oil Seal,OEM or equivalent<br />
❑ Adjustable Rocker Arms with Screw-in Studs and<br />
Guideplates<br />
❑ Hardened Steel Pushrods<br />
Catalog #<strong>7132</strong> ©2005 <strong>Edelbrock</strong> Corporation<br />
Rev. 3/05 Page 1 of 4 Brochure # 63-0319
REMOVAL OF ENGINE PARTS BEFORE CAMSHAFT<br />
INSTALLATION<br />
Be sure to keep all parts in order<br />
WARNING! DO NOT REMOVE RADIATOR CAP OR<br />
RADIATOR HOSES WHILE ENGINE IS HOT!<br />
1. Disconnect the battery.<br />
2. Drain radiator coolant. Drain plug will normally be<br />
located on lower right or left side of the radiator facing<br />
the engine.<br />
3. Remove radiator and air conditioning condenser, if so<br />
equipped. In some cases, the front grille may have to<br />
be removed. Measure distance from front cover to<br />
grille or brackets that may interfere with camshaft<br />
against the length of the camshaft.<br />
4. Remove the gas cap to relieve pressure. Disconnect<br />
fuel line and plug. Replace gas cap.<br />
5. Disconnect all linkage from carburetor such as throttle,<br />
throttle springs, transmission, cruise control and<br />
automatic choke.<br />
6. Tag and remove coil wires and sensor wires.<br />
7. Tag and remove vacuum lines.<br />
8. Remove distributor cap and wires, rotate engine until<br />
rotor points towards number 1 terminal in cap and<br />
pointer on front cover is on top dead center (TDC) and<br />
remove distributor. Note the approximate position of<br />
the distributor housing in relation to the manifold to<br />
assist in getting the distributor properly located during<br />
re-installation.<br />
9. Remove valve covers.<br />
10. Remove carburetor and intake manifold. Remove and<br />
discard intake manifold gasket.<br />
11. Remove rocker arms and pushrods. NOTE: Late model<br />
engines- Intake and exhaust rocker arms of each<br />
cylinder pivot on a bridged pivot assembly which is<br />
secured to cylinder head by two cap screws.<br />
WARNING: Cap screws should be loosened alternately<br />
one turn at a time to avoid breaking bridge. Keep<br />
rockers and pushrods in order <strong>for</strong> reassembly.<br />
12. Remove hydraulic valve lifters.<br />
13. Remove crankshaft pulley, and using a suitable puller,<br />
crankshaft dampener.<br />
14. Remove two front oil pan bolts. Remove bolts securing<br />
timing chain cover. NOTE: Bolts vary in length and<br />
must be installed in same location as removed. Pull<br />
cover <strong>for</strong>ward until free of locating dowel pins.<br />
NOTE: The front cover oil seal should be replaced<br />
be<strong>for</strong>e the front cover is re-installed.<br />
15. Remove fuel pump and fuel pump pushrod. Rotate<br />
engine until timing marks are aligned as in Figure 2.<br />
16. Remove bolts retaining camshaft sprocket. Remove<br />
sprocket and chain.<br />
17. Remove crank sprocket using a gear puller.<br />
18. Remove camshaft.<br />
• VALVE SPRINGS<br />
WARNING ABOUT YOUR WARRANTY: In order <strong>for</strong> this<br />
cam and lifter kit to be covered under ANY WARRANTY,<br />
you must use the correct valve springs. <strong>Edelbrock</strong><br />
cylinder heads are sold with the correct valve springs<br />
installed. For factory cast iron cylinder heads, use<br />
Crane #99838 valve springs. Failure to do so could<br />
cause the cam lobes to wear excessively and could<br />
cause additional engine damage.<br />
1. This camshaft is designed to function with springs<br />
with spring pressures of 120 lbs. closed and 320<br />
lbs. open.<br />
• LIFTERS<br />
1. New lifters must be used with a new camshaft. Use<br />
only the lifters supplied with your kit.<br />
2. Check to make sure all lifters fit freely in lifter<br />
bores.<br />
• INSTALLATION INSTRUCTIONS<br />
1. Coat cam lobes and bottom of each lifter with<br />
MOS2 lube supplied with your kit. This will prevent<br />
cam lobe and lifter wear from occurring during<br />
initial engine start up. Do NOT pre-oil or "pumpup"<br />
lifters be<strong>for</strong>e installation as this may hold<br />
valves off the valve seat leading to loss of<br />
compression and/or bent valves during initial<br />
engine start up.<br />
2. Install new camshaft with new sprockets and<br />
timing chain align timing marks as shown. See<br />
Figure 2.<br />
CAUTION: When using <strong>Per<strong>for</strong>mer</strong>-Link True Rolling<br />
Timing Chain and Gear Set #7818 with an<br />
<strong>Edelbrock</strong> cam and lifter kit, straight up timing<br />
alignment is achieved. If any other timing gear set<br />
is used, it is necessary to check camshaft position<br />
<strong>for</strong> correct timing alignment. This requires indexing<br />
the camshaft with a degree wheel to verify timing<br />
alignment. O.E.M. or non-<strong>Edelbrock</strong> timing gear<br />
sets are not recommended <strong>for</strong> use with <strong>Edelbrock</strong><br />
camshafts. Use locking compound material on bolt<br />
Catalog #<strong>7132</strong> ©2005 <strong>Edelbrock</strong> Corporation<br />
Rev. 3/05 Page 2 of 4 Brochure # 63-0319
threads holding gear to cam. Torque to factory<br />
recommendations (30 ft./lbs.).<br />
3. Install camshaft with timing marks lined up as<br />
recommended by factory specifications. See<br />
Figure 2.<br />
• PUSHROD AND ROCKER ARM INSTALLATION - After<br />
the cam is installed and timed correctly (see Figure 2),<br />
install pushrods, lifters and rocker arms. NOTE: High<br />
per<strong>for</strong>mance adjustable rocker arms must be used with<br />
screw-in rocker arm studs and guide plates. Stock<br />
cylinder heads may require machining to install screwin<br />
studs. Hardened steel pushrods MUST be used with<br />
guide plates. Longer than stock pushrods may be<br />
required.<br />
• VALVE ADJUSTMENT<br />
1. Rocker arm adjustment is 1/4 turn of preload<br />
beyond zero lash. Install push rods and rocker arm<br />
assembly and tighten rocker arm nuts until zero<br />
lash is achieved.<br />
2. Turn rocker arm nuts 1/4 turn past zero lash.<br />
• FRONT COVER OIL SEAL REMOVAL & INSTALLATION<br />
1. For front seal removal, pry seal out from the inside<br />
of the cover. Clean seal bore and apply light coat of<br />
suitable sealer such as <strong>Edelbrock</strong> Gasgacinch<br />
#9300 to outer surface of new seal. Drive seal into<br />
place from inside cover using suitable tool. When<br />
seal contacts outer flange of cover it is installed<br />
correctly. Apply a light film of engine oil to lips of<br />
neoprene seal.<br />
• INSTALL FRONT COVER<br />
1. Remove lower locating dowel pin from engine block<br />
and clean all gasket surfaces.<br />
2. Cut both sides of oil pan gasket flush with engine<br />
block. Using old gasket as a guide, trim new gasket<br />
to correspond to amount cut off at oil pan.<br />
3. Install front oil pan seal and align tongues of new oil<br />
pan gasket pieces with seal and apply suitable<br />
sealer such as RTV Silicone sealant to both sides of<br />
gaskets and cement into place on cover. Apply<br />
suitable sealer to cut-off edges of original oil pan<br />
gaskets and place cover into position, then install<br />
two front oil pan bolts. Tighten bolts slowly and<br />
evenly until cover aligns with upper locating dowel.<br />
Install lower dowel through cover and drive into<br />
corresponding hole in engine block. Install cover<br />
retaining bolts in same location they were removed<br />
from and tighten.<br />
5. Torque front timing cover bolts to 25 ft. lbs.<br />
6. Install front harmonic balancer and torque to 55 ft.lbs.<br />
7. Install fuel pump and pushrod.<br />
8. Install water pump using new gaskets and torque to<br />
4 ft.-lbs.<br />
9. Install intake manifold using new intake gasket set<br />
and torque bolts to 25 ft/lbs.<br />
• DISTRIBUTOR INSTALLATION AND ENGINE TIMING<br />
1. Turn the engine over in direction of rotation until the<br />
No. 1 intake valve closes and continue until the<br />
pointer on the front cover is approximately five<br />
degrees be<strong>for</strong>e top dead center (BTDC). See Figure<br />
1 <strong>for</strong> firing order.<br />
2. Re-install the distributor with the rotor pointing<br />
towards No. 1 terminal in the cap, and with the<br />
distributor housing in its original position. If<br />
distributor will not drop down all the way to the<br />
flange on the engine, it will be necessary to align<br />
the distributor shaft with the oil pump drive. Slowly<br />
rotate the engine until the distributor drops down<br />
against the engine, then continue turning until two<br />
complete revolutions are completed and the timing<br />
marks once again come to five degrees BTDC.<br />
3. Lightly tighten the hold-down clamp so that the<br />
distributor can still be turned to determine final<br />
setting using a timing light with the engine running.<br />
4. Replace valve covers, carburetor linkage and<br />
remaining vacuum and electrical connections.<br />
5. Engine oil & filter should be changed be<strong>for</strong>e and<br />
after break-in.<br />
• CAMSHAFT & LIFTER RUN-IN<br />
IMPORTANT: DO NOT ALLOW THE ENGINE TO RUN<br />
UNDER 2000 <strong>RPM</strong> FOR THE FIRST 1/2 HOUR. Vary<br />
engine speed between 2000 and 2500 rpm. Slow idle<br />
speeds may result in severe cam and lifter wear. START<br />
THE ENGINE AND BRING TO BREAK-IN <strong>RPM</strong>.<br />
• IMPORTANT NOTES AFFECTING YOUR WARRANTY<br />
CAM LOBE WEAR - Cam lobe wear is almost nonexistent<br />
unless mismatched parts are used or<br />
installation of the cam and lifters is done improperly.<br />
Catalog #<strong>7132</strong> ©2005 <strong>Edelbrock</strong> Corporation<br />
Rev. 3/05 Page 3 of 4 Brochure # 63-0319
Most cam damage is caused by the timing gear<br />
loosening due to improper torque on bolt. Bolts holding<br />
gear to camshaft should be torqued carefully and a<br />
locking compound applied to threads of bolts. Be<strong>for</strong>e<br />
installing your new <strong>Per<strong>for</strong>mer</strong> <strong>RPM</strong> camshaft, check the<br />
gear drive on the distributor and oil pump <strong>for</strong> any signs<br />
of wear. If worn, be sure to replace with a new timing<br />
gear set.<br />
• CAM GEARS AND CAMSHAFT END PLAY - If cam gear<br />
becomes loose, the cam will slide back in the block,<br />
causing the lifters to hit the lobes next to them and also<br />
the cam bearing journals. If the engine is run after this<br />
happens, the bottom of the lifters and the sides of the<br />
lobes will become chipped.<br />
• SPECIAL INSTRUCTIONS<br />
With the <strong>Edelbrock</strong> manifold, cylinder head, and<br />
camshaft package plus a header installation, a<br />
carburetor jet change and ignition change may be<br />
required <strong>for</strong> best per<strong>for</strong>mance. Due to the varied<br />
applications of years and models of vehicles, no one<br />
combination could suffice <strong>for</strong> all installations. The<br />
following procedure is only a guideline and in many<br />
cases, the manufacturing specifications <strong>for</strong><br />
recommended carburetors or timing may be best.<br />
• CARBURETION<br />
OEM square-bore 4-bbl - In most cases, carburetor<br />
modification <strong>for</strong> best per<strong>for</strong>mance may be found in a<br />
plus or minus 2 number jet change.<br />
<strong>Edelbrock</strong> <strong>Per<strong>for</strong>mer</strong> Series #1407 (750 cfm, manual<br />
choke) - No modifications necessary.<br />
<strong>Edelbrock</strong> <strong>Per<strong>for</strong>mer</strong> Series #1413 (800 cfm, electric<br />
choke) - No modifications necessary.<br />
<strong>Edelbrock</strong> Thunder Series #1812 (800 cfm, manual<br />
choke) - No modifications necessary.<br />
<strong>Edelbrock</strong> Thunder Series #1813 (800 cfm, electric<br />
choke) - No modifications necessary.<br />
• IGNITION TIMING<br />
In most cases, an increase of 10° to 14° will give best<br />
per<strong>for</strong>mance. Aftermarket ignition curve kits may be<br />
used. Vacuum advance line can be connected to direct<br />
manifold vacuum <strong>for</strong> best per<strong>for</strong>mance, not ported<br />
vacuum. Disconnect vacuum advance when checking<br />
timing, then reconnect after timing adjustment.<br />
NOTE: The best combination <strong>for</strong> any particular vehicle<br />
or application must be determined by trial and error<br />
using the above in<strong>for</strong>mation as a guideline.<br />
• TUBULAR EXHAUST SYSTEM<br />
A tubular exhaust system is recommended with the<br />
<strong>Per<strong>for</strong>mer</strong> <strong>RPM</strong> package to provide the best<br />
per<strong>for</strong>mance. Please consult your <strong>Edelbrock</strong> dealer or<br />
the <strong>Edelbrock</strong> catalog <strong>for</strong> a listing of available<br />
<strong>Edelbrock</strong> Tubular Exhaust Systems. Be sure to check<br />
local emission control regulations <strong>for</strong> legality of<br />
camshaft and exhaust system changes.<br />
Timing<br />
Marks<br />
Figure 1 - 304-401 c.i.d <strong>AMC</strong> <strong>V8</strong><br />
Firing Order - 1-2-7-5-6-3-4-8<br />
Turn distributor counter clockwise to advance timing Figure 2 - Timing Chain Sprocket Alignment<br />
<strong>Edelbrock</strong> Corporation • 2700 Cali<strong>for</strong>nia St. • Torrance, CA 90503<br />
Tech-Line: 800-416-8628 • E-Mail: <strong>Edelbrock</strong>@<strong>Edelbrock</strong>.com<br />
Catalog #<strong>7132</strong> ©2005 <strong>Edelbrock</strong> Corporation<br />
Rev. 3/05 Page 4 of 4 Brochure # 63-0319
CAMSHAFT: <strong>Per<strong>for</strong>mer</strong> <strong>RPM</strong><br />
CATALOG #<strong>7132</strong><br />
ENGINE: <strong>343</strong>-401 c.i.d. <strong>AMC</strong> <strong>V8</strong><br />
<strong>RPM</strong> RANGE: 1500-6500<br />
CAUTION: Use only <strong>Edelbrock</strong> Cylinder Heads (Include Proper Valve<br />
Springs),or Crane # 99838 Valve Springs with Stock Iron Cylinder<br />
Heads. Use stock ratio rocker arms only.<br />
Duration at 0.006" Lift: Intake: 310° Exhaust: 320°<br />
Duration at 0.050" Lift: Intake: 234° Exhaust: 244°<br />
Lift at Cam: Intake: 0.325" Exhaust: 0.340"<br />
Lift at Valve: Intake: 0.520" Exhaust: 0.544"<br />
Timing at 0.050" Lift: Open Close<br />
Intake: 10° BTDC 44° ABDC<br />
Exhaust: 59° BBDC 5° ATDC<br />
Centerlines:<br />
Lobe Separation: 112° Intake Centerline: 107°<br />
CAUTION: Use <strong>Per<strong>for</strong>mer</strong>-Link Timing Set, #7818. Do not use late<br />
model timing sets. They are machined in a retarded position and are<br />
not recommended <strong>for</strong> this camshaft installation. <strong>Edelbrock</strong><br />
<strong>Per<strong>for</strong>mer</strong>-Link True Rolling Timing Sets feature three keyways <strong>for</strong><br />
specific timing selection. Always use the “0” or straight-up timing<br />
mark when installing <strong>Per<strong>for</strong>mer</strong> <strong>RPM</strong> camshafts with <strong>Per<strong>for</strong>mer</strong>-Link<br />
Timing Sets.<br />
Rev. 3/05 Brochure #63-0353<br />
CAMSHAFT: <strong>Per<strong>for</strong>mer</strong> <strong>RPM</strong><br />
CATALOG #<strong>7132</strong><br />
ENGINE: <strong>343</strong>-401 c.i.d. <strong>AMC</strong> <strong>V8</strong><br />
<strong>RPM</strong> RANGE: 1500-6500<br />
CAUTION: Use only <strong>Edelbrock</strong> Cylinder Heads (Include Proper Valve<br />
Springs),or Crane # 99838 Valve Springs with Stock Iron Cylinder<br />
Heads. Use stock ratio rocker arms only.<br />
Duration at 0.006" Lift: Intake: 310° Exhaust: 320°<br />
Duration at 0.050" Lift: Intake: 234° Exhaust: 244°<br />
Lift at Cam: Intake: 0.325" Exhaust: 0.340"<br />
Lift at Valve: Intake: 0.520" Exhaust: 0.544"<br />
Timing at 0.050" Lift: Open Close<br />
Intake: 10° BTDC 44° ABDC<br />
Exhaust: 59° BBDC 5° ATDC<br />
Centerlines:<br />
Lobe Separation: 112° Intake Centerline: 107°<br />
CAUTION: Use <strong>Per<strong>for</strong>mer</strong>-Link Timing Set, #7818. Do not use late<br />
model timing sets. They are machined in a retarded position and are<br />
not recommended <strong>for</strong> this camshaft installation. <strong>Edelbrock</strong><br />
<strong>Per<strong>for</strong>mer</strong>-Link True Rolling Timing Sets feature three keyways <strong>for</strong><br />
specific timing selection. Always use the “0” or straight-up timing<br />
mark when installing <strong>Per<strong>for</strong>mer</strong> <strong>RPM</strong> camshafts with <strong>Per<strong>for</strong>mer</strong>-Link<br />
Timing Sets.<br />
Rev. 3/05 Brochure #63-0353