35100 - Pro-Flo Electronics Upgrade for Chevy_120702 ... - Edelbrock
35100 - Pro-Flo Electronics Upgrade for Chevy_120702 ... - Edelbrock
35100 - Pro-Flo Electronics Upgrade for Chevy_120702 ... - Edelbrock

Create successful ePaper yourself
Turn your PDF publications into a flip-book with our unique Google optimized e-Paper software.
Part #<strong>35100</strong><br />
Rev. 7/2/12 QT/mc<br />
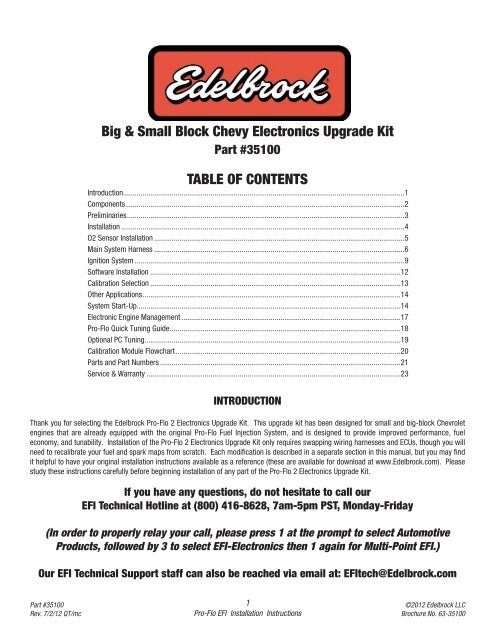
Big & Small Block <strong>Chevy</strong> <strong>Electronics</strong> <strong>Upgrade</strong> Kit<br />
Part #<strong>35100</strong><br />
TABLE OF CONTENTS<br />
Introduction.................................................................................................................................................1<br />
Components................................................................................................................................................2<br />
Preliminaries...............................................................................................................................................3<br />
Installation ..................................................................................................................................................4<br />
O2 Sensor Installation .................................................................................................................................5<br />
Main System Harness .................................................................................................................................6<br />
Ignition System ...........................................................................................................................................9<br />
Software Installation .................................................................................................................................12<br />
Calibration Selection .................................................................................................................................13<br />
Other Applications.....................................................................................................................................14<br />
System Start-Up........................................................................................................................................14<br />
Electronic Engine Management .................................................................................................................17<br />
<strong>Pro</strong>-<strong>Flo</strong> Quick Tuning Guide.......................................................................................................................18<br />
Optional PC Tuning....................................................................................................................................19<br />
Calibration Module <strong>Flo</strong>wchart....................................................................................................................20<br />
Parts and Part Numbers ............................................................................................................................21<br />
Service & Warranty ...................................................................................................................................23<br />
INTRODUCTION<br />
Thank you <strong>for</strong> selecting the <strong>Edelbrock</strong> <strong>Pro</strong>-<strong>Flo</strong> 2 <strong>Electronics</strong> <strong>Upgrade</strong> Kit. This upgrade kit has been designed <strong>for</strong> small and big-block Chevrolet<br />
engines that are already equipped with the original <strong>Pro</strong>-<strong>Flo</strong> Fuel Injection System, and is designed to provide improved per<strong>for</strong>mance, fuel<br />
economy, and tunability. Installation of the <strong>Pro</strong>-<strong>Flo</strong> 2 <strong>Electronics</strong> <strong>Upgrade</strong> Kit only requires swapping wiring harnesses and ECUs, though you will<br />
need to recalibrate your fuel and spark maps from scratch. Each modification is described in a separate section in this manual, but you may find<br />
it helpful to have your original installation instructions available as a reference (these are available <strong>for</strong> download at www.<strong>Edelbrock</strong>.com). Please<br />
study these instructions carefully be<strong>for</strong>e beginning installation of any part of the <strong>Pro</strong>-<strong>Flo</strong> 2 <strong>Electronics</strong> <strong>Upgrade</strong> Kit.<br />
If you have any questions, do not hesitate to call our<br />
EFI Technical Hotline at (800) 416-8628, 7am-5pm PST, Monday-Friday<br />
(In order to properly relay your call, please press 1 at the prompt to select Automotive<br />
<strong>Pro</strong>ducts, followed by 3 to select EFI-<strong>Electronics</strong> then 1 again <strong>for</strong> Multi-Point EFI.)<br />
Our EFI Technical Support staff can also be reached via email at: EFItech@<strong>Edelbrock</strong>.com<br />
1<br />
<strong>Pro</strong>-<strong>Flo</strong> EFI Installation Instructions<br />
©2012 <strong>Edelbrock</strong> LLC<br />
Brochure No. 63-<strong>35100</strong>
Part #<strong>35100</strong><br />
Rev. 7/2/12 QT/mc<br />
PRIMARY KIT COMPONENTS<br />
❑ Electronic Control Unit/System ECU ❑ Calibration Module<br />
❑ Main system harness ❑ Software CD<br />
❑ Installation package ❑ Ignition Harness<br />
❑ USB/Serial Converter<br />
Many <strong>Pro</strong>-<strong>Flo</strong> 2 components, including the Manifold Absolute Pressure sensor, fuel pressure regulator, Coolant Temperature sensor, and the fuel<br />
filter are standard OEM pieces. In the event that one of these parts needs to be replaced, you are likely to find a replacement at your local parts<br />
supplier, in addition to your local <strong>Edelbrock</strong> dealer or directly from <strong>Edelbrock</strong>. For a list of part numbers, refer to the PART NUMBERS section at<br />
the back of this manual.<br />
NOTE: The original fuel and spark maps saved in your existing <strong>Pro</strong>-<strong>Flo</strong> ECU cannot be transferred to the new <strong>Pro</strong>-<strong>Flo</strong> 2 system. New fuel and<br />
ignition maps will need to be generated from scratch through the tuning process described in the <strong>Pro</strong>-<strong>Flo</strong> Quick Tuning Guide portion of this<br />
manual.<br />
2<br />
<strong>Pro</strong>-<strong>Flo</strong> EFI Installation Instructions<br />
©2012 <strong>Edelbrock</strong> LLC<br />
Brochure No. 63-<strong>35100</strong>
TOOLS AND EQUIPMENT<br />
Use the following checklist <strong>for</strong> items needed.<br />
❑ Box and open end wrenches<br />
❑ Socket set<br />
❑ Screwdrivers (regular and Phillips)<br />
❑ Timing light<br />
❑ Vacuum gauge<br />
Part #<strong>35100</strong><br />
Rev. 7/2/12 QT/mc<br />
PRELIMINARY CHECKLIST<br />
1. CAREFULLY STUDY AND UNDERSTAND ALL INSTRUCTIONS, BEFORE BEGINNING THIS INSTALLATION.<br />
NOTE: This installation can be accomplished using common tools and procedures. However, you should have a basic<br />
knowledge of automotive repair and modification and be familiar with and com<strong>for</strong>table working on your vehicle. If you do<br />
not feel com<strong>for</strong>table working on your vehicle, it is recommended to have the installation completed by a professional<br />
mechanic.<br />
2. Examine the <strong>Pro</strong>-<strong>Flo</strong> 2 kit <strong>for</strong> possible shipping damage. If damaged, contact your dealer immediately.<br />
3. Check all threaded manifold holes.<br />
4. Check all internal manifold passages with a light and wire, making sure they are clean and unobstructed.<br />
5. Check automatic transmission shift points be<strong>for</strong>e removal of your stock manifold and adjust linkage after <strong>Edelbrock</strong><br />
manifold installation <strong>for</strong> same shift points (if needed).<br />
NOTE: We recommend that you refer to this checklist again after installation to be sure that you have completed all steps.<br />
3<br />
<strong>Pro</strong>-<strong>Flo</strong> EFI Installation Instructions<br />
HARDWARE AND PARTS RECOMMENDED<br />
Use the following checklist <strong>for</strong> items needed.<br />
❑ Wiring diagram <strong>for</strong> your vehicle<br />
❑ Dynojet wideband commander (Optional, not included)<br />
❑ DB9 Serial cable (Optional, not included)<br />
©2012 <strong>Edelbrock</strong> LLC<br />
Brochure No. 63-<strong>35100</strong>
INSTALLATION<br />
Be<strong>for</strong>e beginning, remove the existing main system harness, ignition amplifier and ignition amplifier harness. The <strong>Pro</strong>-<strong>Flo</strong> 2 system does not<br />
require an ignition amplifier. The ignition signal is now sent directly to the coil. You will reuse the existing coil harness. The small three<br />
connector ignition amplifier harness is no longer required.<br />
1. Inspect the new Main System Harness, making sure that all connectors and grounds are properly in place. Refer to the Harness Layout<br />
diagram on page 5 <strong>for</strong> details.<br />
2. Extend the fuel pump relay and ECU connectors through the firewall hole into the passenger compartment.<br />
NOTE: The T-connectors at the joints of the Main System Harness are closed by snap fasteners which can be opened by hand or with a<br />
flathead screwdriver. Once open, the T-connectors can be rotated <strong>for</strong> ease of installation, if necessary.<br />
3. The aluminum plate included on the harness mounts over the firewall hole using four hex head sheet metal screws.<br />
4. The wire harness is assembled with the aluminum plate flush against a T-connector. The black plastic casing on the wire harness can be<br />
cut to allow the plate to slide up the harness to the correct location. Once the harness is in place, the casing should be reattached on both<br />
sides of the firewall.<br />
CAUTION: When feeding the wire harness through the firewall, be careful to not damage the wires against the cut sheet metal.<br />
5. A rubber grommet is provided to protect the wires in the aluminum plate. Use RTV to seal the plate to the firewall.<br />
6. Install all connectors according to the list and diagrams.<br />
The Throttle Position sensor attaches to<br />
the harness with Connector J5.<br />
The Coolant Temperature<br />
sensor attaches to the harness<br />
with Connector J15.<br />
Part #<strong>35100</strong><br />
Rev. 7/2/12 QT/mc<br />
ELECTRONIC CONTROL UNIT / SYSTEM ECU<br />
The Electronic Control Unit (ECU) must be mounted away<br />
from moisture, excessive heat, or vibration. Underneath the<br />
dashboard on the passenger side, or behind the glove box are<br />
recommended locations.<br />
4<br />
<strong>Pro</strong>-<strong>Flo</strong> EFI Installation Instructions<br />
The Manifold Absolute Pressure<br />
sensor attaches to the harness<br />
with Connector J17.<br />
The Manifold Air Temperature<br />
sensor attaches to the harness<br />
with Connector J16.<br />
©2012 <strong>Edelbrock</strong> LLC<br />
Brochure No. 63-<strong>35100</strong>
OXYGEN (O2) SENSOR<br />
An oxygen sensor, installed on the header collector pipe, measures exhaust gas oxygen content and is used by the ECU to manage fuel delivery<br />
under closed loop control. Installing the sensor requires drilling a 1/2-inch hole in the passenger-side header collector. The sensor is held in<br />
place with the provided fitting which must be professionally welded into place. The red-lean/green-rich light on the Calibration Module is also<br />
controlled by the O2 sensor. The O2 sensor is connected to the Main System Harness by Connector J18. For installation details, refer to the FUEL<br />
SYSTEM section of this manual.<br />
NOTE: The <strong>Pro</strong> <strong>Flo</strong> system is capable of using either a narrow band or wide band O2 sensor. The difference between a narrow band and wide<br />
band O2 sensor is the range over which the sensor is accurate. A narrow band sensor is basically a switch that only tells the ECU if the air fuel<br />
ratio (AFR) is richer or leaner than 14.7 to 1. A wide band sensor/controller typically has a linear voltage output that is accurate over a range of<br />
10 to 20:1 AFR. The included wideband sensor calibration is <strong>for</strong> use with the Dynojet Wide Band Commander Air Fuel Ratio Monitor. See<br />
http://www.widebandcommander.com <strong>for</strong> more in<strong>for</strong>mation. To select the wideband option, install the included O2 select jumper as shown<br />
below. To use the default narrow band option, leave the jumper off. A dust cap is provided <strong>for</strong> protection when the connector is not used. The<br />
wideband sensor input is located on pin 31 of the larger 34 pin main<br />
ECU connector. Using the supplied ECU terminal pigtail, insert the<br />
pigtail by depressing the white terminal lock on the connector. Insert<br />
the terminal into pin 31, then close the terminal lock by pushing it in<br />
the other direction. Connect the wideband controller output to the<br />
pigtail.<br />
O2 SENSOR INSTALLATION<br />
NOTE: It is recommended that the O2 sensor installation be<br />
per<strong>for</strong>med by a professional muffler shop.<br />
1. Double check header gaskets, replacing if necessary.<br />
2. Drill a 1/2-inch to 9/16-inch hole in the passenger-side header<br />
collector reducer, as close to the header flange as possible. (1"<br />
to 3" away)<br />
NOTE: Be<strong>for</strong>e drilling, make sure the O2 sensor will be mounted<br />
horizontally and within reach of the harness connector. Check to<br />
ensure adequate clearance <strong>for</strong> the sensor, taking into<br />
consideration engine movement.<br />
3. Fit the provided fitting into the hole in the exhaust pipe and weld<br />
into place.<br />
4. Once it has been welded into place, clean the threads in the<br />
center of the fitting. If your exhaust is coated tap bung threads to<br />
ensure a good ground <strong>for</strong> the 0/2 sensor.<br />
5. Thread the O2 sensor into the fitting. A high-heat anti-seize<br />
compound is included and needs to be applied to the sensor<br />
threads.<br />
NOTE: The O2 sensor has 18mm x 1.25 spark plug threads.<br />
6. Attach the O2 sensor to the main system harness. Refer to the<br />
MAIN SYSTEM HARNESS section of this manual.<br />
NOTE: UNLEADED FUEL MUST BE USED ONCE THE O2 SENSOR<br />
HAS BEEN INSTALLED.<br />
Part #<strong>35100</strong><br />
Rev. 7/2/12 QT/mc<br />
5<br />
<strong>Pro</strong>-<strong>Flo</strong> EFI Installation Instructions<br />
O2 SELECT<br />
JUMPER<br />
INSTALL FOR WIDEBAND (OPTIONAL)<br />
O2 SELECT<br />
JUMPER CAP<br />
J3<br />
O2 SENSOR<br />
SELECT<br />
INSTALL FOR NARROW BAND (INCLUDED IN KIT)<br />
©2012 <strong>Edelbrock</strong> LLC<br />
Brochure No. 63-<strong>35100</strong>
MAIN SYSTEM HARNESS<br />
This diagram illustrates the entire <strong>Pro</strong>-<strong>Flo</strong> Main System<br />
Harness.<br />
Part #<strong>35100</strong><br />
Rev. 7/2/12 QT/mc<br />
6<br />
<strong>Pro</strong>-<strong>Flo</strong> EFI Installation Instructions<br />
©2012 <strong>Edelbrock</strong> LLC<br />
Brochure No. 63-<strong>35100</strong>
Part #<strong>35100</strong><br />
Rev. 7/2/12 QT/mc<br />
7<br />
<strong>Pro</strong>-<strong>Flo</strong> EFI Installation Instructions<br />
©2012 <strong>Edelbrock</strong> LLC<br />
Brochure No. 63-<strong>35100</strong>
Part #<strong>35100</strong><br />
Rev. 7/2/12 QT/mc<br />
8<br />
<strong>Pro</strong>-<strong>Flo</strong> EFI Installation Instructions<br />
HARNESS LAYOUT<br />
©2012 <strong>Edelbrock</strong> LLC<br />
Brochure No. 63-<strong>35100</strong>
The fuel injector connectors are identical, but they are<br />
placed in logical sequence. Refer to the diagram when<br />
installing the harness connectors to the fuel injectors.<br />
The 3-foot coil harness is attached to the distributor cap with the<br />
connector shown previously, and at the main wiring harness with the<br />
connector to the right. The ground goes to the rear of the cylinder<br />
head. When used with a small cap distributor or any distributor with<br />
an external ignition coil, this harness must be slightly modified. The<br />
three wire leads at the distributor connector (on the right below), must<br />
be cut from the connector (or released with a small screwdriver) and<br />
individually routed using the provided terminals. The black wire may<br />
be removed between the connection on right above and the 3/8" ring<br />
lug. The 3/8" ring lug must still be grounded on the rear of cylinder<br />
head. The red and brown wires are routed as follows:<br />
RED: ignition coil positive (+) terminal.<br />
BROWN: ignition coil negative (-) terminal Sleeves and tie-wraps are<br />
provided to fit over the terminals once the wires are is installed.<br />
TO MAIN HARNESS<br />
J6 IGNITION COIL<br />
Part #<strong>35100</strong><br />
Rev. 7/2/12 QT/mc<br />
NOTE: The red and brown wires<br />
should be the only coil connections.<br />
Do not add another switched power<br />
wire to the positive terminal.<br />
IGNITION HARNESS<br />
GROUND TO REAR<br />
CYL HEAD<br />
9<br />
<strong>Pro</strong>-<strong>Flo</strong> EFI Installation Instructions<br />
RED (+)<br />
BROWN (-)<br />
NON HEI COIL ONLY<br />
CUT AND INSULATE BLACK WIRE<br />
NOT USED FOR 2 TERMINAL COIL APPLICATIONS<br />
©2012 <strong>Edelbrock</strong> LLC<br />
Brochure No. 63-<strong>35100</strong>
The diagram below shows how the distributor, ignition harness, and Main System Harness are connected.<br />
NOTE: The connectors <strong>for</strong> the distributor hookup (J4) and coil harness hookup (J6) are identical. Refer to the wire colors shown below and the<br />
harness diagram on page 6 <strong>for</strong> proper installation.<br />
A KEY ON wire (Pink with black stripe) is also included in the <strong>Pro</strong>-<strong>Flo</strong> system. This wire connects to the fuse box. Make sure there is power with<br />
the key on and also while cranking.<br />
Power to the coil is now provided through the main harness. Do not connect a 12V power wire to the “BAT” terminal.<br />
REFER TO VEHICLE REPAIR MANUAL FOR WIRING DIAGRAM, IF NECESSARY.<br />
NOTE: If you are using an adjustable collar distributor: Loosen the adjustable slip collar. Install the Distributor into the engine without the gasket<br />
installed, make sure the oil pump shaft is fully engaged, and slide the slip the collar down to sit against the manifold. Tighten the collar and<br />
remove the distributor. Tighten the set screws on the collar and install the gasket.<br />
Part #<strong>35100</strong><br />
Rev. 7/2/12 QT/mc<br />
10<br />
<strong>Pro</strong>-<strong>Flo</strong> EFI Installation Instructions<br />
©2012 <strong>Edelbrock</strong> LLC<br />
Brochure No. 63-<strong>35100</strong>
ADDING AFTERMARKET IGNITION<br />
If you are wishing to use a MSD 6AL or MSD 6-Digital ignition with your <strong>Pro</strong>-<strong>Flo</strong> fuel injection, follow the wiring diagram below.<br />
NOTE: When installing the MSD box, keep the red battery lead, the main MSD box, and the power leads to the ignition amplifier AWAY from the<br />
ECU and it’s wires. Failure to do so will cause serious communication and running issues.<br />
GM HEI MSD EXAMPLE<br />
TYPICAL 2 TERMINAL<br />
COIL MSD EXAMPLE<br />
Part #<strong>35100</strong><br />
Rev. 7/2/12 QT/mc<br />
11<br />
<strong>Pro</strong>-<strong>Flo</strong> EFI Installation Instructions<br />
©2012 <strong>Edelbrock</strong> LLC<br />
Brochure No. 63-<strong>35100</strong>
To connect the ECU to your PC, plug the 34 pin ECU connector into the<br />
ECU. The connector will only plug in one way. Connect the DB9 serial<br />
connector to your PC either directly or through an extension cable (not<br />
included). Plug the AC Power Adapter into a standard wall socket.<br />
NOTE: A USB to Serial converter is included with the kit to be used if<br />
your PC does not have a 9 pin serial port. Connect the USB end of the<br />
adapter to your PC and the serial port (9 pin) end to the power adapter<br />
harness. Follow the instructions included with the USB adapter to<br />
install the appropriate drivers. Go to File - Port Settings in eFlash and<br />
select the com port that matches the location of the adapter.<br />
Part #<strong>35100</strong><br />
Rev. 7/2/12 QT/mc<br />
Confirm that the ECU is connected and<br />
communicating with eFlash. “ECU<br />
Connected” should be displayed in the<br />
lower left hand corner as shown to the right.<br />
INSTALLING THE SOFTWARE<br />
The software package included with the <strong>Pro</strong> <strong>Flo</strong> kit is required to load the initial calibration file into your ECU. An optional software package<br />
called System Editor is also included on the supplied CD-ROM.<br />
NOTE: All ECUs are shipped pre-programmed with the 3514 calibration. If your application uses the 3514 calibration according to the table on<br />
the next page, you do not need to load a new calibration.<br />
To install the software, load the supplied CD into your PC’s CD drive. The installation routine should auto run. Follow the onscreen prompts to<br />
install the software.<br />
eFlash is a stand alone system that can be used to load calibration files or different firmware versions onto an ECU using any Windows<br />
compatible PC. A laptop is not required. The system includes a DC power source that can be plugged into any standard wall socket. It will<br />
provide power to the ECU and allow two way communication without having to install the ECU in the vehicle. Tuning can then be done using the<br />
handheld module. In addition to allowing flash programming, eFlash has several additional features that can be useful.<br />
It displays all ECU data real time in one consolidated view.<br />
It displays all calibration module trims and modifications in<br />
one view so you can see them at a glance.<br />
It allows <strong>Edelbrock</strong> tech support personnel to view your ECU<br />
data real time using the iLink feature (internet connection<br />
required)<br />
It allows you to send your existing calibration file to <strong>Edelbrock</strong><br />
tech support personnel using the iLink feature (internet<br />
connection required).<br />
It allows the user to per<strong>for</strong>m software updates if necessary.<br />
12<br />
<strong>Pro</strong>-<strong>Flo</strong> EFI Installation Instructions<br />
To open the eFlash utility double<br />
click on the eFlash desktop icon.<br />
©2012 <strong>Edelbrock</strong> LLC<br />
Brochure No. 63-<strong>35100</strong>
Part #<strong>35100</strong><br />
Rev. 7/2/12 QT/mc<br />
SELECTING THE PROPER CALIBRATION<br />
Application Kit Part No. Calibration No. Intake @ .050”<br />
AMC<br />
343, 390 Per<strong>for</strong>mer RPM 35300 3548 Stock to 224°<br />
304, 360, 390, 401 Per<strong>for</strong>mer RPM 35310 3549 224°-Greater<br />
Chevrolet<br />
S/B Per<strong>for</strong>mer 35030 3512 Stock-220°<br />
S/B Per<strong>for</strong>mer RPM 35000 3514 220°-Greater<br />
S/B Per<strong>for</strong>mer RPM w/ Vortec Heads 35070 3514 200°-Greater<br />
B/B Per<strong>for</strong>mer 35510 3552 Stock-224°<br />
B/B Per<strong>for</strong>mer RPM 35500 3554 224°-Greater<br />
Chrysler<br />
S/B Per<strong>for</strong>mer 35260 3545 Stock-224°<br />
S/B Per<strong>for</strong>mer RPM 35260 3547 224°-Greater<br />
B/B Per<strong>for</strong>mer RPM 35080/35090 3542 Stock-224°<br />
B/B Per<strong>for</strong>mer RPM 35080/35090 3543 224°-Greater<br />
Ford<br />
289-302 S/B Per<strong>for</strong>mer 35210 3522 Stock-224°<br />
289-302 S/B Per<strong>for</strong>mer RPM 35210 3523 224°-Greater<br />
351W S/B Per<strong>for</strong>mer RPM 35410 3544 Stock-224°<br />
351W S/B Per<strong>for</strong>mer RPM 35410 3546 224°-Greater<br />
To load a new calibration file into<br />
the ECU, go to File - Load New Map<br />
The calibration files are saved in folders identified by kit part number.<br />
Double click on the folder with your kit part number, then select the<br />
calibration that corresponds to your camshaft duration. The eFlash utility<br />
will load the calibration into your ECU. Follow the on screen prompts to<br />
complete the process. When the software prompts you to cycle power,<br />
simply remove the connector from the ECU, wait 5-10 seconds, then plug<br />
it back in and hit OK. When finished, close the eFlash program and<br />
disconnect the power adapter connector from the ECU. You are now<br />
ready to connect the ECU to the vehicle harness. Additional in<strong>for</strong>mation<br />
can be found in the help file included in the software.<br />
13<br />
<strong>Pro</strong>-<strong>Flo</strong> EFI Installation Instructions<br />
NOTE: The intake @.050”<br />
column represents the camshaft<br />
intake lobe duration in degrees<br />
measured at 0.050” lift. This<br />
data is standard and provided<br />
with all camshaft specifications.<br />
The intake duration has a large<br />
influence on the amount of<br />
vacuum your engine produces<br />
and will significantly affect the<br />
overall tuneup. Starting with the<br />
correct calibration file will reduce<br />
the amount of tuning needed.<br />
NOTE: <strong>Edelbrock</strong> recommends a<br />
minimum of 112° <strong>for</strong> intake lobe<br />
seperation angle on all <strong>Pro</strong>-<strong>Flo</strong><br />
EFI applications. A value less<br />
than this may make tuning more<br />
difficult depending on the intake<br />
duration.<br />
©2012 <strong>Edelbrock</strong> LLC<br />
Brochure No. 63-<strong>35100</strong>
Part #<strong>35100</strong><br />
Rev. 7/2/12 QT/mc<br />
SYSTEM START-UP<br />
Once the <strong>Edelbrock</strong> <strong>Pro</strong>-<strong>Flo</strong> system has been installed, there are a few procedures you must follow to break-in the system. Carefully per<strong>for</strong>ming<br />
these break-in procedures will ensure best results and optimal per<strong>for</strong>mance.<br />
Use this checklist to double-check the following areas BEFORE starting the car:<br />
❑ Has the battery been reconnected?<br />
❑ Have all linkages been reconnected?<br />
Testing The Sensors<br />
Be<strong>for</strong>e starting the engine, test all sensors.<br />
1. Turn the key to the ON position with the Calibration Module connected. The display will read:<br />
NOTE: A vacuum reading of other than 0.0” Hg may be displayed depending upon barometric pressure and air temperature. At extreme<br />
altitude, the vacuum reading may be as high as 5.0” Hg.<br />
2. Push the UP ARROW key once to display.<br />
OTHER APPLICATIONS<br />
The <strong>Pro</strong>-<strong>Flo</strong> 2 system has been designed and calibrated specifically using the Chevrolet 454 c.i.d. Big-block with large-valve style cylinder heads<br />
(such as <strong>Edelbrock</strong>’s Per<strong>for</strong>mer RPM Street Cylinder Heads with 2.25-inch valves) and the Chevrolet 350 c.i.d. Small-block with large-valve style<br />
cylinder heads (such as <strong>Edelbrock</strong>’s Per<strong>for</strong>mer RPM Street Cylinder Heads with 2.02-inch valves) and tubular headers as a baseline. It is unlikely<br />
that every engine on which the <strong>Pro</strong>-<strong>Flo</strong> system is installed will match this baseline combination. The system can be used with similar<br />
applications, as long as the correct chip matching your cam profile is installed in the computer and necessary fuel calibration adjustments are<br />
made. If your engine does not have headers, and uses small-valve style cylinder heads it may require additional tuning adjustments. For further<br />
in<strong>for</strong>mation refer to the SYSTEM SET-UP SECTION of the Owner’s Manual.<br />
If you are running small-valve heads and/or you are not using tubular headers, it may be necessary to adjust the air/fuel ratio at WOT from 4000<br />
rpm and up. Refer to the table below <strong>for</strong> starting points <strong>for</strong> adjustments. Refer also to the SYSTEM SET-UP section in the Owner’s Manual. Use<br />
the FUEL @ WOT screens (located under FUEL MODIFIERS) to adjust the fuel at each available RPM. It should not be necessary to lean the fuel<br />
calibrations at 12” or 18” vacuum.<br />
WARNING: Watch the Rich/Lean light on the Calibration Module. If the light indicates a lean condition (red) <strong>for</strong> more than a fraction of a second at<br />
06” vacuum or WOT you are too lean <strong>for</strong> safe engine operation at full load.<br />
TH2O: 76°F TPS: 13°<br />
TAIR: 77°F Volt: 12.0<br />
NOTE: The water and air temperatures displayed will vary depending on ambient conditions. The system voltage will vary depending on the<br />
condition of the battery.<br />
3. Move the throttle to test the Throttle Position Sensor (TPS). The TPS reading should vary depending on throttle angle.<br />
4. If the calibration module goes blank while cranking, the system is losing power. Check the Pink/Black wire attached to the 3 Amp fuse <strong>for</strong><br />
+12V power with the ignition in the crank position and the run position <strong>for</strong> proper operation.<br />
14<br />
<strong>Pro</strong>-<strong>Flo</strong> EFI Installation Instructions<br />
❑ Has the calibration module been connected to the main harness?<br />
❑ Have all wiring harness connectors been connected?<br />
RPM: 0 FUEL: 0.0 mS<br />
VAC: 0.0” Hg SPK: 10°<br />
©2012 <strong>Edelbrock</strong> LLC<br />
Brochure No. 63-<strong>35100</strong>
Setting Base Spark Advance<br />
Use a timing light and the <strong>Pro</strong>-<strong>Flo</strong> Calibration Module to accurately set timing.<br />
1. Start the engine<br />
2. The Calibration Module screen will display this screen:<br />
3. Press the DOWN ARROW key once to reach this screen:<br />
4. Press the ENTER key to display this screen:<br />
5. Press the UP ARROW key six (6) times until the module displays this screen:<br />
6. Press the ENTER key. Press either ARROW key and the screen will display Base Tim’g set: ON.<br />
7. Set the base timing using a timing light and engine running at 1500rpm. Turn the distributor until 10° advance is set.<br />
8. Press the UP ARROW or DOWN ARROW key to turn Base Tim’g set to OFF.<br />
Part #<strong>35100</strong><br />
Rev. 7/2/12 QT/mc<br />
RPM: ø FUEL: 0.0 ms<br />
VAC: 0.0"Hg SPK: 10°<br />
<br />
ENTER to select<br />
Target Idle RPM:xxxx<br />
MODE = SCROLL ENTER<br />
WARNING: DO NOT DRIVE THE VEHICLE WITH THE BASE TIM’G SET ON. SERIOUS ENGINE DAMAGE MAY RESULT<br />
NOTE: If you use an advance-type timing light, the degrees advance shown on the Calibration Module (SPRK:) should always agree with the<br />
actual reading at the crank with the timing light.<br />
9. Press the MODE key. You can now leave this screen using the UP ARROW or DOWN ARROW keys.<br />
Idle Adjustment<br />
This procedure is a general recommendation, intended to help you tune up your <strong>Pro</strong>-<strong>Flo</strong> ® system.<br />
NOTE: In manual transmission cars, this procedure must be followed with the car in Neutral and with the clutch pedal pressed. In automatic<br />
transmission cars, this procedure must be followed with the car in Drive and with the brake pedal pressed.<br />
15<br />
<strong>Pro</strong>-<strong>Flo</strong> EFI Installation Instructions<br />
Base Tim'g set: OFF<br />
MODE = SCROLL ENTER<br />
©2012 <strong>Edelbrock</strong> LLC<br />
Brochure No. 63-<strong>35100</strong>
Idle Calibration <strong>Pro</strong>cedure<br />
Prior to idle calibration, you need to have completed the "System Start-Up" procedure<br />
Warm up engine to at least 175°F.<br />
Idle Control<br />
Using the calibration module, Select MISC. MODIFIERS and, Set Idle Control OFF.<br />
Set Idle Mechanical Stop<br />
Set the mechanical stop screw so that idle speed in park/neutral is 50-100 RPM higher than you want the engine to actually idle in gear<br />
with the idle control turned on. Typically 600 - 1000 RPM depending on the installed camshaft.<br />
We find 650 RPM a good idle <strong>for</strong> our Per<strong>for</strong>mer-Plus camshaft calibration.<br />
Set Throttle Position Sensor<br />
Loosen the two Throttle Position Sensor (TPS), mounting screws, and rotate the TPS sensor to a setting of 13 degrees as observed on<br />
the Calibration Module. This setting must be at 13 degrees after the idle adjustment is completed.<br />
Set Idle Fuel Modifier and Idle Spark Modifier<br />
Using the calibration module, Select MISC. MODIFIERS and adjust Idle Spark and fuel Modifiers to obtain best idle quality. Idle quality<br />
will vary with engine design. Fuel and Spark setting will interact, particularly when you approach best settings.<br />
You must establish a smooth idle prior to using Idle Control. Otherwise, the RPM will surge when Idle Control is turned on.<br />
Save Calibration<br />
Re-check that the TPS setting is 13 Degrees.<br />
Using the calibration module, Select MISC. MODIFIERS<br />
Set IDLE CONTROL ON. Set TARGET IDLE to the same RPM established by the idle stop screw.<br />
Save calibration settings to “A”<br />
Idle Speed Activity<br />
Displayed on the calibration module, (Second Data Screen). The displayed value represents the amount of air that is bypassing the<br />
throttle blades of the air valve, Normal values range from 5% to 75%. This ensures that the computer can increase or decrease the idle<br />
air flow to control idle speed.<br />
If your have established a "good" idle set up, the RPM will remain nearly constant between in-gear and out-of-gear. The Idle Speed<br />
Activity will change 10- 30% as it adjusts the idle speed.<br />
The value of Idle Activity is 20% when Idle Speed Control is off.<br />
Idle Speed Activity Modifier<br />
This function is locked out when Idle Control is off as indicated by "XXXX" in the Target idle display on the Calibration Module Display.<br />
The Idle Speed Activity Modifier biases the Idle Activity duty cycle, +/50%, this has the effect of changing RPM control loop response time.<br />
We recommend that this value be set to zero modification except in extreme cases.<br />
Part #<strong>35100</strong><br />
Rev. 7/2/12 QT/mc<br />
16<br />
<strong>Pro</strong>-<strong>Flo</strong> EFI Installation Instructions<br />
©2012 <strong>Edelbrock</strong> LLC<br />
Brochure No. 63-<strong>35100</strong>
Part #<strong>35100</strong><br />
Rev. 7/2/12 QT/mc<br />
ELECTRONIC ENGINE MANAGEMENT<br />
The <strong>Edelbrock</strong> <strong>Pro</strong>-<strong>Flo</strong> system uses the Speed-Density method of electronic engine management, in which fuel and spark requirements are<br />
based on engine speed (RPM) and engine load (manifold pressure and temperature).<br />
The Electronic Control Unit (ECU) receives signals regarding engine speed (from the distributor), and the three load factors consisting of coolant<br />
temperature (ECT), Manifold Absolute Pressure (MAP) and air temperature (MAT). Once the ECU has determined the engine operating point (RPM<br />
and Load factor), it uses tables programmed into it to instantly calculate correct spark advance and injector pulse width.<br />
The <strong>Pro</strong>-<strong>Flo</strong> system displays vacuum rather than the less-familiar manifold pressure. This vacuum reading is based on the following SAE<br />
standard atmosphere:<br />
Barometer 29.5 in Hg<br />
Temperature 77°F<br />
Because of this, the vacuum figures displayed on the Calibration Module may differ from the vacuum indicated by a true vacuum gauge,<br />
particularly at extreme high or low altitude.<br />
FUEL MODIFIER TABLE<br />
SPARK MODIFIER TABLE<br />
17<br />
<strong>Pro</strong>-<strong>Flo</strong> EFI Installation Instructions<br />
The Calibration Module allows you to modify the fuel and spark<br />
tables at various engine speeds and levels of vacuum. These<br />
tables may be used <strong>for</strong> recording your modifications to the base<br />
table with your own fuel pulse width and spark advance figures.<br />
©2012 <strong>Edelbrock</strong> LLC<br />
Brochure No. 63-<strong>35100</strong>
Part #<strong>35100</strong><br />
Rev. 7/2/12 QT/mc<br />
PRO-FLO QUICK TUNING GUIDE<br />
This guide is based on our simple graph that shows the 24 fuel cells that you can tune in to result in a clean and powerful engine. We<br />
recommend when you have your <strong>Pro</strong>-<strong>Flo</strong> installed, you have the idle tune up completed and then drive the vehicle to determine what amount of<br />
tuning is needed <strong>for</strong> general driving. If the unit is driveable, this is the method to use <strong>for</strong> ease of tuning. On page 15 of this installation manual,<br />
there is a fuel grid that can be used as the map on which to locate and then tune any drivability problems. Simply drive the vehicle and note any<br />
areas that have problems. Circle those areas as a baseline.<br />
When circling the area where a problem exists, you are circling the RPM and Vacuum reading that is present when the problem occurs.<br />
Note whether it is running rich (green light) or lean (red light) at each problem area. Once any problem areas have been located and noted rich or<br />
lean, go into the Miscellaneous Modifiers menu and turn off the Closed Loop Fuel, exit, go to Fuel Modifiers, and then into Global Fuel. Now drive<br />
the vehicle and drive back to each problem area. When driving in a problem area, add or subtract fuel to obtain the smoothest operation at that<br />
driving point. Write down the quantity (plus or minus) of fuel required to achieve a smooth operation. When all the problem areas have been<br />
noted, and the amount of fuel required to achieve smooth operation has been noted at each problem area, you may now do each adjustment one<br />
at a time to achieve a complete tune up.<br />
To input this in<strong>for</strong>mation, you will need to make sure the Closed Loop Fuel is in the OFF position. Go to each area and enter the in<strong>for</strong>mation.<br />
If you have found a problem that is not exactly in the center of one of the fuel cells, you will still be able to tune the area by using the Surround<br />
and Conquer method <strong>for</strong> properly managing the fuel curve. Listed below is an example of this method:<br />
Assume that you have found a problem area at 2500 RPM and 15 inches of Vacuum. This is not an area where you can address the<br />
problem directly. In this scenario, we will say the unit is showing a lean condition (red light). In which case, fuel will need to be added.<br />
We will also say that when driving and using the Global Modifier to find the exact amount of fuel required, it was determined that the<br />
amount needed was plus ten percent (+10%). In the Surround and Conquer method, you will add fuel at the four locations surrounding<br />
the problem area. This is shown in the figure below:<br />
VACUUM<br />
(WOT) 0<br />
6<br />
12<br />
18<br />
1000 2000 3000 4000 5000 7000<br />
X<br />
X<br />
LEAN<br />
ENGINE RPM<br />
<strong>Pro</strong>blem Area<br />
X<br />
X<br />
18<br />
<strong>Pro</strong>-<strong>Flo</strong> EFI Installation Instructions<br />
In this example, tune<br />
by adding 10% fuel at<br />
each area marked by<br />
an “X”, surrounding<br />
the problem area.<br />
When the required amount of fuel has been added at each surrounding fuel cell, complete the operation by returning to the Miscellaneous<br />
Modifiers menus, and turning the Closed Loop Fuel ON. Press the SAVE key, then the ENTER key. The hand-held unit will show SAVING IN<br />
PROGRESS. Repeat this procedure at each problem area to complete the tune up.<br />
©2012 <strong>Edelbrock</strong> LLC<br />
Brochure No. 63-<strong>35100</strong>
To use the optional PC tuning feature, connect a<br />
DB9 serial extension cable to connector J25 of<br />
the main harness. Connect the other end to<br />
your PC’s serial port as shown. Double click on<br />
the System Editor icon shown below.<br />
Part #<strong>35100</strong><br />
Rev. 7/2/12 QT/mc<br />
OPTIONAL PC TUNING FEATURE<br />
MAIN ENGINE HARNESS<br />
J19<br />
PUMP<br />
The engine controllers included in the <strong>Edelbrock</strong> <strong>Pro</strong> <strong>Flo</strong> system CANNOT be edited live using the System Editor software. In other words, System<br />
Editor can only be used to edit the calibration file loaded in the software. You cannot directly edit the calibration file loaded into the ECU. When<br />
you make changes to a calibration file, it must be saved and flashed into your ECU’s memory be<strong>for</strong>e those changes take effect. For additional<br />
in<strong>for</strong>mation on using System Editor to edit your calibration files, refer to the online help by selecting the Help menu at the top of the screen.<br />
3/8"<br />
J25<br />
PC COMMS<br />
J18<br />
o2<br />
J24<br />
CAL MODULE<br />
19<br />
<strong>Pro</strong>-<strong>Flo</strong> EFI Installation Instructions<br />
CAL MODULE ADAPTER<br />
CAL MODULE<br />
J1<br />
J2<br />
MAIN ECU CONNECTORS<br />
DB9 SERIAL CABLE (OPTIONAL, NOT INCLUDED IN KIT)<br />
HANDHELD CAL MODULE<br />
FOR TUNING WITHOUT PC<br />
TO PC SERIAL PORT<br />
USE WITH SYSTEM EDITOR<br />
SOFTWARE FOR OPTIONAL<br />
PC TUNING<br />
©2012 <strong>Edelbrock</strong> LLC<br />
Brochure No. 63-<strong>35100</strong>
Part #<strong>35100</strong><br />
Rev. 7/2/12 QT/mc<br />
CALIBRATION MODULE FLOWCHART<br />
20<br />
<strong>Pro</strong>-<strong>Flo</strong> EFI Installation Instructions<br />
©2012 <strong>Edelbrock</strong> LLC<br />
Brochure No. 63-<strong>35100</strong>
Part #<strong>35100</strong><br />
Rev. 7/2/12 QT/mc<br />
PART NUMBERS<br />
Many of the components of the <strong>Pro</strong>-<strong>Flo</strong> 2 system are available separately. Many are standard<br />
OEM parts. In the event that one of these parts need to be replaced, you are likely to find a<br />
replacement at your local parts supplier, in addition to your local <strong>Edelbrock</strong> dealer or directly<br />
from <strong>Edelbrock</strong>.<br />
<strong>Edelbrock</strong> <strong>Pro</strong>-<strong>Flo</strong><br />
Fuel Injection System........................................................................................<strong>Edelbrock</strong> #<strong>35100</strong><br />
Manifold Absolute Pressure sensor ...................................................................<strong>Edelbrock</strong> #36019<br />
GM 16212460<br />
Manifold Air Temperature sensor (Push-In) .........................................................<strong>Edelbrock</strong> #3579<br />
AC12160244<br />
Coolant Temperature sensor...............................................................................<strong>Edelbrock</strong> #3589<br />
GM 25036979<br />
Throttle Position sensor ......................................................................................<strong>Edelbrock</strong> #3590<br />
Oxygen (O2) sensor...........................................................................................<strong>Edelbrock</strong> #36013<br />
High pressure fuel pump.....................................................................................<strong>Edelbrock</strong> #3594<br />
Fuel filter ............................................................................................................<strong>Edelbrock</strong> #3596<br />
GM 25055065<br />
Fuel pressure regulator.......................................................................................<strong>Edelbrock</strong> #3584<br />
GM 17107010<br />
Fuel injectors (set of eight)............................................................................................................<br />
#3550 Kit use .....................................................................................................<strong>Edelbrock</strong> #3684<br />
#3551 Kit use .....................................................................................................<strong>Edelbrock</strong> #3598<br />
Fuel injectors (one)........................................................................................................................<br />
#3550 Kit use .....................................................................................................<strong>Edelbrock</strong> #3685<br />
#3551 Kits use ...................................................................................................<strong>Edelbrock</strong> #3585<br />
Hall Effect Sensor ...............................................................................................<strong>Edelbrock</strong> #3517<br />
Idle air control solenoid.......................................................................................<strong>Edelbrock</strong> #3599<br />
Ford FOAE-9F715 B1A<br />
Throttle Cable Bracket #35500 or #35510 ..........................................................<strong>Edelbrock</strong> #8031<br />
21<br />
<strong>Pro</strong>-<strong>Flo</strong> EFI Installation Instructions<br />
©2012 <strong>Edelbrock</strong> LLC<br />
Brochure No. 63-<strong>35100</strong>
Part #<strong>35100</strong><br />
Rev. 7/2/12 QT/mc<br />
COMPLETE PRO-FLO 2 SYSTEM PARTS<br />
(1) <strong>Pro</strong>-<strong>Flo</strong> 2 ECU<br />
(1) <strong>Pro</strong>-<strong>Flo</strong> 2 Calibration Module<br />
(1) RJ12 Calibration Module Cord Adapter<br />
(1) AC Power Adapter<br />
(1) USB/Serial Converter<br />
(1) Software CD<br />
(1) Main system harness<br />
(2) Bulkhead cover plate<br />
(1) Bulkhead Grommet<br />
(4) Self tapping screws<br />
(1) Oxygen (O2) sensor (Narrow Band)<br />
(1) Manifold Absolute Pressure sensor (MAP)<br />
(1) MAP Sensor bracket<br />
(3) 10” Pigtail w/ crimped contacts<br />
(10) 11” Tie Wraps<br />
22<br />
<strong>Pro</strong>-<strong>Flo</strong> EFI Installation Instructions<br />
©2012 <strong>Edelbrock</strong> LLC<br />
Brochure No. 63-<strong>35100</strong>
Part #<strong>35100</strong><br />
Rev. 7/2/12 QT/mc<br />
SERVICE<br />
In the event that your <strong>Edelbrock</strong> <strong>Pro</strong>-<strong>Flo</strong> System should need servicing, return the unit pre-paid to the<br />
<strong>Edelbrock</strong> Service and Repair facility at 2700 Cali<strong>for</strong>nia Street, Torrance, CA 90503. Do not attempt to<br />
disassemble or service the components of the <strong>Pro</strong>-<strong>Flo</strong> system yourself. Doing so may void the warranty.<br />
WARRANTY<br />
It is the constant endeavor of the <strong>Edelbrock</strong> Corp. to provide our customers with the highest quality<br />
per<strong>for</strong>mance products. <strong>Edelbrock</strong> warrants the <strong>Edelbrock</strong> <strong>Pro</strong>-<strong>Flo</strong> System to be free from defects in both<br />
workmanship and materials <strong>for</strong> a period of one year from date of purchase, provided that the product is<br />
properly installed and subjected to normal use and service, is not used <strong>for</strong> racing or competition purposes<br />
and that the product is not modified or altered in any way unless specified by our instructions. Our<br />
warranty service and repair facility is located at 2700 Cali<strong>for</strong>nia Street, Torrance, CA 90503. Customers<br />
requiring warranty assistance should contact the dealer from whom they purchased the product. In turn,<br />
the dealer will contact <strong>Edelbrock</strong>, and we will determine the method of satisfying the warranty. Should<br />
<strong>Edelbrock</strong> determine that the product be returned to the factory, it should be accompanied by proof of<br />
purchase and a clear description of the exact problem. The product must be returned freight pre-paid. If a<br />
thorough inspection of the product by the factory indicates defects in workmanship or material, our sole<br />
obligation shall be to repair or replace the product. This warranty covers only the product itself and not<br />
the cost of installation or removal.<br />
EDELBROCK CORP. SHALL NOT BE LIABLE FOR ANY AND ALL CONSEQUENTIAL DAMAGES OCCASIONED<br />
BY THE BREACH OF ANY WRITTEN OR IMPLIED WARRANTY PERTAINING TO THIS SALE, IN EXCESS OF THE<br />
PURCHASE PRICE OF THE PRODUCT SOLD.<br />
If you have any questions regarding this product or installation, please contact our Technical Department<br />
from 7:00 am - 5:00 pm, Pacific Standard Time, Monday through Friday at:<br />
Tech Telephone: (800) 416-8628<br />
Fax: (310) 972-2730<br />
<strong>Edelbrock</strong> Corporation<br />
2700 Cali<strong>for</strong>nia Street<br />
Torrance, CA 90503<br />
23<br />
<strong>Pro</strong>-<strong>Flo</strong> EFI Installation Instructions<br />
©2012 <strong>Edelbrock</strong> LLC<br />
Brochure No. 63-<strong>35100</strong>