Importing And Vectorizing A Bitmap Image - Gravograph
Importing And Vectorizing A Bitmap Image - Gravograph
Importing And Vectorizing A Bitmap Image - Gravograph

You also want an ePaper? Increase the reach of your titles
YUMPU automatically turns print PDFs into web optimized ePapers that Google loves.
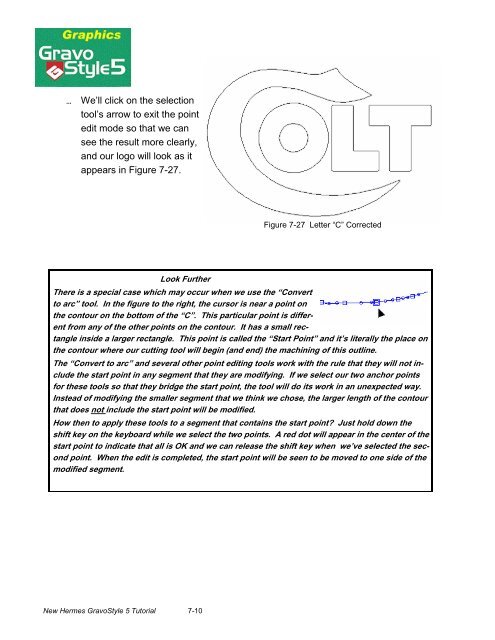
We’ll click on the selection<br />
tool’s arrow to exit the point<br />
edit mode so that we can<br />
see the result more clearly,<br />
and our logo will look as it<br />
appears in Figure 7-27.<br />
New Hermes GravoStyle 5 Tutorial 7-10<br />
Figure 7-27 Letter “C” Corrected<br />
Look Further<br />
There is a special case which may occur when we use the “Convert<br />
to arc” tool. In the figure to the right, the cursor is near a point on<br />
the contour on the bottom of the “C”. This particular point is different<br />
from any of the other points on the contour. It has a small rectangle<br />
inside a larger rectangle. This point is called the “Start Point” and it’s literally the place on<br />
the contour where our cutting tool will begin (and end) the machining of this outline.<br />
The “Convert to arc” and several other point editing tools work with the rule that they will not include<br />
the start point in any segment that they are modifying. If we select our two anchor points<br />
for these tools so that they bridge the start point, the tool will do its work in an unexpected way.<br />
Instead of modifying the smaller segment that we think we chose, the larger length of the contour<br />
that does not include the start point will be modified.<br />
How then to apply these tools to a segment that contains the start point? Just hold down the<br />
shift key on the keyboard while we select the two points. A red dot will appear in the center of the<br />
start point to indicate that all is OK and we can release the shift key when we’ve selected the second<br />
point. When the edit is completed, the start point will be seen to be moved to one side of the<br />
modified segment.